Start a Release From a Template
This topic describes how to create a release from a template using various methods and the steps required before starting the release.
Create a Release from a Template
You can create a release from a template using one of these methods:
- From the sidebar, under RELEASES, click Templates > Select a template > and click New release.
- From the sidebar, under OVERVIEW, click Folders, browse and select a folder > click Templates > select a template > and click New release.
- Click New Release on the template when it is open in the Release Flow Editor.
When you create a release from a template, it starts in the planned state. As the release owner, complete these requirements before starting the release:
-
Enter a name for the release.
-
Specify the folder where you want to create the release.
-
Assign a risk profile to the release.
-
Set or modify the description.
-
Assign values to variables. For more information, see Variables in Release.
-
Populate the release teams or revise the members of the teams. For more information, see Configure teams for a release.
-
Optionally set scheduled start and due dates on tasks.
-
Revise dependencies on other releases.
noteDependencies can only be set on active releases, they cannot be specified in the template.
-
Click Create.
Pre-fill Variables from Past Releases
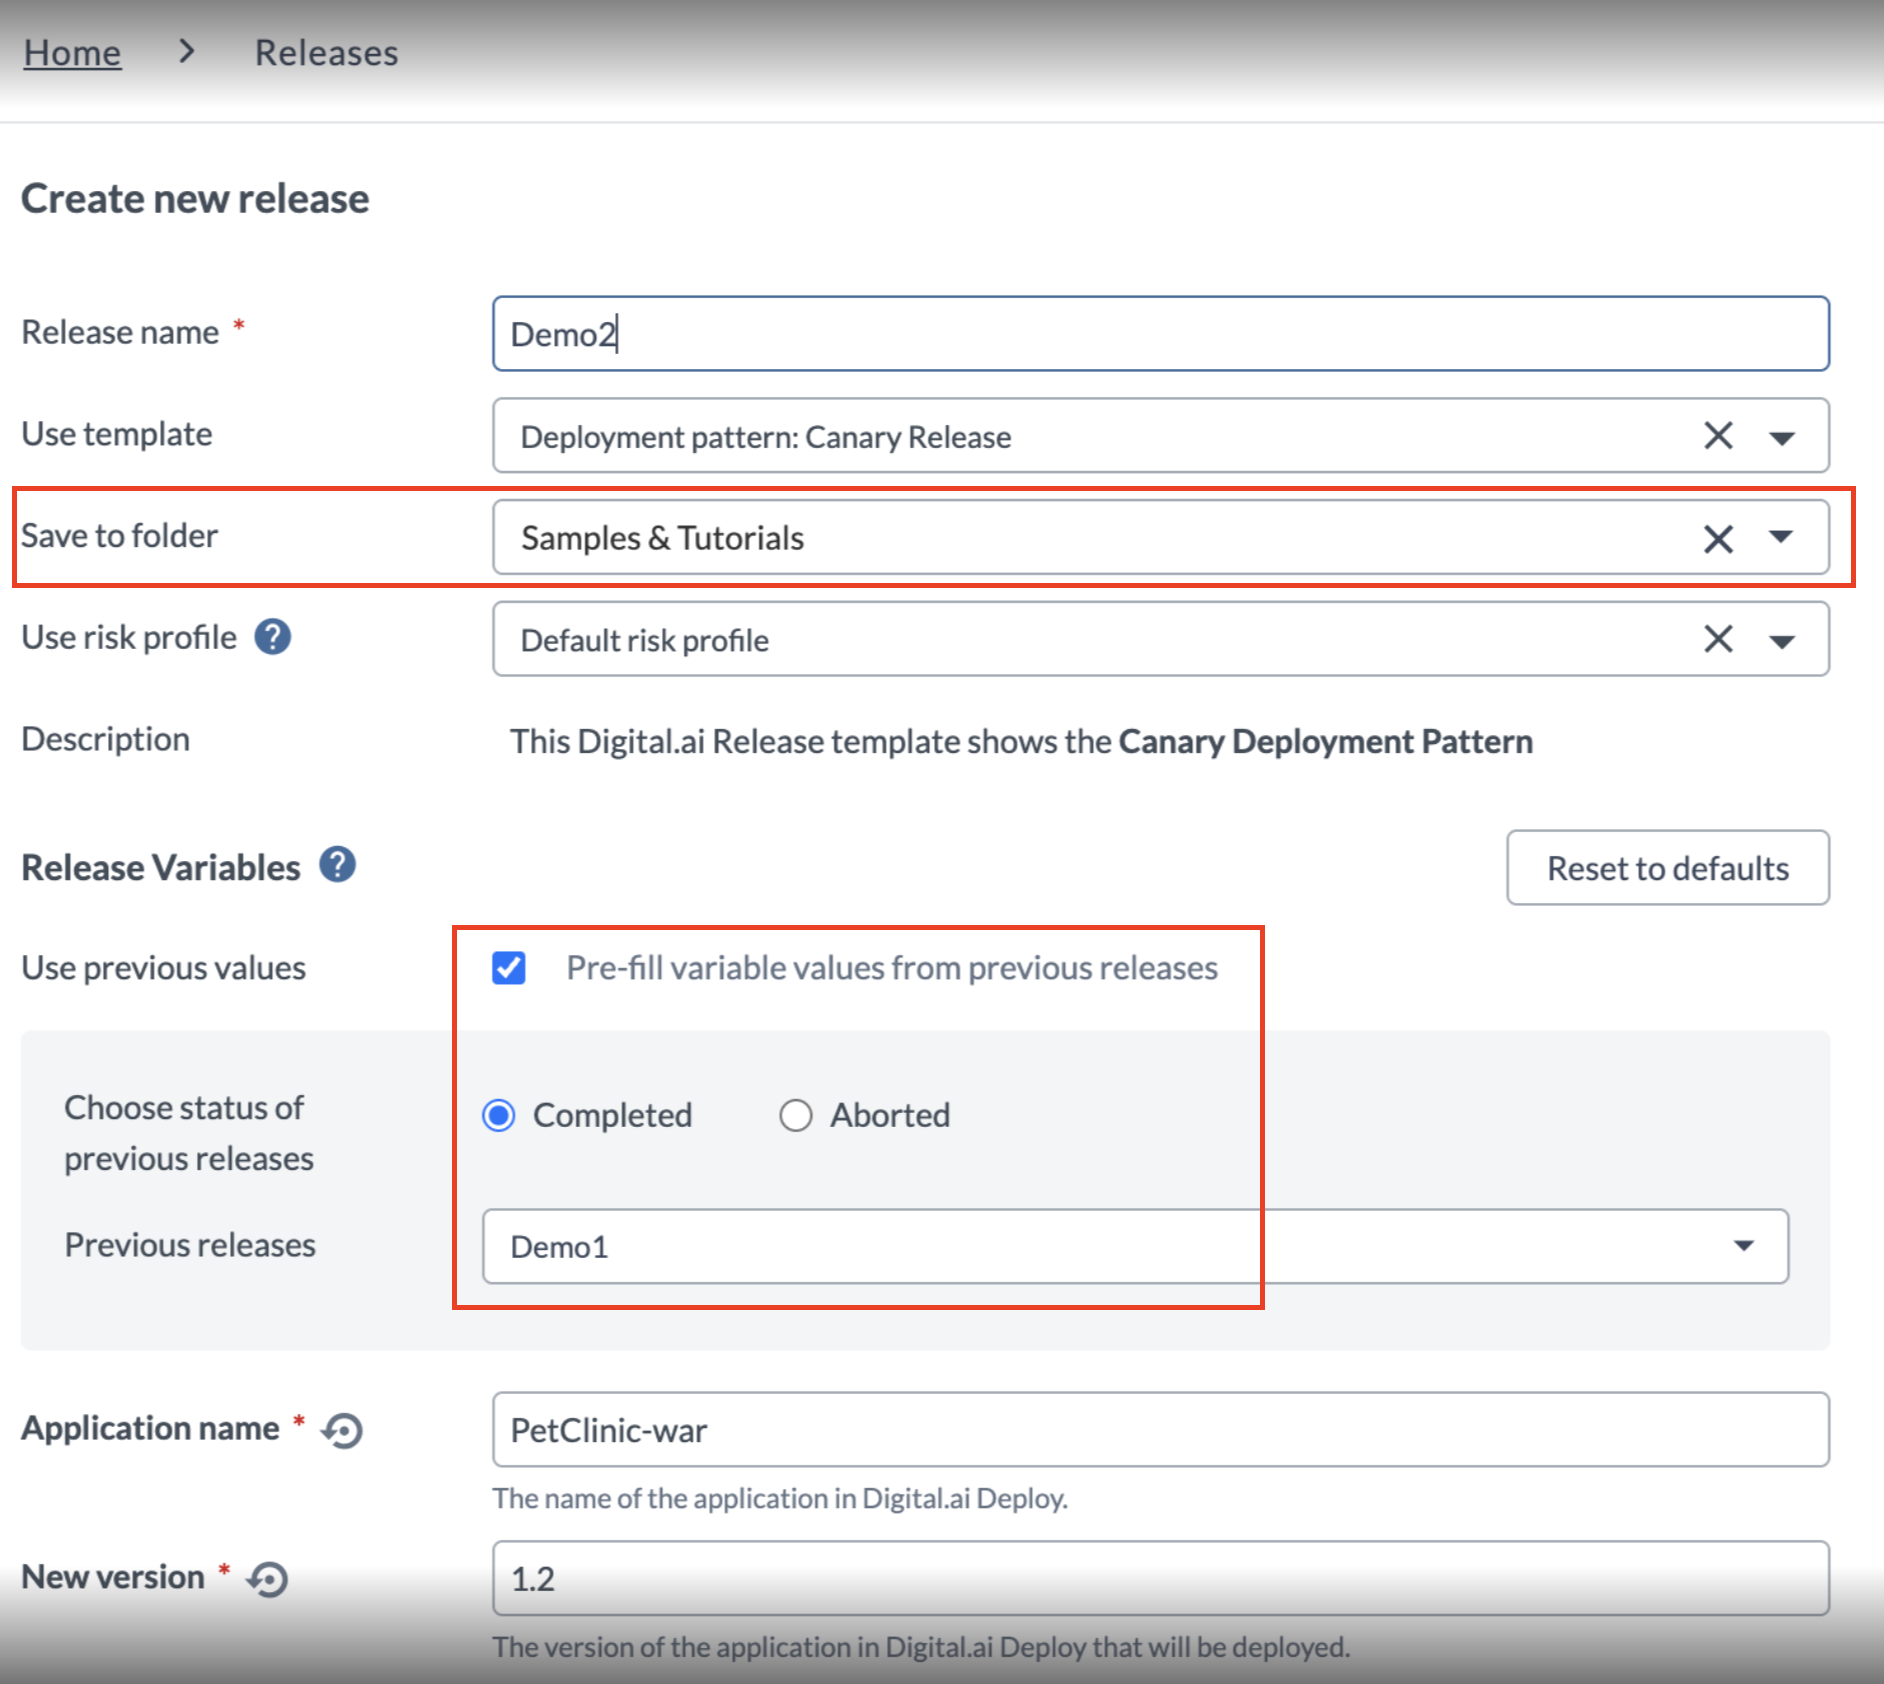
You can now speed up the process of starting a release by pre-filling variable values from one of the last 10 completed or aborted releases in the same folder when creating a new release from a template.
This is especially helpful when iteratively testing release templates that contain many variables on the Create Release page.
- Select the Pre-fill variables from previous releases checkbox.
- Choose a Completed or Aborted release from the drop-down list.
- Pre-filling variable values are currently not supported for archived releases or those in a Failed status. Only releases that are Completed or Aborted (i.e., in a final state) can be used for pre-filling values.
- Values will be automatically applied to variables that match by both name and type.
- Click Reset to Defaults to discard the pre-filled values and apply the template’s default values—either for all variables or for individual ones.

Variables will not be pre-filled in the following cases:
- Password-type variables must always be entered manually.
- Variables with the same name but different types in the selected release must be reviewed and entered manually.
- Variables not present in the selected release (such as newly added in the current release) must be entered manually.