Change and Risk Prediction (CRP) Plugin
The Release Change and Risk Prediction (CRP) plugin lets you predict high-risk changes and take actions to prevent failure, while also identifying low-risk changes and automating deployment. This helps you make data-driven decisions to avoid downtime and improve user experience.
Features
- Get Risk Prediction task
- Change Risk Prediction: Risk Prediction Gate task
Requirements
The plugin requires the following:
- An instance of a change and risk prediction (CRP) server running on your local network.
- The client identifier issued during the application registration process.
- The client secret issued during the application registration process
Set up a Change and Risk Prediction (CRP) Server
You can define a Change and Risk Prediction (CRP) server configuration in two locations:
- On a global level in Connections under the CONFIGURATION group in the navigation pane.
- On a folder level in Overview > Folders of the navigation pane, under the CONFIGURATION tab of the desired folder.
To set up a connection to a CRP server:
-
In Release, go to one of the specified locations.
-
Click
next to Change and Risk Prediction: Server.
-
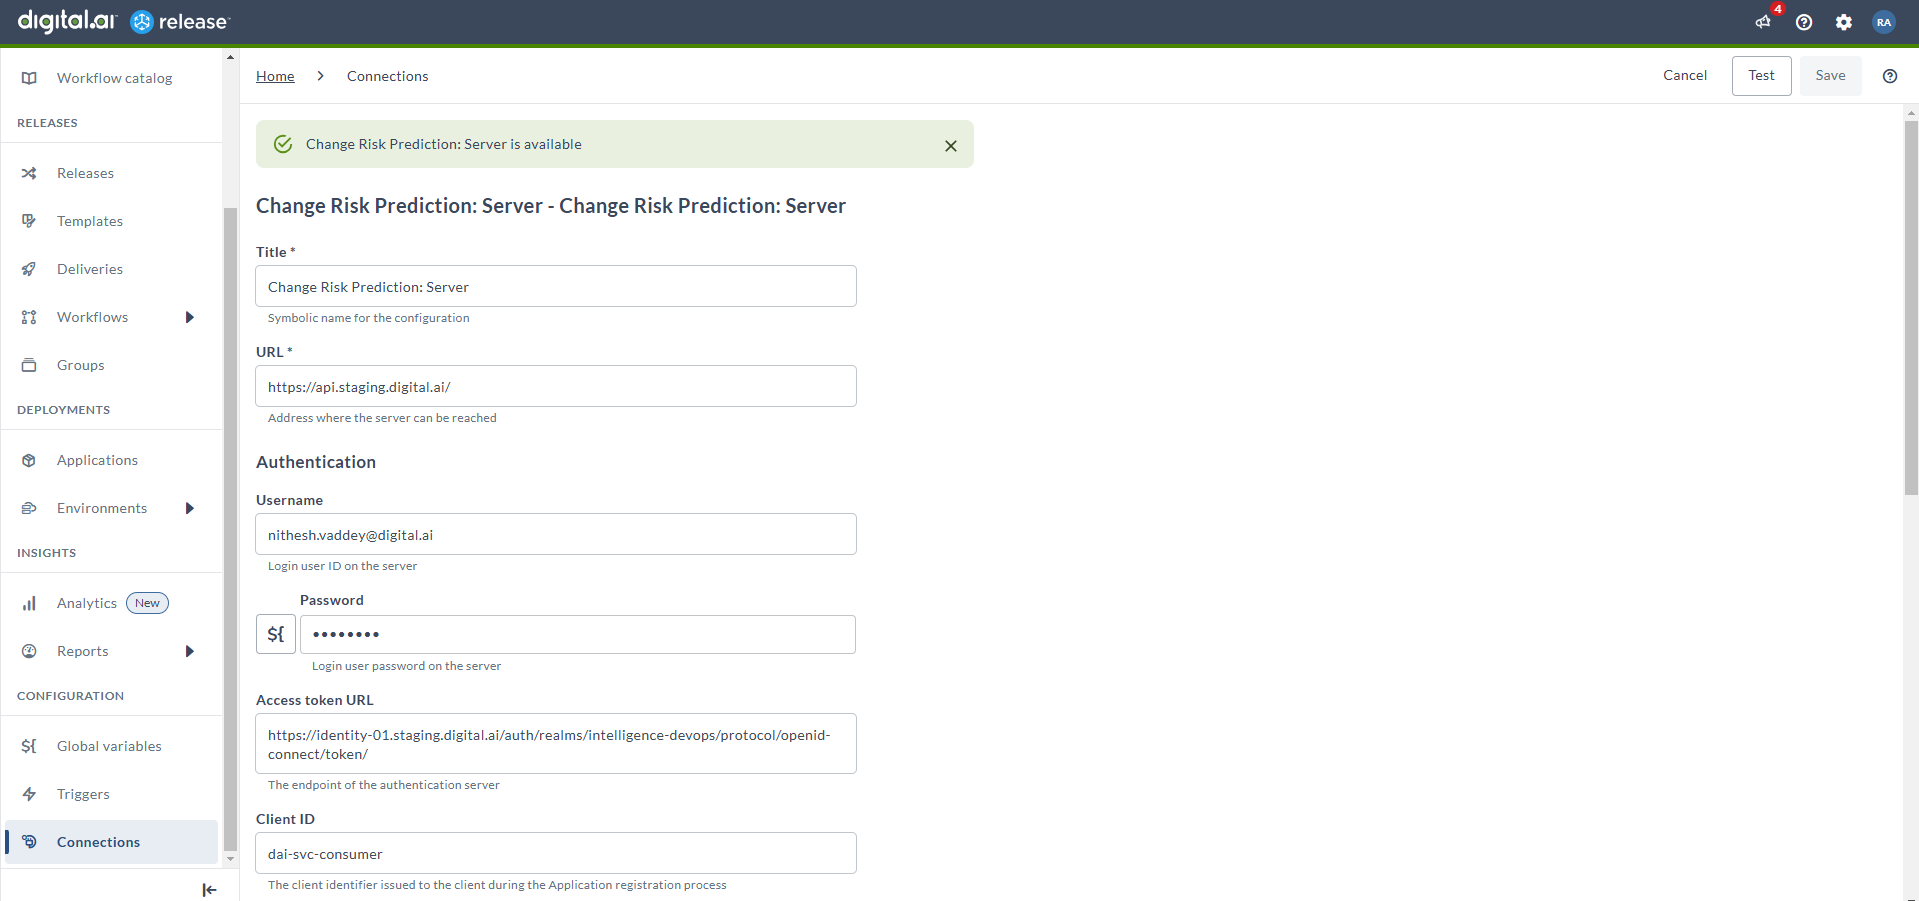
In the Title field, specify a name for your CRP server configuration.
-
In the Symbolic name field, enter a unique identifier for this configuration.
-
In the URL field, specify the server's address where it can be reached.
-
In the Authentication section, configure the following:
- Username: Enter the login user ID for the server.
- Password: Enter the login password for the server.
- Access token URL: Enter the endpoint URL for the authentication server.
- Client ID: Enter the client identifier provided during the application registration process.
- Client Secret: Enter the client secret provided during the application registration process.
- Scope: Specify the scope of the access request. For multiple scopes, use space-delimited values.
- Grant Type: Select "password" or the appropriate grant type.
-
In the Proxy section, configure the following (if a proxy connection is needed):
- Proxy Host: Enter the HTTP proxy host.
- Proxy Port: Enter the HTTP proxy port.
- Proxy Username: Enter the username for proxy access.
- Proxy Password: Enter the password for proxy access.
- Proxy Domain: Enter the domain for NTLM proxy authentication, if required.
-
To test the server connection, click Test.
-
Click Save.

Create a Change Risk Prediction: Get Risk Prediction Task
The Get Risk Prediction task in the Release CRP integration plugin lets you retrieve the risk prediction value for a specific change request. It helps you predict high-risk changes and take actions to prevent failure.
To add a Change Risk Prediction: Get Risk Prediction task:
- In the release flow view of a release or a template, add a task of the type Change Risk Prediction > Get Risk Prediction.
- Open the added task and configure the following in the Input Properties:
- In the Server field, select the Change Risk Prediction server connection.
- In the Change Request Number field, enter the ServiceNow Change Request number (for example, 'CHG0030007').
- In the Project Name field, enter the name of the project for which the Change Risk Prediction (CRP) value is to be retrieved (for example, 'ChangeFailure').
- In the Model Name field, enter the name of the model used to calculate the Change Risk Prediction (CRP) value (for example, 'CRPModel').
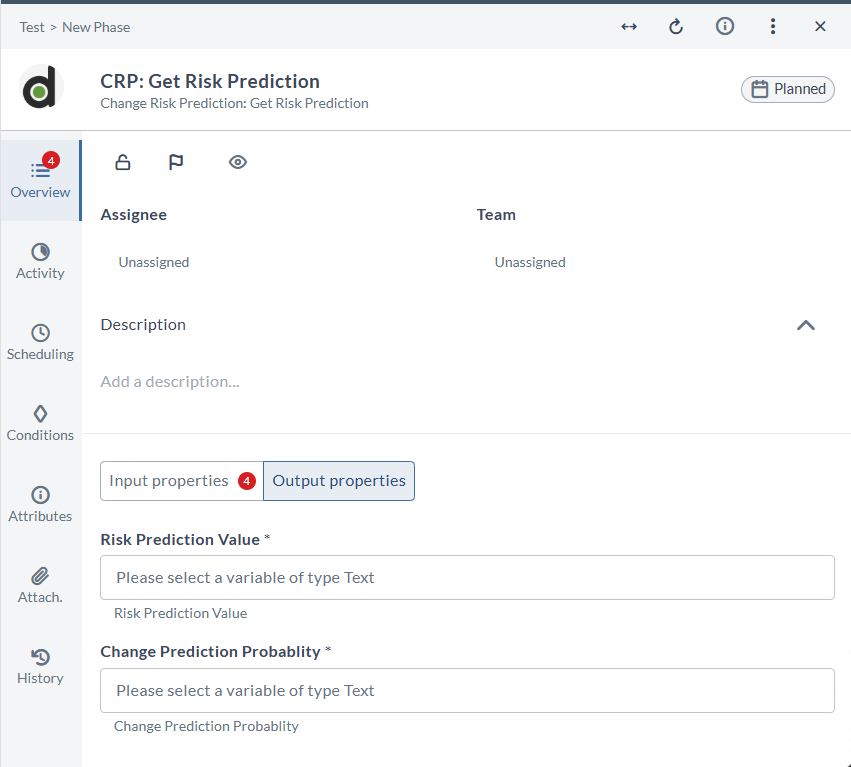
- Next, configure the following in the Output Properties:
- In the Risk Prediction Value field, select a variable of Text type to store the output value. This value indicates whether the risk prediction for the change request exceeds the threshold.
- In the Change Prediction Probability field, select a variable of type Text to store the probability (in percentage) associated with the prediction.
The Risk Prediction Value and Change Prediction Probability are the key outputs of this task. Together, they help assess the risk level for the change request.

Create a Change Risk Prediction: Risk Prediction Gate task
The Change Risk Prediction: Risk Prediction Gate task in the Release CRP integration plugin lets you define a gate threshold for a specific change request based on its risk prediction score. This helps prevent high-risk changes from progressing in the release pipeline, giving your team the opportunity to address issues before they reach production.
To add a Change Risk Prediction: Risk Prediction Gate task:
-
In the release workflow or template, add a task of type Change Risk Prediction > Risk Prediction Gate.
-
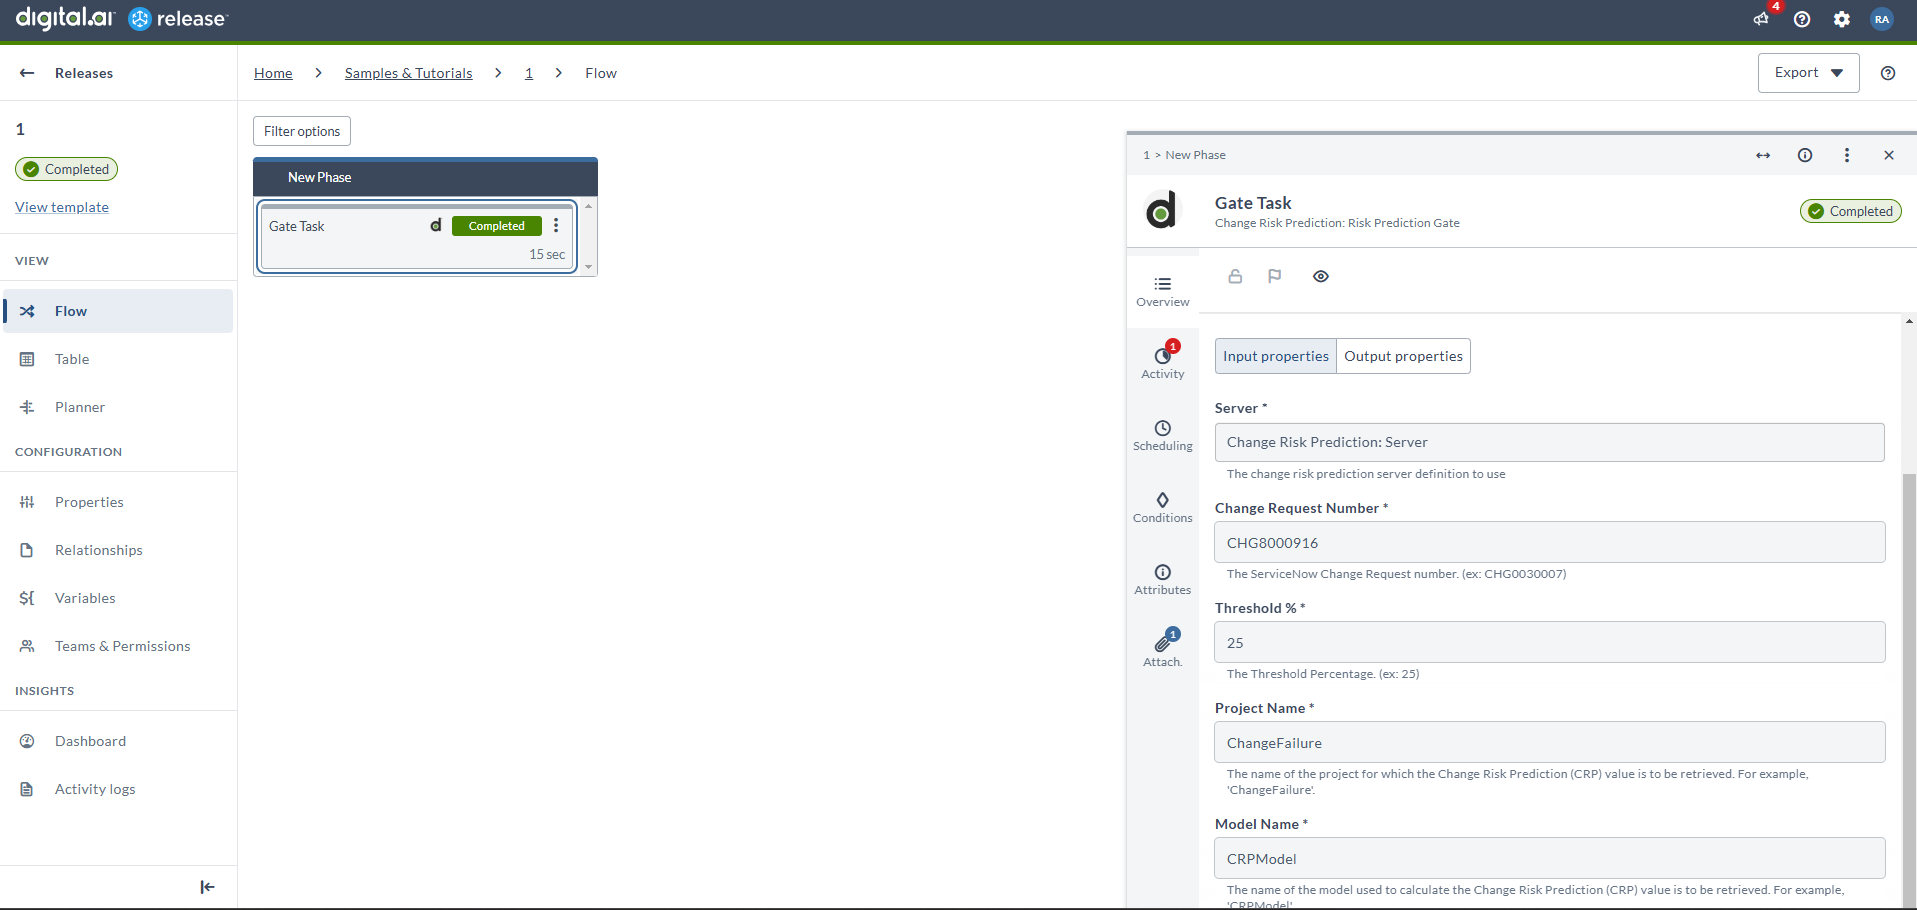
Open the added task and configure the following in the Input Properties:
- In the Server field, select the Change Risk Prediction server connection.
- In the Change Request Number field, enter the ServiceNow Change Request number (for example, 'CHG0030007').
- In the Threshold % field, specify the threshold percentage that defines the acceptable risk level (for example, '25'). If the risk prediction exceeds this threshold, the gate will prevent further progression.
- In the Project Name field, enter the name of the project associated with the Change Risk Prediction (CRP) value (for example, 'ChangeFailure').
- In the Model Name field, enter the model name used to calculate the CRP value (for example, 'CRPModel').
-
Configure the following in the Output Properties:
- In the Change Prediction Probability field, select a variable of type Text to store the output value. This value represents the calculated probability of change risk, providing a basis for evaluating the risk level.
