Conjur Plugin
The Conjur Plugin (Jython-based) integrates Digital.ai Release with CyberArk Conjur. It retrieves secrets from a Conjur server at runtime and stores them in password-type release variables, which later tasks in the release can then use.
This plugin runs directly on the Release server. It works with both self-hosted Conjur and CyberArk Conjur Cloud (SaaS), and supports and supports basic and OAuth 2.0 authentication methods.
For scalable, runner-based execution, use the Conjur Container Plugin.
You must set up a connection to a Conjur server before external secrets can be configured.
What You Can Do With This Plugin
- Retrieve secrets from a CyberArk Conjur server (self-hosted or SaaS)
- Populate password-type release variables with secrets for use by later tasks
- Authenticate to Conjur using basic or OAuth 2.0 methods
Prerequisites
The plugin requires the following:
- A running CyberArk Conjur server (self-hosted or Conjur Cloud) reachable over HTTP(S).
- A Conjur account name that holds the secrets you want to retrieve.
- Credentials for the authentication method you plan to use (for example, a username and password for basic authentication, or the client ID, client secret, and access token URL for OAuth 2.0).
- Policy permissions that allow the authenticating identity to read the required secrets.
Set up a Connection to the Conjur Server
- From the navigation pane, click Configuration > Connections.
- Under Secrets management, beside Conjur: Server, click
 .
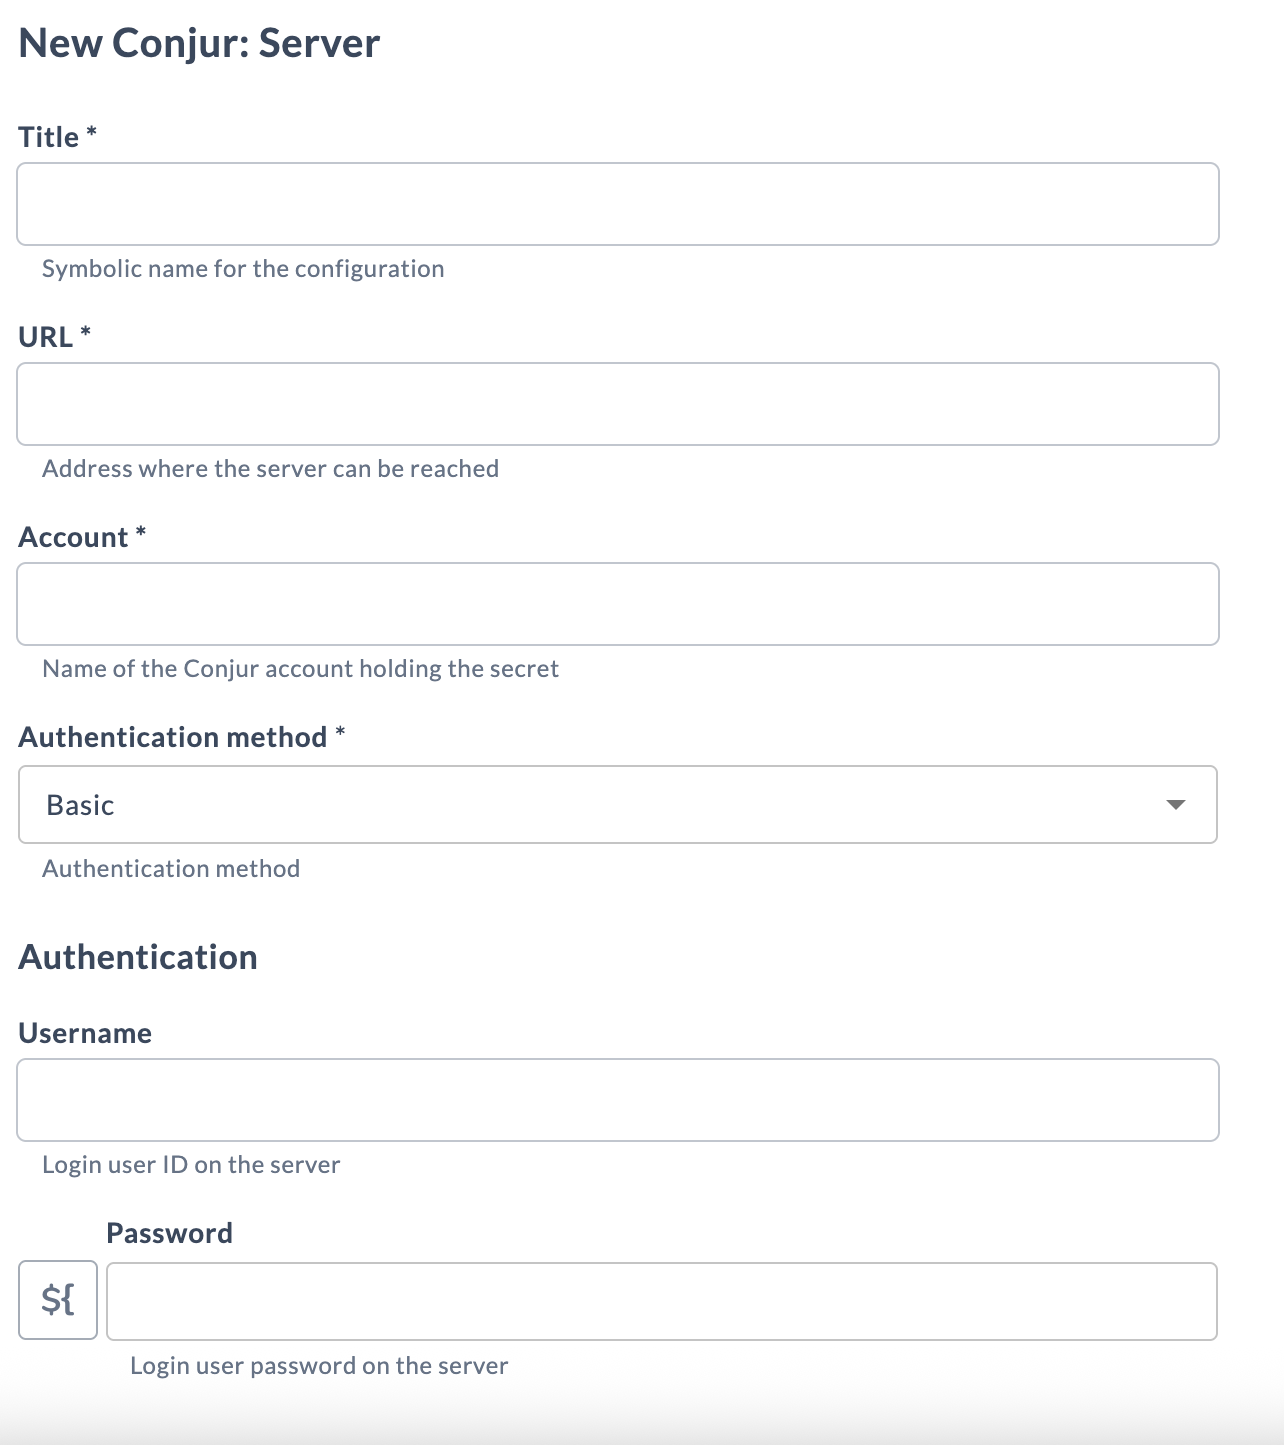
. - Provide the connection details:
Field Name Description Title* Symbolic name for the configuration. This name displays in Conjur tasks. URL* Address where the server can be reached, in the form http(s)://address:port. For CyberArk Conjur Cloud (SaaS), suffix the base URL with/api(for example,<BASE_URL>/api).Account* Name of the Conjur account holding the secret. Authentication method* The method used to authenticate with the Conjur server. See Authentication Methods. - To test the connection, click Test.
- To save the configuration, click Save.
After the server connection is set up, you can map Conjur secrets to release variables.
Authentication Methods
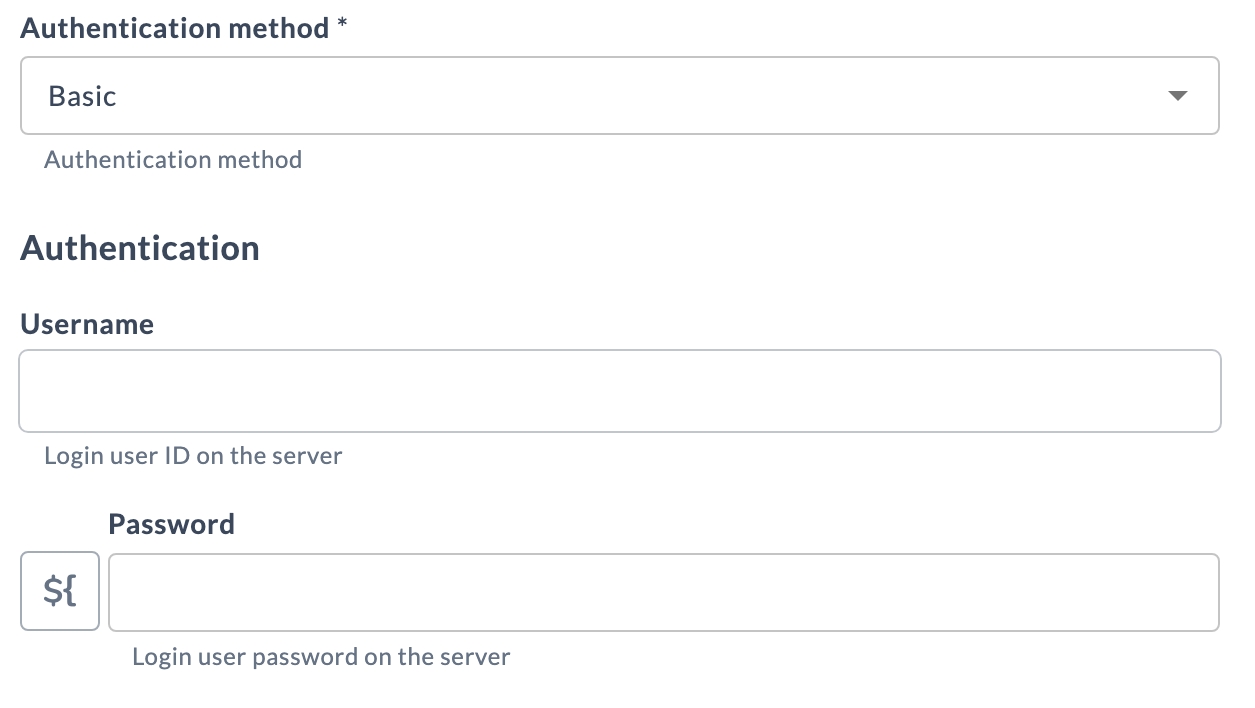
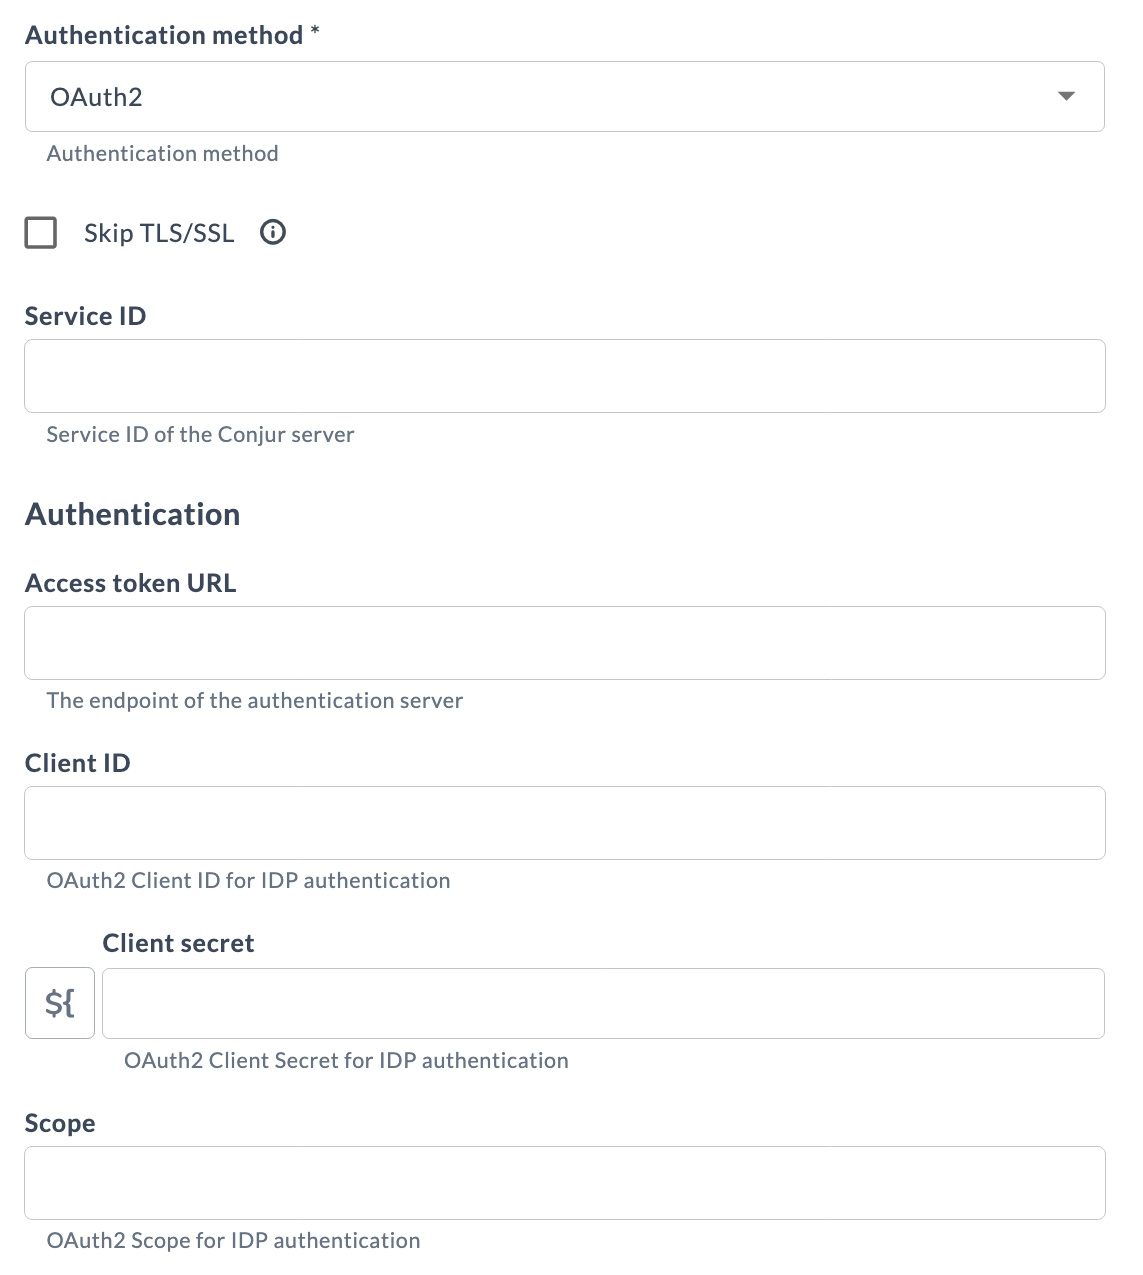
Conjur supports Basic and OAuth2 authentication methods. Select the method from the Authentication method drop-down list, then provide the fields required for that method:
- Basic: Enter a Username and Password.
- OAuth2: Enter the Service ID, Access Token URL, Client ID, Client Secret, and Scope. Optionally, enable Skip TLS/SSL to bypass certificate validation. Use this method to authenticate with an OAuth 2.0 provider using an access token.
Get Secret
The Get Secret task retrieves a single secret from a Conjur server and stores it in a password-type release variable. Add one Get Secret task for each secret you need, and place each task so that it runs immediately before the task that uses the secret.
Before you add the task, create a release variable to hold the secret: name the variable, set its type to Password, and clear the Required and Show on Release Form options.
Input Fields
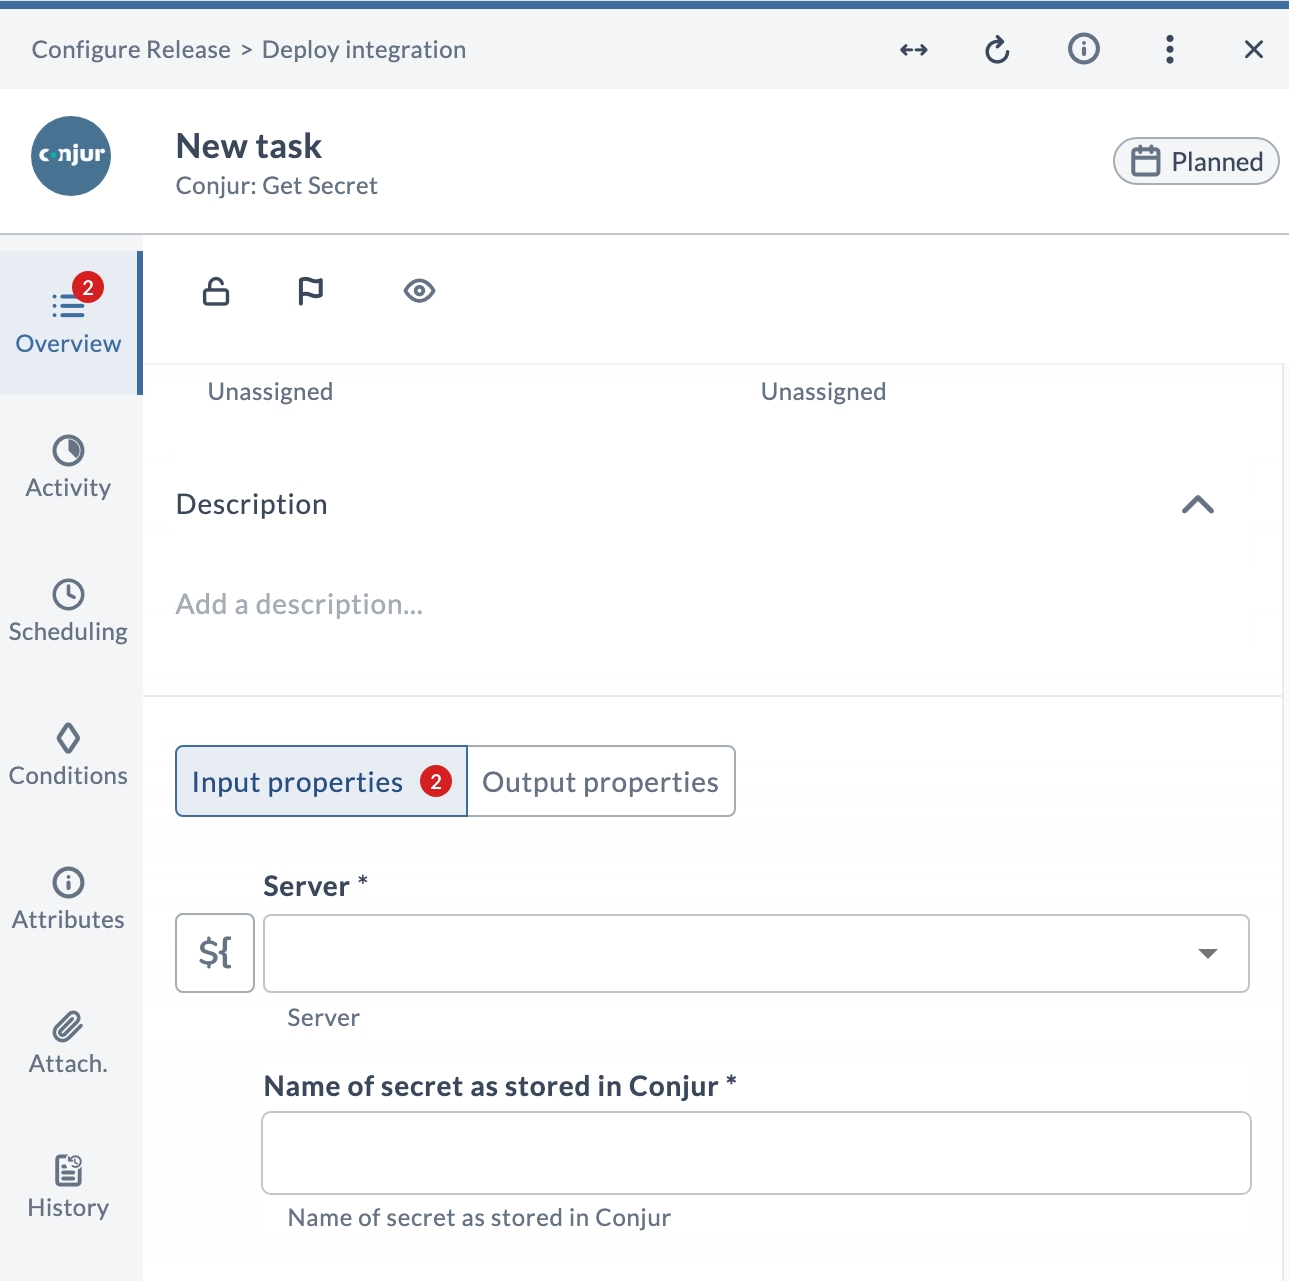
| Field Name | Description | Example |
|---|---|---|
| Server* | The configured Conjur server connection to use. | conjur.example.com |
| Name of secret as stored in Conjur* | The name (path) of the secret as it is stored in Conjur. | prod/db/password |
Output Fields
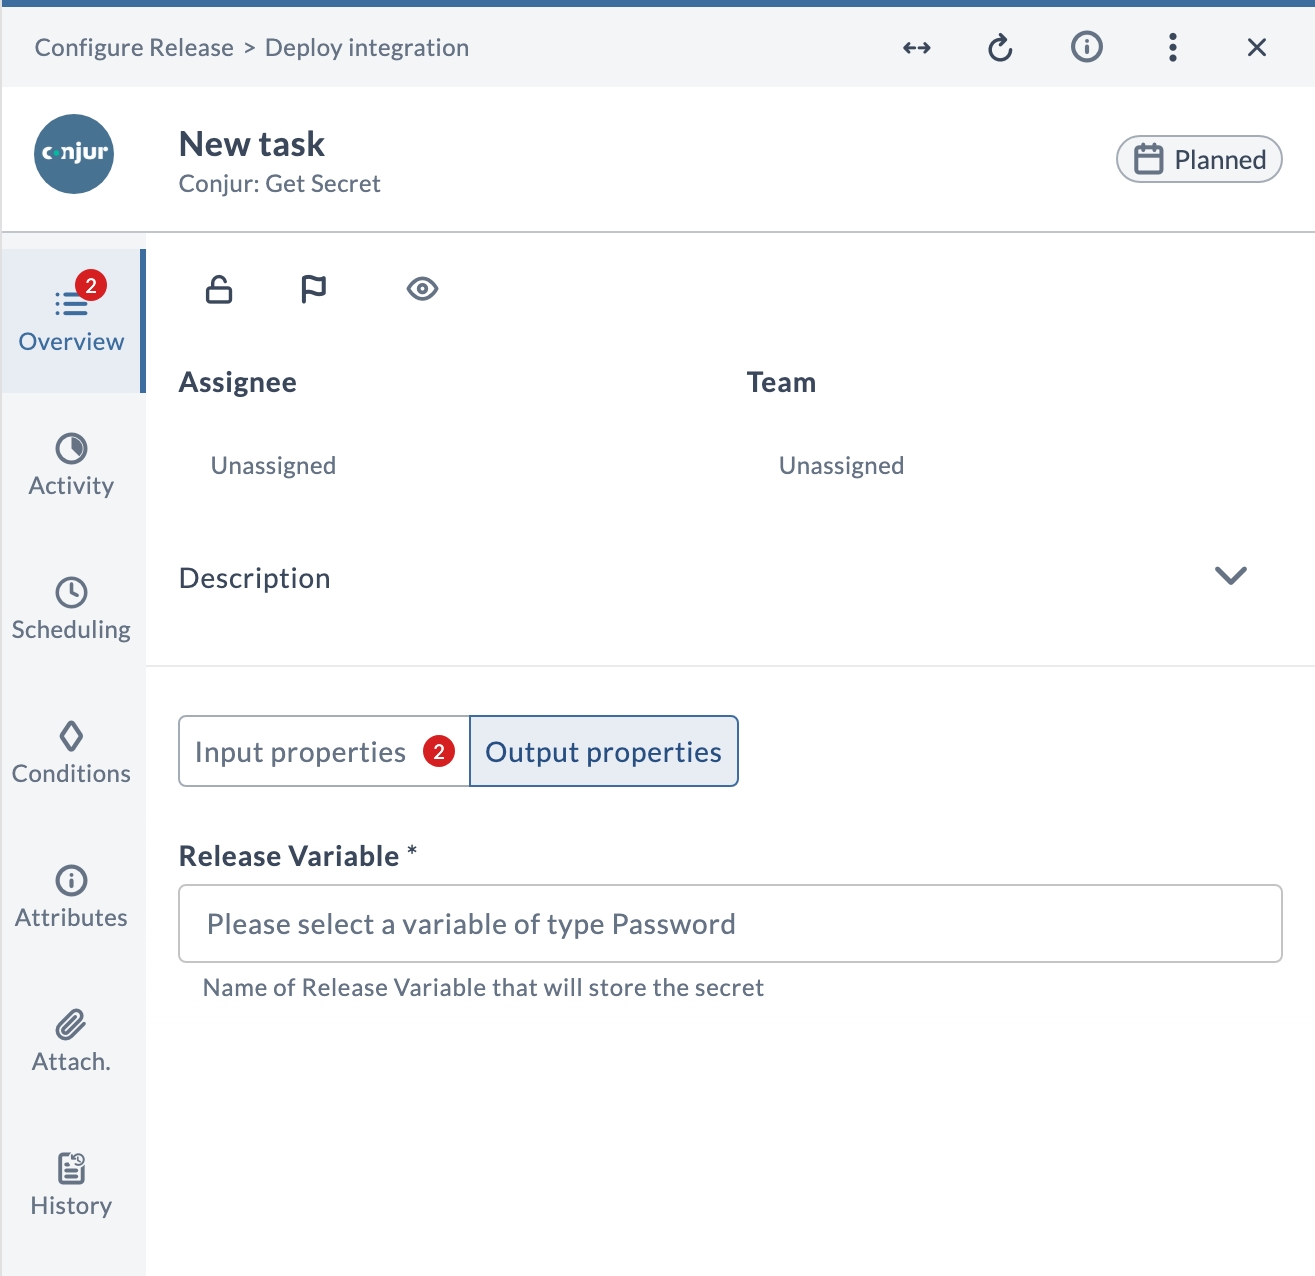
| Output Property | Description |
|---|---|
| Release Variable* | The password-type release variable that stores the retrieved secret. |
Example Usage
Suppose you want to retrieve a database password stored in Conjur and use it in a later Jira task:
| Field | Value |
|---|---|
| Server | conjur.example.com |
| Name of secret as stored in Conjur | prod/db/password |
| Release Variable | ${newSecret} |
After running the task, the release variable newSecret holds the retrieved secret. A following Jira Create Issue task can then use newSecret as the Jira password, overriding the password configured for the Jira server.