SeeTestAutomation - Activating A Floating License For Server Installation
Please note that this tool is classified as a Legacy tool. We recommend transitioning to our updated solutions to maintain optimal performance and security in your workflows. For more information on this matter, please reach out to technical support .
Please note that this tool is classified as a legacy application. We recommend evaluating alternative, updated solutions to ensure optimal performance and security for your workflows.
For more information on that matter, contact technical support .
The following page describes how to install and activate the floating license server (Phase I) and continues with how to use it (Phase II).
Step 1: PREREQUISITES:
Experitest will provide you with the following two files:
- Haspdinst.exe – The Sentinel runtime installer.
- RUS_KYBXC.exe – The License activation utility.
PHASE I: License Server (Installation & Activation)
This is a one-time process which should be carried out by the person responsible for the licensed machine. It should be executed on the machine that will run the licensed server.
The following operating systems are supported for use as the Cloud Server machine:
- Windows XP (32-bit and 64-bit)
- Windows Server 2003 (32-bit and 64-bit)
- Windows Vista (32-bit and 64-bit)
- Windows 2008 (32-bit and 64-bit)
- Windows 7 (32-bit and 64-bit)
- Windows 8 (32-bit and 64-bit)
- Windows 2008 R2
- Windows Server 2012
- Windows XP Embedded standard (x86 only)
- Windows 7 Embedded standard SP1 (x86 only)
- The latest service packs and security updates must be installed.
Step 1: License Server Installation:
-
Open the command line window
-
Run the following command <path to>\haspdinst.exe –i

-
The installation will be complete within few minutes. The following message will then be displayed:
To confirm that Sentinel license server is running on your machine, browse to http://localhost:1947.
The Sentinel portal UI should be visible:

Step 2: License Server Activation (Only once step 1 is completed):
-
Run the RUS_KYBXC.exe utility. The following window will appear:

-
Under the tab titled "Collect Status Information", choose "Installation of new protection key" and click "Collect Information". The utility will present a file chooser dialog for you to store the .C2V file on your machine.
-
Go to the self-service portal URL: https://licactivation.com/ems/customerLogin.html
-
Enter your product key and click "Login".
-
Enter your details and click "Save". This step is optional. You can skip it by clicking "Register Later".
Note: If you already used an E-mail address to register - click on the 'Already registered? click here' link: then insert the registered E-mail address
-
After the registration step, you will be presented with your license details.
-
Use Offline Activation. During offline activation, we will use a tool supplied with SeeTest Automation to generate a fingerprint of the machine on which it will run. This fingerprint will be uploaded to the self-service portal for the final license activation.
-
In the self-service portal, click "Offline Activation". You will be presented with the following dialog:

-
Click the button displaying three periods in the "Upload .C2V" section. This will let you upload the previously generated file. After you have selected the file, click "Generate". The portal will upload the C2V file and generate the final license file with extension V2C. Save the file and transfer it to the machine where you have generated the .C2V file.
-
In the RUS utility - Go to the "Apply License File" tab, insert the path of the .V2C file at the bottom and click "Apply Update"
-
Verify the license by browsing http://localhost:1947 and navigating to "Sentinel Keys". You will see the following screen:

-
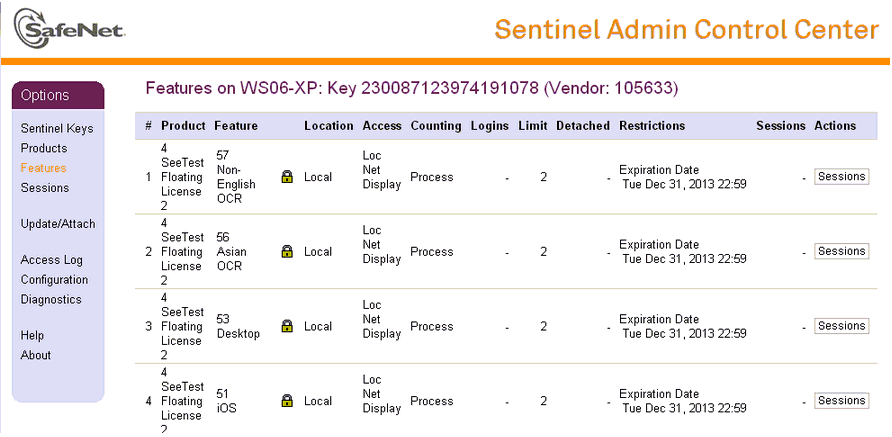
To view the number of licenses you have, click on the Features button on the screen above. You will see the following window with the license information relevant to your organization:

PHASE II: Using a seat from the floating license server in the User machine
Step 1: Download and install the latest studio version.
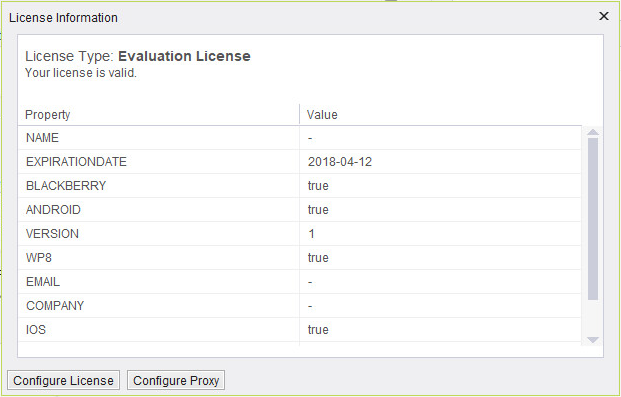
Step 2: Open the studio and go to Help->License Information. The user will get the following window:

Step 3: Click on "Configure License". The user will see the following window:
Step 4: Choose "Connect to Floating Server" and click "Next". The user will then see the Floating configuration window:
Step 5: The user should enter IP of the machine on which the license server was installed (the machine in Phase I above). Then click the "Ok" button.
Step 6: The studio will reopen in order for the license to get into effect.
Step 7: Choose the features you wish to use on your computer (according to the floating license availability).

After choosing the features for each agent, in the floating license dialog box. you can suspend the dialog box, so it won't pop when the studio starts. To suspend it, you need to add the property: suspend.floating.dialog=true to the properties file