Create and View Baselines
Prerequisite: You must have Create/View Baseline permission to both create and view Baselines. View Only permission allows you to just view the Baselines.
Save a Draft of Baselines
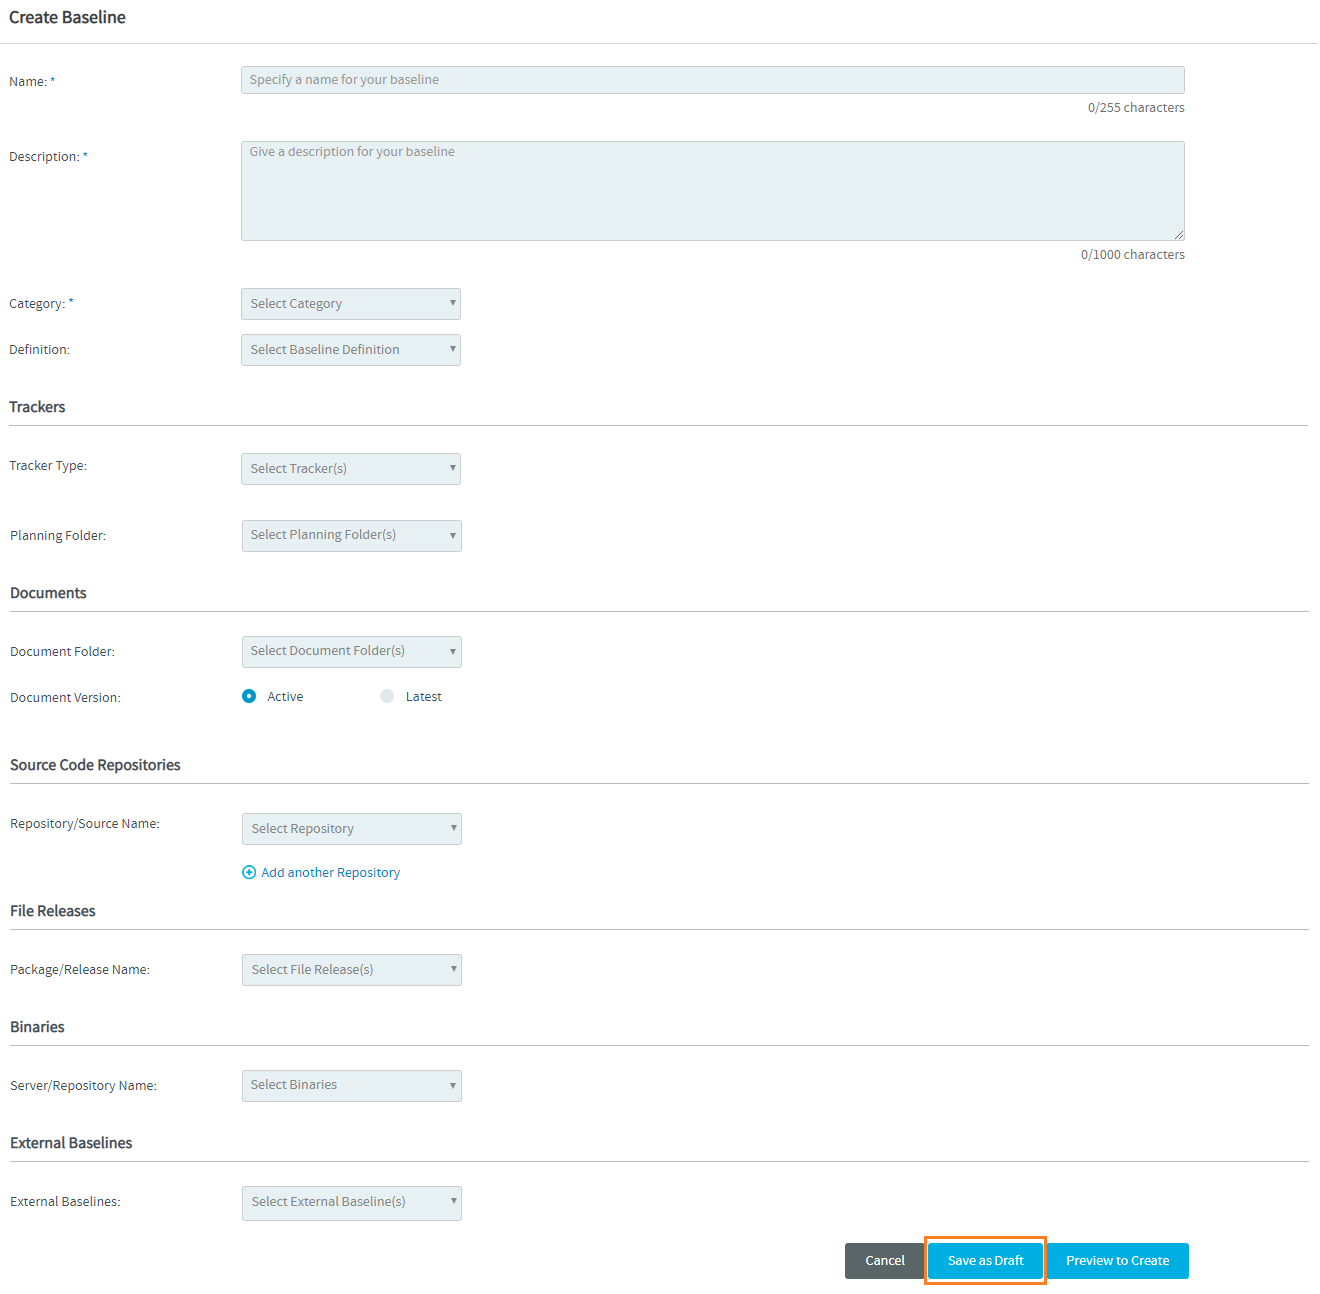
You can now save a draft of the baseline that's being created. Use the Save as Draft button in the Create Baseline page to save a draft of the baselines that are being created.
Once saved, you can edit or delete draft baselines at a later point in time.
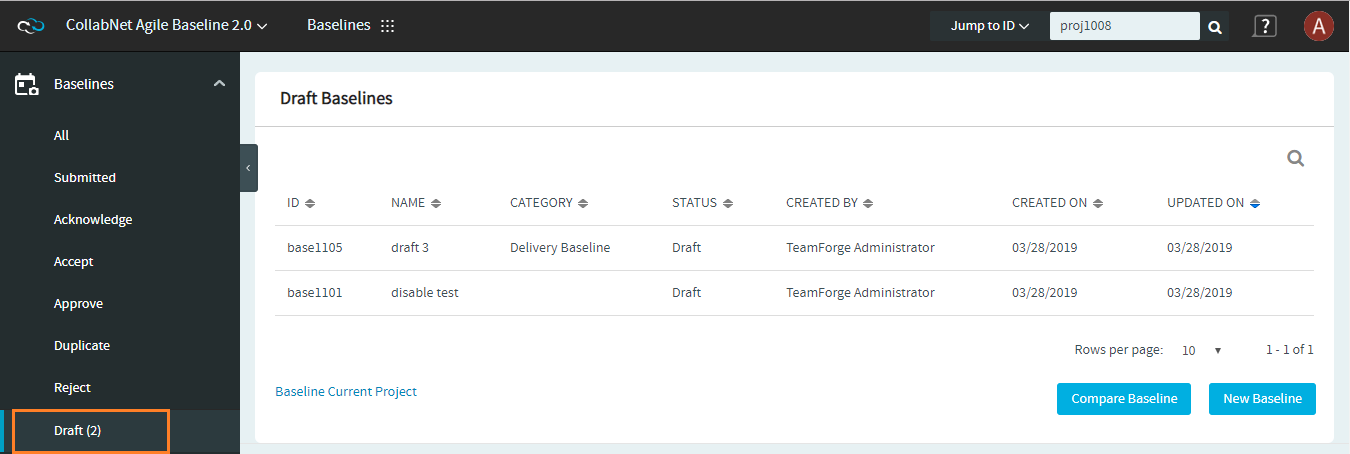
You can view the list of draft baselines by selecting Draft from the left navigation menu. The total number of draft baselines is shown next to the Draft option within parenthesis ().
Create Baselines
To create a Baseline:
-
Log on to TeamForge and select a project from My Workspace.
-
Click Baselines from the Project Home menu.
-
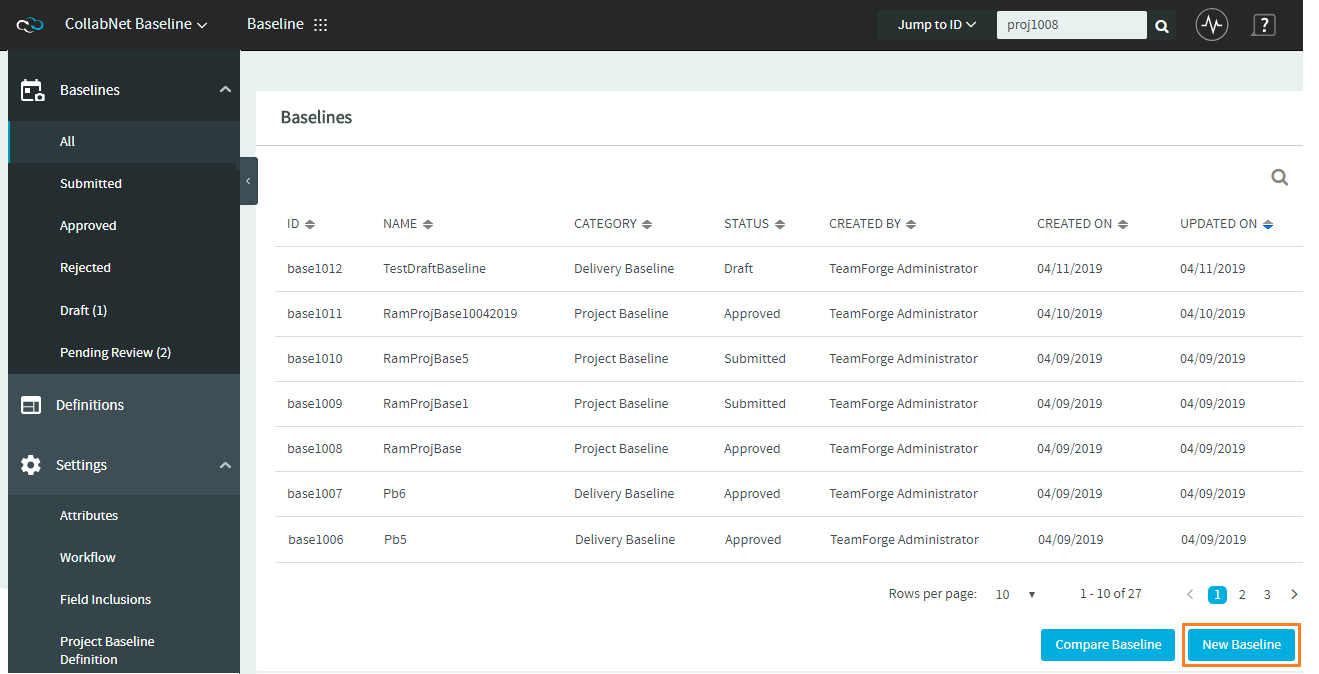
Click New Baseline.
-
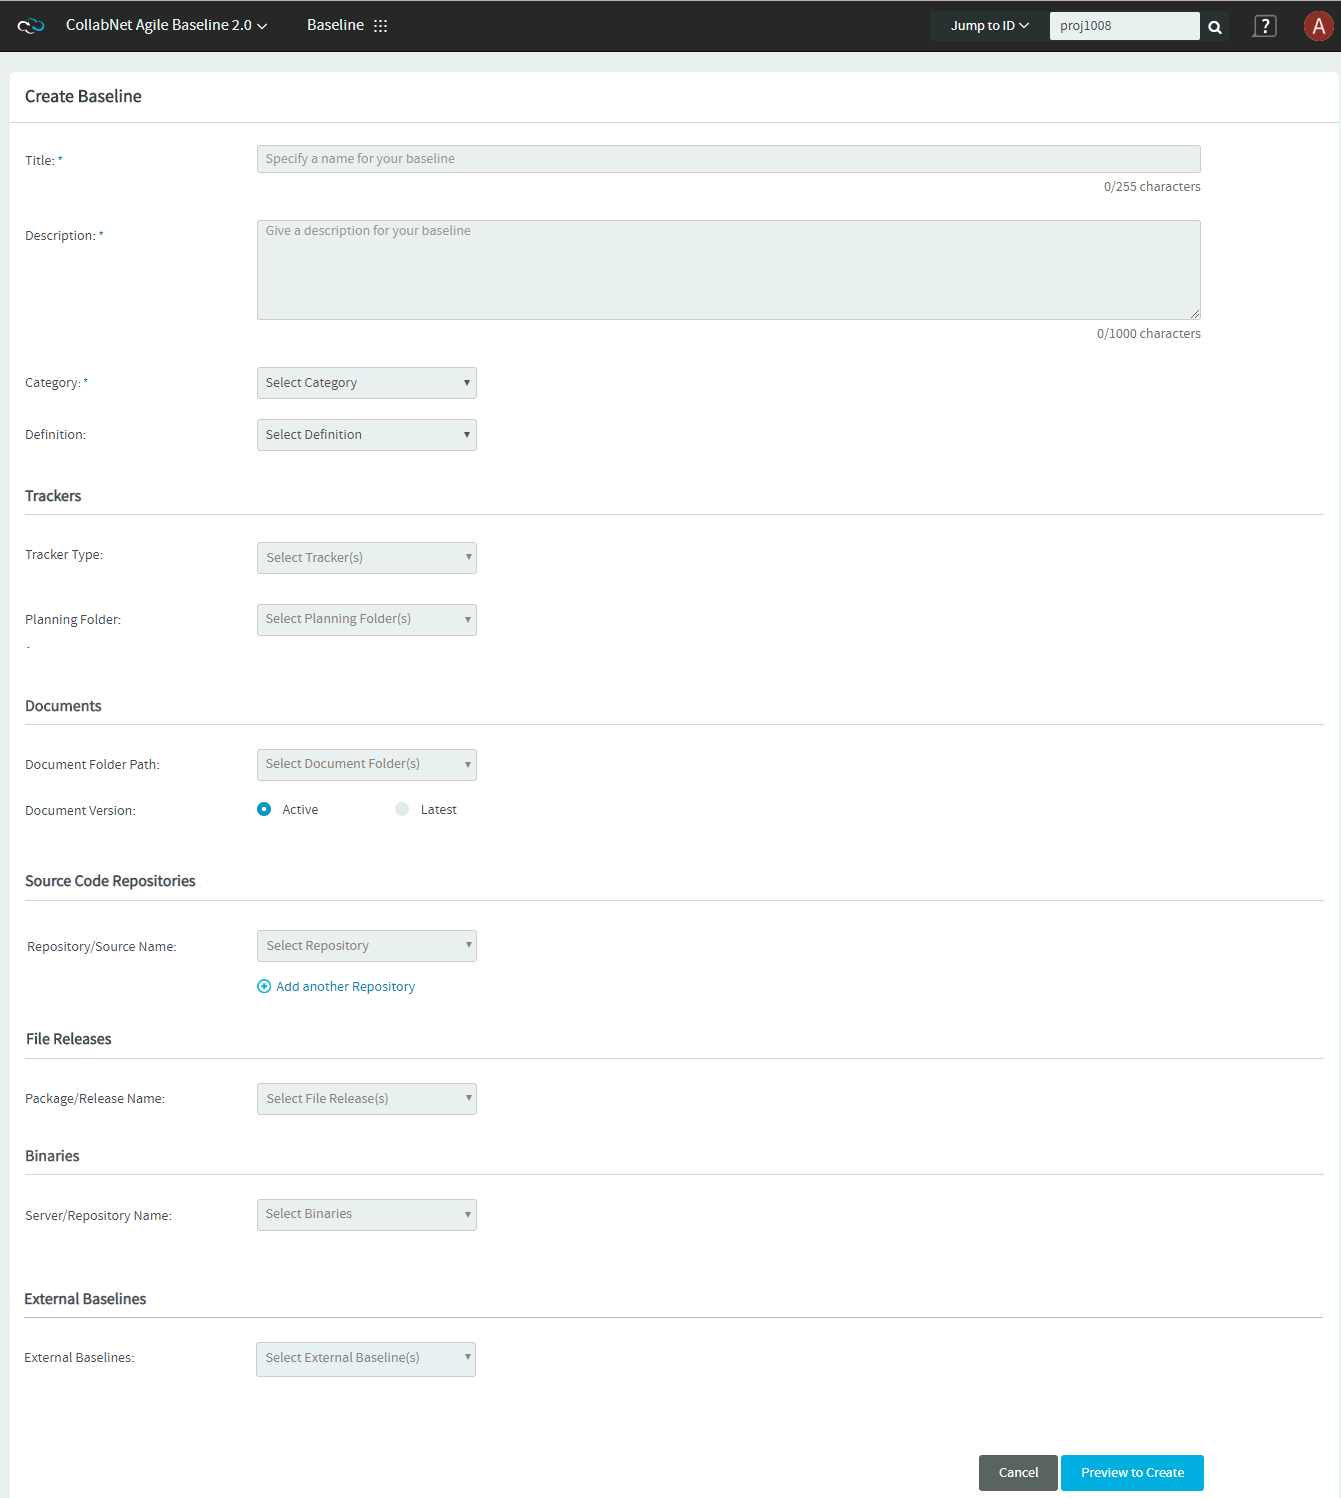
Enter values for the required fields such as Title, Description and Category.
-
Define the filter criteria.
You can define the filter criteria for Trackers, Documents, Source Code Management, File Releases and Binaries. Select the following tabs to view the instructions.
-
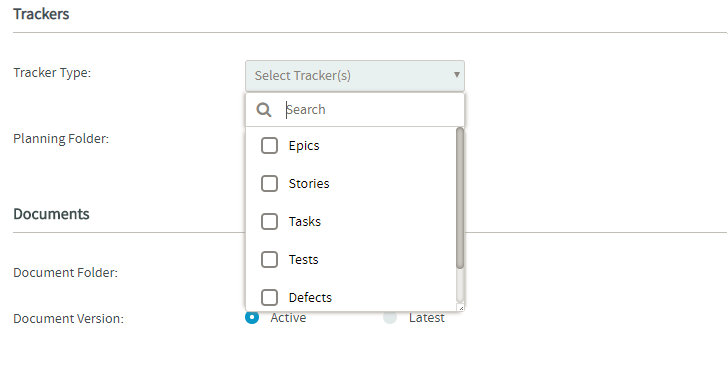
Select the tracker type(s) from the Tracker Type drop-down list.
-
Click Add Filter(s).

- Attribute--Select a tracker attribute from the drop-down list.
- Condition--Select a condition from the drop-down list.
- Value--For the selected attribute, either select one or more values or enter a value.
For example, the following filter includes all the Closed tracker artifacts in the baseline.
-
Click Add "AND" Condition to add more constraints to the filter criteria.

-
Repeat steps b and c to add more filters.
You can click the remove icon (
) next to a filter criteria to remove it.
-
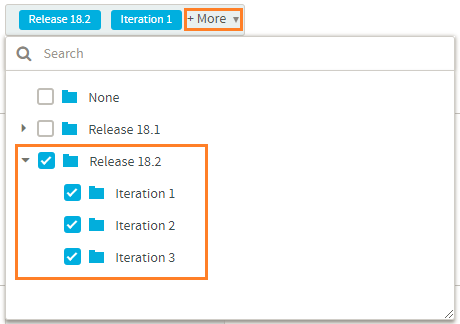
Select the planning folder. Selecting the parent/root planning folder shows all its child/sub folders.
For folders with sub folders, click More to view the complete folder structure and select the desired one.
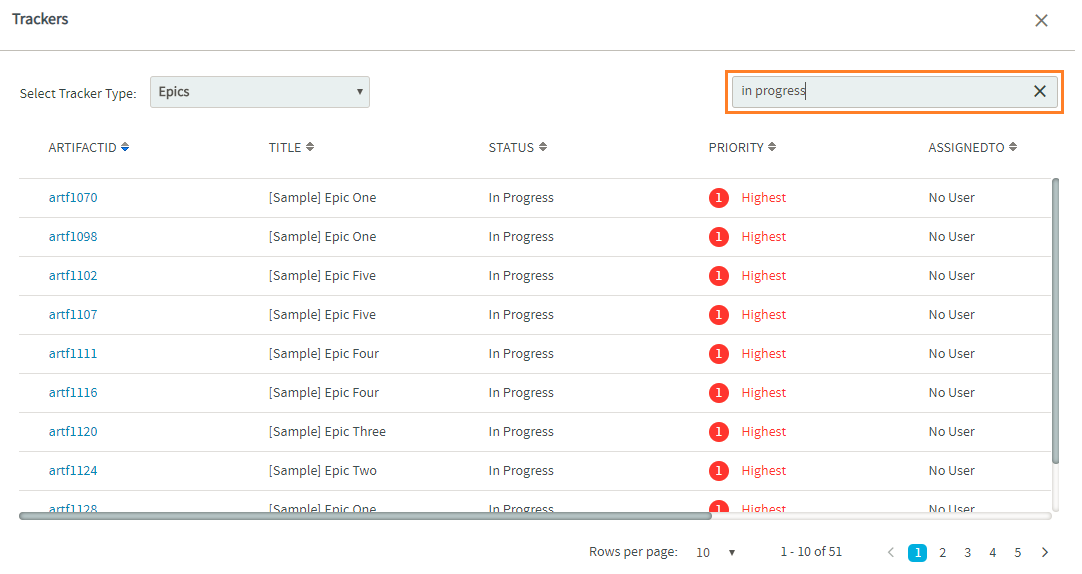
 To view the filtered list of artifacts, click the view icon (
 ) in the TRACKER/PLANNING FOLDER section. The Tracker/PlanningFolder Preview dialog box appears.
You can also do a keyword search by clicking the search icon (
) on the Tracker/PlanningFolder Preview dialog box.
-
Select the document folder.
For folders with sub folders, click More to view the complete folder structure and select the desired one.
-
Select the document version.
-
Click Add Filter(s).
- Attribute--Select an attribute from the drop-down list.
- Condition--Select a condition from the drop-down list.
- Value--For the selected attribute, either select one or more values or enter a value.
-
Click Add "AND" Condition to add more constraints to the filter criteria.
-
Repeat steps c and d to add more filters.
You can click the remove icon (
) next to a filter criteria to remove it.
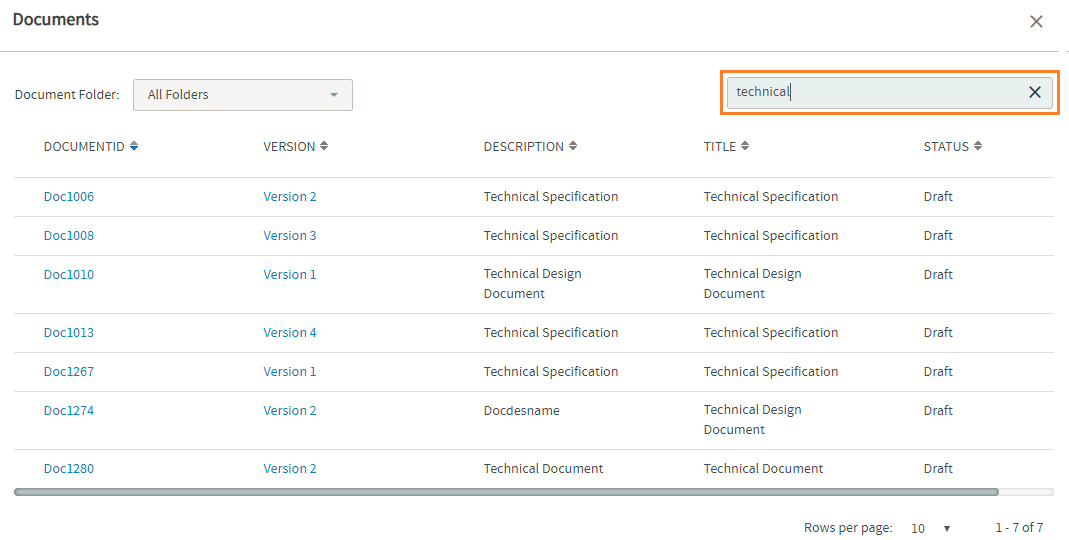
To view the filtered list of documents, click the view icon (
) in the DOCUMENTS section. The Documents Preview dialog box appears.
You can also do a keyword search by clicking the search icon (
) on the Documents Preview dialog box.
-
Select a repository from the Repository/Source Name drop-down list. Select the repository again if you want to clear your selection.
-
Select a tag for the selected repository. Select the tag again if you want to clear your selection.
Tagging is one of the features of version control systems that lets you mark particular revisions (for example, a release version)—so that you can recreate a certain build or environment at a later point in time.
- The Select Tag drop-down list shows all the tags you have for the selected Git or Subversion repository.
- For Subversion repositories, the list of tags comes from the
/tagsdirectory of the repository. - For more information about SVN tags, see Branching / Tagging.
- You can click the View Tag link to view the tag details.

-
Click Add another Repository to add more repositories.
Select the package or the release name from the Package/Release Name drop-down list.
To view the filtered list of files, click the view icon (
) in the File Releases section.
You can also do a keyword search by clicking the search icon (
) on the File Releases dialog box.
 note
noteNexus
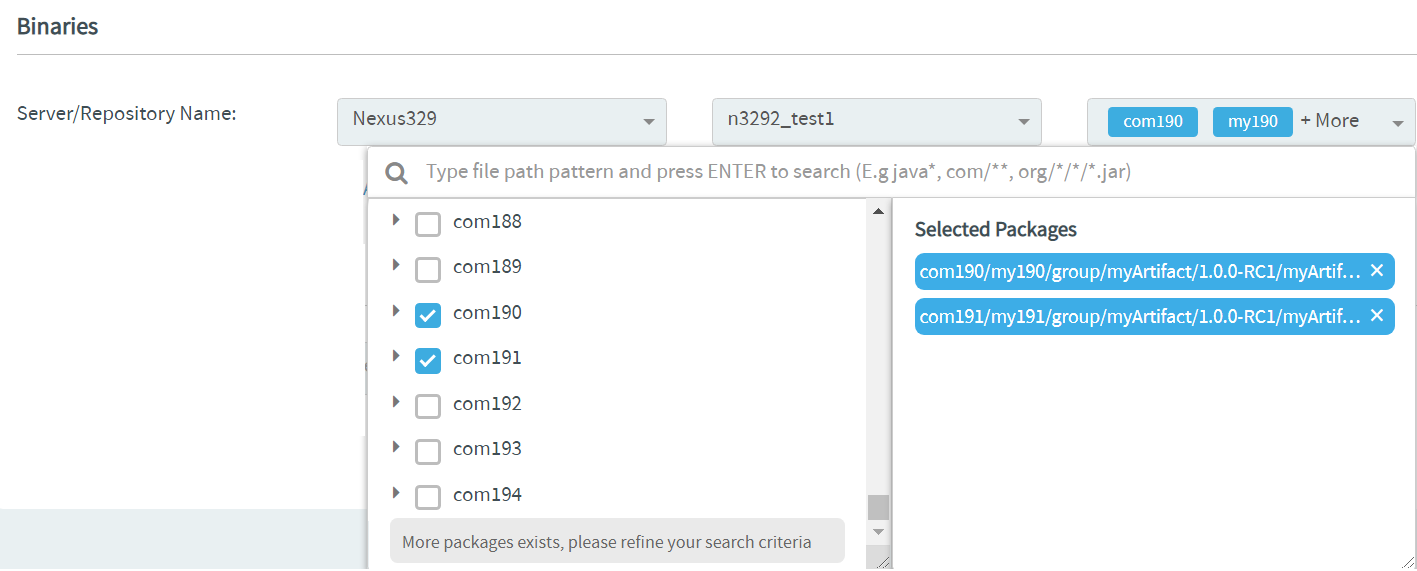
Maven2andRawformatted Proxy, Hosted and Group types of repositories are only supported.Select the server and repository from the Server and Repository drop-down lists, and select one or more packages from the Select Packages drop-down list.
- The Select Packages drop-down list lets you search for packages using glob patterns.
- The Select Packages drop-down list loads the first 100 packages to start with.
- You must search for packages using file path glob patterns if you do not find what you are looking for.
- For example, use the
com/**/*.jarglob pattern to recursively search for JAR files in thecomfolder.
Use an Existing Baseline DefinitionInstead of defining the filter criteria from the ground up, you can use the Definition drop-down list to select an existing Baseline Definition and create an Baseline.
Select a Baseline Definition from the Definition drop-down list. The selected Baseline Definition's filter criteria are auto-populated.
Review the filter criteria and modify the filters, if required.
-
-
Select one or more external baselines from the External Baselines drop-down list.

- You may click the selected external baselines to view them.
- You can search for the external baselines that are not listed in the External Baselines drop-down list.
- Only two selected external baselines can be shown at a time. To see the complete list of selected baseline definitions, click + More in the External Baselines drop-down list.
-
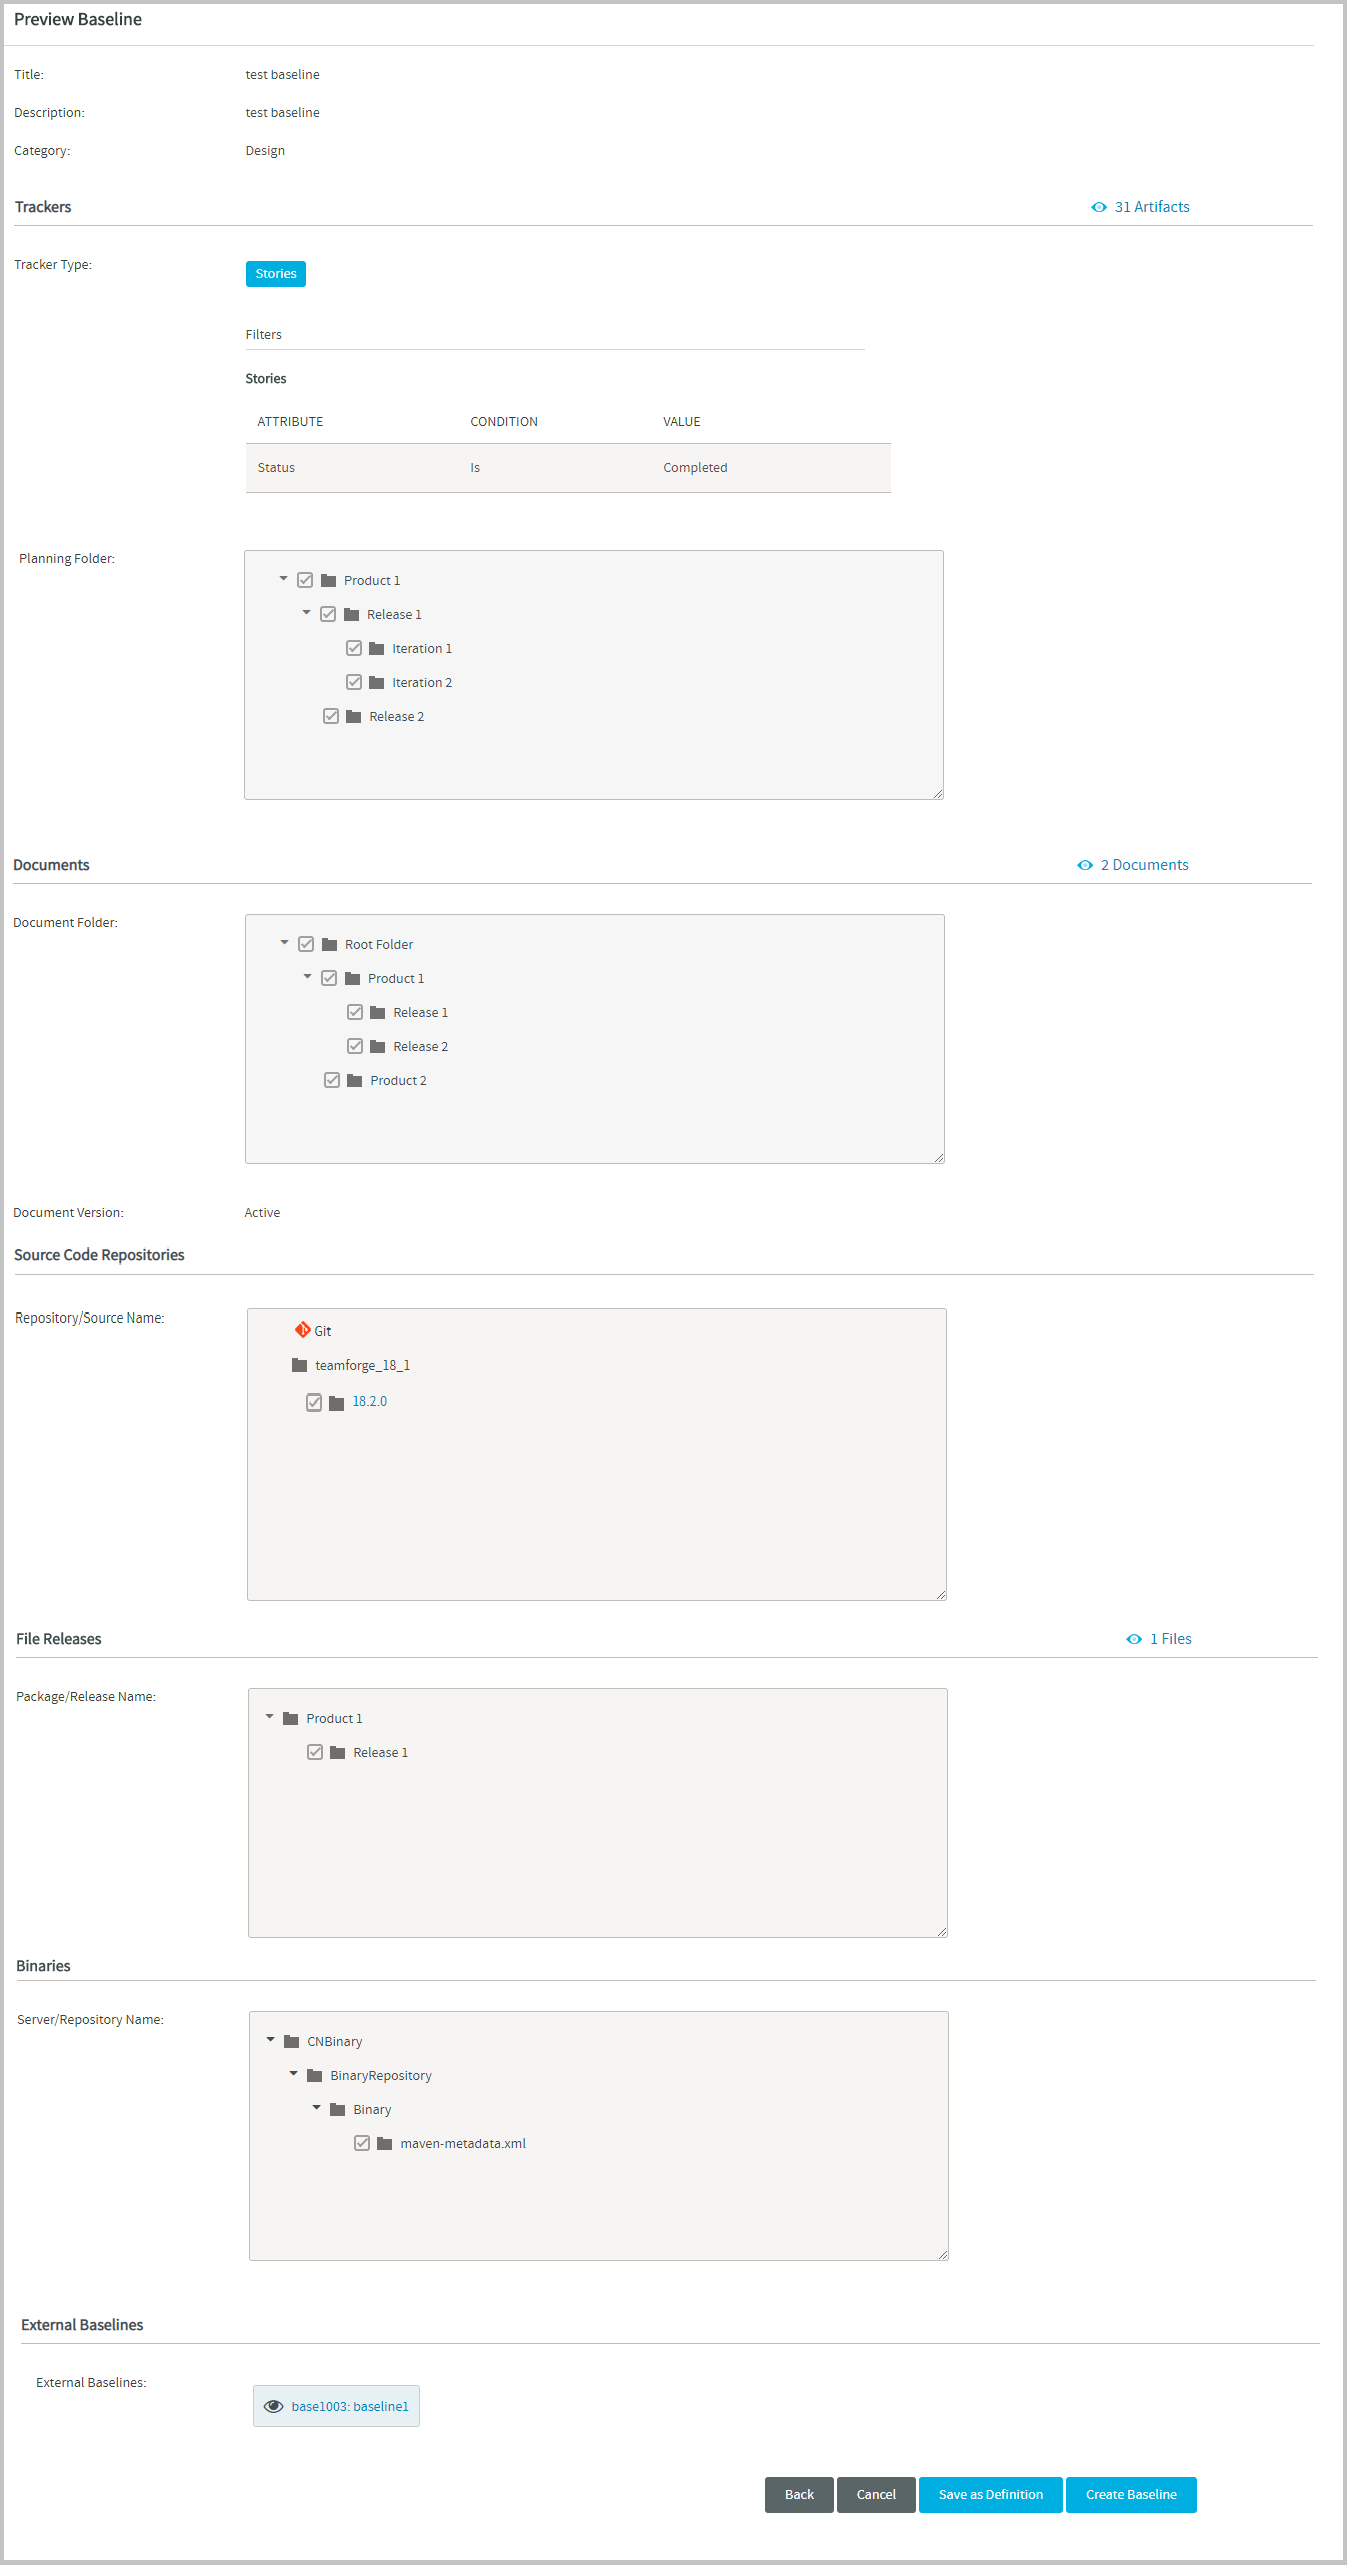
Click Preview to Create to preview the Baseline.
-
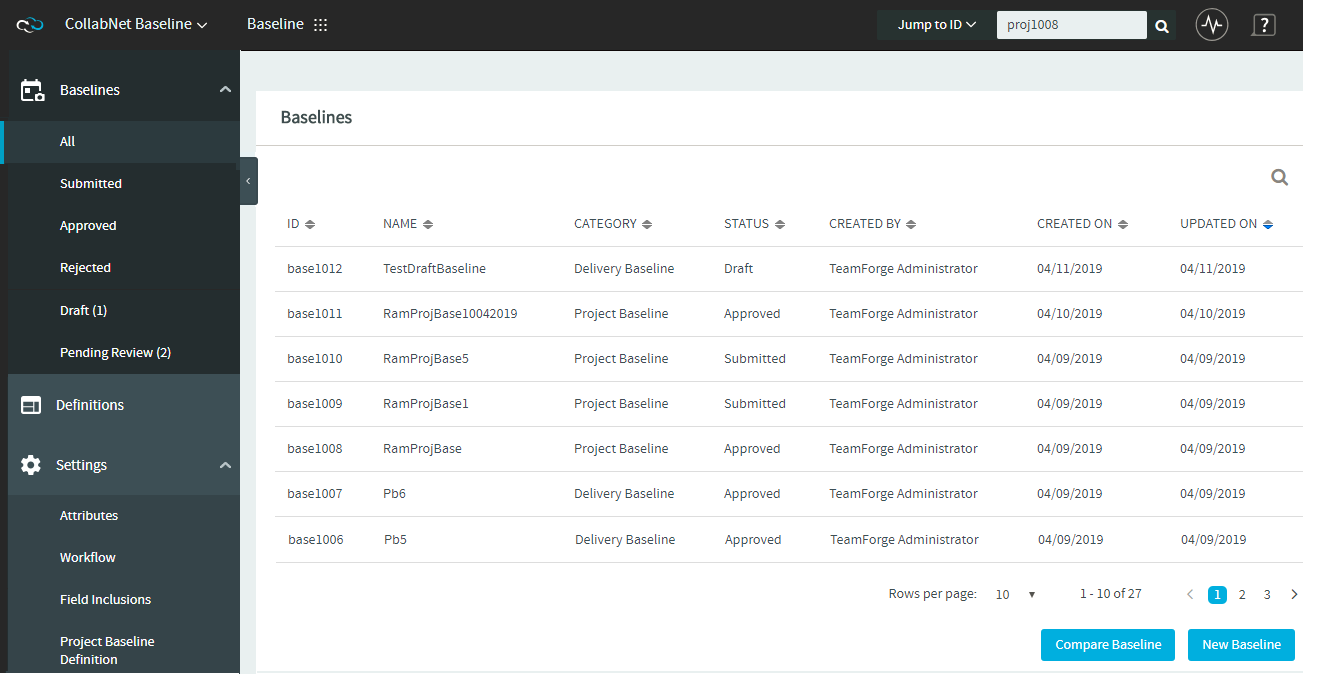
Click Create Baseline to save the Baseline.
Once created, the new Baseline is added to the list of Baselines.
-
If required, click Back to edit the Baseline on the Create Baseline page.
Refresh Baseline Status
For a baseline including configuration items with large volume of data, there would be a delay in taking the snapshot of the configuration items. In such cases, a "Click to refresh" link is provided to refresh the status of the baseline being created.
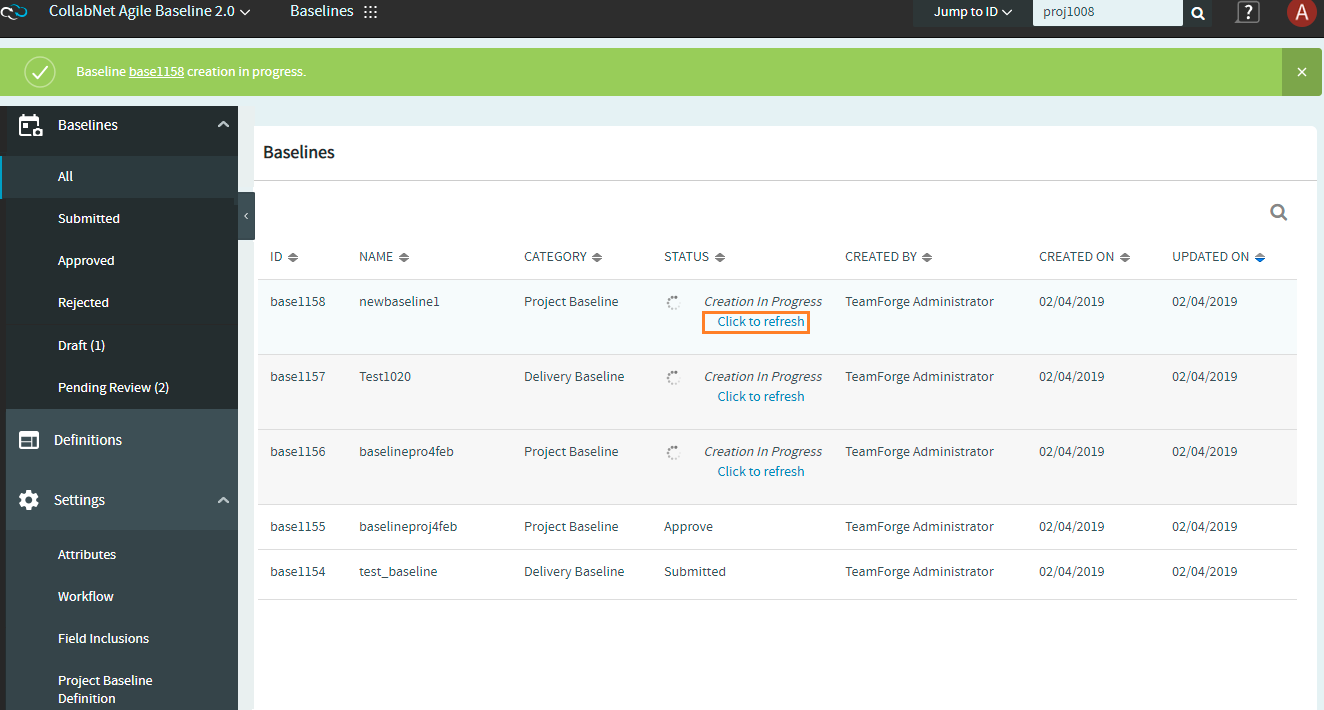
Auto Refresh Baselines List Page
The baselines list page is automatically refreshed every one minute until the baselines (with the status "Creation In Progress") in a specific project are created. You can continue to use the Click to refresh link to manually refresh the baseline(s).
Create a New Baseline from Baseline Definition
-
Log on to TeamForge and select a project from My Workspace.
-
Click Baselines from the Project Home menu.
-
Click Definitions from the side navigation menu.
-
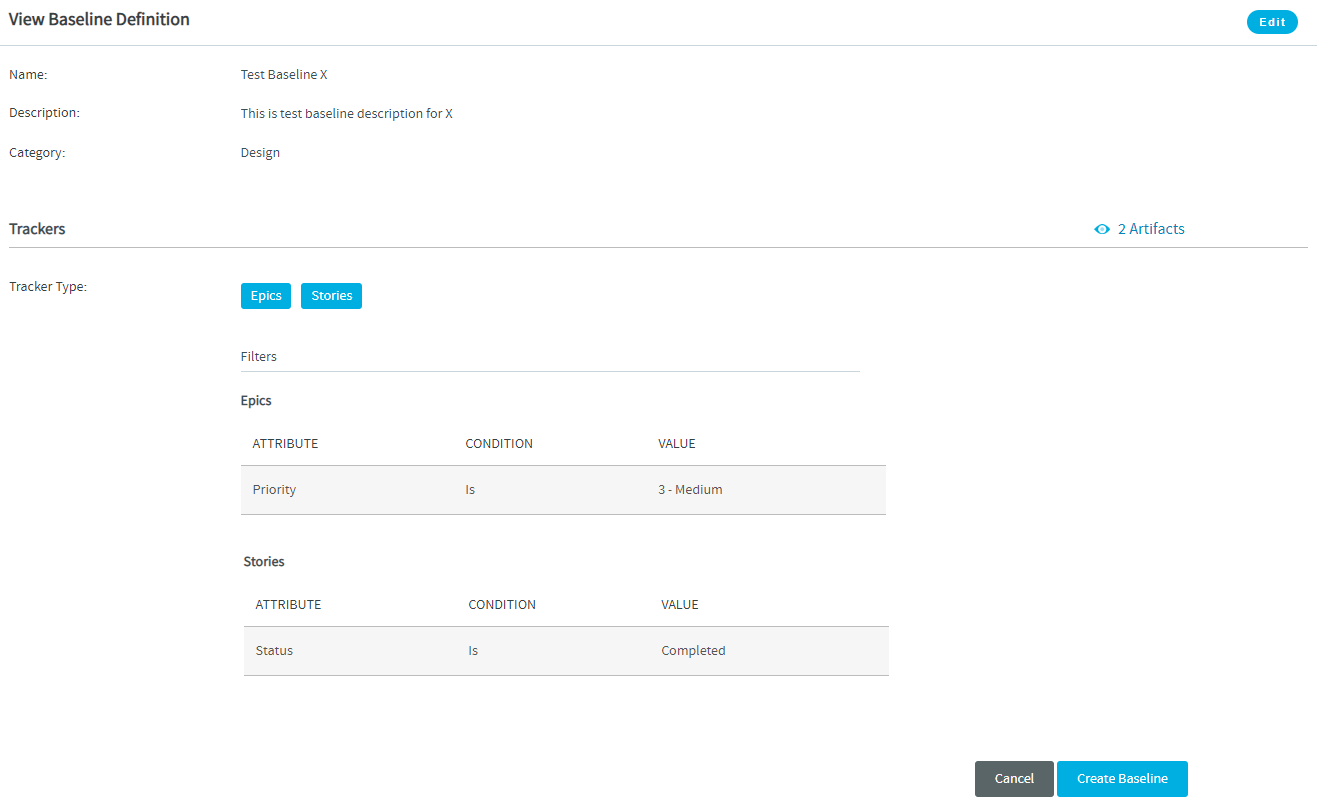
Select a Baseline Definition from the list to view its details.
-
Click Create Baseline on the View Baseline Definition page to create a new Baseline. For more information, see Create Baselines.
For a baseline including configuration items with large volume of data, there would be a delay in taking the snapshot of the configuration items. In such cases, a "Click to refresh" link is provided to refresh the status of the baseline being created.

The next step is to review Baselines. Select a submitted Baseline to proceed with the baseline review. For more information, see Review Baselines.
Create New Baselines from Approved Baselines
You can now create a new Baseline from an approved Baseline.
Project Baselines cannot be cloned.
To create a new Baseline from an approved Baseline, follow these steps:
-
Log on to TeamForge and select a project from My Workspace.
-
Click Baselines from the Project Home menu.
-
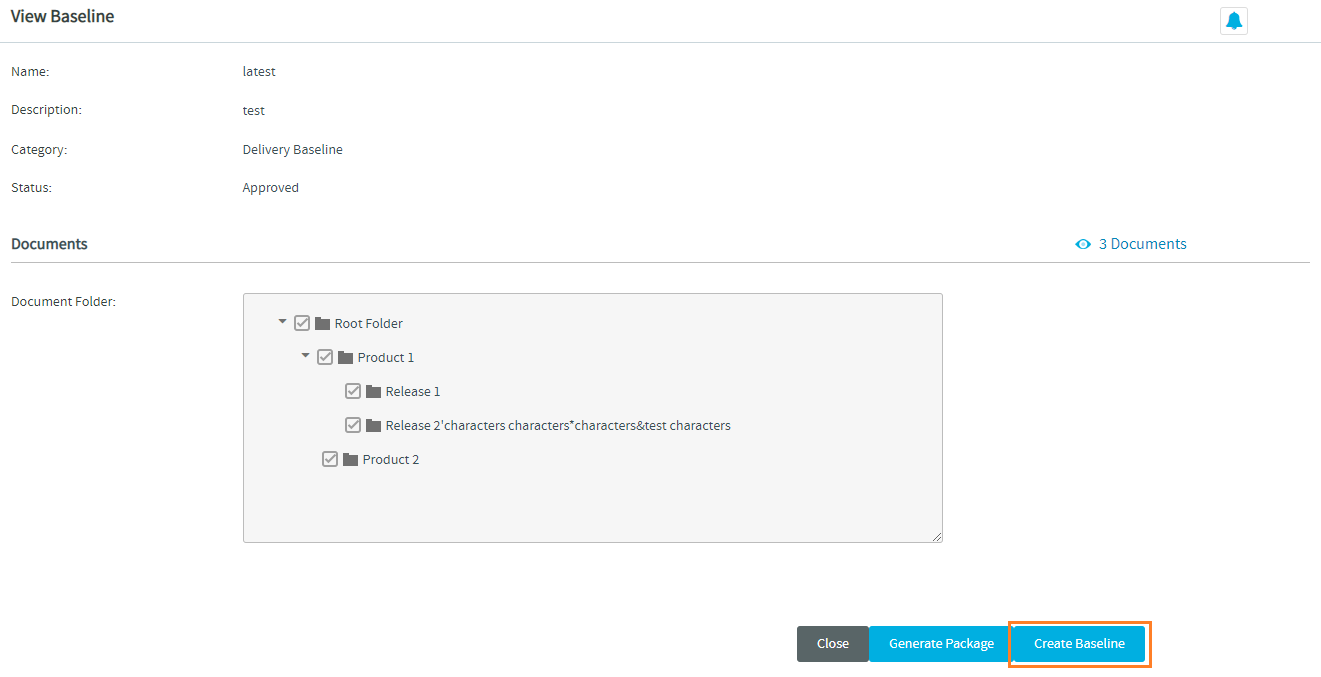
Select an approved Baseline from the list of baselines.
-
Click Create Baseline.
-
Enter the name and the description for the new Baseline.
noteAll but the name and the description fields are auto-filled with data from the source Baseline that’s being cloned.
-
Modify the fields and the filter criteria, if required.
-
Click Preview to Create.
-
Click Create Baseline on the Preview Baseline page.
The new Baseline is created.
View the Baseline
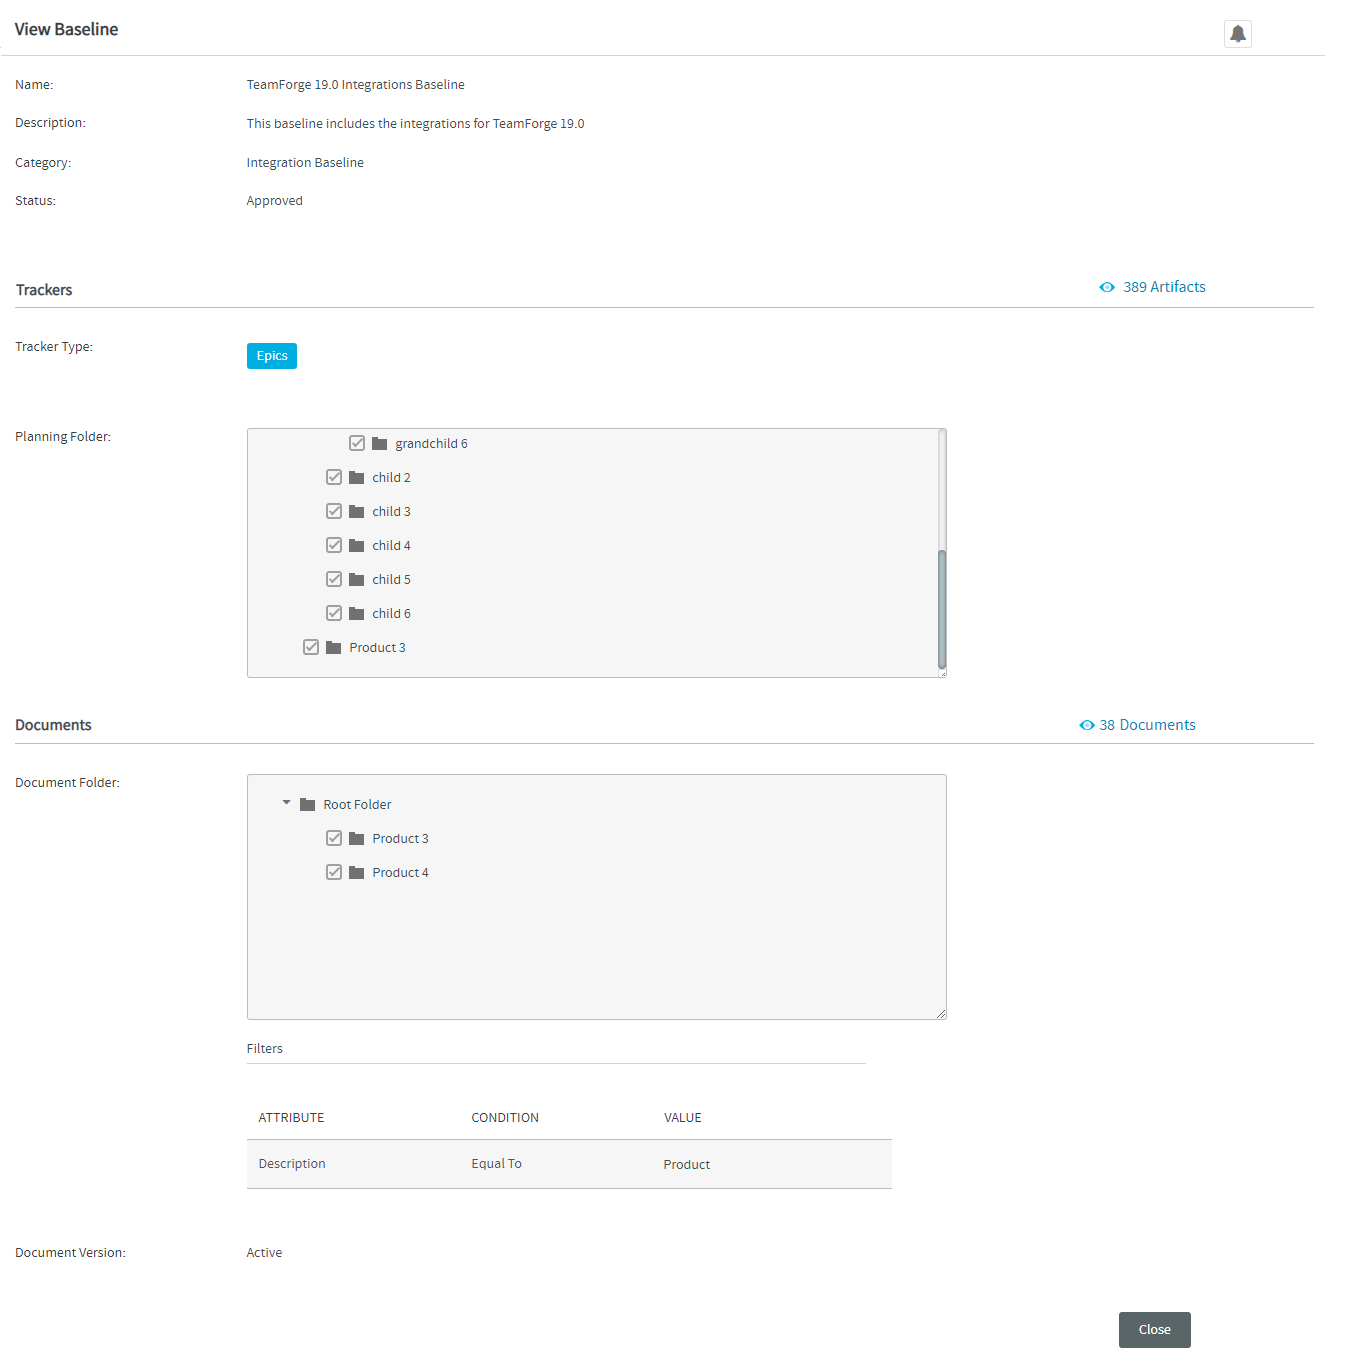
You can view a Baseline, after it is approved or rejected. In other words, you cannot edit the Baseline (both system-defined and custom fields) after its status changes to Approved or Rejected.
Export Approved Baselines to Excel
You must have the VIEW ONLY permission (or any other TeamForge Baselines permission that grants you View permission) to export to Excel.
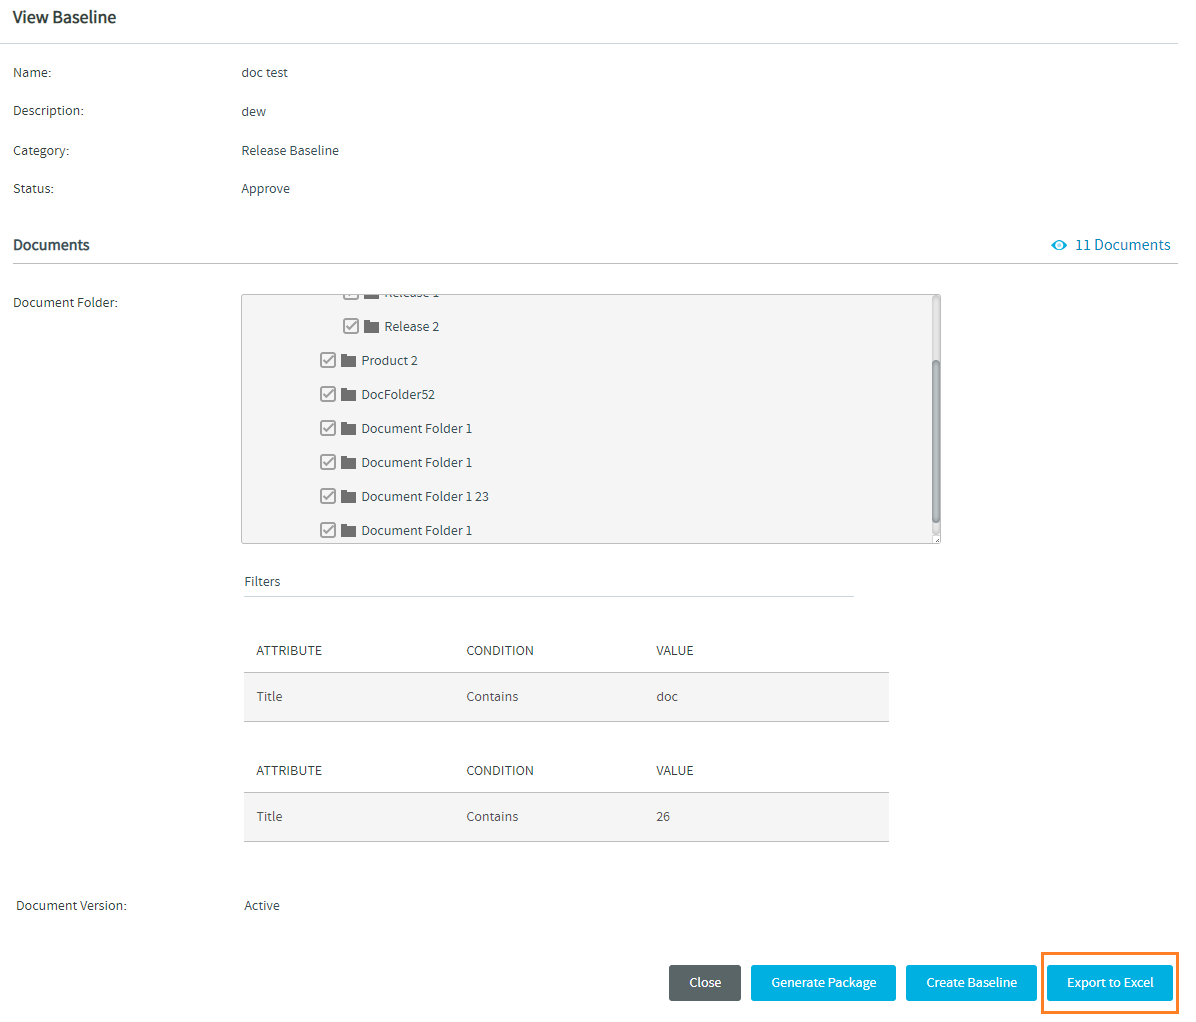
You can now export the approved Baselines as Excel reports using the "Export to Excel" option on the View Baseline page.
To export a Baseline as an excel report, select the approved Baseline on the baseline list view and click the Export to Excel button on the View Baseline page.
The name of the downloaded excel file has the format "[baseline_id]baseline_name". For instance, if you export the baseline "export_baseline" with the id "base1015", the name of the result excel file reads as "[base1015]export_baseline".
If the baseline name has a special character other than an underscore ("_") or if the baseline has a space in its name, it will be replaced with an underscore ("_") in the name of the downloaded excel file. For example, when the baseline "test baseline for export#1" is exported, the downloaded excel file name reads as "[base1033]test_baseline_for_export_1".
The excel file has worksheets for each component included in the exported Baseline. Each worksheet has as many number of columns as the manifest fields for each component.
Monitor a Baseline
Baselines created by a user is monitored by the user by default. To monitor Baselines created by other users, click the Start Monitoring icon . To stop monitoring a Baseline, click the Stop Monitoring
icon.