Create, View, and Delete Baseline Definitions
Prerequisite: You must have Create/View Baseline permission to both create and view Baseline Definitions. You need View Only permission to only view Baseline Definitions.
Create Baseline Definitions
You can create Baseline Definitions from either the Create Definition page or a Create Baseline page.
Create Baseline Definition from Create Definition Page
-
Log on to TeamForge and select a project from My Workspace.
-
Click Baselines from the Project Home menu. The Baselines list view is shown by default.
-
Click Definitions from the side navigation menu.
-
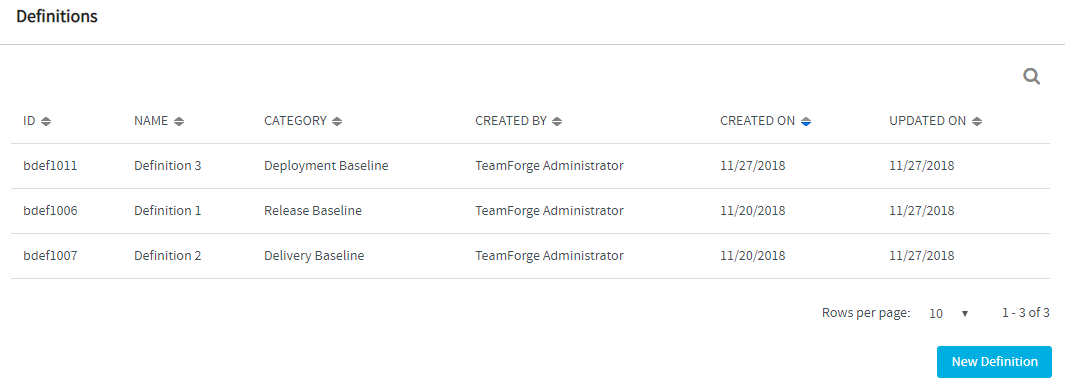
Click New Definition on the Definitions list view.
noteOnly Baseline Definitions are listed in baseline definitions list. To access/view the Project Baseline Definition, click Settings on the left navigation menu and select Project Baseline Definition.

-
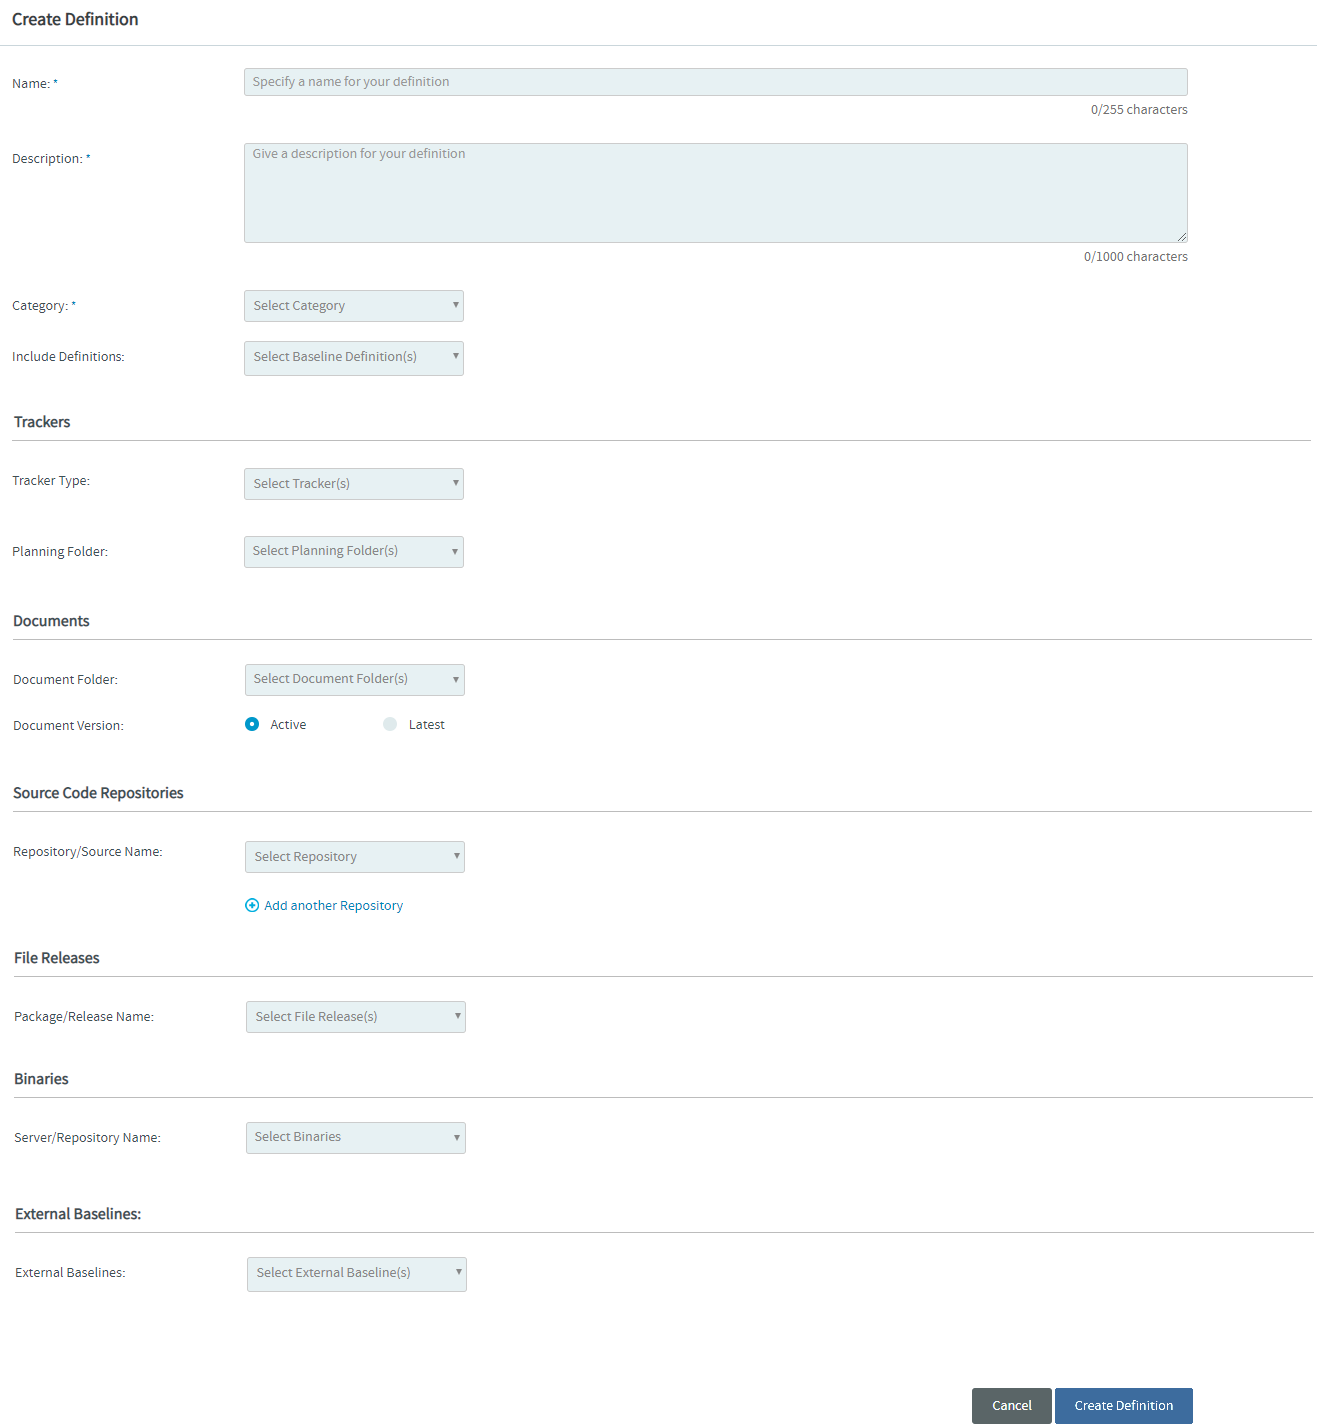
Enter values for the required fields on the Create Definition page.
-
Select one or more Baseline Definitions from the Include Definitions drop-down list. Click the selected Baseline Definition to view it.
noteInclude Definitions drop-down list lists all the Baseline Definitions in a project.
You can search for the Baseline Definitions that are not listed in the Include Definitions drop-down list. Only two selected Baseline Definitions can be shown at a time. To see the complete list of selected Baseline Definitions, click + More in the Include Definitions drop-down list.
-
Define the filter criteria.
You can define the filter criteria for Trackers, Documents, Source Code Repositories, File Releases and Binaries. Select the following tabs to view instructions.
-
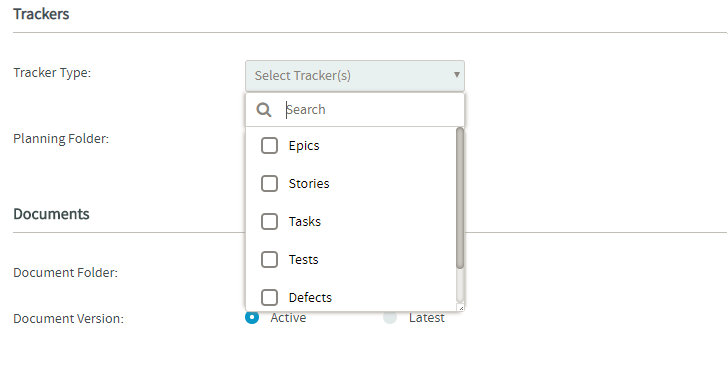
Select the tracker type(s) from the Tracker Type drop-down list.
-
Click Add Filter(s).

- Attribute--Select a tracker attribute from the drop-down list.
- Condition--Select a condition from the drop-down list.
- Value--For the selected attribute, either select one or more values or enter a value.
For example, the following filter includes all the Closed tracker artifacts in the baseline.
-
Click Add "AND" Condition to add more constraints to the filter criteria.

-
Repeat steps b and c to add more filters.
You can click the remove icon (
) next to a filter criteria to remove it.
-
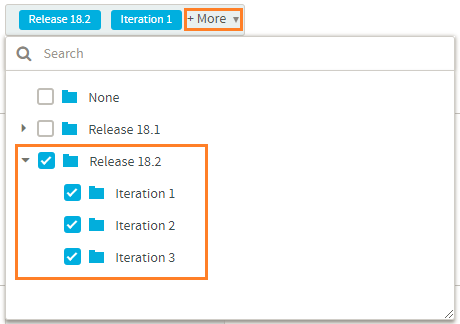
Select the planning folder. Selecting the parent/root planning folder shows all its child/sub folders.
For folders with sub folders, click More to view the complete folder structure and select the required folders.
 To view the filtered list of artifacts, click the view icon (
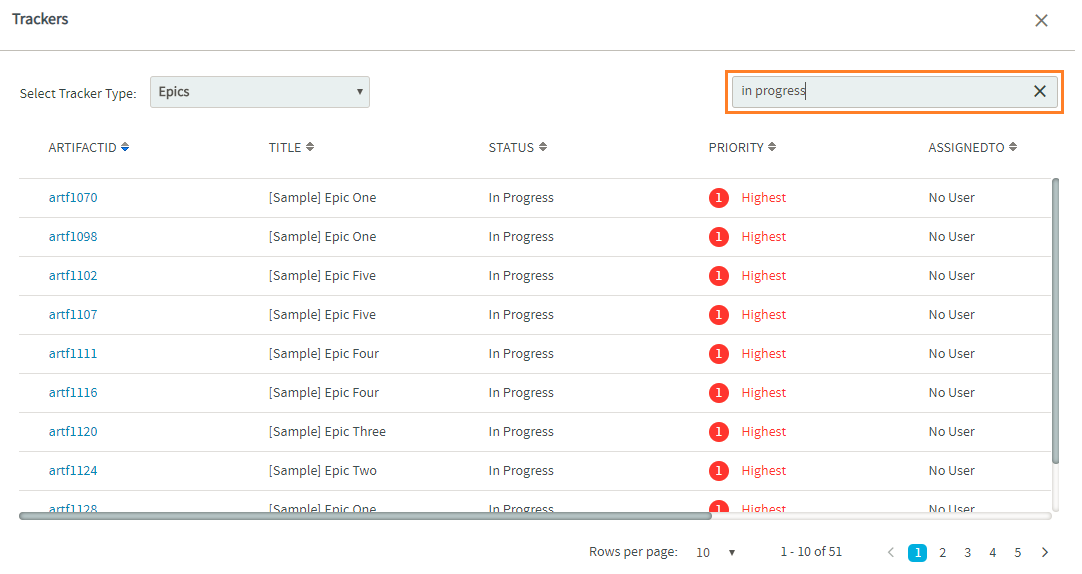
 ) in the TRACKER/PLANNING FOLDER section. The Tracker/PlanningFolder Preview dialog box appears.
You can also do a keyword search by clicking the search icon (
) on the Tracker/PlanningFolder Preview dialog box.
-
Select the document folder.
For folders with sub folders, click More to view the complete folder structure and select the required sub folders.
-
Select the document version.
-
Click Add Filter(s).
- Attribute--Select an attribute from the drop-down list.
- Condition--Select a condition from the drop-down list.
- Value--For the selected attribute, either select one or more values or enter a value.
-
Click Add "AND" Condition to add more constraints to the filter criteria.
-
Repeat steps c and d to add more filters.
You can click the remove icon (
) next to a filter criteria to remove it.
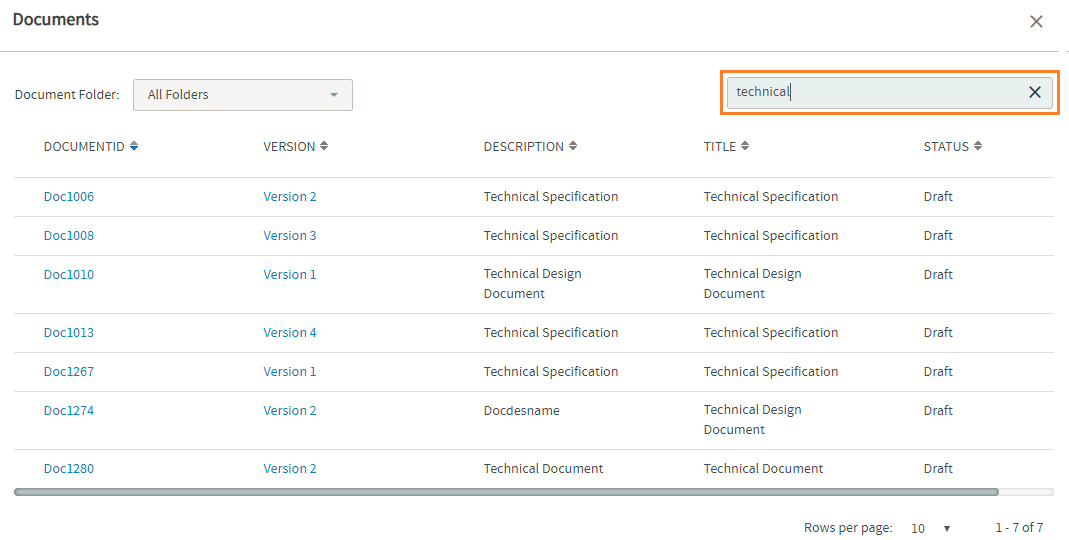
To view the filtered list of documents, click the view icon (
) in the DOCUMENTS section. The Documents Preview dialog box appears.
You can also do a keyword search by clicking the search icon (
) on the Documents Preview dialog box.
-
Select a repository from the Repository/Source Name drop-down list. Select the repository again if you want to clear your selection.
-
Select a tag for the selected repository. Select the tag again if you want to clear your selection.
Tagging is one of the features of version control systems that lets you mark particular revisions (for example, a release version)—so that you can recreate a certain build or environment at a later point in time.
- The Select Tag drop-down list shows all the tags you have for the selected Git or Subversion repository.
- For Subversion repositories, the list of tags comes from the
/tagsdirectory of the repository. - For more information about SVN tags, see Branching / Tagging.
- You can click the View Tag link to view the tag details.

-
Click Add another Repository to add more repositories.
Select the package or the release name from the Package/Release Name drop-down list.
To view the filtered list of files, click the view icon (
) in the File Releases section.
You can also do a keyword search by clicking the search icon (
) on the File Releases dialog box.
 warning
Projects created via the Project Baseline supports only Nexus 3 binary repositories. Nexus
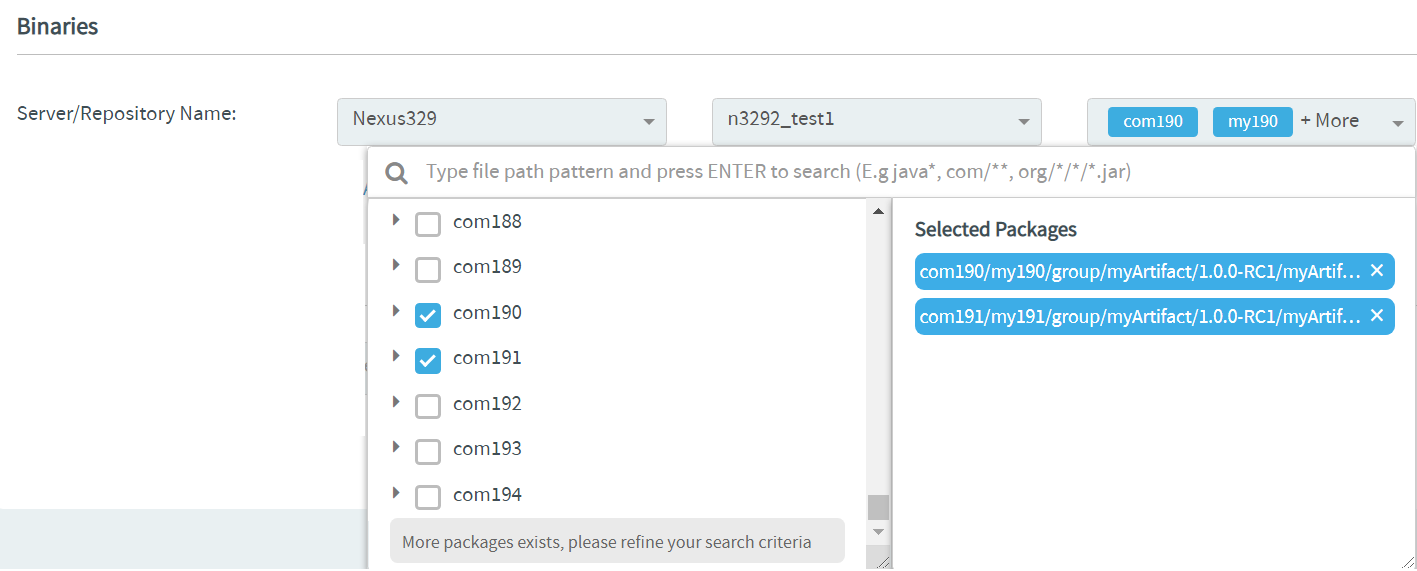
Maven2andRawformatted Proxy, Hosted and Group types of repositories are only supported.Select the server and repository from the Server and Repository drop-down lists, and select one or more packages from the Select Packages drop-down list.
- The Select Packages drop-down list lets you search for packages using glob patterns.
- The Select Packages drop-down list loads the first 100 packages to start with.
- You must search for packages using file path glob patterns if you do not find what you are looking for.
- For example, use the
com/**/*.jarglob pattern to recursively search for JAR files in thecomfolder.
-
-
Select one or more external baselines from the External Baselines drop-down list.

Click the selected External Baseline to view it.
You can search for the External Baselines that are not listed in the External Baselines drop-down list. Only two selected External Baselines can be shown at a time. To see the complete list of External Baselines, click + More in the External Baselines drop-down list.
-
Click Create Definition.
Once created, the new Baseline Definition is added to the list of Baseline Definitions.
Create Baseline Definition from Create Baseline Page
-
Log on to TeamForge and select a project from My Workspace.
-
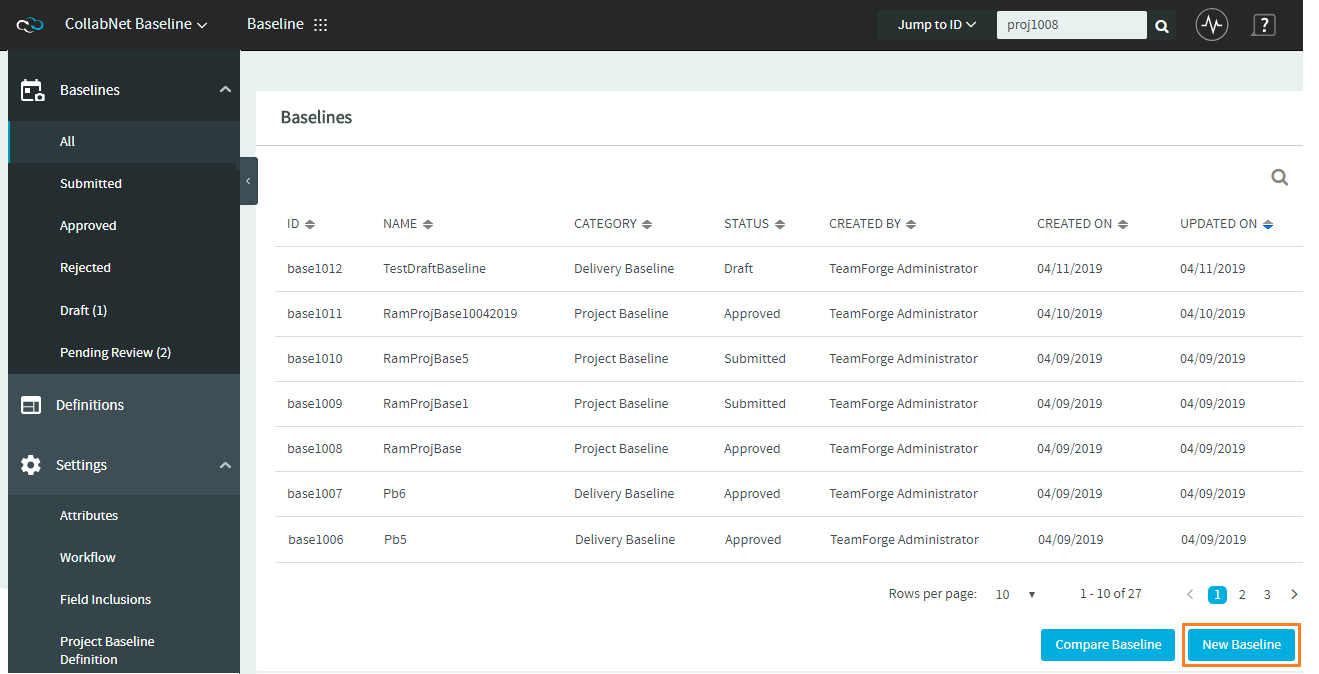
Click Baselines from the Project Home menu. The Baselines list view is shown by default.
-
Click New Baseline on the baseline list view.
-
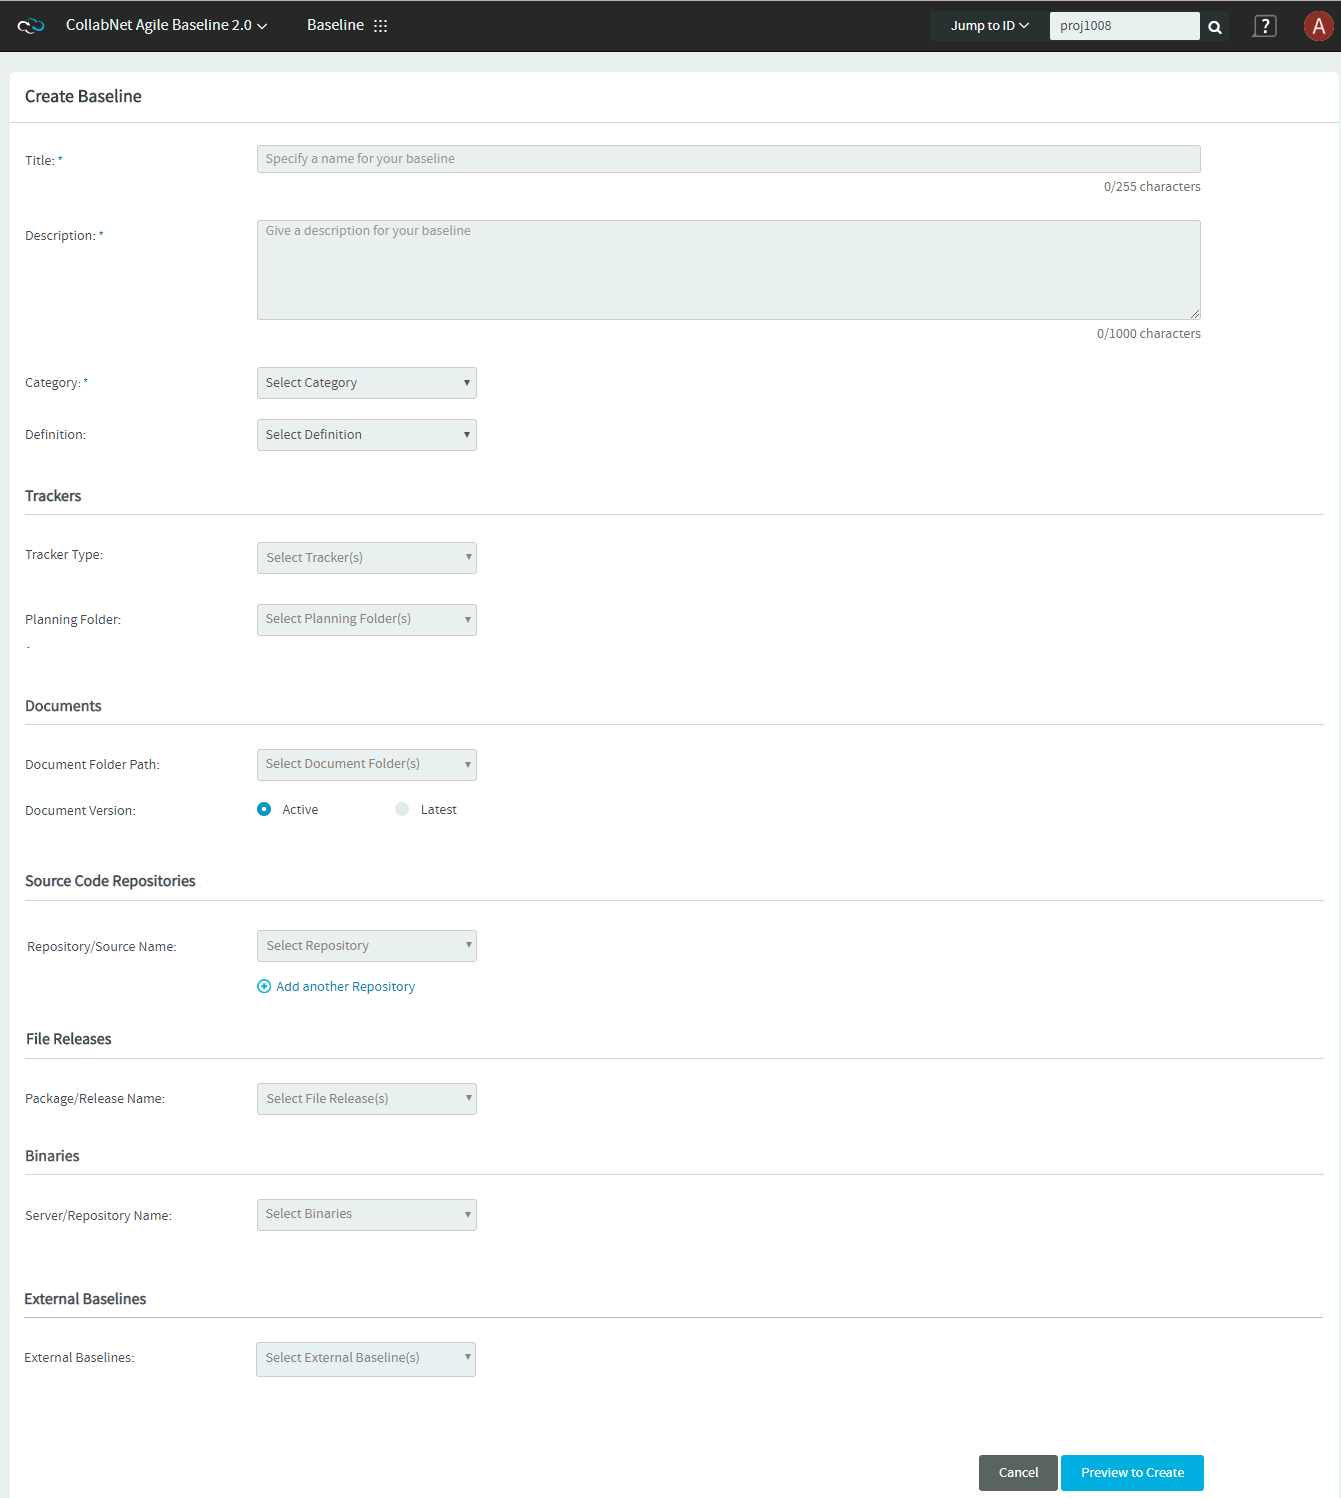
Enter values for the required fields.
-
Define the filter criteria.
You can define the filter criteria for Trackers, Documents, Source Code Repositories, File Releases and Binaries. Select the following tabs to view instructions.
-
Select the tracker type(s) from the Tracker Type drop-down list.

-
Click Add Filter(s).

- Attribute--Select a tracker attribute from the drop-down list.
- Condition--Select a condition from the drop-down list.
- Value--For the selected attribute, either select one or more values or enter a value.
For example, the following filter includes all the Closed tracker artifacts in the baseline.
-
Click Add "AND" Condition to add more constraints to the filter criteria.

-
Repeat steps b and c to add more filters.
You can click the remove icon (
) next to a filter criteria to remove it.
-
Select the planning folder. Selecting the parent/root planning folder shows all its child/sub folders.
For folders with sub folders, click More to view the complete folder structure and select the required folders.
 To view the filtered list of artifacts, click the view icon (
 ) in the TRACKER/PLANNING FOLDER section. The Tracker/PlanningFolder Preview dialog box appears.
You can also do a keyword search by clicking the search icon (
) on the Tracker/PlanningFolder Preview dialog box.

-
Select the document folder.
For folders with sub folders, click More to view the complete folder structure and select the required sub folders.
-
Select the document version.
-
Click Add Filter(s).
- Attribute--Select an attribute from the drop-down list.
- Condition--Select a condition from the drop-down list.
- Value--For the selected attribute, either select one or more values or enter a value.
-
Click Add "AND" Condition to add more constraints to the filter criteria.
-
Repeat steps c and d to add more filters.
You can click the remove icon (
) next to a filter criteria to remove it.
To view the filtered list of documents, click the view icon (
) in the DOCUMENTS section. The Documents Preview dialog box appears.
You can also do a keyword search by clicking the search icon (
) on the Documents Preview dialog box.

-
Select a repository from the Repository/Source Name drop-down list. Select the repository again if you want to clear your selection.
-
Select a tag for the selected repository. Select the tag again if you want to clear your selection.
Tagging is one of the features of version control systems that lets you mark particular revisions (for example, a release version)—so that you can recreate a certain build or environment at a later point in time.
- The Select Tag drop-down list shows all the tags you have for the selected Git or Subversion repository.
- For Subversion repositories, the list of tags comes from the
/tagsdirectory of the repository. - For more information about SVN tags, see Branching / Tagging.
- You can click the View Tag link to view the tag details.

-
Click Add another Repository to add more repositories.
Select the package or the release name from the Package/Release Name drop-down list.
To view the filtered list of files, click the view icon (
) in the File Releases section.
You can also do a keyword search by clicking the search icon (
) on the File Releases dialog box.
 warning
Projects created via the Project Baseline supports only Nexus 3 binary repositories. Nexus
Maven2andRawformatted Proxy, Hosted and Group types of repositories are only supported.Select the server and repository from the Server and Repository drop-down lists, and select one or more packages from the Select Packages drop-down list.
- The Select Packages drop-down list lets you search for packages using glob patterns.
- The Select Packages drop-down list loads the first 100 packages to start with.
- You must search for packages using file path glob patterns if you do not find what you are looking for.
- For example, use the
com/**/*.jarglob pattern to recursively search for JAR files in thecomfolder.

-
-
Select one or more External Baselines from the External Baselines drop-down list.

Click the selected External Baseline to view it.
You can search for the External Baselines that are not listed in the External Baselines drop-down list. Only two selected External Baselines can be shown at a time. To see the complete list of External Baselines, click + More in the External Baselines drop-down list.
-
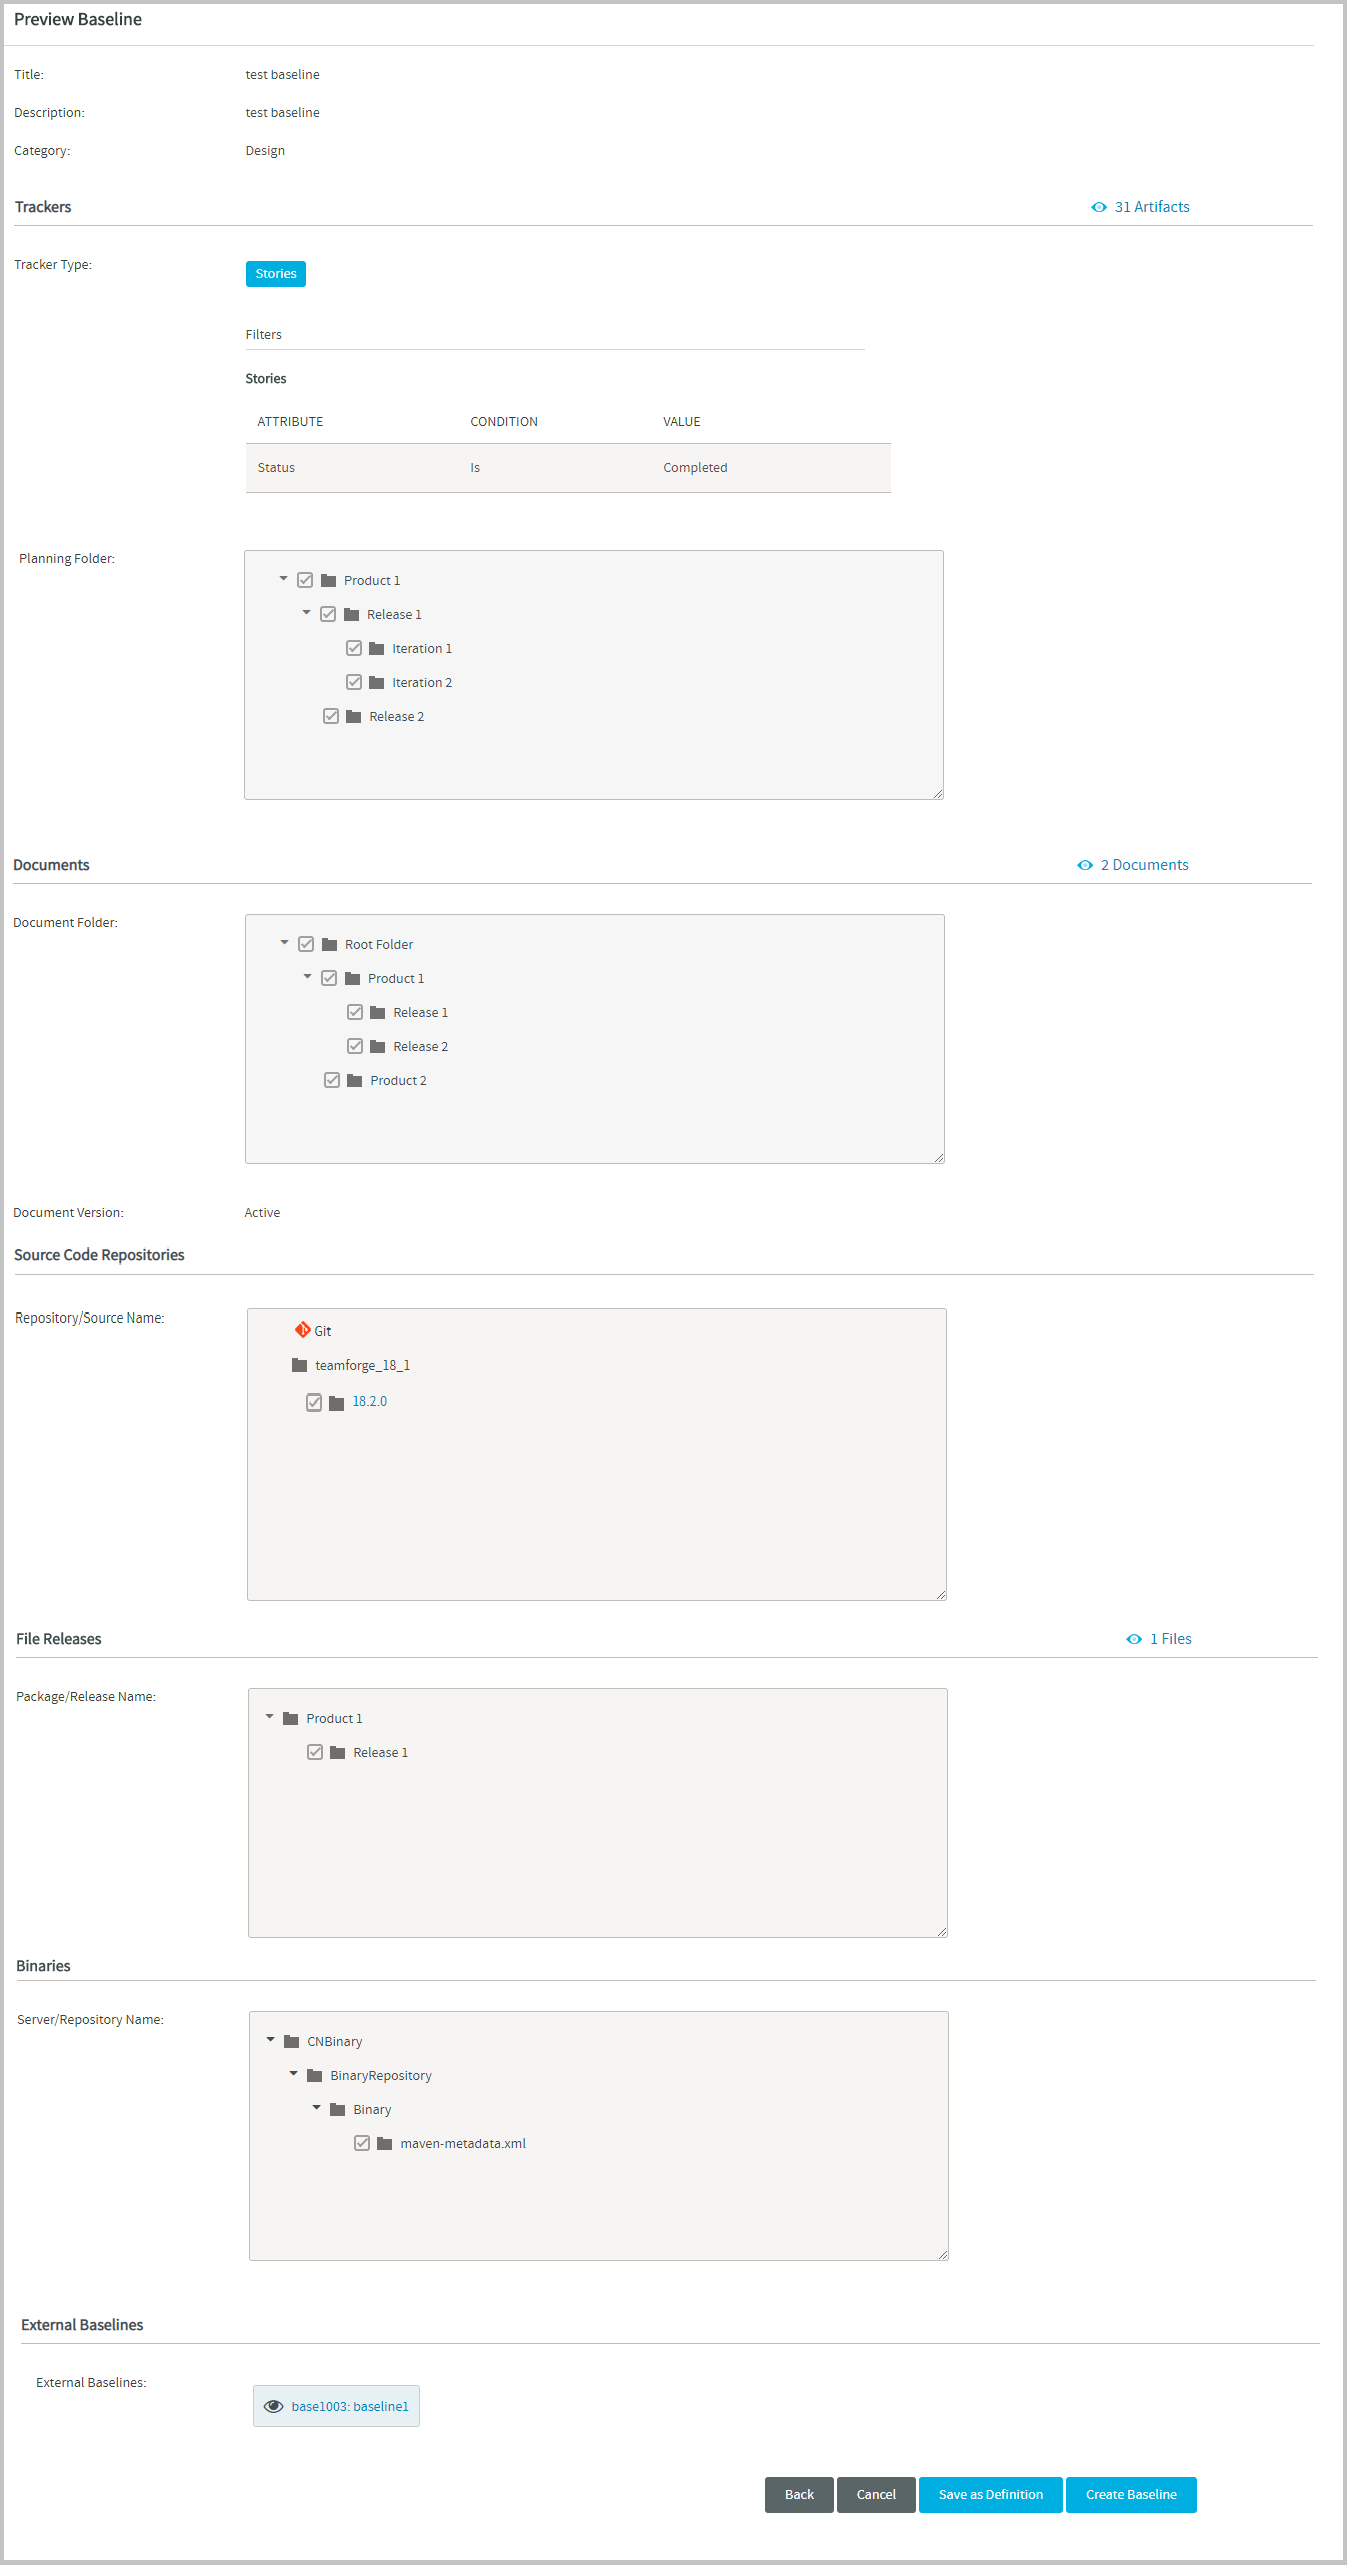
Click Preview to Create to preview the Baseline Definition.
-
Click Save as Definition to save the Baseline Definition.
noteBy default, the Baseline title is shown in the Name field.
-
Either enter a new name for the Baseline Definition or leave the Baseline title in the Name field.
-
Click Save. If the entered name already exists, you are prompted to enter a different name.

Once saved, the new Baseline Definition is added to the list of Baseline Definitions.

-
If required, click Back to edit the Baseline Definition on the Create Baseline page.
Create Baseline Definition from an Existing Baseline Definition
You can create an Baseline Definition using an already existing Baseline Definition from the Create Baseline page.
Create Baseline Definition from Create Baseline Page
Instead of creating an Baseline Definition from the ground up, you can build one from an already existing Baseline Definition.
-
Repeat steps 1 through 4 as discussed earlier in Create Baseline Definition from Create Baseline Page.
-
Select a Baseline Definition from the Definition drop-down list. The selected Baseline Definition's filter criteria are auto-populated.
-
Review the filter criteria and modify the filters, if required.
-
Repeat steps 5 through 10 as discussed earlier in Create Baseline Definition from Create Baseline Page and create the new Baseline Definition.
Once saved, the new Baseline Definition is added to the list of Baseline Definitions.

View Baseline Definition
-
Log on to TeamForge and select a project from My Workspace.
-
Click Baselines from the Project Home menu.
-
Click Definitions from the side navigation menu.
-
Select a Baseline Definition from the list to view its details.

Delete Baseline Definition
You can delete a baseline definition as long as you have the DELETE/VIEW BASELINE DEFINITION permission assigned to you. Existing baselines, if any, created from deleted baseline definitions, are not affected in any way.
Users with the DELETE/VIEW BASELINE DEFINITION permission can:
- Search for baseline definitions
- View baseline definitions
- Delete baseline definitions
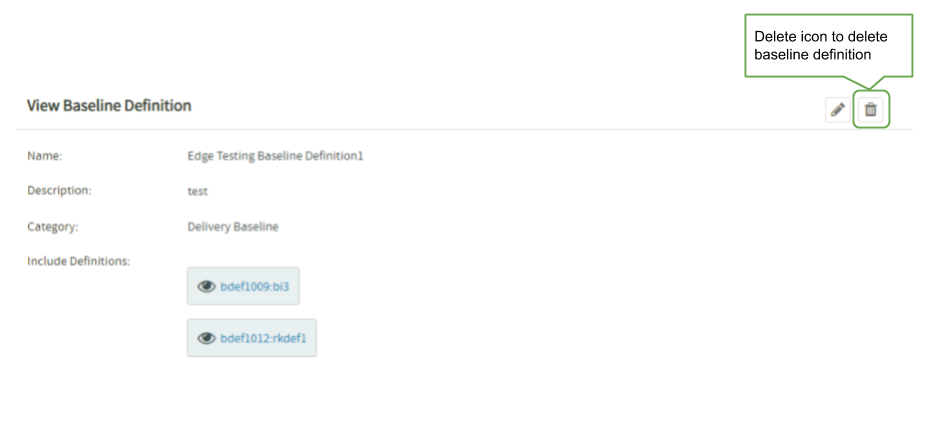
You can delete baseline definitions—only on a case-by-case basis—from the View Baseline Definition page.
To delete a baseline definition:
-
Select a baseline definition to view it.
-
Click the Delete icon on the View Baseline Definition page.
-
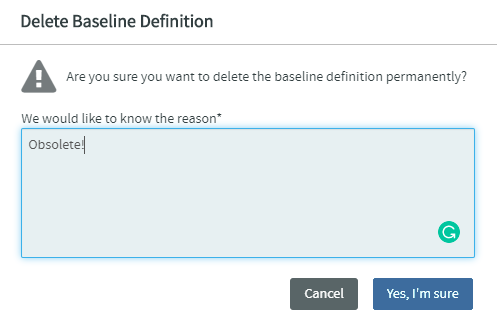
A confirmation message appears.
-
You must type a reason to delete the baseline definition and click Yes, I’m sure. The comment/reason you type is stored in the database and is associated with the baseline definition you are trying to delete.
The baseline definition is deleted.
An email notification is sent to the user that created the baseline definition.