Set up LFS
LFS is supported by TeamForge-Git/Gerrit integration 16.7.10-2.13.2 and later. LFS is controlled by two levels of configuration in TeamForge. First, integration level LFS configuration that provides default values for a given Gerrit instance. Second, repository level LFS configuration, which by default derives system level configuration that can be further adjusted.
In practice, it is assumed that the Gerrit integration server is LFS ready by default and one (Project Owner/Site Admin) decides on enabling LFS at the repository level with or without maximum object size limitation. This configuration scenario supports a model where LFS is enabled for specific repositories only while the rest of the system remains unaffected.
Enable LFS for a Repository
You can enable LFS for both existing and new repositories.
This section provides instructions to set up LFS for both exiting and new repositories.
Setting up LFS for Existing Repositories
-
Log on to TeamForge, select Project Home > Source Code, and select (click) a repository.
-
Select Settings > Polices.
-
To enable LFS, you must select the values for MAX LFS OBJECT SIZE and GIT LFS ENABLED fields.
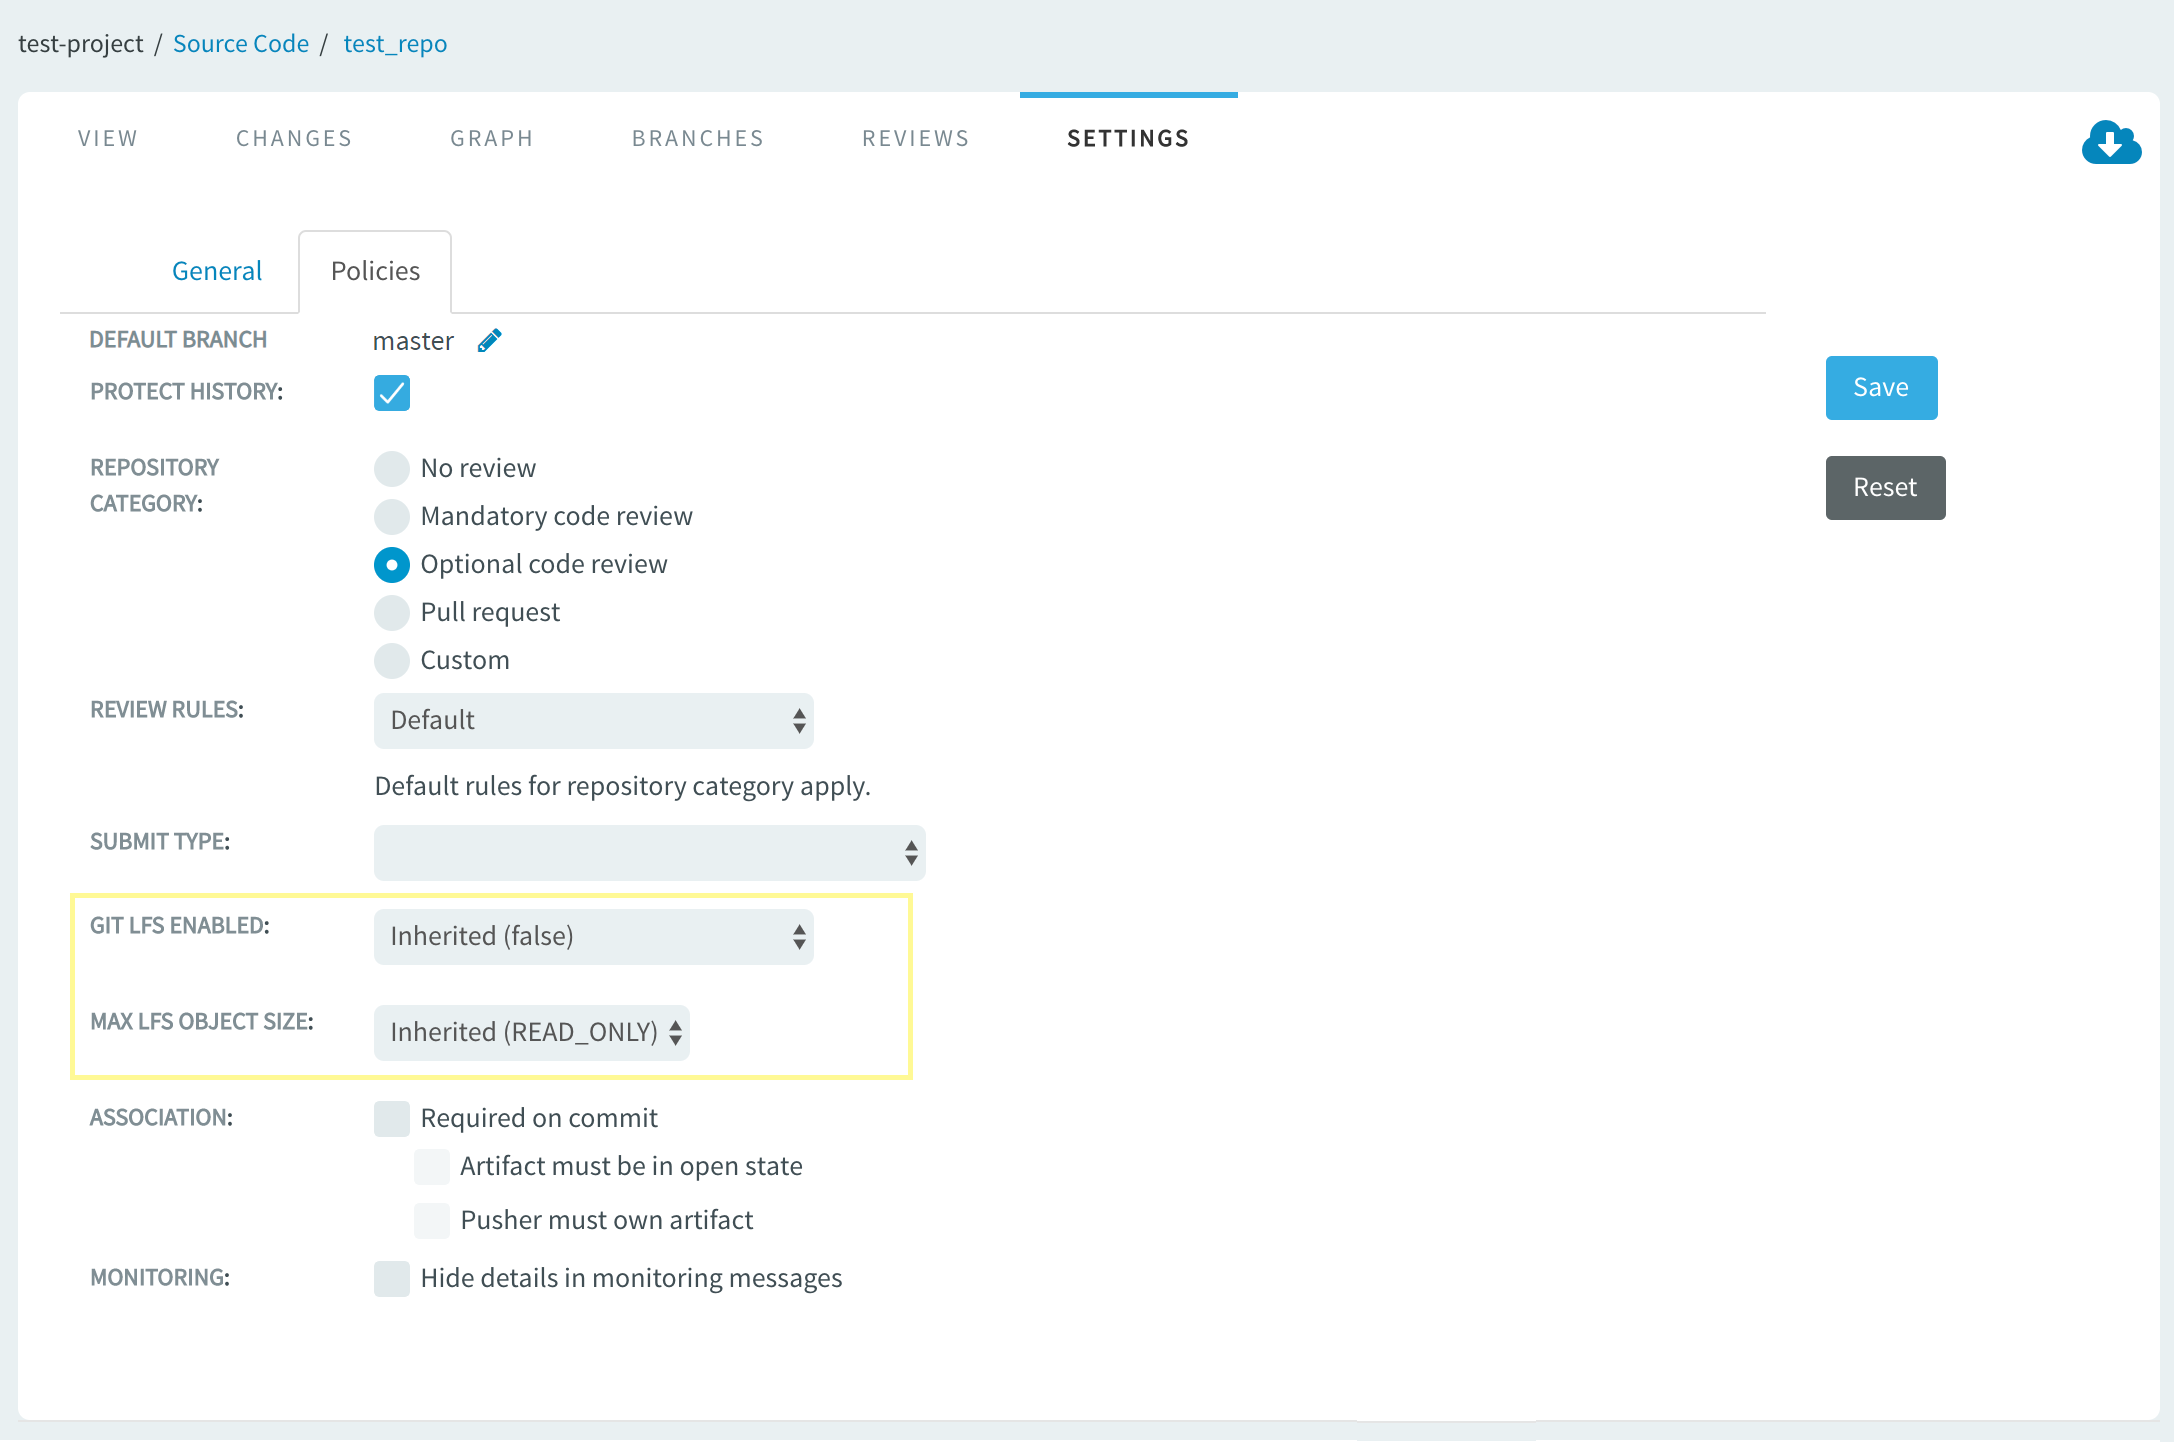
MAX LFS OBJECT SIZE (required field)
Select one of the values:
Inherited,Unlimited,Read-onlyorLimited to.By default Inherited value is READ_ONLY. It means that once LFS data is pushed into repository it is always available for fetch/clone operation. Even if you switch to Unlimited, for example, and then decide to go back to READ_ONLY at a later point in time for a given repository or integration, repository consistency is preserved and data would always be available. This is necessary to prevent situations where crucial binary data is always readable unless you rewrite the repository history to render such binary data unavailable. Select:
- Inherited that makes this repository inherit the default Git-integration settings. Note that in case of Inherited, current default integration setting is shown for your reference.
- Unlimited to support unlimited object size (size is not proactively limited by Gerrit but space availability still applies).
- Limited to limit maximum object size to a reasonable value, for example, 100MB.
- Read-only that turns LFS in this repository to read-only mode.
GIT LFS ENABLED (optional field)
Select one of the values:
Inherited,trueorfalse.The inherited value is
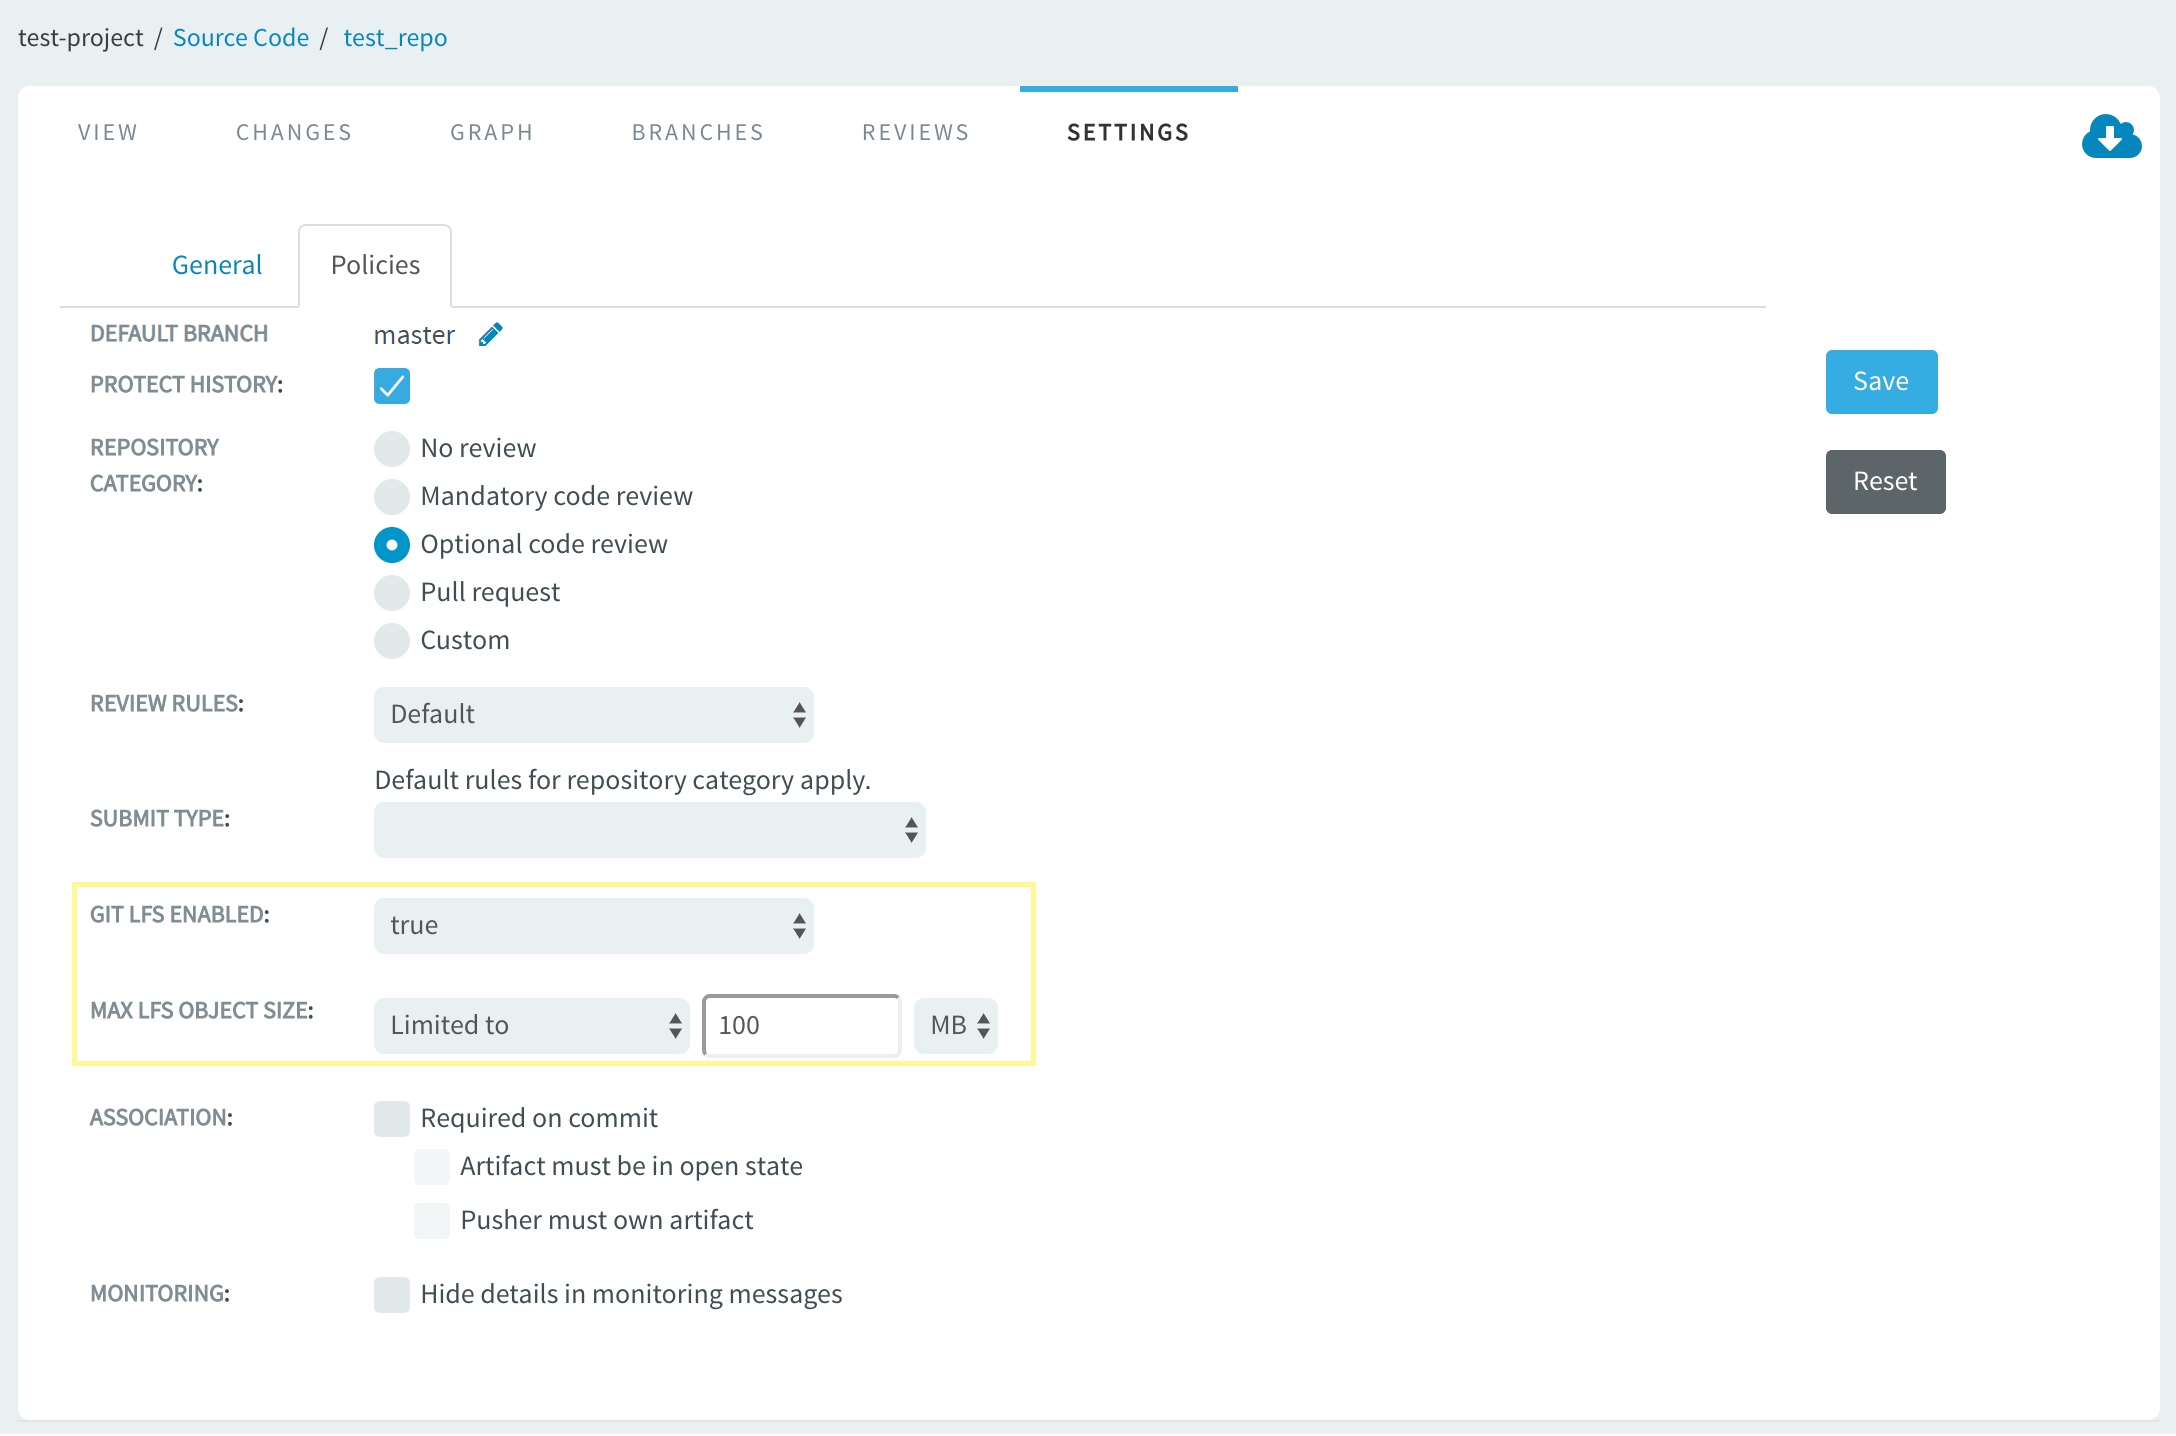
falseby default. LFS is served from master Gerrit instance over HTTP/HTTPS protocol and therefore you must enable this parameter to extend the checkout URLs with LFS specific part for SSH protocol and replication. This is required as the LFS client, by default, uses the same URL (derives the protocol from it) that is used for fetch/clone/push operations, while pointing to the master Gerrit instance over HTTP/HTTPS to read/write data.The following illustration shows a typical LFS configuration where the MAX LFS OBJECT SIZE is limited to 100 MB for a repository that's server over SSH:
Setting up LFS When You Create a New Repository
-
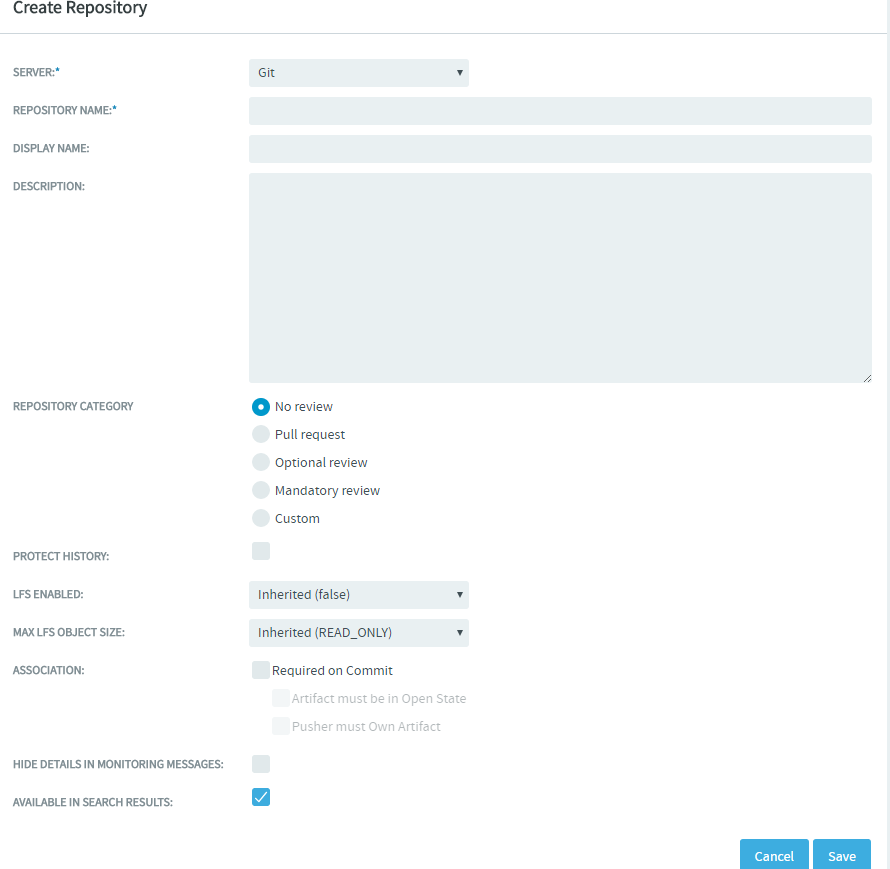
Log on to TeamForge, select Project Home > Source Code, and click Create Repository.
-
Select the values for MAX LFS OBJECT SIZE and GIT LFS ENABLED fields while creating the new repository and click Save.
Set up LFS Client and Work with Large Files
Download the Git LFS client for your platform. These instructions are valid for Git LFS client 1.3 and later. The checkout URLs are automatically extended with LFS part and you do not have to modify the checkout URL manually to have it working out of the box for SSH protocol or replication scenarios.
For downloading Git LFS client, see Git Large File Storage page.
Working with LFS over HTTP/HTTPS (Without Replication)
-
Use extended checkout URL. Example:
git clone -c
      'lfs.url=http://product_developer@main.server.collab.net/gerrit/test_repo.git/info/lfs'
      ssh://product_developer@gerrit.server.collab.net:29418/test_repo && cd "test_repo" && git
      config user.name "Nancy S." && git config user.email "nancy@example.com" && git config
      url."ssh://gerrit.server.collab.net:29418".insteadOf "ssh://main.server.collab.net:29418"
      && git config url."ssh://product_developer@gerrit.server.collab.net:29418".insteadOf
      "ssh://product_developer@main.server.collab.net:29418" && git config
      url."ssh://product_developer@main.server.collab.net:29418".pushInsteadOf
      "ssh://product_developer@gerrit.server.collab.net:29418" && scp -P 29418
product_developer@gerrit.server.collab.net:hooks/commit-msg .git/hooks/ -
Select the file types you'd like Git LFS to manage. You can configure additional file extensions anytime.
The following command tracks all
.jpgimages in a given working directory.git lfs track *.jpg -
Create a commit by adding the binary file and the technical file (
.gitattributes) that is modified by Git LFS client.git add IMG_0036.jpg .gitattributes -
Commit and push the file(s) to the remote repository.
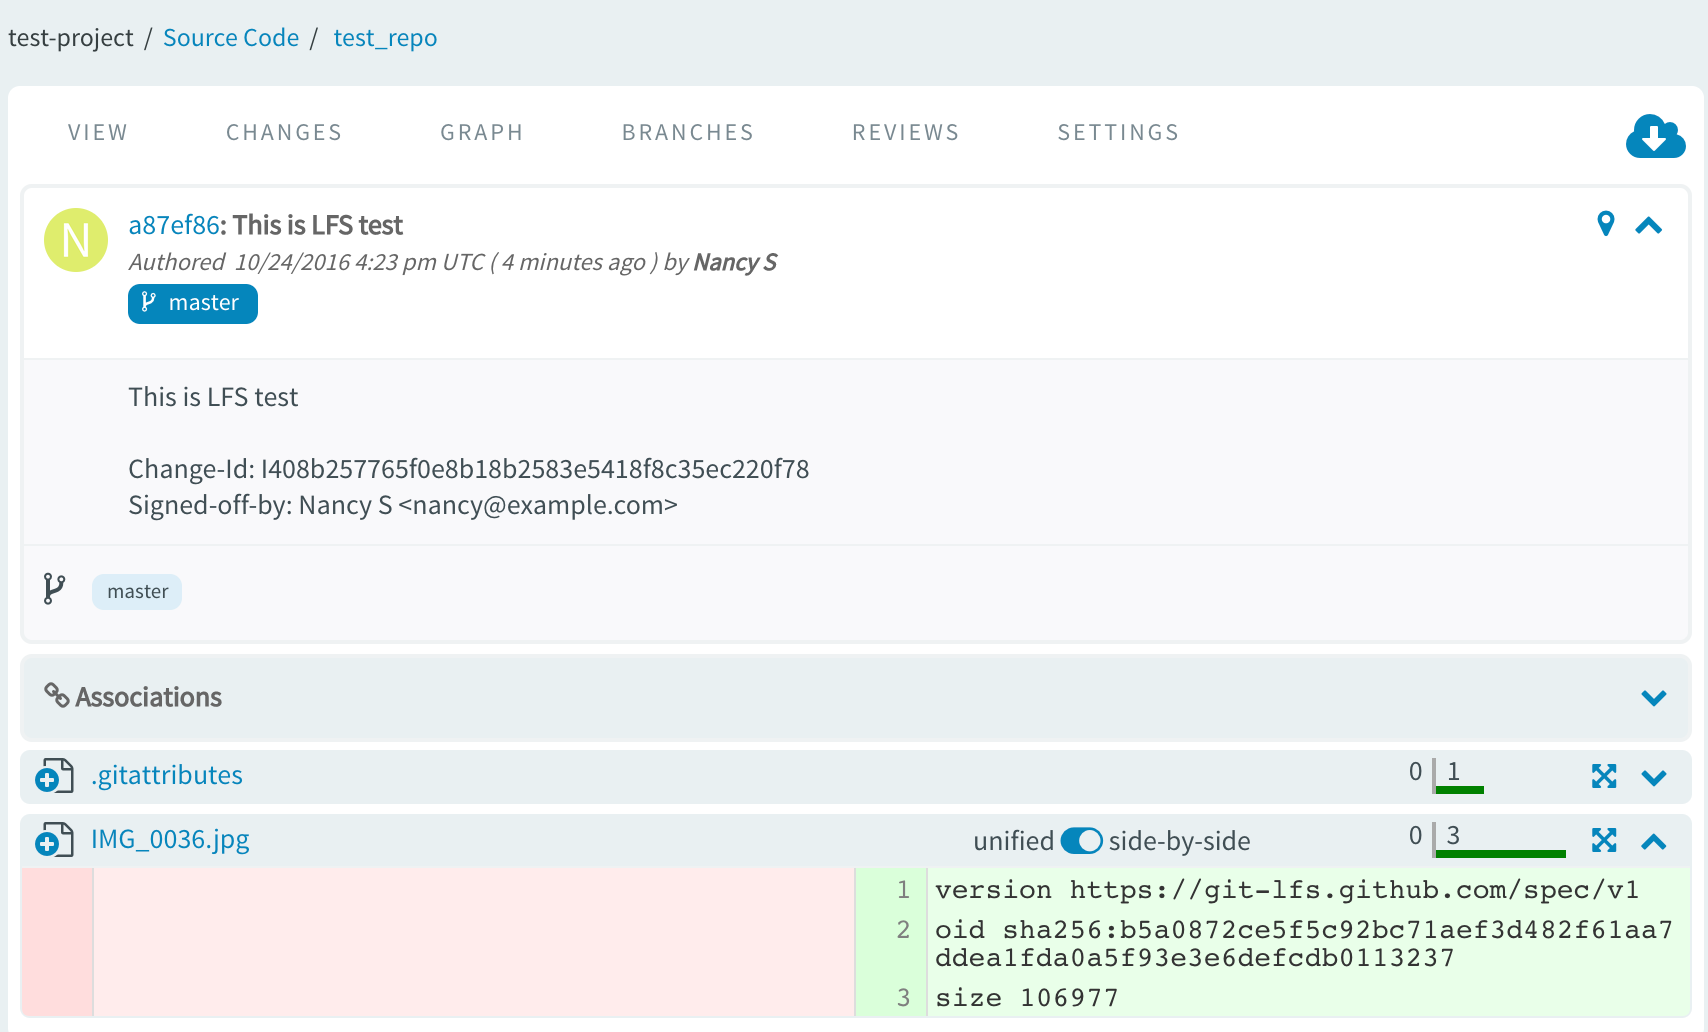
git commit -sm 'This is LFS test' && git push origin HEAD:masterThe binary file that is successfully pushed to LFS manifests itself by having a reference file committed to Gerrit and you can check its content by going to TeamForge code browser for the given repository. Here is an example reference file. It contains Git LFS protocol version specification along with Git LFS object SHA and its size.
LFS Data in Downloaded Zip Archives of Git Repositories and Repository Tags
LFS data are now included in the downloaded zip folders of both the Git repositories and the repository tags.
LFS Data in Downloaded Zip Archive of Git Repositories
After pushing files to a Git repository as mentioned in Working with LFS over HTTP/HTTPS (Without Replication), do the following:
-
Click the VIEW tab of a selected Git repository.
-
Click Download this file as ZIP file (
) icon.
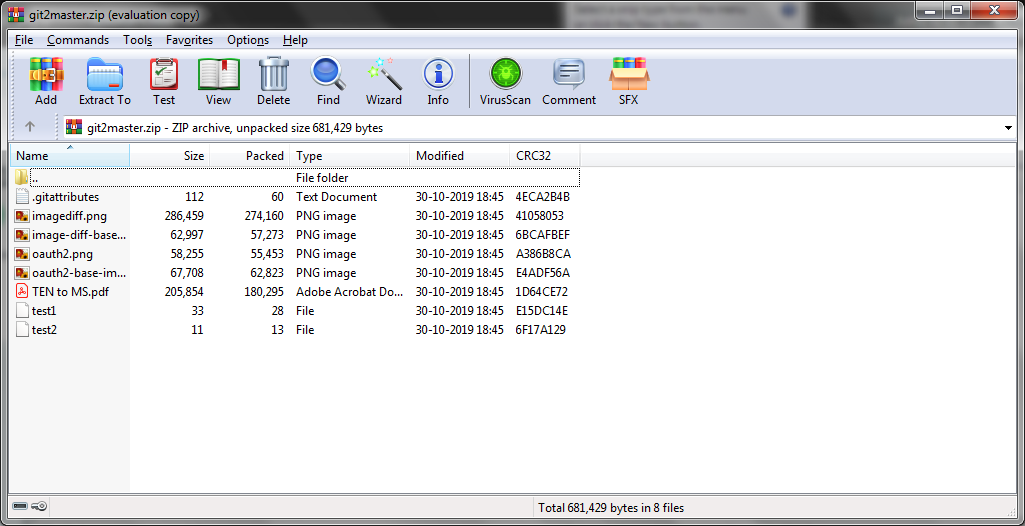
The repository contents are downloaded as a zipped archive. The zipped archive consists of the .gitattributes file and the actual Git LFS file, that was committed.
LFS Data in Downloaded Zip Archive of Git Repository Tags
After pushing files to a Git repository as mentioned in Working with LFS over HTTP/HTTPS (Without Replication), do the following:
-
Click the TAGS tab of a selected Git repository.
-
Select the required tag.
-
Click either the zip or tar.gz icon.
The repository contents are downloaded as a zipped archive. The zipped archive file consists of the .gitattributes file and the actual Git LFS file, that was committed.
