Configure Progression Boards
Learn how to configure your Delivery Insights progression board and track your packages.
Configure the Digital.ai Release Dashboard
-
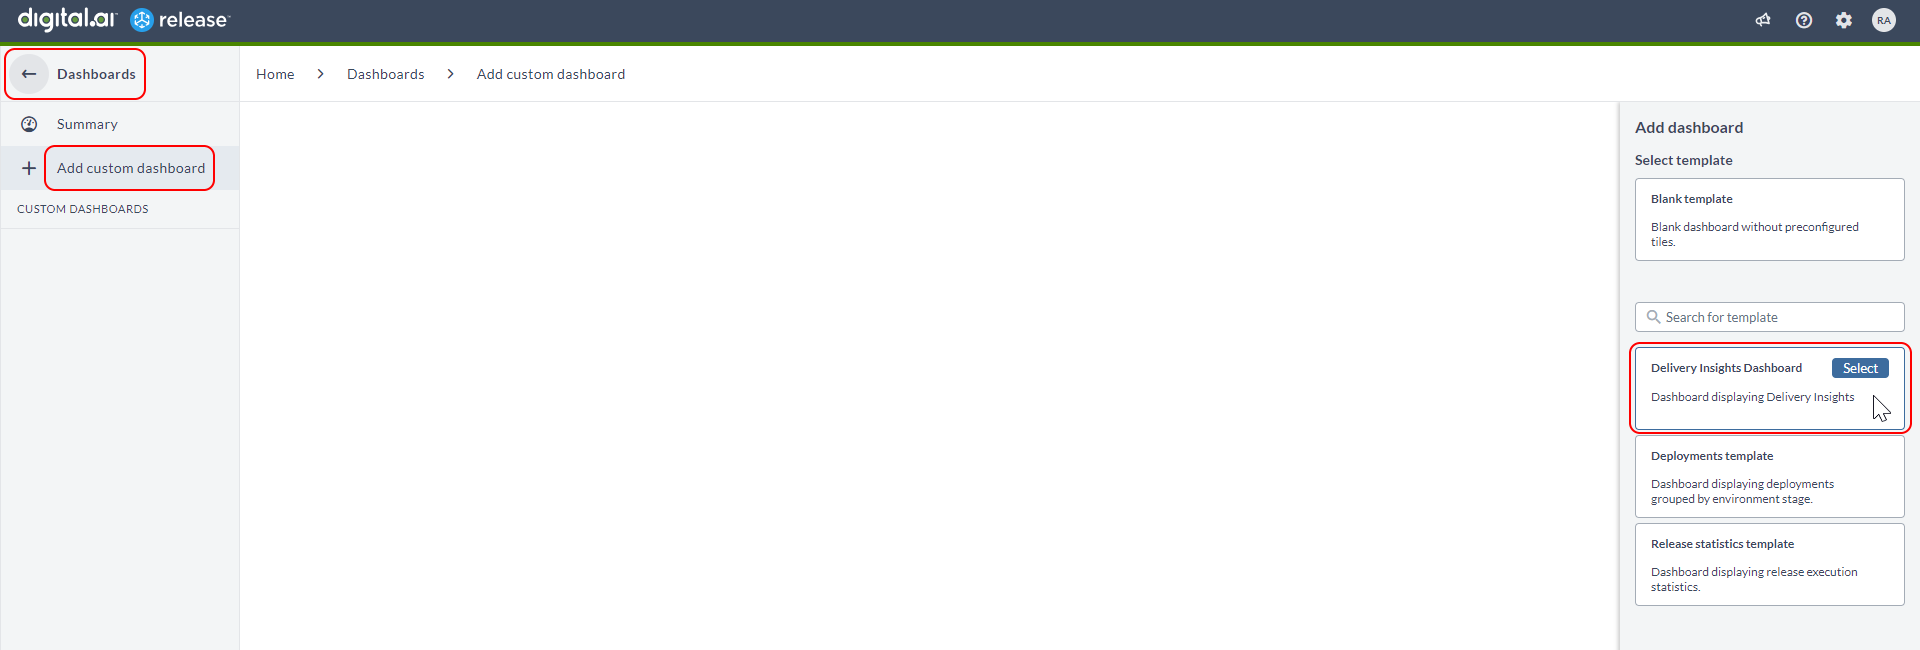
From the left-navigation pane, click Dashboards > + Add custom dashboard.
-
Hover over the Delivery Insights Dashboard card and click Select.
-
Type a name and description for the dashboard (
Pet Clinic Dashboardin this example) and click Create.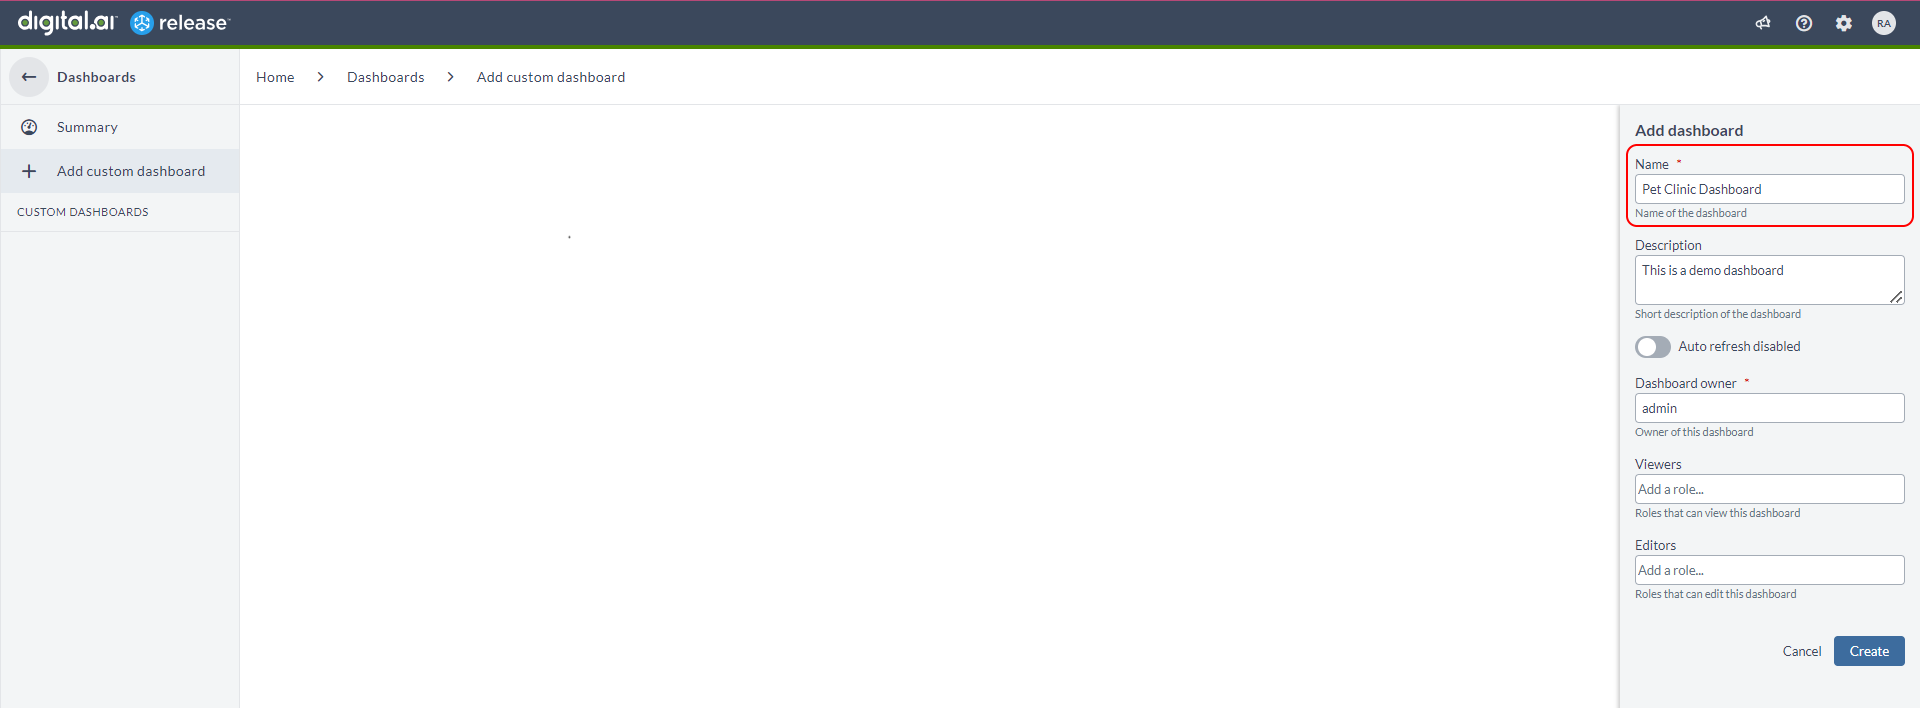
The new dashboard (
Pet Clinic Dashboardin this example) is created.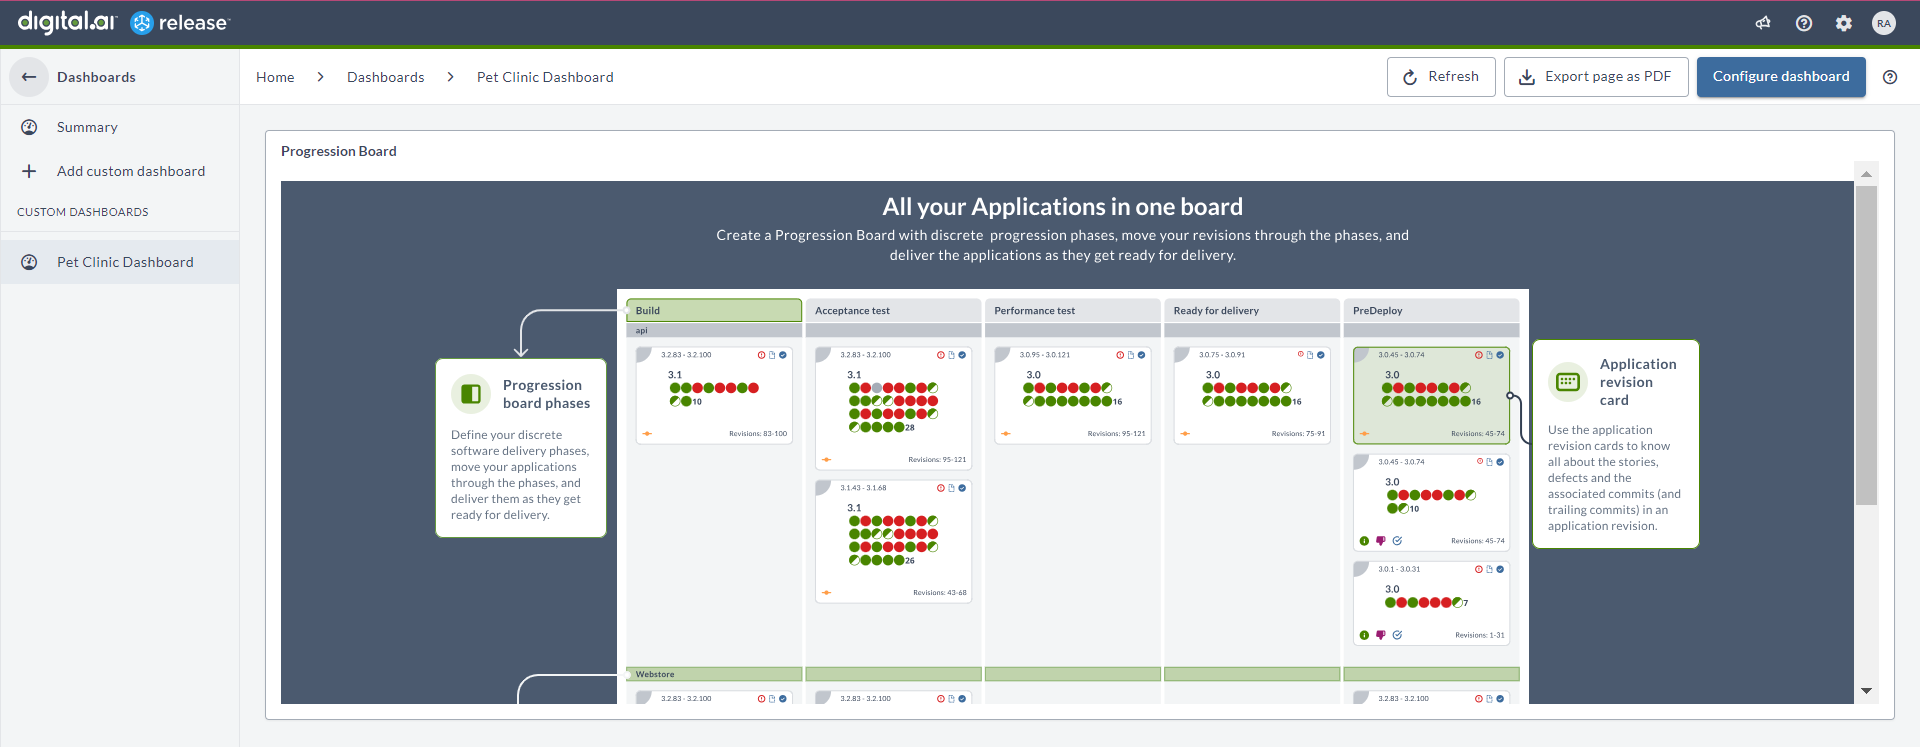
-
Click Configure dashboard.
-
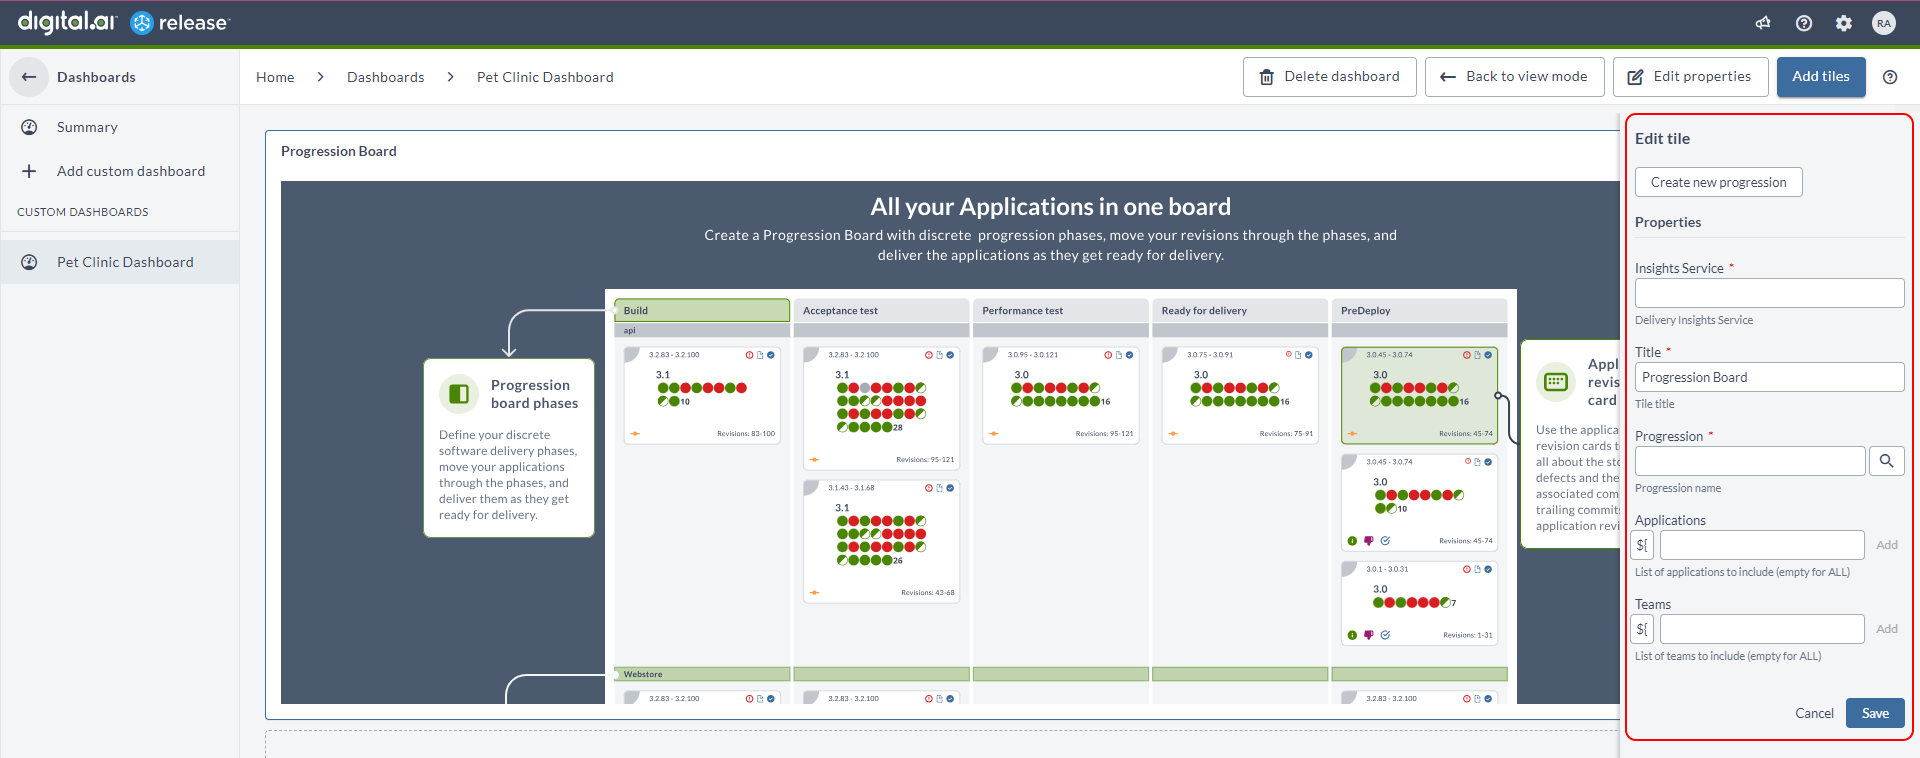
Hover over the progression board splash screen and click the Configure icon. The Edit tile pane shows up.
-
Select the Delivery Insights server from the Insights Service drop-down list.
-
Click Create new progression and type a name for your progression (
Pet Clinic Web Serverin this example) and click Save. This gets automatically updated in the Progression field.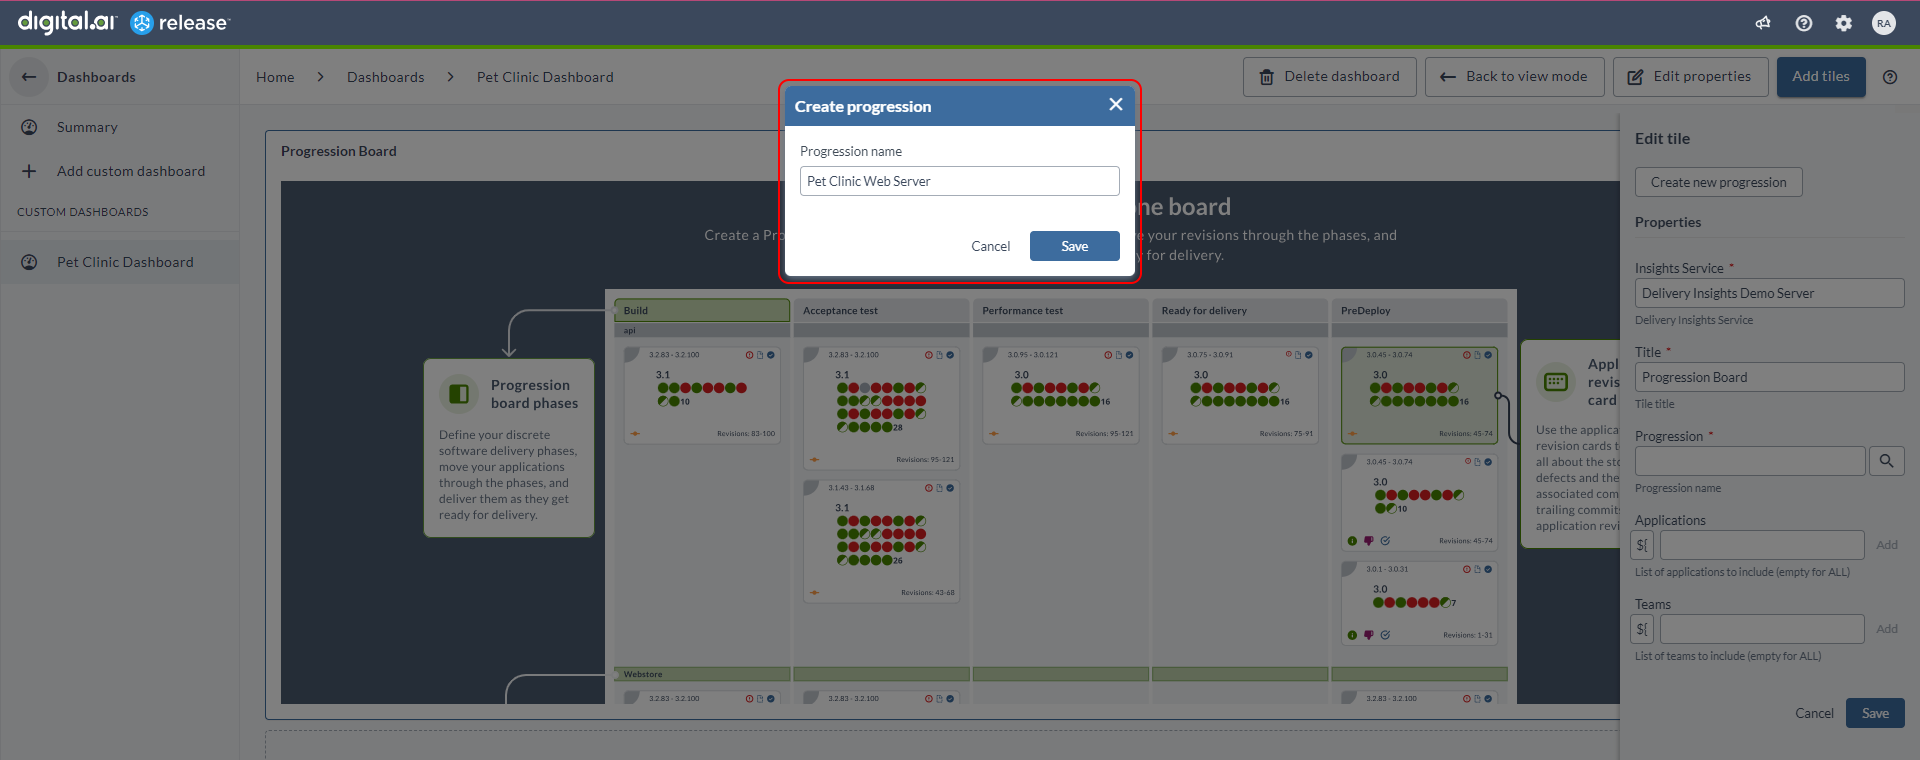
-
Type a meaningful title (
Pet Clinic Package Progressionin this example) for the progression in the Title field.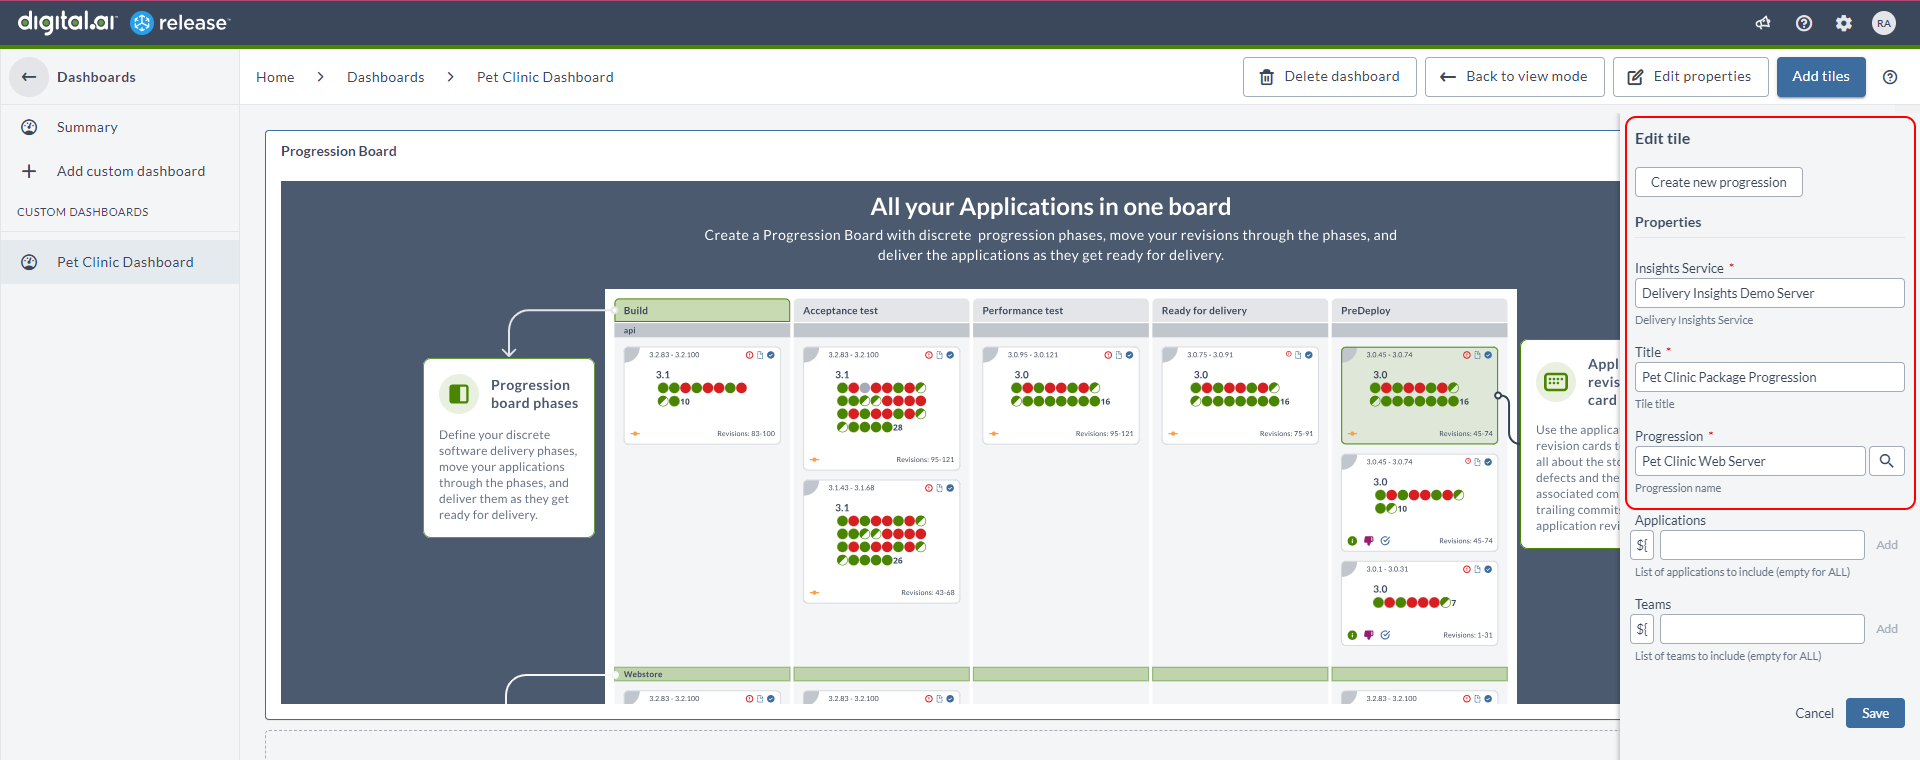
-
Click Save.
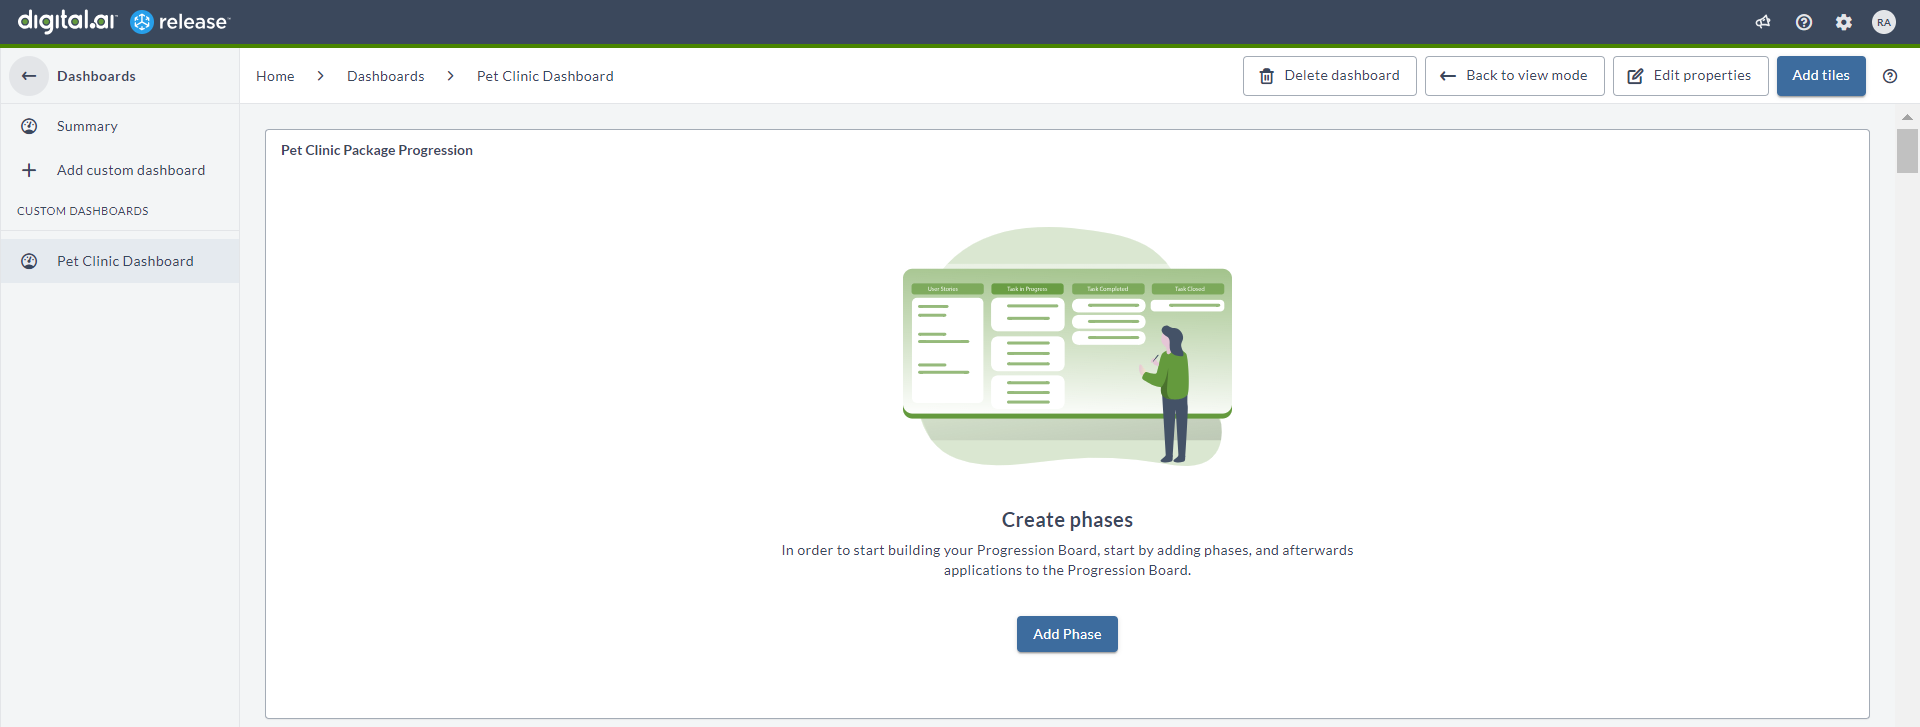
The new Progression Board is created.
-
Click Back to view mode.
Add Your Value Stream Phases
-
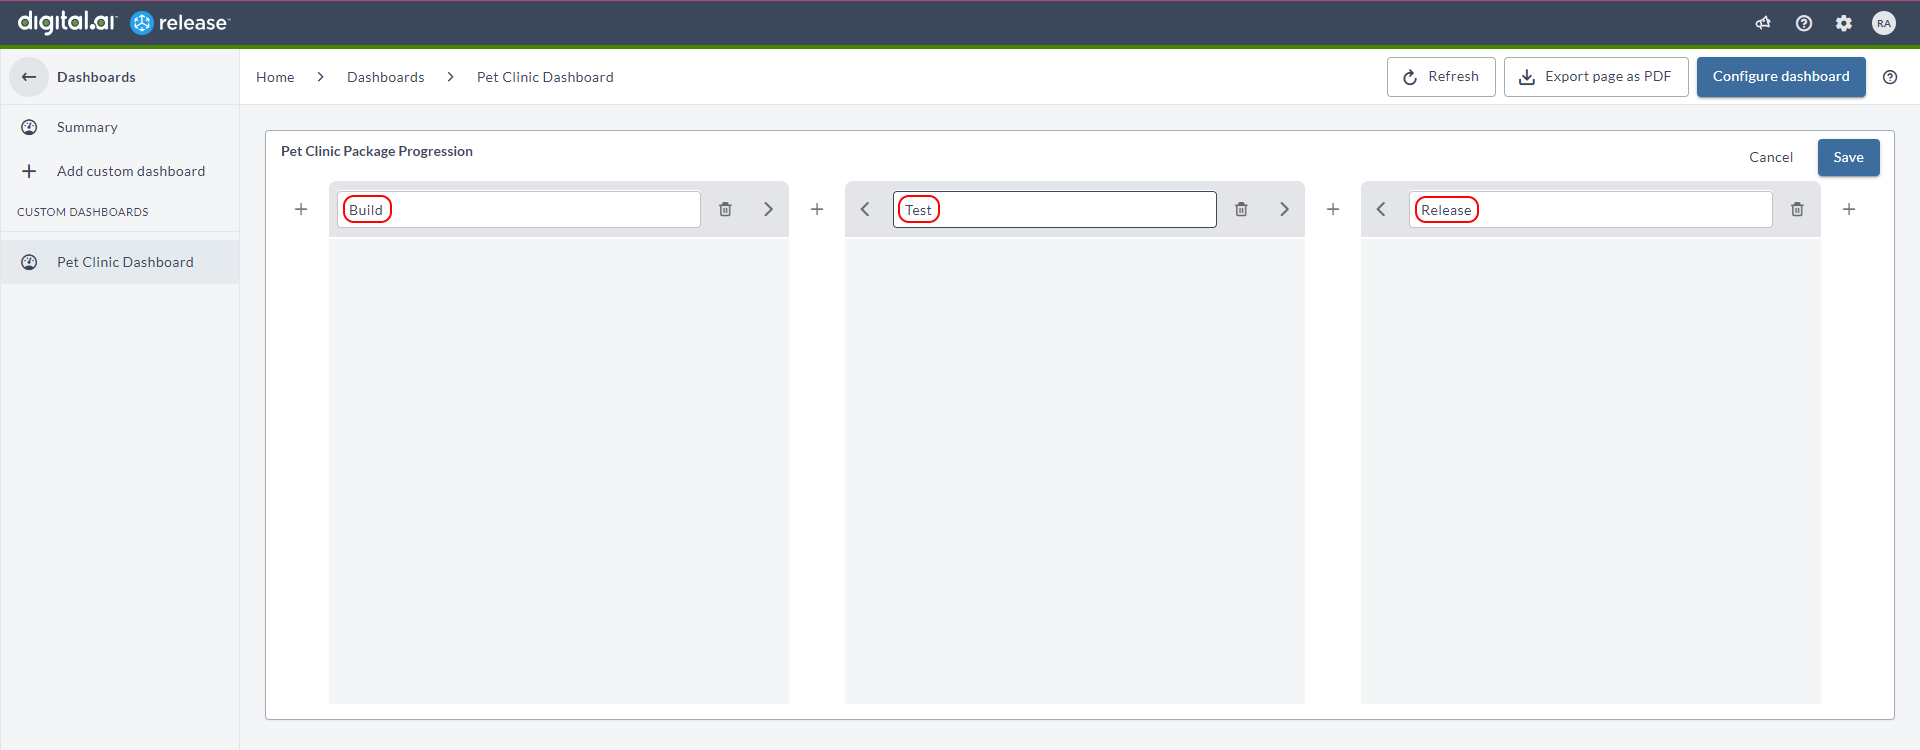
Click Add Phase.
-
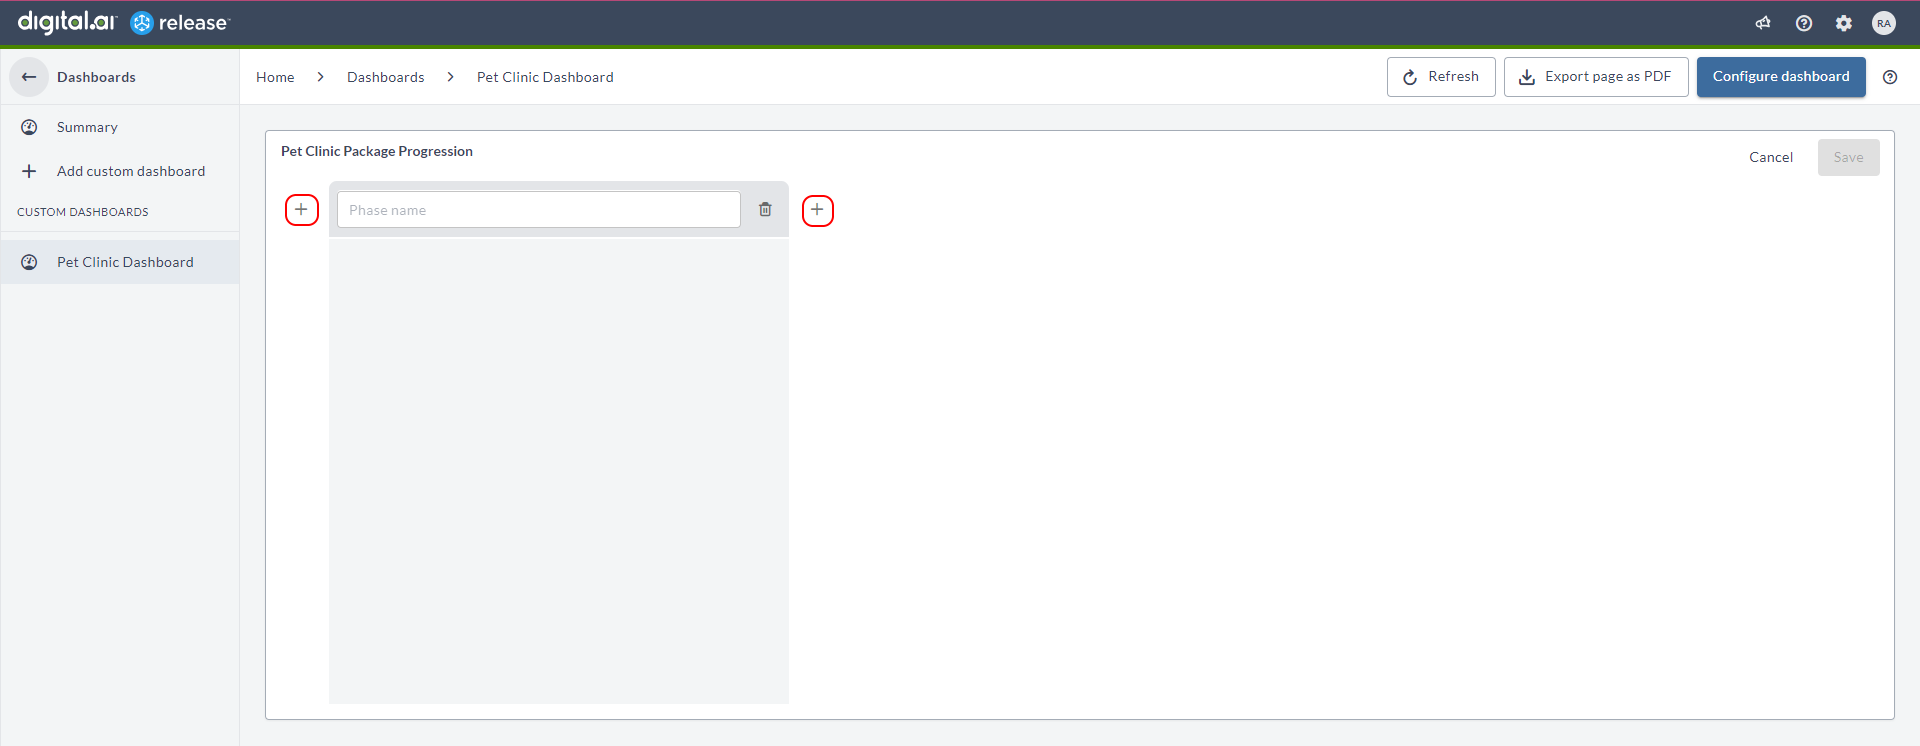
Click the + icon on the sides of the phases. You can add as many phases as you want.
-
Type a name for all the phases you add.
-
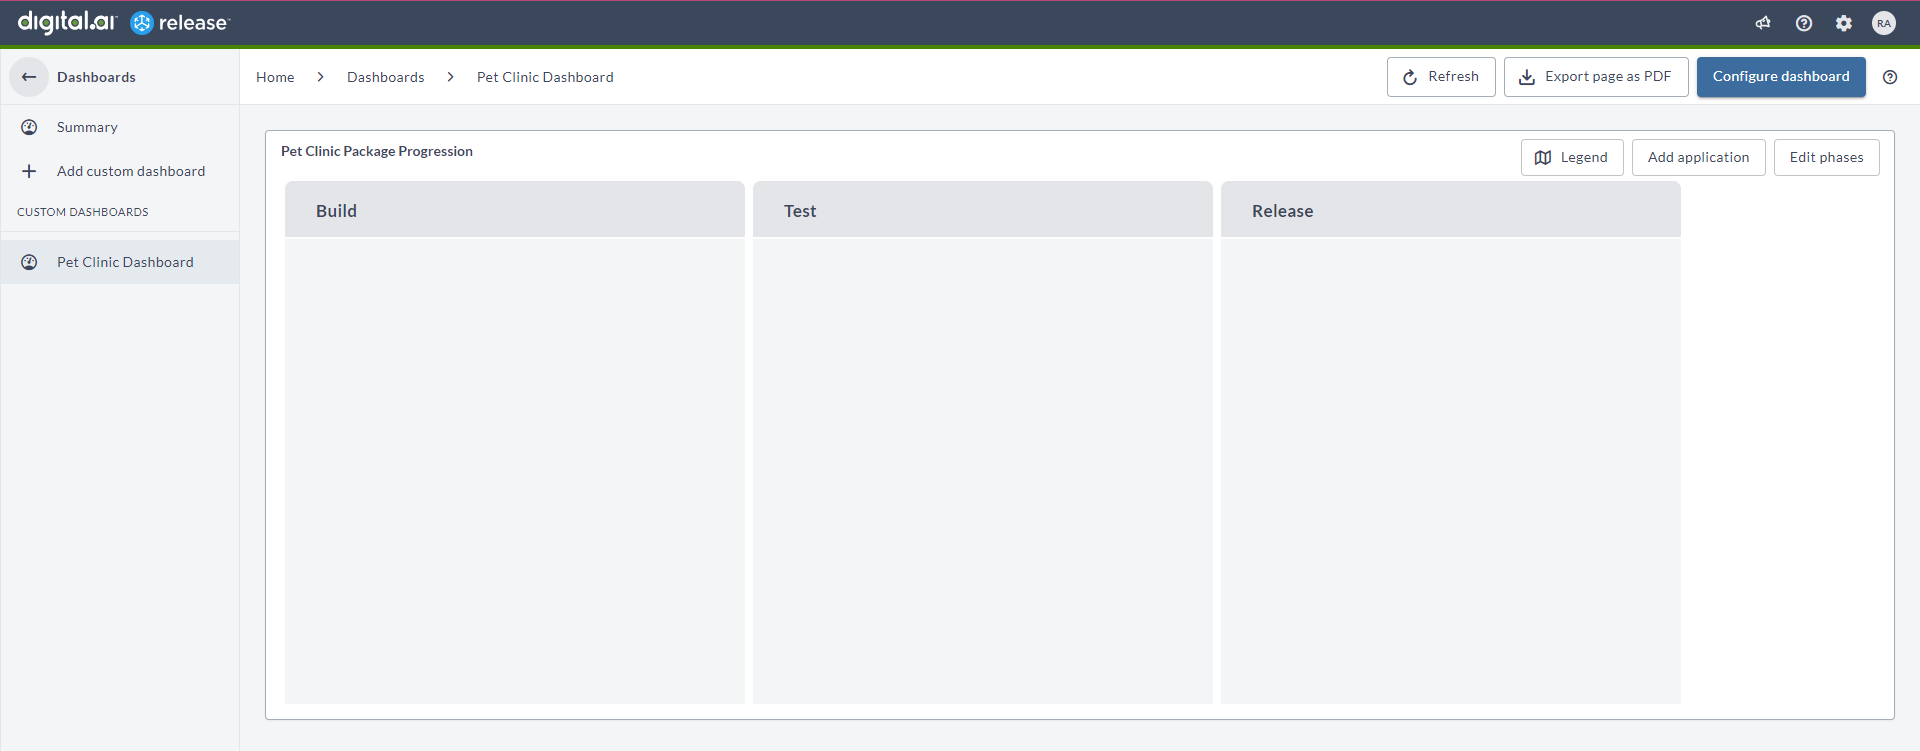
Click Save. The phases are added to the Progression Board.
Add an Application
-
Click Add application. The Add application pane shows up.
-
Type a name for the application (
Web Serverin this example) in the Application name field. -
Select a source control (
GitHubin this example) from the Source Control drop-down list. -
Select your GitHub server from the Server name drop-down list (
GitHub-delivery-insights-demo-docsin this example). -
Select your GitHub repository from the Repository name drop-down list (
Delivery-insights-repoin this example). -
Select a ticketing system (
JIRAin this example) from the Ticketing System drop-down list. -
Select the Jira server (
JIRA-serverin this example) from the Server name drop-down list.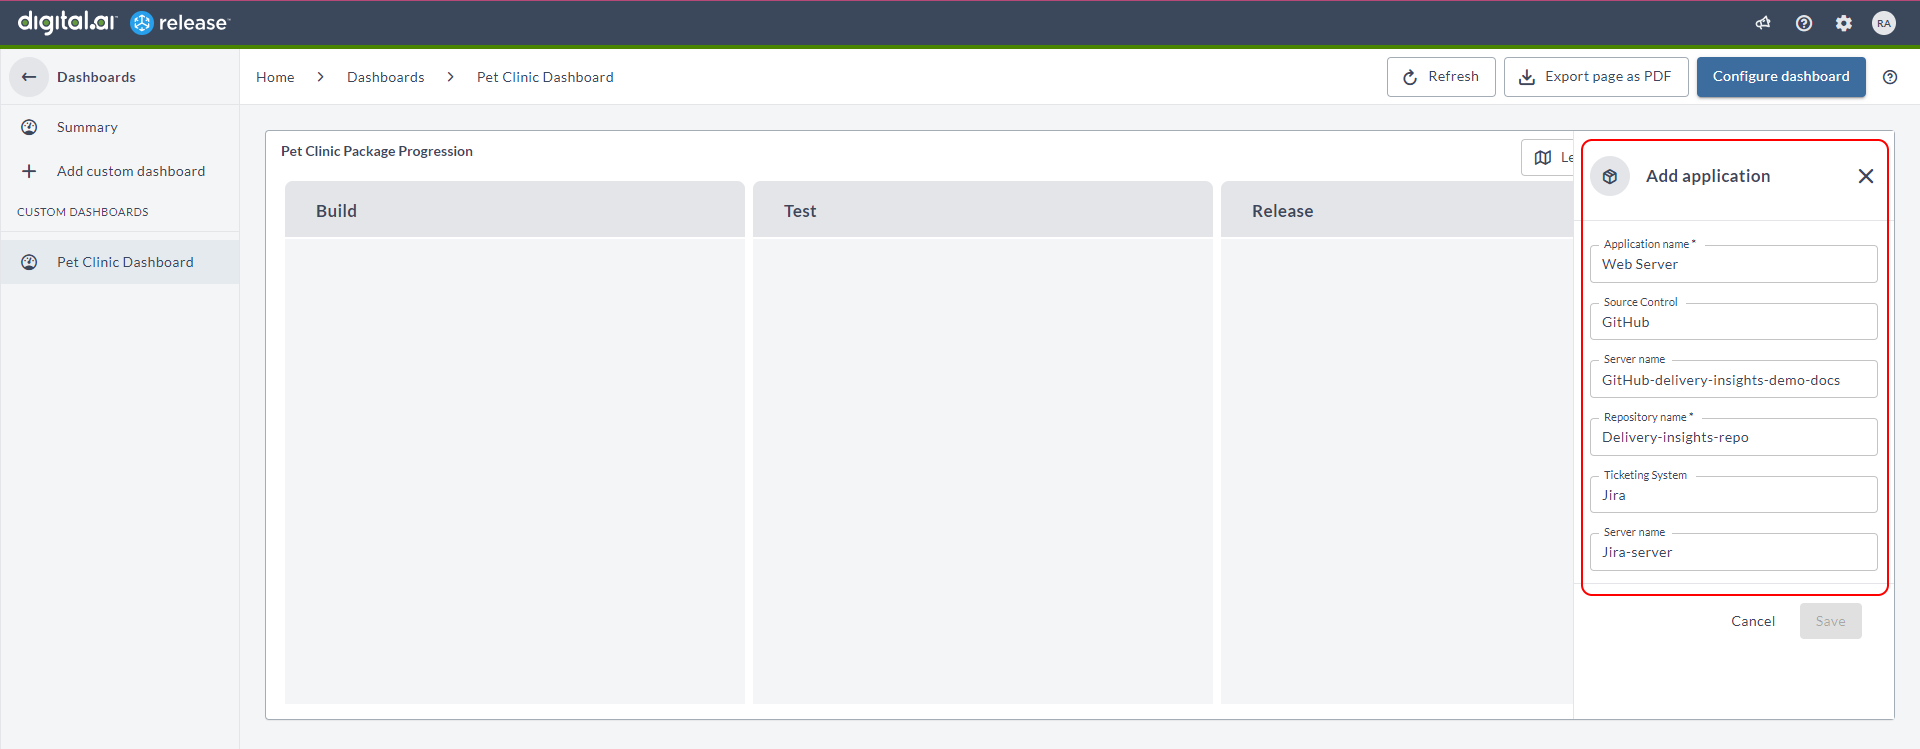
-
Scroll down and click Save.
The new application (
Web Server) is created in the Progression Board.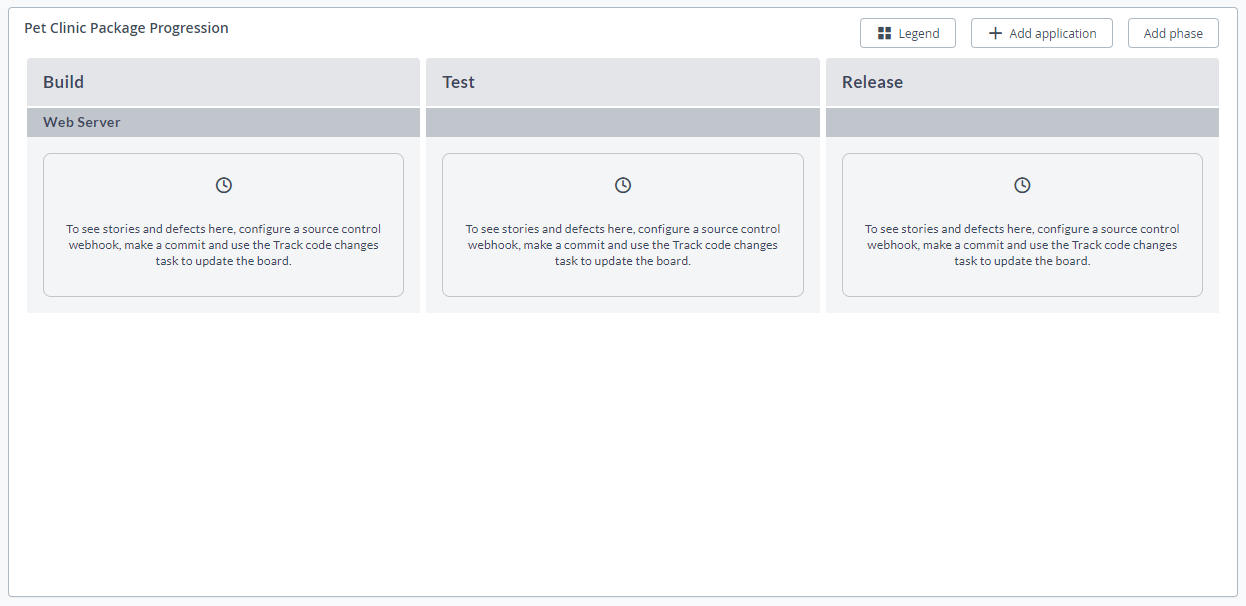
How to Recover The Payload Url of an Application?
- Go to the Progression Board and click the application's name.
The Application Details pane appears.
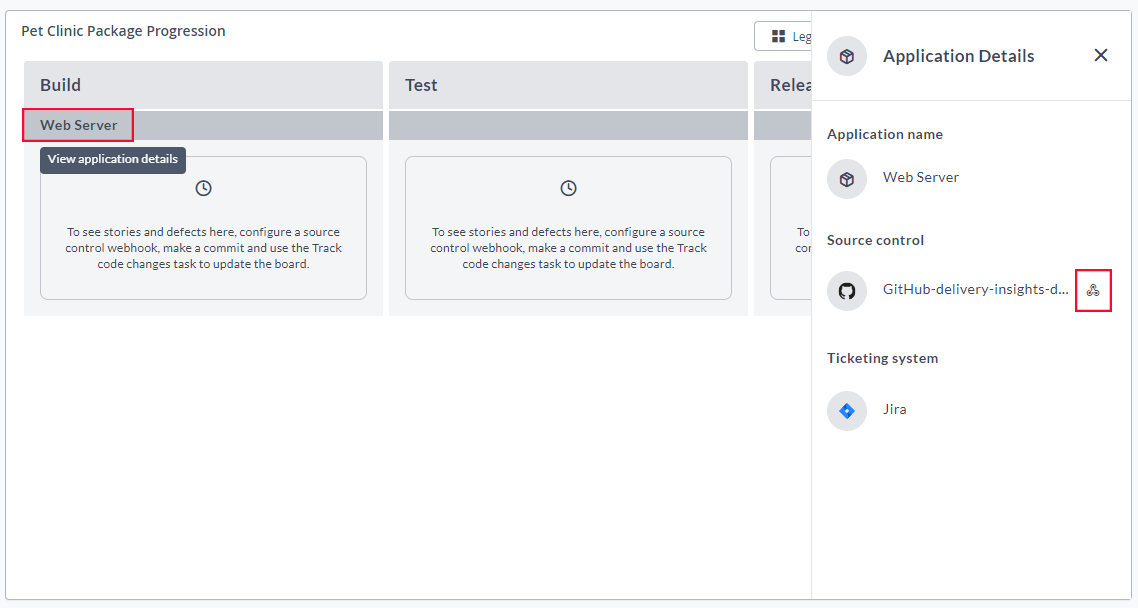
- Click the webhook icon
in the Source Control section. The Configure WebHook dialog appears.
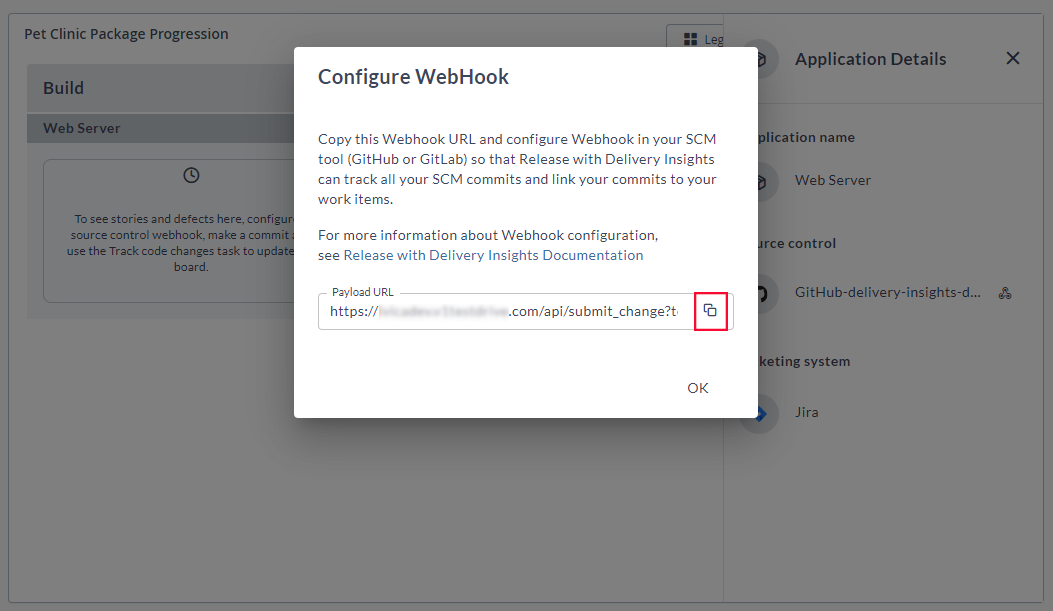
- Click the Copy to clipboard icon to copy the Payload URL. Now, click OK to close the dialog box.
Configure the Application's Webhook in Github
-
Log in to GitHub.
-
Select your repository.
-
Select the Settings tab.
-
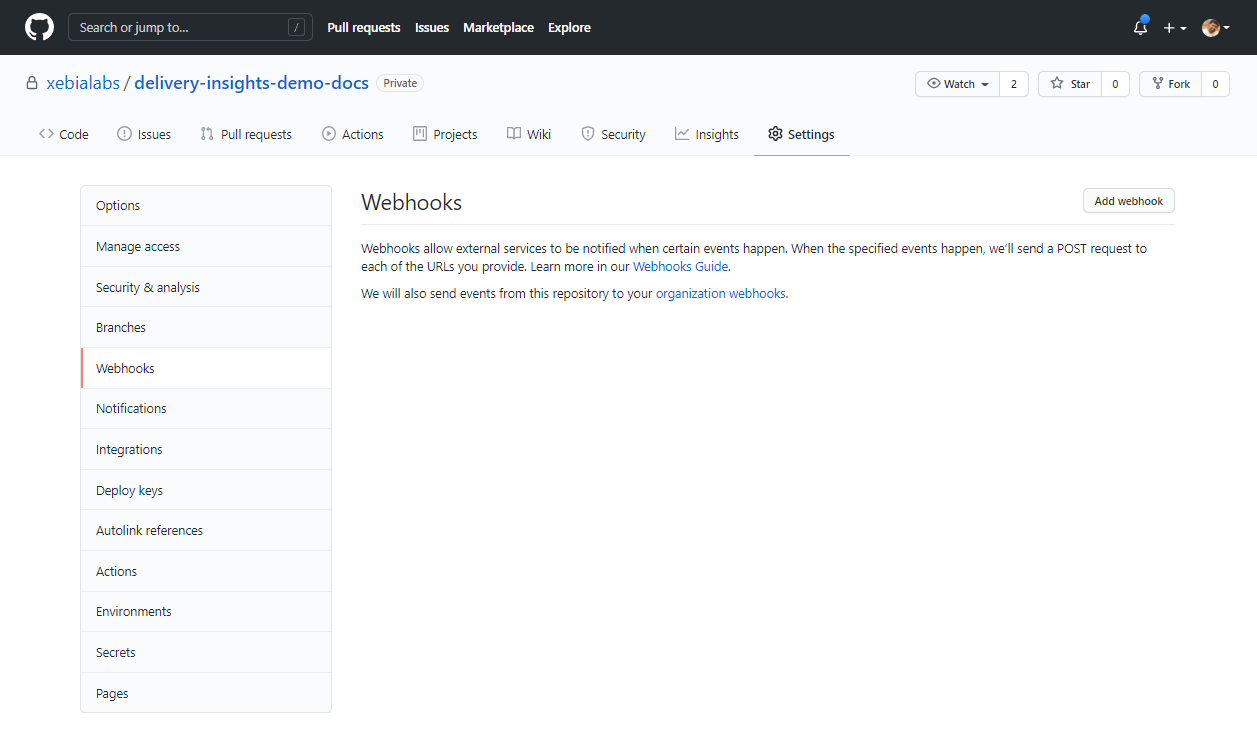
Select Webhooks from the left pane.
-
Click Add webhook.
-
Copy and paste the application's Payload URL into the Payload URL text box.
-
Select application/json from the Content type drop-down list.
-
Leave the defaults for the other fields and click Add webhook.
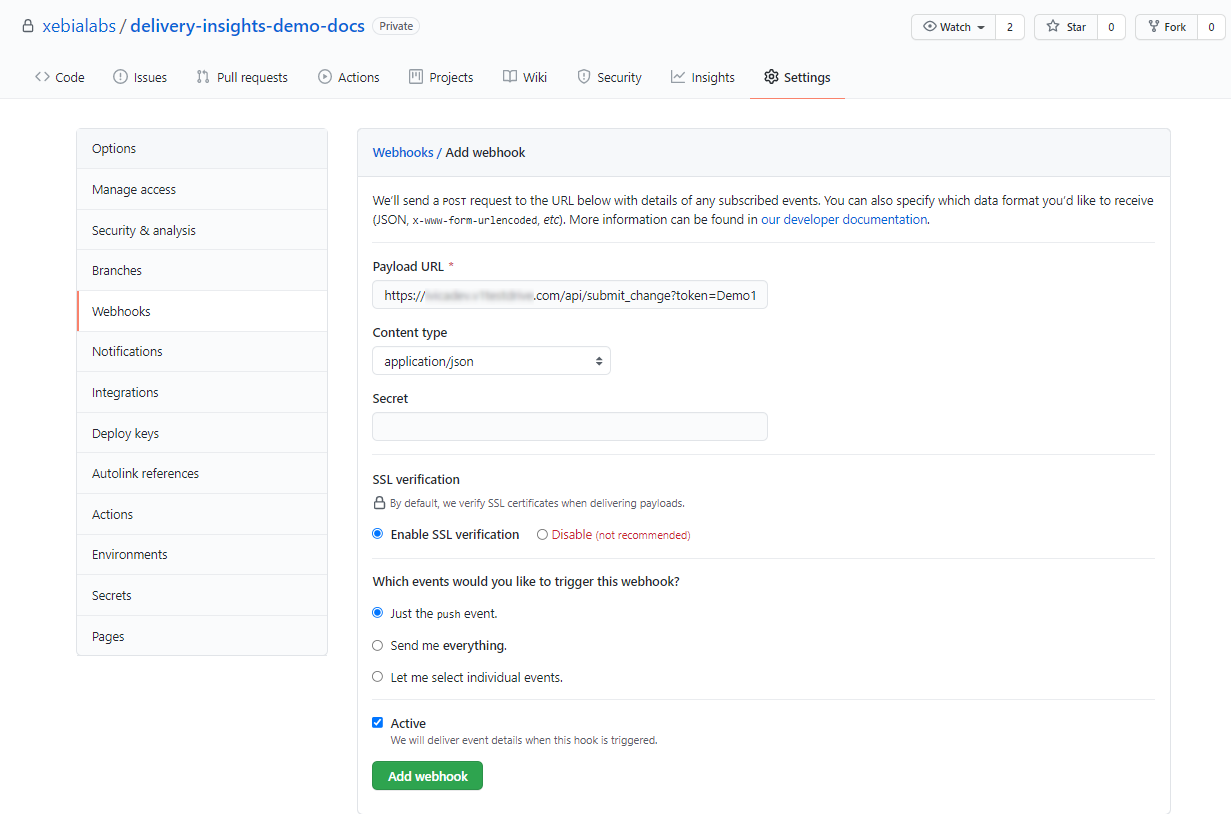
You are now all set with the configuration.
Example
Let us now push some commits to the GitHub repository, create a package in the progression board, promote a package revision from one phase to the other, and finally remove (deliver) the package revision from the progression board.
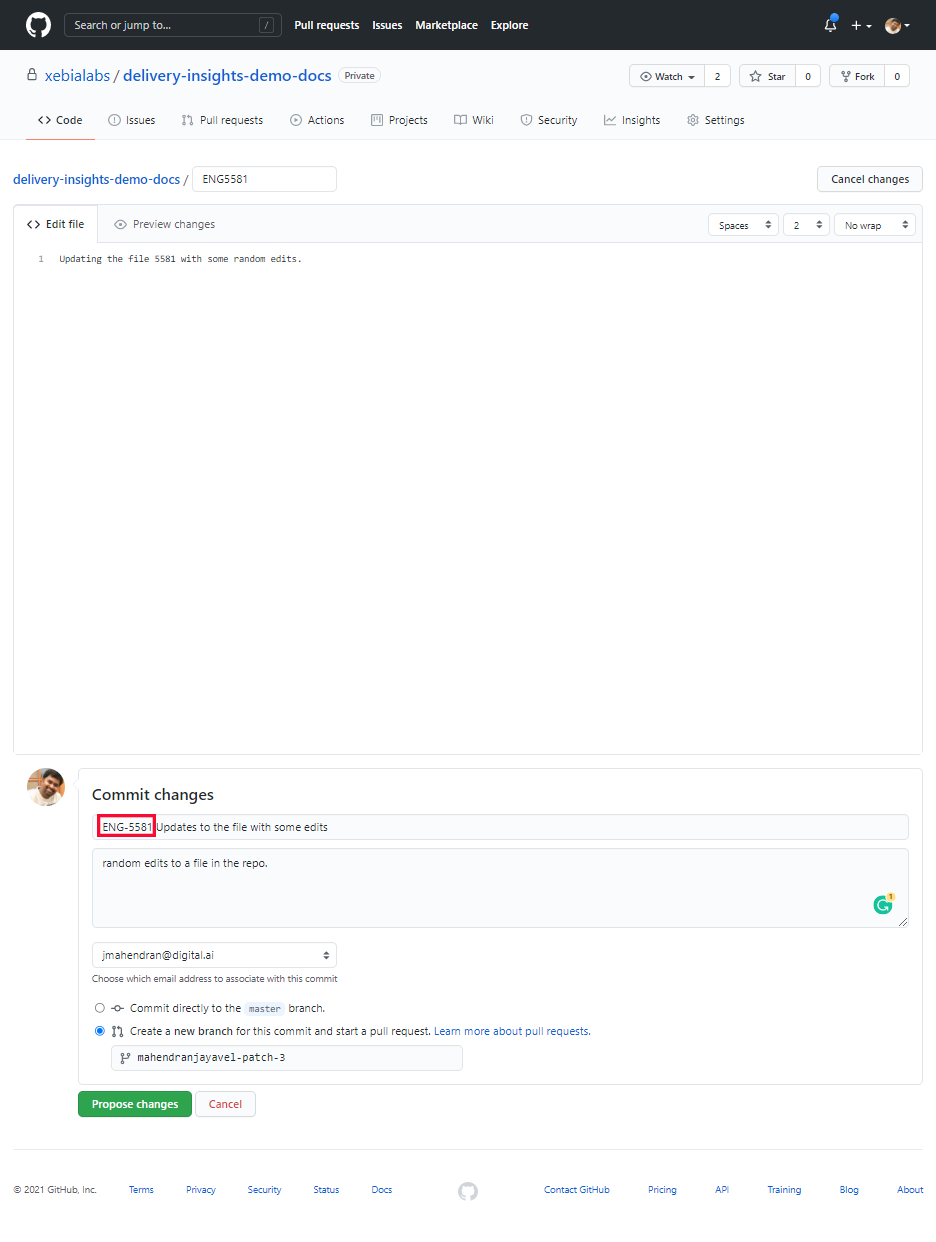
For this tutorial, I have created three Jira work items as illustrated in the following image to commit my changes in the GitHub repository. Note the Jira work item IDs (ENG-5580, ENG-5581, ENG-5582), which I would include in the commit messages for creating association between the commits and work items.

Here's an example commit message to illustrate how to include the Jira work item ID in the commit message.
Go on and push your commits to your repository. When you have enough commits, you can create a package to track the work items/commits.