General settings
This topic explains how to configure General settings in Release.
To configure Release, select Settings > General from the top menu. The General settings page is only available to users who have the Admin global permission.
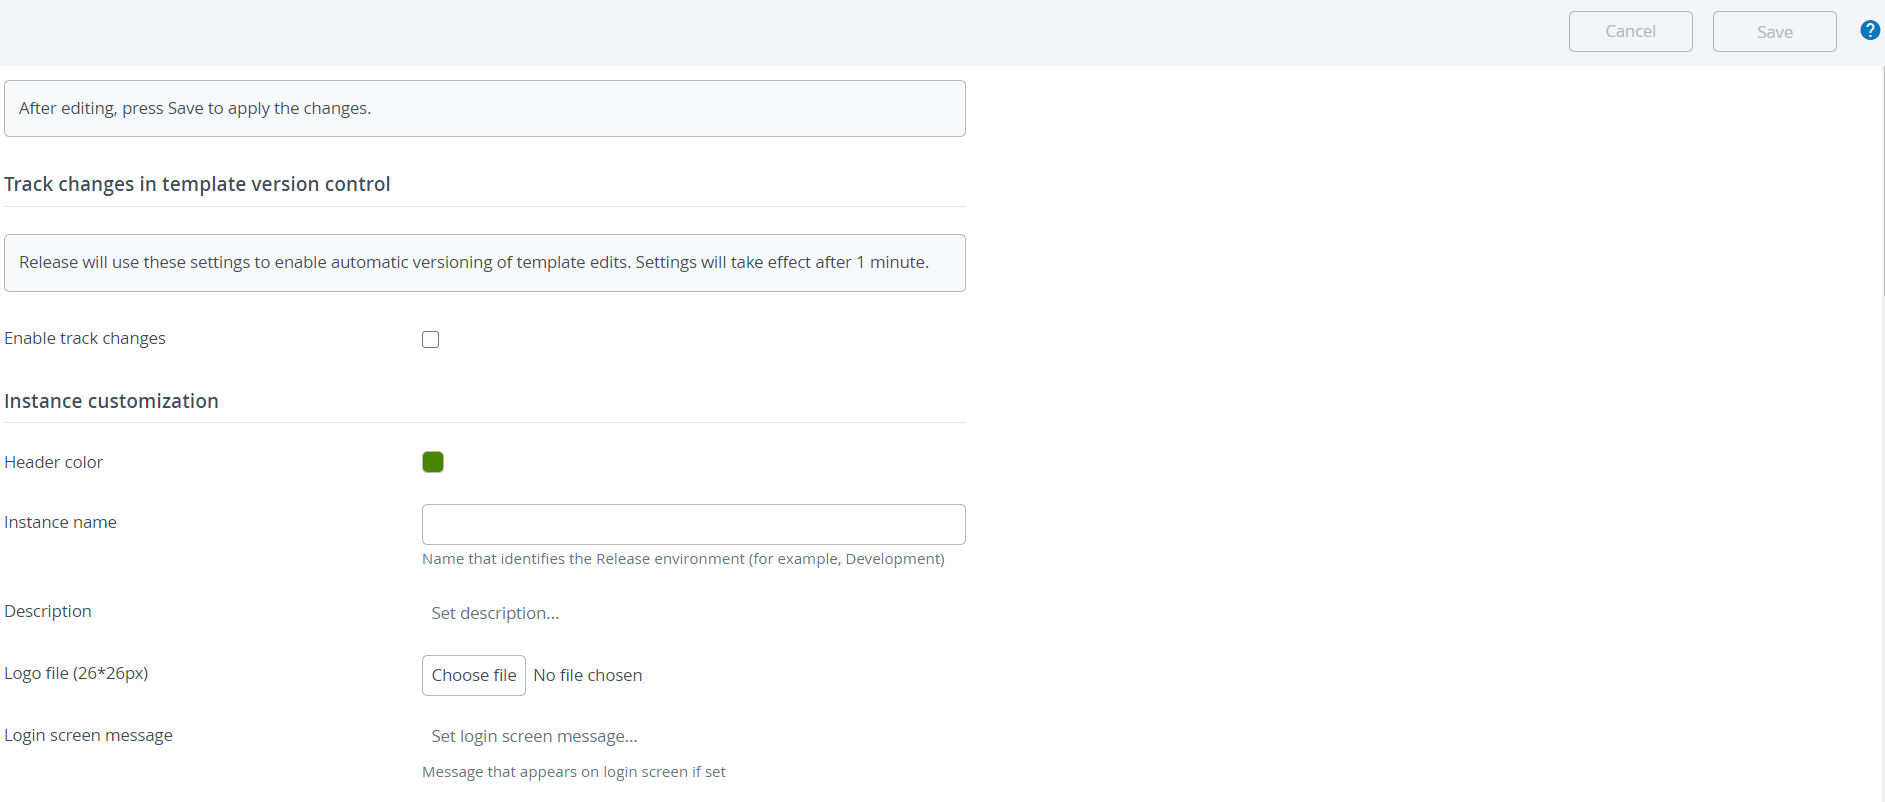
Track changes in version control
To enable the track changes feature:
- Go to Settings > General.
- In the Track changes in template version control section, select the Enable track changes checkbox.

Release header color
You can configure the color scheme of the Release header and menu bar items. For each type of your Release instance, you can define an associated color.
Select a color from the list and specify the name of you environment (for example: Production, Development). You can set a short description for the selected Release instance.

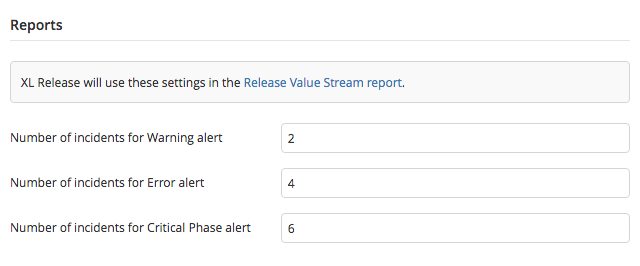
Reports
Use the Reports section to configure thresholds used in the release value stream screen.

Polling
Use the Polling section to configure the polling interval to automatically refresh screens when task status changes (Status interval), or when tasks are added or deleted (List interval).

Custom logo
In Release 8.6.0 and later, you can configure your company's logo.
Release has an option to upload your company's logo. Users with admin permission can upload a 26 x 26 pixel logo.
To enable the custom logo in XL-Release 8.6.0 and later:
- Go to Settings > General.
- Click the Choose file option under the Release header settings section.
- Choose your file and click the Save button.
- The logo is now displayed in the top header section.
These are the supported file formats:
- gif
- jpeg
- png
- svg+xml
- tiff
- x-icon (ico)

Once configured, all notification emails from Release will display this logo in the footer.
It is not possible to replace the XebiaLabs Release logo through this setting.
Archiving and cleaup
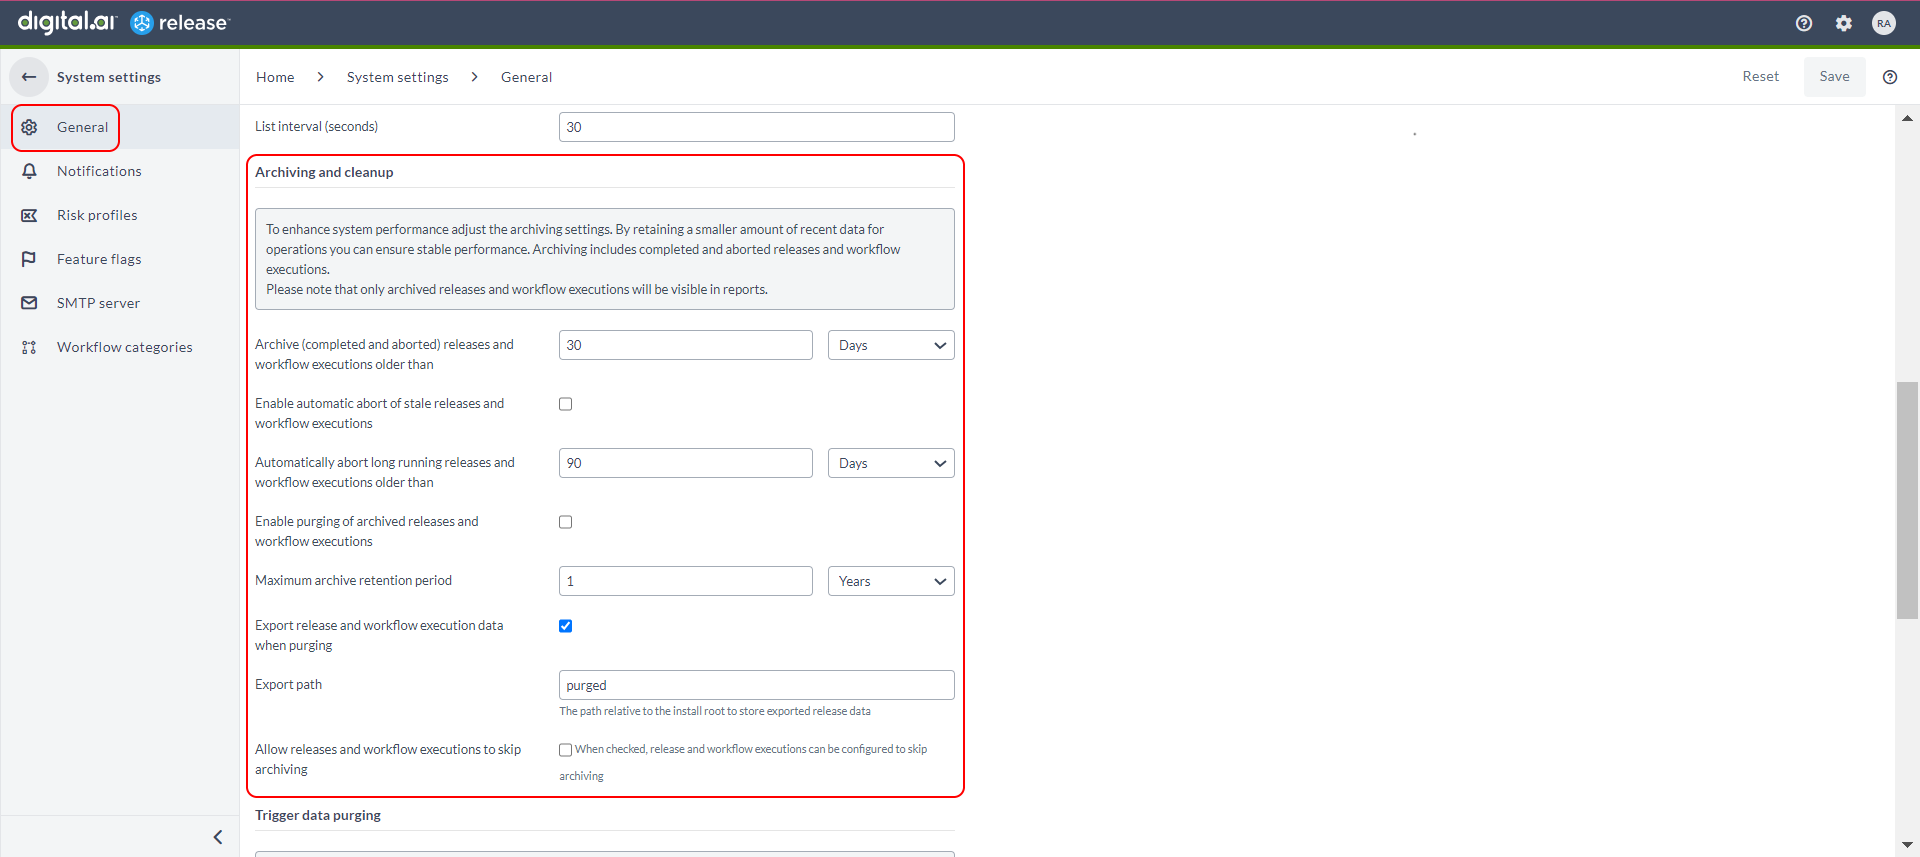
Use the Archiving and cleanup section to archive finished (that is, completed and aborted) releases and workflow executions. These are moved to a separate internal archive database so that the active repository can be kept relatively small.
Archived releases and workflow executions are available in reports and you can search for them from them Release Value Stream Mapping screen.
You can configure the time after which Release will archive a completed release. This is an amount of time since the release was completed or aborted.
You can also purge archived releases and workflow executions (from the archive database) that are being held after the expiration of the configured retention period. This allows for automatic cleanup of releases and workflow executions that are not required per your company's audit or governance policy.
The purge process is disabled by default and needs to be activated by the Administrator on the System settings -> General screen.
Before the releases are removed from the database, their content will automatically be exported to the file system location configured in the System settings. The exported releases will be organized in subdirectories by their end date so each zip will be in the purged/<year>/<month>/<day>/<release-id>.zip format.
Here's an example for the contents of a purged release zip file:
release.json
activity-log.json
attachments/<attachment-id>/<attachment-file-name>
Exempt Releases from Being Archived
Navigate to System settings > General > Archiving and cleanup section to enable or disable this option.
-
Use the Automatically abort long running releases and workflow executions older than drop-down list to set a value in days or weeks. This value defines the number of days or weeks after which the releases or workflow executions that are incomplete will be aborted. The default value is
30days. -
Use the Archive (completed and aborted) releases and workflow executions older than drop-down list to set a value in days or weeks. This value defines the number of days or weeks after which the releases or workflow executions that are completed or aborted will be archived. The default value is
30days. -
Select the Enable automatic abort of stale releases and workflow executions or Enable purging of archived releases and workflow executions checkboxes to automatically abort stale releases and workflows executions or automatically purge archived releases and workflows executions respectively.
-
Use the Maximum archive retention period drop-down list to set a value in days or years. This value defines the maximum number of days or years you can archive the releases or workflow executions.
-
Use the Allow releases and workflow executions to skip archiving checkbox to exempt selected releases and workflows from being archived. When this option is enabled, the Archive release checkbox shows up on the template and release Properties sub-pages.
-
By marking a release to skip archive, the completed/aborted release is deleted instead of being moved to the archive database.
-
This is useful for transient releases, which has no business value and are to be excluded from reporting and statistics.

For more information, see How archiving works.
Release reports related to finished releases only use data from the archive database. Therefore, if you configure a very long period before releases are archived, then your reports will not be up-to-date. Also, having a large number of releases that are not archived negatively affects performance. For more information about the configuration of the database, see Configure the archive database.
Trigger data purging
This section is use to purge the Release Trigger execution data. These execution data will be removed from the database table.
To enable the trigger data purging:
- Go to Settings > General
- In the Trigger data purging section, select the Enable purging of trigger data checkbox.
You can configure the time after which Release will purge trigger data. This is an amount of time since the release was executed.

Release audit reports
In Release, the generated release audit reports are stored as temporary files on a shared file system. These reports are available for a default period of 10 days after they are generated.
To configure the retention period for the generated reports in Release:
- Go to Settings > General.
- Under Release audit reports, in the Delete release audit report older than field, specify the maximum number of days the reports can be stored before automatically deleting them.