TeamForge Security
The TeamForge security dataset applies row-level security to dashboards by restricting data visibility according to your access rights, which are determined at the project level or based on your organizational role. It ensures the view is tailored to your scope, ensuring confidentiality across different roles. By integrating source system identifiers and security settings, data visibility can be dynamically managed in a multi-tenant setup.
Note: This dataset filter includes only active records in the dataset, excluding those that have been marked as soft deleted. It helps ensure that reports and dashboards reflect the most current and relevant data.
There are five security datasets available for the TeamForge source:
- TeamForge security dataset 1
- TeamForge security dataset 2
- TeamForge security dataset 3
- TeamForge security dataset 4
- TeamForge security dataset 5
These datasets are used to implement security in your dashboard. For example, if your dashboard includes three asset types such as Story, Defect, and Epic you may need to use three corresponding security datasets, one for each asset type.
The following are the components of this dataset:
| Attribute Name | Description |
|---|---|
| Security flag 1 | Indicates whether row-level security is applied. The default value is 'Y'. |
| Security hash 1 | Identifies the planning level you have access to. |
| Sys_source | Unique Identifier of the source. |
This dataset doesn’t have any metrics.
Steps to Enable Row-Level Security in a Dashboard
To enable security on a dashboard using the above datasets:
- Add a Security Dataset: Add the above datasets in the newly created dashboard. We can add more than one dataset depending upon the need.
- Blend Datasets: Blend it with the Security hash of above datasets and project level other datasets.
- Apply the Security Flag: Add Security flag to the global filter and set it to Y.
If multiple independent datasets exist in the dashboard, each requiring separate security measures, then the above mentioned steps must be followed individually for each dataset.
Use case 1:
Datasets Used:
- Teamforge security dataset 1(secured)
- Defects trend by month (not secured)
The following approach can be taken to implement data security for a dashboard utilizing the Defects trend by month dataset.
- Right-click the Project attribute, select Link to Other Dataset, and then select Security hash1 attribute from the Teamforge security dataset 1 .
- On the View menu, select Filter Panel.
- Select the ellipsis (…), point to Add Filters, select Security flag1, and then select OK.

The dashboard will display only data for project level that the user is authorized to view.
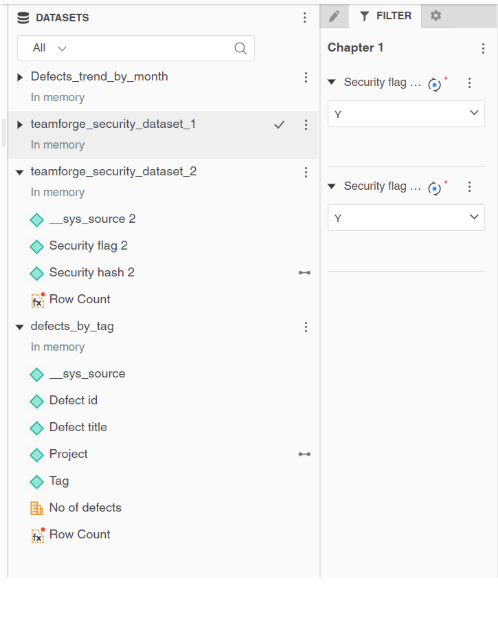
Use Case 2:
If the user is working with multiple independent datasets, the same result can be accomplished using the steps outlined below:
- Right-click the Project attribute, select Link to Other Dataset, and then select Security hash1 attribute from the Teamforge security dataset 1 .
- On the View menu, select Filter Panel.
- Select the ellipsis (…), point to Add Filters, select Security flag1, and then select OK.
- Right-click the Project attribute, select Link to Other Dataset, and then select Security hash2 attribute from the Teamforge security dataset 2.
- On the View menu, select Filter Panel.
- Select the ellipsis (…), point to Add Filters, select Security flag2, and then select OK.
Datasets Used:
- Teamforge security dataset 1(secured)
- Teamforge security dataset 2(secured)
- Defects trend by month (not secured)
- Defects by tag (not secured)
With this, the dashboard will show data of projects for which user has access.