Manage Applications
An application is any Digital.ai product or service connected to the Platform so your users can reach it with federated access. Registering an application creates an OIDC client for it, which is what lets the Platform authenticate users on that product's behalf. Registered applications appear as links on the Overview page.
Registering an application is one part of connecting a product. After that, you need to configure the product itself. See Complete a Product Integration.
Add an Application
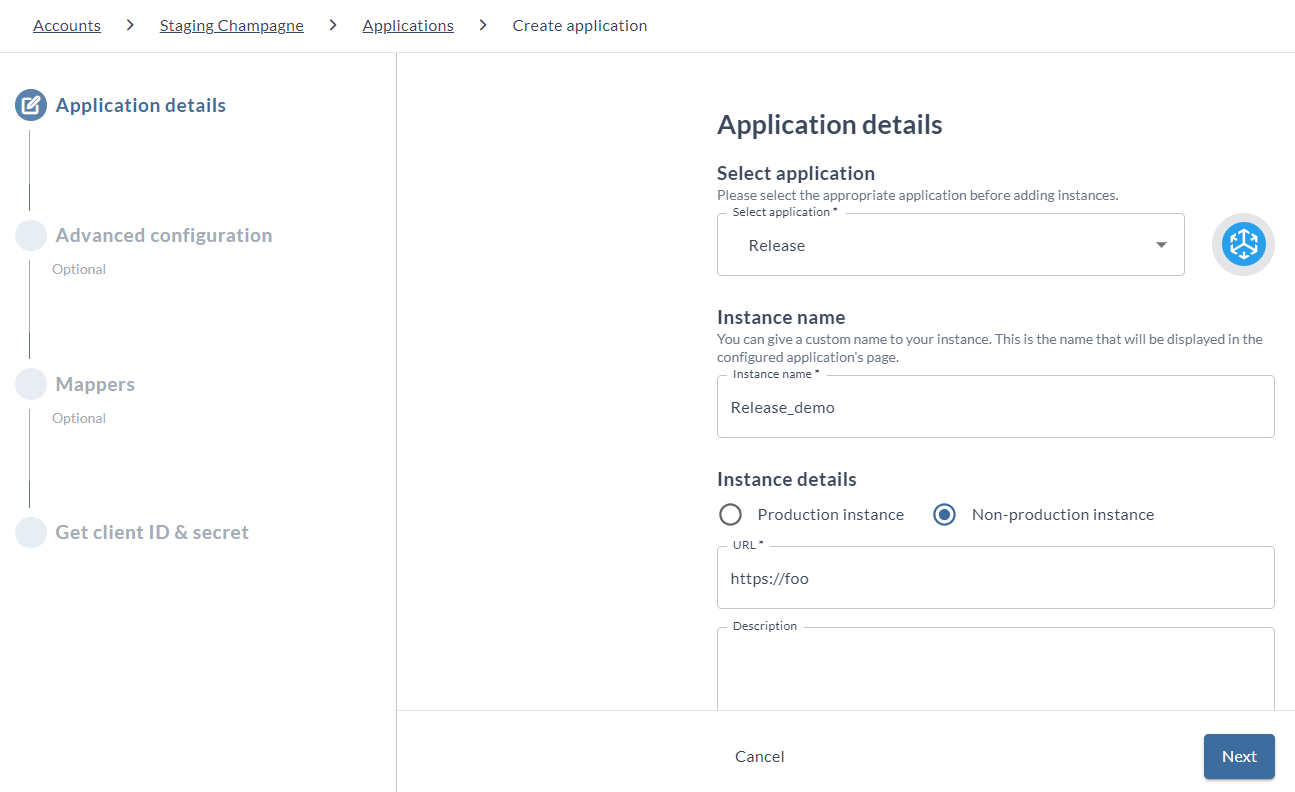
The wizard has four pages: Application details, Advanced configuration, Mappers, and Get client ID & secret. The two middle pages are optional, because the Platform completes them for you based on the type and URL you enter on the first page.
- Log in to the Platform as an administrator.
- In the left navigation, click Applications.
- Alternatively, click Create new application on the Overview page.
- Click Create application.
- On the Application details page:
- In Select application, choose the application type that matches the product you're connecting.
- In Instance name, enter a name for this instance. This is the name shown on the application's page in the Platform. For example,
Release_demo. - Under Instance details, select Production instance or Non-production instance.
- In URL, enter the URL of your product instance.
- In Description, optionally describe the instance.
- Click Next.
- On the Advanced configuration page, click Next. See Review the OIDC Client Settings.
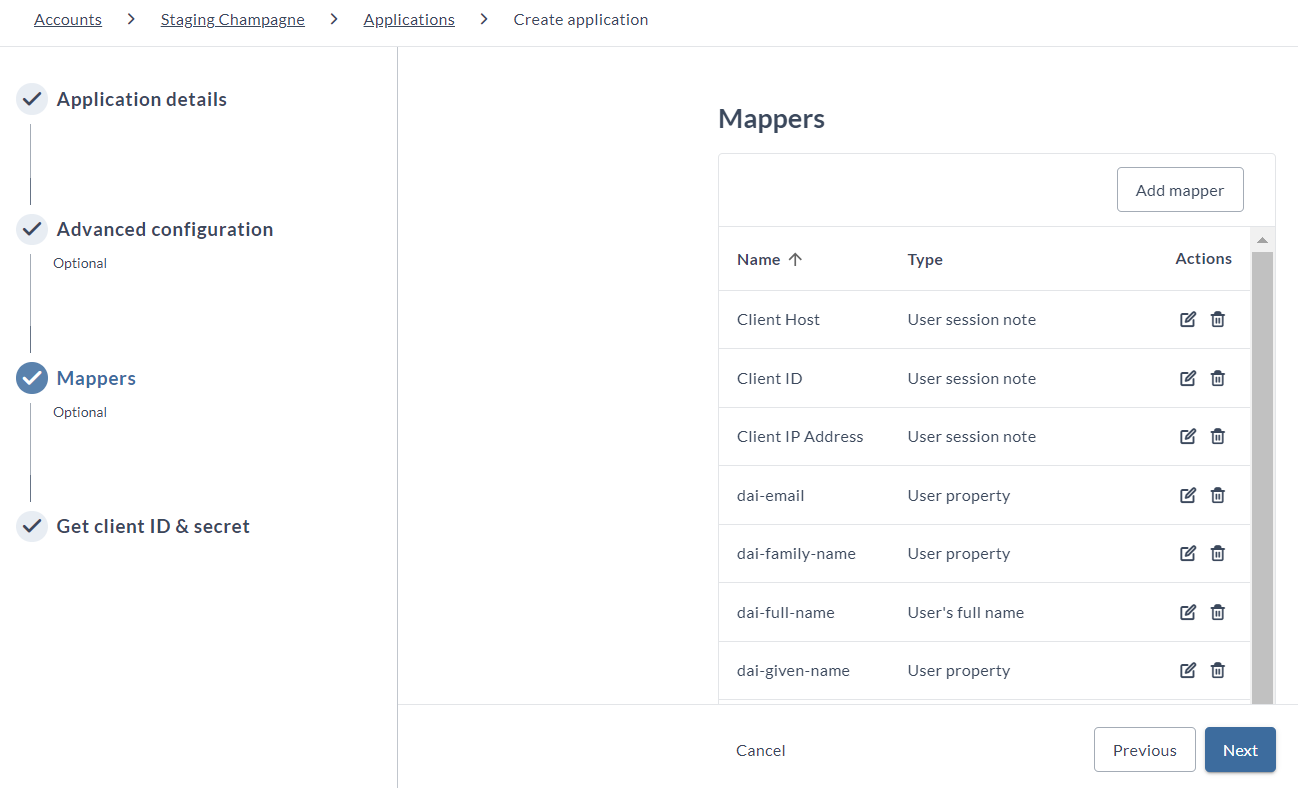
- On the Mappers page, click Next. See Change Application Mappers.
- On the Get client ID & secret page, copy the credentials and download the configuration file your product needs. See Find the Client ID and Secret.
- Click Complete.
Review the OIDC Client Settings
The Advanced configuration page holds the OIDC client settings for this application. The Platform populates the access type, the enabled flows, the valid redirect URIs, the root and base URLs, and the web origins from the type and URL you entered, so a typical registration needs no changes here.
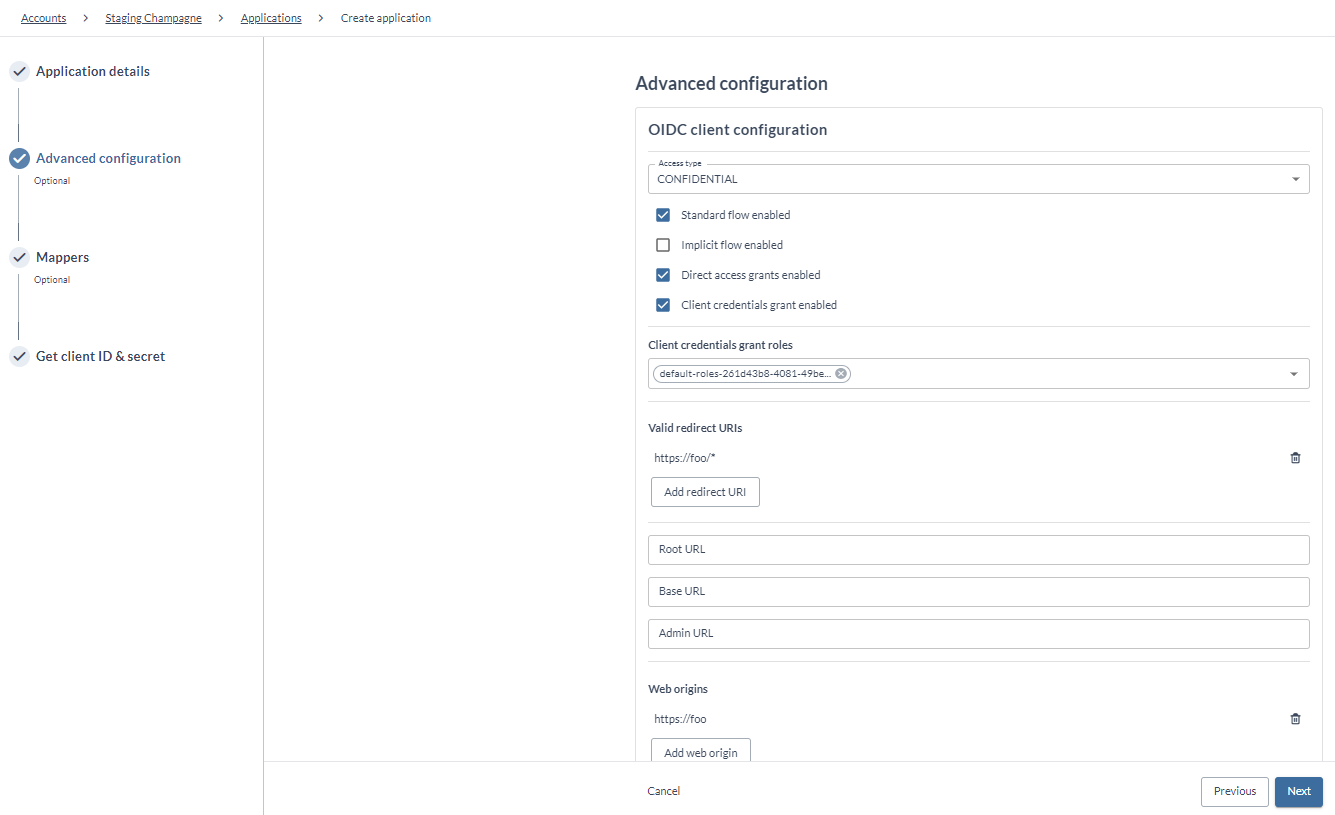
Change these values only when your product's documentation or Digital.ai support tells you to. A wrong redirect URI or web origin stops users reaching the product.
Change Application Mappers
Mappers on the Mappers page control what user information the Platform includes in the token it sends to this application. They run in the opposite direction from the mappers you configure on an identity provider: those bring user data into the Platform, while these pass it out to the application.
The Platform creates a default set when you register the application, including mappers for the user's email address, given name, family name, and full name, plus session details such as the client ID and host.
Most integrations never need a change here. Edit or add a mapper only when:
- The application expects a claim under a name the Platform doesn't use by default.
- The application needs a user attribute that isn't in the default set.
To change them, click the Edit or Delete icon on a mapper's row, or click Add mapper to create one. For background on how mappers work and the attributes available, see Map User Attributes.
Mappers on an application are separate from mappers on an identity provider. Changing one has no effect on the other.
Find the Client ID and Secret
The Get client ID & secret page is the last page of the wizard, and it holds everything your product needs to authenticate against this client.
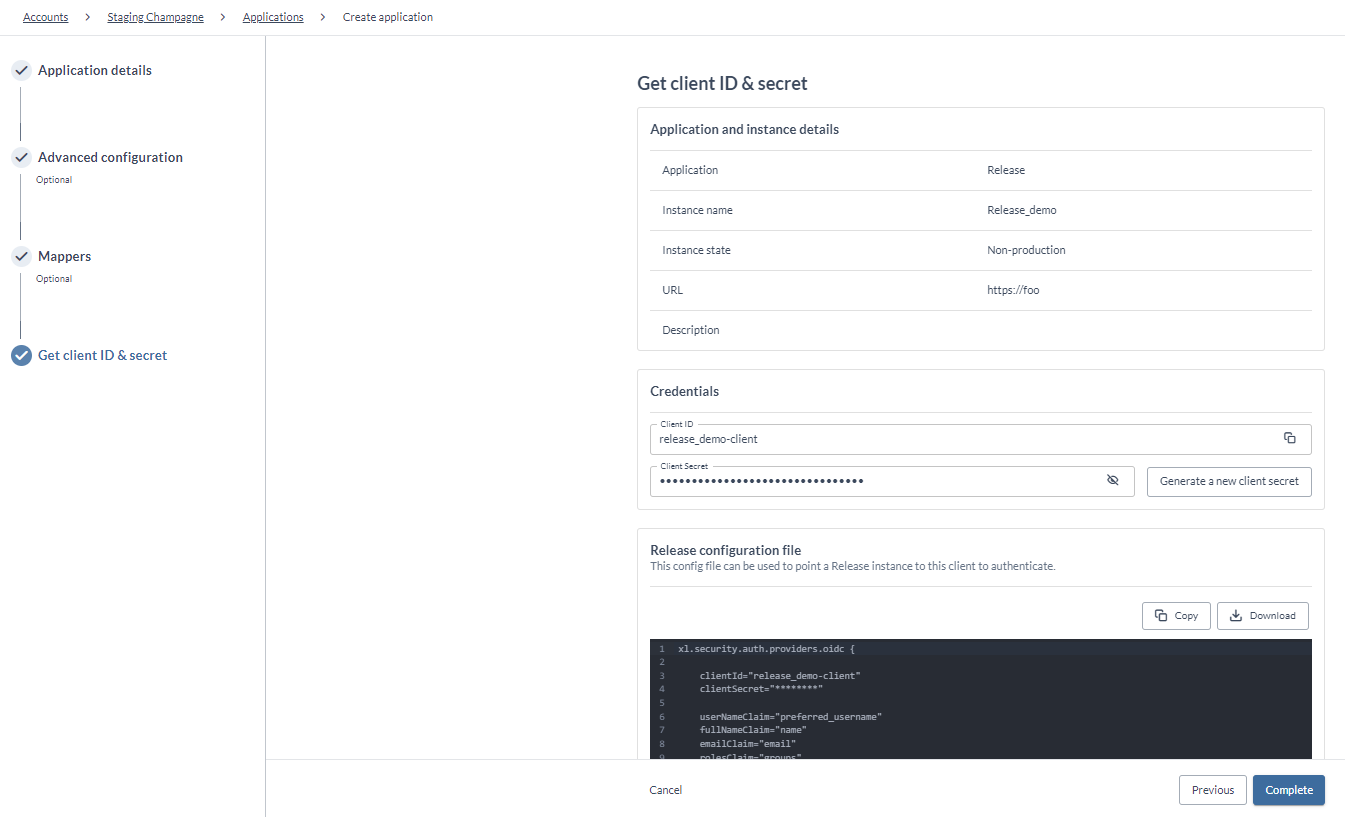
The page has three parts:
- Application and instance details: the type, instance name, instance state, URL, and description you entered.
- Credentials: the Client ID, which you can copy, and the Client Secret, which is masked until you choose to reveal it. Use Generate a new client secret to replace the secret, for example when you rotate credentials.
- The product configuration file: for product types that use one, a ready-made configuration block you can Copy or Download. It contains the client ID, the client secret, and the claim names your product reads. The Release configuration file, for example, downloads as
xl-release.conf.
The client secret grants access to your account through this client. Treat it as a secret, share it only with people who need it, and generate a new one if it's exposed.
You can return to this page after you finish the wizard. Open the application from the Applications page and step through to Get client ID & secret. Generating a new secret invalidates the old one, so update your product's configuration whenever you rotate it.
Complete a Product Integration
Registering an application identifies the product to the Platform. It doesn't finish the integration: the product also needs to be configured to authenticate against the client you just created, and its roles need to line up with your Platform user groups.
Every product integration also depends on a working connection to your corporate identity provider. See Prepare the Platform for a Product Integration.
For Release, Agility, and Deploy, an end-to-end guide covers the product side:
- How to Integrate Release with the Platform
- How to Integrate Agility with the Platform
- How to Integrate Deploy with the Platform
For the other application types, see that product's own documentation for its identity configuration, or contact Customer Support.