Google Cloud Compute Plugin
The Digital.ai Deploy Google Cloud Compute plugin allows you to deploy the Digital.ai Deploy instance on the Google Cloud platform.
Prerequisites
- Digital.ai Deploy 10.3 or later releases
- Google Cloud Platform infrastructure
Build the Plugin
To build the plugin, run the following command:
./gradlew clean build
After the build is successful, a *.xldp file containing the plugin is generated under the build/distributions folder.
Installing the Plugin
To install the plugin on Digital.ai Deploy:
- Download the latest JAR file from the Distribution site.
- Copy the plugin file to
XL_DEPLOY_SERVER/plugins/xld-officialdirectory. - Restart the Digital.ai Deploy server.
Using the Google Compute Plugin
Before using the Google Compute plugin, you must configure the plugin properties on Digital.ai Deploy interface:
- From Explorer, click Infrastructure > New > Directory > AccountCloud, and fill in the properties.
Alternatively, you can use the Import from JSON task from Monitoring > Deployment Tasks and configure google.AccountCloud.
- Click Monitoring > Deployment Tasks and select the Check Connection to validate the parameters.
- Right-click Environments > New > Environment and create an environment.
- In the Containers field, enter
google.AccountCloudto add the container.
When configuring the google.AccountCloud container, you can configure proxy and SSL certificate verification settings for all API communications with Google Cloud Platform:
- Proxy Server Protocol: Specify the proxy protocol (HTTP/HTTPS)
- Proxy Server Host: The hostname or IP address of the proxy server
- Proxy Server Port: The port number for the proxy server
- Proxy Server Credentials: Username and password for proxy authentication
- Verify SSL: Enable or disable SSL certificate verification for HTTPS connections. When enabled (recommended), only certificates from trusted Certificate Authorities are accepted. When disabled, the plugin will accept any certificate including self-signed, expired, or invalid certificates from any server.
These settings are applied globally to all plugin operations, including:
- Deploy, update and undeploy operations
- Generate IAM Token tasks
Exception: DialogFlow Agent task does not support proxy and VerifySSL configuration.
Disabling SSL verification reduces security and should only be used in development or testing environments with trusted networks.
Upload Deployment Artifacts to Google Cloud Storage
You can upload files, folders, and archives to a Google Cloud Storage (GCS) bucket from your deployment package. This feature is similar to uploading content to an AWS S3 bucket.
This section explains the configuration properties required and demonstrates how sync behavior works during deployment updates.
File and Archive Upload Properties
The following configuration options are available:
- Target File Name: Specify a different name for the uploaded file.
- Target Path in Bucket: Define the destination path within the GCS bucket.
- Predefined ACL: If your GCS bucket does not use Uniform Bucket-Level Access (UBLA), you can set a predefined access control list (ACL) here. If UBLA is enabled, this field is ignored.
Folder Upload Properties
Uploading folders includes some of the same options as file or archive upload, but excludes the Target File Name property. It introduces two additional properties: Sync Folder and Remove Deleted Files on Sync.
-
Sync Folder: If selected, the plugin synchronizes the folder by comparing the current contents in the deployment package with those in the GCS bucket. Only modified and new files are uploaded.
-
Remove Deleted Files on Sync: If selected, any files present in the GCS bucket but missing from the current deployment package are deleted during synchronization. If not selected, the plugin retains all existing files in the bucket, even if they are not part of the new deployment.
See Configuring Deployables Using Google Cloud Compute to learn more about deploying using GCP.
Manage Google Cloud Storage Buckets
The Google Cloud Compute plugin supports complete lifecycle management of GCS buckets, allowing you to create, update, and delete buckets directly from Deploy.
Bucket Operations
- Create: Deploy a new deployment package to create a bucket with specified configuration
- Update: Modify bucket properties by updating the deployment package version
- Delete: Undeploy the package to remove the bucket
- Only empty buckets can be deleted. Ensure to remove all objects from the bucket before attempting deletion
See Configuring Deployables Using Google Cloud Compute for step-by-step instructions.
Generate IAM Token
The Digital.ai Google Cloud Compute plugin supports Generate IAM Token Configurations.
To Generate IAM Token:
-
Click Explorer, hover over Configuration, Click
 and select New > gcp > GenerateToken to create a new
 gcp.GenerateToken.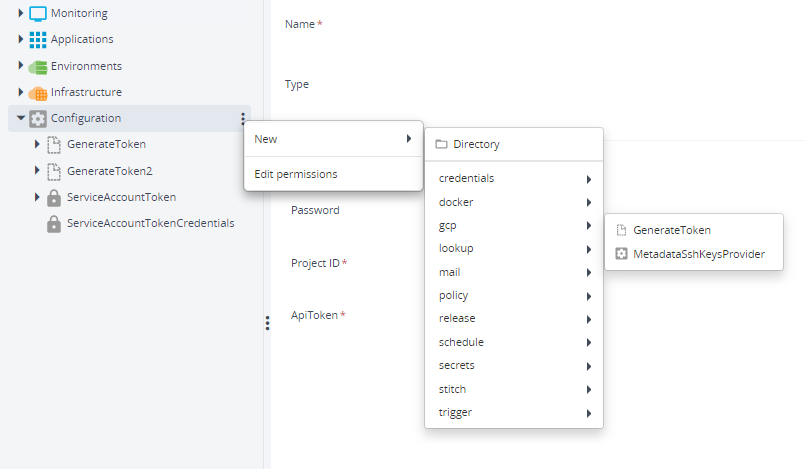
-
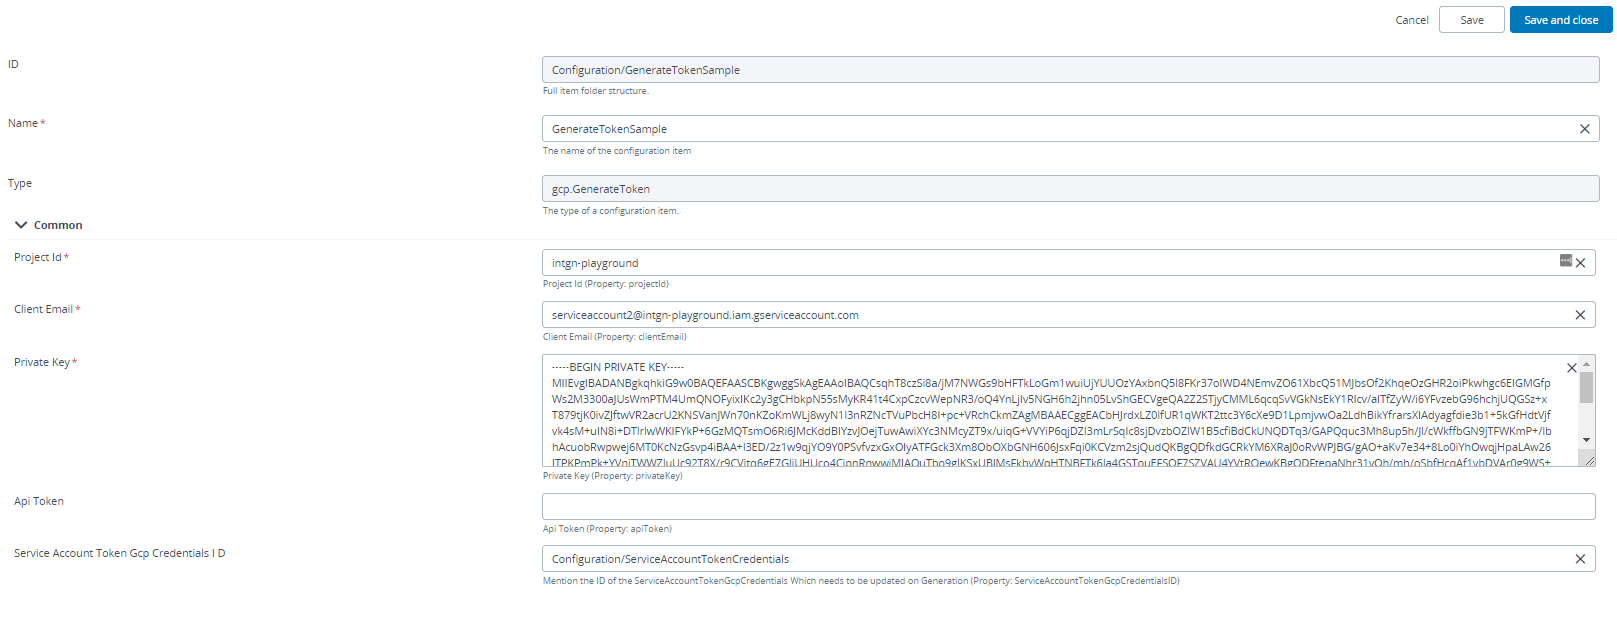
Fill in the required properties.
-
Click Save.
-
Goto GenerateTokenSample and select Generate IAM Token to execute and populate the Token Value in the
gcp.GenerateToken.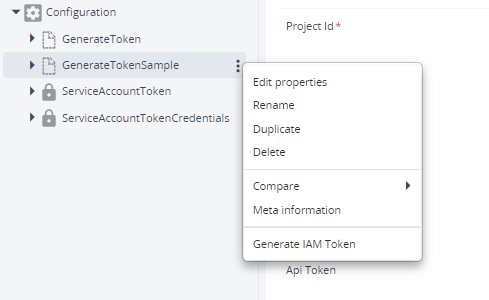
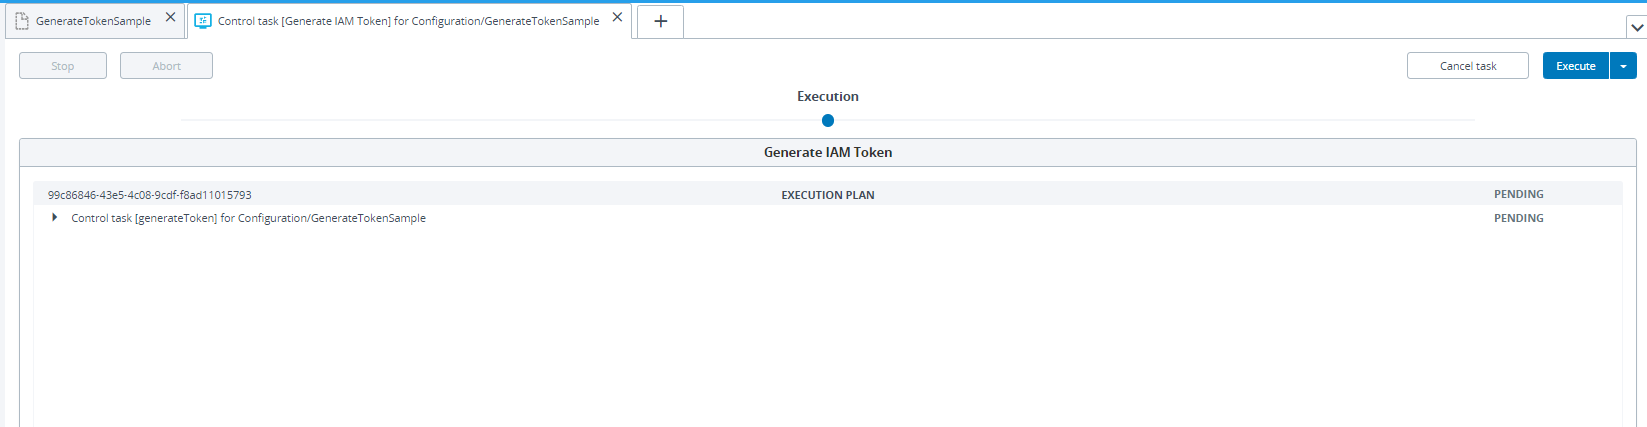
-
Click Execute to generate the Token.
-
Double Click GenerateTokenSample to view the generated Token in API Token field.
-
Use the Token Value in Service Account Token Gcp Credentials ID field.
-
In case the Generated Token needs to update
credentials.gcp.ServiceAccountTokenGcpCredentialsapiToken field, specify theService Account Token GCP Credential IDto updateapiTokenfield on Token Generation.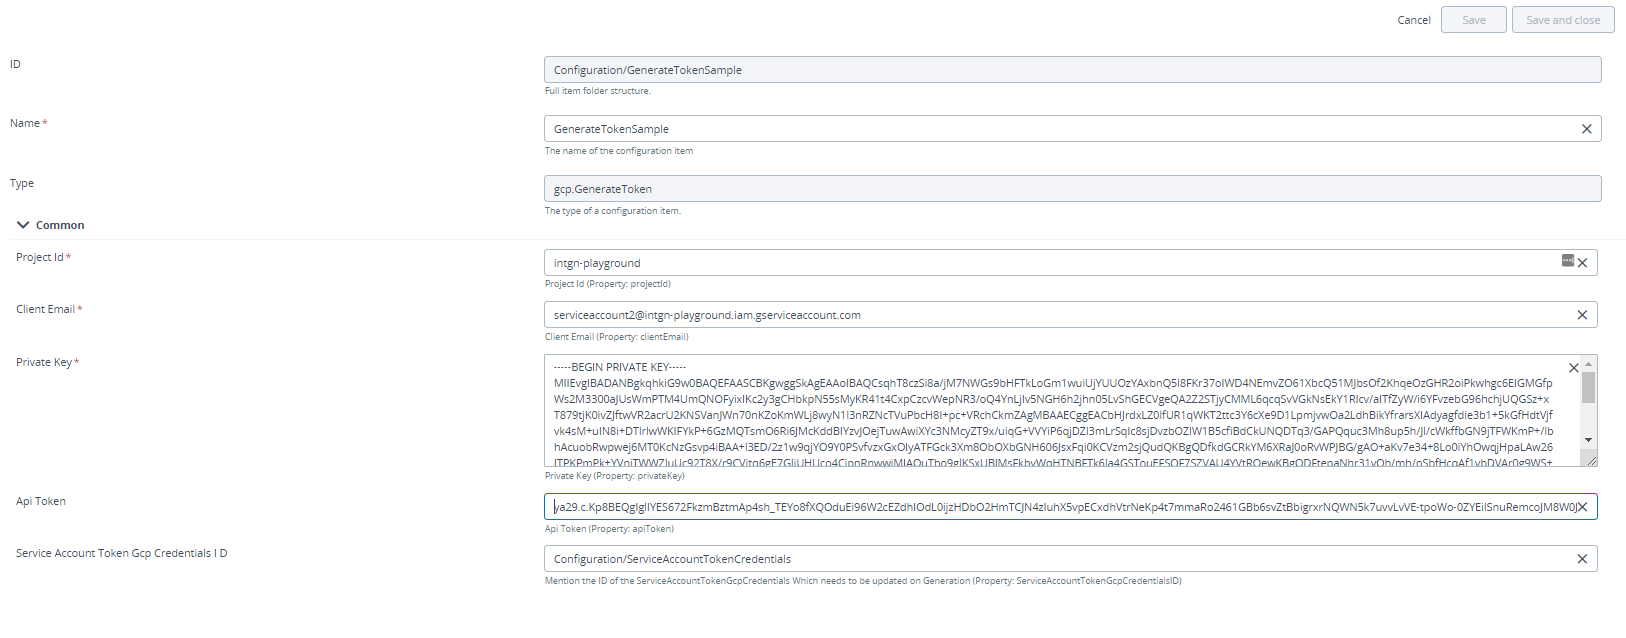 note
noteWhen configuring
gcp.GenerateToken, you can configure the same proxy and SSL certificate verification settings as described in the Using the Google Compute Plugin.
Scheduling Generation of IAM Token
To Schedule the Generation of IAM Token:
- Hover over Configuration Click and select New > schedule > ControlTaskJob to create a new
schedule.ControlTaskJob.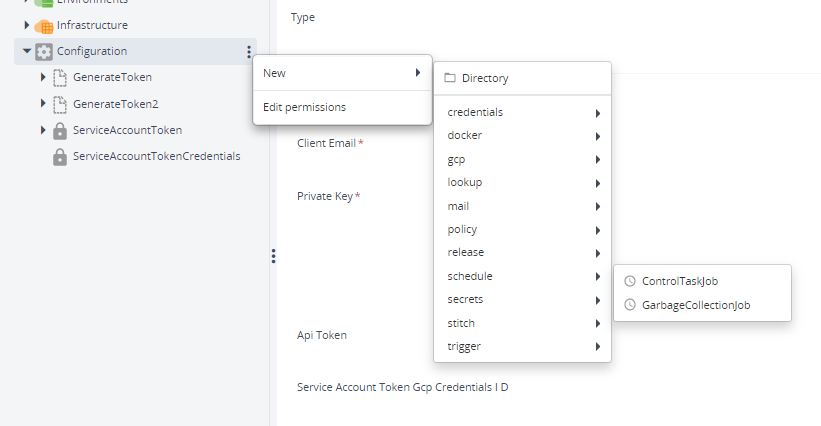
- Enter the Configuration item Id of the Api token Generation in the Configuration item Id field and the generateToken in the Control Task name field.

- Click Save.
- The ApiToken Generates automatically as per the Crontab schedule.