circleci
circleci is an advanced CI/CD tool that lets you setup and run a customizable build-test-integration process.
To use circleci with your Digital.ai Testing, follow the steps below:
1. Fork Git Repository
Choose any of our git repositories and fork them.
Each git repository contains the .circleci directory with a config.yml file that specifies build properties and build steps
To learn more about configuring your circleci pipeline .yml file, visit circleci documentation.
Currently, circleci does not support .NET, which means that C# projects cannot be run.

2. Authorize GitHub in circleci
In your account click on Projects → Authorize GitHub:

If you signed in using Google or some other Oauth service, simply authorize GitHub in your account.

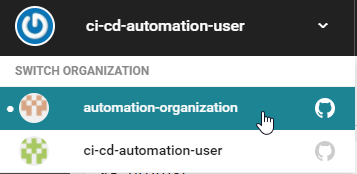
3. Choose your Organization
If you are part of an organization, you can choose the organization in order for circleci to get access to the repositories under this organization

4. Set Access Key of Digital.ai Testing Cloud platform as an Environment Variable
Go to Settings and under Projects click the cogwheel next to the relevant git repository:
Set your access key as environment variable:


5. Trigger Build
Setup your project: go to Projects → Add Project. Next to the relevant repository click Setup Project. In the next screen click Start Building. As your repository already contains the config.yml file, circleci will know how to trigger the build.
We recommend referencing circleci's documentation to learn more about their robust CI abilities.