Install Nexus
Installing Nexus 3
Nexus comes bundled with a Jetty instance that listens to all configured IP addresses on a host (0.0.0.0) and runs on port 8081 by default.
Installing Nexus is straightforward. Unzip the Nexus bundle in a directory and start Nexus.
Though Nexus can be installed on Mac OS, Digital.ai does not support Nexus integration on Mac OS.
The following instructions are for installing Nexus as a standalone server and integrating it with TeamForge.
-
Log on to the Nexus server.
-
Download the Nexus zip file. TeamForge supports integration with Nexus 3.41.1. For instructions, see Nexus 3 Installation.
-
Unzip the content to a directory of your choice.
You can find two directories, a directory that contains Nexus installation files and folders (hereinafter referred to as
<nexus-install-directory>) and a Nexus work directory (hereinafter referred to as<nexus-work-directory>).
<sonatype-work>is the default Nexus work directory. As a notation,<nexus-work-directory>is used in place of<sonatype-work>in this document.
Make sure you have full access permissions on all Nexus folders.
-
Open the command prompt and start Nexus.
-
Linux:
-
Change to
<nexus-install-directory>.cd <nexus-install-directory> -
Start Nexus.
./bin/nexus start
-
-
Windows:
-
Change to
<nexus-install-directory>.cd <nexus-install-directory> -
Start Nexus.
\bin\nexus start
-
-
-
Verify if Nexus is running by accessing the URL:
<nexus host name>:port/index.html.Default port is 8081. In case you have multiple Nexus instances, modify the application-port property in
/<nexus-work-directory>/nexus3/etc/nexus.propertiesfile for Nexus 3.
-
Do this if and only if you are installing Nexus 3.21.2 or later and if you have TeamForge Baselines installed for baselining Nexus repositories. Add the
nexus.scripts.allowCreation=trueproperty on a new line to the/<nexus-work-directory>/nexus3/etc/nexus.propertiesfile. -
Stop Nexus.
- Linux:
./bin/nexus stop - Windows:
\bin\nexus stop - Linux:
Upgrade Nexus 2 to Nexus 3
TeamForge—Nexus 2 integration is no longer supported from TeamForge 19.2. If you have TeamForge—Nexus 2 integration, upgrade to Nexus 3 and integrate TeamForge and Nexus 3. For more information on TeamForge—Nexus 3 integration, see Installing and Configuring TeamForge-Nexus 3 Integration Plugin.
This section discusses the migration and post migration steps of Nexus 2 to Nexus 3 migration.
It is assumed that you're running Nexus version 2.14.8 that uses Java 8.
-
Upgrade your Nexus 2 server to Nexus 3 following the instructions. See Upgrading Nexus.
-
Do this if and only if you are installing Nexus 3.21.2 or later and if you have TeamForge Baselines installed for baselining Nexus repositories.
Add the
nexus.scripts.allowCreation=trueproperty on a new line to the/<nexus-work-directory>/nexus3/etc/nexus.propertiesfile. -
Log on to the Nexus 3 server as a Site Administrator.
-
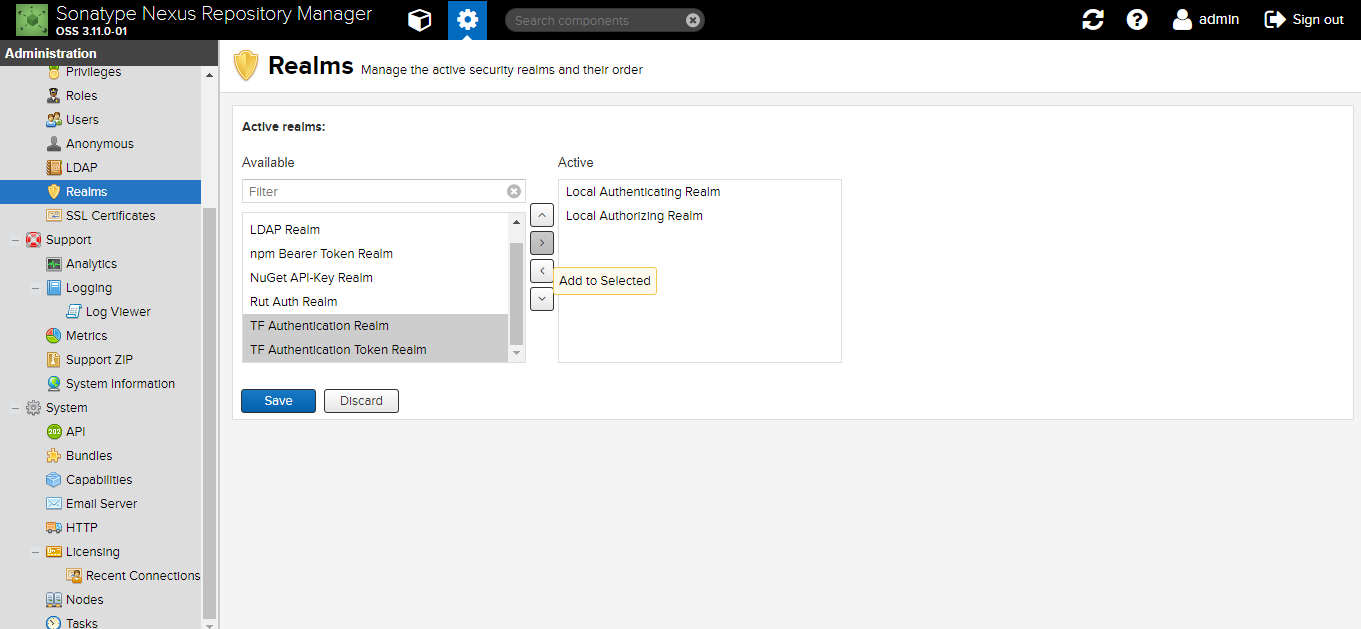
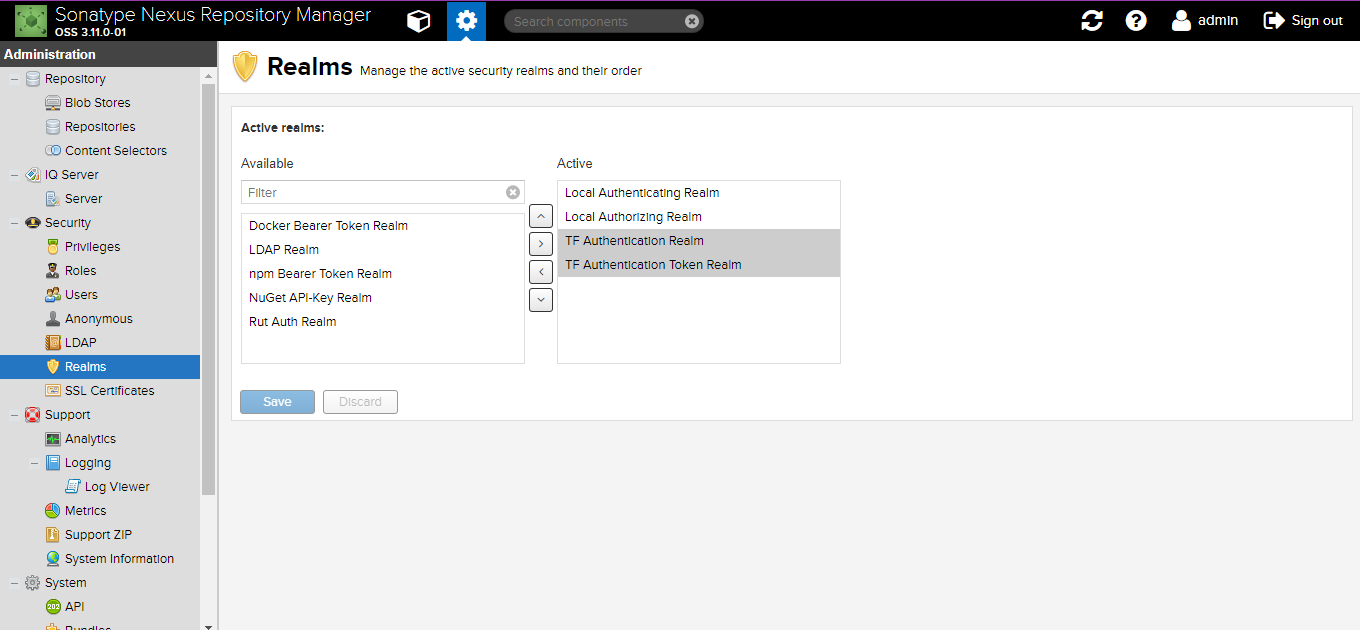
Click Realms from the Administration > Security menu.
-
Select TF Authentication Realm and TF Authentication Token Realm from the available list of realms.
Both the TF Authentication Realm and TF Authentication Token Realm will get listed in the available list of realms, only if you have already installed the TeamForge-Nexus 3 plugin. For installing the TeamForge-Nexus 3 plugin, see Installing the TeamForge-Nexus 3 Integration Plugin.

-
Add them to the list of active realms and click Save.

-
Copy
teamforgeProjectConfigurationfolder from Nexus 2 to Nexus 3.-
If you have installed Nexus 3 on the same server where Nexus 2 services are running:
cp -r <nexus-work-directory>/nexus/conf/teamforgeProjectConfiguration <nexus-work-directory>/nexus3/etc/ -
If Nexus 2 and Nexus 3 are installed on separate servers:
scp -r user@<nexus-work-directory>/nexus/conf/teamforgeProjectConfiguration user@<nexus-work-directory>/nexus3/etc/
-
-
Copy the values of the TIME_TO_HOLD_USER_CACHE and TIME_TO_HOLD_PERMISSION_CACHE properties from the Nexus 2
ctf_nexus.propertiesfile to that of Nexus 3.-
Location of the
ctf_nexus.propertiesfile in Nexus 2:<nexus-work-directory>/nexus/conf/ -
Location of the
ctf_nexus.propertiesfile in Nexus 3:<nexus-work-directory>/nexus3/etc/
-
-
Do this step on the TeamForge Application Server. Run the
nexus3_upgrade.pyscript with the required arguments (see below command—run the command withsudoif required) to update the repository path and the IAF server name of Nexus 2 (against the Binary database) with that of Nexus 3./opt/collabnet/teamforge/runtime/scripts/nexus3_upgrade.py nexus2_app_name nexus3_app_name nexus3_repo_host_urlwhere,
- nexus2_app_name: Integrated Application Framework (IAF) server name of Nexus 2
- nexus3_app_name: Integrated Application Framework (IAF) server name of Nexus 3
- nexus3_repo_host_url: Repository path of Nexus 3
-
Restart Nexus 3.
<nexus_3_app_dir>/bin/nexus restart -
Delete the Nexus 2 application integrated with TeamForge.
-
Log on to TeamForge as a Site Administrator.
-
Select My Workspace > Admin.
-
Select Integrated Apps from the Projects menu.
-
Select the Binaries tab.
-
Select the Nexus 2 integrated app that you want to delete.
-
Click Delete or Force Delete.
-
Key Points to Note When You Integrate TeamForge with Nexus 3
Clicking a repository link from the Binaries page shows the repository in the Nexus application page on a separate browser tab.
Clicking Create Repository from the Binaries page redirects you to the Nexus application to create the repository.
The Include Traceability function is not supported any longer.
All the users with permission to create binary repositories can link repositories.
You can create new repositories, update or delete existing repositories and do other repository management activities only from within the Nexus application (with TeamForge's RBAC).
Roles and permissions are mapped/created automatically during the Nexus 2 to Nexus 3 migration and during repository creation.
You can link TeamForge to different types of Nexus repositories such as Maven, Docker, NuGet, and so on and so forth.
You can link the repository groups from Nexus to TeamForge from the Binaries page.