OpenShift Plugin
The Release OpenShift plugin allows you to work with resources on an OpenShift host from the Release UI.
The following task types are included:
- OpenShift API: Start Build
- OpenShift API: Image Tag
- OpenShift API: Start Deployment
- OpenShift API: Service Status
In the release flow editor, the Openshift tasks have a blue border.
Features
- Create a new OpenShift resource
- Remove an OpenShift resource
- Start an OpenShift build
- Tag an OpenShift image stream
- Start an OpenShift deployment
- Check for an OpenShift service accessibility
Requirements
The OpenShift plugin requires the following:
- OpenShift command line client:
octo be installed on a Unix host machine. - A valid OpenShift account and a user with admin rights associated to it.
Set up an OpenShift client
Set up a connection to a Unix server with the installed OpenShift client:
-
In Release, from the navigation pane, go to Configuration > Connections and click Add Unix Host.
-
In the Address field, enter the IP address or host name of the remote machine with the installed OpenShift client.
-
In the Port field, enter the SSH port of the remote machine.
-
In the Username and Password fields, specify the user name and password of the SSH user that Release uses when connecting to the remote machine.
-
In the Sudo Username field, enter the user name of the
sudouser on the remote machine (for example:root).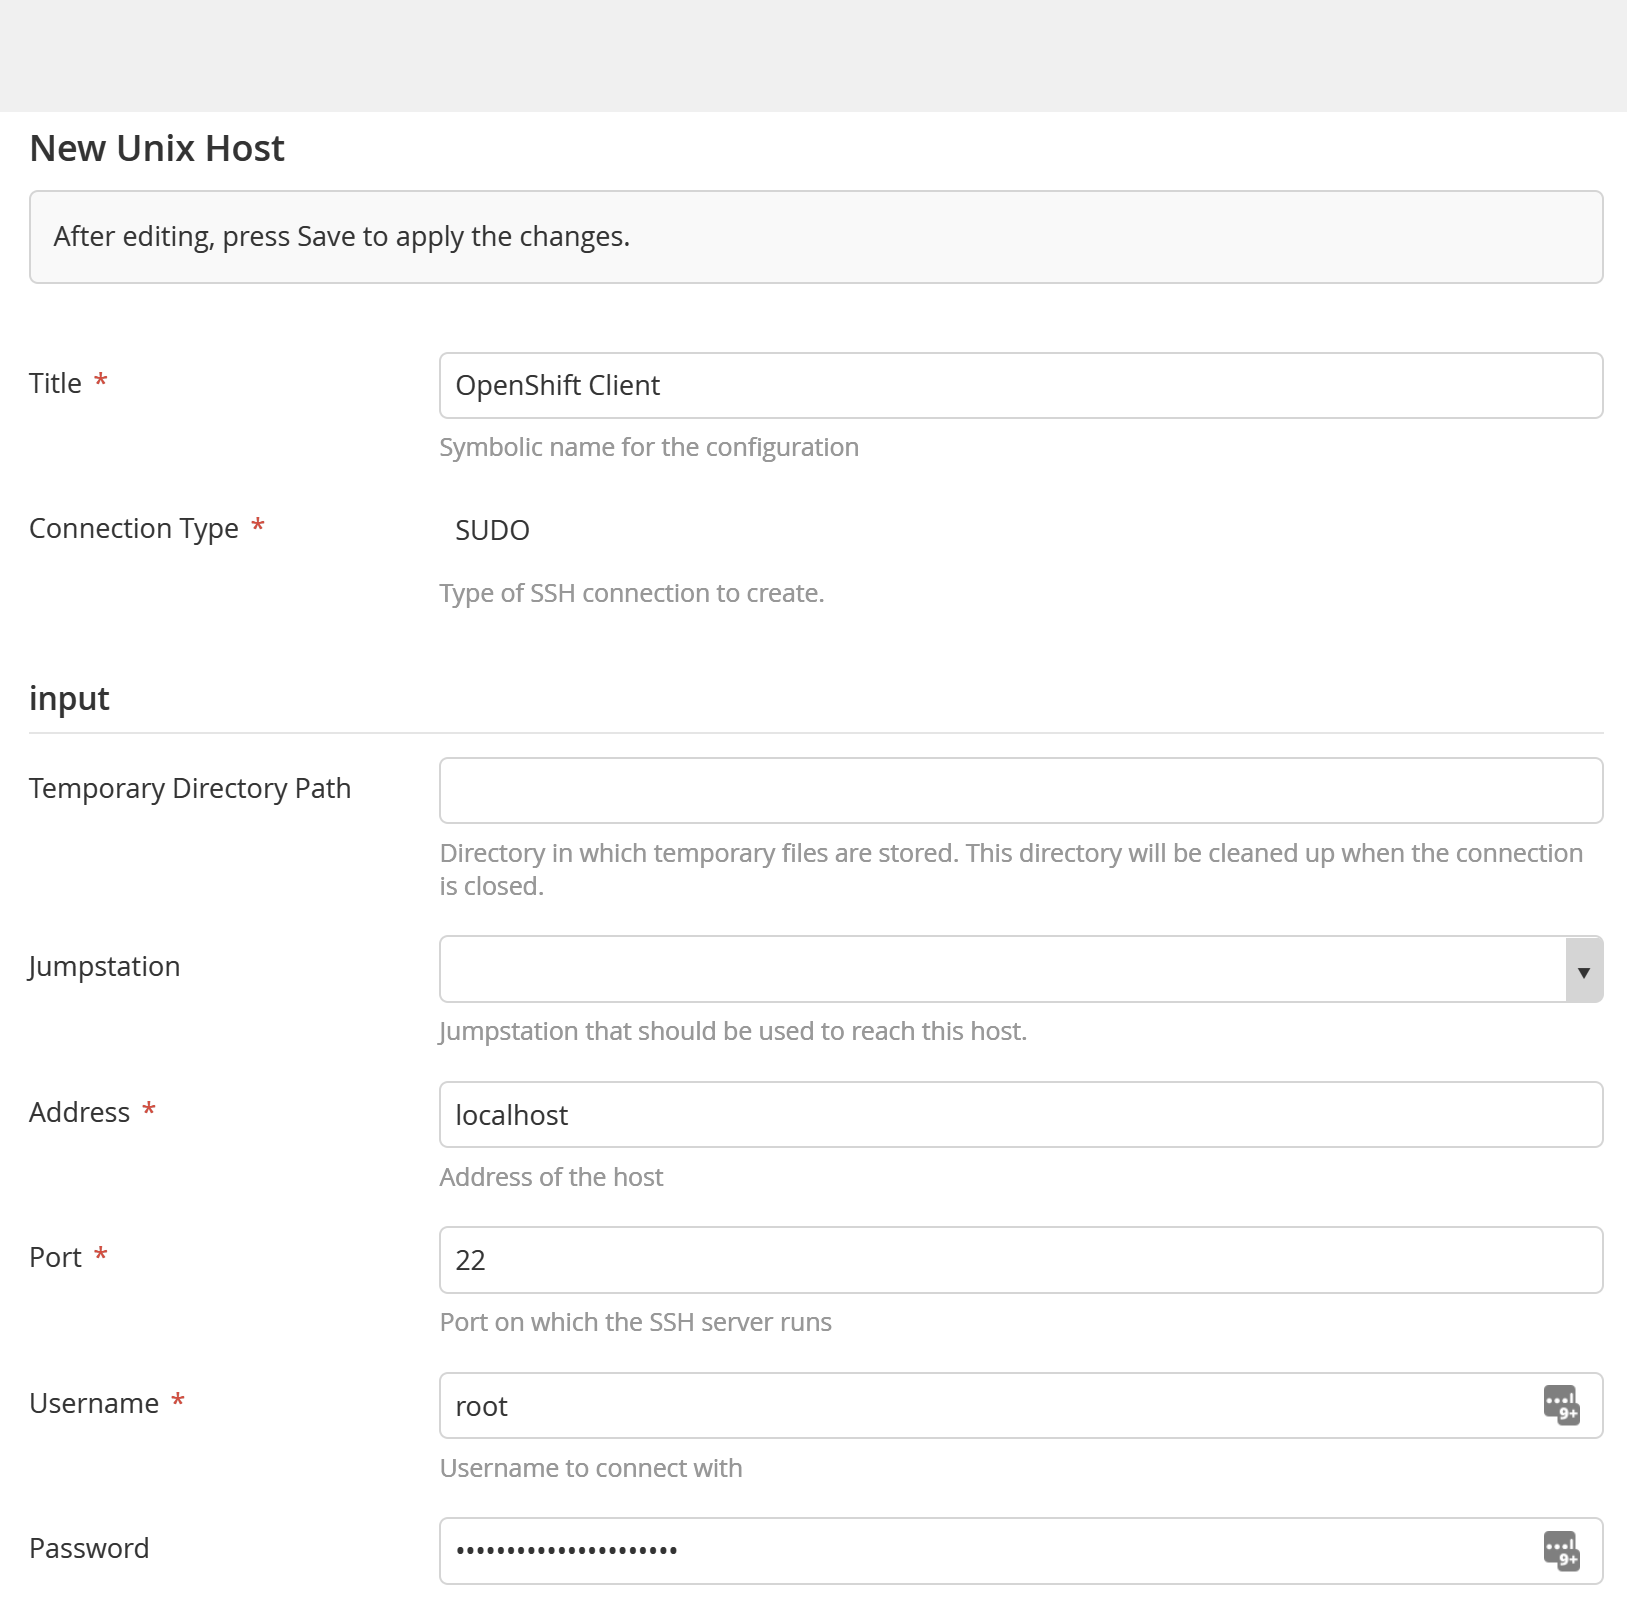
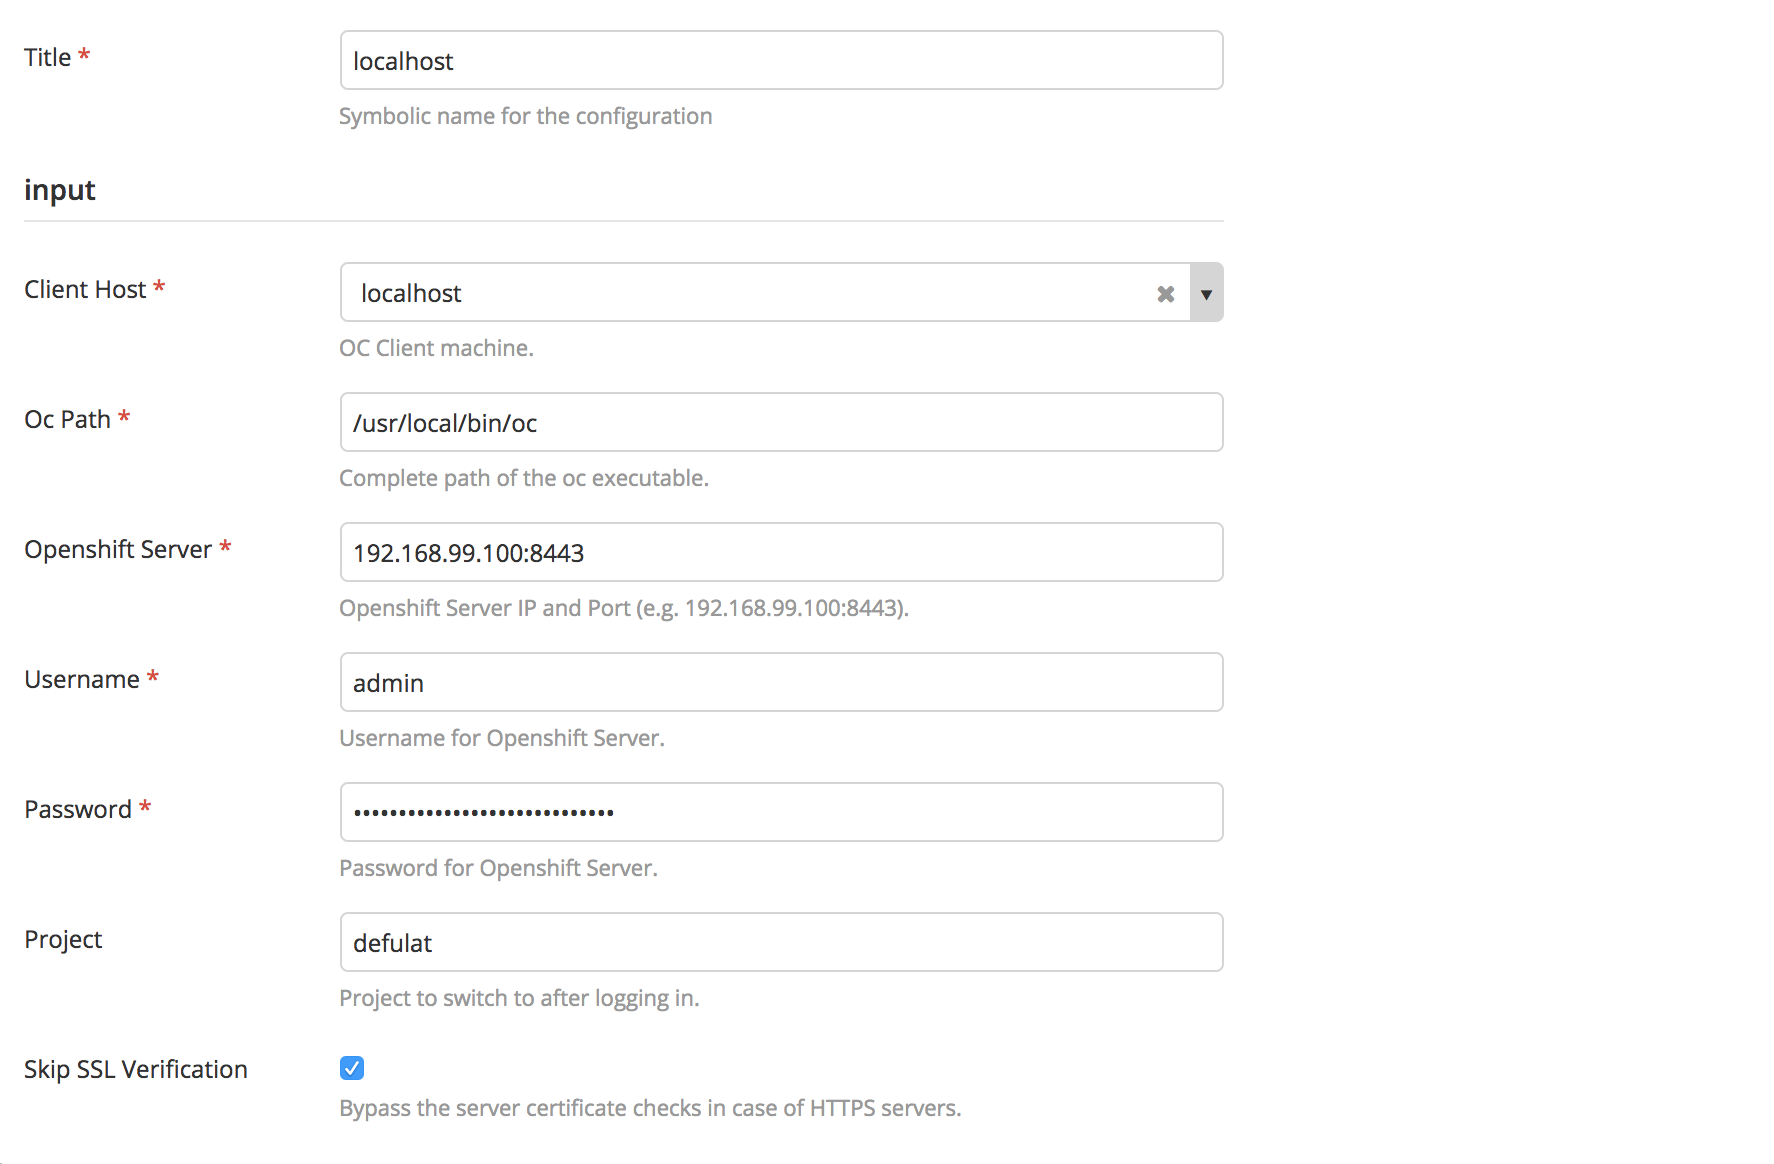
Set up an OpenShift client (OC):
-
In Release, from the navigation pane, go to Configuration > Connections and click Add Openshift Client (OC) Configuration.
-
In the Client Host field, select Unix host you created.
-
In the OC Path field, enter the path for OC.
-
In the Openshift Server field, enter URL to connect with the OpenShift Server.
-
In the Username field, enter username to connect with the OpenShift Server.
-
In the Password field, enter password to connect with the OpenShift Server.
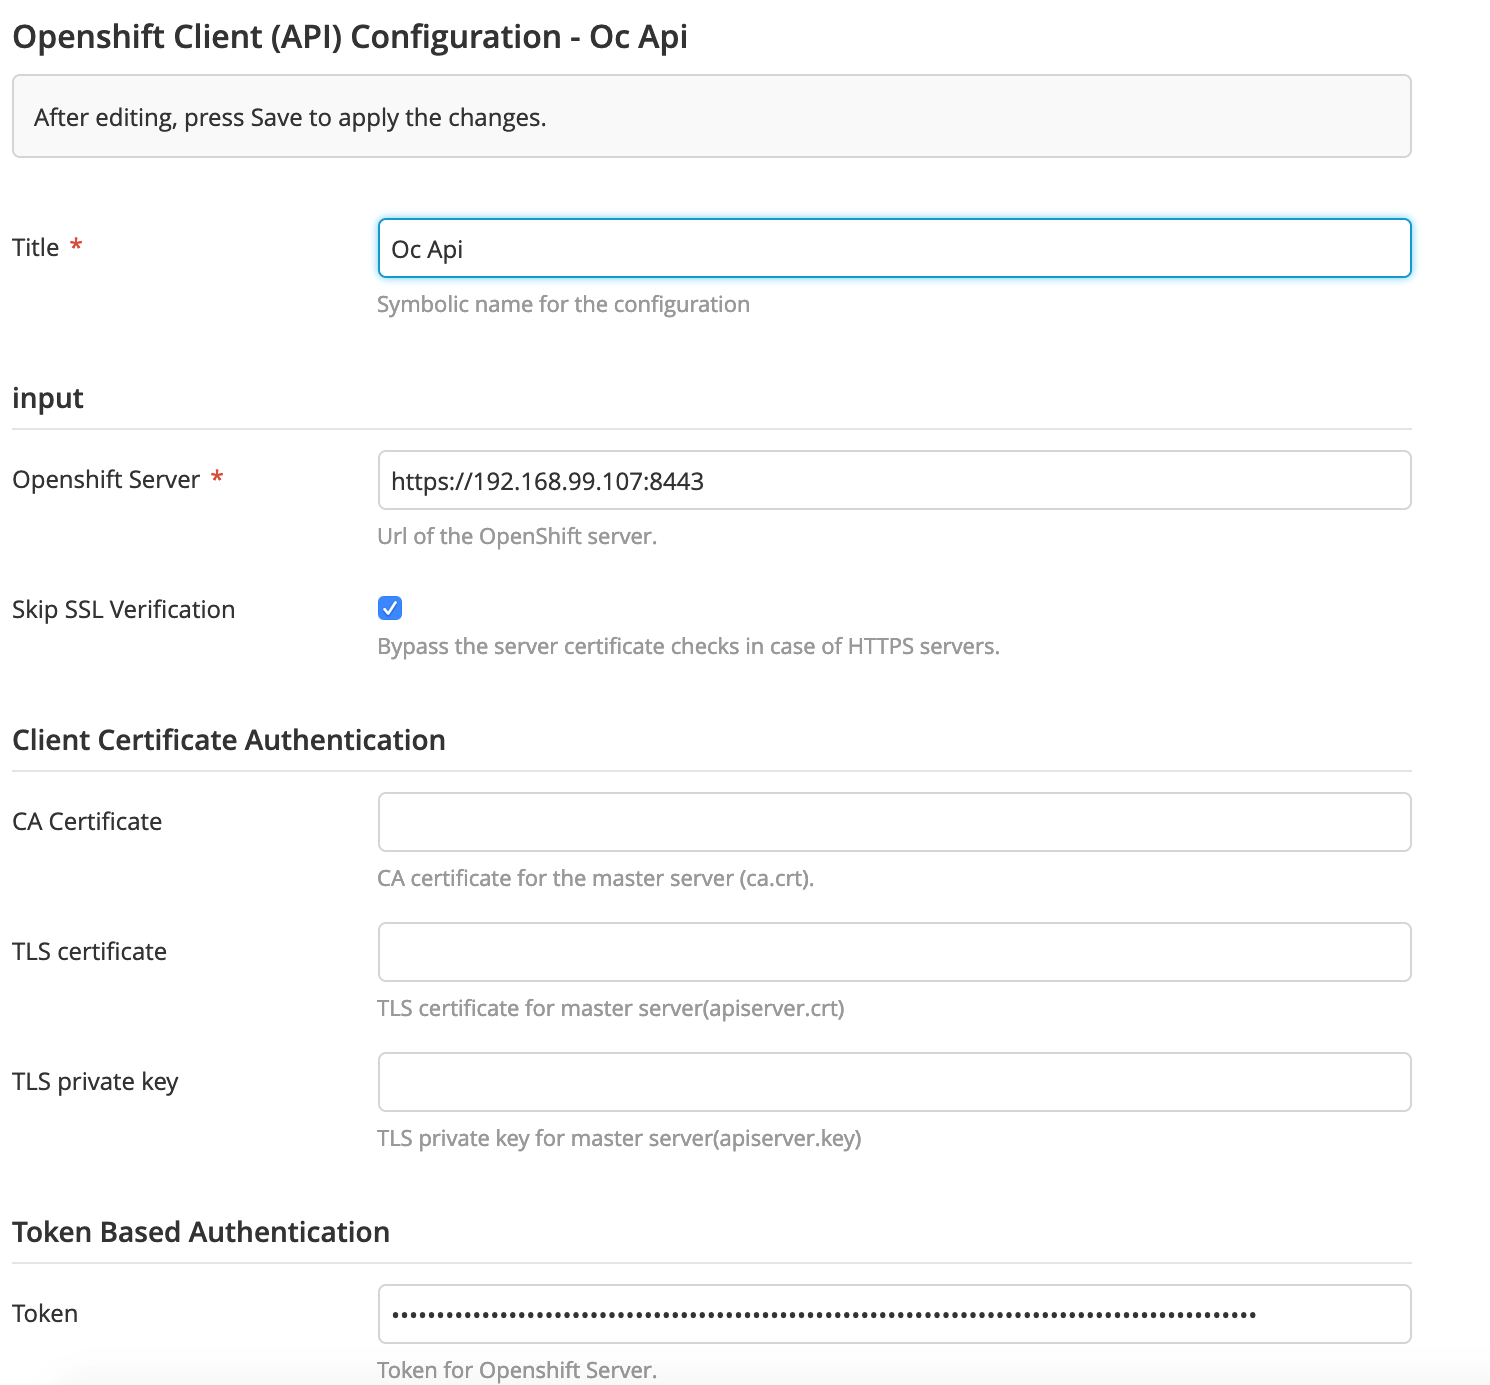
Set up an OpenShift client (API):
-
In Release, from the navigation pane, go to Configuration > Connections and click Add Openshift Client (API) Configuration.
-
In the Openshift Server field, enter URL to connect with the OpenShift Server.
-
Select Skip SSL Verification checkbox.
-
In the CA Certificate field, enter the certificate located in .minishift directory.
-
In the TLS certificate field, enter the certificate located in .minishift directory.
-
In the TLS private key field, enter the private key located in .minishift directory.
-
In the Token field, enter the OC token located in the OC Admin page under Help -> Command Line Tools.
Start build task type - OpenShift API
The OpenShift API: Start Build task type starts a build in specified project in OpenShift. You must specify the project name and build config name that already exists on OpenShift.

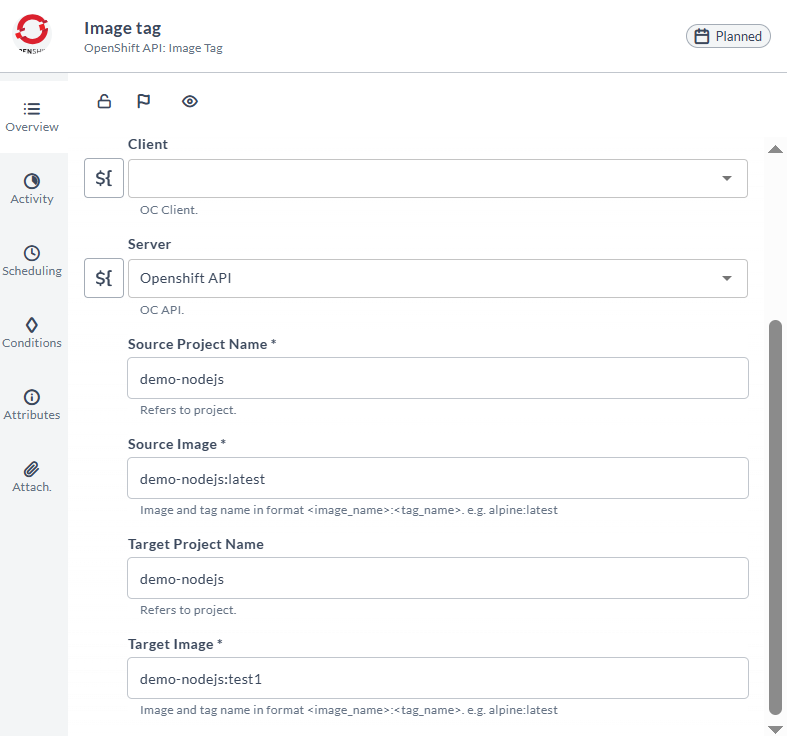
Image tag task type - OpenShift API
The OpenShift API: Image Tag task type tags an image stream in OpenShift. The difference from OC - Client is that if the image tag is not specified from Openshift when the project is built, the OC API will show it as an error. To fix this, the first image tag needs to either be specified in the YAML file or use the OC Client to create it first.
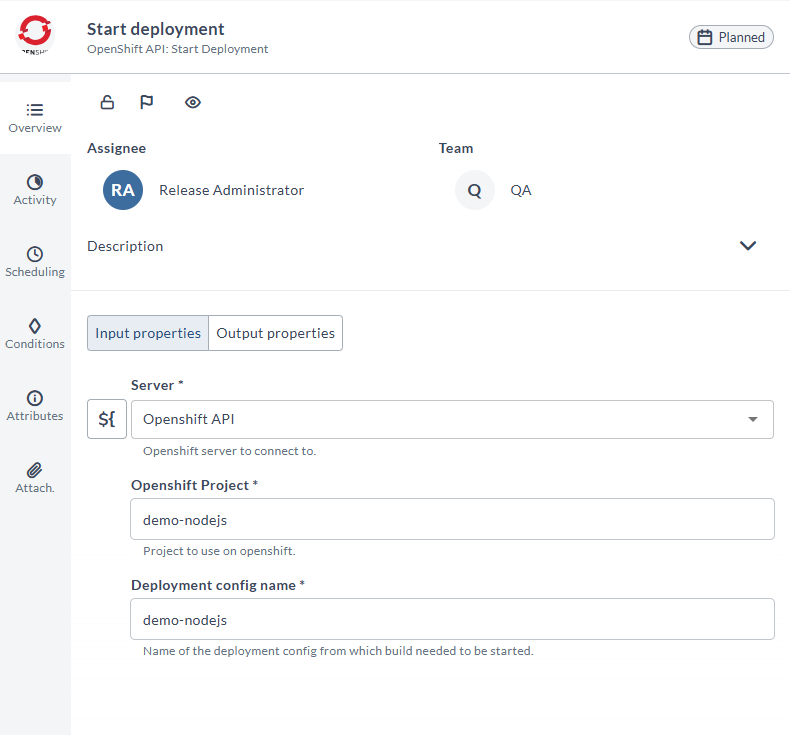
Start deployment task type - OpenShift API
The OpenShift API: Start Deployment task type starts a deployment in the specified project in OpenShift. You must specify the project name and deployment config name that already exists on OpenShift.
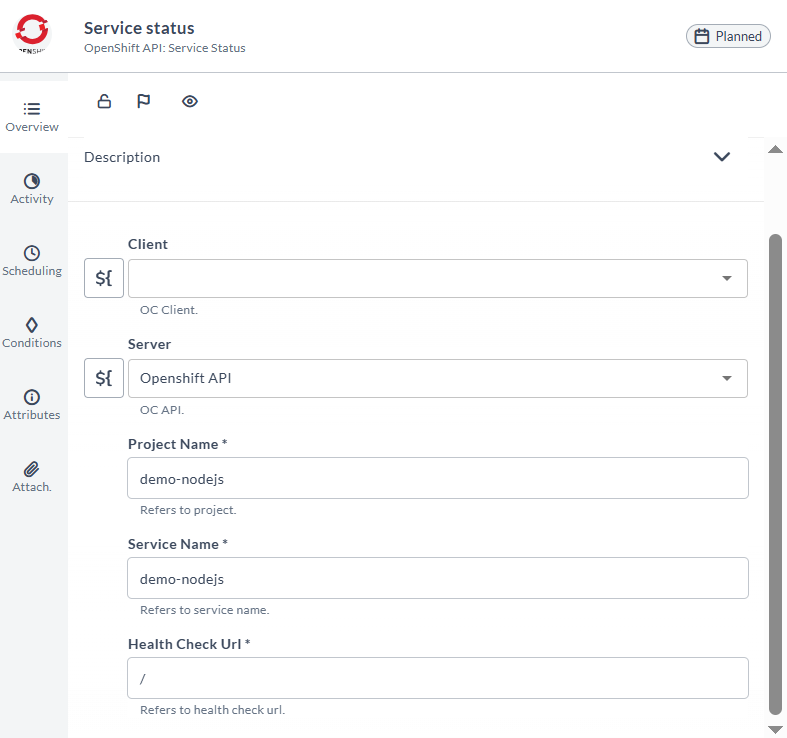
Check service task type - OpenShift API
The OpenShift API: Service Status task is fairly similar to the OC client version. You must specify the project name and service name that already exists on OpenShift. Keep in mind that a health check port (type: NodePort,LoadBalancer) must be available from Openshift service.