The Continuous Testing plugin allows users to execute Android, iOS and web application test cases that will accelerate your Release Cycles with our SeeTest Continuous Testing Platform. SeeTest can execute hundreds of manual or automated tests in parallel on real iOS & Android devices in the cloud.
Features
- Execute Espresso test cases by providing .apk files.
- Execute XCUI test cases by providing .ipa files.
- Get the run status and results of your Espresso or XCUITest execution.
- Create test views to house result sets.
- Get test view results from your Appium test jobs.
Setup the Continuous Testing Server
To setup a server connection, do the following:
-
In Release, from the navigation pane, go to Configuration > Connections on Continuous Testing instance, click on “+".
-
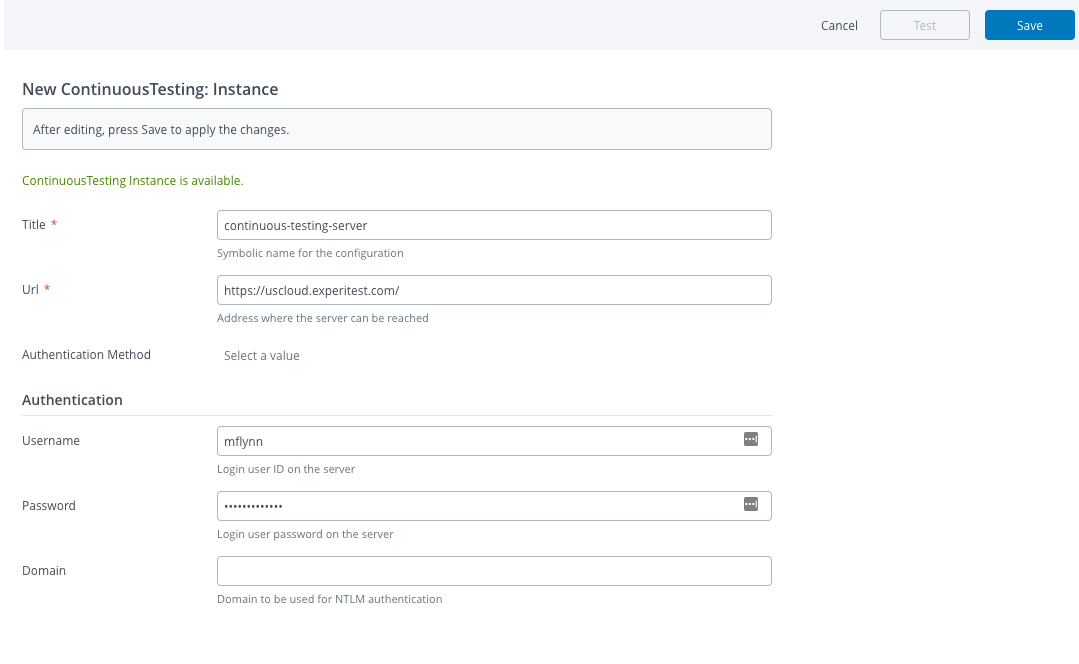
Under the New Continuous Testing: instance, fill-in the required fields below:
-
Enter a title in the Title field. (ex: Continuous Testing USCloud Server)
-
Enter the URL where the Continuous Testing server is running. This can be a local instance you have configured on premises or one of the DAI Cloud SaaS instances. (ex: https://uscloud.experitest.com)
-
-
Under the Authentication section, fill-in the fields below:
-
Enter the Continuous Testing username in the username field. (example: admin)
-
Enter the Continuous Testing password in the password field. (example: testing123)
-
-
Under the Proxy section, fill-in the appropriate fields. Please be advised that these fields are optional and only required if dictated by your organization.
-
Click on Test to test the availability of the Continuous Testing Instance.
-
Click on Save.
Usage
The available Tasks are Trigger Espresso Test Case, Trigger XCUITest case, Get Test Run Status And Result For Unit Tests, Create Test View, and Get Test View Results.
Trigger Espresso Test Case
Note: This task is used to run test cases for Android applications (.apk)
To create a Trigger Expresso Test Case task, do the following:
- Navigate and select the respective Release Template where you want to create the Trigger Expresso Test Case task.
- Under the Phase, click on Add task.
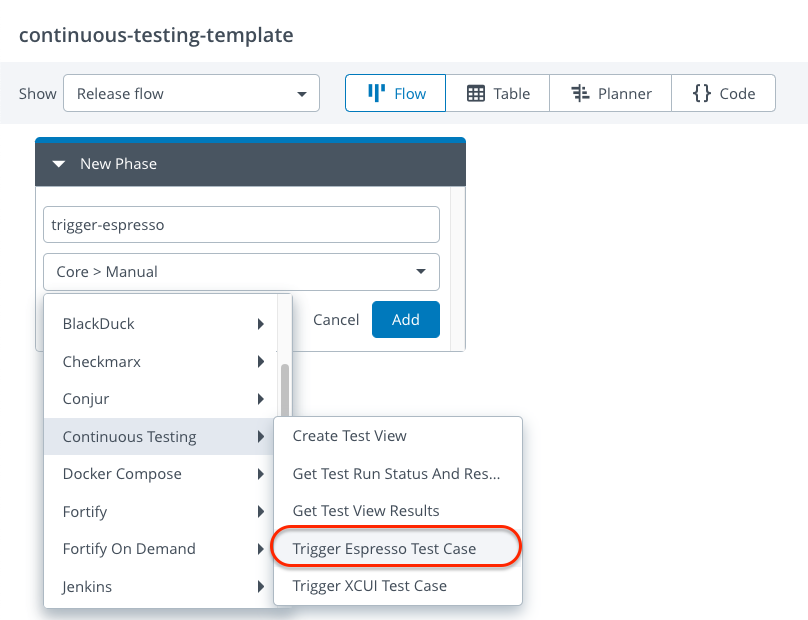
- Enter the Title in the Task title field.
- Select Digital.ai Continuous Testing > Trigger Espresso Test Case using the dropdown.
-
Click on Add.
-
Click on the created task (Trigger Espresso Test Case).
-
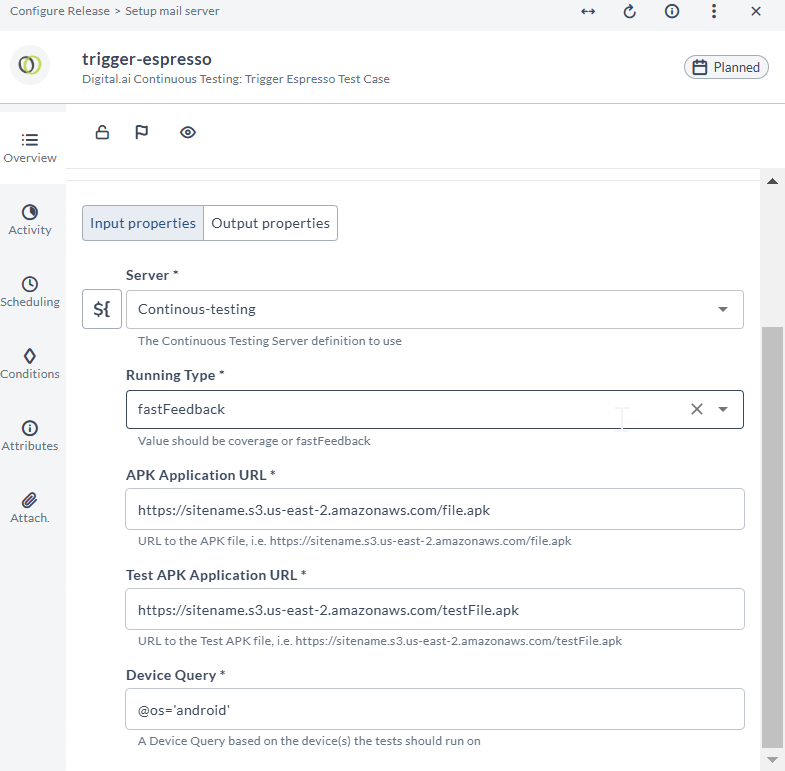
Enter the required properties in the opened Trigger Espresso Test Case task.
-
By default, the server field picks the created server. If you have multiple configured Continuous Testing servers, you can pick which one you want to use.
-
Select the required Running Type.
Note: The execution mode is defined here. Coverage Running Type is used to run ALL test cases on devices and fastFeedback is used to spread the test cases across devices.
-
Enter the URL where the APK application can be retrieved.
Example: https://sitename.s3.us-east-2.amazonaws.com/filename.apk -
Note: you can also retrieve from a public facing repo like Github or Bitbucket, but at this time the plugin does not have a way to pass credentials to a secured repo site. This capability will be coming in a future release.
-
Enter the URL where the APK test cases can be retrieved.
Example: https://sitename.s3.us-east-2.amazonaws.com/test-filename.apk -
Note: you can also retrieve from a public facing repo like Github or Bitbucket, but at this time the plugin does not have a way to pass credentials to a secured repo site. This capability will be coming in a future release.
-
Enter the appropriate Device Query.
Note: the details for constructing a device query can be obtained here: https://docs.experitest.com/display/TE/Device+Queries
-
Close the Trigger Espresso Test Case task.
Trigger XCUI Test Case
Note: This task is used to run test cases for iOS applications (.ipa)
To create a Trigger XCUI Test case task, do the following:
-
Navigate and select the respective Release Template where you want to create the Trigger XCUI Test task.
-
Under the Phase, click on Add task.
-
Enter the Title in the Task title field.
-
Select the Digital.ai Continuous Testing > Trigger XCUI Test Case using the dropdown.
-
Click on Add.
-
Click on the created task (Trigger XCUI Test Case).
-
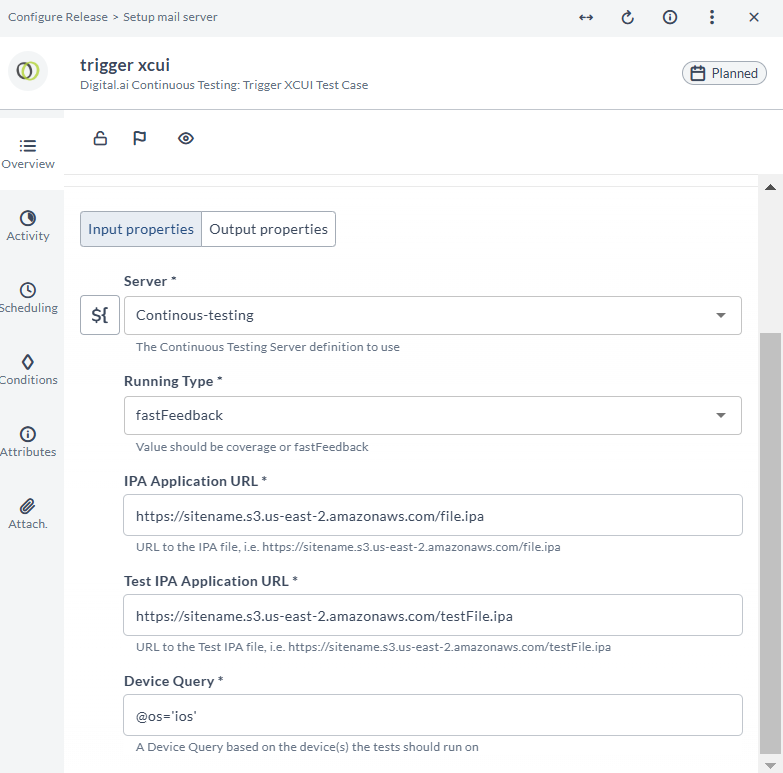
Enter the required properties in the opened Trigger XCUI Test Case task.
-
By default, the server field picks the created server. If you have multiple configured Continuous Testing servers, you can pick which one you want to use.
-
Select the required Running Type.
Note: The execution mode is defined here. Coverage Running Type is used to run ALL test case on devices and fastFeedback is used to spread the test cases across devices.
-
Enter the URL where the IPA application can be retrieved.
Example: https://sitename.s3.us-east-2.amazonaws.com/filename.ipa -
Note: you can also retrieve from a public facing repo like Github or Bitbucket, but at this time the plugin does not have a way to pass credentials to a secured repo site. This capability will be coming in a future release.
-
Enter the URL where the IPA test cases can be retrieved.
Example: https://sitename.s3.us-east-2.amazonaws.com/test-filename.ipa -
Note: you can also retrieve from a public facing repo like Github or Bitbucket, but at this time the plugin does not have a way to pass credentials to a secured repo site. This capability will be coming in a future release.
-
Enter the appropriate Device Query.
Note: the details for constructing a device query can be obtained here: https://docs.experitest.com/display/TE/Device+Queries
-
Close the Trigger XCUI Test Case task.
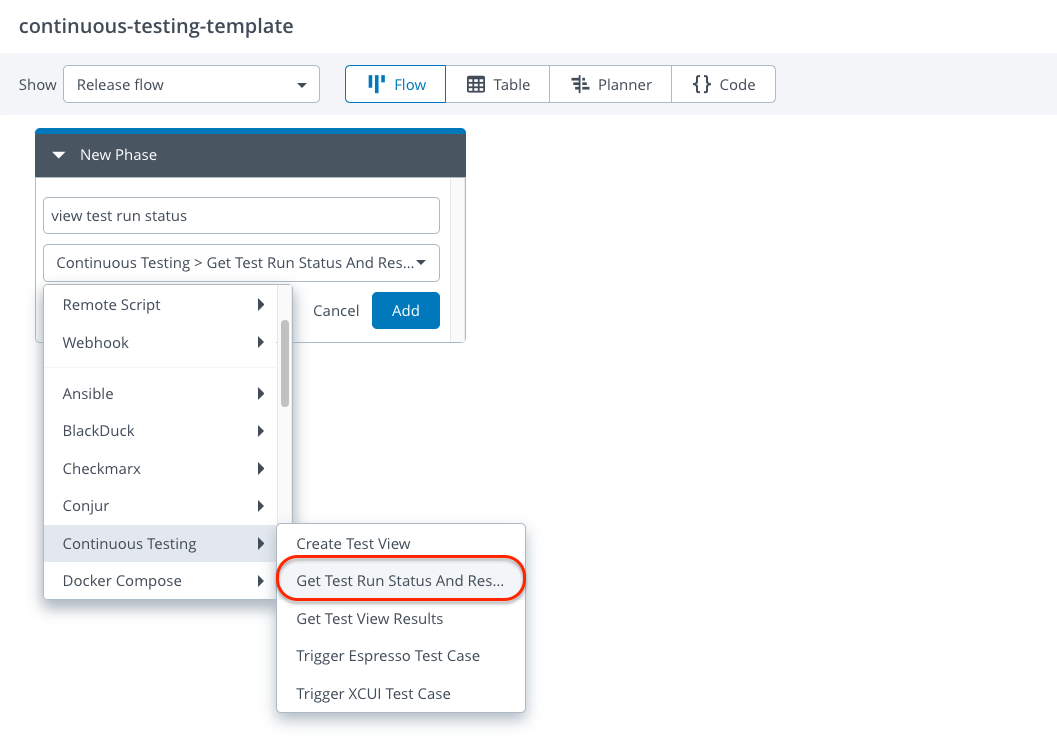
Get Test Run Status and Result for Unit Tests
Note: This task provides the test results for Espresso and XCUI Test tasks.
To create Get Test Run Status and Result for Unit Test task, do the following:
- Under the Phase, click on Add task.
- Enter the Title in the Task title field.
- Select the Digital.ai Continuous Testing > Get Test Run Status and Result for Unit Tests using the dropdown.
- Click on Add.
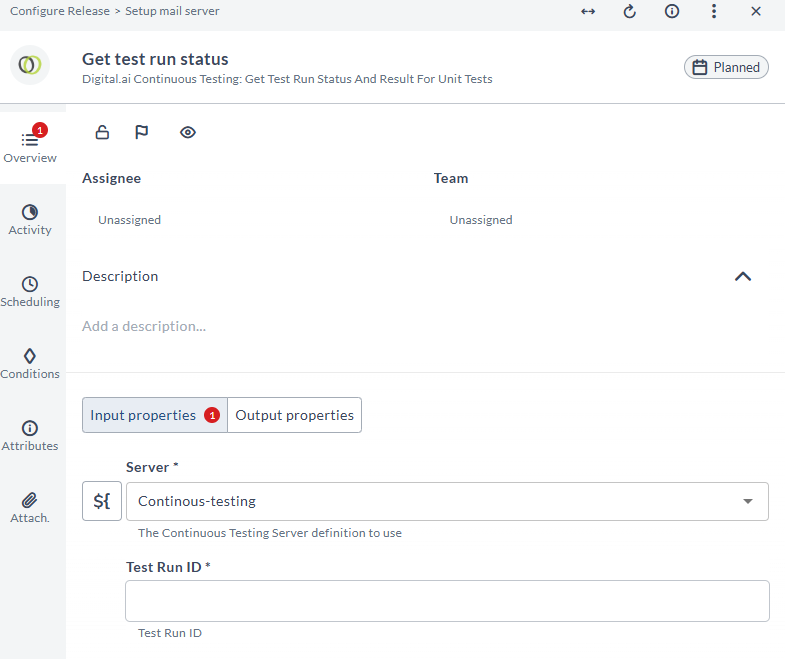
- Click on the created task (Get Test Run Status and Result for Unit Tests).
- Enter the required properties in the opened Get Test Run Status and Result for Unit Tests task.
- By default, the server field picks the created server. If you have multiple configured Continuous Testing servers, you can pick which one you want to use.
- Enter the Test Run ID. This value is an output property from the Trigger Test Case (Espresso / XCUI Test) tasks. Leverage variables to pass this value between the two tasks.
- Close the Get Test Run Status and Result for Unit Tests task.
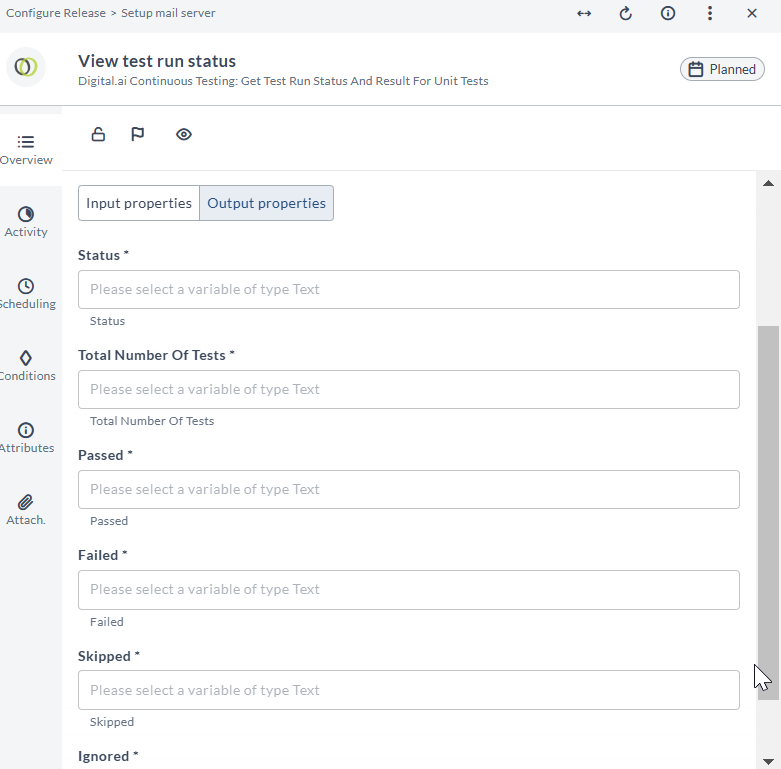
The Output properties shown above will be populated after the tests have completed executing in your SeeTest instance.
Create Test View
To create a Create Test View task, do the following steps:
- Under the Phase, click on Add task.
- Enter the Title in the Task title field.
- Select the Digital.ai Continuous Testing > Create Test View using the dropdown.
- Click on Add.
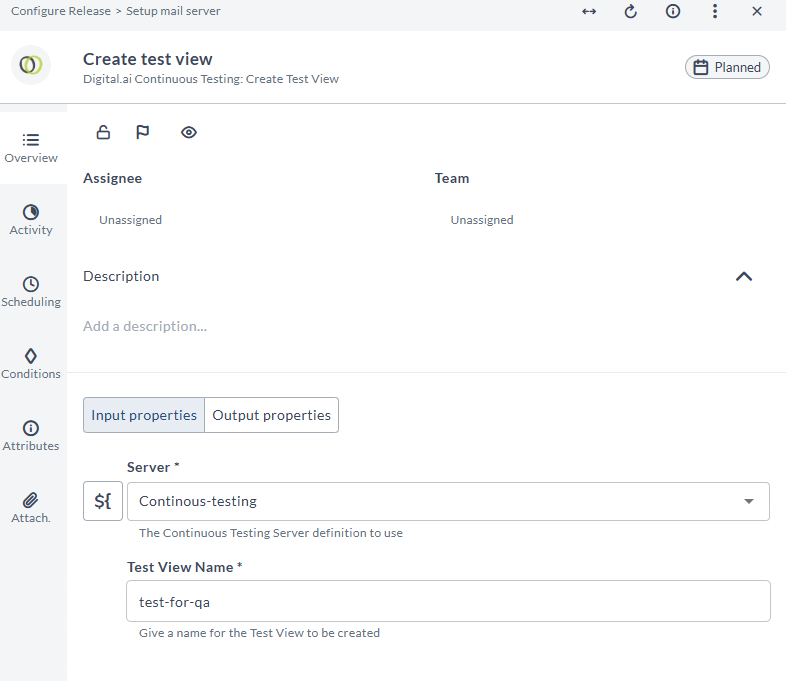
- Click on the created task (Create Test View).
- Enter the required properties in the opened Create Test View task.
- By default, the server field picks the created server. If you have multiple configured Continuous Testing servers, you can pick which one you want to use.
- Enter a string value in the Test View Name field.
- Close the Test View Name task.
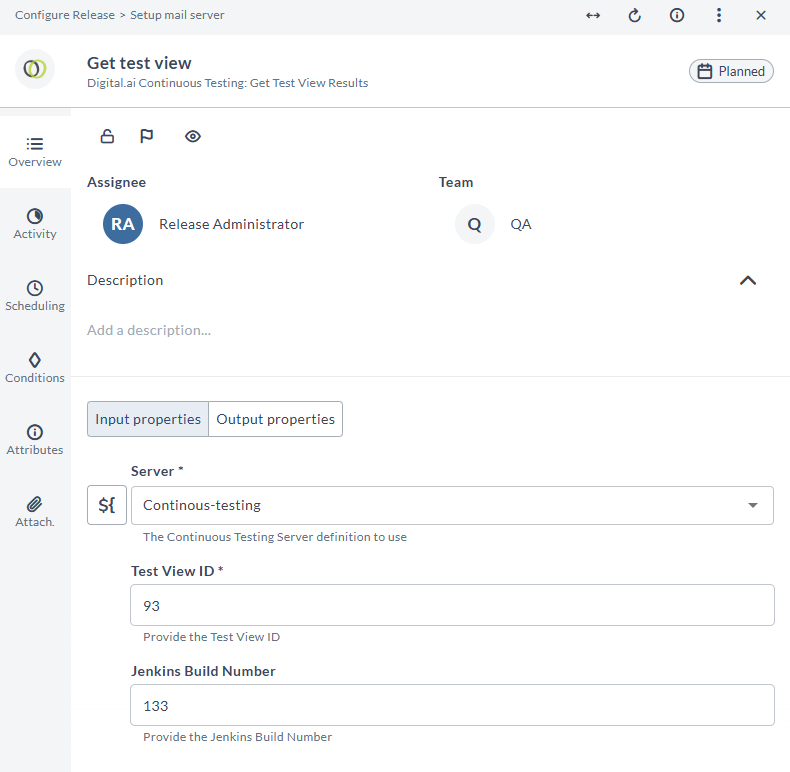
Get Test View Results
To create Get Test View Results task, do the following steps:
- Under the Phase, click on Add task.
- Enter the Title in the Task title field.
- Select the Digital.ai Continuous Testing > Get Test View Results using the dropdown.
- Click on Add.
- Click on the created task (Get Test View Results).
- Enter the required properties in the opened Get Test View Results task.
- By default, the server field picks the created server. If you have multiple configured Continuous Testing servers, you can pick which one you want to use.
- Enter the Test view ID in the Test View ID field. Test View ID is an output property from the Create Test View task. Use release variables to pass this value between tasks.
- Enter the Jenkins Build Number in the Jenkins Build Number field. You can get this value from the Jenkins task. It is an output property of the Jenkins task. Again, use release variables to pass this value between tasks.
- Close the Get Test View Results task.
Create Manual Report Template
To create Create Manual Report Template task, do the following steps:
-
Under the Phase, click Add task.
-
Type the Title in the Task title field.
-
Select the Digital.ai Continuous Testing > Create Manual Report Template using the dropdown.
-
Click Add.
-
Click the created task (Create Manual Report Template).
-
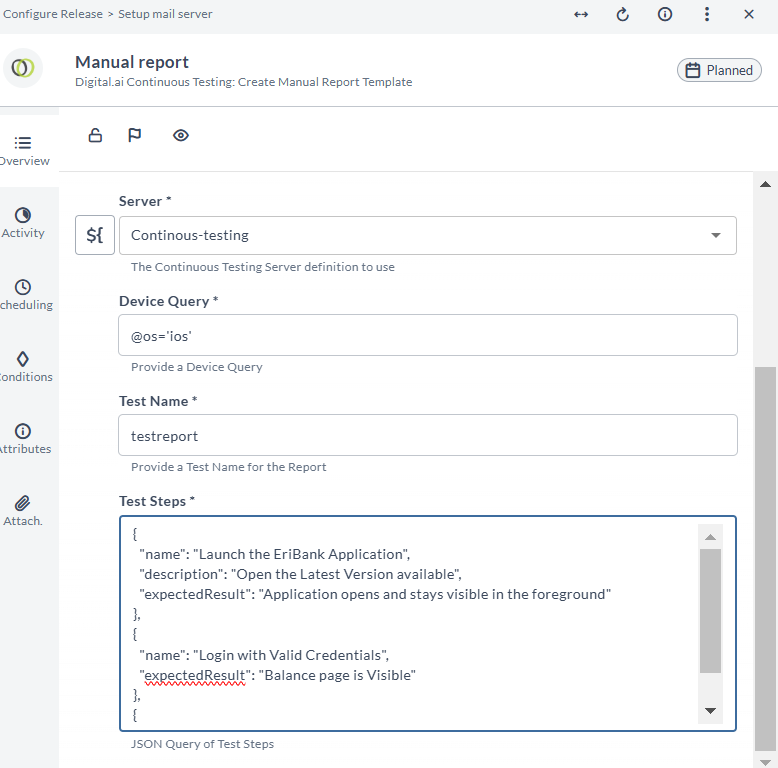
Enter values for the required properties in the opened Create Manual Report Template task.
-
By default, the server field picks the created server. If you have multiple configured Digital.ai Continuous Testing servers, you can pick the oneyou want to use.
-
Enter the appropriate Device Query.
Note: For more information about constructing a device query, see https://docs.experitest.com/display/TE/Device+Queries
-
Enter a Test Name in the Test Name field.
-
Enter the Manual Test Steps in the Test Steps field as a json list.
Sample Steps:
{
 		       "name": "Test Step1:Launch the application",
 			   "description": "Open the Latest Version available",
 			   "expectedResult": "Application opens and stays visible in the foreground"
 		   },
 		   {
 			   "name": "Test Step2:Open the accounts page",
                "expectedResult": "Accounts page is Visible"
}
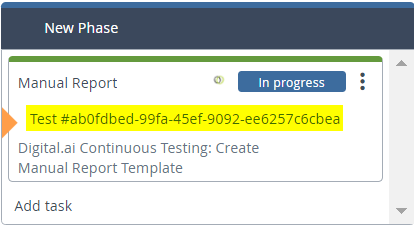
- Close the Create Manual Report Template task and run the release. When the tasks is running, it displays the link to the created Manual Report with the specified Test Steps.
- Click the link, complete the manual testing of all test steps and click Save Report.
- Now the task in Release is complete and a link to the completed manual testing report is displayed.
