Personal Access Token (PAT) Authentication
Overview
Personal Access Tokens (PATs) provide a secure alternative to passwords for authenticating with Digital.ai Release. They are particularly useful for:
- Authenticating with public APIs
- Accessing webhook endpoints
- Automated task execution
PATs are supported for both internal and LDAP users. For external users, use OIDC-based authentication. See Configure OpenID Connect (OIDC) authentication for Release for more information.
Managing Personal Access Tokens
Learn how to create, configure, and manage your Personal Access Tokens for secure authentication.
Creating a PAT
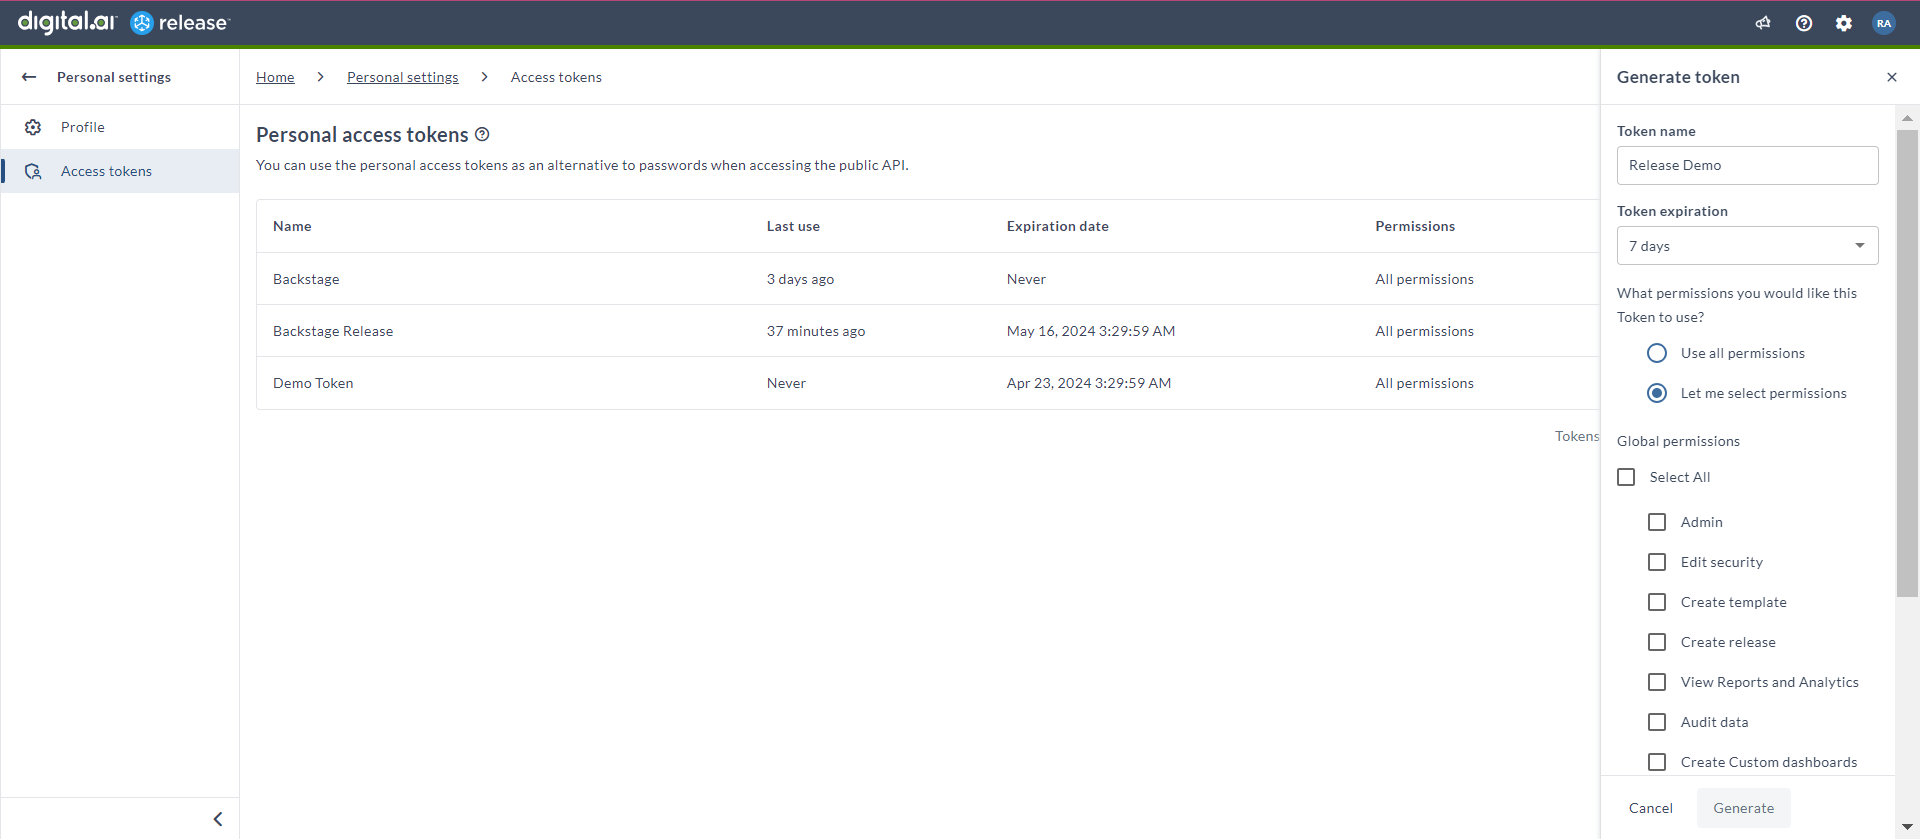
Follow these steps to generate a new Personal Access Token:
- Log in to Digital.ai Release
- Navigate to your profile by clicking your avatar in the top-right corner
- Select Access tokens
- Click Generate new tokens
- In the Generate token panel:
- Enter a descriptive Token name
- Select a Token expiration period
- Choose permission scope:
- Use all permissions: Grants comprehensive access
- Let me select permissions: Allows custom permission selection (See Global Permissions)
- Click Generate
- Important: Copy and store the token securely. The token will not be visible after you leave the page.

Managing Token Expiration
Understanding token expiration settings helps you maintain secure access while ensuring continuous service availability.
Expiration Options
- 7 days
- 30 days
- 45 days
- 60 days
- 1 year
- No expiration
Timezone Considerations
- Expiration dates are displayed in your local browser timezone
- The "Expires in" counter shows the exact remaining time, regardless of timezone
- This ensures consistent expiration tracking across different geographical locations

Deleting a Token
When a token is no longer needed, you can easily remove it to maintain security:
- Locate the token in the Personal access tokens list
- Click the Delete button
- Confirm by clicking Delete token
Using Personal Access Tokens
Learn how to implement PAT authentication in different scenarios, from API calls to webhook configurations.
Authentication with Public APIs
There are two methods to authenticate API calls using PATs:
Method 1: Basic Authentication
curl -u :<pat> 'http://localhost:5516/api/v1/releases' -i -X GET
Method 2: Header Authentication
curl --header 'x-release-personal-token: <pat>' 'http://localhost:5516/api/v1/releases' -i -X GET
Authentication for Automated Tasks
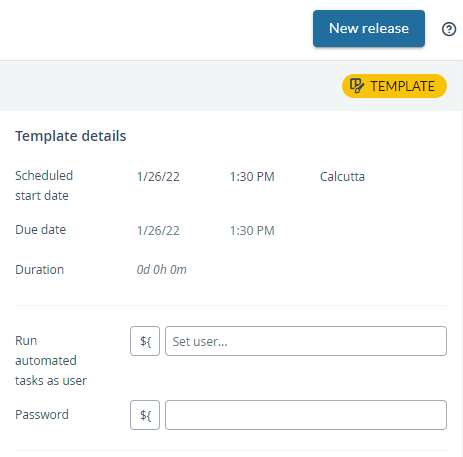
When setting up automated tasks, you can use PATs for secure authentication. Here's how to configure it:
- Leave the username field empty
- Enter your PAT as the password
- Start the release

Configuring Webhook Endpoints with PAT
Follow these steps to set up webhook endpoints using PAT authentication:
- Navigate to Configuration > Connections
- Under Webhooks and Events, click + next to HTTP Endpoint for Webhooks
- Configure the endpoint:
- Select an HTTP endpoint option
- Enter a descriptive Title
- Enable the endpoint
- Specify the Endpoint Path
- Set Authentication Method to Token Authentication
- Enter your PAT in the Secret Token field
- Set the desired Request Retention value
- Click Save to apply the configuration