Personal Access Token for Authentication
This topic describes how to create and use Personal Access Tokens (PAT).
PATs are used as an alternative to passwords for authenticating with Digital.ai Release. You can use PATs with public APIs and webhook endpoints.
Note: Currently, PATs are only supported for internal users. For external users, use OIDC-based authentication. For more information, see Configure OpenID Connect (OIDC) authentication for Release.
Creating a PAT
-
Log in to Digital.ai Release.
-
From the navigation bar, click your profile avatar.
-
From the menu, click Access tokens.
-
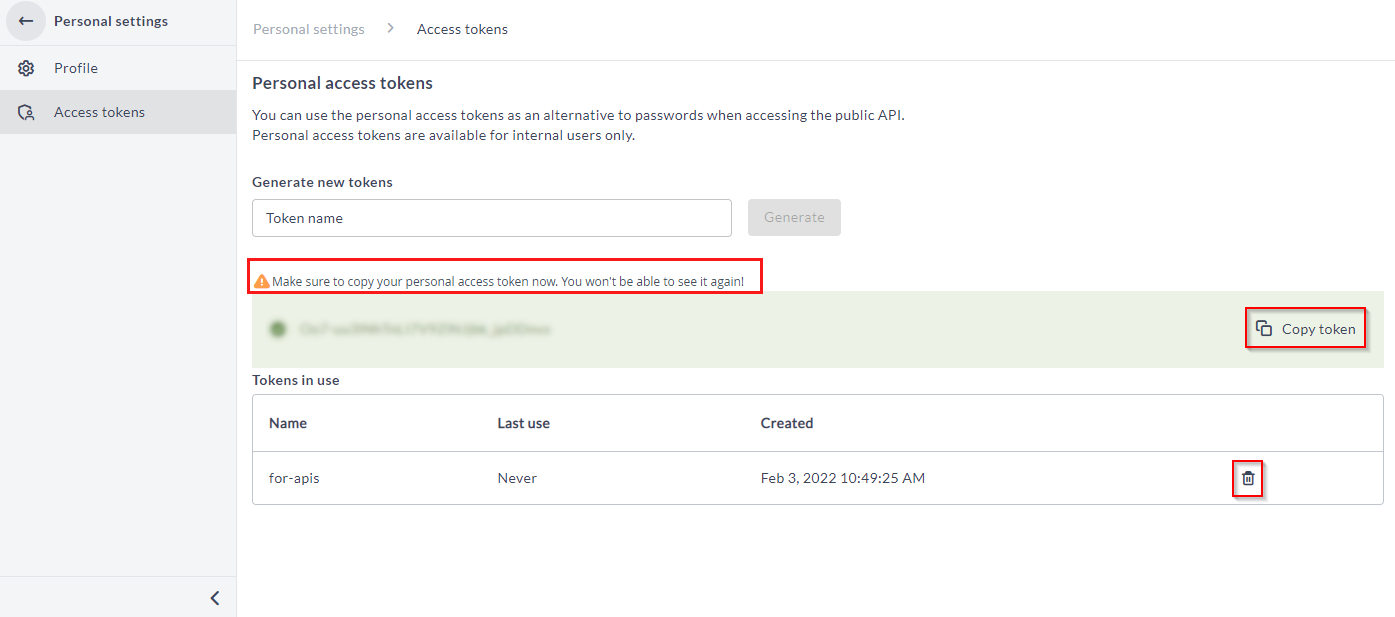
On the Access Tokens page, under Generate new tokens section, type a token name in the Token name field, and click Generate.
The PAT is generated. -
Click Copy token to copy the token, and save the token in a secure location.

Deleting a token
To delete a token, click the Delete icon.
Authenticating with Public APIs Using PATs
You can use the PATs for authentication with public APIs in the following ways:
- Pass PATs in API calls in place of a password
- Pass PATs in the header of an API call
Note: Users who authenticate in web application through an external ID provider, such as LDAP, Okta, or Keycloak cannot use PATs.
Pass PATs in API Calls in lieu of a Password
Here is an example for basic HTTP authentication without a username:
curl -u :<pat> 'http://localhost:5516/api/v1/releases' -i -X GET
Pass PATs in API Call's Header
Here is an example for passing the token as part of the header:
curl --header 'x-release-personal-token: <pat>' 'http://localhost:5516/api/v1/releases' -i -X GET
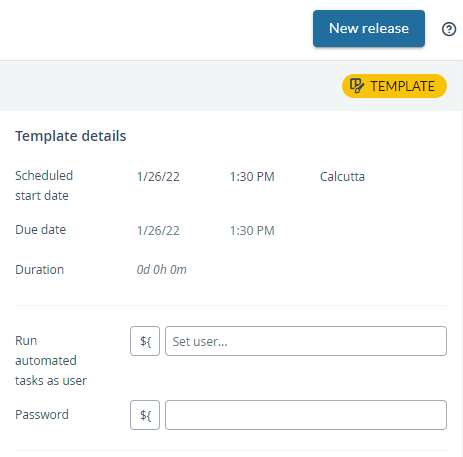
For run as automated user for script tasks (see Assigning an Automated Tasks User), keep the user name field blank and set the PAT as your password, and start the release.

Authenticating with Webhook Endpoints Using PATs
To use PATs with webhook endpoints:
-
From the navigation pane, under Configuration group, click Connections.
-
In the Connections page, under Webhooks and Events group, click the + icon next to HTTP Endpoint for Webhooks.
The New HTTP Endpoint for Webhooks page is displayed. -
Choose an HTTP endpoint by selecting one of the check boxes next to HTTP Endpoint for Webhooks.
-
Do the following:
- In the Title field, enter a name for the configuration.
- Select the Enabled check box.
- In the Endpoint Path field, enter the path for the webhook endpoint.
- In the Authentication Method drop-down list, select the Token Authentication method.
- In the Secret Token field, enter the PAT.
- In the Request Retention field, enter the number of requests you want to keep in the database.
-
Click Save.

-
To authenticate, pass the token with
x-release-webhook-tokenheader.