Notification Settings
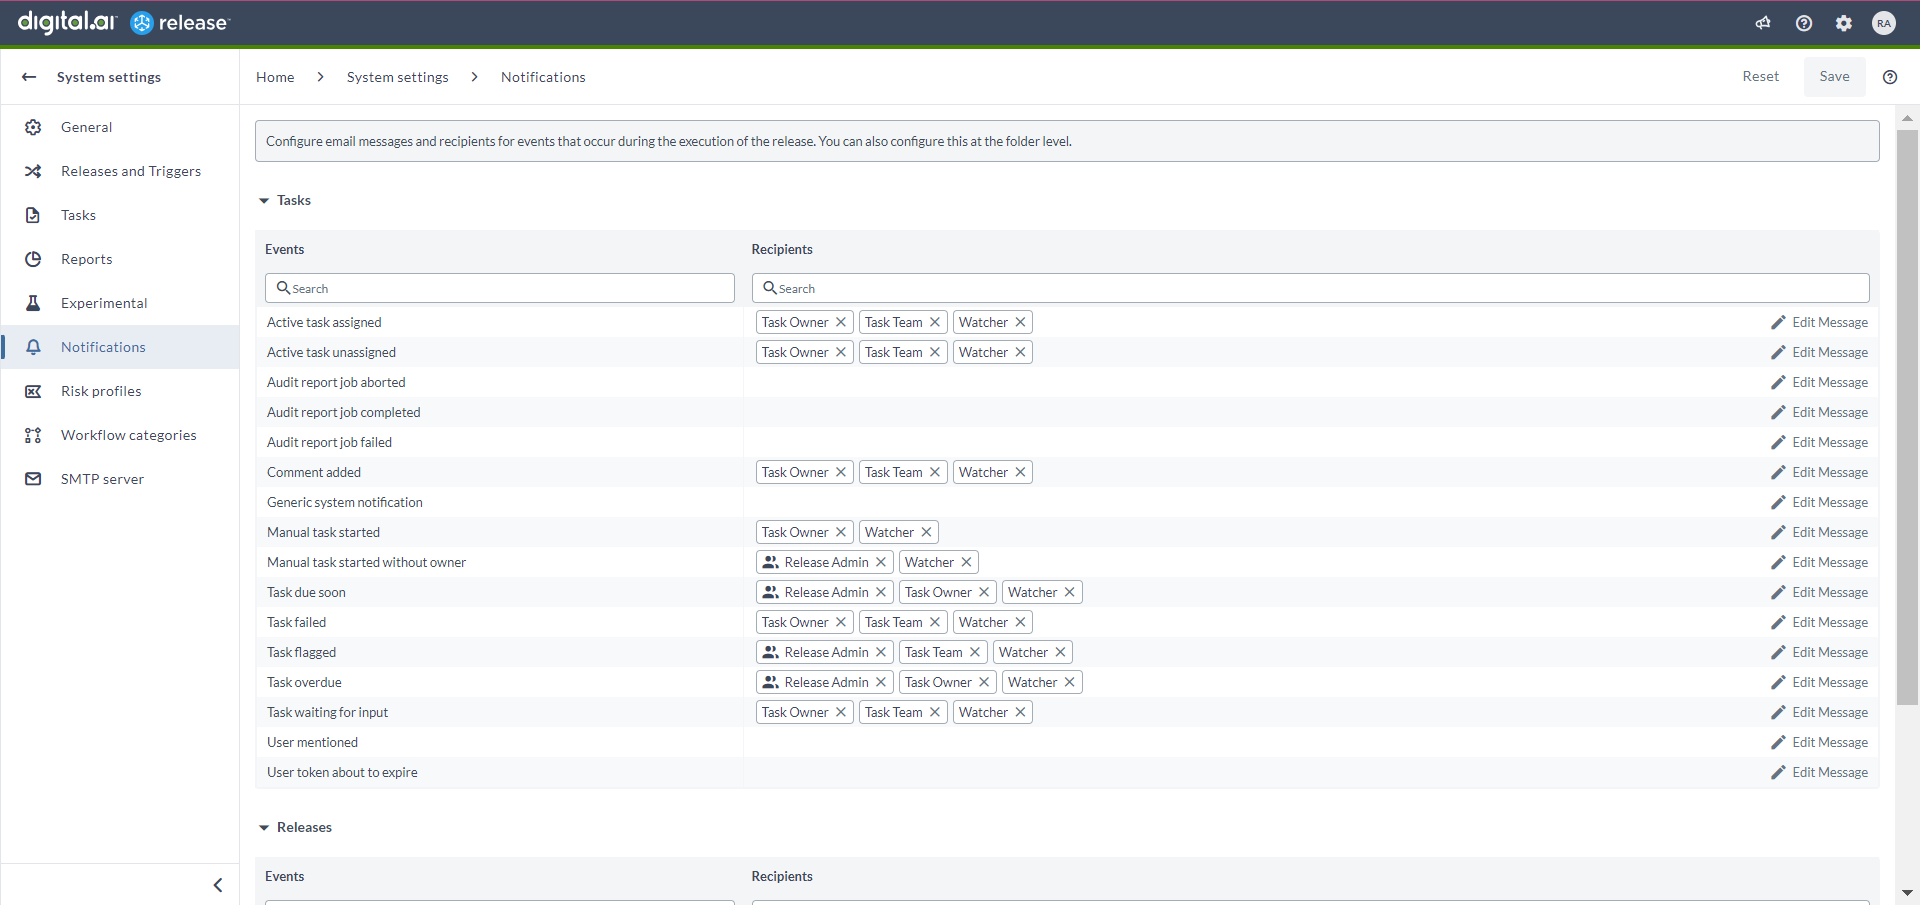
You can configure email notifications in Release by selecting the events that trigger notifications, choosing the recipients, and customizing the email templates. These settings are available only to users with the Admin global permission.
The System Settings page has been reorganized to group related features together, making navigation more intuitive.
Access Notification Settings
- In the upper-right corner, click
.
- Select System Settings > Notifications.

Notification Event Types
Release supports two types of built-in notification events:
- Task-level events
- Release-level events
For more information, see Notifications in Release.
Manage Recipients for Notification Events
You can add or remove recipients for each notification event:
- To remove a recipient, click the x next to the recipient name.
- To add a recipient, click inside the recipient field for an event, start typing a name, and press Enter.

Available recipient types:
- Release Admin
- Task Owner
- Task Team
- Watcher
If an event is configured to notify only the Task Owner, but the task has no owner, Release automatically sends the email to the Task Team.
Add Watchers on Tasks
You can add yourself as a Watcher on tasks to receive email notifications when events occur on those tasks. To add other users as watchers on a task, you must have the edit task permission.
For more information, see Working with tasks.
Edit Notification Message Templates
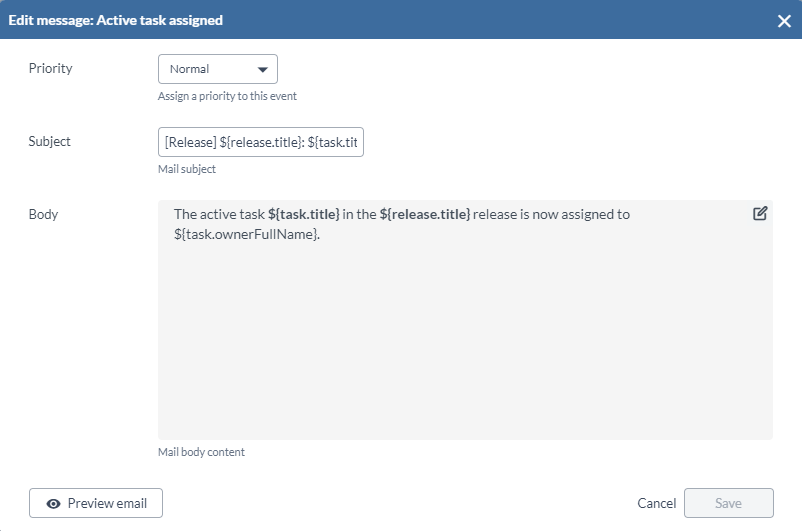
You can customize the email template used for each notification event.
Open the Template Editor
On the Notifications page, locate an event and click Edit Message.

Configure Template Fields
You can modify:
- Priority (High, Normal, or Low)
- Subject
- Body (supports Markdown)
Click Save to confirm the changes or Cancel to discard them.
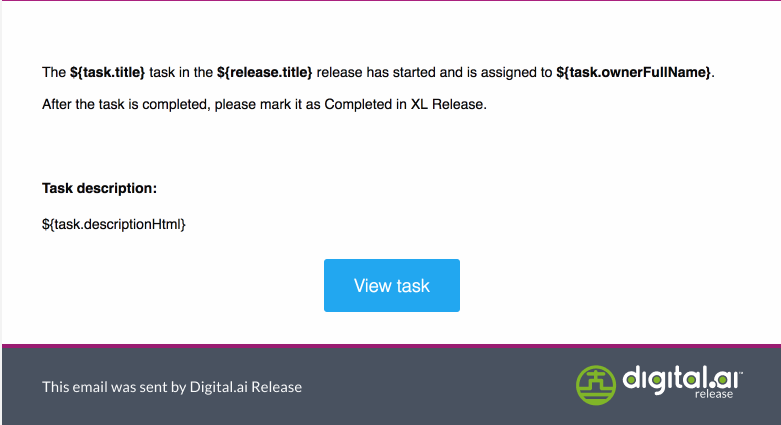
To preview the email, click Preview email. The preview opens in a new browser tab.

Variables Supported For Email Template
Use the following variables in your templates:
| Variable | Description |
|---|---|
${url} | Server URL from configuration |
${release.*} | Release properties |
${task.*} | Task properties |
${comment.*} | Comment properties |
${release.url} | Direct link to the release |
${task.url} | Direct link to the task |
${task.ownerFullName} | Full name of the task owner |
${task.descriptionHtml} | Task description that was processed by Markdown |
${task.dueInHours} | Hours until the task is due |
${task.dueInMinutes} | Minutes until the task is due |
${comment.authorFullName} | Full name of the comment author |
${comment.textHtml} | The comment text that was processed by Markdown |
The task description is always included in the email template by default.
Additional Customization (Using Mustache)
Release supports mustache-style placeholders to insert dynamic values. Unlike standard Mustache ({{variable}}), Release uses a custom format: ${variable}.
For more information on mustache syntax, see Mustache Manual.
Troubleshooting Chrome Behavior for HTTP Links
When viewing a notification email in Chrome, clicking View task or View release may cause the browser to rewrite http:// links as https://, which can lead to an error.
To fix this:
- Manually switch
https://back tohttp://in the address bar, or - Open
chrome://net-internals, select HSTS, remove the Release domain, and clear your browser cache.