Working With Tasks Using New Task Drawer
The New Task Drawer is a feature in Tech Preview—released in Digital.ai Release 22.3—enabled by default. You can disable this feature (using the Feature flags) if you do not want to use the New Task Drawer for Manual and Automated Tasks.
The Task Drawer was already introduced in Digital.ai Release 22.2 as a feature in Tech Preview only for Manual tasks. Now, with Digital.ai Release 22.3 the design is enhanced and this feature is applied to both Manual and Automated tasks. For more information, see the Enable or Disable Task Drawer for Tasks section on this page.
Manual tasks are steps in a Template or Release that are to be completed manually by the assigned user. These tasks are either assigned to a single user or to a team and are displayed with a gray border in the Release flow editor. For more information on how Manual tasks are assigned, see Configure teams for a release. Automated tasks are different from manual tasks, and a Release execution engine performs an automated script to complete an automated task. To understand the difference between the task types, see Task types in Release.
Here's how the new Task Drawer looks like.
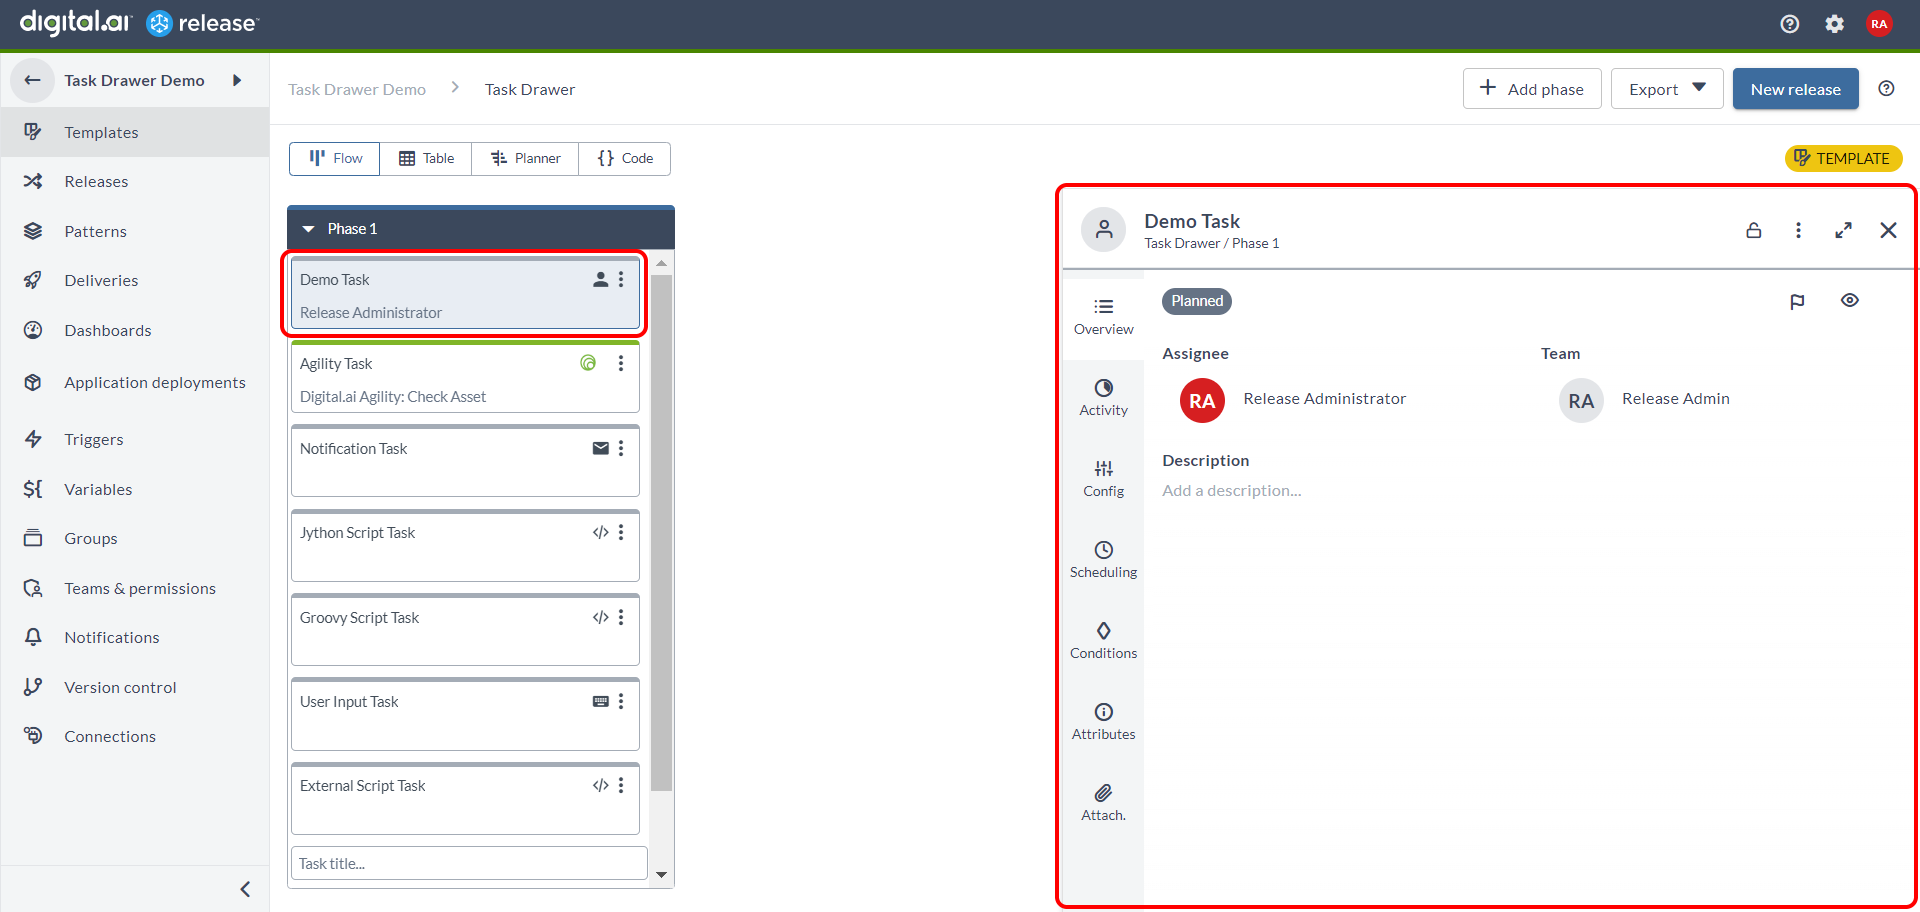
Task Drawer for Tasks
The following sub-sections illustrate how to work with tasks using the Task Drawer.
Header
The Header of the Task Drawer allows you to:
- Hover over the icon to view the task type
- View or modify the task title
- View the task breadcrumb as Release title / Phase title
- Use the Lock icon at the header of the Task Drawer to lock or unlock tasks. For more information, see lock tasks.
- Click the
button to do the following:
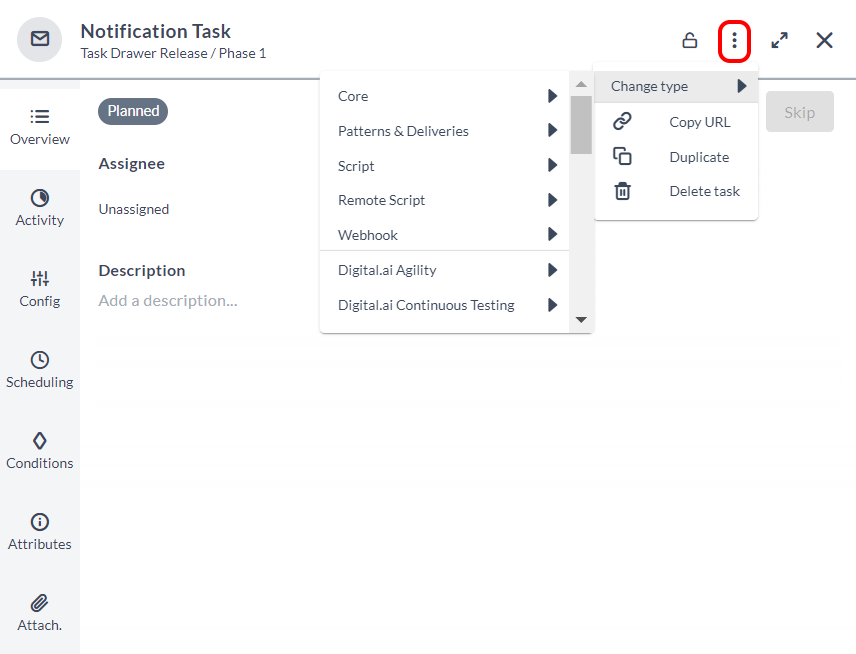
- Change task type
- Copy task URL
- Duplicate task
- Delete task
- Maximize or minimize the Task drawer screen.
- Close the task.
Overview Tab
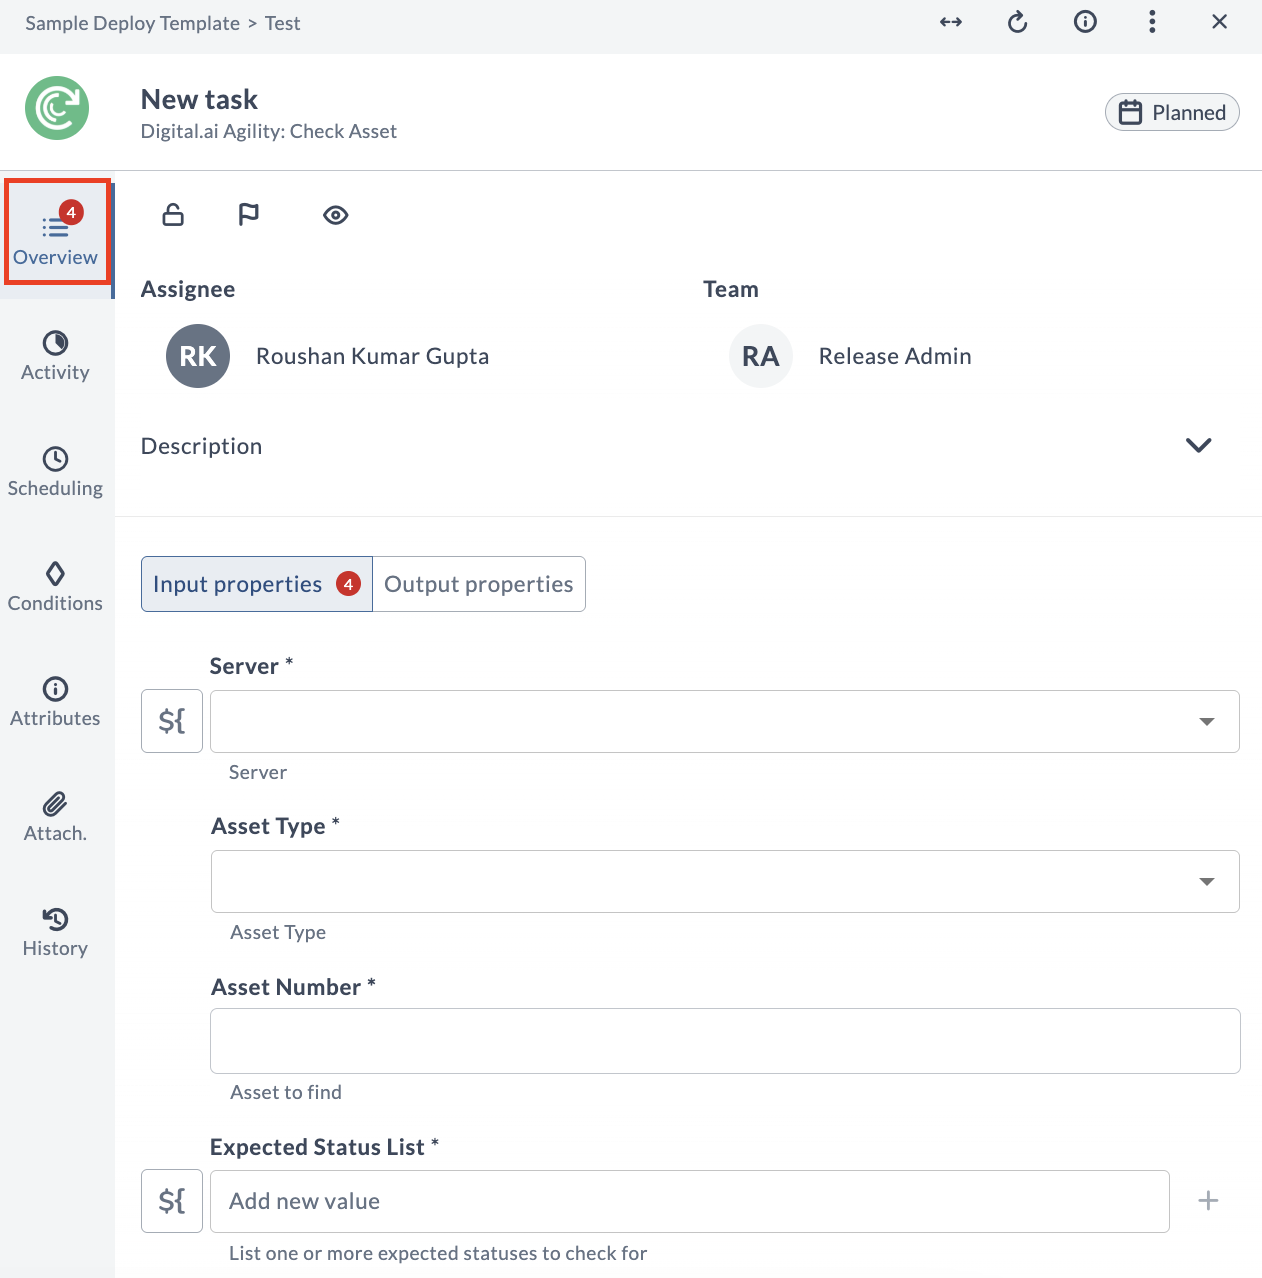
The Overview tab contains everything required to complete a task as a runtime user. It provides information about the Assignee, Team, and Description.
Add an Assignee or Team
- Hover over the Assignee or Team fields. These fields display an Unassigned placeholder when no assignees are assigned.
- Click the Unassigned placeholder and select the assignee or team from the drop-down lists respectively.
Note: Users can be assigned directly using the Assign to me option from the ellipsis menu in the Release flow editor.
Add Descriptions
- Hover over the Description field. The field displays an Add a Description placeholder when no description is available.
- Click the Add a Description placeholder and enter the description for the task.
- Click Save to save your changes.
Activity Tab
The Activity tab displays the conversations related to the task. For more information, see Mention Users in the Release task.
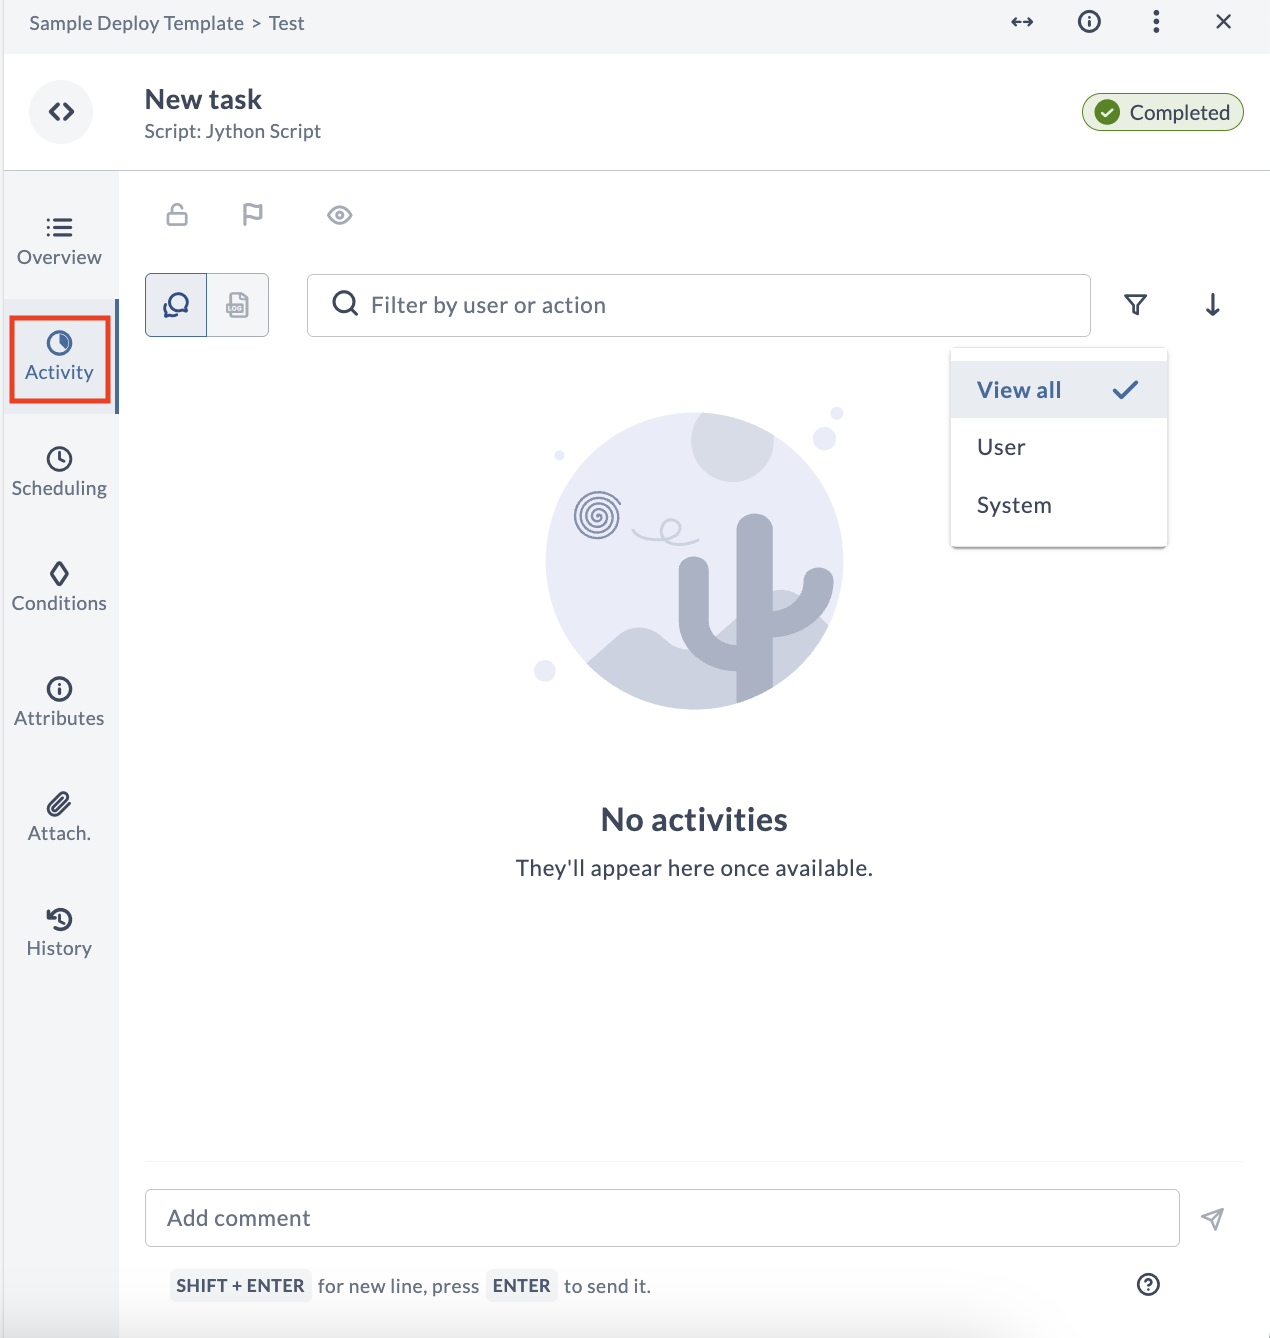
Manage Conversations
- Click Activity in the left-navigation pane of the Task drawer.
- To add a comment, type some text in the Add comment field at the bottom and press Enter. The comments are displayed above the Add comment field.
- You can filter comments using the Search filter. Additionally, you can perform granular filtering using User messages or System and logs messages.
- To edit or delete a comment, hover over the comment and edit or delete respectively.
- Click Newest first to sort the latest comments from top to bottom.
- Click Oldest first to sort the oldest comments from top to bottom.
Config Tab
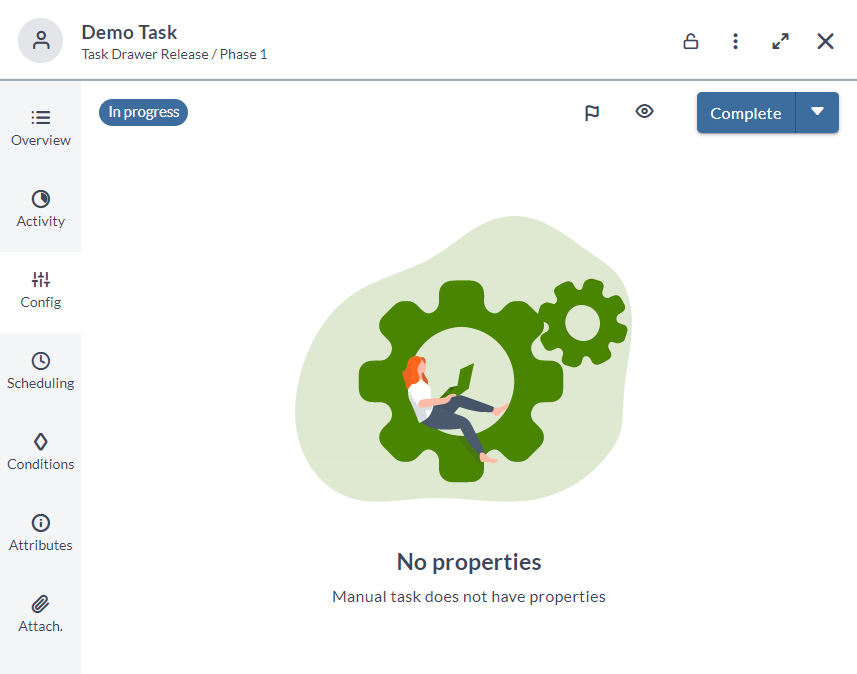
User action task types like Manual, Gate, and User Input tasks do not have properties defined.
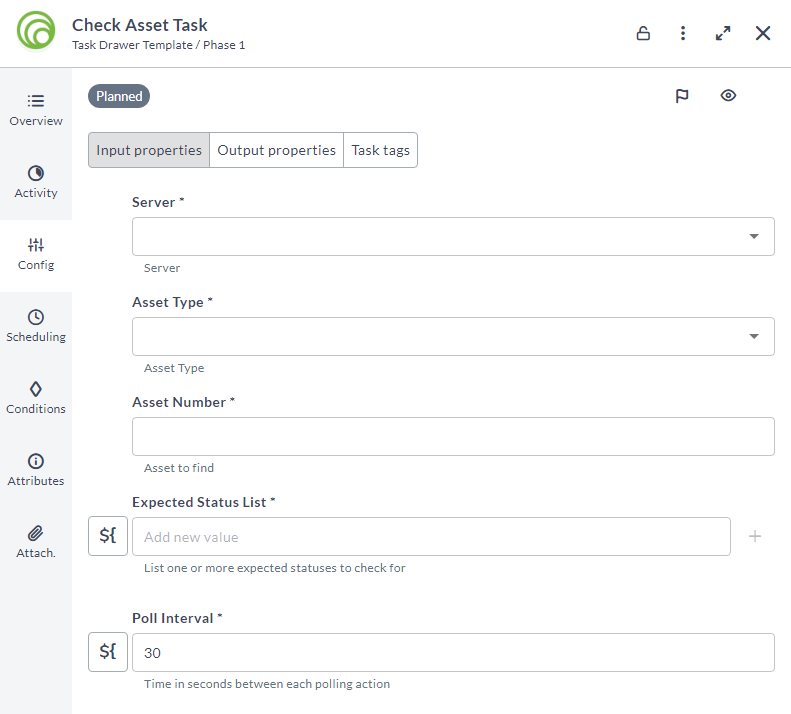
Automated Tasks have properties defined, and the input or output properties vary depending on the type of the task. The following screenshot is an example of an automated task (Check Asset task from Digital.ai Agility).
Create Connections
For automated tasks, you can now directly create a connection from the Config tab itself. It is explained using a JIRA - Create Issue task below.
- Add a Create Issue task.
- In the Config tab, select the Server* drop-down list.
- Click Create new Server.
Note: If the connection to a JIRA server is already available on the folder or global level, it will be displayed in the drop-down list.
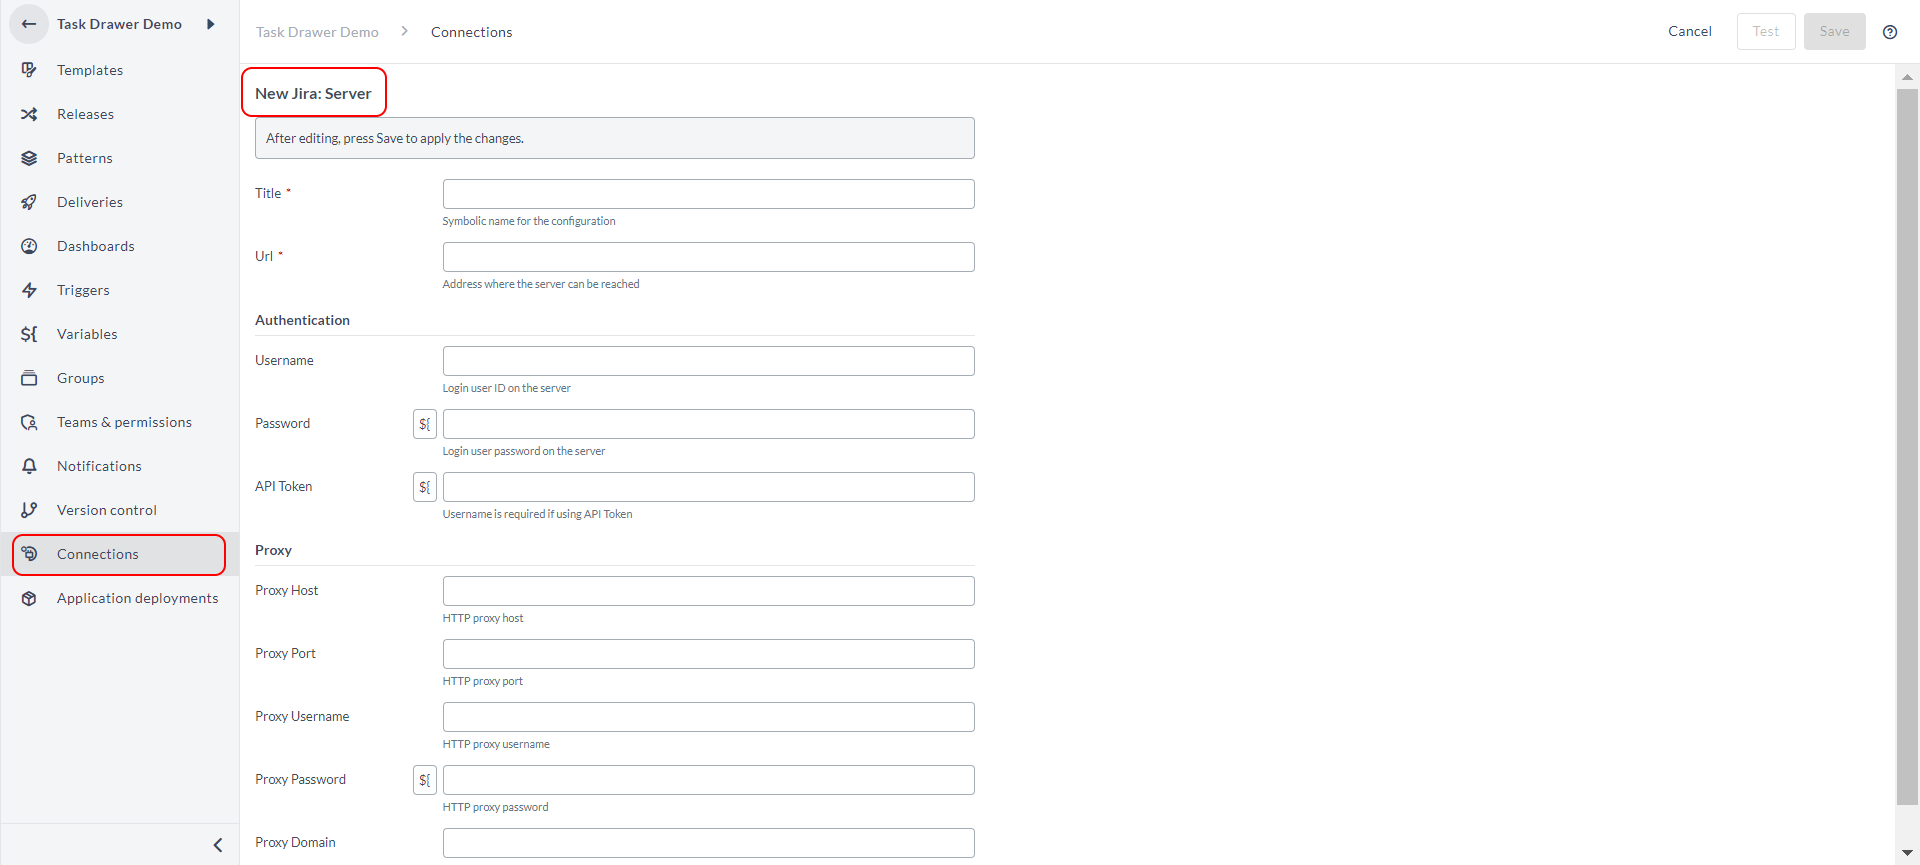
- The Connections section opens for the respective folder with the New Jira: Server screen.
Add Task Tags
- In the Config tab, select the Task tags section.
- In the Task Tags field, enter any text and press Enter. Tags are added in the Task Tags field.
- You can use these tags to filter the tasks.
Scheduling Tab
The Scheduling tab is used to schedule a time period for tasks.
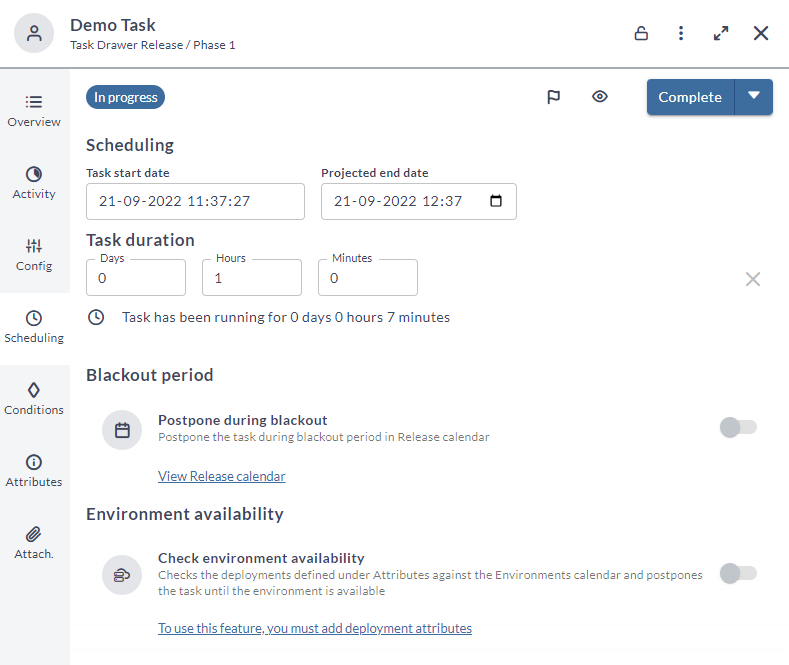
Set Task Duration
- Click Scheduling in the left-navigation pane of the Task drawer.
- In the Scheduling section, select the projected start date and projected end date of the task using the Projected start date and Projected end date fields respectively. The Task duration section, calculates the duration of the task and displays it in the Days, Hours, and Minutes fields.
Note: Once the release is started and the task is set to In-progress, the Projected start date is changed to Task start date.
- In the Blackout period section, you can switch on the Postpone during blackout toggle to postpone the task during the blackout period.
- You can view the blackout period using the View Release Calendar link. For more information, see Blackout period.
- In the Environment availability section, you can switch on the Check environment availability toggle to postpone the task until the environment is available. For more information, see Environment availability.
Conditions Tab
The Conditions tab is used to manage preconditions and failure handlers for your tasks.
Enable Precondition
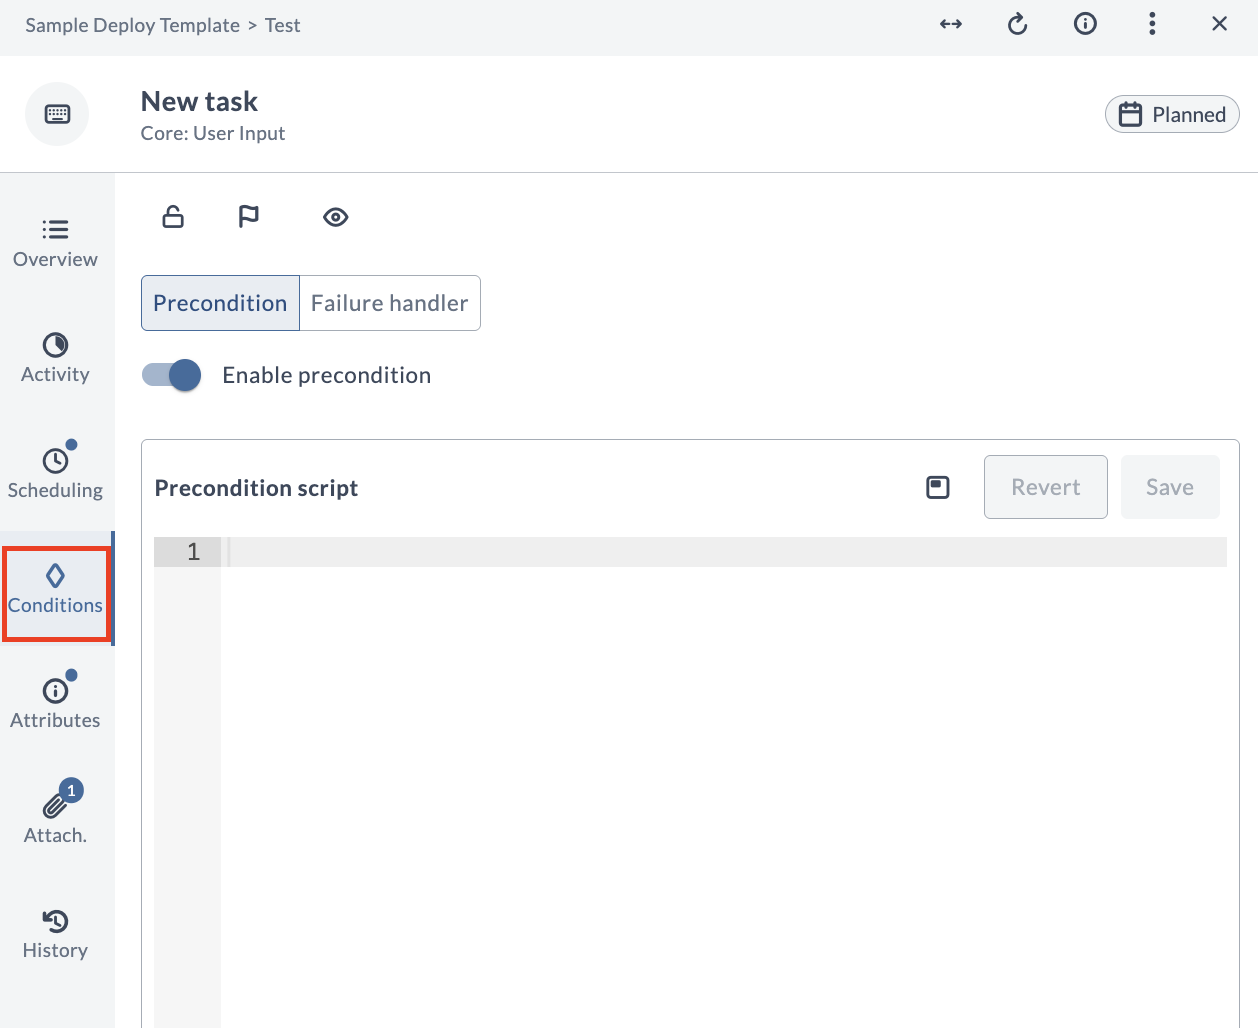
- Click Conditions in the left-navigation pane of the Task drawer. Precondition tab is selected by default.
- Switch on the Enable precondition toggle button. The Precondition script field opens.
- Enter or copy your script.
- Click Save to save your changes.
Enable Failure Handler
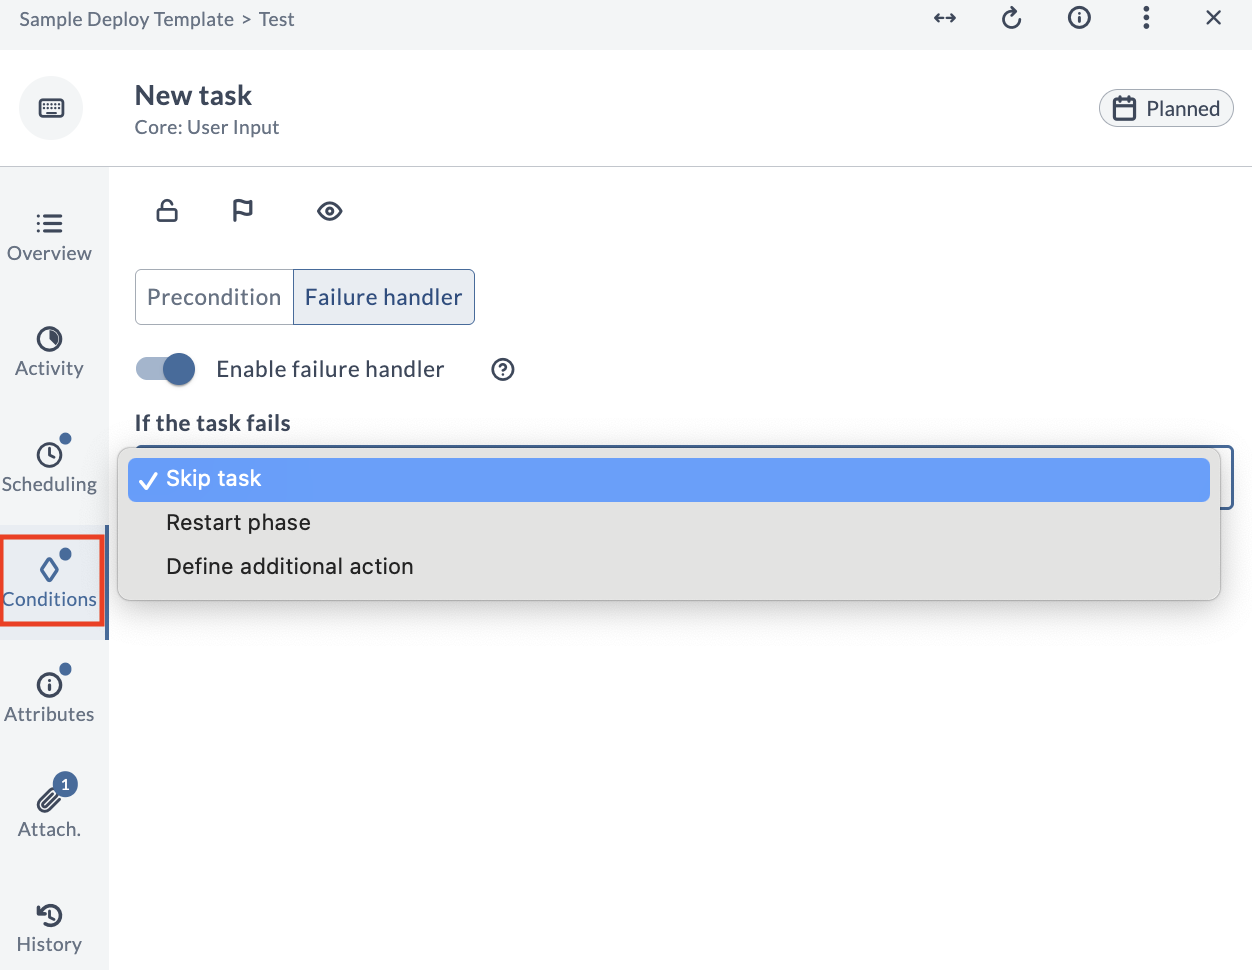
- Click Conditions in the left-navigation pane of the Task drawer. Precondition tab is selected by default.
- Click Failure Handler tab.
- Switch on the Enable failure handler toggle button.
If the task fails drop-down list is enabled with the following options:
- Skip task
- Restart Phase
- Define additional action
- Select Skip task to skip the task if it fails.
- Select Restart Phase to restart the phase itself if the task fails.
- Select Define additional action. The Failure handler script field opens.
- Enter or copy your script.
Note: If you do not handle task failure within the script, your task will fail.
- Click Save to save your changes.
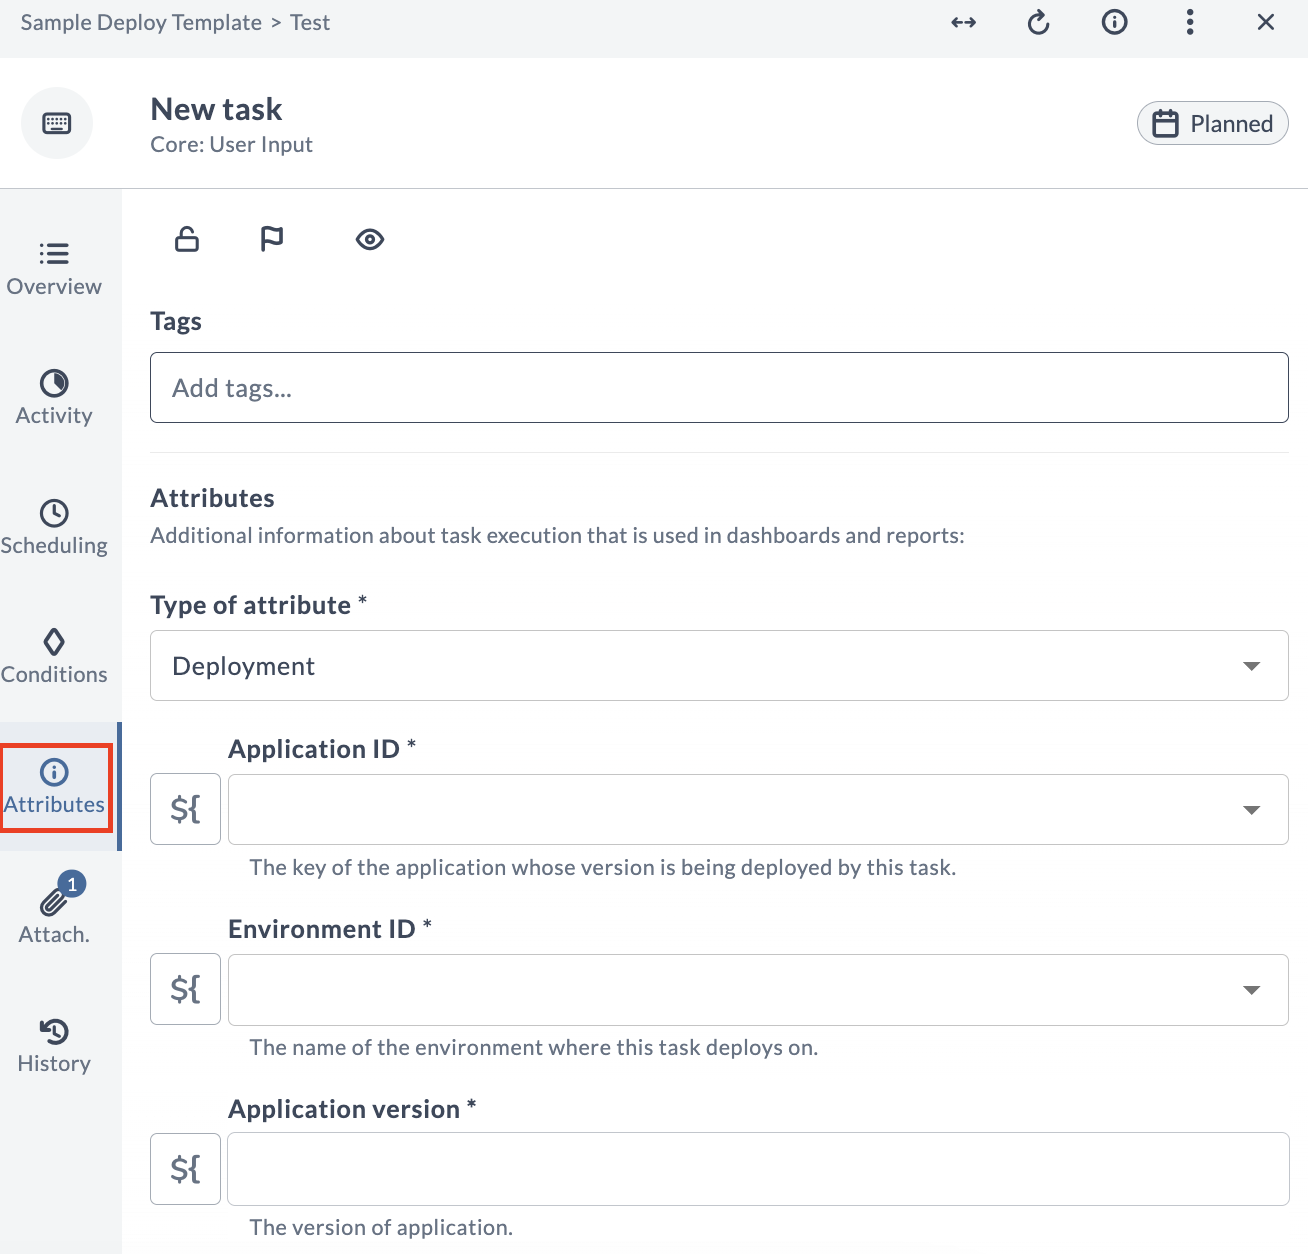
Attributes Tab
The Attributes tab is used to link deployments to your deliveries.
Add Attributes
- Click Attributes in the left-navigation pane of the Task drawer.
- Click Add attribute.
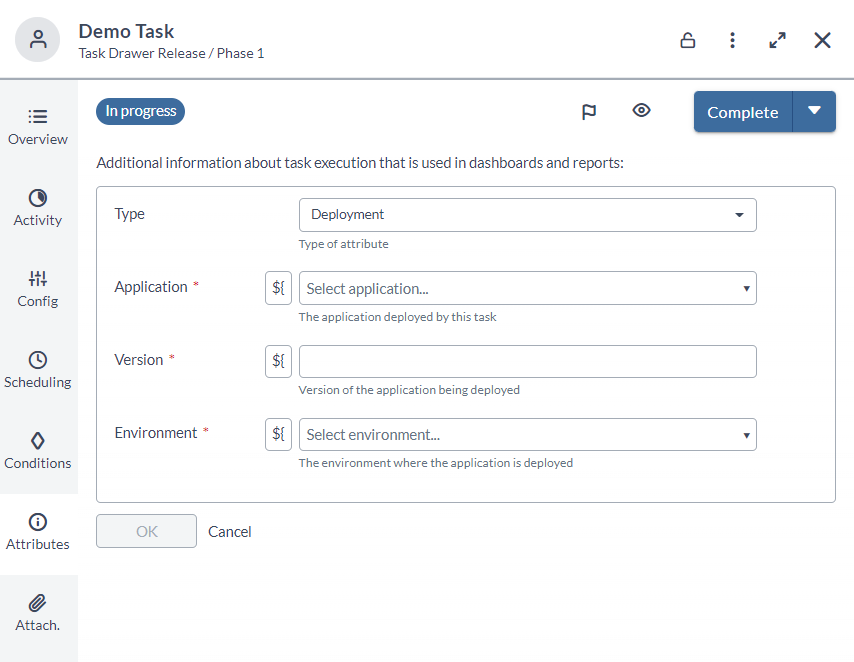
- In the Type drop-down list, select the attribute type. This will enable the other fields.
Note: Click ${ (Variable switching button) next to the Application, Version, or Environment fields, to toggle their field entries to variables or manual entries.
- In the Application drop-down list, select the application.
- In the Version field, enter the version number of the application.
- In the Environment drop-down list, select the environment.
- Click OK to save the changes.
Attachments Tab
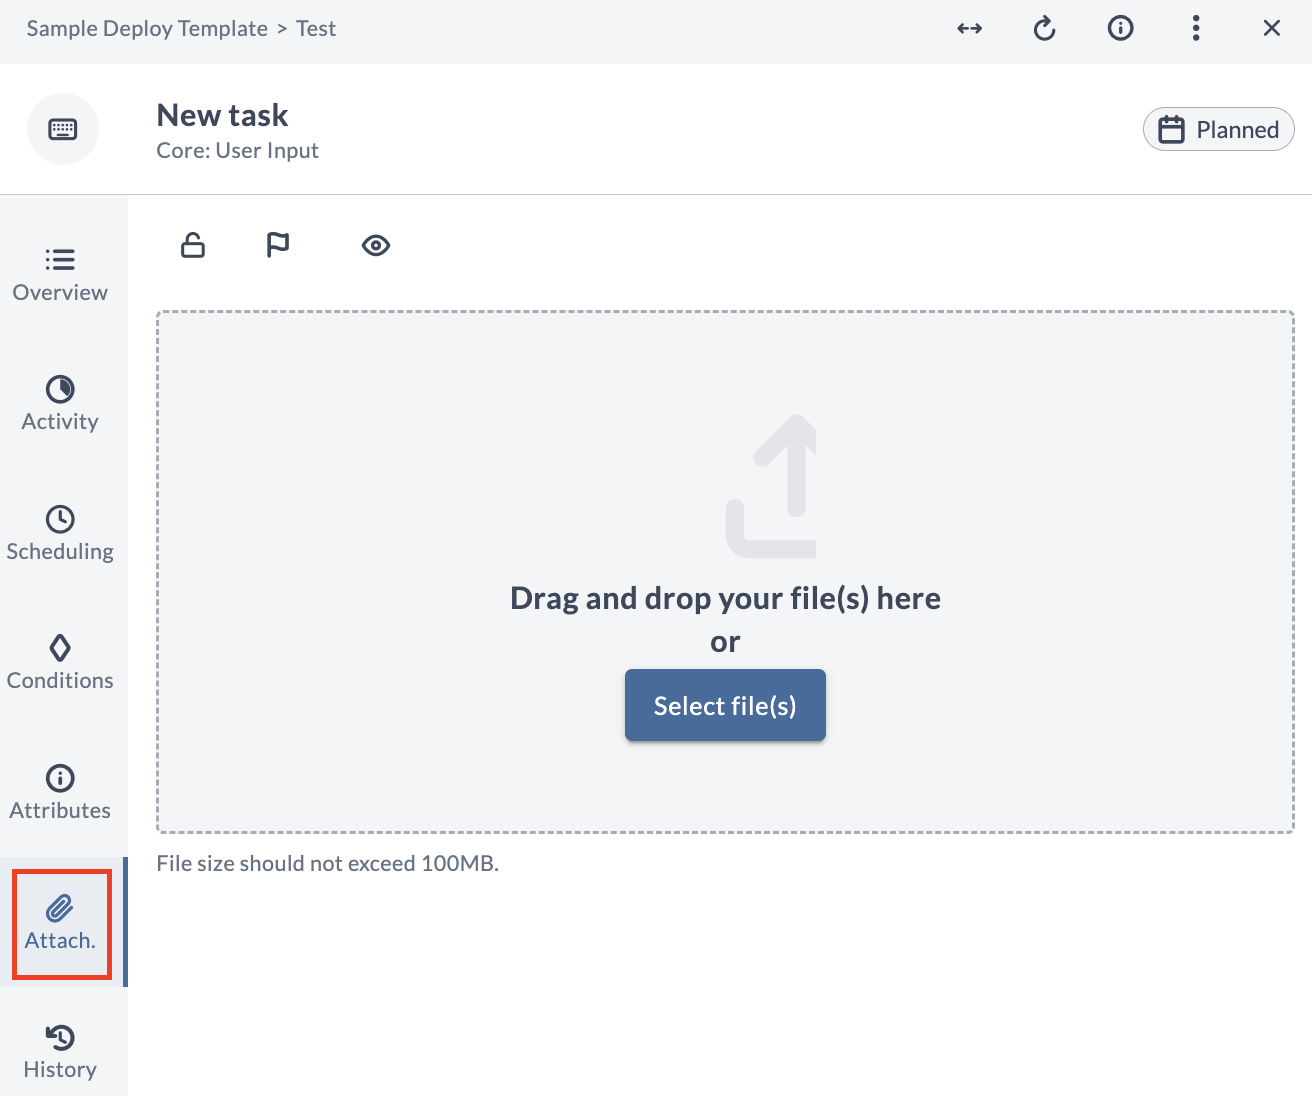
The Attach. section is used to add attachments for the task.
Add Attachments
- Click Attach. in the left-navigation pane of the Task drawer.
- Click Select file(s) to select your attachment and add. Additionally, you can also drag and drop your attachments.
Common Features
Some features are common and are available in the top of the Task Drawer for all the tabs.
Set Status Flags
Use the status flags to signal about the status of the risk involved in the completion of a task. It alerts the Release Manager and other users when they navigate through all the sections of the Task Drawer.
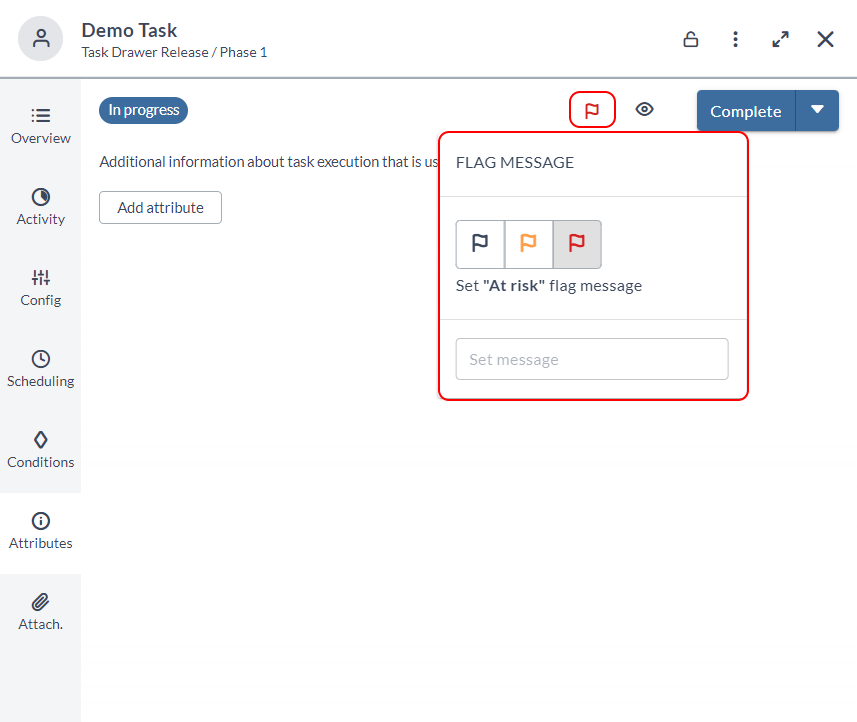
- Click the Flag icon below the header of the Task Drawer. The FLAG MESSAGE pop-up appears.
- You can set the flag as follows:
- Black Flag indicates the flag message is set to None
- Orange Flag indicates the flag message is set to Attention needed
- Red Flag indicates the flag message is set to At risk
- You can use the text box to customize the flag message.
Add Watchers
Watchers feature is used to notify watchers when events occur.
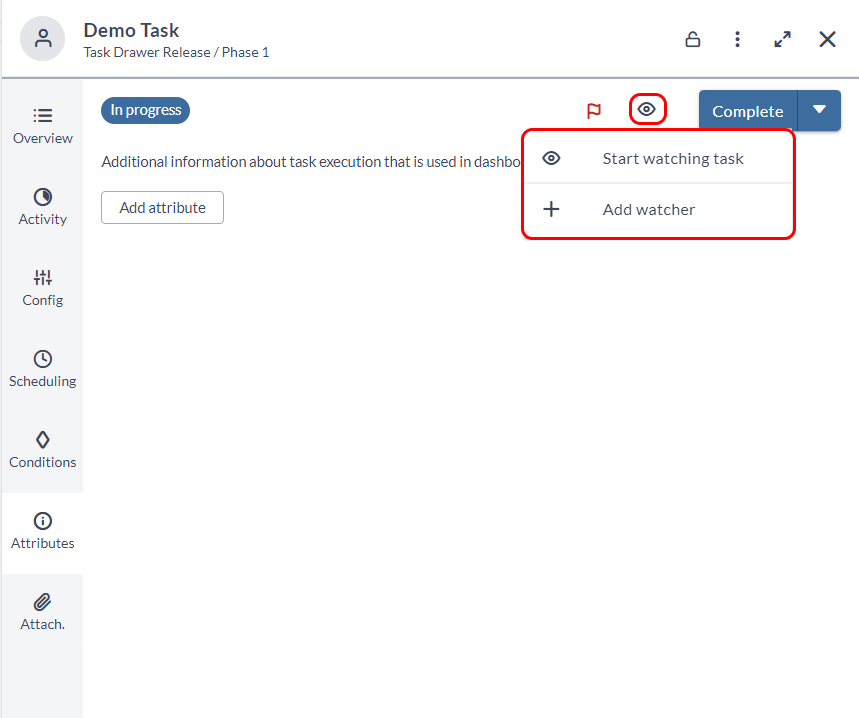
- Click the Eye icon next to the Flag icon in the header of the Task Drawer.
- Click Start watching task to watch the task. You can stop watching the task by clicking Unwatch.
- Click Add watcher to select other users to watch this task.
Change Task Status
Use the Action button drop-down list next to the watchers Eye icon to change the status of the tasks. Note that, this can also be performed from the ellipsis menu on the tasks in the Release flow editor.
Enable or Disable Task Drawer for Tasks
- Log in to Digital.ai Release.
- On the top-right corner, click Settings > System settings. The System settings screen appears.
- In the left-navigation bar, click Feature flags.
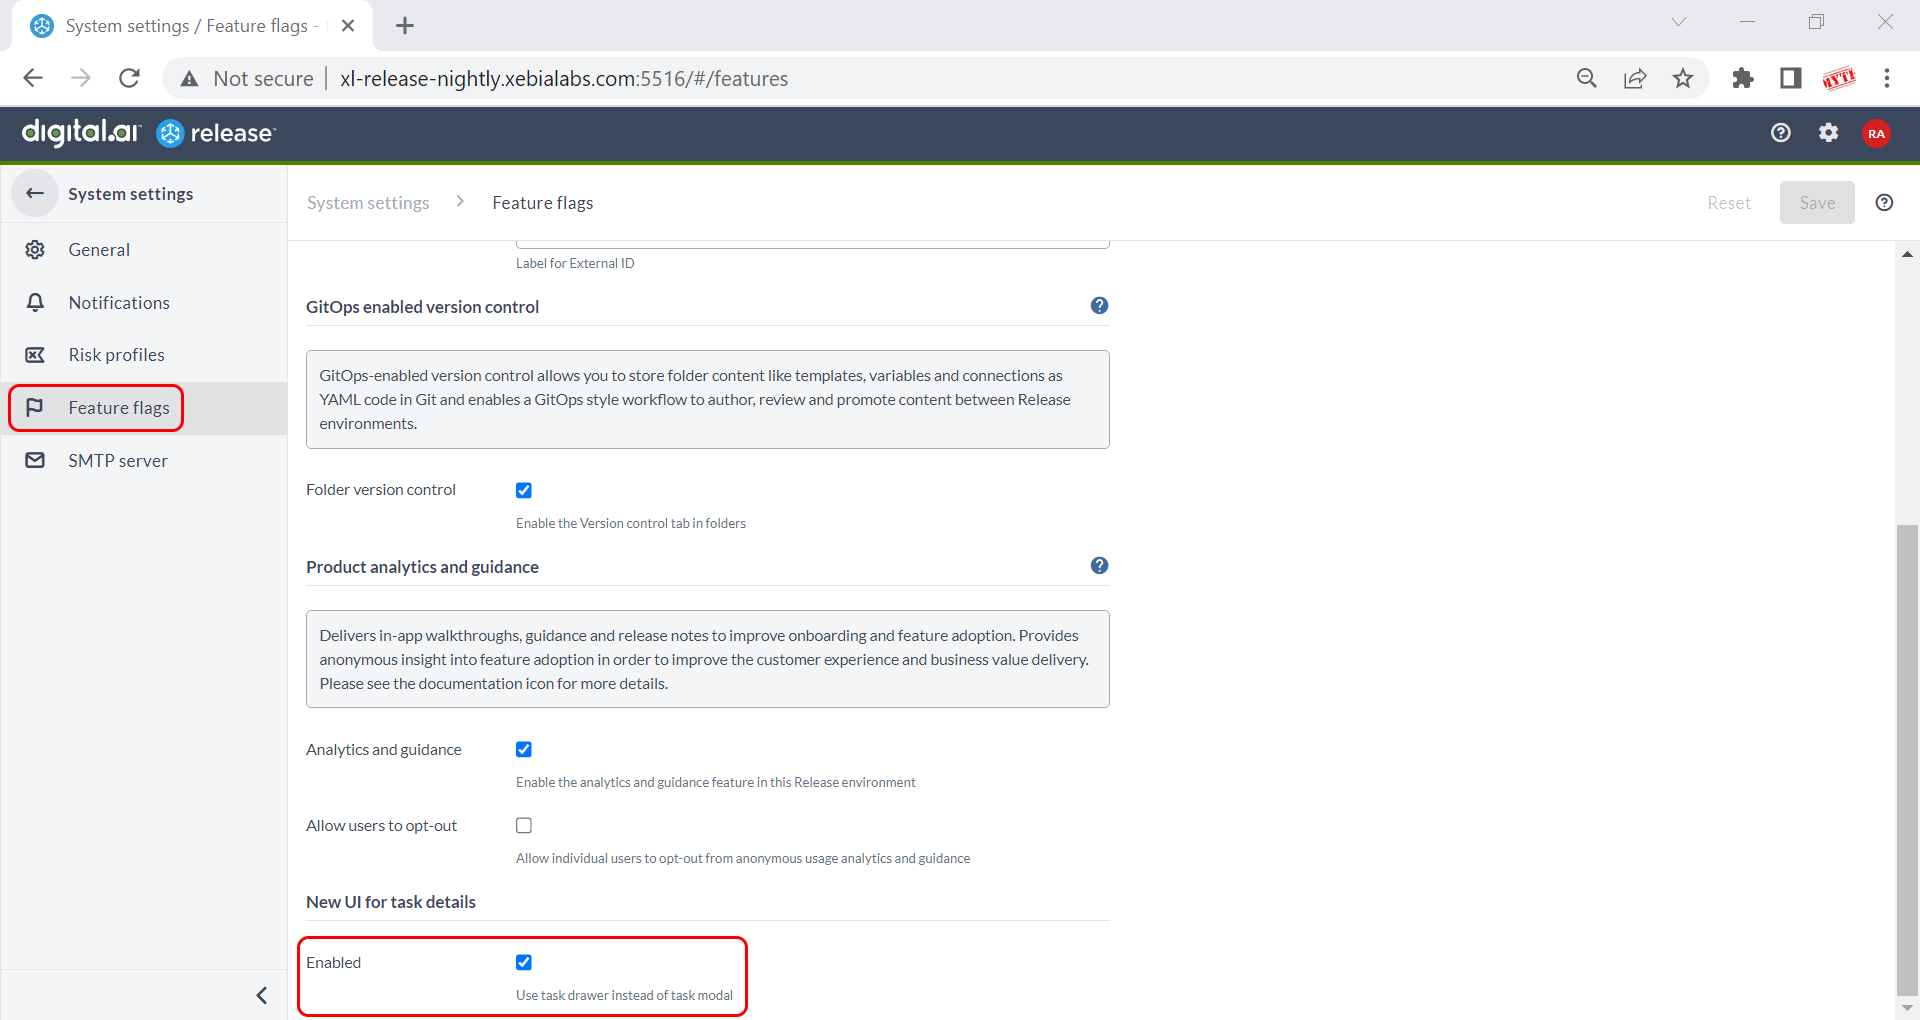
- Select the Stable tab. In the New UI for task details section, the Enabled checkbox is selected by default. This means the new Task Drawer for tasks is enabled by default.
Note: If you want to use the Task Modal for tasks instead of the new Task Drawer, clear the Enabled checkbox and click Save.
Enable or Disable Task Drawer for Tasks—Opt Out of Task Drawer
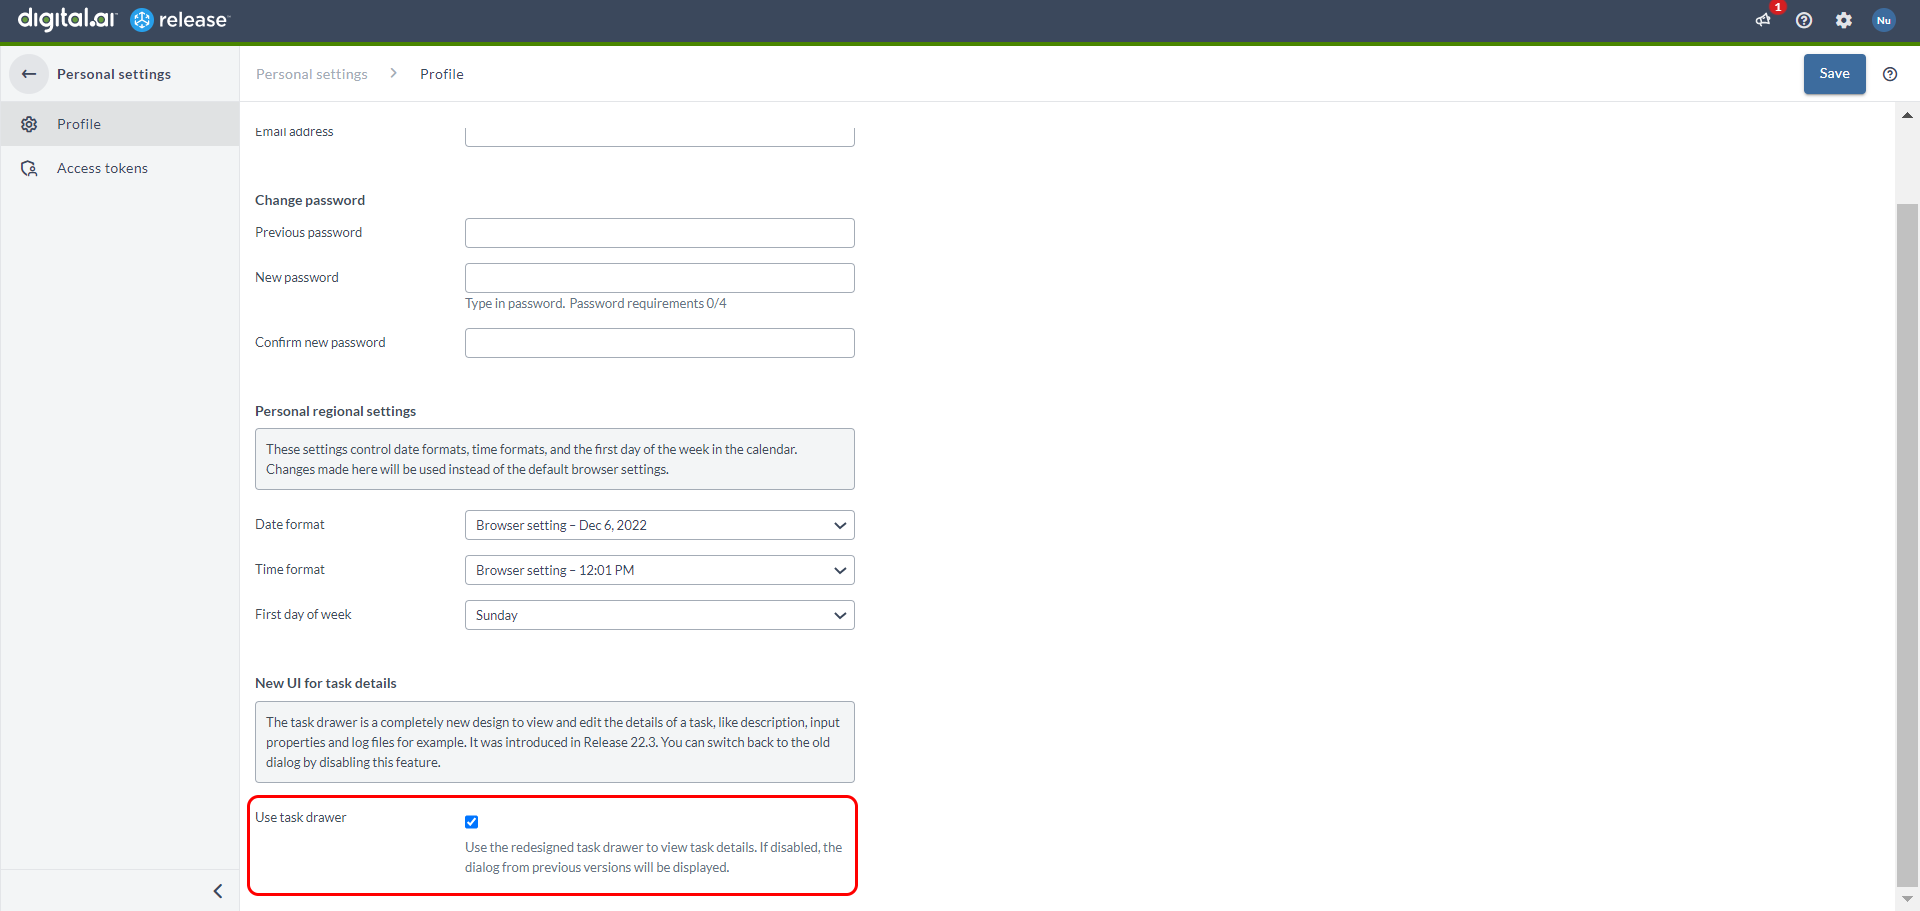
Digital.ai Release 23.1 and later allows non-admin users to enable or disable the Task Drawer feature. This is possible if and only if your Administrator has enabled the new Task Drawer and you want to opt out of it in favor of the Task Modal.
-
Log in to Digital.ai Release.
-
In the Profile page, under the New UI for task details section, clear the Use task drawer check box to opt out from the Task drawer and use the Task modal instead.
Real time Task Updates
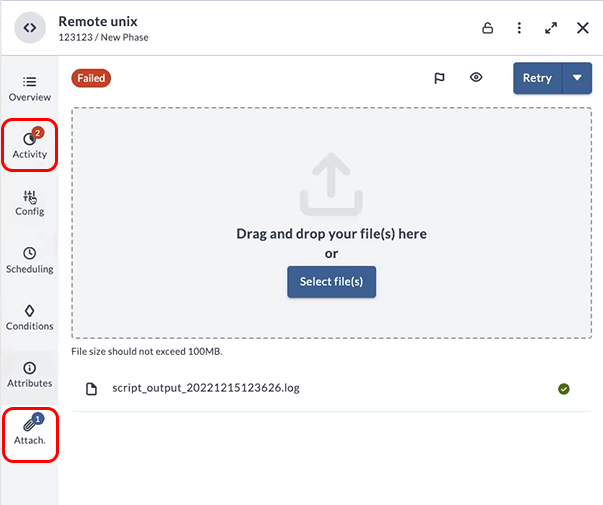
Real time updates about events like Comments and Container logs are now displayed in the Task Drawer.
Additionally, help notification icons are displayed in the Activity and Attachments tabs whenever an event occurs.
Enhanced Task Details View
The Task Details view for the Task Drawer is now enhanced to preview and edit the details of a task. To enable this feature, click System setting > Feature flags, navigate to the Task details (redesigned UI) section and select the Use new Task details version checkbox.
Note: The Task Drawer feature was introduced with Release 22.3. However, with every release enhancements are made for better usability. You can switch back to the old view (Task Modal) by clearing the Use new Task details version checkbox.
Download Live Logs
You can now click the download button next to the Runs drop-down list to download the live logs from the task drawer.