Bitbucket Plugin
This topic describes how to configure the Digital.ai Release Bitbucket plugin.
Prerequisites
- Install the Bitbucket plugin into the XLR plugins/xlr-official folder.
Requirements
- Bitbucket Cloud running and accessible.
- Bitbucket Server running and accessible.
- Digital.ai Release running and accessible.
Configuration
- You need to have information about URL, username and password to connect with Bitbucket cloud and Bitbucket server.
- Create a Connections for your Bitbucket Cloud and Bitbucket Server.
- Create a Connections for your HTTP Endpoint For Webhooks.
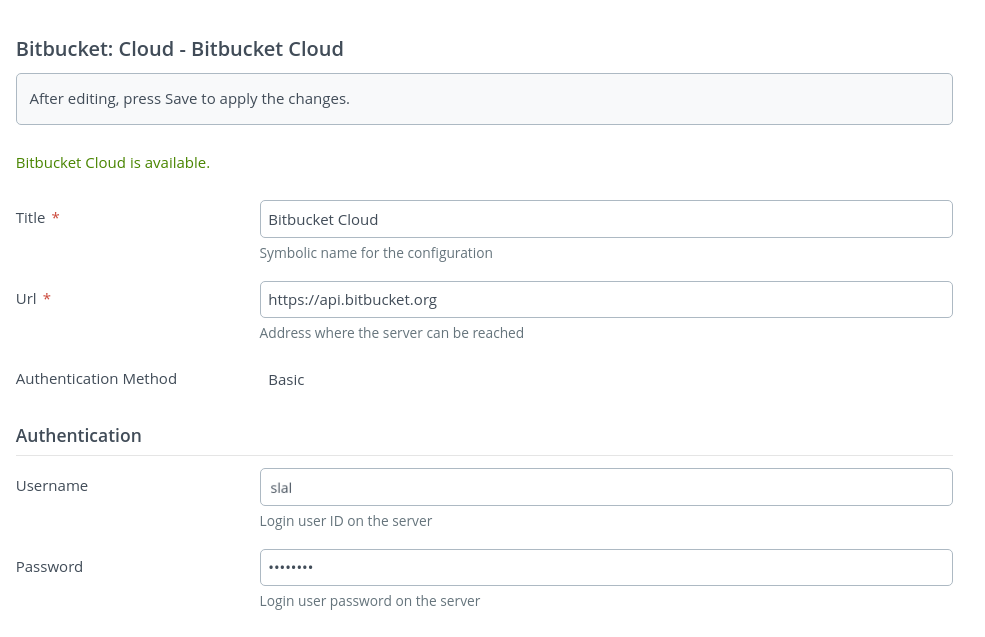
Set up a connection to the Bitbucket Cloud
- From the navigation pane, click Configuration > Connections.
- Under configurations, beside Bitbucket: Cloud, click
- In the Title field, enter a name for the configuration.
- In URL, enter the URL where the Bitbucket cloud is running.
- In Username, enter the Bitbucket cloud username.
- In Password, enter the Bitbucket cloud password.
- Click Test, to test the connection.
- Click Save, to save the configuration.
Set up a connection to the Bitbucket Server
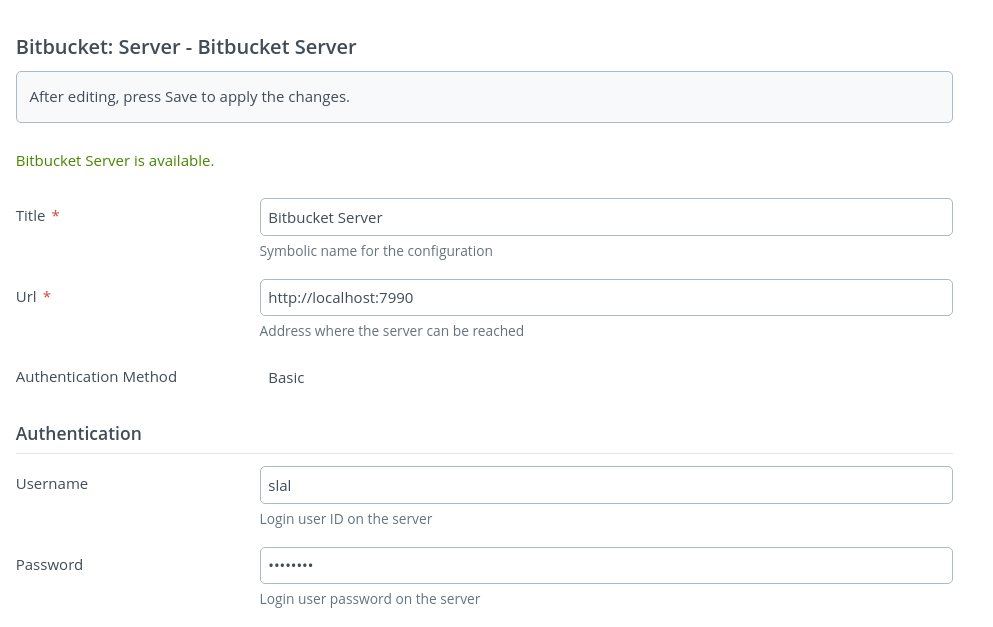
- From the navigation pane, click Configuration > Connections.
- Under configurations, beside Bitbucket: Server, click
- In the Title field, enter a name for the configuration.
- In URL, enter the URL where the Bitbucket server is running.
- In Username, enter the Bitbucket server username.
- In Password, enter the Bitbucket server password.
- Click Test, to test the connection.
- Click Save, to save the configuration.
Features
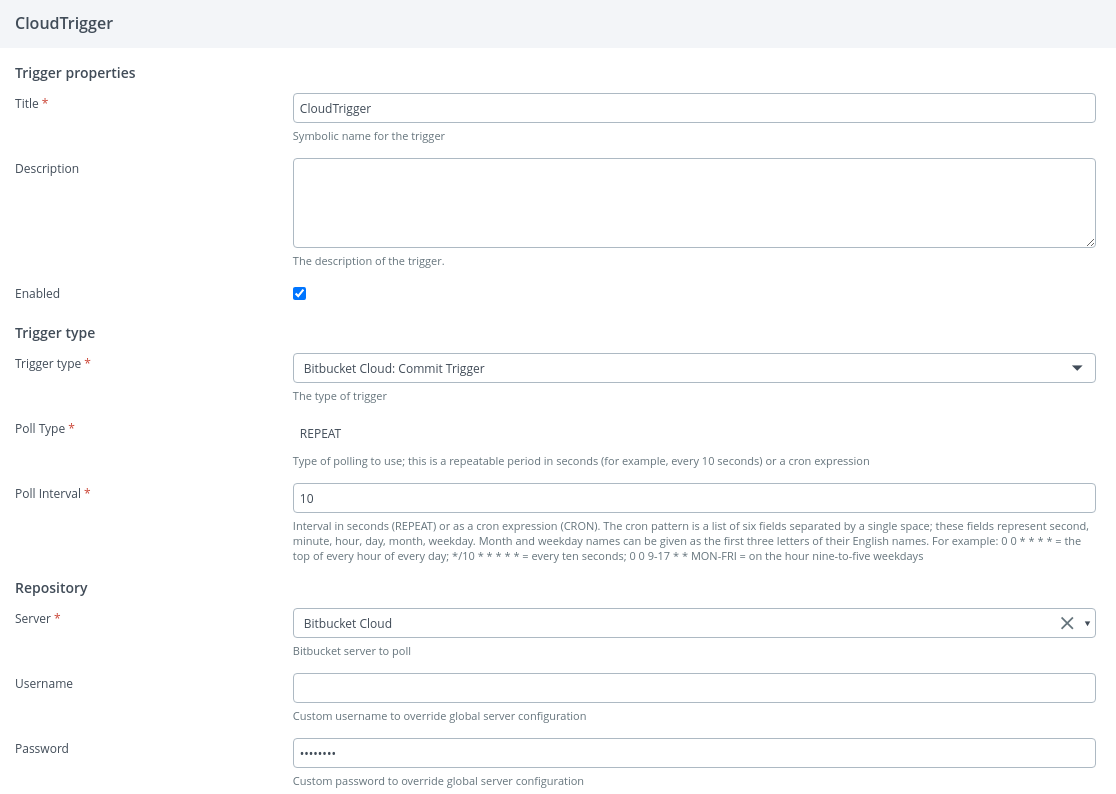
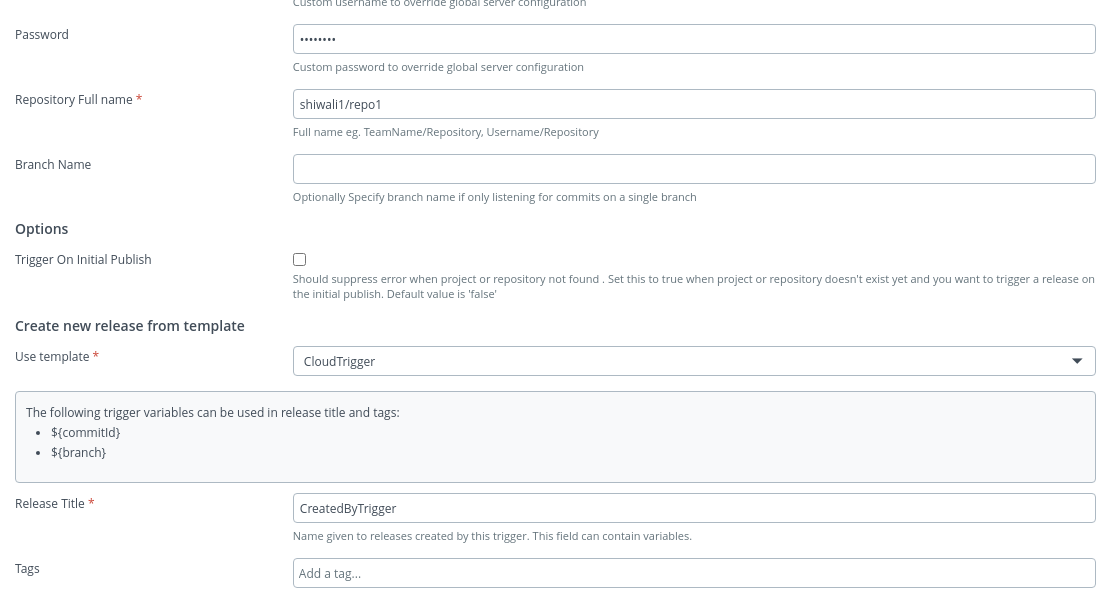
- Bitbucket cloud commit trigger configuration - This trigger can be used to poll the Bitbucket cloud for triggering releases.
- Bitbucket server commit trigger configuration - This trigger can be used to poll the Bitbucket server for triggering releases.
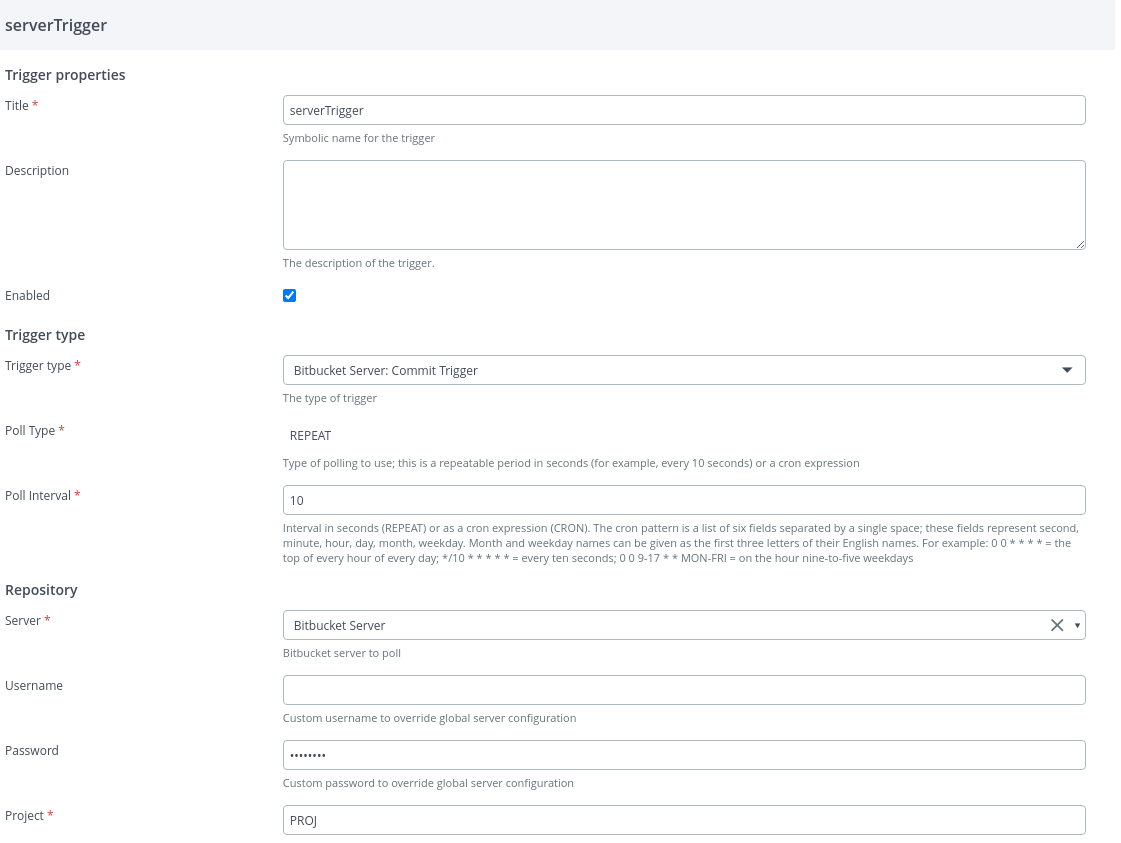
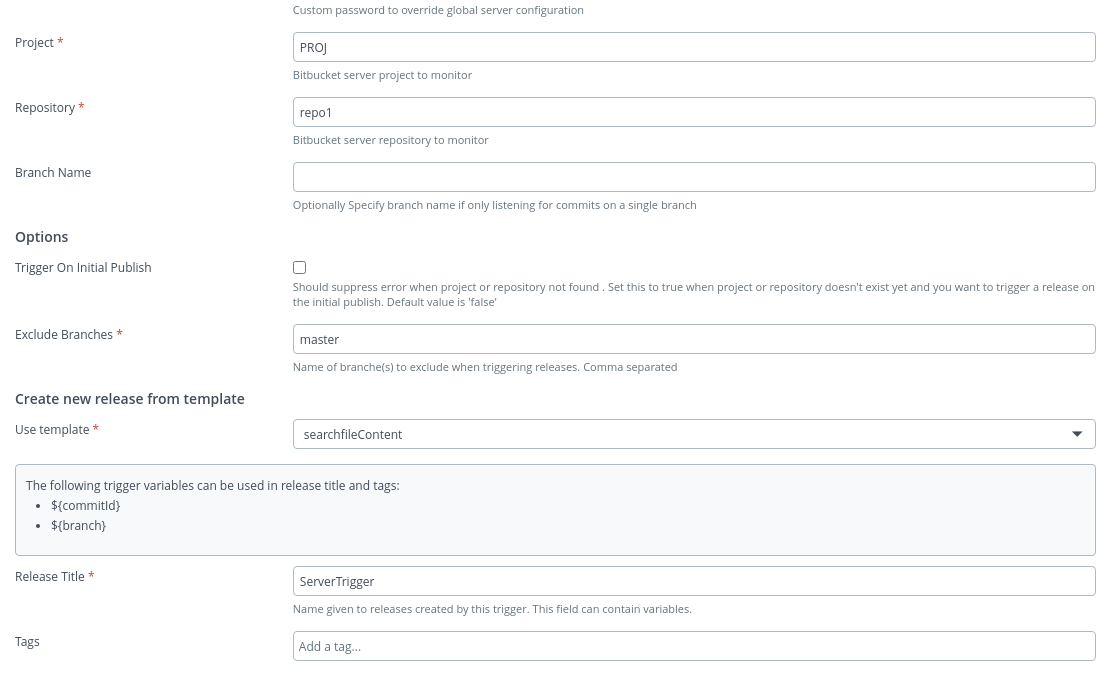
- Create bitbucket cloud/server tasks.
-
Tasks of bitbucket cloud -
- Bitbucket Cloud: Create Pull Request
- Bitbucket Cloud: Merge Pull Request
- Bitbucket Cloud: Wait for Pull Request
- Bitbucket Cloud: Commit List
- Bitbucket Cloud: Download Code
-
Tasks of bitbucket server -
- Bitbucket Server: Create Branch
- Bitbucket Server: Delete Branch
- Bitbucket Server: Create Pull Request
- Bitbucket Server: Approve Pull Request
- Bitbucket Server: Merge Pull Request
- Bitbucket Server: Decline Pull Request
- Bitbucket Server: Get Pull Request
- Bitbucket Server: Wait For Merge
- Bitbucket Server: Commit Query
- Bitbucket Server: Download Code
- Bitbucket Server: Tag Release
- Bitbucket Server: Search File Content
-
- Create webhooks event for the Bitbucket cloud/server.
- Add Bitbucket cloud/server tiles on the release dashboard.
Set up a connection for Webhooks
- From the navigation pane, click Configuration > Connections.
- Under configurations, beside HTTP Endpoint For Webhooks under Webhooks and Events section, click
- Select POST endpoint in the HTTP Endpoint for Webhooks field.
- Enabled checkbox should be enabled.
- In the Title field, enter a name for the configuration.
- In Endpoint path, enter the endpoint path.
- Select No authentication in Authentication Method field.
- Click Save, to save the configuration.
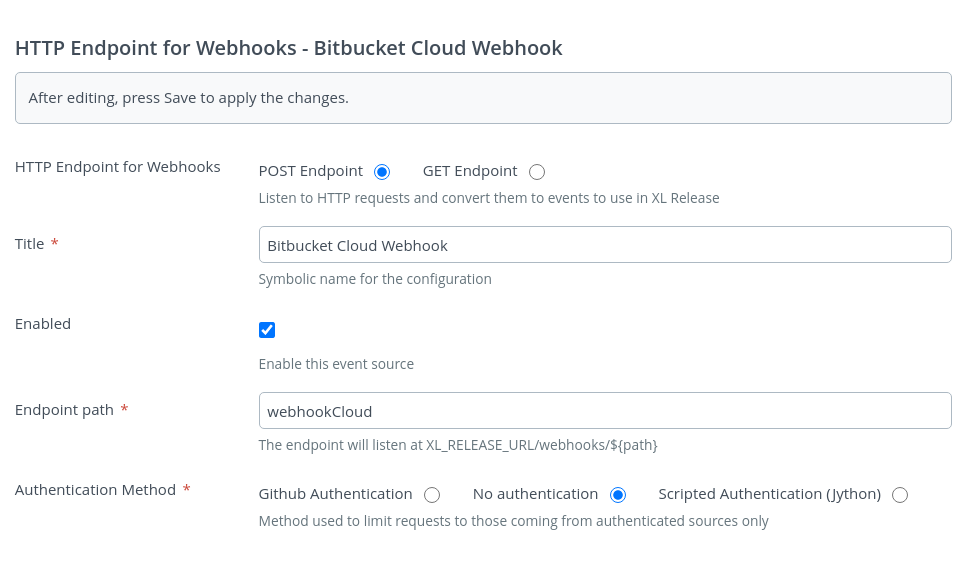
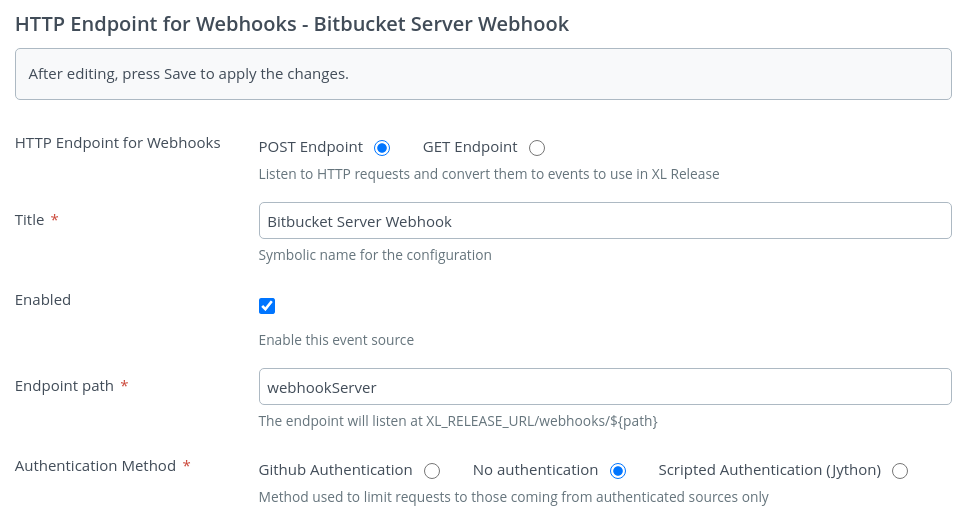
Tile and Dashboard configuration for Bitbucket Cloud
There are four tiles in Bitbucket cloud:
- Bitbucket Cloud Commits Summary
- Bitbucket Cloud Contributions Summary
- Bitbucket Cloud Merge Requests Summary
- Bitbucket Cloud Commits Timeline
- From the navigation pane, click Reports.
- Select the dashboard where you want to add the new tile.
note
If you have not created a dashboard yet, you can do so by clicking the Add dashboard button in the top right of the screen.
- In the top right of the screen, click Configure dashboard.
- In the top right of the screen, click Add tiles.
- Hover over Bitbucket Cloud Commits Summary, and click Add.
- Click the Configure option present in the tile.
- In the Title field, enter a name for the tile.
- In the Bitbucket Cloud field, select the cloud configured.
- In the Repository Full name field, enter the name of the repository.
- In the Branch Name field, enter the name of branch from which data can be fetched.
- In the Tag Name field, enter the tag name.
- In the Results Limit field, enter the limit of list in numbers.
- Click Save.
You can configure for rest of the three tiles of the Bitbucket cloud using the same process described above.
Tile and Dashboard configuration for Bitbucket Server
There are four tiles in Bitbucket server:
- Bitbucket Server Commits Summary
- Bitbucket Server Contributions Summary
- Bitbucket Server Merge Requests Summary
- Bitbucket Server Commits Timeline
- From the navigation pane, click Reports.
- Select the dashboard where you want to add the new tile.
note
If you have not created a dashboard yet, you can do so by clicking the Add dashboard button in the top right of the screen.
- In the top right of the screen, click Configure dashboard.
- In the top right of the screen, click Add tiles.
- Hover over Bitbucket Server Commits Summary, and click Add.
- Click the Configure option present in the tile.
- In the Title field, enter a name for the tile.
- In the Bitbucket Server field, select the server configured.
- In the Project Name field, enter the project key.
- In the Project Slug field, enter the name of the repository.
- In the Branch Name field, enter the name of branch from which data can be fetched.
- In the Tag Name field, enter the tag name.
- In the Results Limit field, enter the limit of list in numbers.
- Click Save.
You can configure for rest of the three tiles of the Bitbucket server using the same process described above.
Report creation
- Click Reports.
- Go to Audit report.
- Click the Generate new report button.
- Select Time period.
- Click Add filter to generate the report for a specific template.
- Click the Preview results button.
- Click the Generate report button.
- Download the generated report.
- Extract it and verify the extracted reports.