Helm Plugin
The Digital.ai Deploy Helm plugin can deploy and undeploy Helm charts on a Kubernetes host.
The Digital.ai Deploy Helm plugin supports:
- Deploy & upgrade helm.Chart V2 & V3
To use the plugin:
- Download the Deploy Helm plugin ZIP from the Distribution Site.
- Unpack the plugin inside the
XL_DEPLOY_SERVER_HOME/plugins/directory. - Restart Deploy.
This plugin enables the use of Helm Client host types and tasks that are specific to installing and deleting Helm charts, in Deploy.
Setting Up the Deploy Helm Plugin
- In the infrastructure, create an Overthere host (Linux and Unix hosts) with Helm binary installed (helm binary uses kubectl and its config).
- After successful connection to the host, hover over host Infrastructure and click
.
- Click New and select
helm.Client. - Create a Helm Client with the required properties.
- In Helm Client, provide value in Helm Host only when using Helm v2. For Helm v3, keep it blank.
- The Helm client also needs a reference in the Kubernetes master (k8s.Master) to manage Helm charts deployments on Kubernetes cluster.
- If the Kubernetes Master already exists in the Infrastructure list, then point the helmClient property of
k8s.Masterto the Helm Client created in step 4. If Kubernetes master is not already in Infrastructure list, then create a newk8s.Masteras Deploy Kubernetes plugin and set the Helm client property to point at Helm client.
For more information, refer to Using Deploy Helm Plugin section.
Using Deploy Helm Plugin
Infrastructure Set-Up for Helm (Helm-client)
To setup the Kubernetes master in infrastructure, refer to Kubernetes Master.
Create the Helm Client
To create the Helm Client in Infrastructure CI:
-
In the side navigation bar, Click Explorer.
-
Expand the Infrastructure Cl list.
-
Navigate to a CI of Helm Client type, click
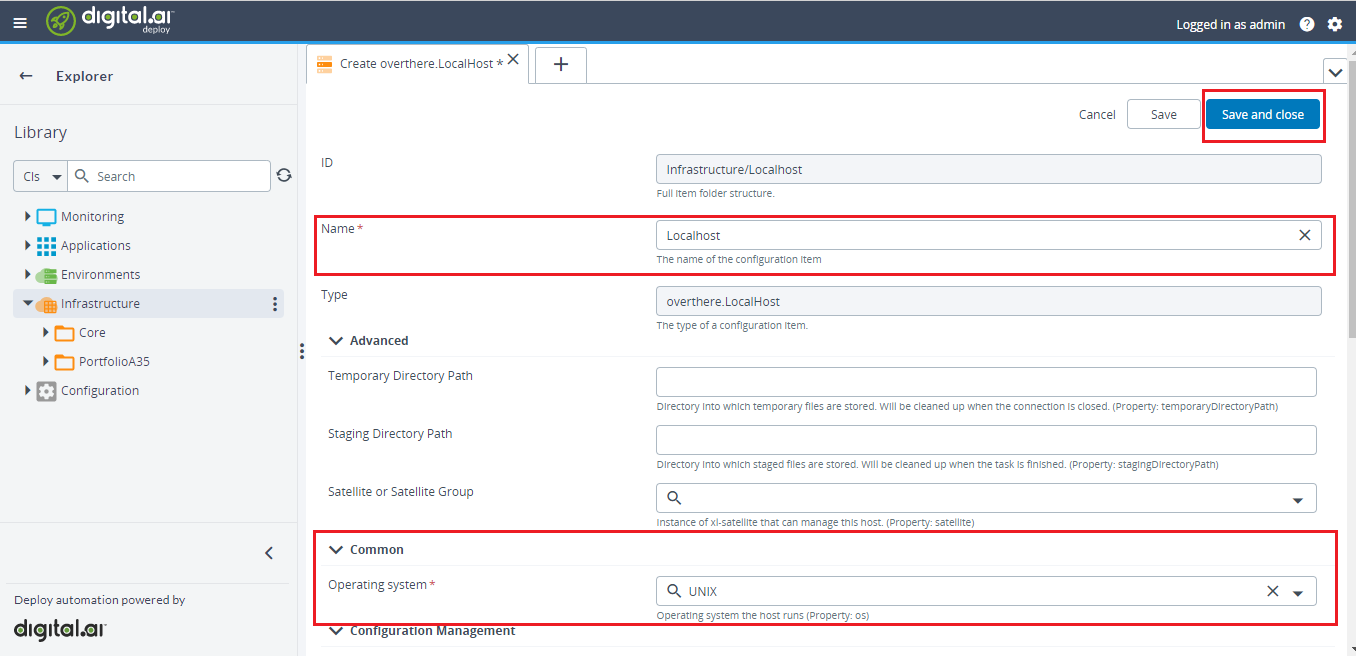
, and select New > Overthere > LocalHost.
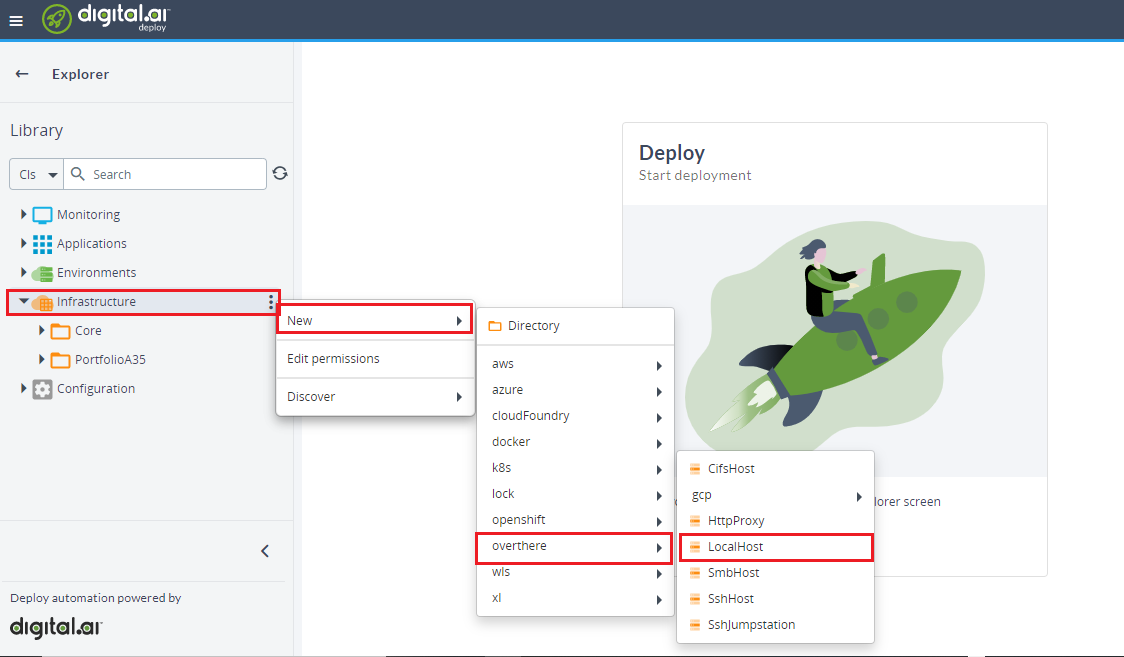
-
Specify the Name region as LocalHost.
-
In the Operating system field, select UNIX from the drop-down List.
noteif required we can provide username and Password in Authentication section.
-
Click Save or Save and close.
Create the Helm Client Using helm.client
- In the side navigation bar, click Explorer.
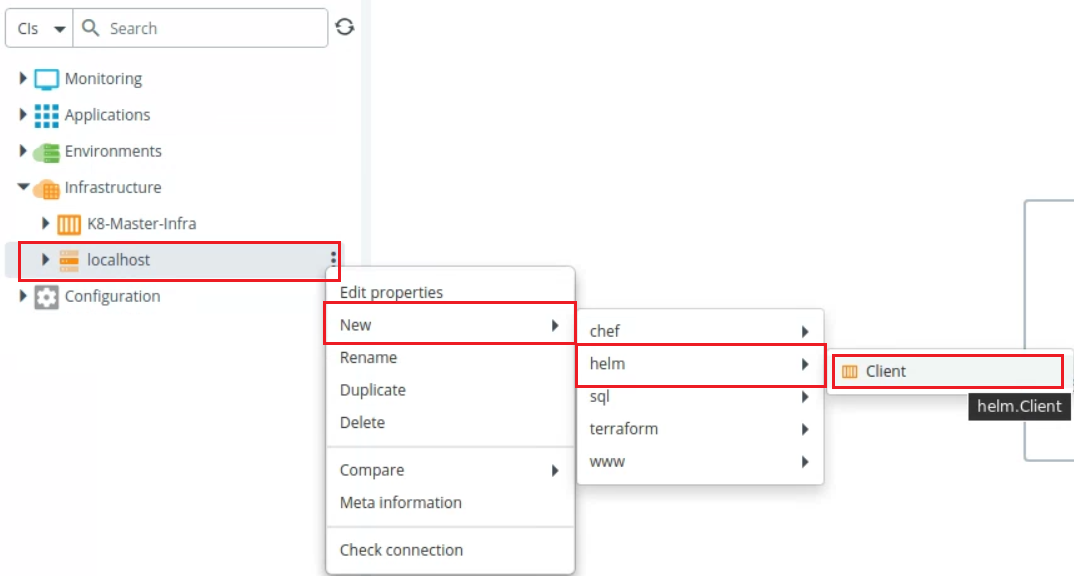
- Expand the Infrastructure, hover over newly created infrastructure and click
, and select New > helm > client.
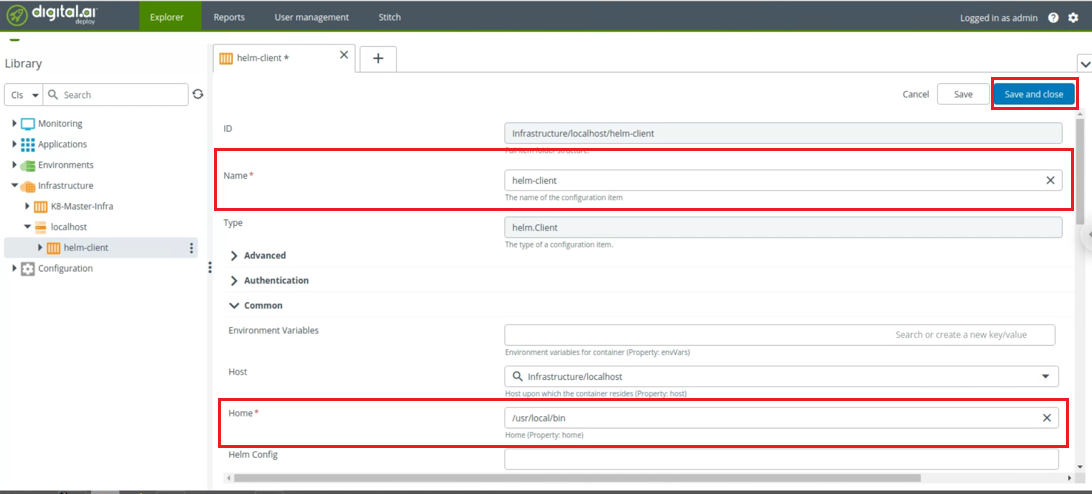
- In the Name field enter the name of the configuration item.
- In the Home field enter the path where the Helm client is installed.
- Under the Advanced section, select the version from the drop down list in the version field.
Verify the Connectivity of Helm Client
-
Expand the Infrasturcture list.
-
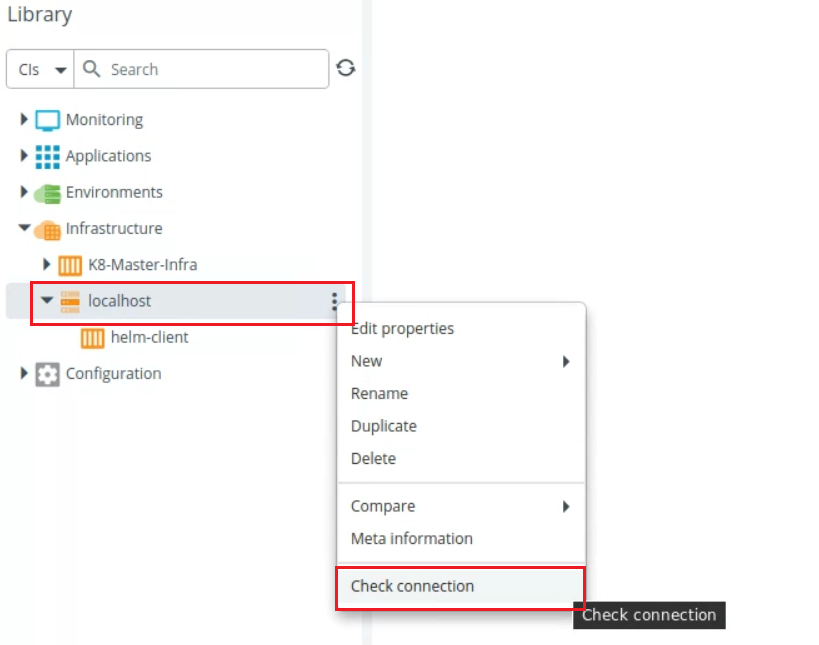
Hover over newly Created Infrastructure and click
, and Select Check Connection.
 note
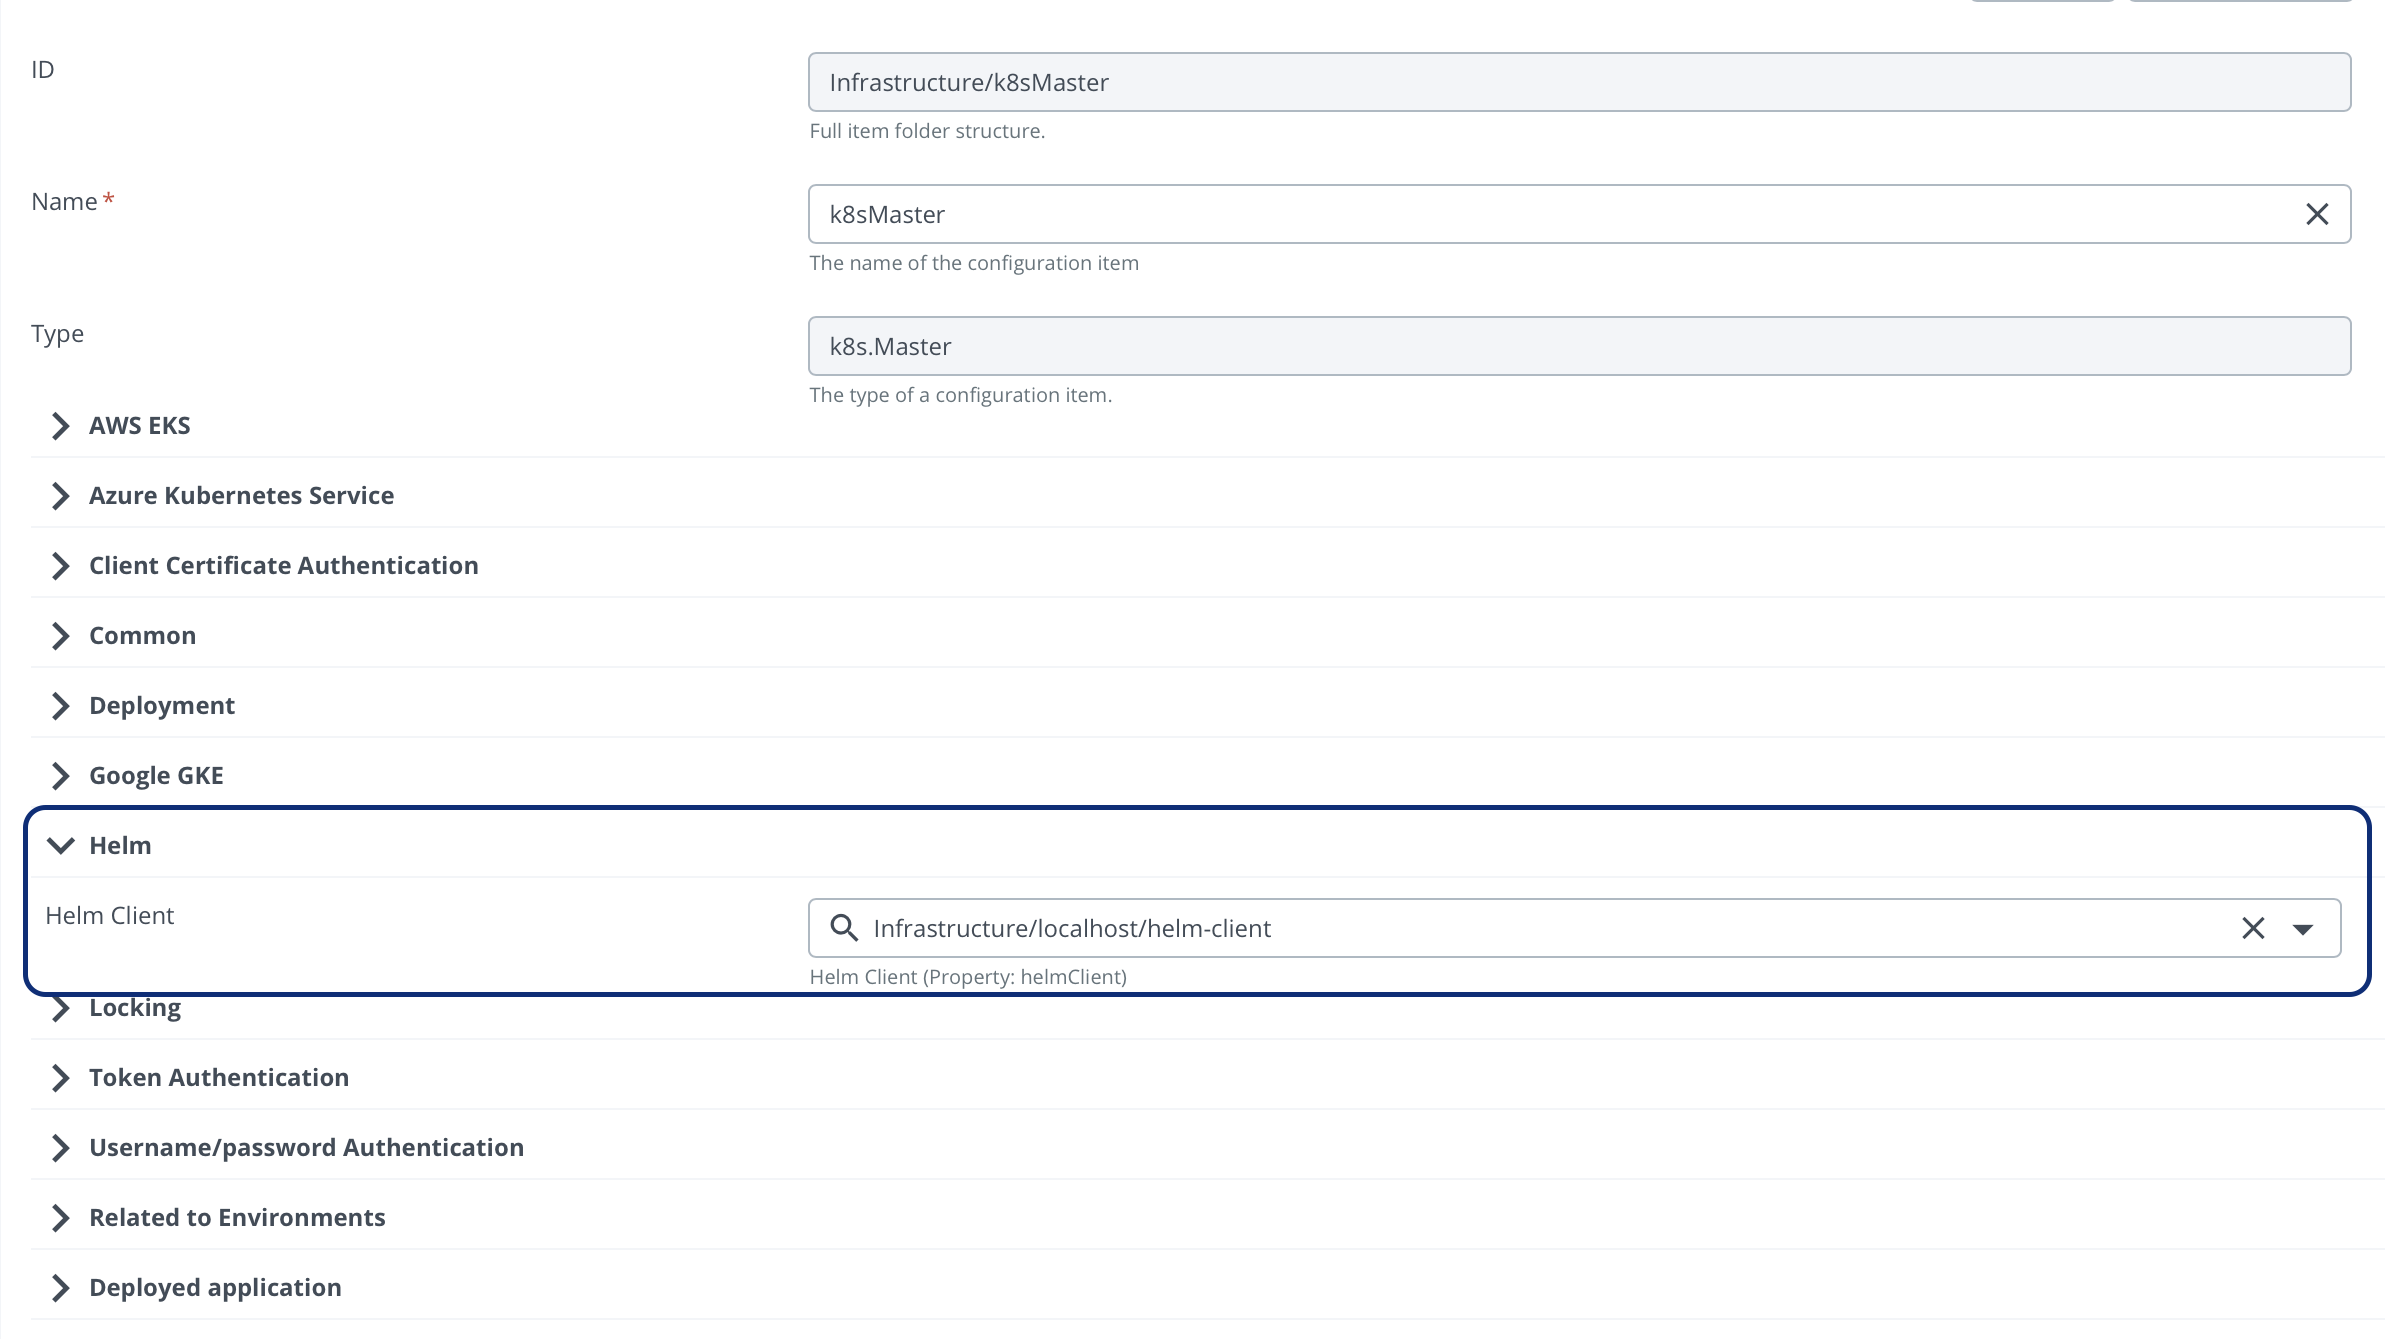
noteOnce connection is Successful, provide path for Helm-Client in the configuration of created K8-Master-infra. You can find it in Helm section of configuration.
-
Click Save and close
Environment Setup for Deployment:
To create an new environment:
-
In the side navigation bar, click Explorer.
-
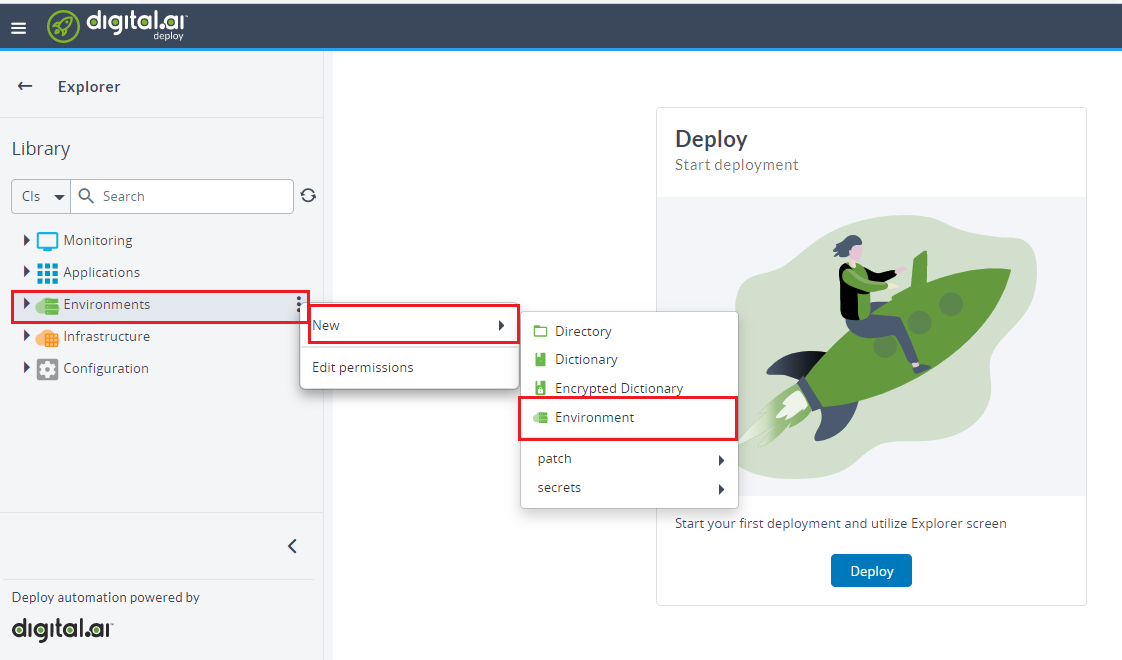
Hover over Environments, click
, then select New > Environment.
-
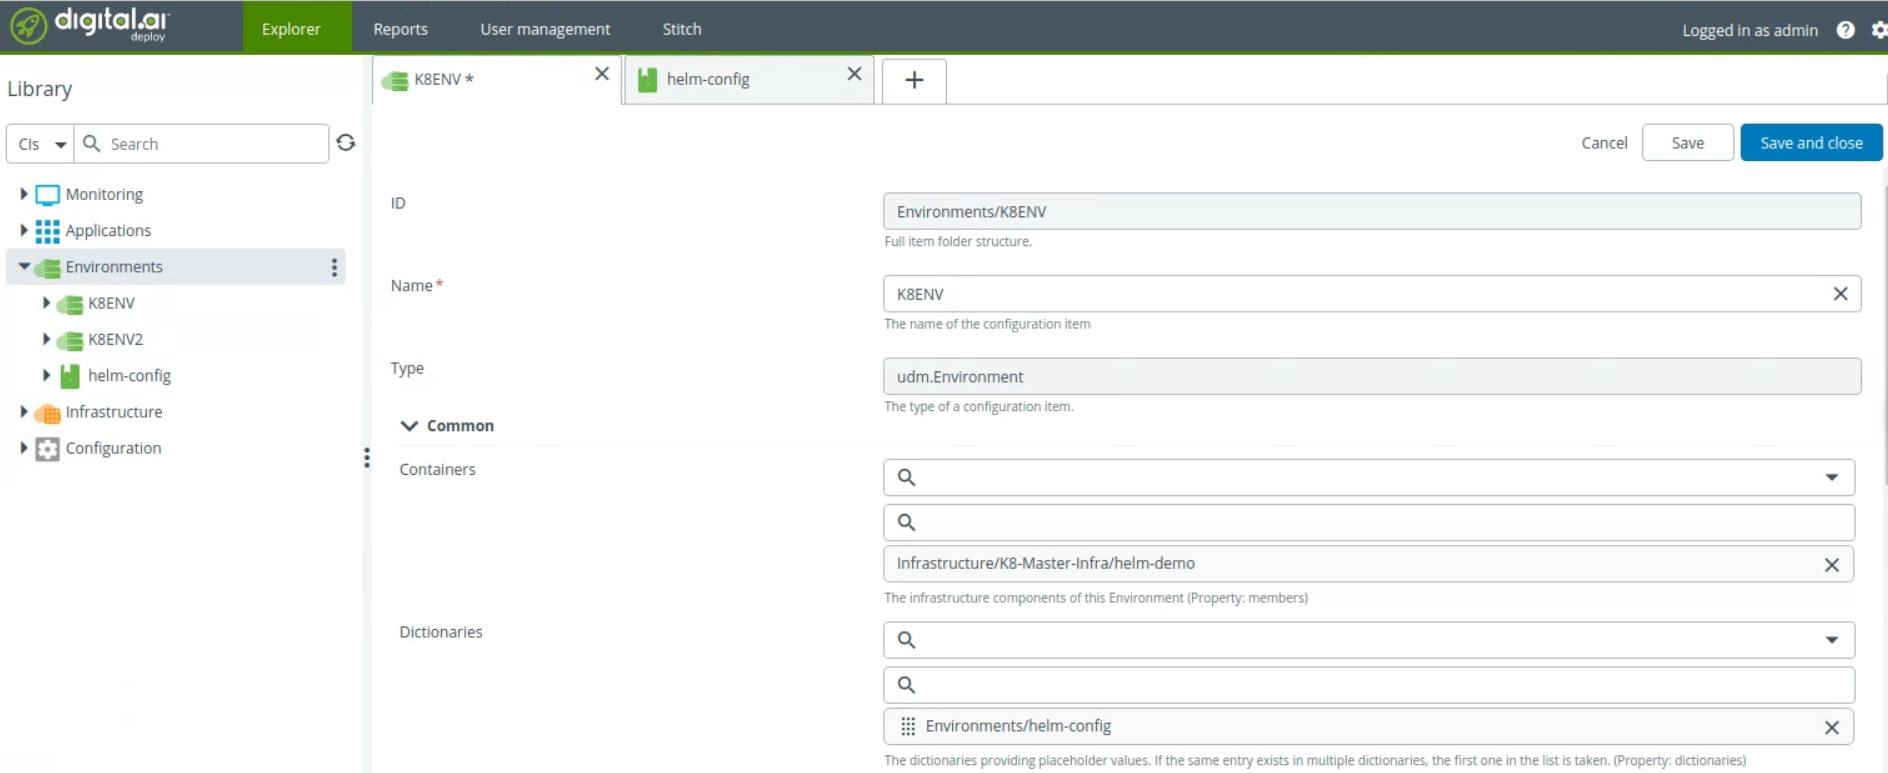
In the Name field, enter the name of the Configuration item.
-
Under Common section, Select the Containers field from the drop-down list. The selected container path should be the namespace of Kubernetes on which we are deploying.
noteYou can install Helm charts with auto-created Namespace.
-
You can also select a dictionary from the drop-down section. Before selecting a dictionary, you must first create it in Environments.
Create a Dictionary
To create an dictionary:
- In the top bar, click Explorer.
- Hover over Environments, click
, and select New >dictionary.
Application Creation for Helm
Chart and Repository Deployment
-
To Create a new Application, click
, and select New > Application.
-
Specify the Name for application.
-
Expand the Application list.
-
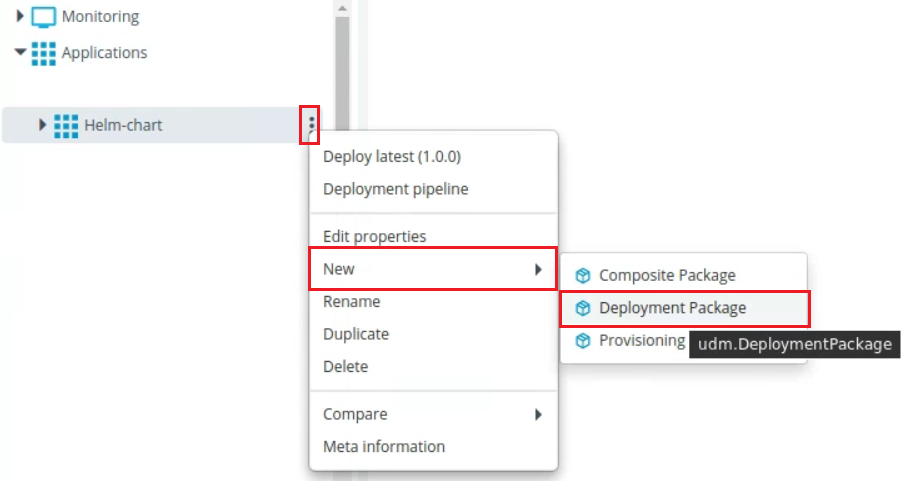
Hover over newly created application and click: and select New > Deployment Package.
-
Specify the Name for the Deployment Package.
-
Hover over newly created Package and click: and select New > Helm > Chart.
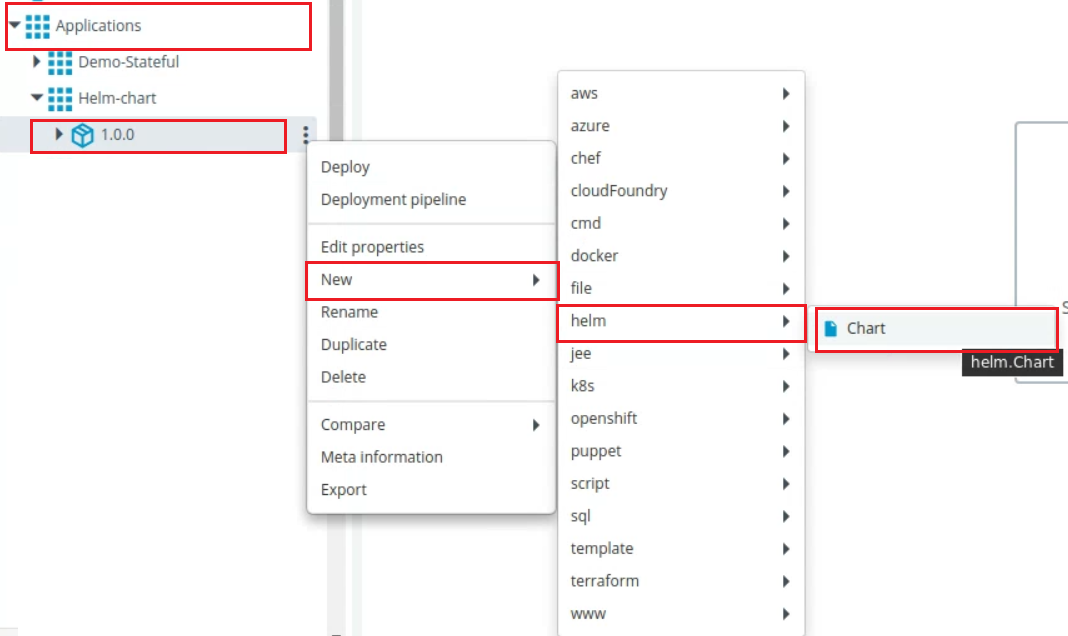
-
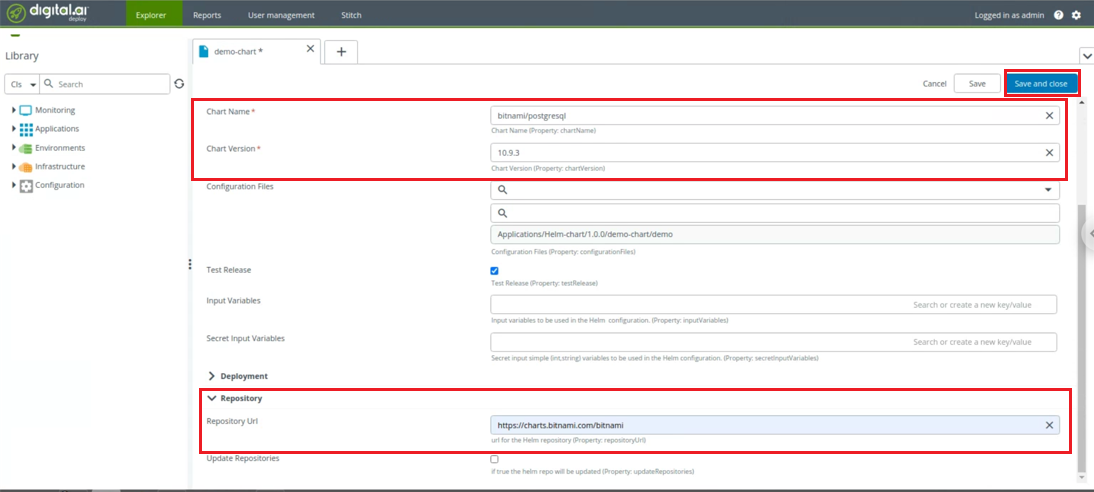
In the Name field, enter the name of the configuration item.
-
Under the Common section:
- In the Chart Name field ,enter the chart name.
- In the Chart Version field . enter the chart version.
-
Under the Repository section, enter the URL for the helm repository in Repository URL field.
noteIf Repository is already present then, no need to give repository URL.
-
Click Save and close.
To Update values.yaml Using ConfigFile Specification
- A YAML file which overrides the
Values.yamlof a Helm chart, is supported ashelm.ConfigFiletype. To specify a Config file which overrides the values inValues.yaml. - To create a
helm.ConfigFileunderHelm.Chart. Hover Over newly created chart application, Click : and select helm > ConfigFile.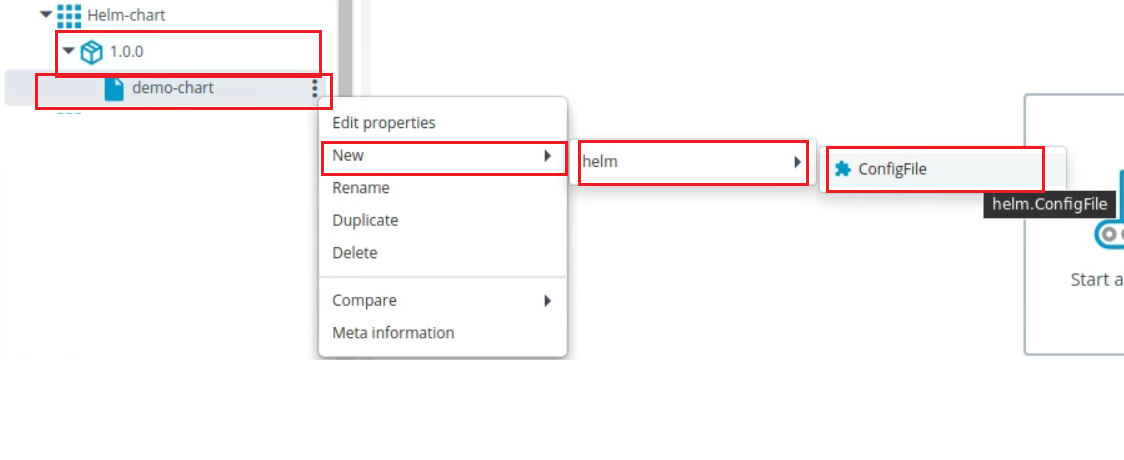

- In the Name field, enter the name of the configuration item.
- In the Choose file field, select the
.yml file of ConfigMapfrom the Browser. - Click Save and close.
- The custom values for
Values.yamlcan also be specified in Input Variables and Secret Input Variables.
Deploy the Package
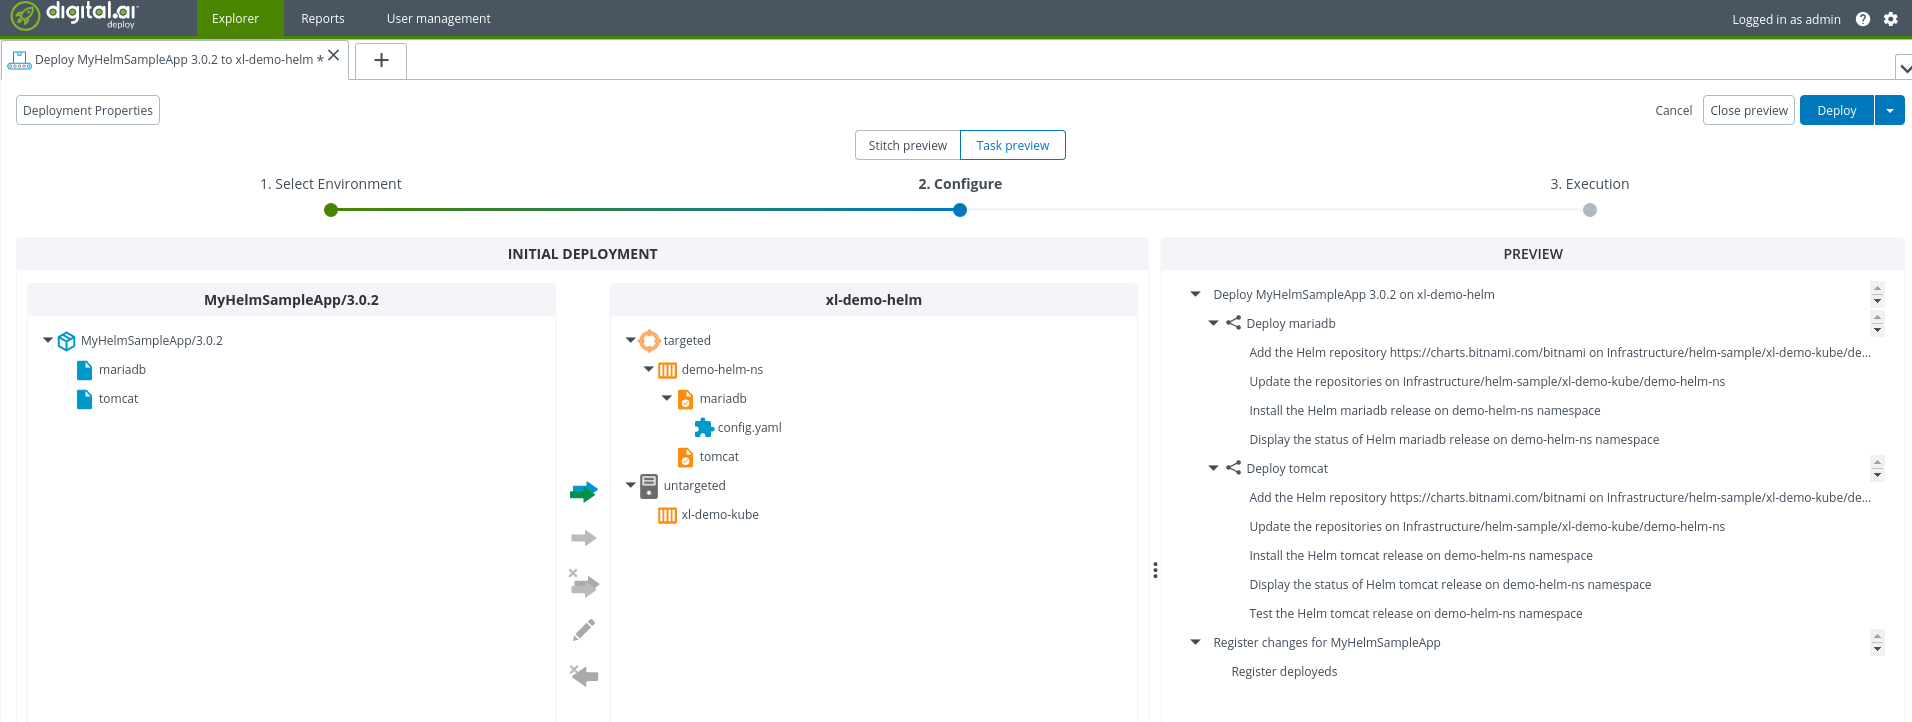
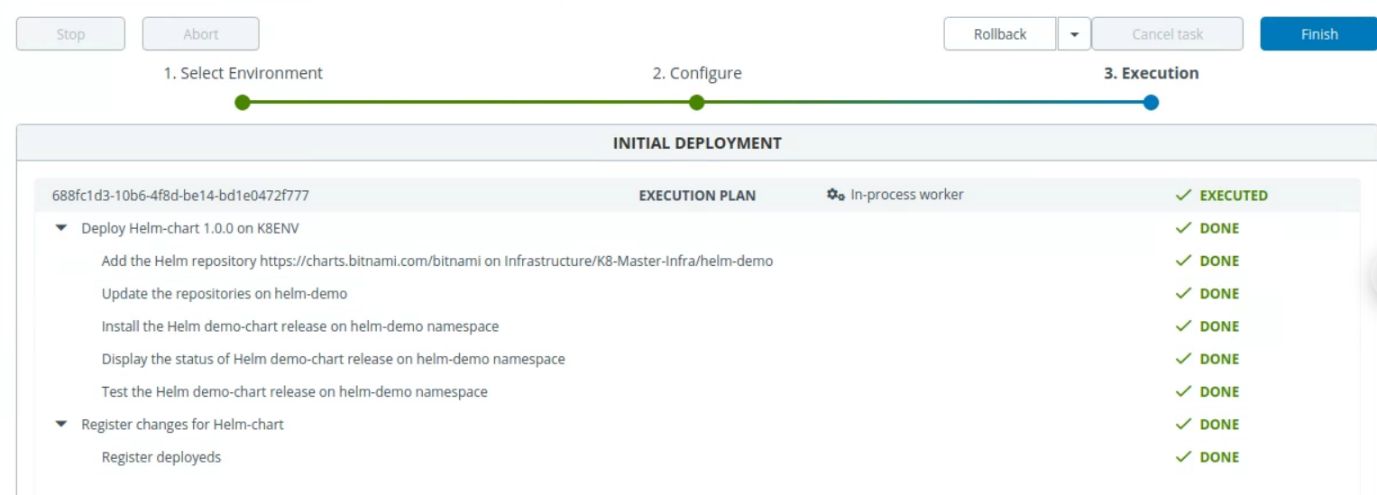
To deploy the package, select the environment on which you want to deploy.
- Click Continue and Deploy
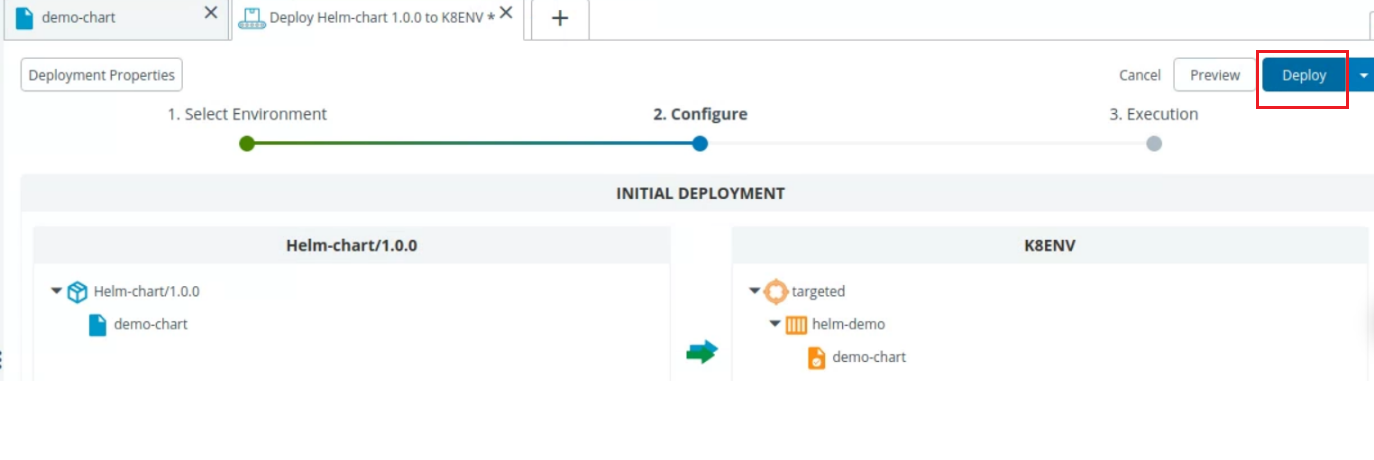
-
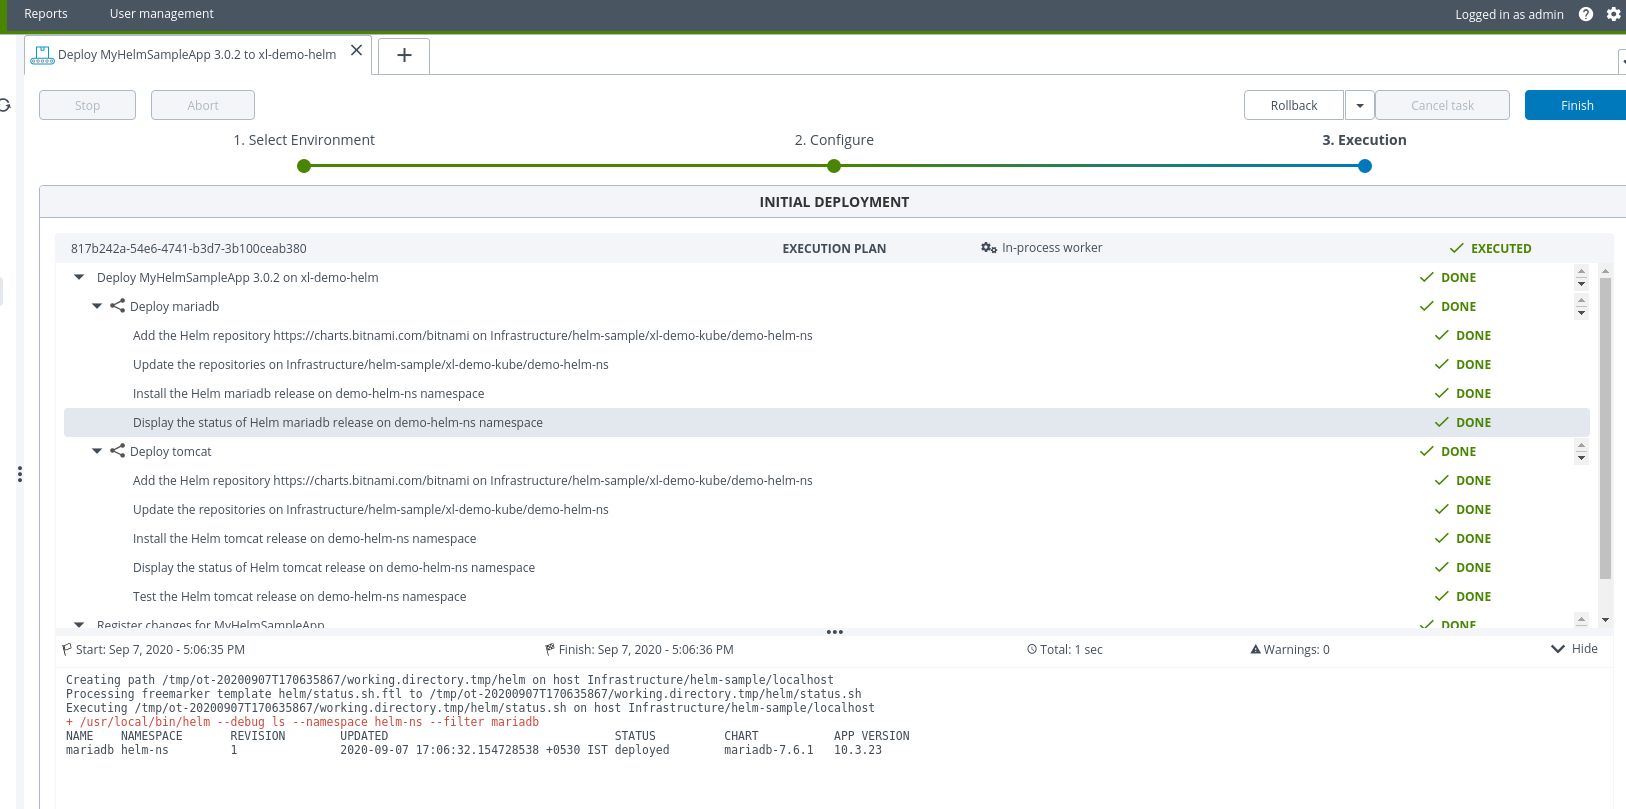
Use “helm ls -n helm-demo” command on terminal to check the deployment. Where helm-demo is name of namespace on which we are deploying,

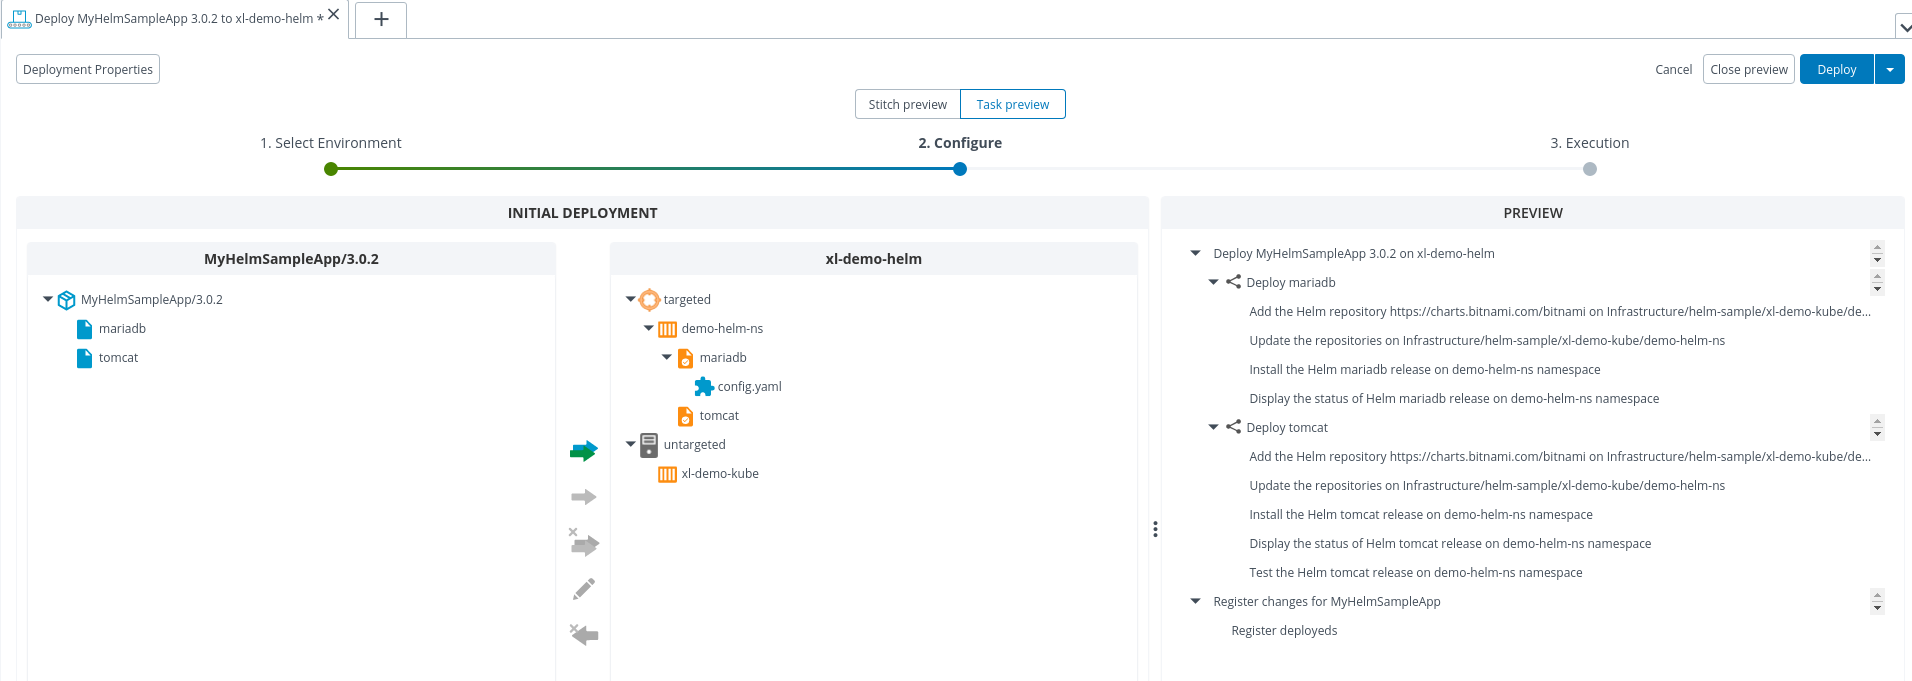
Deploying Two Helm Charts in Parallel with Deploy
-
Users can deploy Helm charts in parallel with Deploy. The Deploy Helm plugin supports all the core features of deployments provided by Deploy.
