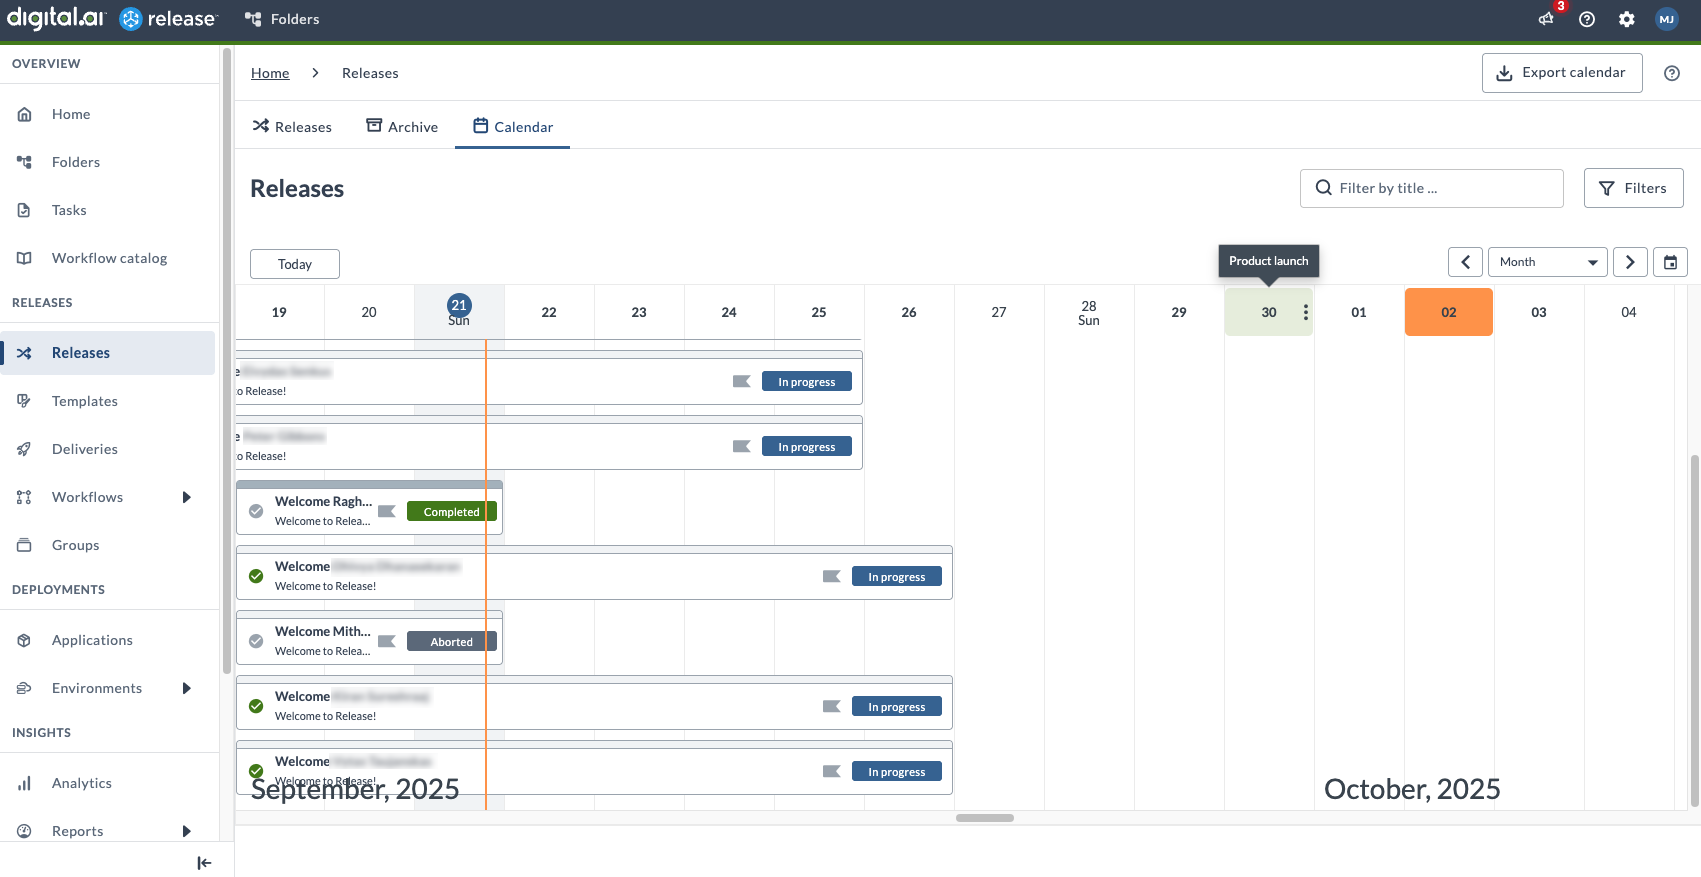
Calendar view
This topic provides an overview of the Calendar view in Digital.ai Release, including how to navigate different calendar views, filter releases, mark special days, and export the calendar.
You can access the Calendar view in two ways:
- Select Releases from the sidebar, then click the Calendar tab at the top to view all releases in calendar format.
- Go to Overview > Folders in the sidebar, select a folder, and then click the Calendar tab to view releases within that folder in calendar format.
Calendar Views
The Calendar view offers multiple perspectives for visualizing scheduled releases and tasks:
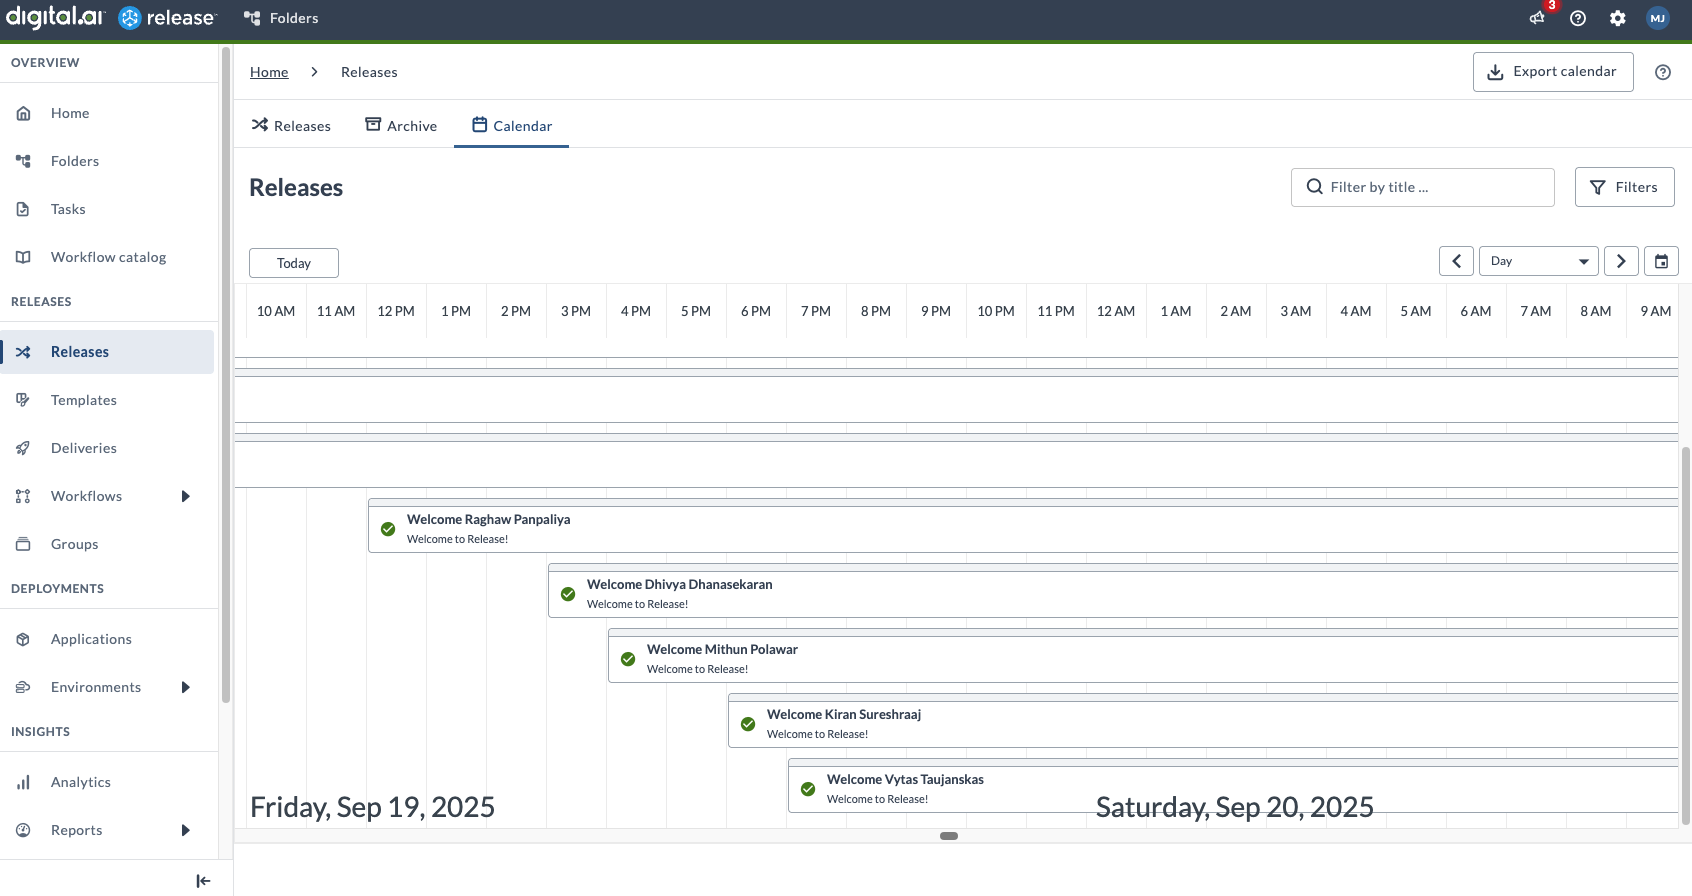
Day View
Displays scheduled tasks and their times for a specific day.
Week View
Shows scheduled tasks for the selected week.
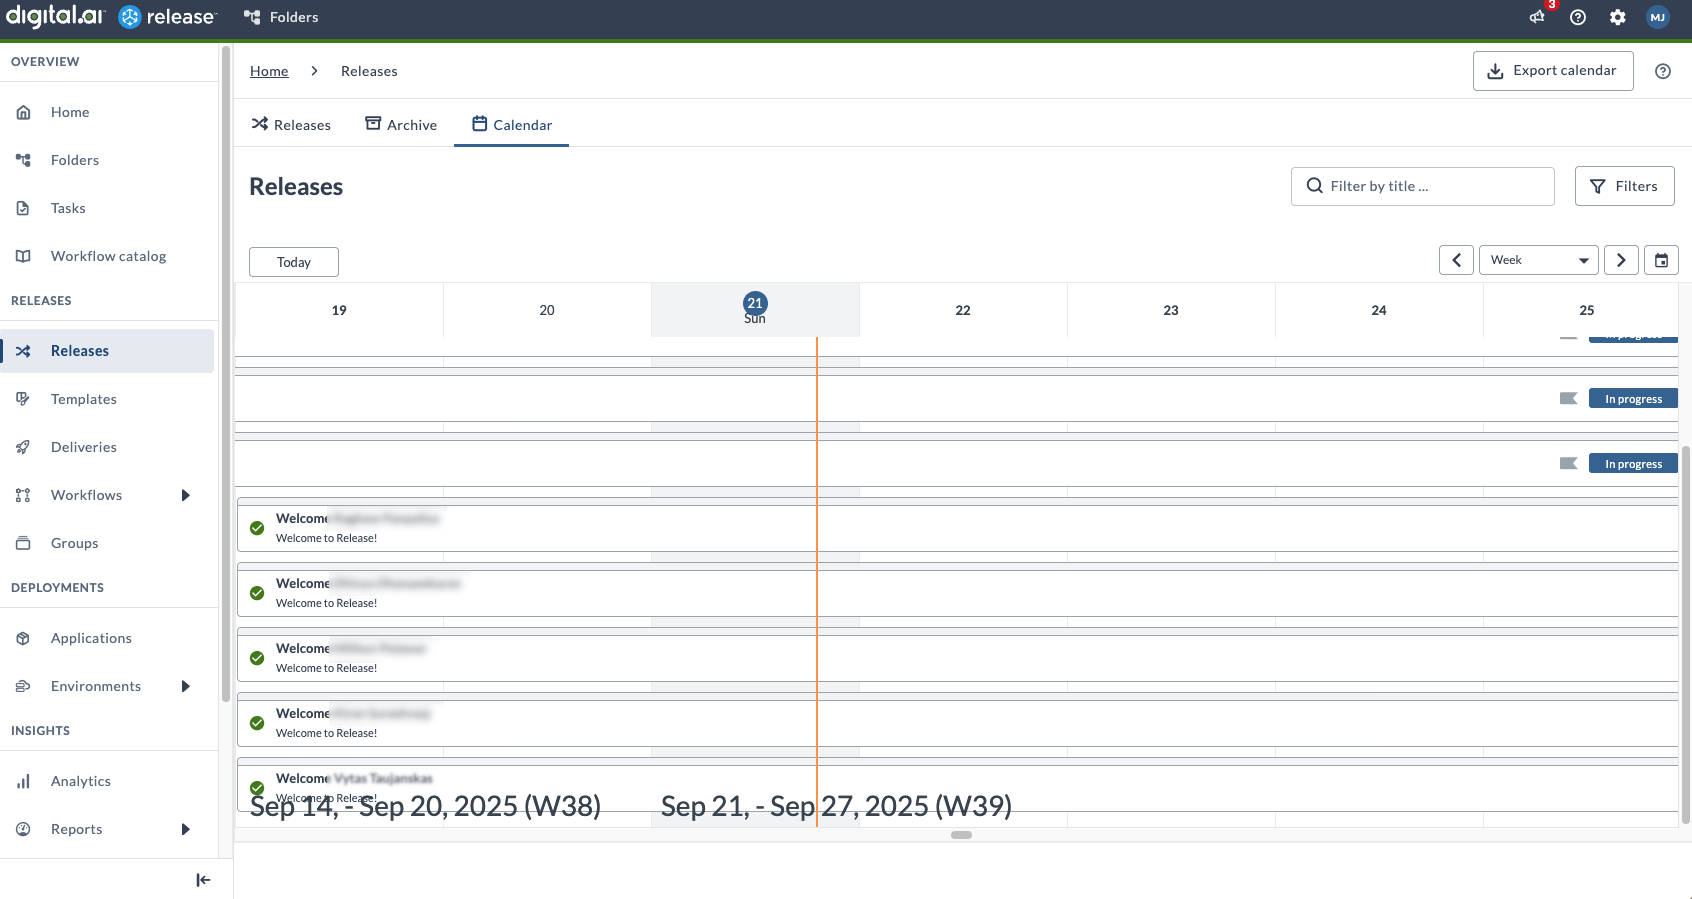
The week starts from the current day.
Month View
Shows scheduled tasks for the selected month.
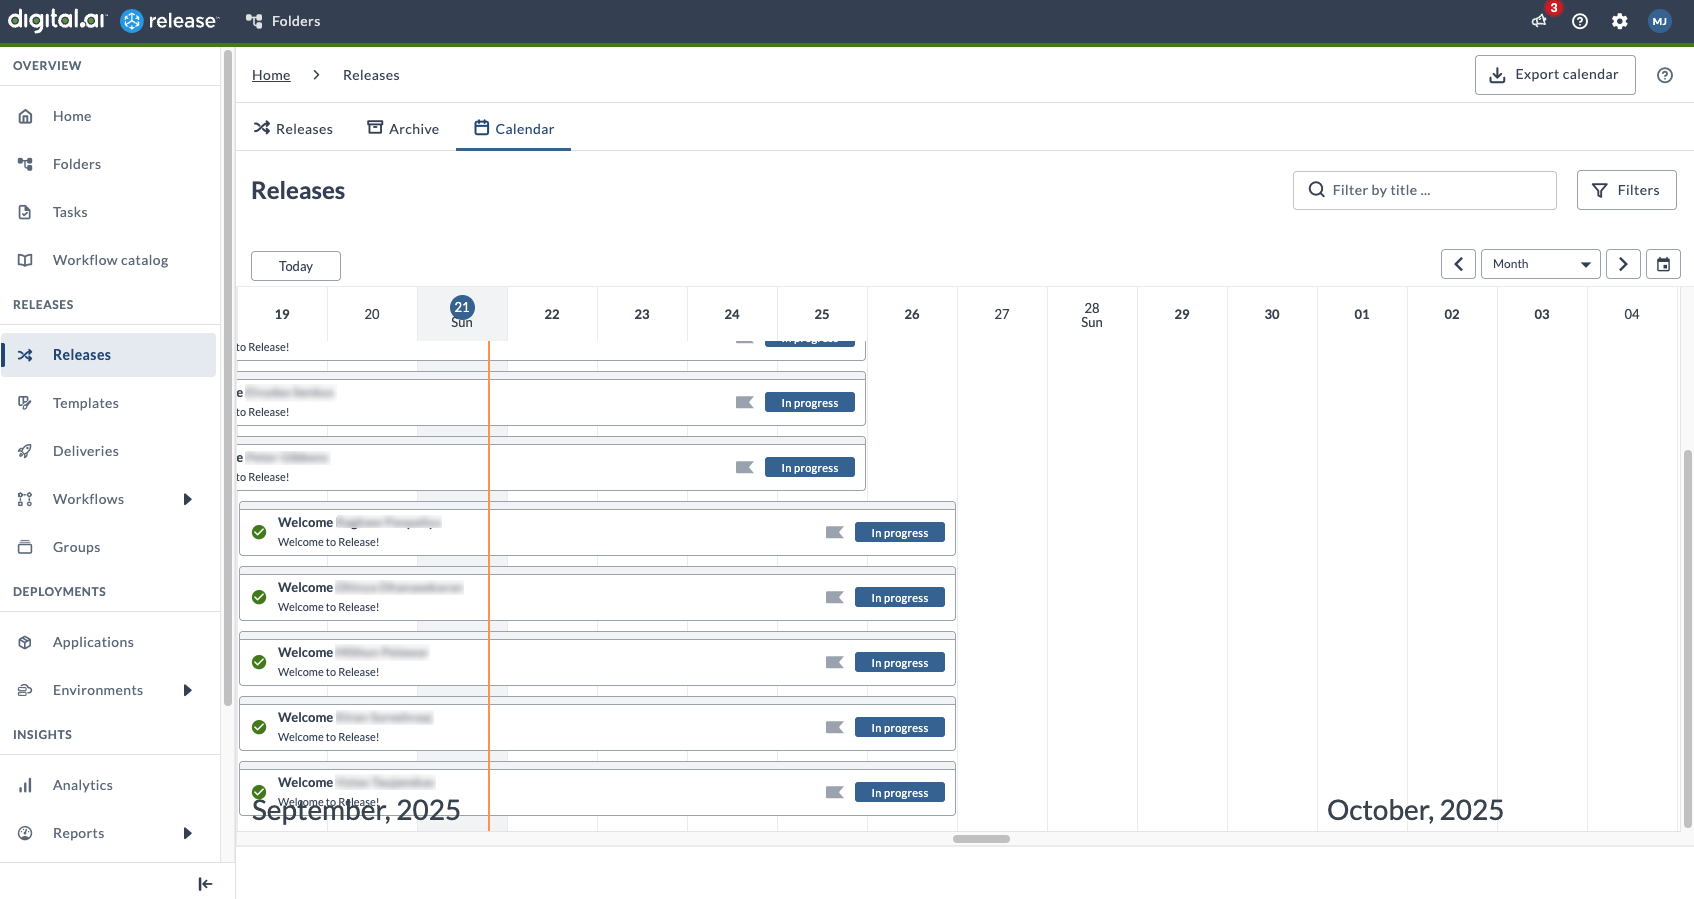
The month starts from the current day.
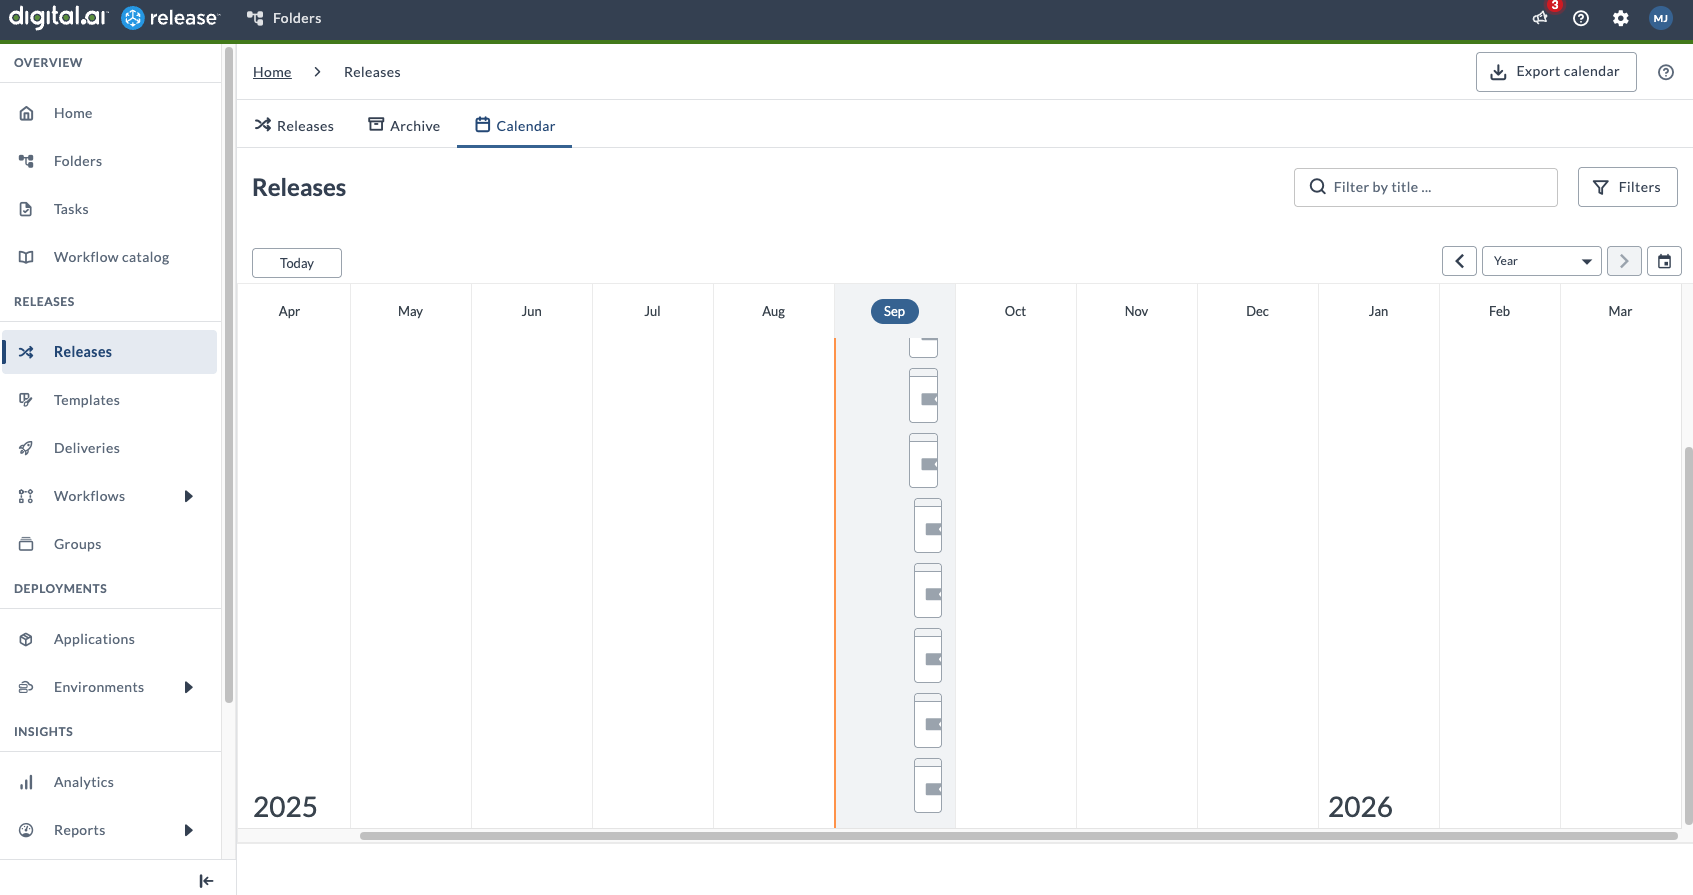
Year View
Displays scheduled tasks for the selected year.
To change the calendar view, click the current view label and select Day, Week, Month, or Year. Use the left/right arrows to move to the previous or next period.
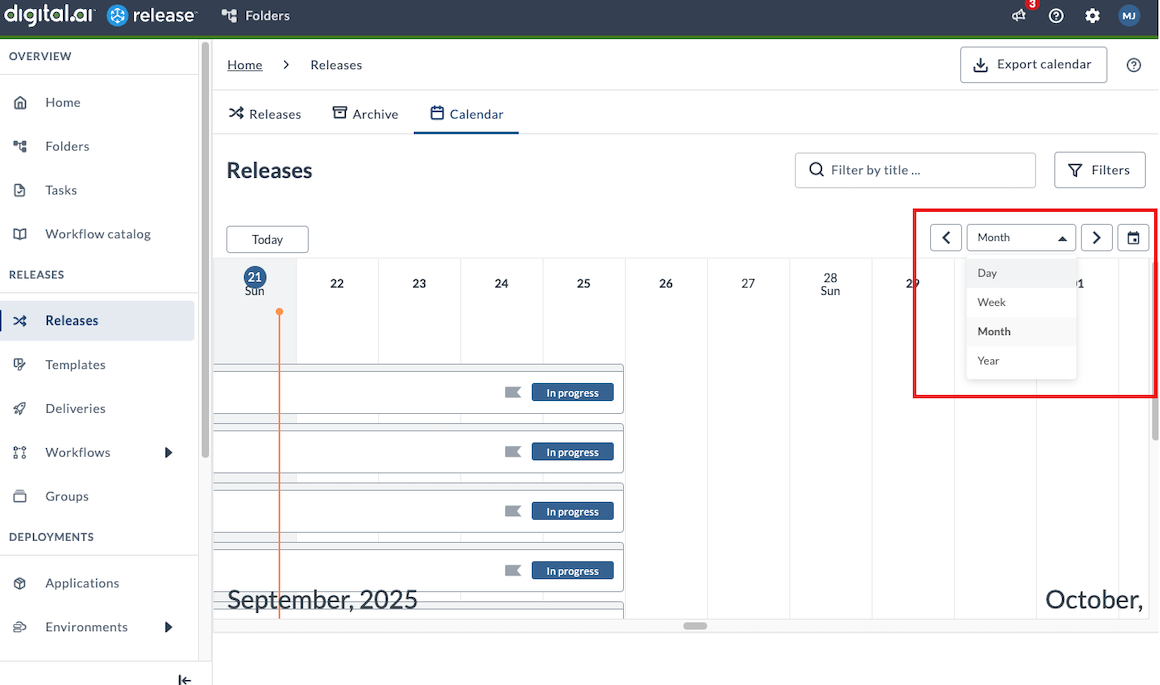
To jump to a specific date, week, month, or year, click the ![]() icon at the top right of the Calendar view.
icon at the top right of the Calendar view.
The jump-to-date dialog adapts to the current calendar view.
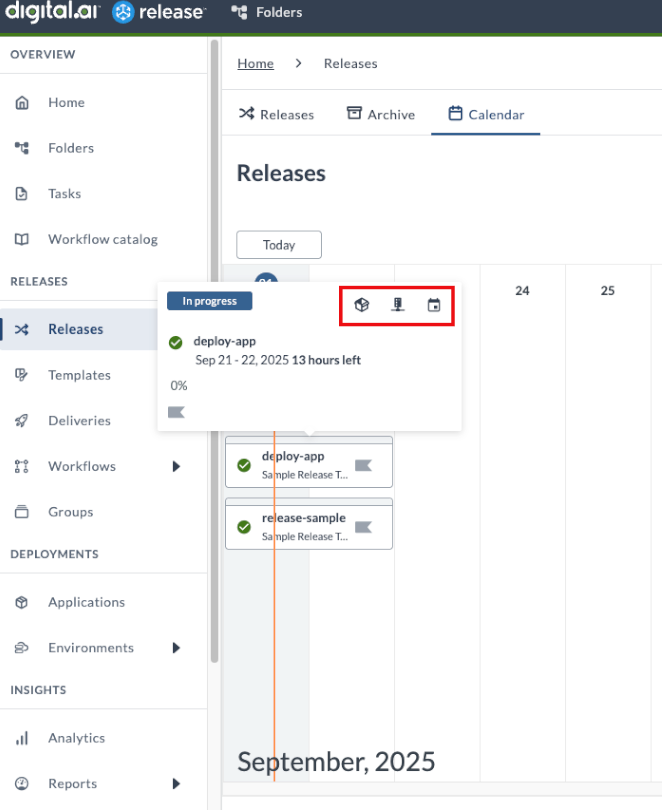
Viewing Release Details in the Calendar
- Hover over a release to view the release details.
- Click a release to view the release details pop up.
- Use the icons in the release details pop-up to:
- View release (in the flow editor)
- View dependencies
- Download release calendar .ics file
Release Statuses and Colors
On the calendar, release statuses are represented by colored badges:
- In progress: Blue
- Completed: Green
- Failing: Orange
- Failed: Red
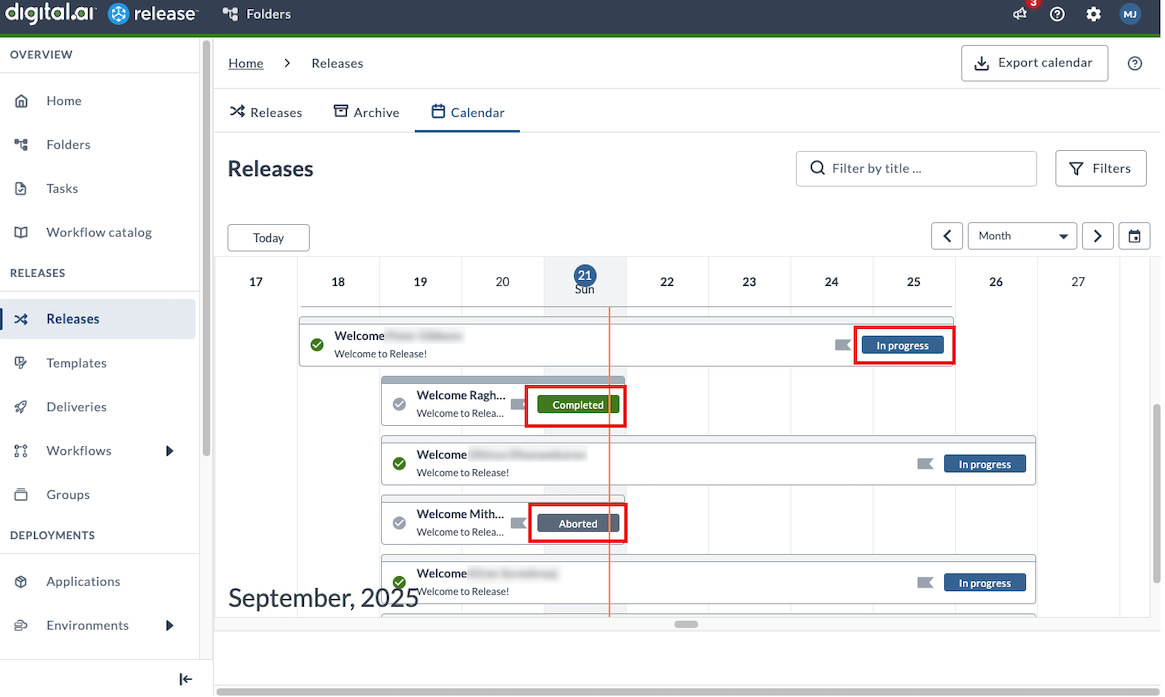
Click a release to view more details.
Hover over a dependent release to see it highlighted in the calendar.
Filtering Releases in the Calendar View
You can filter releases in two main ways:
-
Quick Filter by Title:
Use the Filter by title search box to instantly narrow down releases by their title.
-
Advanced Filters Drawer:
Open the Filters drawer to apply multiple filter criteria at once.
Filters Drawer - Calendar View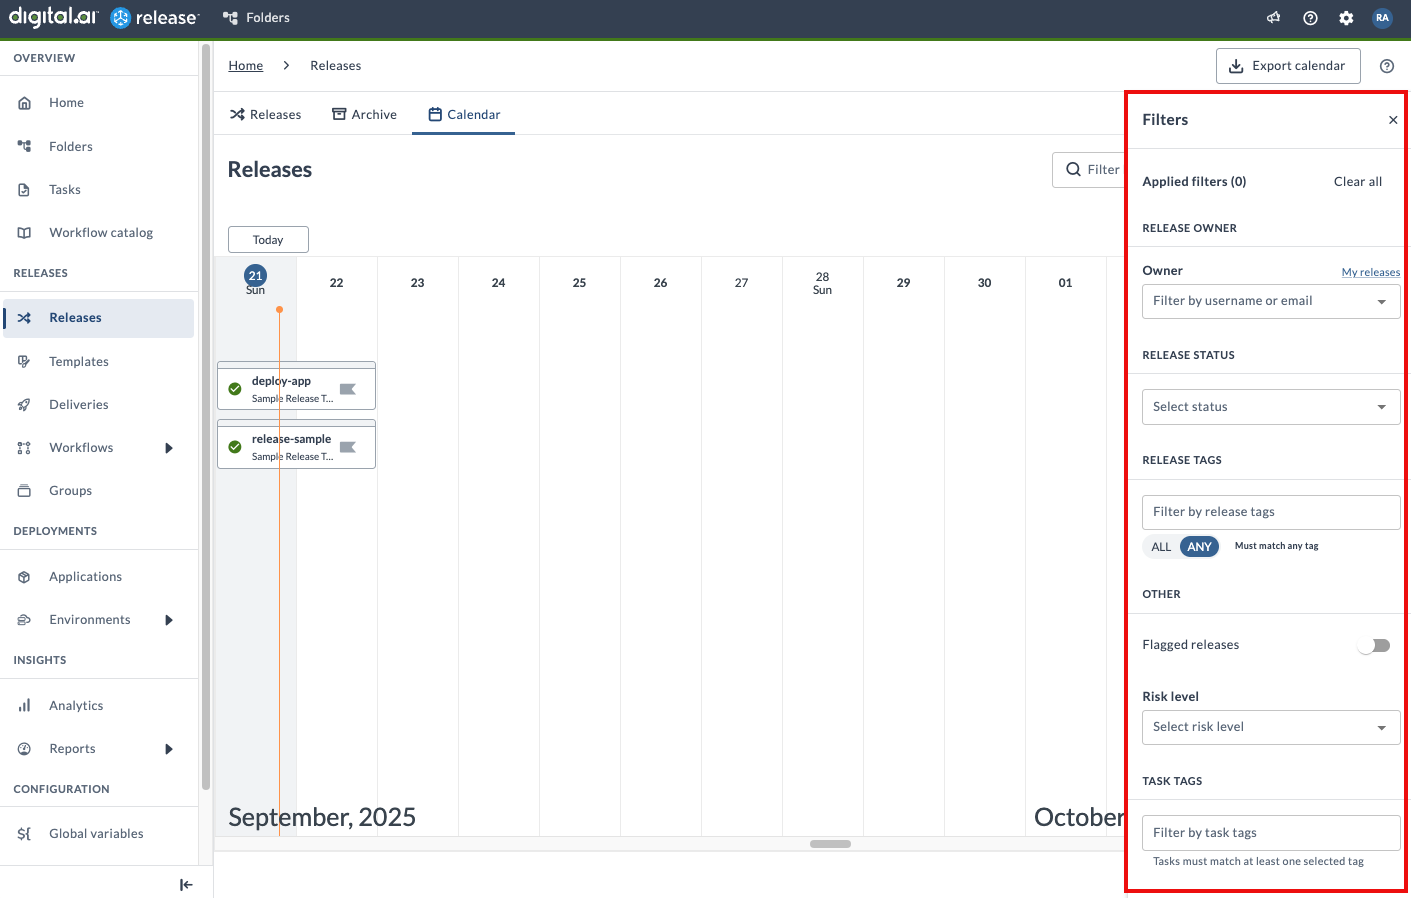
Available Filter Criteria:
- Owner: Filter by release owner name. To see only your releases, click My Releases.
- Release Status: Filter by one or more statuses:
- Planned: Releases created but not yet started (in the planned state)
- In Progress: Releases currently in progress
- Paused: Releases that are paused
- Failing: Releases that are failing
- Failed: Releases that have failed
- Aborted: Releases in the aborted state
- Completed: Releases in the completed state
- Release Tags: Filter by one or more release tags. Use the All option to show releases that include every selected tag, or Any to show releases that include at least one of the selected tags.
- Flagged Releases: Toggle to show only releases flagged with a warning message (click Flagged).
- Risk Level: Filter by risk level: On Track, At Risk, or Attention Needed.
- Task Tags: Filter by one or more task tags. Shows releases that contain at least one of the selected task tags.
- All filter fields support auto-complete where relevant for easier selection.
- The date range filter (Releases Active Within) does not apply to the Calendar tab.
Marking Special Days
You can highlight special days (such as holidays) in the Calendar tab by adding a custom label and background color. These are for visual reference only and do not affect task or release execution.
To mark a special day:
- Hover over the day you want to mark.
- Click the ellipsis menu
 .
. - Click Set label and choose your label and color.
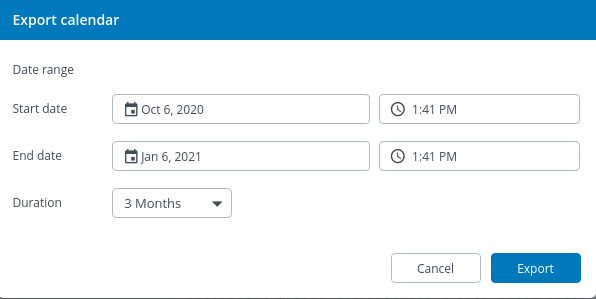
Exporting the Calendar
To export the calendar:
- Click the Export Calendar button at the top right of the Calendar view.

- In the dialog, select or specify the time period or date range to export.
- Click Export to download the calendar as an Excel file.
Setting a Blackout Period
You can set a blackout period to prevent specific tasks from being performed during that time. For more information, see Set blackout period.