Enable Application Security using OPA
Before you begin
This how-to involves working with a variety of tools and technologies such as Digital.ai Release, Digital.ai Deploy's DevOps as code (YAML files), GitHub, OPA, and so on. You can perform this task by simply following the instructions. However, being familiar with these tools and technologies can help you considerably when you try this out in your test environment.
What's the objective?
The objective is to set up an automated release and deployment pipeline—a pipeline of tools such as OPA, Application Security, Digital.ai Release, and have your application deployed to the required environment based on policy checks against guards and other security data.
Once you have this setup in place, all you would be doing is to push a code change to trigger a Parsing task in the automated release, evaluate the Application Security application output with predefined OPA policy, use the output to deploy the application in the test environment, verify the deployment to the test environment, and then approve the test deployment task to proceed with the deployment to your production environment.
What do you need?
- A Linux or Windows server (with root and Internet access) that has both Digital.ai and Release version 23.1.0 (or later) installed
- OPA plugin for Digital.ai Release (installed by default when you install Release)
- An OPA server running on local or remote host.
- An GitHub Actions/Jenkins Job with Application Security enabled (requires license for Application security software).
What do you have?
-
A xebialabs-community/application-security-opa GitHub repository that hosts the workflows and can be used to import the required templates.
-
A xebialabs-community/application-security-opa-policies GitHub repository that hosts the policies.
How does it work?

Here's a detailed step-by-step.
Step 1 — Set up Workflows for Templates
In Digital.ai Release,
- Create a new folder.
- From within the folder, in the left navigation pane, select Git versioning.
- Click Configure. The Git versioning settings screen opens.
- Under Git Repository, click on the New Repository link.
- Create a new connection by specifying the details of the GitHub Repository.
- Specify the branch as main and specify the Repository path as ApplicationSecurityWorkflows or use OpaManagementTasks for management templates.
- Click Save.
Note: In the Connections screen, create a connection to the OPA server with the name OPA Server1.
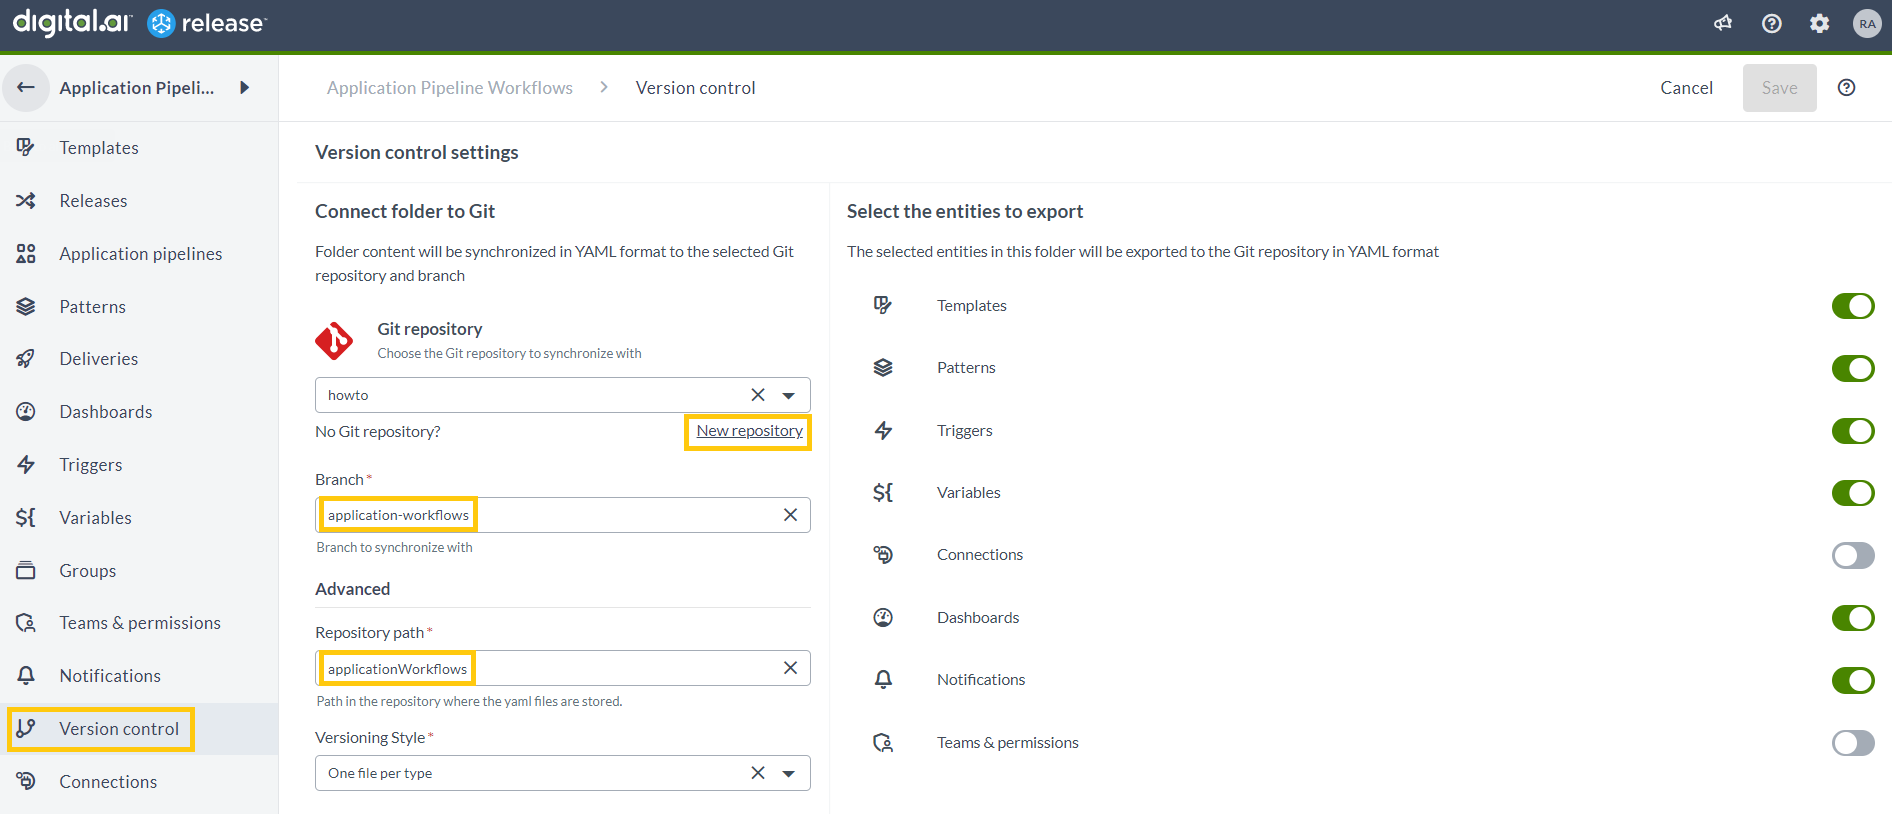
- In the Git versioning screen, select the latest version displayed and click Apply this version.
- The workflow templates are populated in the Templates screen.

Step 2 — Add Policy for Application Security using Create Policy Task
The Create Policy task creates a policy in the OPA server.
Sample Policies are hosted in the xebialabs-community/application-security-opa-policies repository, which can be used to enforce Android or Ios based application security.
- In the release flow tab of a Release template, add a task of type OPA > Create Policy.
- Click the added task to open it.
- In the Server field, select the configured OPA server.
- In the Name of policy to be created field, add the policy name.
- For policy that is a string, paste the policy in the Policy field.
- To fetch the policy as a code from the GitHub repository, add the URL of GitHub raw file in the Git File Url field, and the GitHub PAT in the Git PAT field.
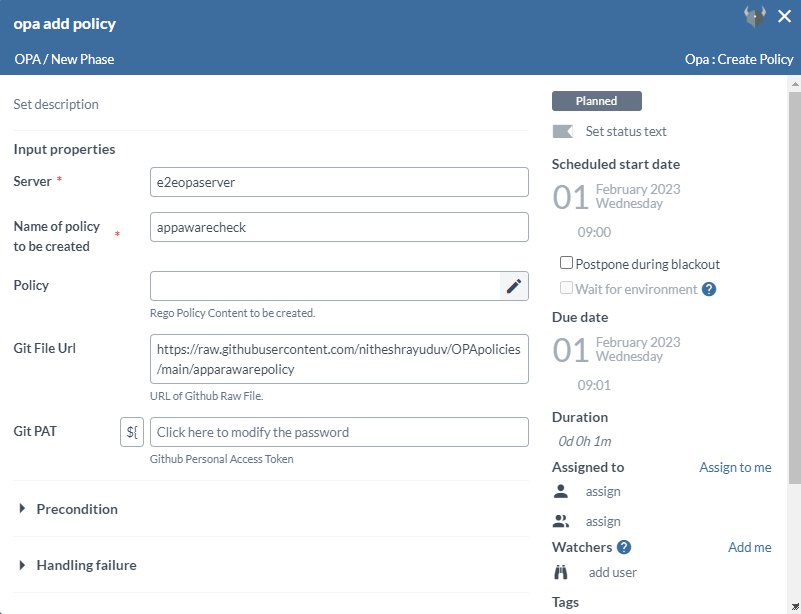
Step 3 — Create Automated Task in Github Actions or Jenkins Jobs to Trigger Based on Job Completion.
- In the GitHub actions update the manifest for githubactions to trigger automated release on code push.
Path:
<Repository>/.github/workflows/manifest.yml
  run: |
        run_id=${{ github.run_id }}
        echo "::set-output name=run_id::$run_id"
        echo ${{github.run_id}}
        curl --request POST -u 'admin:admin' --header 'content-type: application/json' --url 'http://111.111.111.111:5516/api/v1/templates/Applications/Folder59347dbf86ec4fb9ba7fa8822c855955/Release995328f6d3b6479993e8ed570b540b05/start' -d '{"releaseTitle":"Release-IOS-AndroidAppProtectionTest-${{github.run_id}}", "releaseVariables": {"REPO_NAME": "AndroidAppProtectionTest","WORKFLOWID": "${{github.run_id}}"}}'
Similar automation can be created on the Jenkins job with the curl command that is similar to the one above.
Step 4 — Add Parse GitHub Actions Log Task
To download and parse GitHub actions log task from an Application Security Job, perform the following steps:
Note: This task works only with Application Security Log.
- In the release flow tab of a Release template, add a task of type OPA > Parse GitHub Actions Log.
- Click the added task to open it.
- In the Server field, select the configured OPA server.
- In the Application Type field, select Android or Ios.
- In the Base url field, enter the GitHub api, for example
https://api.github.com. - In the Username field, enter the GitHub username.
- In the Git PAT field, enter the GitHub PAT.
- In the Repository Name field, enter the GitHub repository name.
- In the Workflow Run ID field, enter the GitHub Actions workflow ID.
- In the Json Input output properties field, the output will be assigned to the variable assigned in this field.
Note: The output variable can be used for further evaluation as an input.
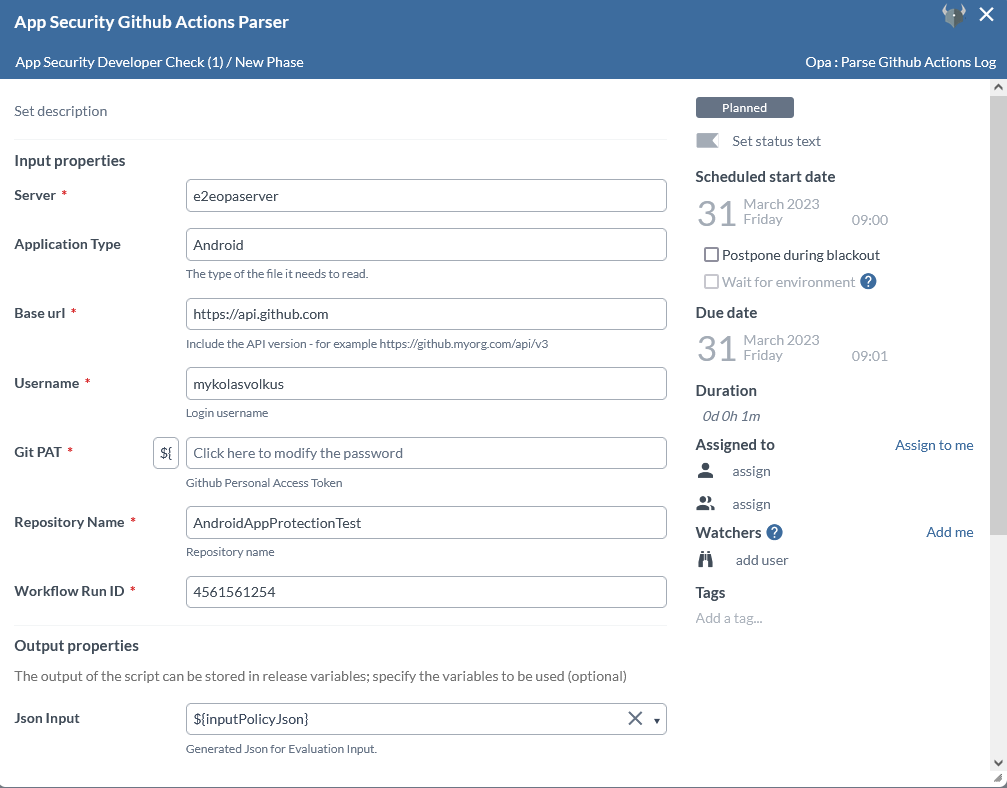
Step 5 — Add Parse Jenkins Log Task
To download and parse Jenkins log task from an Application Security Job, perform the following steps:
Note: This task works only with Application Security Log.
- In the release flow tab of a Release template, add a task of type OPA > Parse Jenkins Log.
- Click the added task to open it.
- In the Server field, select the configured OPA server.
- In the Application Type field, select Android or Ios.
- In the Jenkins Server field, select the configured Jenkins server.
- In the Username field, enter the Jenkins username.
- In the Password field, enter the Jenkins password, or else use the Token field.
- In the API Token field, enter the Jenkins token, or else use the Password.
- In the Job Url field, enter the Jenkins job URL.
- In the Json Input output properties field, the output will be assigned to the variable assigned in this field.
Note: The output variable can be used for further evaluation as an input.
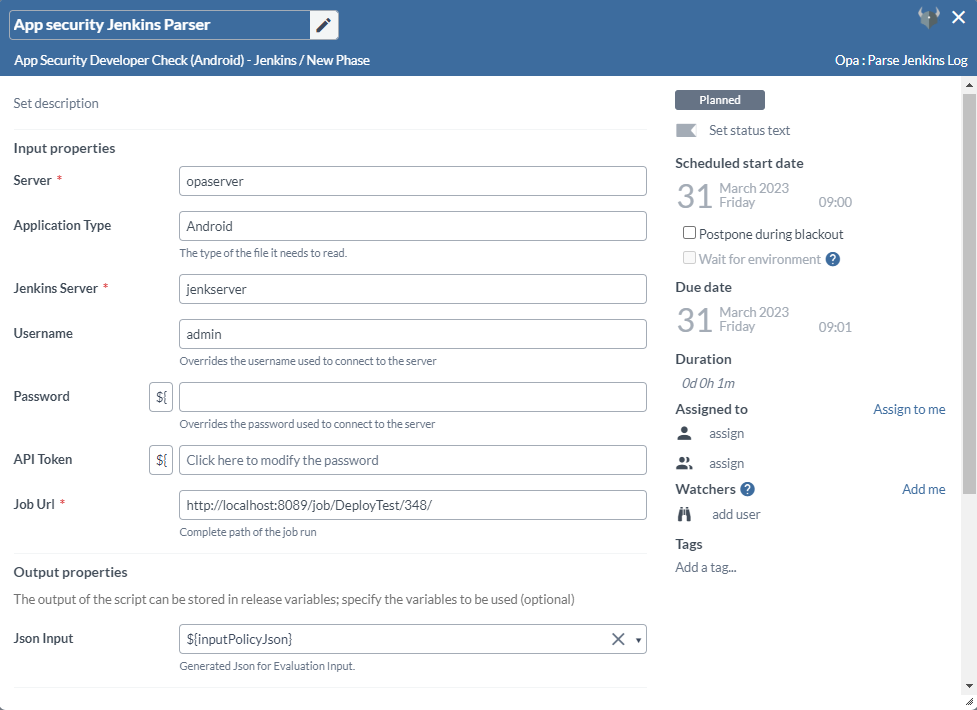
Step 6 — Evaluate Policy Task
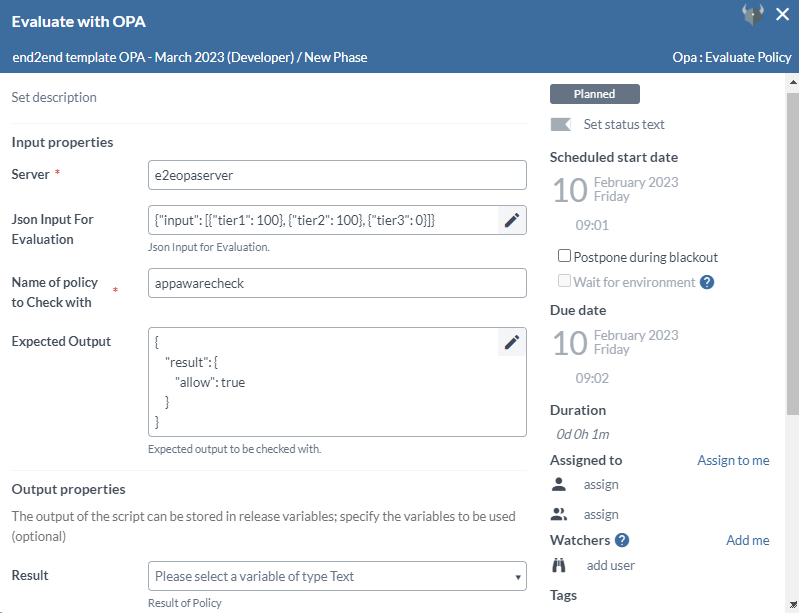
The Evaluate Policy task evaluates an input against a policy in the OPA server.
- In the release flow tab of a Release template, add a task of type OPA > Evaluate Policy.
- Click the added task to open it.
- In the Server field, select the configured OPA server.
- In the Json Input For Evaluation field, add the input which will be evaluated against the policy.
- In the Name of policy to Check with field.
- In the Expected Output field, the expected output will be checked with the actual policy check result.
Step 7 — Create an Application Security Evaluation Task with OPA - DevSecOps
To create an Application Security Evaluation task with OPA:
- Create the required policies following the above-mentioned steps in Add Create Policy task and starting the release.
- Create the required task for parsing GitHub actions logs following the Add a Parse GitHub Actions Log task or How to Add a Parse Jenkins Log task steps.
- Create the required Evaluation template with required policy name and input following the above mentioned steps in Add a Evaluate Policy task.
- Add other required tasks.
- Create and start the release for evaluating. Based on the evaluation add further required tasks.