Deploy to Amazon EKS Using Digital.ai Deploy and Release
This how-to demonstrates how you can leverage the Digital.ai Deploy and Release applications' capabilities and deploy your application to the Amazon EKS test and prod namespaces.
This how-to is built using Amazon EKS as the platform of choice for illustrative purposes.
Here's a video walk-through.
Before you begin
This how-to involves working with a variety of tools and technologies such as Digital.ai Deploy and Release, the XL CLI, Digital.ai Deploy's DevOps as code (YAML files), GitHub, Amazon EKS, AWS CLI, kubectl, and so on. You can perform this task by simply following the instructions. However, being familiar with these tools and technologies can help you considerably when you try this out in your test environment.
What's the objective?
The objective is to set up an automated release and deployment pipeline—a pipeline of tools such as GitHub, DockerHub, Digital.ai Release, Digital.ai Deploy, and Amazon EKS—and have your application deployed to the Amazon EKS cluster with little human intervention.
Once you have this setup in place, all you would be doing is pushing a code change to trigger a deployment job in the automated release and deployment pipeline and have your application deployed to your test environment, verify the deployment to the test environment, and then approve the test deployment task to proceed with the deployment to your production environment.
What do you need?
- A Linux or Windows server (with root and Internet access) that has both Digital.ai Deploy and Release version 10.2.1 (or later) installed
- XL CLI
- Kubernetes plugin for Digital.ai Deploy (installed by default when you install Deploy)
- An AWS account
- An Amazon EKS cluster—with two namespaces—
testandprod - AWS CLI and kubectl—to create the
testandprodnamespaces on your EKS cluster - A Docker Hub account—to push every new version of the demo application you generate to the Docker Hub repository
What do you have?
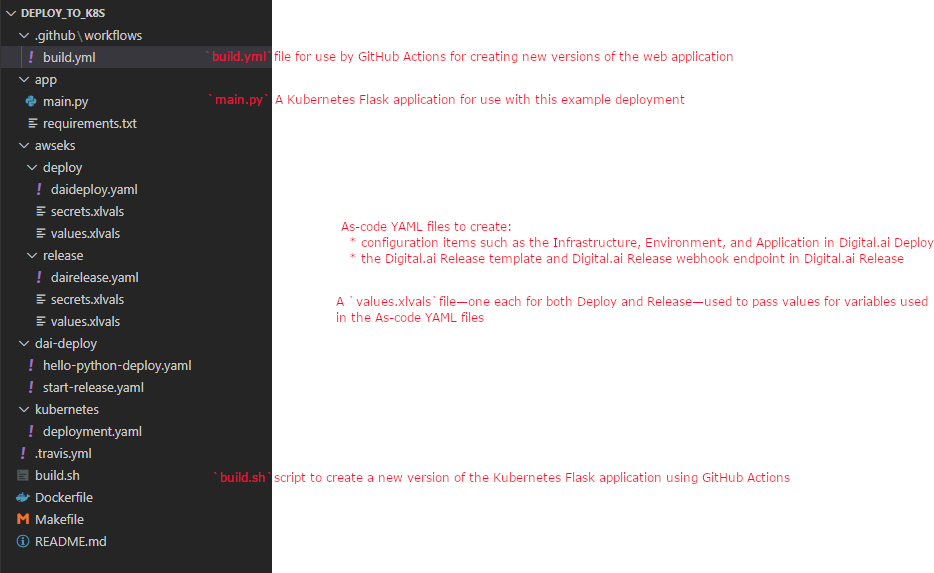
We have created a xebialabs-community/deploy-to-k8s GitHub repository that hosts the following.
- A Flask application for use with this example deployment.
- A build.sh script to create a new image of the Flask application using GitHub Actions.
- Digital.ai As-code YAML file for Deploy and Release to create:
- configuration items such as the Infrastructure, Environment, and Application in Digital.ai Deploy.
- the Digital.ai Release template, Deploy server configuration, webhook trigger, and Digital.ai Release webhook endpoint in Digital.ai Release.
- A build.yml file for use by GitHub Actions for creating new versions of the web application.
- A values.xlvals file—one each for both Deploy and Release—used to pass values for dictionary variables used in the As-code YAML files.
- A
secrets.xlvalsfile—one each for both Deploy and Release—used to store and pass values for Amazon EKS, Digital.ai Deploy and Release secrets.
How does it work?
Here's a high-level overview of what you would do to set this up and what happens when you start the deployment process with a simple code commit/merge.
At the end of this exercise you would have:
- forked the xebialabs-community/deploy-to-k8s GitHub repository and cloned the same to your Digital.ai Deploy/Release server.
- installed and configured Digital.ai Deploy and Release 10.2.1 (or later).
- installed XL CLI.
- created and configured an Amazon EKS cluster.
- installed AWS CLI and kubectl.
- configured AWS CLI and kubectl.
- created two namespaces—
testandprod—using AWS CLI/kubectl. - created the Digital.ai Deploy configuration items (using the As-code YAML file) such as Infrastructure, Environment (both
testandproddeployment environments), and Application. - created the webhook HTTP endpoint (using the As-code YAML file) in Digital.ai Release.
- created the Deploy server configuration, the Digital.ai Release template and the webhook trigger (using As-code YAML files) required for orchestrating your application deployments to the
testandprodenvironments.
The deployment process starts when you make a code change to your web application, create a new pull request, and merge your pull request. Here's what the automated deployment workflow does when you merge your changes.
- You—Commit and merge your Flask application's code changes to GitHub
- Automated deployment workflow—Builds your application to create a new version and adds the new version to the Docker Hub repository
- Automated deployment workflow—Triggers a new release in Digital.ai Release to deploy the new version of the Flask application
- Automated deployment workflow—Deploys the new application version to your
testenvironment in Amazon EKS - You—Verify the deployment and mark the verification task complete, which triggers the next phase of the release—deploy to
prod - Automated deployment workflow—Deploys the new application version to your
prodenvironment - You—Verify the deployment to
prodand complete the release process
Here's a detailed step-by-step.
Step 1—Create an Amazon EKS Cluster
For illustrative purposes, this topic deals with Amazon EKS. You can have your cluster in other cloud platforms such as GKE too.
-
Log on to your AWS account and gather the
AWSAccessKeyIdandAWSSecretKey.Create an access key if you do not have one already. For more information, see Managing access keys.
It is recommended to download and save the AWS access key file immediately after creating the access key as you cannot retrieve your Secret Access Key later.

-
Create an Amazon EKS Cluster. For more information, see Creating an Amazon EKS cluster.
While there are innumerable configurations possible for your EKS cluster, this topic assumes the EKS cluster is made up of:
- A cluster with three nodes of instance type
t2.medium - Two namespaces—
testandprod. You may choose to create two separate EKS clusters instead of sharing the same cluster with two namespaces. To keep the setup simple, this topic deals with a single cluster with two namespaces.
- A cluster with three nodes of instance type
-
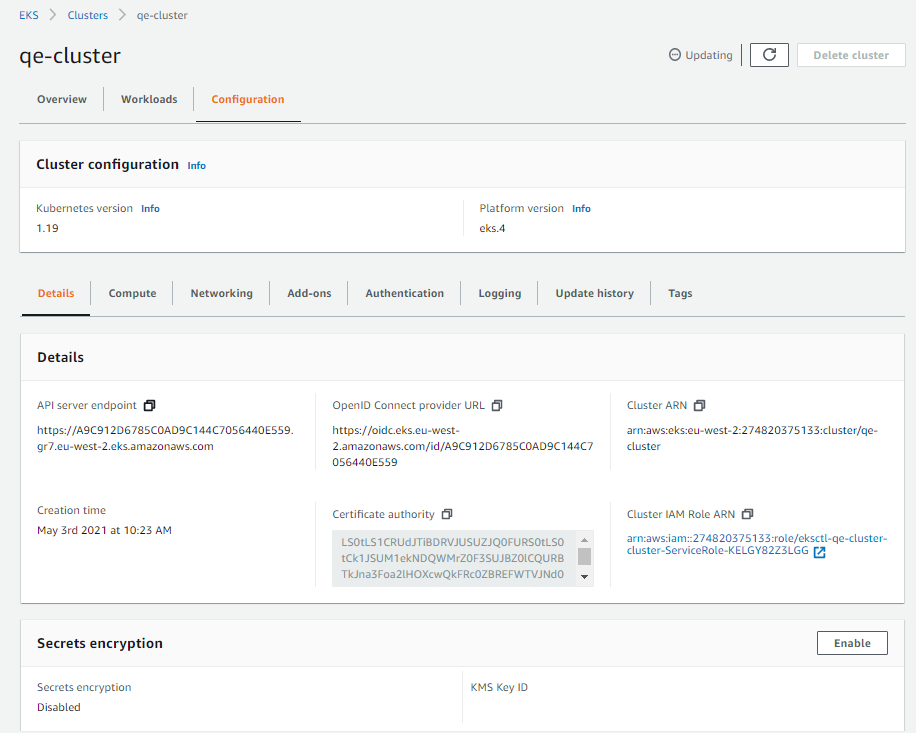
Gather the following information about your Amazon EKS cluster and keep them handy. The values you gather for these properties are added to the
values.xlvalsfile and are passed to the As-code YAML files while creating the Deploy configuration items.- Your Amazon account's
AWSAccessKeyIdandAWSSecretKey - The AWS region code (for example,
eu-west-2) that hosts the EKS cluster - The EKS cluster's name
- The API server endpoint URL
- The Certificate Authority (CA) cert
Here's an example Amazon EKS cluster and its configuration—
qe-cluster.Cluster Name:
qe-cluster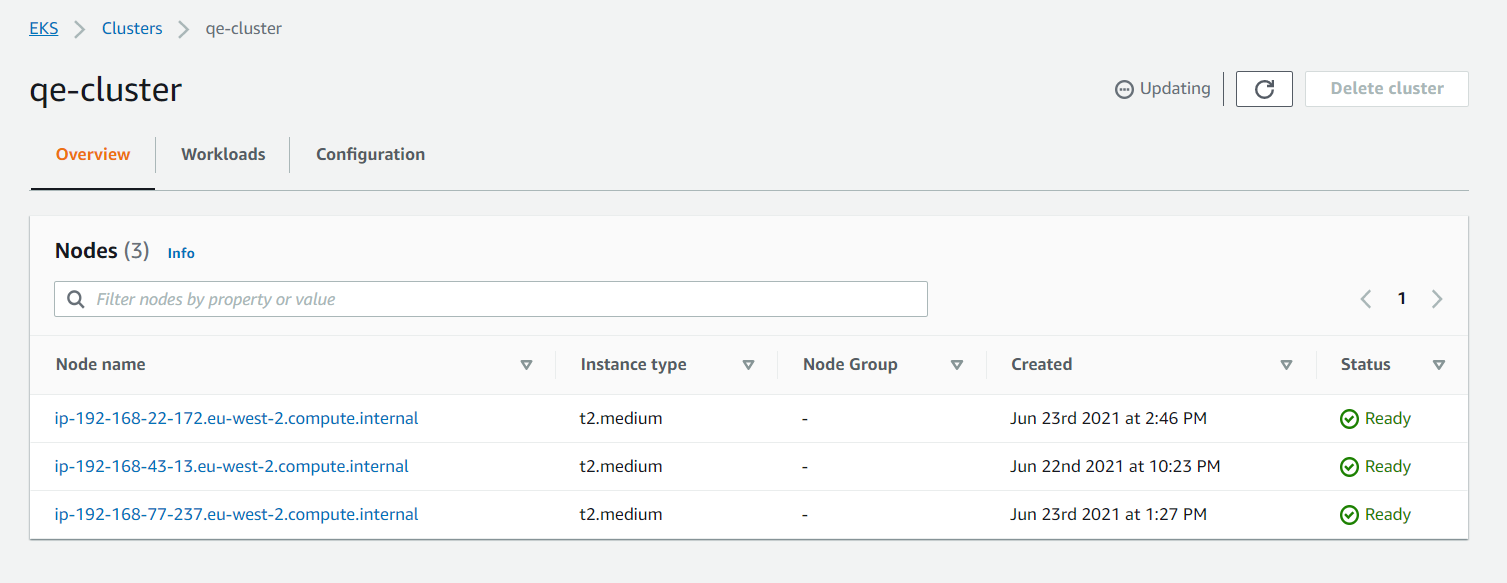
Cluster Configuration
- Your Amazon account's
Step 2—Install the NGINX ingress controller
The next step is to install an NGINX ingress controller to provide external access to the Kubernetes services in your Amazon EKS cluster.
For more information about installing the Bitnami/NGINX ingress controller, see INSTALL BITNAMI/NGINX. While this how-to uses the Bitnami/NGINX, you can install any other flavor of NGINX too.
Configure a domain name for your Amazon EKS cluster using Amazon Route 53
This is required to map the IP addresses of your test and prod NGINX ingress controllers to fully qualified domain names (FQDNs).
You must choose two FQDNs, one for the test ingress controller and the other for the prod ingress controller and configure the domain name mapping for the ingress controllers using Amazon Route 53.
Let's use the following two FQDNs for this tutorial.
testingress controller's FQDN:testdigitalai.xldevinfra.comprodingress controller's FQDN:proddigitalai.xldevinfra.com
For more information about how to configure the FQDNs in Route 53, see Configuring Amazon Route 53 as your DNS service.
Step 3—Set up your Digital.ai Deploy and Release servers
-
Log on to your Linux/Windows server as a root user.
-
Install Digital.ai Release.
-
Install Digital.ai Deploy.
- You mush have a database (including the database driver), PostgreSQL for example, installed and configured for use with Digital.ai Deploy
Tip: If you want to install Deploy and Release using Docker images:
- Install Docker and Docker Compose
- See Install Deploy and Install Release.
-
Start your Digital.ai Deploy and Release servers and log on to them.
-
Fork the xebialabs-community/deploy-to-k8s GitHub repository and clone it. Suppose you clone the repository to the your home directory (for example,
/home/john). -
Go to the forked repository in GitHub and enable GitHub Actions for the forked repository.
-
Install XL CLI.
Add the XL CLI (xl) binary's location to the $PATH environment variable to be able to run it from the following folders:
- Deploy:
/deploy-to-k8s/awseks/deploy - Release:
/deploy-to-k8s/awseks/release
Step 4—Update the values.xlvals and secrets.xlvals files
- Do this on the local
.xlvalsfiles. - Do not commit the
secrets.xlvalsfile to your GitHub repository. Always manage thesecrets.xlvalsfile locally. - Do not change the names of any variables such as
REGION_NAMEorAPI_SERVER_URLor secrets such asAWS_ACCESS_KEYorAWS_SECRET_KEY.
-
Open the Deploy's
values.xlvalsand Release'svalues.xlvalsfiles and update the files with all the required values.Here's an example
values.xlvalsfile with values.Deploy's values.xlvals
# This file includes all non-secret values, you can add variables here and then refer them with '!value' tag in YAML filesREGION_NAME=eu-west-2CLUSTER_NAME=qe-clusterAPI_SERVER_URL=https://A9C912D6785C0AD9C144C7056440E559.gr7.eu-west-2.eks.amazonaws.comCA_CERT=LS0tLS1CRUdJTiBDRVJUSUZJQ0FURS0tLS0tCk1JSUM1ekNDQWMrZ0F3SUJBZ0lCQURBTkJna3Foa2lHOXcwQkFRc0ZBREFWTVJNd0VRWURWUVFERXdwcmRXSmwKY201bGRHVnpNQjRYRFRJeE1EVXdNekEwTlRrd01Gb1hEVE14TURVd01UQTBOVGt3TUZvd0ZURVRNQkVHQTFVRQpBeE1LYTNWaVpYSnVaWFJsY3pDQ0FTSXdEUVlKS29aSWh2Y05BUUVCQlFBRGdnRVBBRENDQVFvQ2dnRUJBTXZICnR1alhCSE5NWDdWT0pSbVRKUFUyVkVib2E5S3psdkd5OFF6Q1VSR2dLY1E0QlRvclh2cmJ0MzY4Y0xoOEF0REEKOUQ2emExZFh2YW1IWkg1WG1ldWI1MCs3ZFRLSDVXQWdZeWlvM1hRak9vZWpBMzlUYUx3eU9CNVAzcWJRczlpSwpJN3VlbzlZKzNiUEdZbGVMa2RuelhhSE04bnNYRU1Wek4xQzhQdENTZVluQlZHQ3R1elVTd3pNWHZDS1NsS0tECmc4ZjUxMXViK3d5YllpOEVESVc2UjN6b2JWK200NUZrUHVCTXFQek9heEQxeHdqMTIzKzFkMFByWHNlRHBBYTEKeFIyVHVnRVd6ZEVDTTFtK3QzclQ4Z1BhVHRWWkJRUVp5dlVacXBPaHhnMFlyWTAvczRtUXZiOUlDbjhONkVjMwpoWis3b3BFaTgxRm0wRWw1UUZFQ0F3RUFBYU5DTUVBd0RnWURWUjBQQVFIL0JBUURBZ0trTUE4R0ExVWRFd0VCCi93UUZNQU1CQWY4d0hRWURWUjBPQkJZRUZIWXMxQlF4SWJxQ3kvMEpMS3BqR25HOFl1YW1NQTBHQ1NxR1NJYjMKRFFFQkN3VUFBNElCQVFBRlZDdjVhN0Q2L0tMdUdvaEM0aWJlcHkyZVprRCtNNFBCSjFoTWNYcS8vck53a284cwp0OW40WDJrcDh1L1lkOGhJZ1paODlzMmRvaVJEc0dOejRQNUFnbkU3RXhnTUYxSDV0ejFxSHpDVXp1dXdYbmJLCm9TWkhFRFdLKzhsc3ZjVVNkTUNtZ2RPUDNza1dQNjNJazNqcFlwQUNnUUxYemk==#FQDN of test ingress hostTEST_INGRESS_HOST=testdigitalai.xldevinfra.com#FQDN of prod ingress hostPROD_INGRESS_HOST=proddigitalai.xldevinfra.comRelease's values.xlvals
# This file includes all non-secret values, you can add variables here and then refer them with '!value' tag in YAML files#DAI Deploy server URLDEPLOY_SERVER_URL=http://localhost:4516#DAI Deploy server usernameDEPLOY_SERVER_USERNAME=admin -
Open the Deploy's
secrets.xlvalsand Release'ssecrets.xlvalsand update the files with all the required values.Caution Do not commit the
secrets.xlvalsfile to your GitHub repository. Always manage thesecrets.xlvalsfile locally. Addsecrets.xlvalsto the.gitignorefile to prevent it from being committed to your GitHub repository.Here's an example
secrets.xlvalsfile with values.Deploy's secrets.xlvals
#SecretsAWS_ACCESS_KEY=XXXXXXXXXXXXXXXXXXXXXXAWS_SECRET_KEY=XXXXXXXXXXXXXXXXXXXXXXRelease's secrets.xlvals
#Secrets#Dai release admin password, required to run automated task in templateRELEASE_ADMIN_PASSWORD=<password>#DAI Deploy server passwordDEPLOY_SERVER_PASSWORD=<password> -
Run the
xl applycommand to apply the As-code YAML file, which creates the release template and webhook triggers in Digital.ai Release.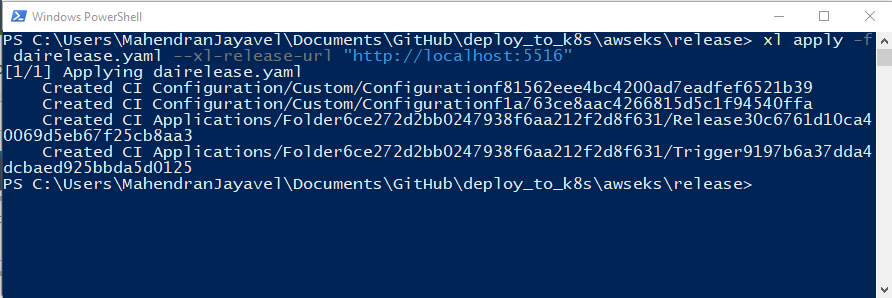
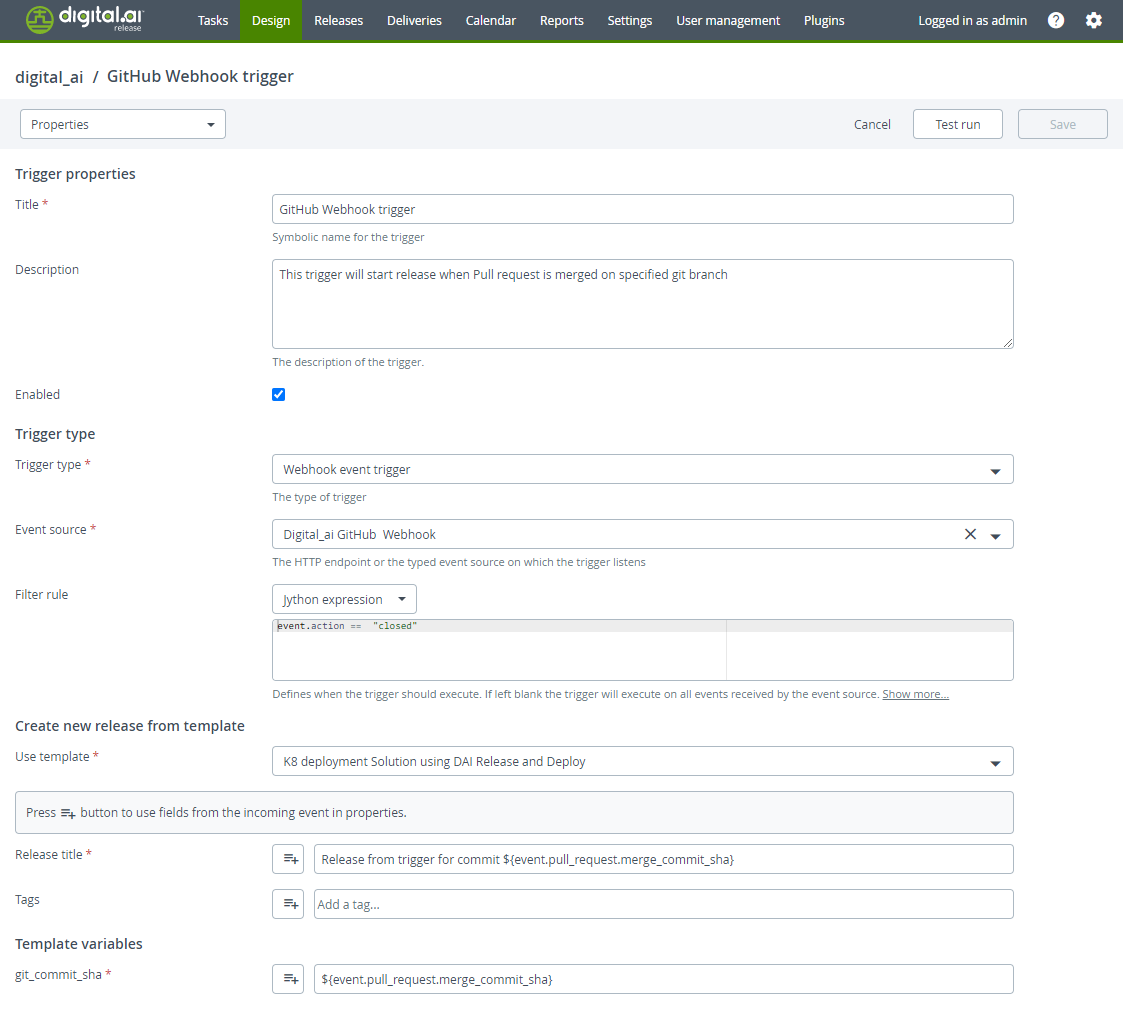
Log on to Digital.ai Release and verify if the following are created:
-
digital.airelease folder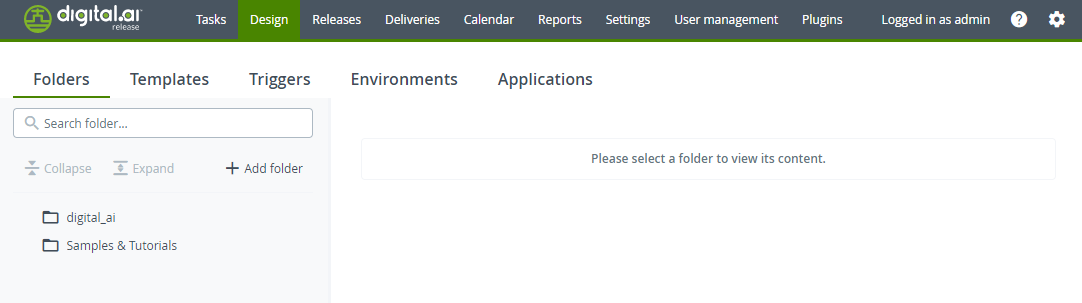
-
K8 deployment Solution using Release and Deployrelease template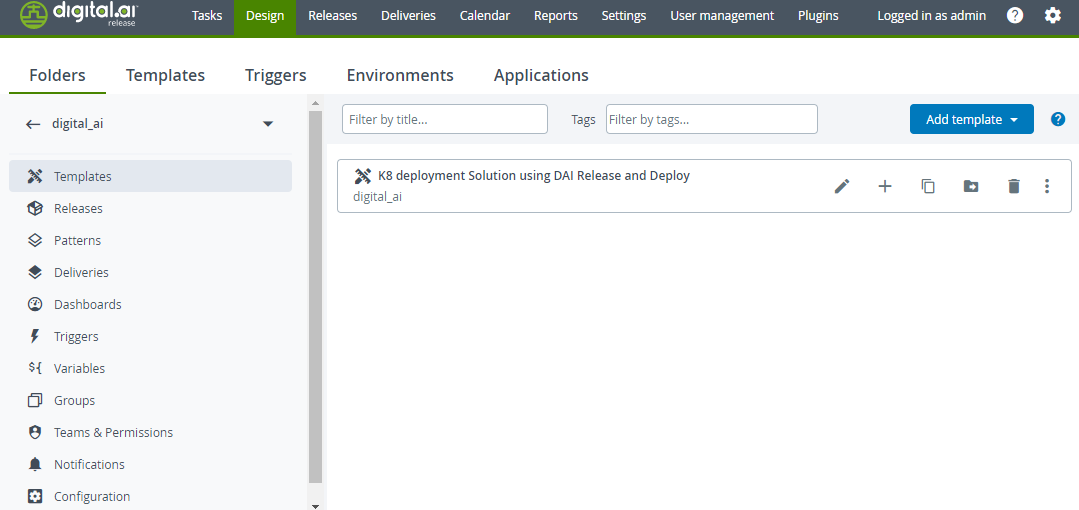
-
Deploy server configuration and HTTP endpoint
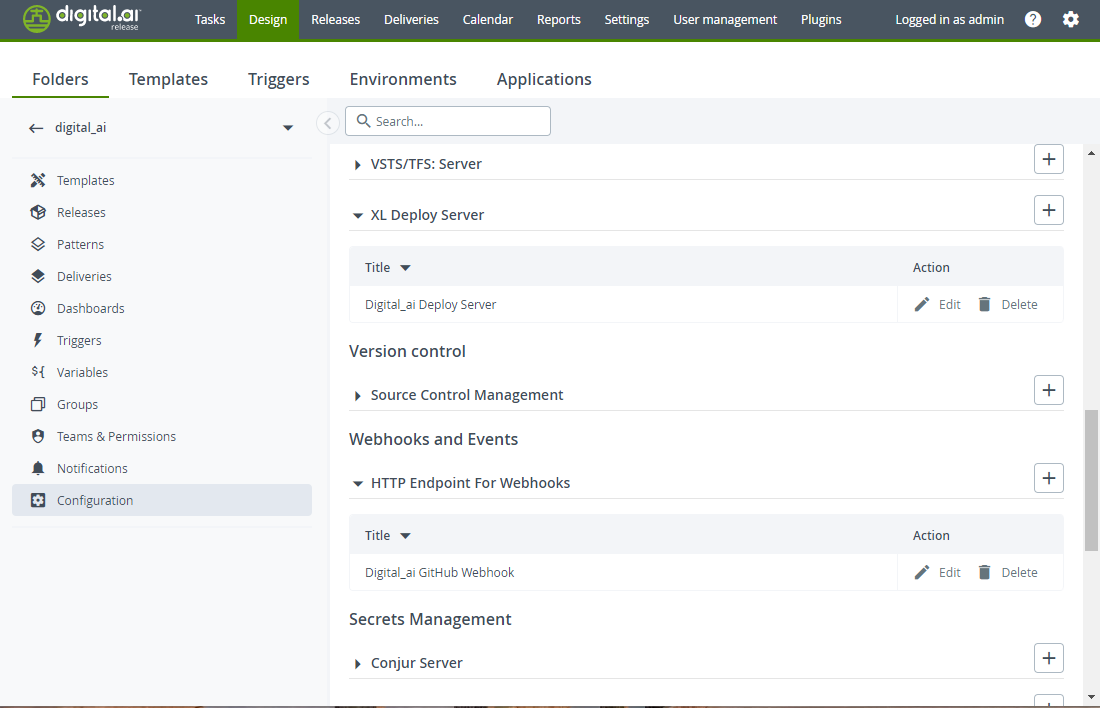
-
A GitHub webhook trigger for the
K8 deployment Solution using Release and Deployrelease template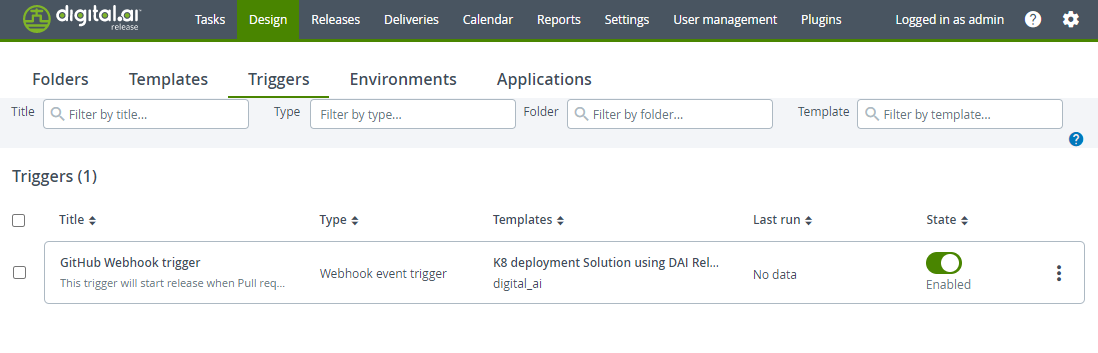
-
-
Run the
xl applycommand to apply the As-code YAML file, which creates the Infrastructure, Environment, and Application configuration items in Digital.ai Deploy.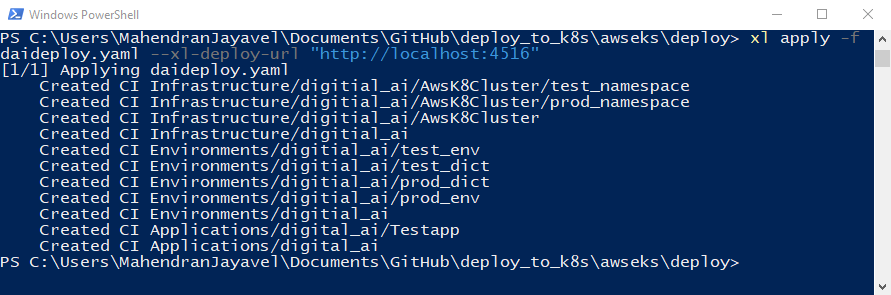
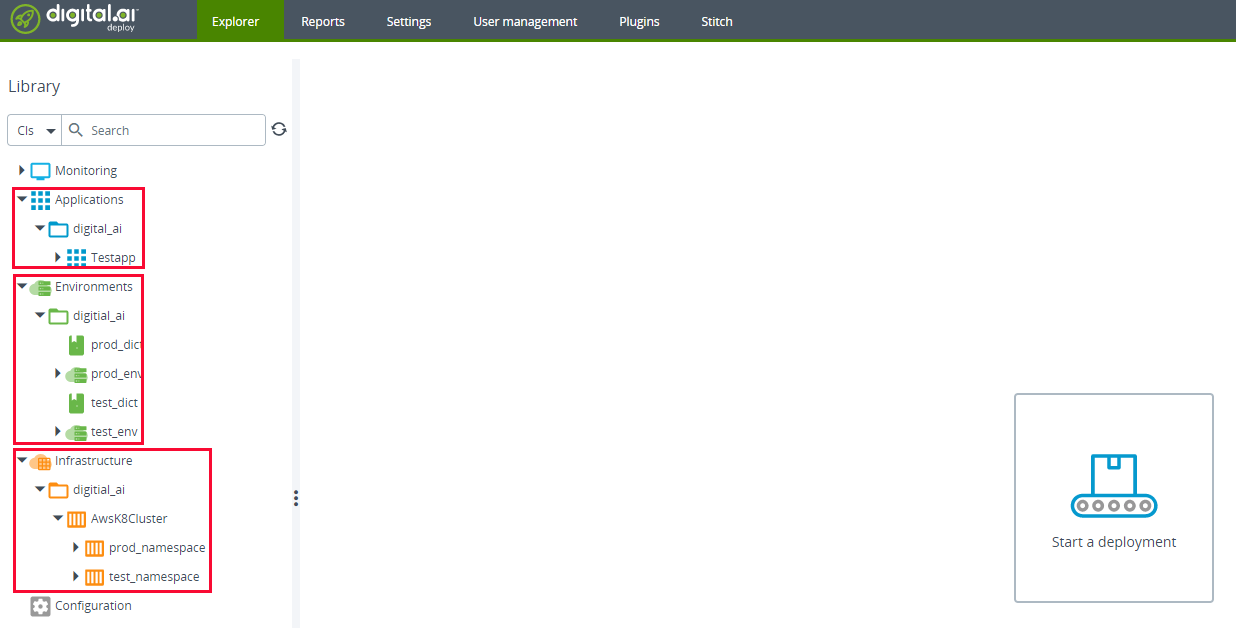
Log on to Digital.ai Deploy and verify if the Application, Environment, and Infrastructure configuration items are created.
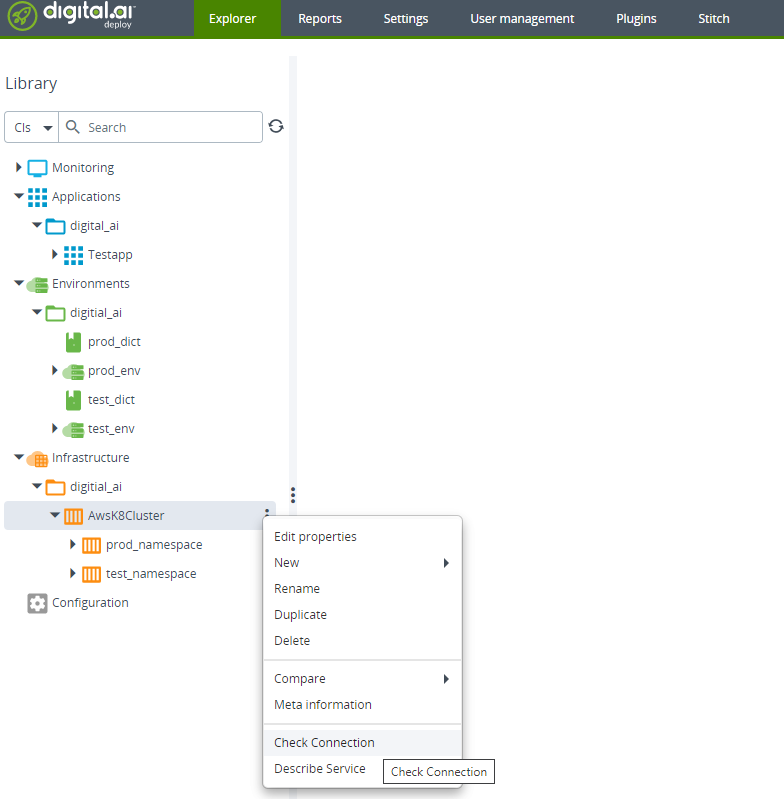
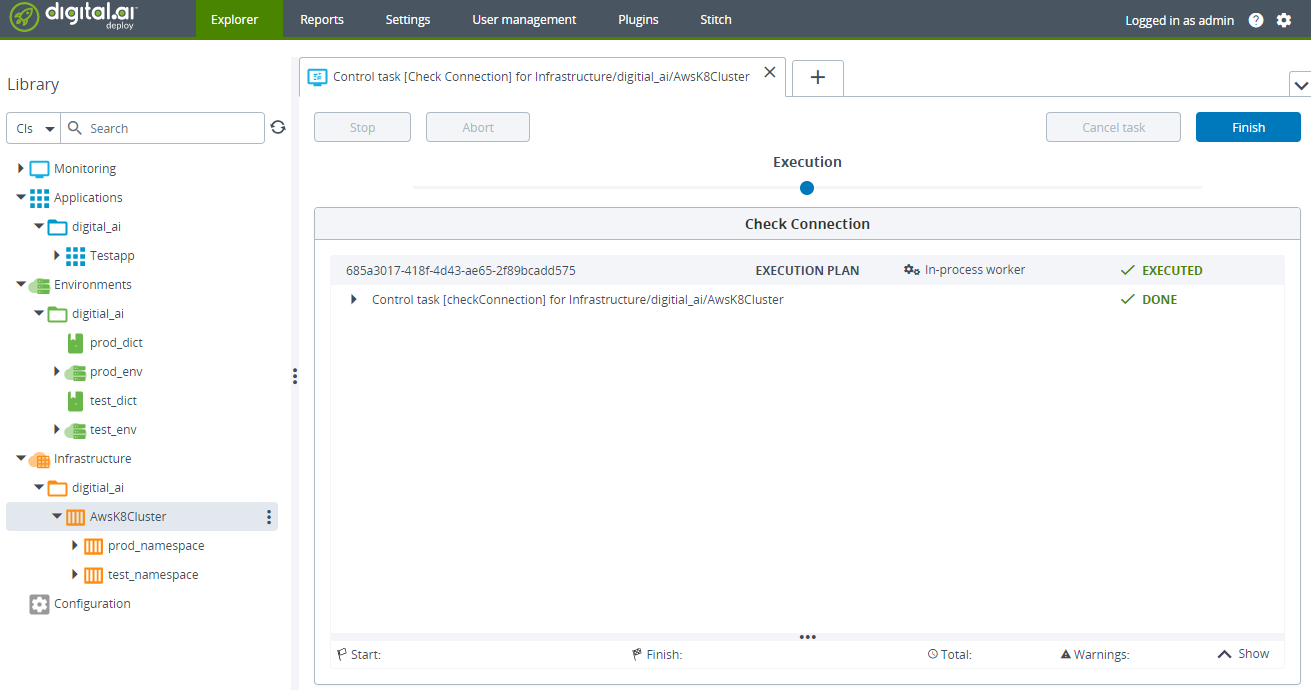
-
Check connection to the Amazon EKS cluster.
Step 5—Install and configure AWS CLI and kubectl
-
Log on to your Linux/Windows server as a root user.
-
Install AWS CLI.
-
Run the following command to configure the AWS CLI. Enter the values when prompted
$ aws configureAWS Access Key ID [None]: XXXXXEXAMPLEACCESSKEYIDXXXXXXXXXXXAWS Secret Access Key [None]: wJalrXUtnFEMI/K7MDENG/bPxRfiCYEXAMPLEKEYDefault region name [None]: us-west-2Default output format [None]: json- For more information, see Quick configuration with aws configure.
- By default, the AWS CLI uses the default profile. FOr illustrative purposes, let us use the default profile.
-
Install kubectl.
-
Configure the kubeconfig file with the EKS cluster's details.
Here's a sample
kubeconfigfile:apiVersion: v1clusters:- cluster:certificate-authority-data: LS0tLS1CRUdJTiBDRVJUSUZJQ0FURS0tLS0tCk1JSUM1ekNDQWMrZ0F3SUJBZ0lCQURBTkJna3Foa2lHOXcwQkFRc0ZBREFWTVJNd0VRWURWUVFERXdwcmRXSmwKY201bGRHVnpNQjRYRFRJeE1EVXdNekEwTlRrd01Gb1hEVE14TURVd01UQTBOVGt3TUZvd0ZURVRNQkVHQTFVRQpBeE1LYTNWaVpYSnVaWFJsY3pDQ0FTSXdEUVlKS29aSWh2Y05BUUVCQlFBRGdnRVBBRENDQVFvQ2dnRUJBTXZICnR1alhCSE5NWDdWT0pSbVRKUFUyVkVib2E5S3psdkd5OFF6Q1VSR2dLY1E0QlRvclh2cmJ0MzY4Y0xoOEF0REEKOUQ2emExZFh2YW1IWkg1WG1ldWI1MCs3ZFRLSDVXQWdZeWlvM1hRak9vZWpBMzlUYUx3eU9CNVAzcWJRczlpSwpJN3VlbzlZKzNiUEdZbGVMa2RuelhhSE04bnNYRU1Wek4xQzhQdENTZVluQlZHQ3R1elVTd3pNWHZDS1NsS0tECmc4ZjUxMXViK3d5YllpOEVESVc2UjN6b2JWK200NUZrUHVCTXFQek9heEQxeHdqMTIzKzFkMFByWHNlRHBBYTEKeFIyVHVnRVd6ZEVDTTFtK3QzclQ4Z1BhVHRWWkJRUVp5dlVacXBPaHhnMFlyWTAvczRtUXZiOUlDbjhONkVjMwpoWis3b3BFaTgxRm0wRWw1UUZFQ0F3RUFBYU5DTUVBd0RnWURWUjBQQVFIL0JBUURBZ0trTUE4R0ExVWRFd0VCCi93UUZNQU1CQWY4d0hRWURWUjBPQkJZRUZIWXMxQlF4SWJxQ3kvMEpMS3BqR25HOFl1YW1NQTBHQ1NxR1NJYjMKRFFFQkN3VUFBNElCQVFBRlZDdjVhN0Q2L0tMdUdvaEM0aWJlcHkyZVprRCtNNFBCSjFoTWNYcS8vck53a284cwp0OW40WDJrcDh1L1lkOGhJZ1paODlzMmRvaVJEc0dOejRQNUFnbkU3RXhnTUYxSDV0ejFxSHpDVXp1dXdYbmJLCm9TWkhFRFdLKzhsc3ZjVVNkTUNtZ2RPUDNza1dQNjNJazNqcFlwQUNnUUxYemkxMmNQTVBuVEtPekVULzNQcmIKYmV5ZzJGZ1pCWW0rVE15Wi93ektGb2hGV3Z1WW1oSWFHUkRkeUpENmZBdWFKOG9rYTFnVXBKZ0pqTkhOWmJ6dgppNmMyVTIwS0M1aUhiTFdkRnkvb3YxaktYMzBUMk9qV0wxSG13TzR6SHZ2UjFHLy84RGxkNEpSQnVha283S1FhCk5qQnE2R1F6bEdsT2FScXFPVXNzSC9kUXRNdEFvbk1KeVpwWgotLS0tLUVORCBDRVJUSUZJQ0FURS0tLS0tCg==server: https://A9C912D6785C0AD9C144C7056440E559.gr7.eu-west-2.eks.amazonaws.comname: arn:aws:eks:eu-west-2:274820375133:cluster/qe-clustercontexts:- context:cluster: arn:aws:eks:eu-west-2:274820375133:cluster/qe-clusteruser: arn:aws:eks:eu-west-2:274820375133:cluster/qe-clustername: arn:aws:eks:eu-west-2:274820375133:cluster/qe-clustercurrent-context: arn:aws:eks:eu-west-2:274820375133:cluster/qe-clusterkind: Configpreferences: {}users:- name: arn:aws:eks:eu-west-2:274820375133:cluster/qe-clusteruser:exec:apiVersion: client.authentication.k8s.io/v1alpha1args:- --region- eu-west-2- eks- get-token- --cluster-name- qe-clustercommand: aws -
Verify the kubectl configuration by getting your EKS cluster state, for example.
kubectl cluster-info
Step 6—Create Amazon EKS namespaces
With AWS CLI and kubectl utilities installed and configured, let us now create two namespaces, test and prod, on the EKS cluster.
Run the following commands to create two namespaces—test and prod
kubectl create namespace test
kubectl create namespace prod
Step 7—GitHub—Configure Webhook and add secrets
-
Go to Settings > Secrets of your forked GitHub repository and add the following secrets.
- DOCKER_USER—your Docker Hub user name
- DOCKER_PASSWORD—your Docker Hub password
- DOCKER_REPO—your Docker Hub repository name,
hello-py, for example - XLD_USER—your Digital.ai Deploy user name
- XLD_PASSWD—your Digital.ai Deploy password
- XLD_URL—your Digital.ai URL (should be a publicly accessible FQDN)
- XLR_URL—your Digital.ai Release URL (should be a publicly accessible FQDN)
**Important: ** Both the Release and Deploy servers must have public IP addresses assigned to them. If you are trying this out for testing purposes and if you run the Deploy and Release servers in your
localhost(in the absence of public IPs), use utilities such as ngrok to create a tunnel to expose your localhost (ports: 4516 and 5516 for Deploy and Release respectively) to the internet.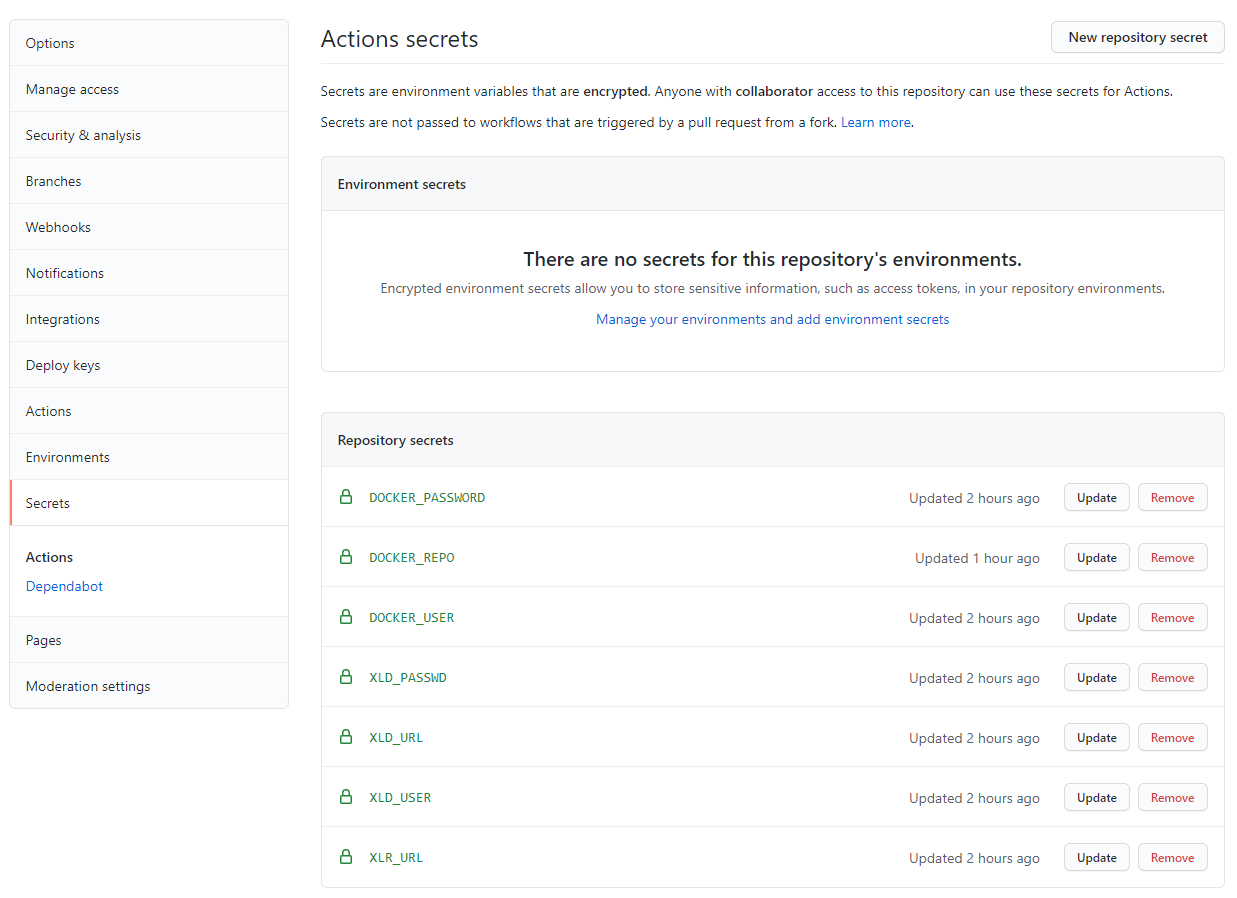
-
Go to Settings > Webhooks and click Add webhook.
-
Type the webhooks URL for Digital.ai Release in the Payload URL field.
The webhook's name (at the end of the payload URL) must be hellopy as shown in the following illustration.
-
Select application/json from the Content Type drop-down list.
-
Select Let me select individual events option from Which events would you like to trigger this webhook? section.
-
Select the Pull Requests check box.
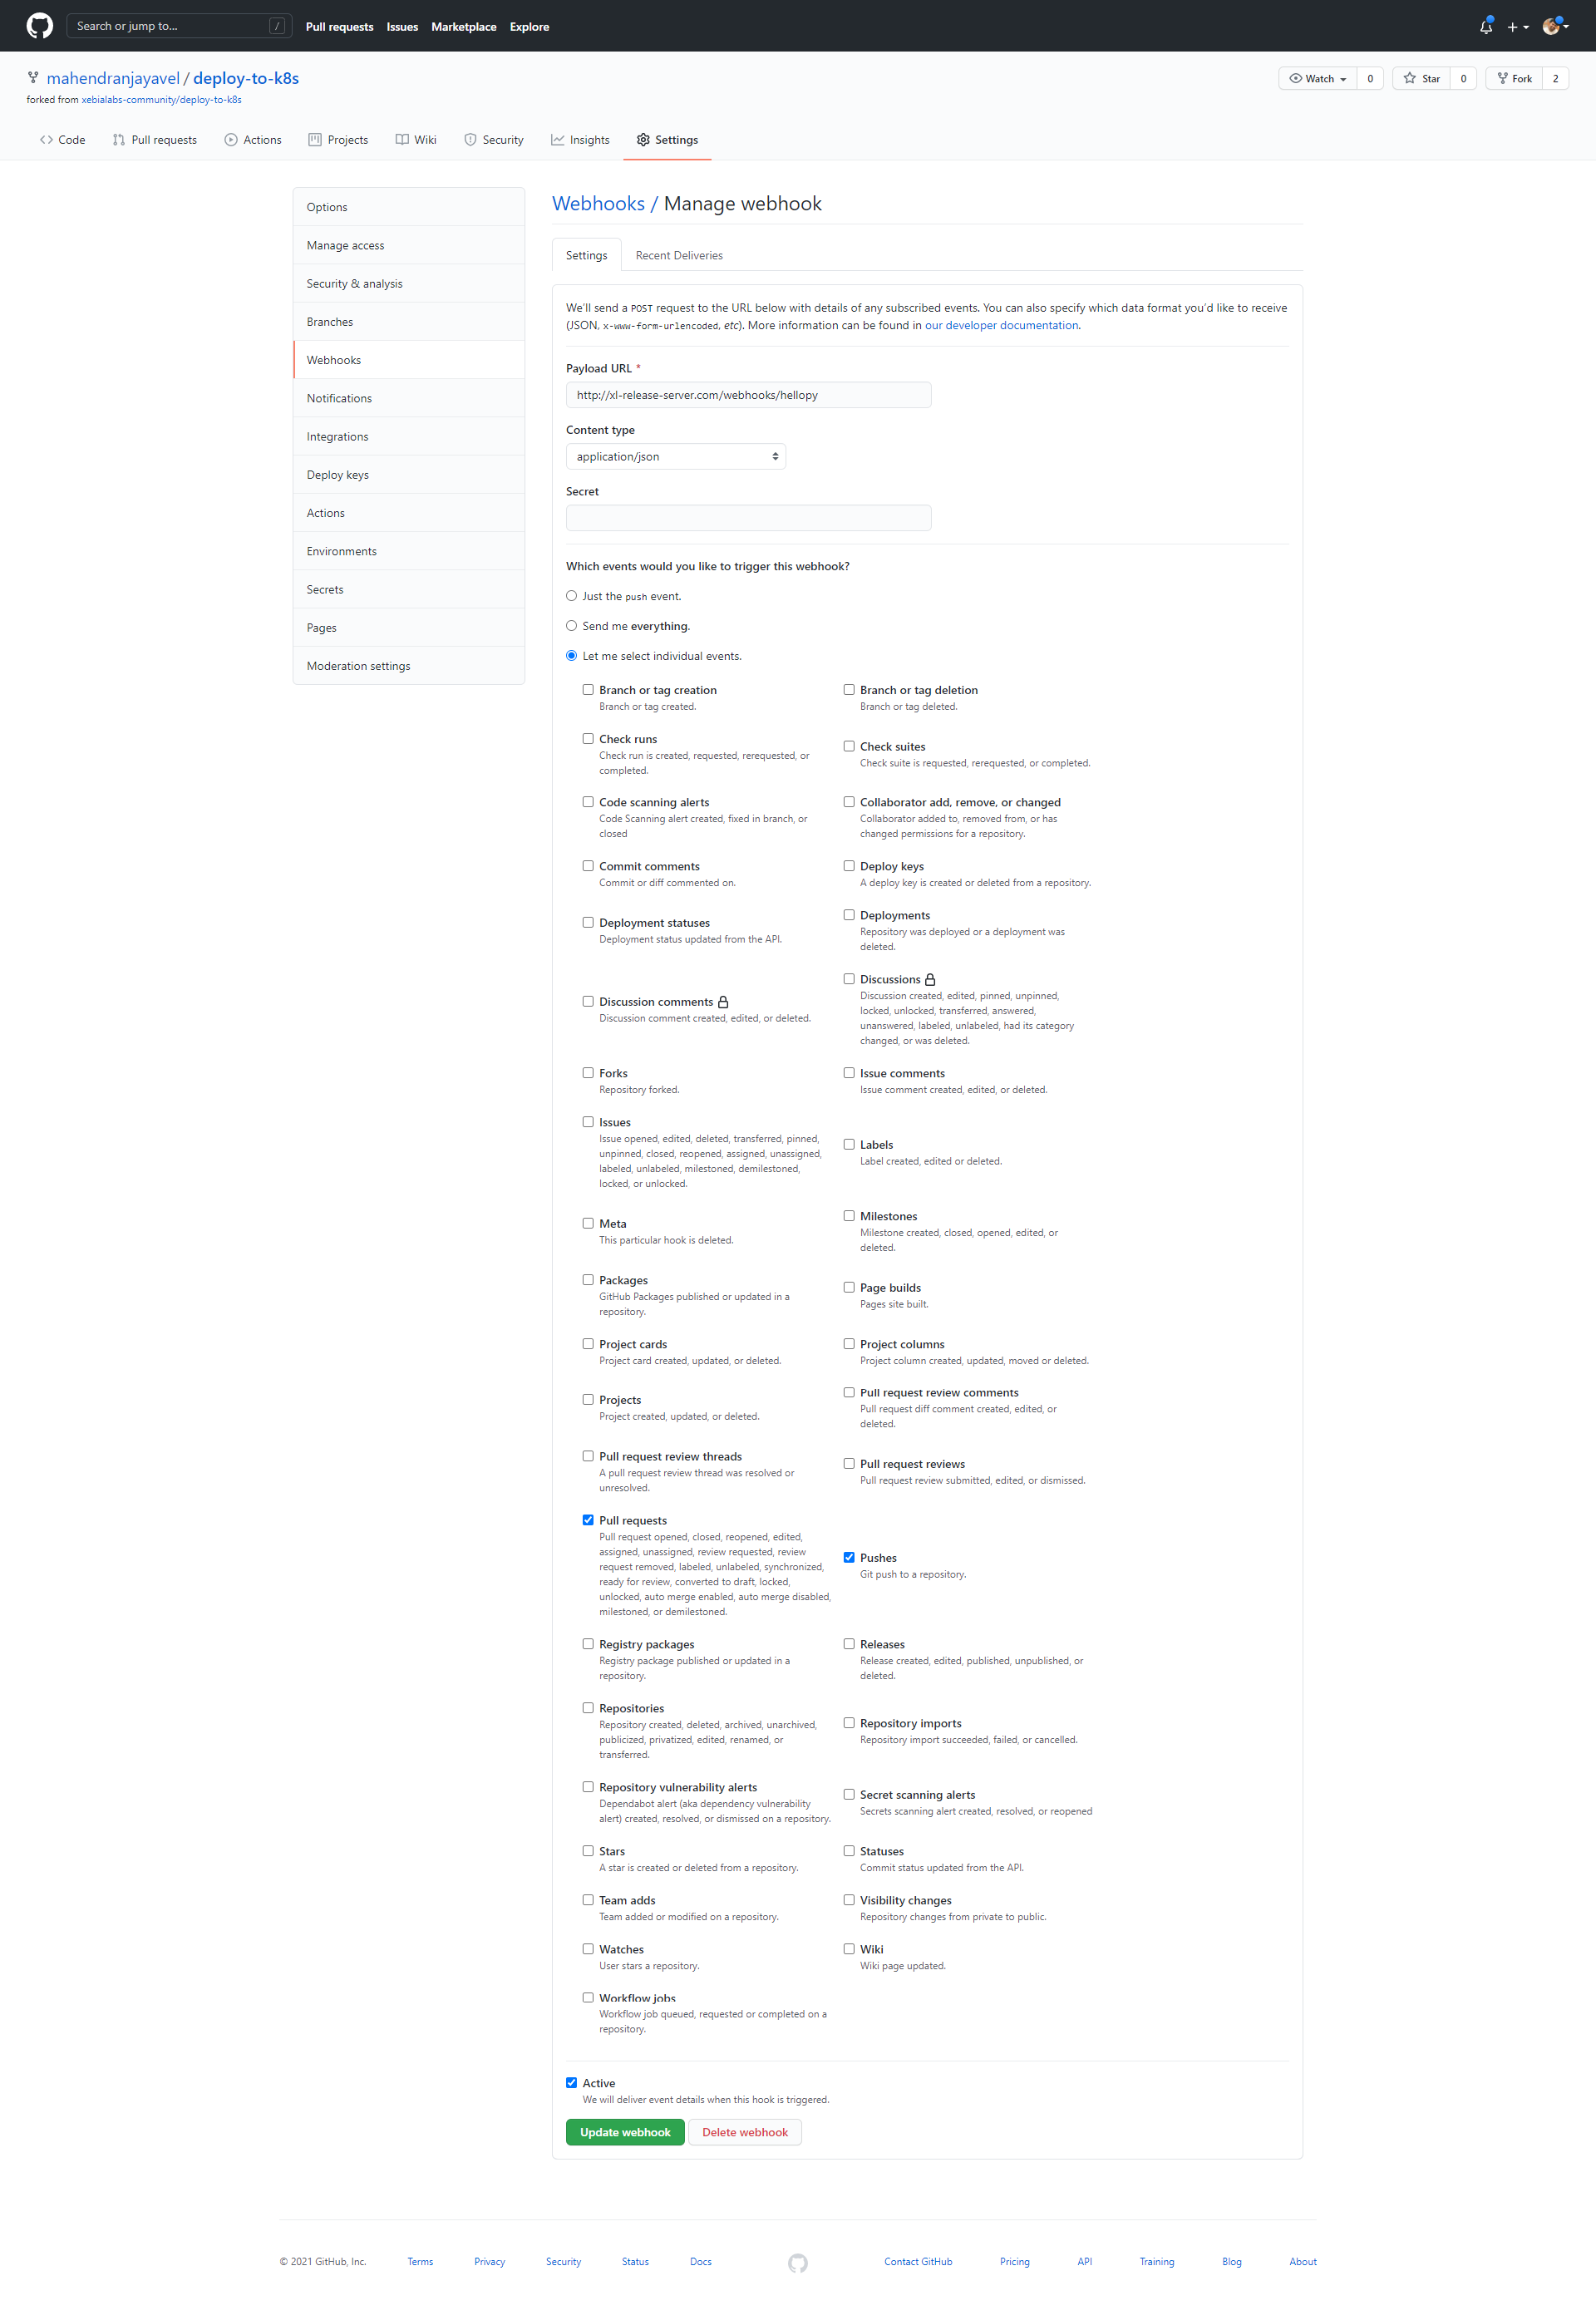
-
Click Add webhook.
You are all set. Now let's create a new Pull Request and witness how the deployment happens.
Step 8—Create a new version of the application and deploy it to Amazon EKS
- Open the
main.pyfile of the Flask application, edit it, and commit the changes to the GitHub repo. - Create a pull request and merge the pull request.
- A new build is triggered by GitHub Actions, a new version of the Flask application is created using the
build.shfile, and the new version is added to the Docker Hub repository. - The Digital.ai Release's Webhooks trigger kick-starts a new release using the release template as soon as it detects a new version of the application in Docker Hub.
- The deployment process starts and the application deployed to the
testenvironment in Amazon EKS. - Open the release task to get the URL for the deployed application, open the URL in a browser and verify that the application has been deployed successfully to the
testenvironment. - Complete the verification task in the release process, which triggers the next phase of the release process—deploy to the
prodenvironment. - Open the release task to get the URL for the deployed application, open the URL in a browser and verify that the application has been deployed successfully to the
prodenvironment. - Complete the verification task and the release itself.