Configuring Deployables Using Google Cloud Compute Plugin
The DIgital.ai Google Cloud Compute plugin supports Deploy Instance Spec, Deploy Template Spec, and DialogFlow Agent Zip Spec deployables.
Prerequisites
- Digital.ai Deploy 10.3 or later releases
- Google Cloud Platform infrastructure
Step 1—Create google.AccountCloud Infrastructure
To create google.AccountCloud in Infrastructure:
- Log in to Digital.ai Deploy.
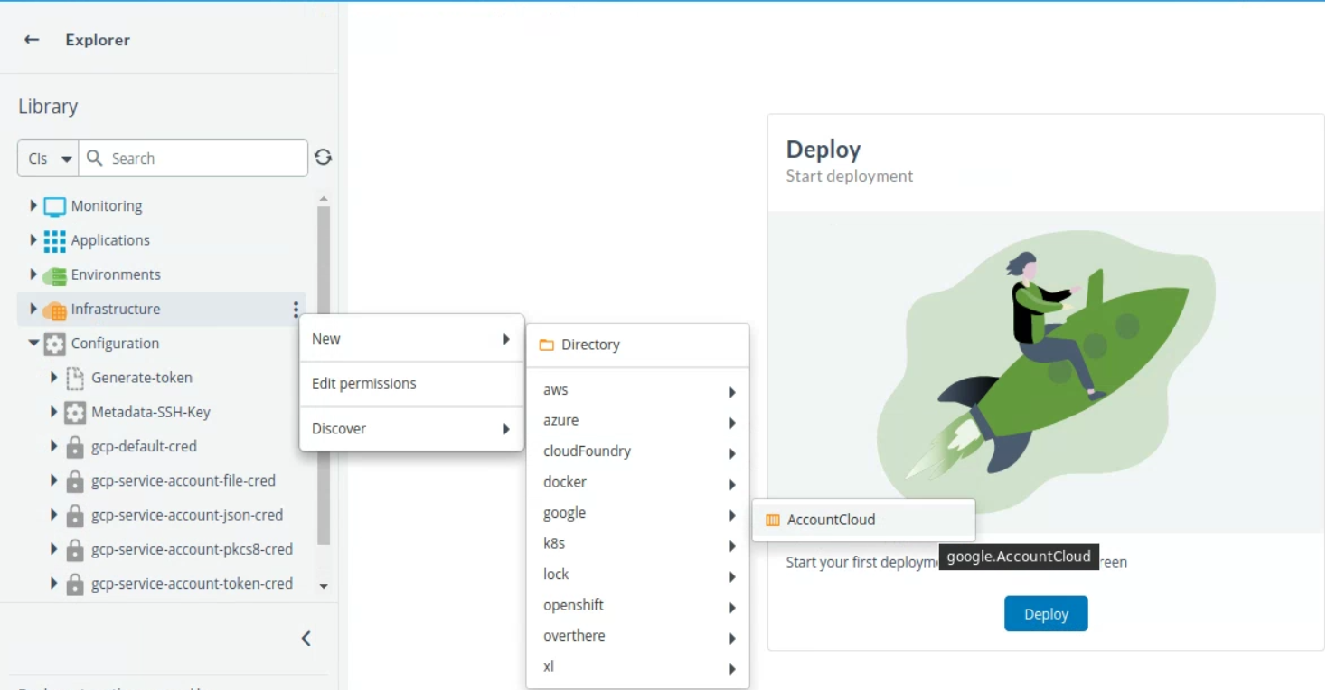
- Click Explorer, hover over Infrastructure, click
, and select New > google > AccountCloud to create
google.AccountCloud.
- Enter the details in Project Id, Clent Email, and Private Key fields.
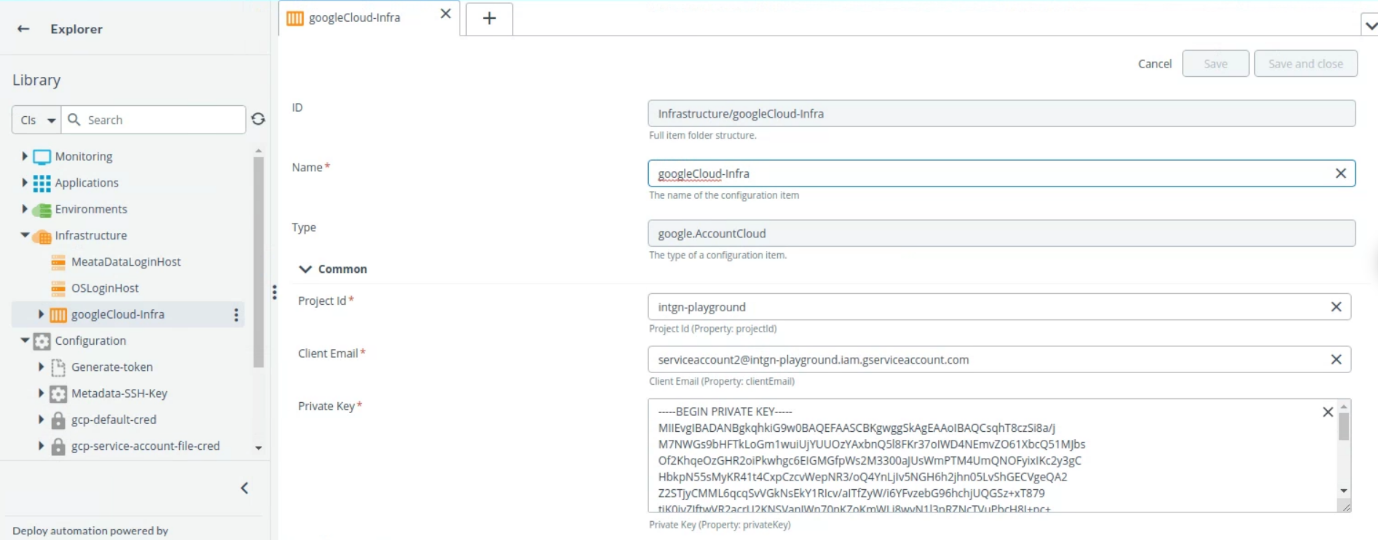
- Click Save.
NOTE Make sure to check the connection is successful.
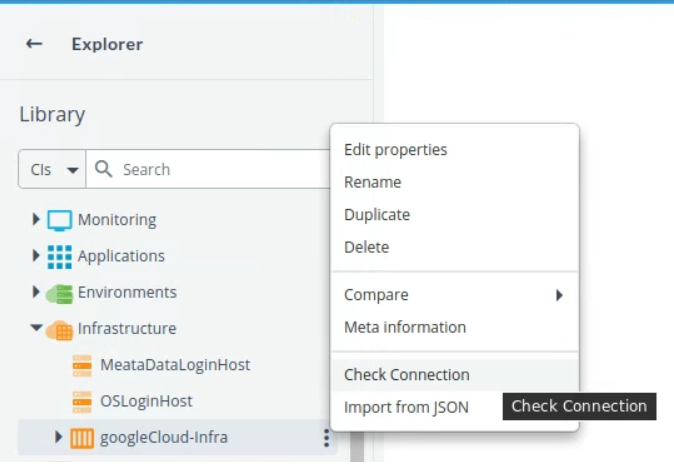
Step 2—Set up google.AccountCloud Enviornment
-
Create environment for
google.AccountCloud. See See create an environment to know more information. -
Select the container from drop down list.

- Click Save
Step 3—Create and Deploy Application
Create and deploy provisioning package for Instance Spec, Template Spec and DialogFlow Agent ZIP Spec:
Step 3.1—Deploy Instance Spec
- Click Explorer, hover over Applications, Click
and select New > Application.
- Enter the name of the application in the Name field. For example
GCP-Instance-Deploy. - Click Save and close.
- Click on Applications drop down, hover over the new application created GCP-Instance-Deploy, Click
and select New > Deployment Package.
- Enter the name of the configuration item in the Name field. For example
1.0.0. - Click Save and close.
- Click on GCP-Instance-Deploy drop down, hover over the new package created 1.0.0. Click
and select New > googlecloud > compute > InstanceSpec.
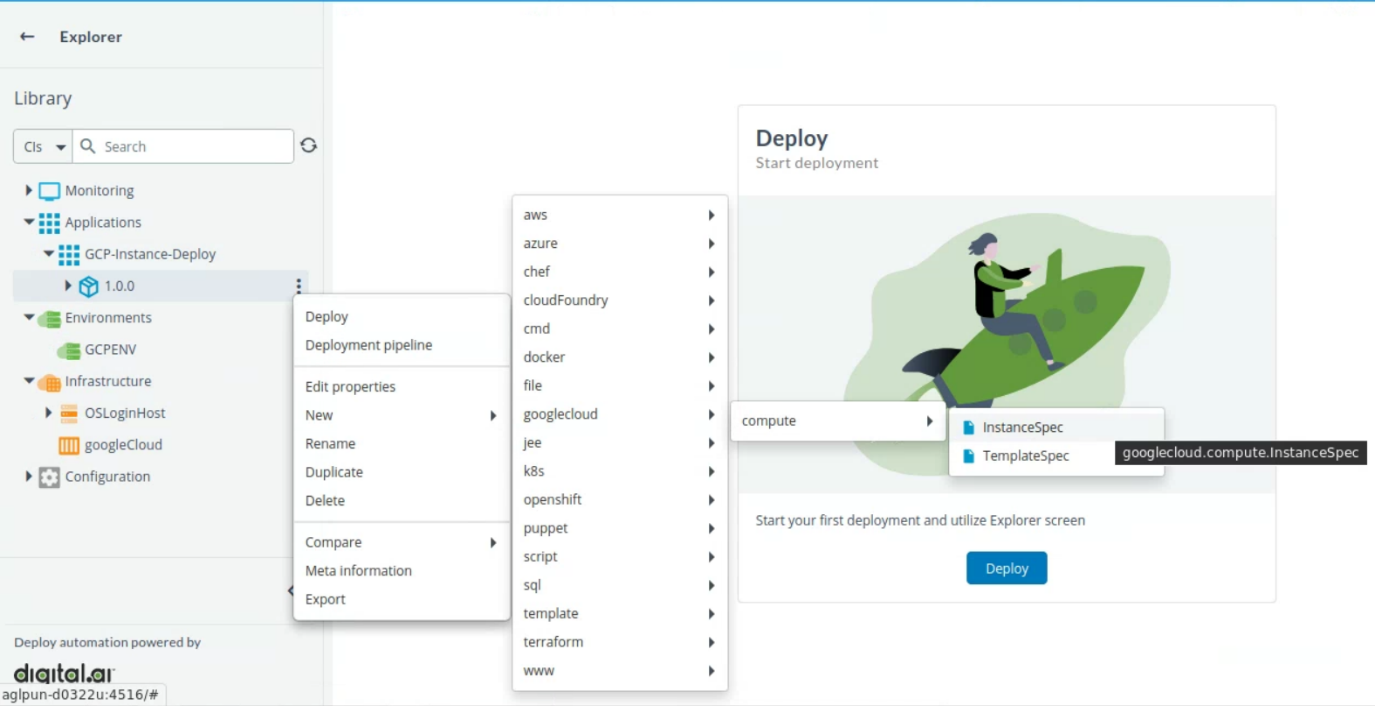
- Enter the name of the configuration item in the Name field.
- Provide the following values:
- Zone
- Machine
- Image Project
- Image
- Wait On Create*
- Wait On Destroy*
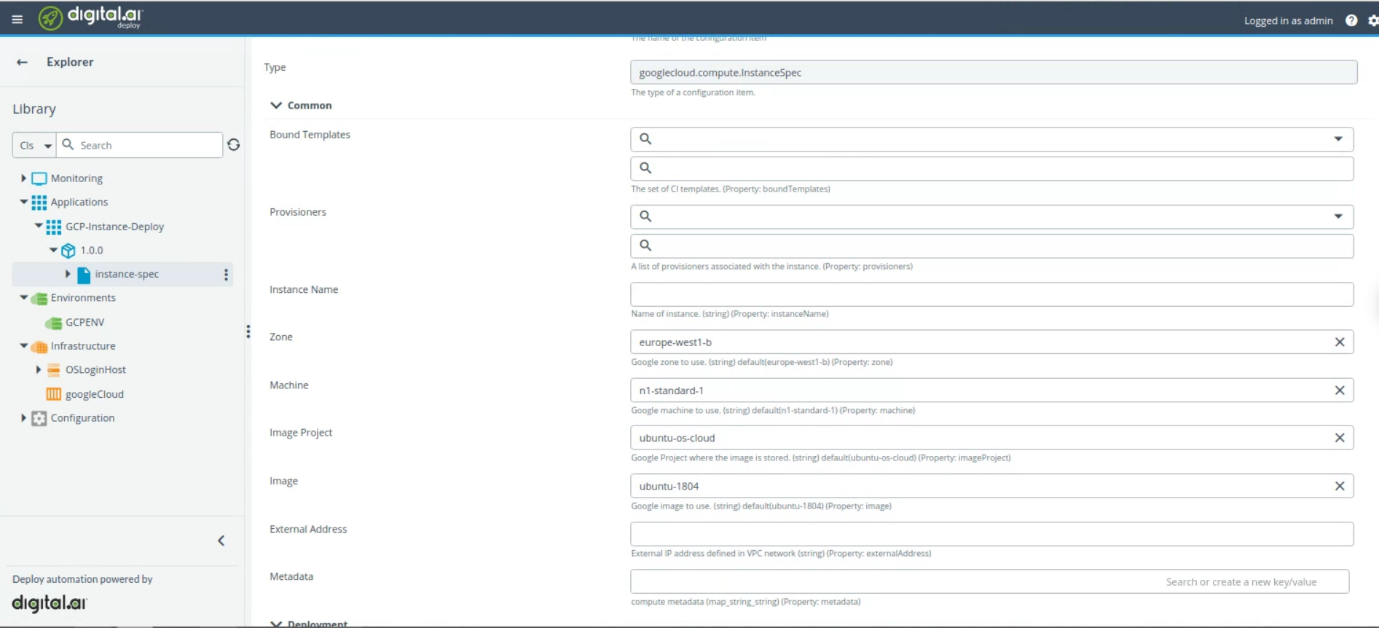
- Click Save.
Note You can add additional configuration as per your requirement.
- To add additional configuration, hover over instance-spec, Click
and select New > and select the required spec.

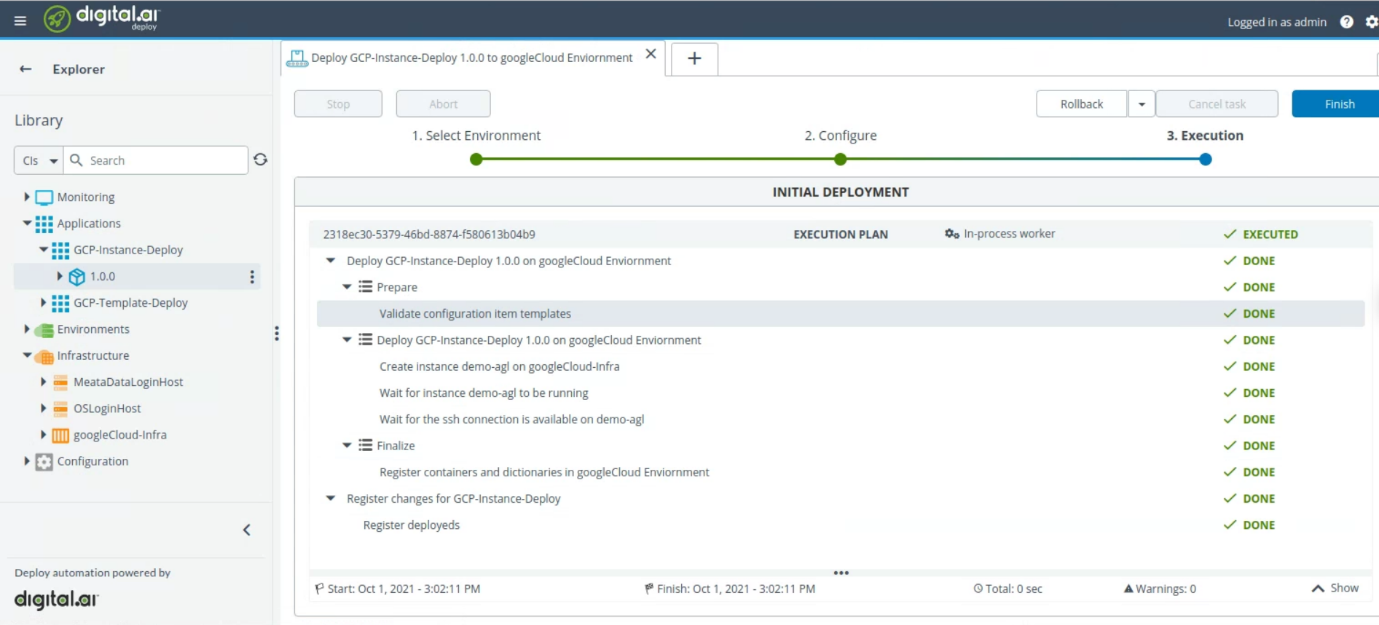
- Start the deployment. For more information, see Start a Deployment.
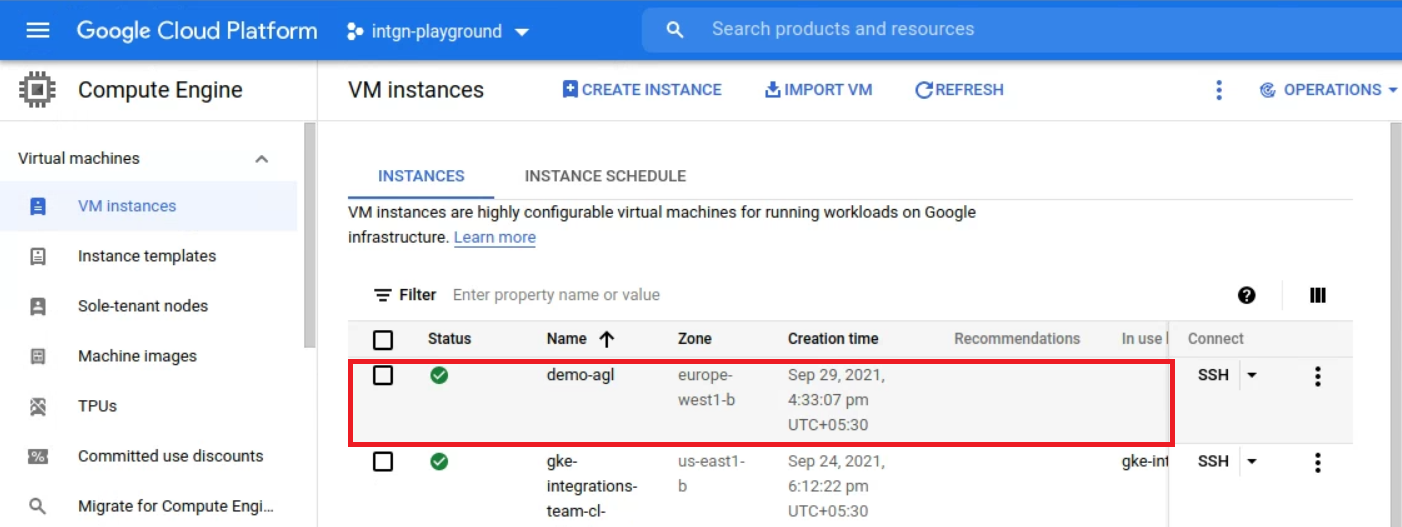
- Check the deployment on google cloud.
Step 3.2—Deploy Template Spec
- Click Explorer, hover over Applications, Click
and select New > Application.
- Enter the name of the application in the Name field. For example
GCP-Instance-Deploy. - Click Save and close.
- Click on Applications drop down, hover over the new application created GCP-Instance-Deploy, Click
and select New > Deployment Package.
- Enter the name of the configuration item in the Name field. For example
1.0.0. - Click Save and close.
- Click on GCP-Instance-Deploy drop down, hover over the new package created 1.0.0. Click
and select New > googlecloud > compute > TemplateSpec.
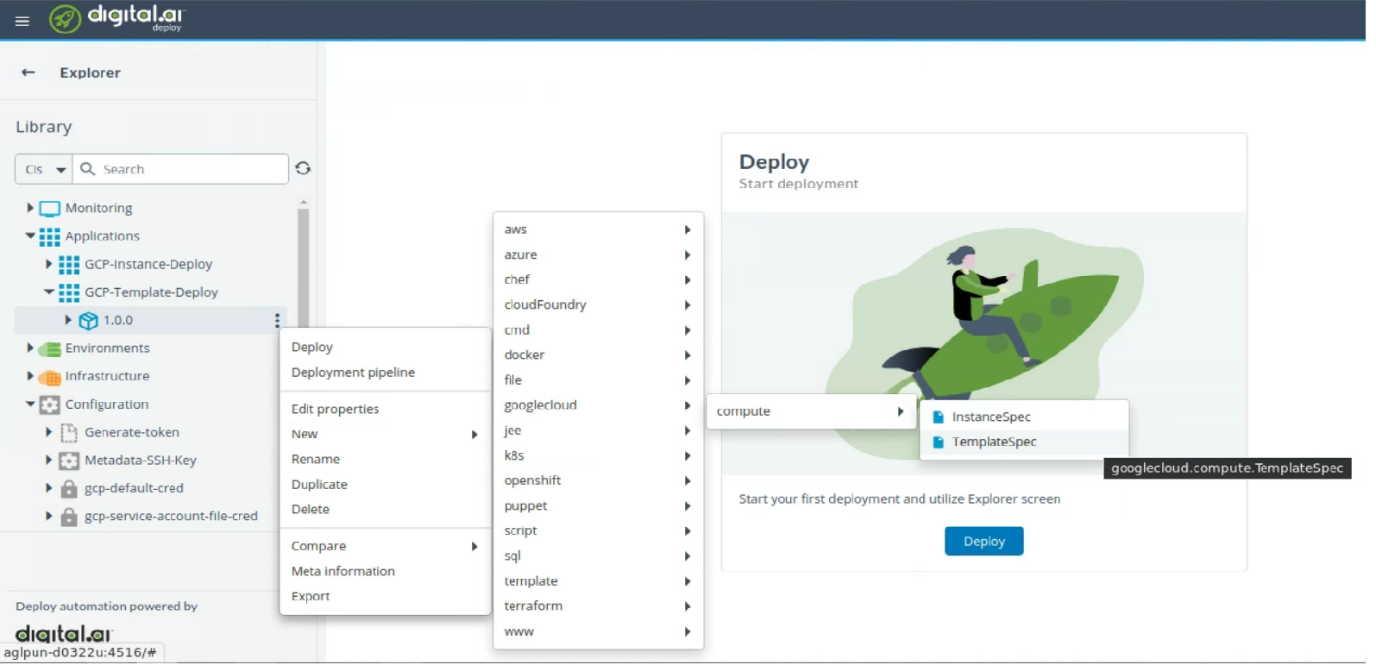
- Enter the name of the configuration item in the Name field.
- Provide the following values:
- Zone
- Machine
- Image Project
- Image
- Wait On Create*
- Wait On Destroy*
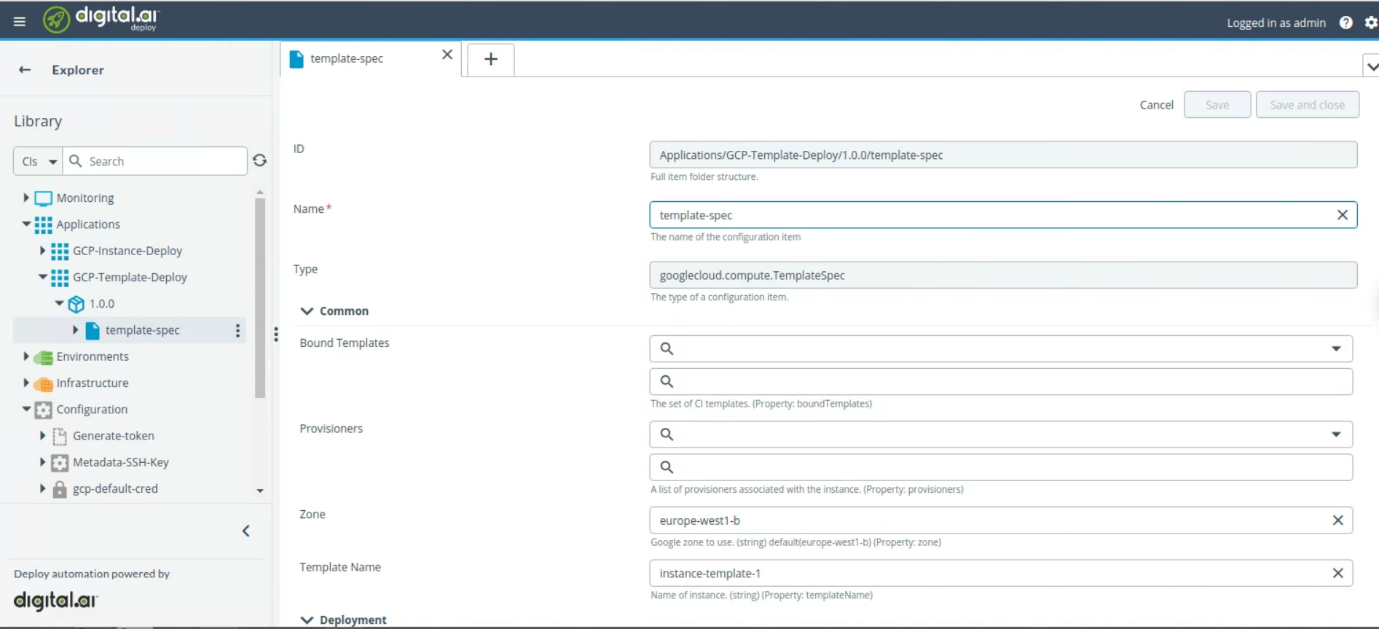
- Click Save.
Note You can add additional configuration as per your requirement.
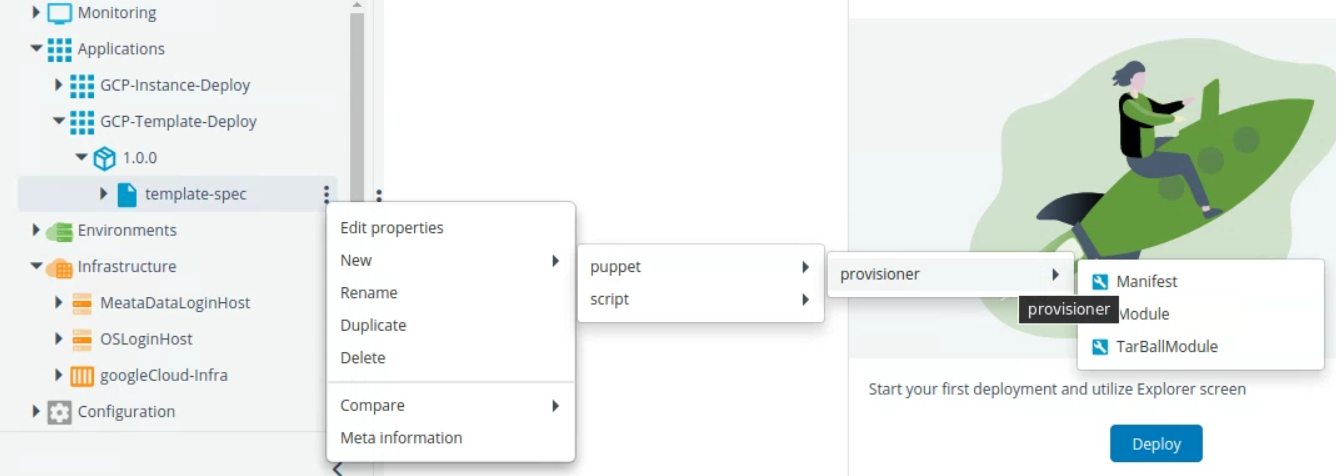
- To add additional configuration, hover over instance-spec, Click
and select New > and select the required spec.
- Start the deployment. For more information, see Start a Deployment.
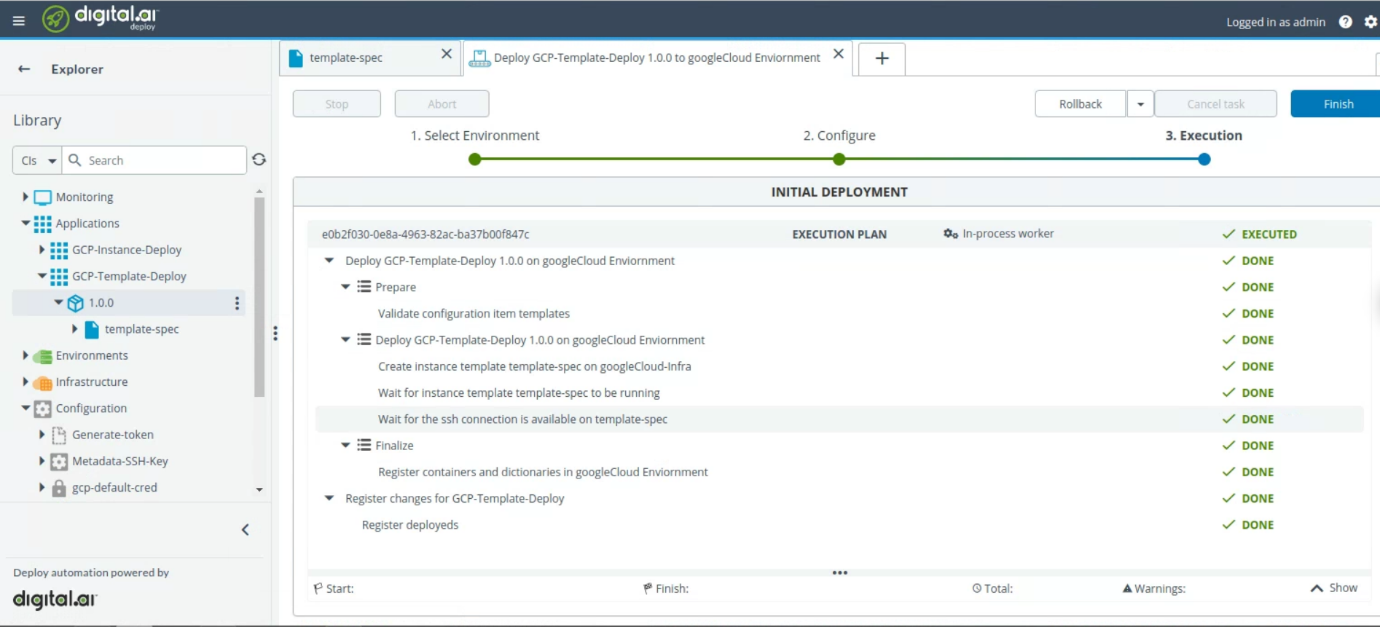
- Check the deployment on google cloud.

Step 3.3—Deploy DialogFlowAgentZIP Spec
- Click Explorer, hover over Applications, Click
and select New > Application.
- Enter the name of the application in the Name field. For example
GCP-Instance-Deploy. - Click Save and close.
- Click on Applications drop down, hover over the new application created GCP-Instance-Deploy, Click
and select New > Deployment Package.
- Enter the name of the configuration item in the Name field. For example
1.0.0. - Click Save and close.
- Click on GCP-Instance-Deploy drop down, hover over the new package created 1.0.0. Click
and select New > googlecloud > dialogflow > AgentZipSpec.
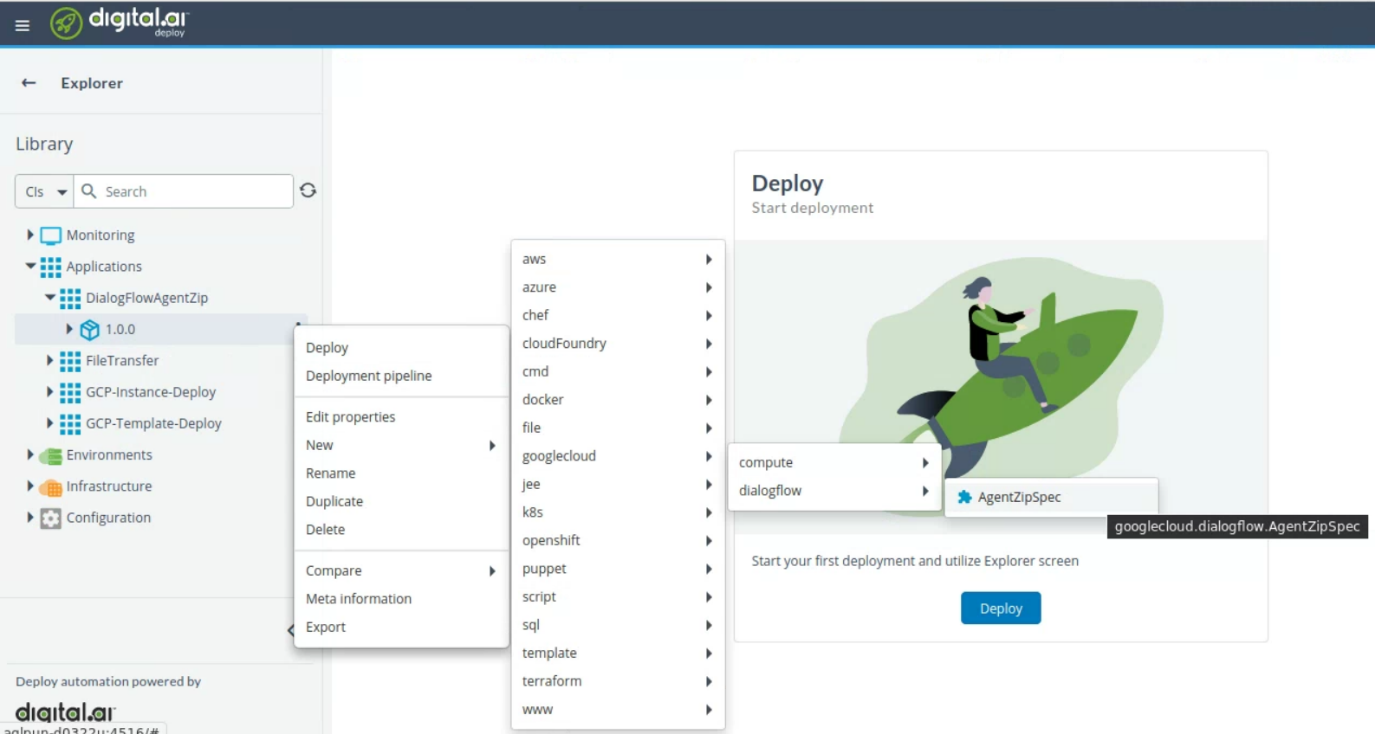
- Type the name of the configuration in Name field.
- Browse the file from Choose file field.
- Type
truein Restore Agent field.
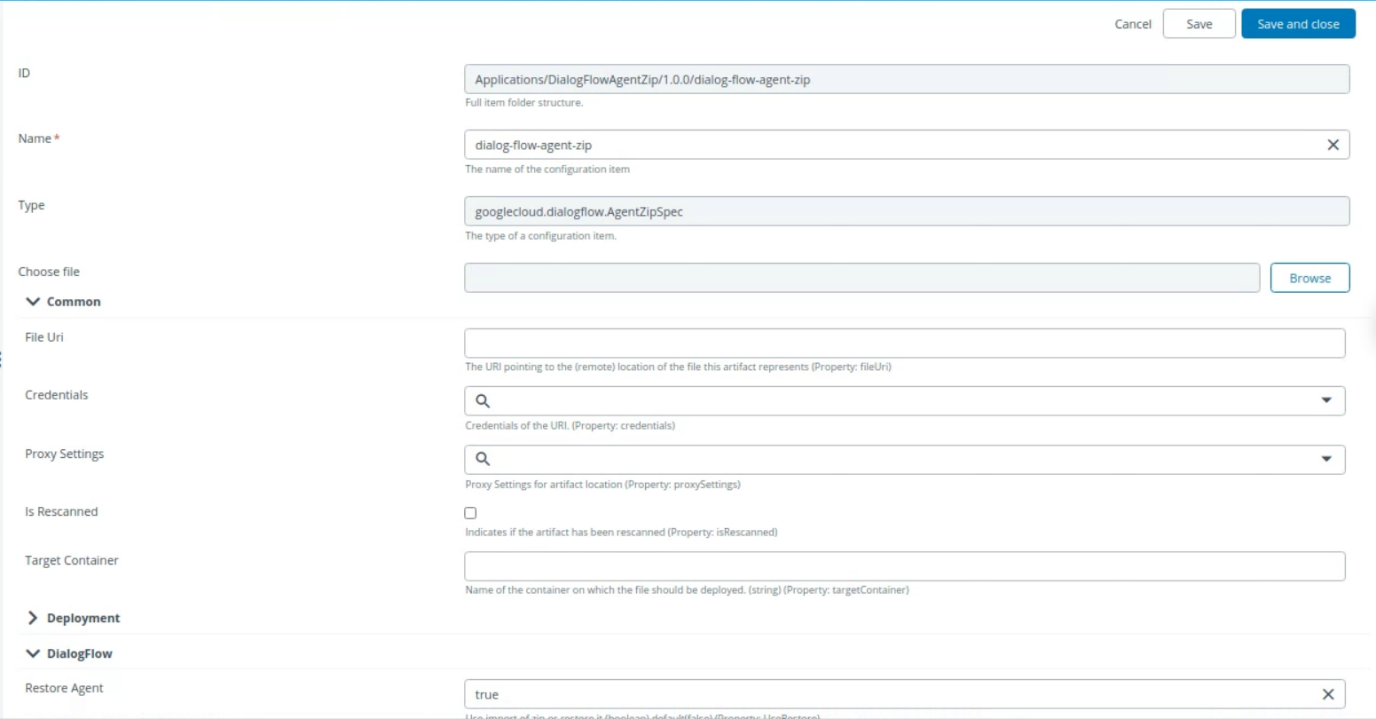
- Click Save and close.
Note The File Uri field updates once you save the configuration.
- Start the deployment. For more information, see Start a Deployment.

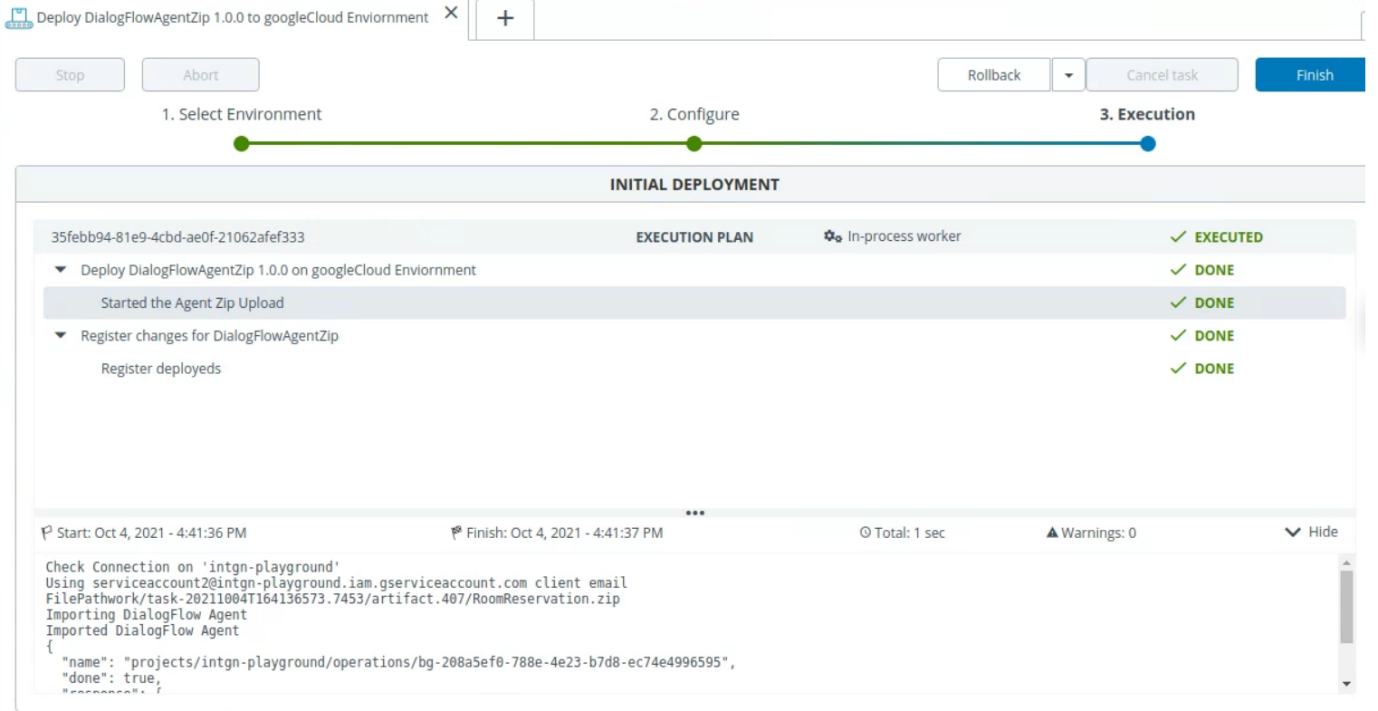
- Check the output at
dialogflow.cloud.google.comfor the selected zip file.
