Github Plugin
This topic describes how to configure the Digital.ai Release Github plugin.
Prerequisites
- Install the Github plugin into the XLR plugins/xlr-official folder.
Requirements
- Github account
- Github Enterprise running and accessible
- Digital.ai Release running and accessible.
Configuration
- You need to have information about URL, username, and password, or access token with the proper permissions or by using client ID/client secret combination
- Create a Connections for your Github Server.
Set up a Connection to the Github Server
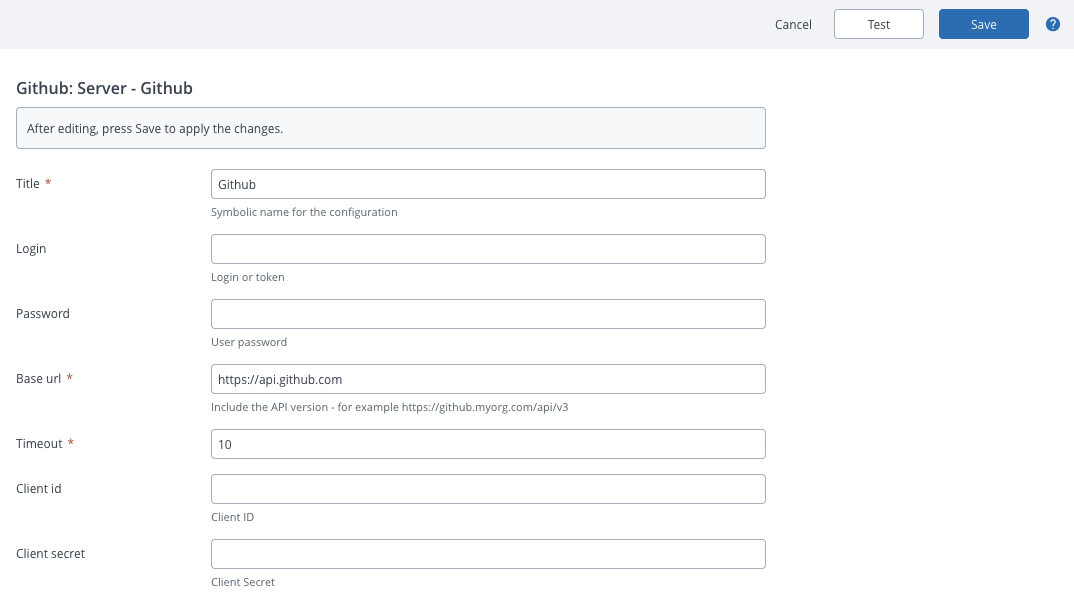
- From the navigation pane, click Configuration > Connections.
- Under configurations, beside Github: Server, click
- Enter the name for the configuration in the Title field.
- Enter the username or login token in the Login field.
- Enter the password Password field, if you have used username in login field.
- Enter the URL in the field, where the Github is running (https://api.github.com or https://github.myorg.com/api/v3).
- Click on Test, to test the connection.
- Click on Save, to save the configuration.

Features
-
Github triggers - This trigger can be used to poll the Github for triggering releases.
- Github commit trigger.
- Github Pull Request trigger.
-
Tasks of Github
- Github: Create Branch
- Github: Create Pull Request
- Github: Create Repository
- Github: Create Tag
- Github: Get Hash From Ref
- Github: Get Version From Tag
- Github: Merge Pull Request
- Github: Update Content
- Github: Wait For Merge
-
Tasks of Github Actions
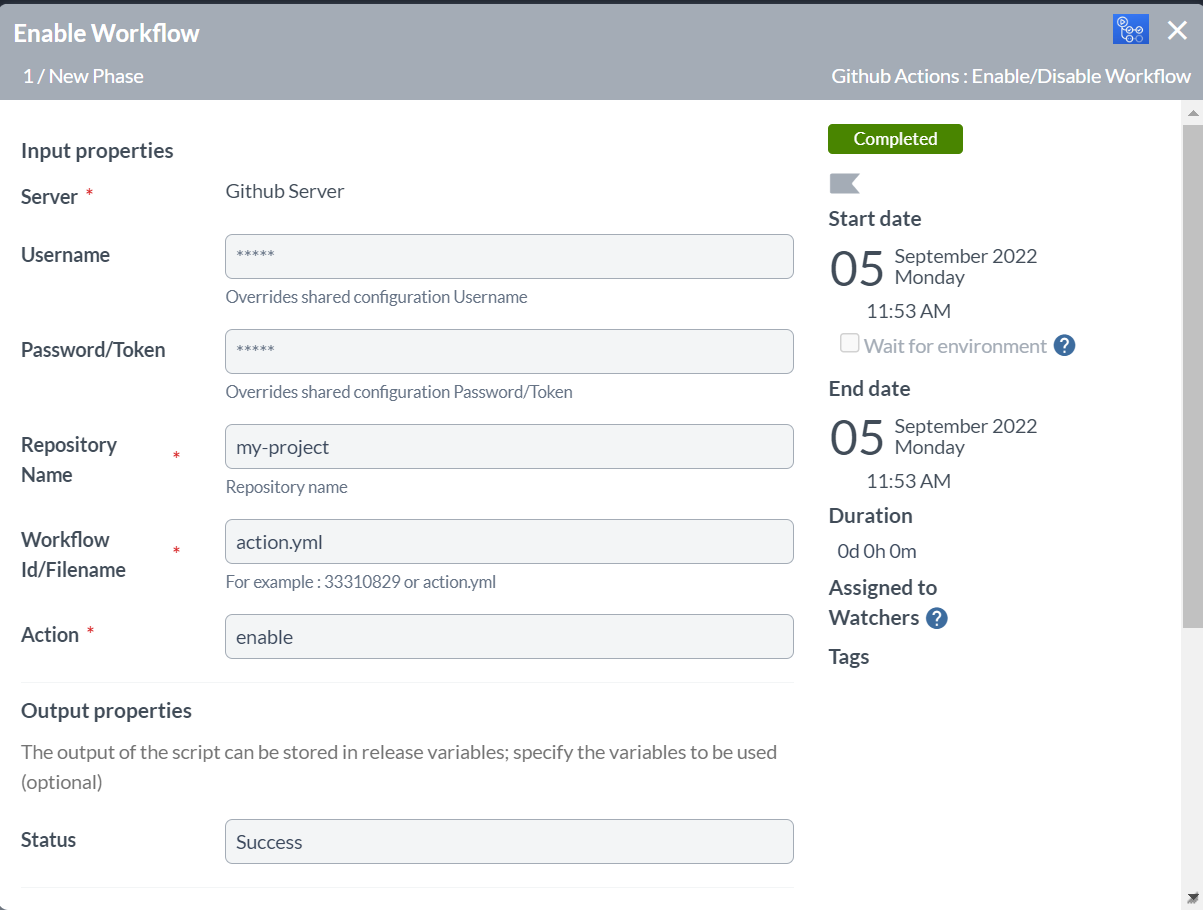
- Github Actions: Enable Disable Workflow
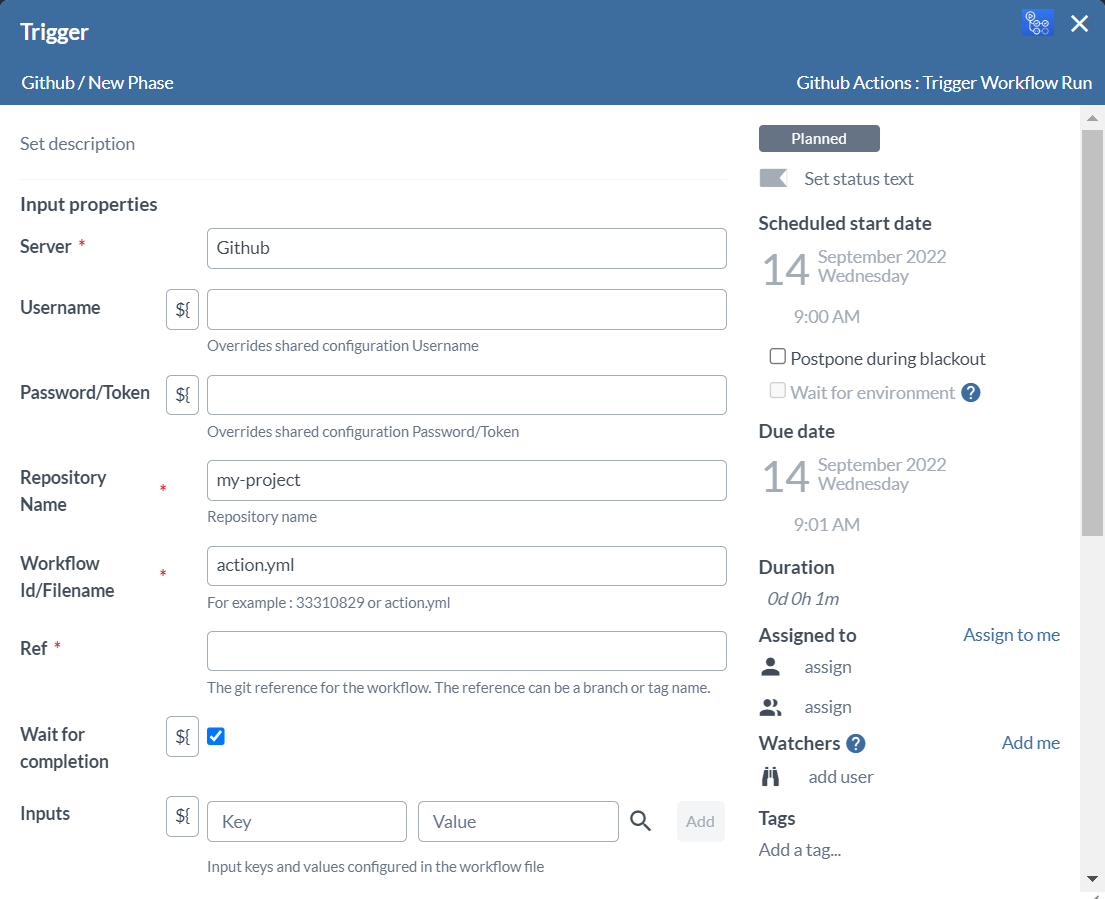
- Github Actions: Trigger Workflow Run
-
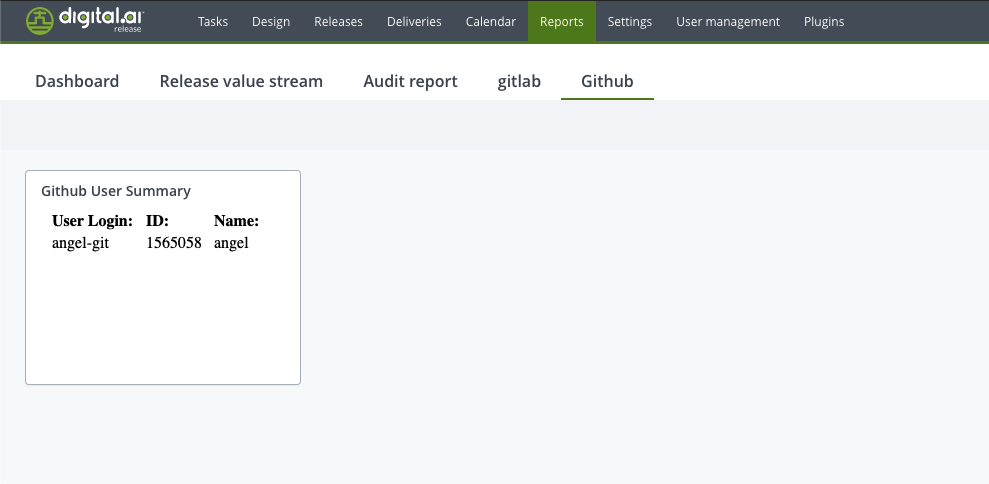
Github tile on the release dashboard.
Github Actions: Enable Disable Workflow**
- Enable or disable a github actions workflow

Github Actions: Trigger Workflow Run**
- Manually trigger a workflow run from Release

Tile and Dashboard Configuration for Github Server
There is one tile in Github server:
- Github User Summary
-
From the navigation pane, click Reports.
-
Select the dashboard where you want to add the new tile.
note
If you have not created a dashboard yet, click on Add dashboard on the top right of the screen to create dashboard.
- In the top right of the screen, click Configure dashboard.
- In the top right of the screen, click Add tiles.
- Hover over Github User Summary, and click on Add.
- Click on the Configure option present in the tile.
- Enter a name for the tile in the Title field.
- Select the github configured in the Github Server field.
- Click on Save.
You can configure for rest of the three tiles of the Bitbucket cloud using the same process described above.

Known Problems
- Github plugin doesn't work behind a proxy