JFrog Triggers
The Release JFrog trigger allows Release to interact with JFrog repositories. It uses the Jfrog REST API to communicate and fetch information from JFrog repositories.
A JFrog trigger periodically polls a JFrog server for new versions of a specific artifact. Later, triggers a release if a new version is published to the repository that is being watched.
Compatibility
The Release JFrog trigger is compatible with JFrog 7.4 and above.
Set up a JFrog server
-
Log in to Release.
-
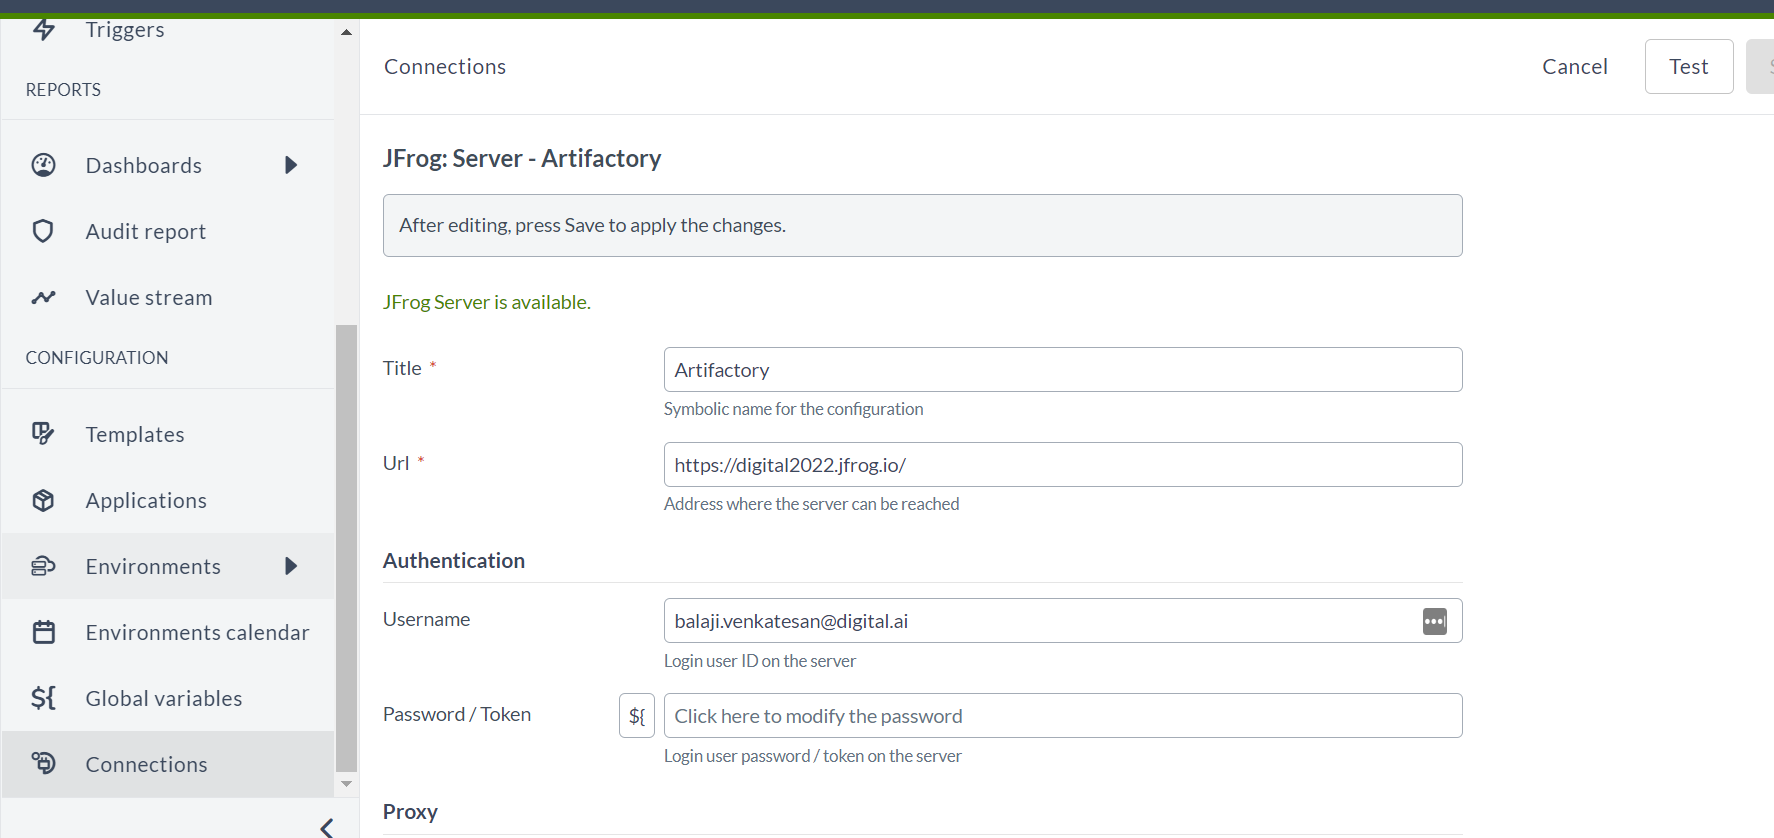
In the left navigation bar, under CONFIGURATION group, click Connections.
-
Click + next to the JFrog: Server - Artifactory. The JFrog: Server - Artifactory screen opens.
-
In the Title box, type the JFrog server name.
-
In the Url box, type the server address.
-
In the Username and Password/Token boxes, type the server's username and password/token respectively.
-
Click Save to save the server.

Add a JFrog trigger for published artifact to a template
-
Add a trigger to the template, as described in Create a release trigger.
-
In the Title box, type the trigger name.
-
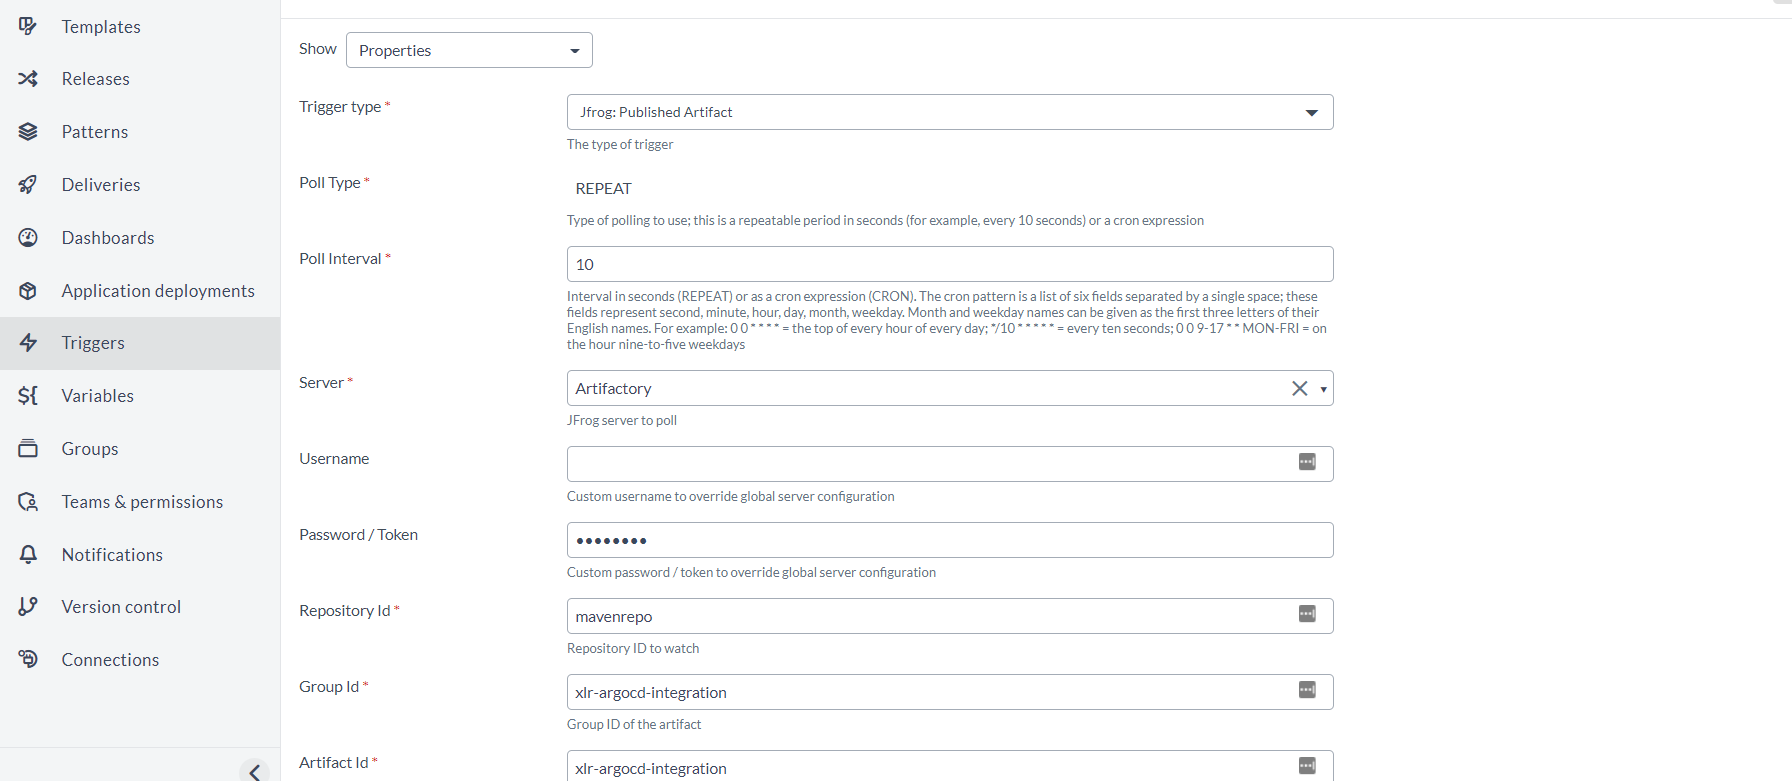
In the Trigger type dropdown, select the JFrog : Published Artifact.
-
In the Poll Type dropdown, select the REPEAT or CRON.
-
In the Poll Interval box, type the poll internal in seconds for REPEAT mode or cron expression for CRON.
-
In the Repository Id box, type the repository ID.
-
In the Group Id box, type the artifact group ID.
-
In the Artifact Id box, type the artifact ID.
-
In the Version box, type the artifact version.
-
In the Username and Password boxes, type the username and password to connect to the server. If set, these will override the credentials defined in the JFrog server configuration.
-
Save the trigger, as described in Create a release trigger.

Add a JFrog trigger for published image to a template
-
Add a trigger to the template, as described in Create a release trigger.
-
In the Title box, type the trigger name.
-
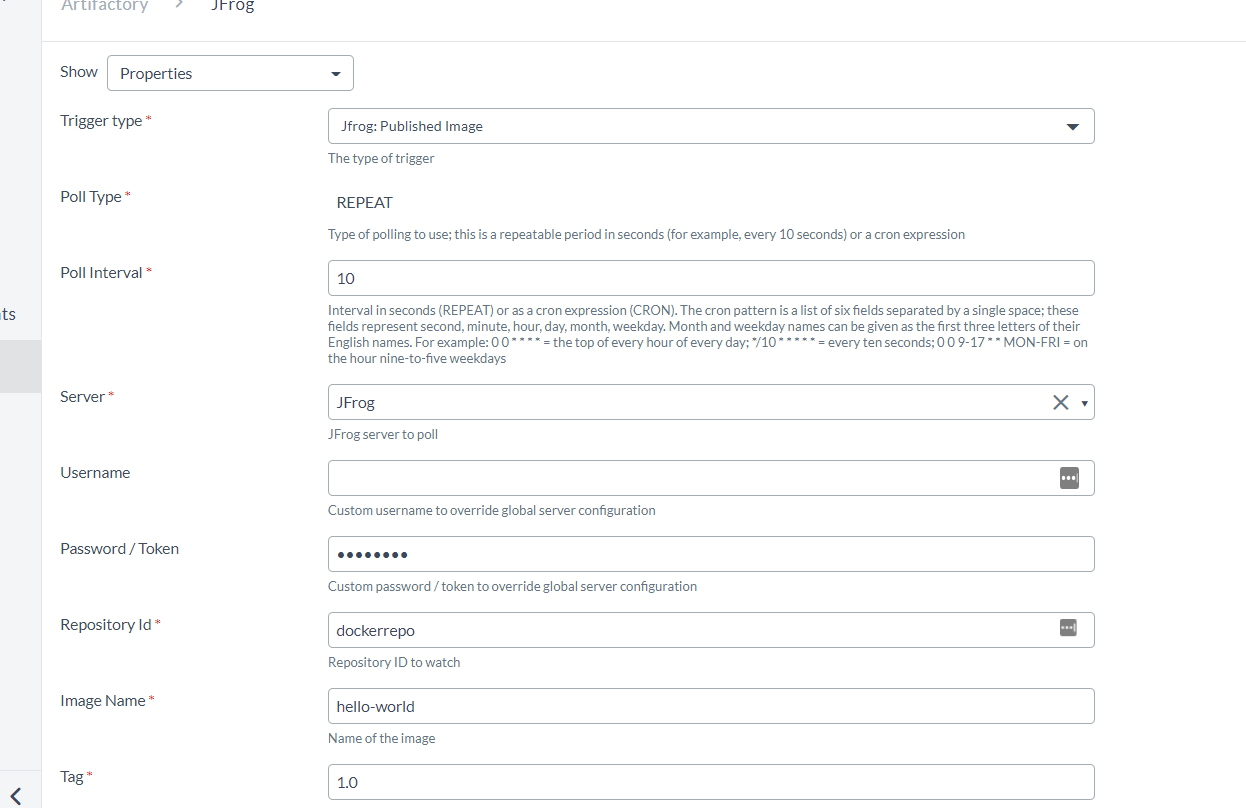
In the Trigger type dropdown, select the JFrog : Published Image.
-
In the Poll Type dropdown, select the REPEAT or CRON.
-
In the Poll Interval box, type the poll Internal in seconds for REPEAT mode or cron expression for CRON.
-
In the Repository Id box, type the repository ID.
-
In the Image Name box, type the image name.
-
In the Tag box, type the tag name.
-
In the Username and Password boxes, type the username and password to connect to the server. If set, these will override the credentials defined in the JFrog server configuration.
-
Save the trigger, as described in Create a release trigger.

Manage triggers
The Triggers management page displays an actionable list of all the triggers that you have permissions to view and manage. It also provides the entry point for creating new triggers. For more information, see Triggers.