As an administrator, you can connect the Digital.ai Platform to Microsoft Entra ID Directory (Entra ID) to create a seamless login experience for your users when they log in to Digital.ai applications and portals. You only need to follow this procedure if your company uses Entra ID as an identity provider. For more information about SSO, see Manage Identity Providers.
Certain parts of these procedures include instructions for a third-party website. These instructions may occasionally become outdated based on changes in the third-party website.
Add OIDC SSO Connection
Prerequisites
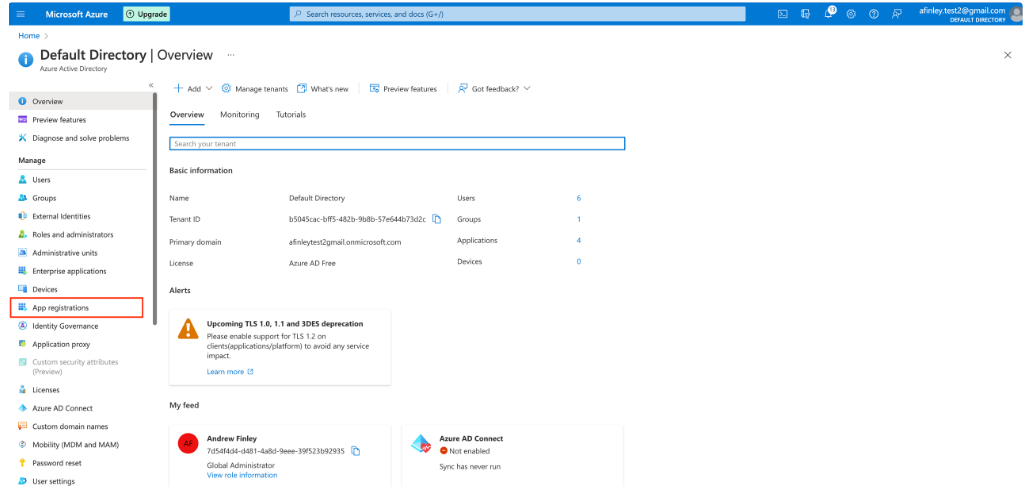
Before you begin, you need to retrieve the following details from the Entra ID tenant you want to use to establish this OIDC SSO connection. You can find this information in your Microsoft Entra ID account by going to Manage Entra ID Active Directory > App registrations and opening the appropriate application (tenant).
- Client ID
- Client secret
- .well-known endpoint - In Azure AD this is known as OpenID Connect metadata and it looks like this:
Save the values to use later in this procedure.
Logging in
-
Log in to the Platform as an administrator.
-
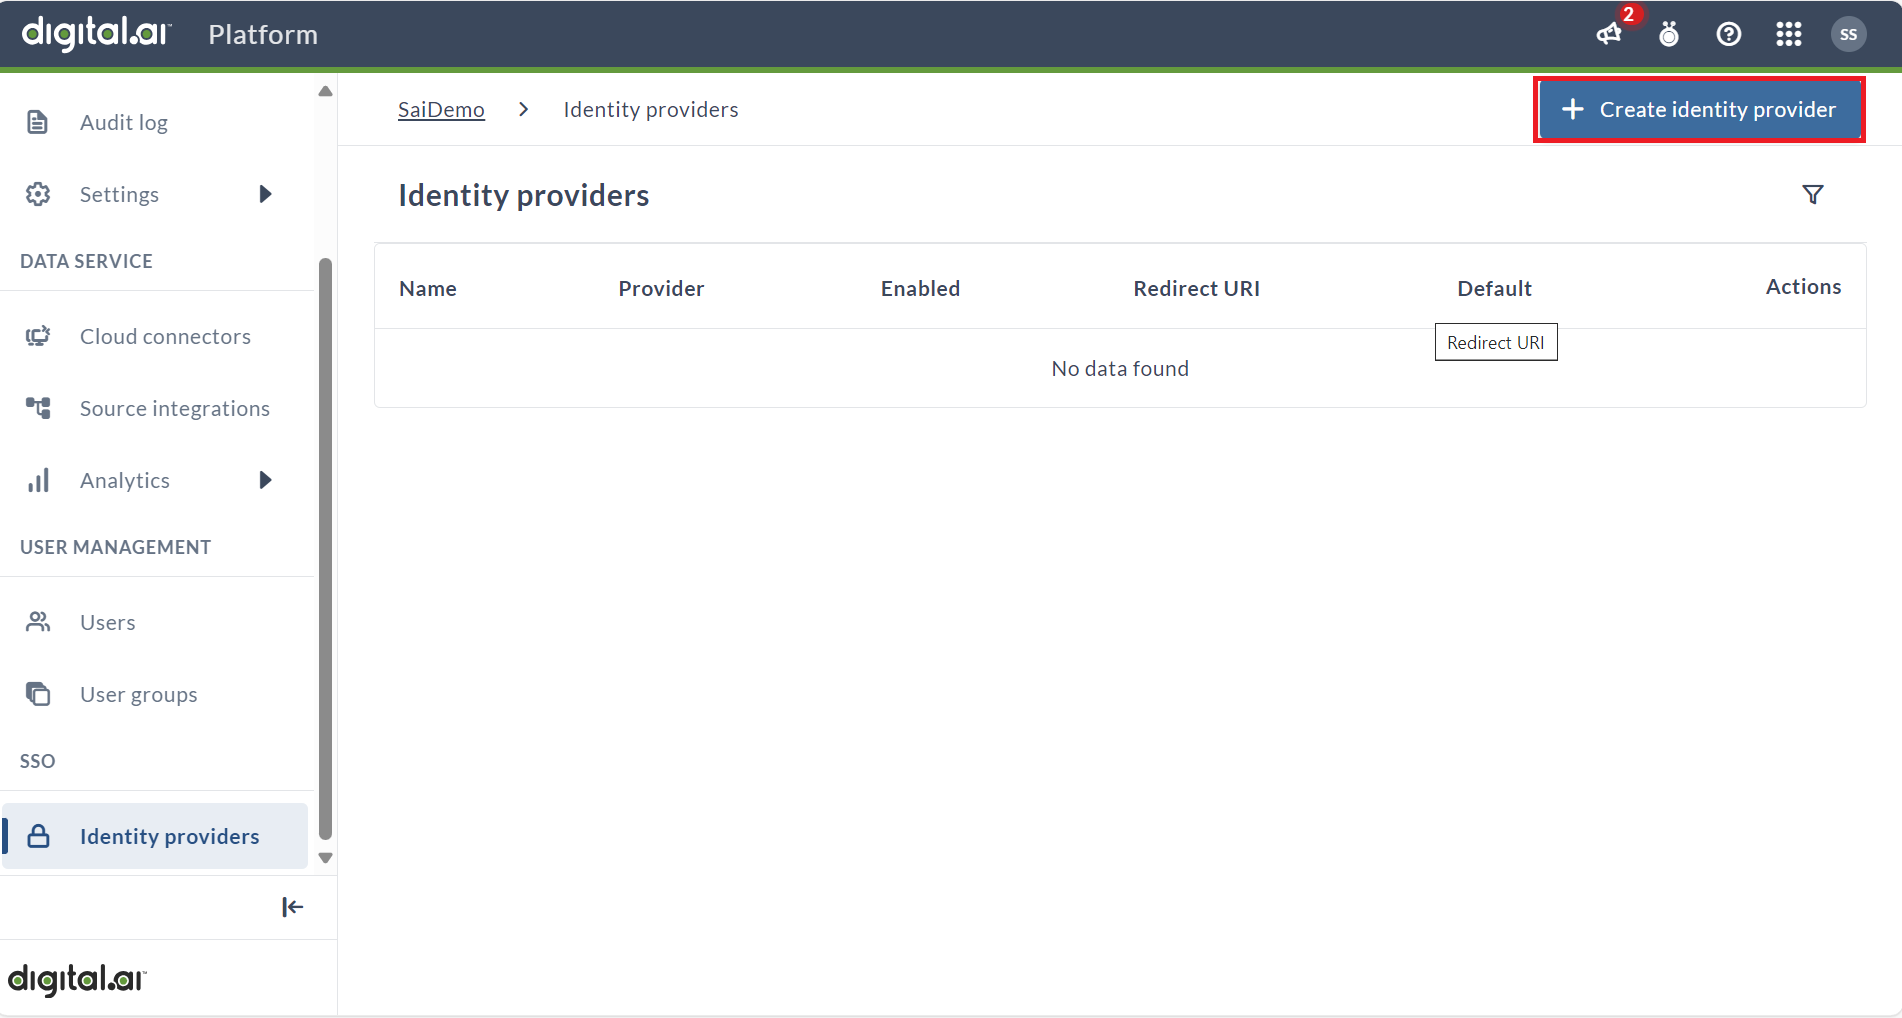
Select Identity providers navigation item from the left side panel.
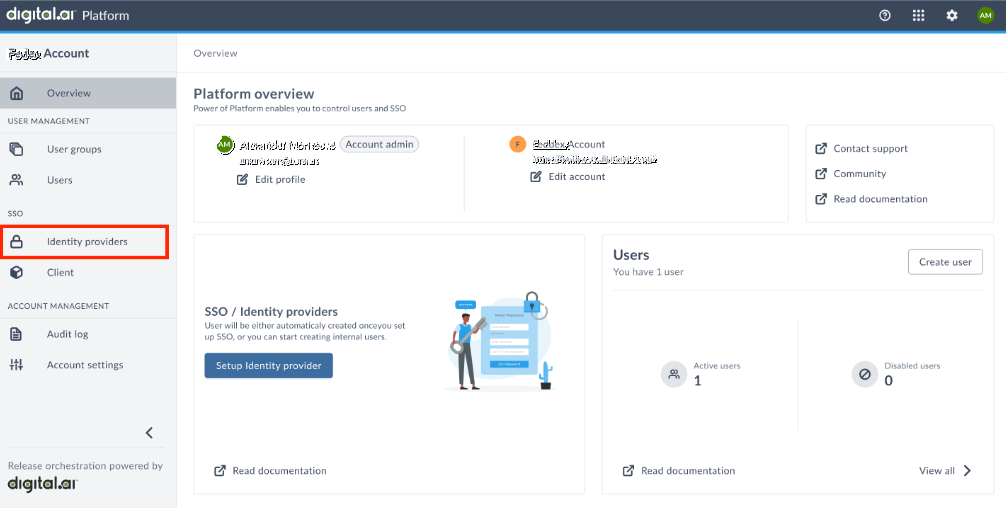
- Click Create identity provider primary action button in the top right corner.
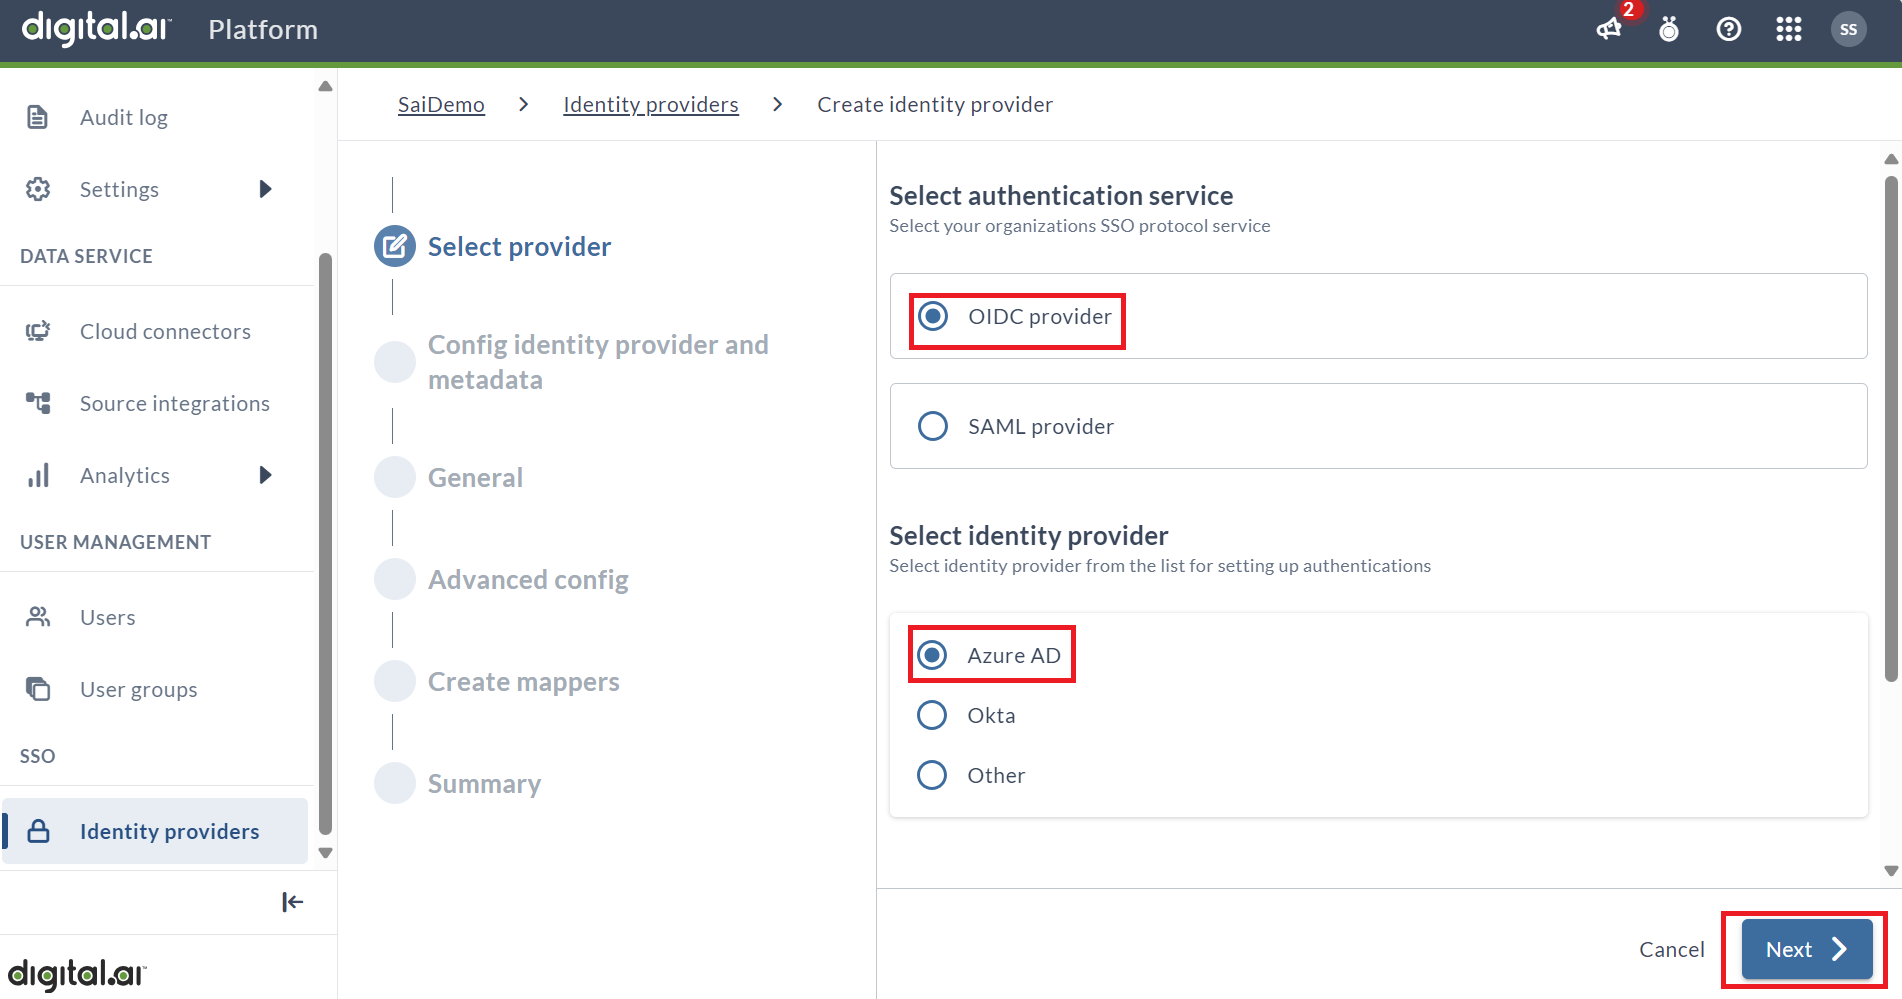
Select Provider
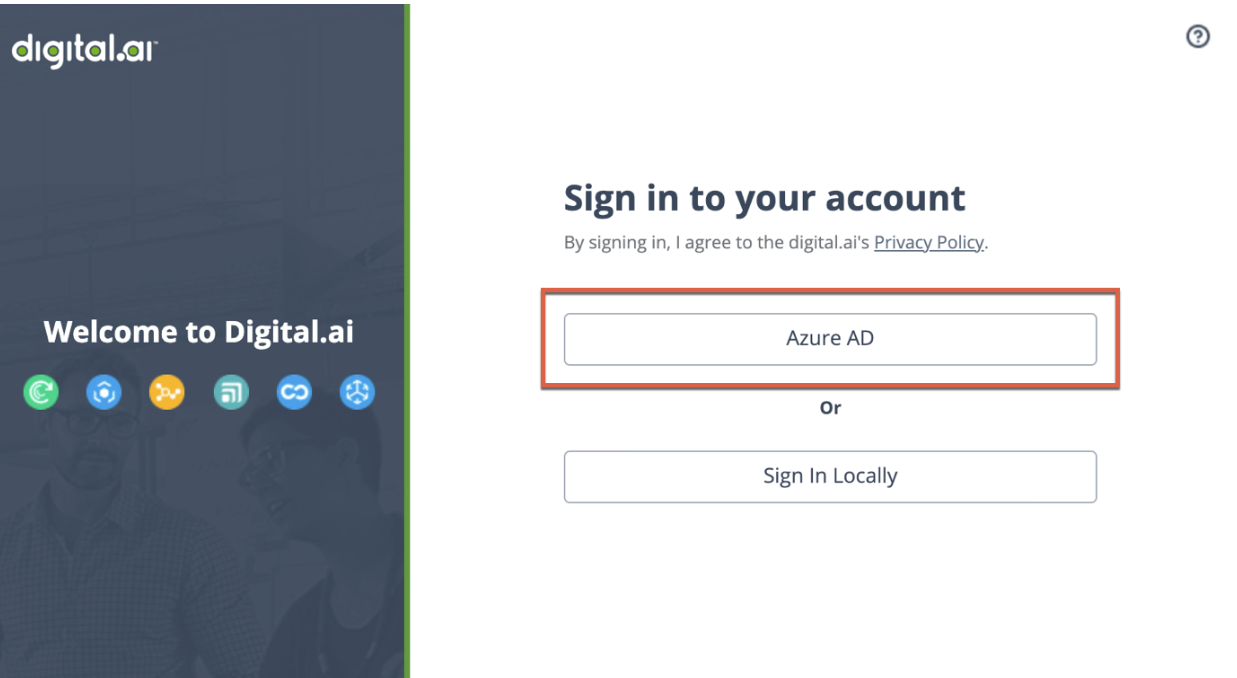
- Select Add OIDC Provider as the authentication service and Entra ID as the provider. In Identity Provider display name, add a unique, user-friendly name for the IdP. This name will appear on the Digital.ai Platform login page and then click Next.
Config Identity Provider and Metadata
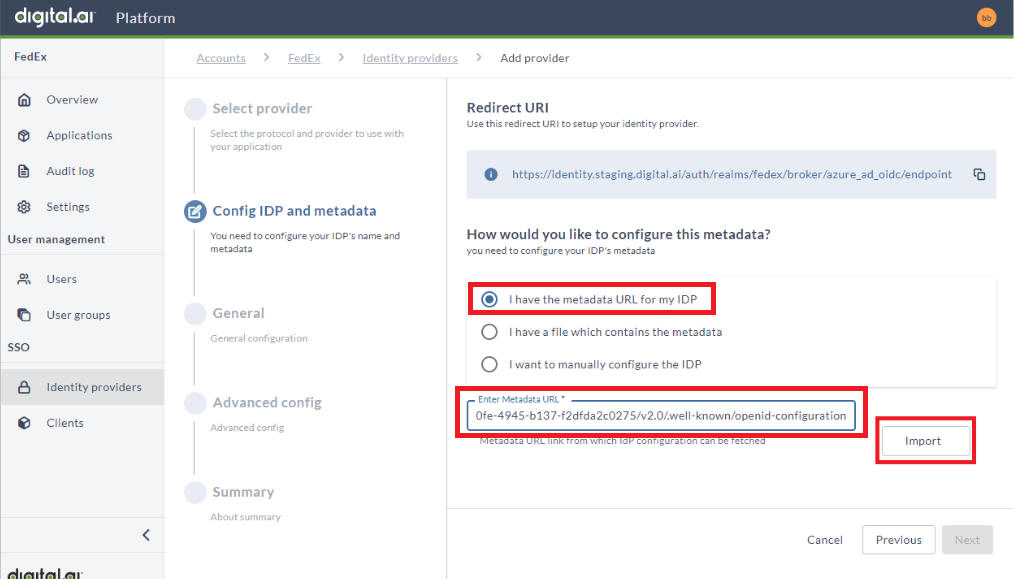
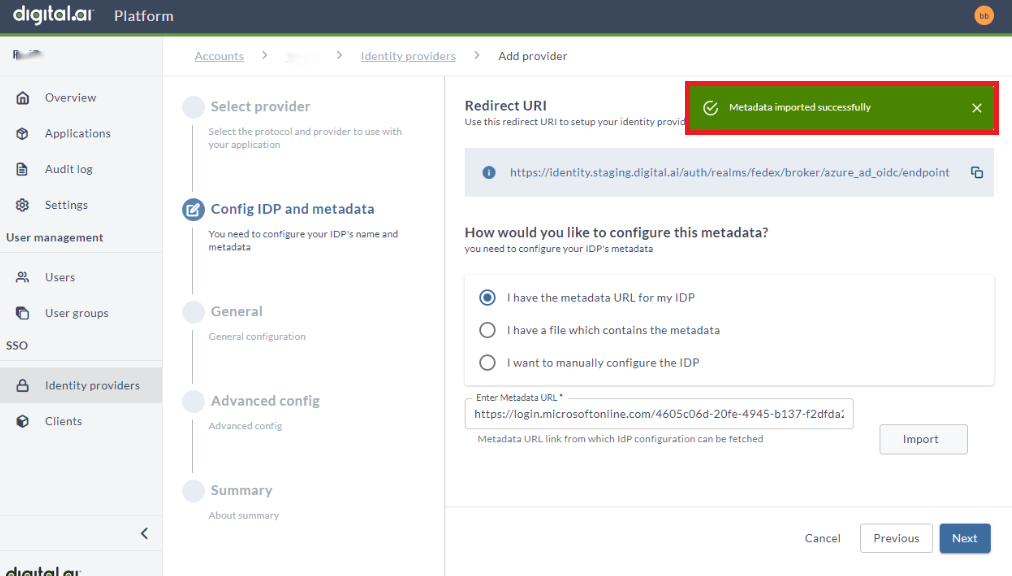
- Copy the Redirect URI to setup your identity provider. Ensure to share this information with your IT/Security/SSO team.
- Your IT/Security/SSO team will use the Redirect URI to configure your corporate IdP and provide the SSO setup details in one of the following three formats:
- If you select I have the metadata URL for my identity provider, then paste the .well-known endpoint into the Enter Metadata URL field and click Import. You will receive a success message once the data is imported. This import should update several fields in the configuration on the General page.
- If you select I have a file which contains the metadata, then select the file and upload.
- If you select I want to manually configure the identity provider, then enter the fields manually.
General
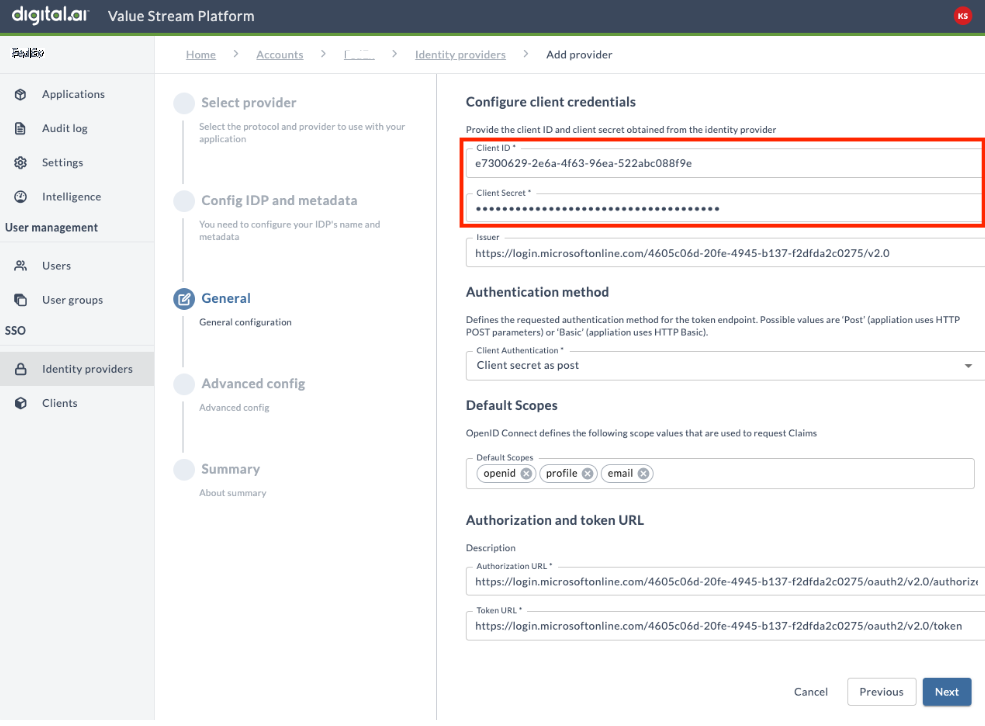
- In Client ID, paste the Client ID value provided by your IT/Security/SSO team.
- In Client Secret, paste the Client Secret value provided by your IT/Security/SSO team.
- In Issuer, enter the issuer of the token received from the IdP.
- In Authentication method, choose Client secret as post.
- In Default scopes, type: openid profile email. These are the scopes required by Digital.ai for retrieving user data, but you may add others at your discretion. Without this setting, the correct user data will not be pulled out of Entra ID.
- In Authorization and token URL, enter the authorization URL and token URL of your IdP. Verify the details and then click Next.
If the Issuer section is not provided, platform identity service will not validate the issuer.
Advance Config
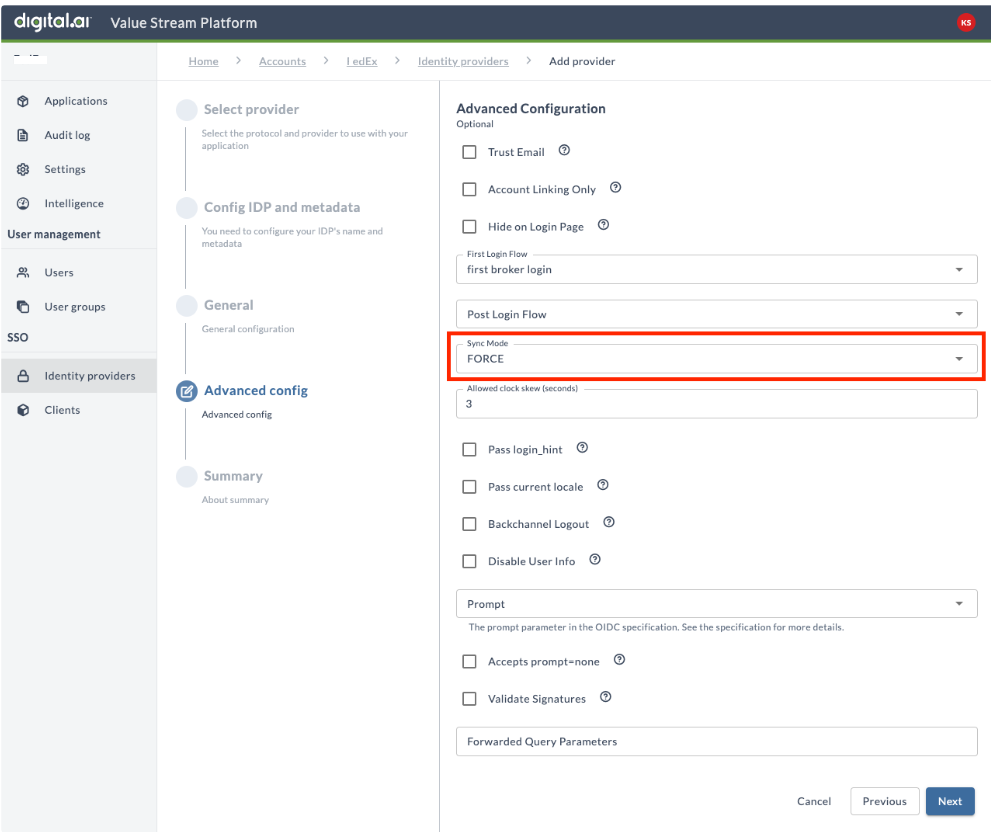
Advanced Configuration page is optional.
Depending on the selection you made in the previous step, the majority of fields may be automatically filled in.
- Ensure that Sync Mode is set to FORCE. Sync Mode is set to FORCE by default, which allows Digital.ai to update a stored user's data whenever it is changed in the IdP. If you set it to IMPORT, user data is only imported the first time they log in through the IdP. Click Next.
Create Mappers
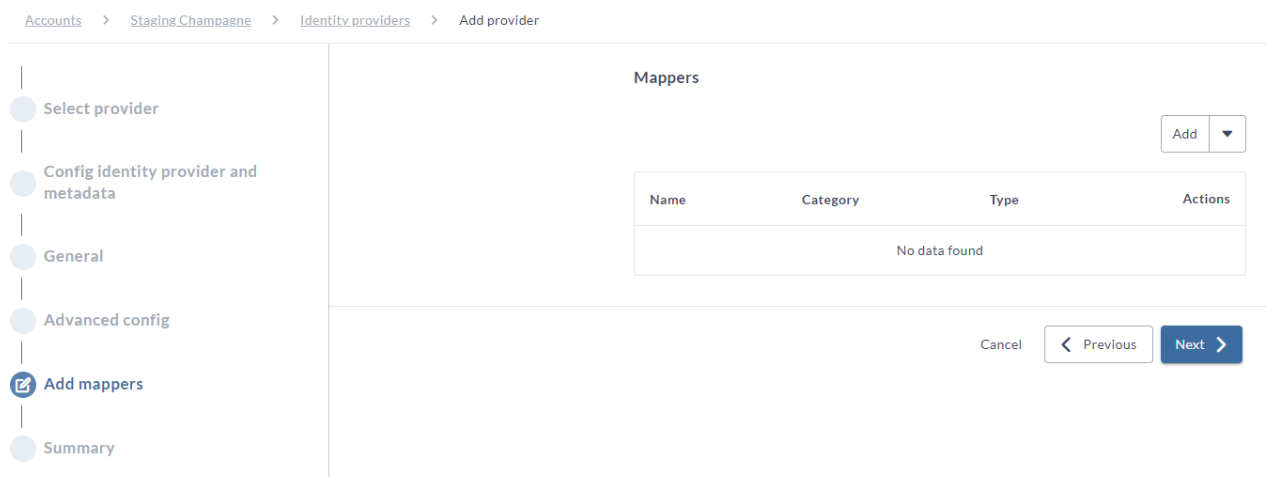
Create Mappers page is optional.
- Adding mappers to this configuration ensures that user and user group attributes from your IdP are correctly mapped with the Digital.ai Platform. For more information check Map User Data
To enable Digital.ai Platform to inherit user groups defined in your IdP, perform the following steps:
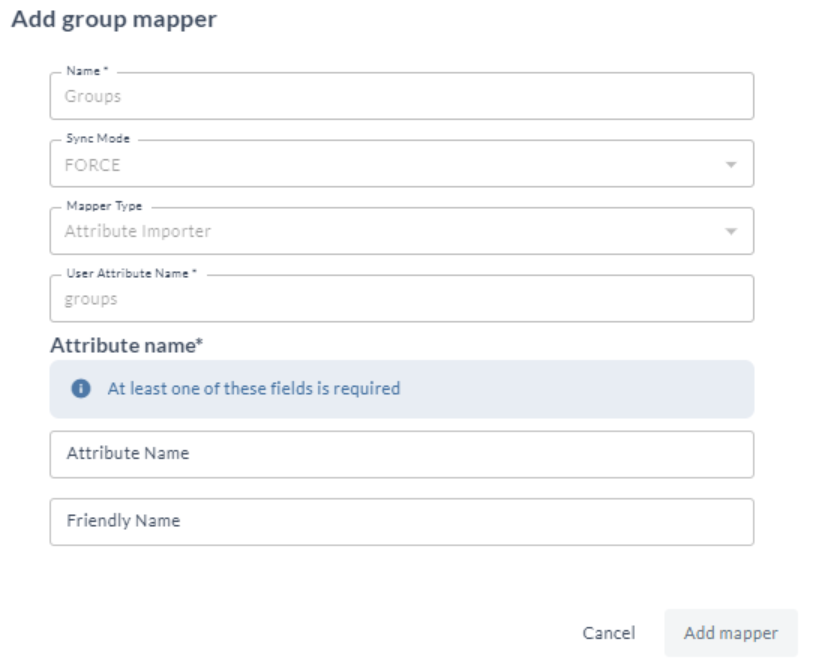
Add Group Mappers
-
Click Add and select Group mapper. All the fields are populated by default.
-
Enter the Claim value.
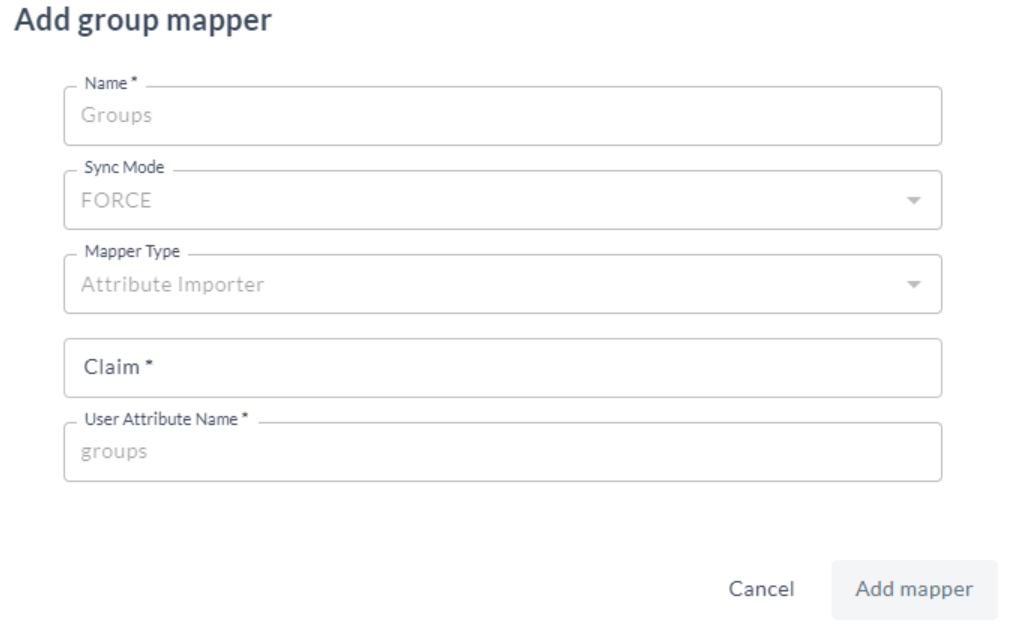
For more information see Group Mappers
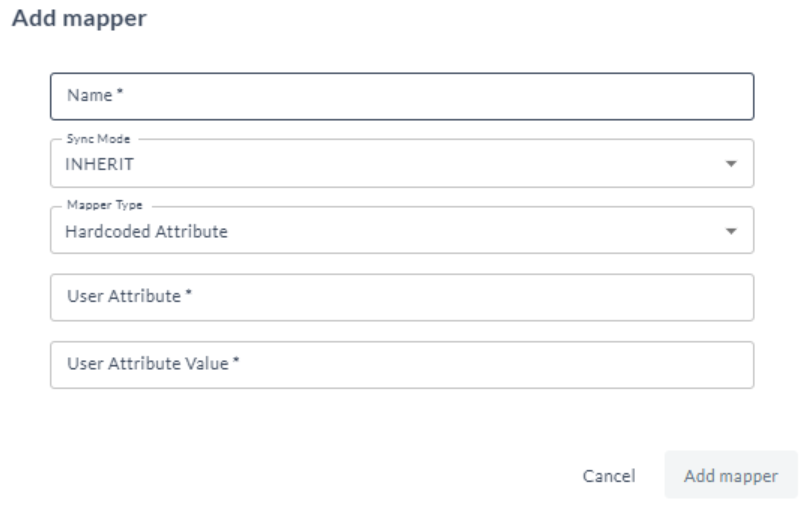
Add Mapper
- Click Add and select Mapper.
- In Name, enter the name of the mapper.
- In Sync Mode, select INHERIT.
- In Mapper Type, choose Hardcoded Attribute (for example).
- In User Attribute, enter the attribute name.
- In User Attribute Value, enter the attribute value.
For more information on Mappers see Mappers
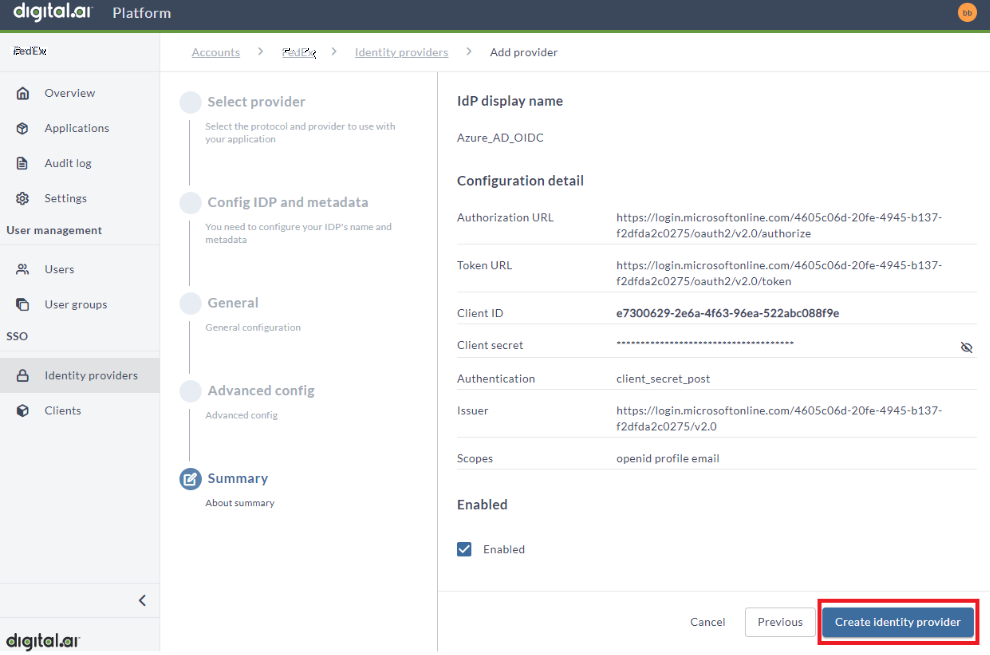
Summary
- The Summary step displays the general configuration of the identity provider. Click Create identity provider to create the new record.
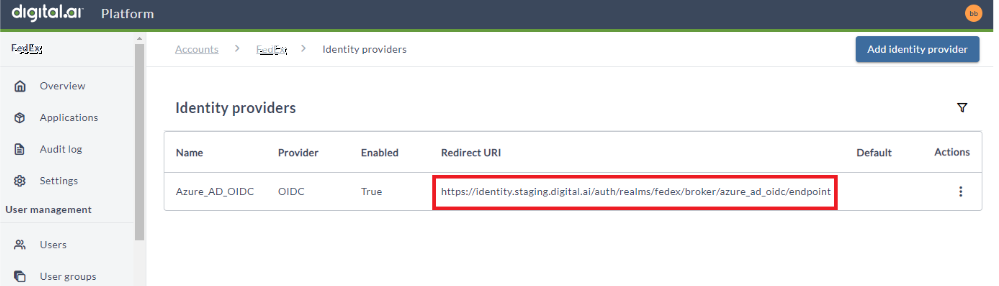
- Copy the Redirect URI for the newly created identity provider.
Entra ID Account
-
Log into your Microsoft Entra ID account to identify the Platform as a valid redirect URL. Go to Manage Entra ID Active Directory.
-
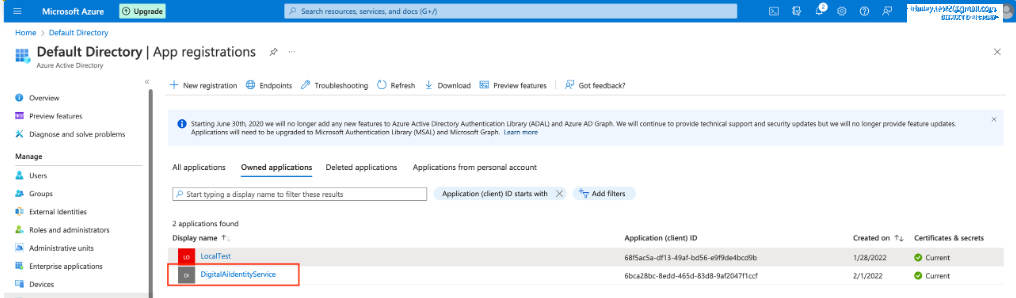
Select App Registrations from the menu.
- Select Owned Applications tab and from the list Select DigitalAiIdentityService.
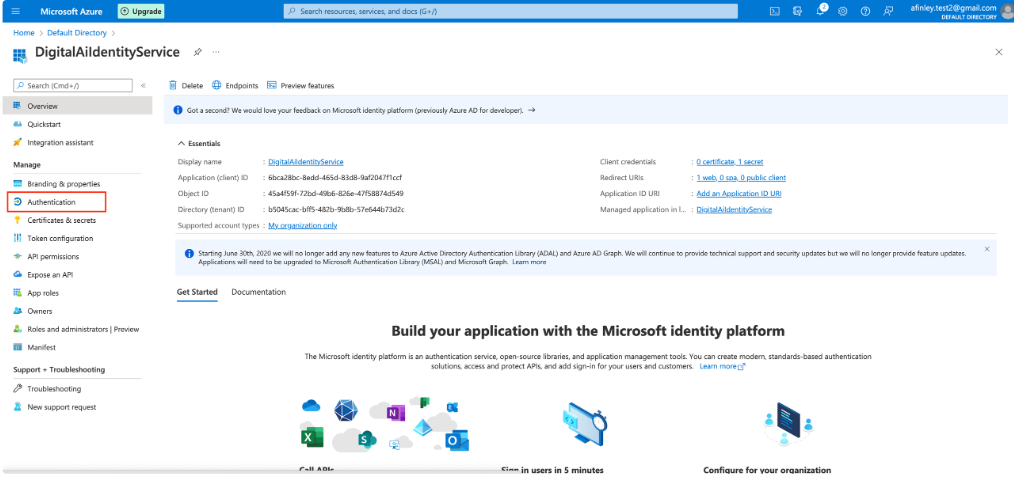
- Select Authentication from the menu.
- Under the Redirect URIs section select Add URI.
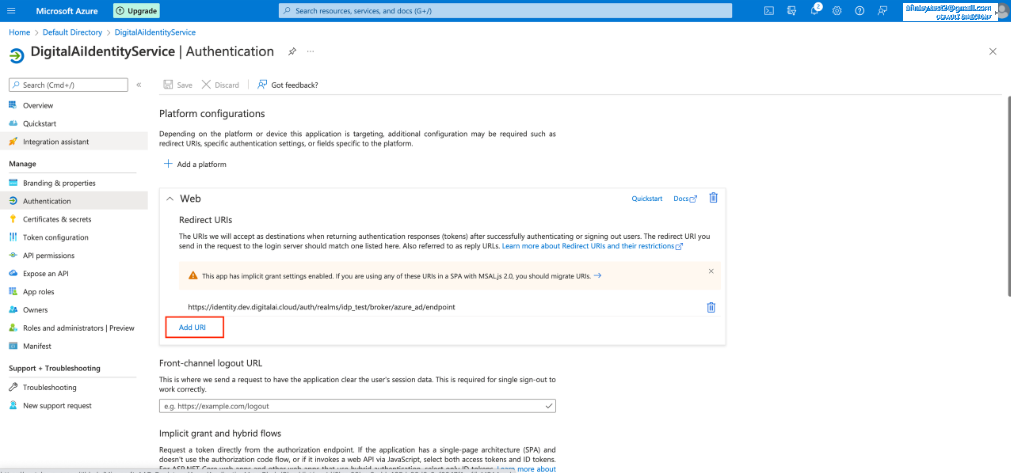
- Add the Redirect URI from step 5 to the Add URI space provided.
Do not remove any existing URI’s in the list, removing a URI will break functionality for the associated accounts.
- Click Save to save your application changes.
When you're finished, a new button will appear on the Digital.ai Platform login page with the name you added under Display Name.
Add SAML SSO Connection
In the OIDC procedure you used an existing Entra ID tenant. However, each SAML connection requires a unique tenant so part of this procedure will involve creating a new Entra ID tenant rather than using information from an existing one.
Prerequisites
Before you begin, ensure to have the following details from your IdP readily available:
- Descriptor Endpoint
This may be unavailable until you have a Redirect URI and Entity ID, which is configured in step 5 of the following steps.
Logging In
- Log in to the Platform as an administrator.
- In the left navigation, under SSO, click Identity providers.
- Alternatively, you can click the Setup identity provider on the Platform overview page.
- Click Create identity provider button.
Select Provider
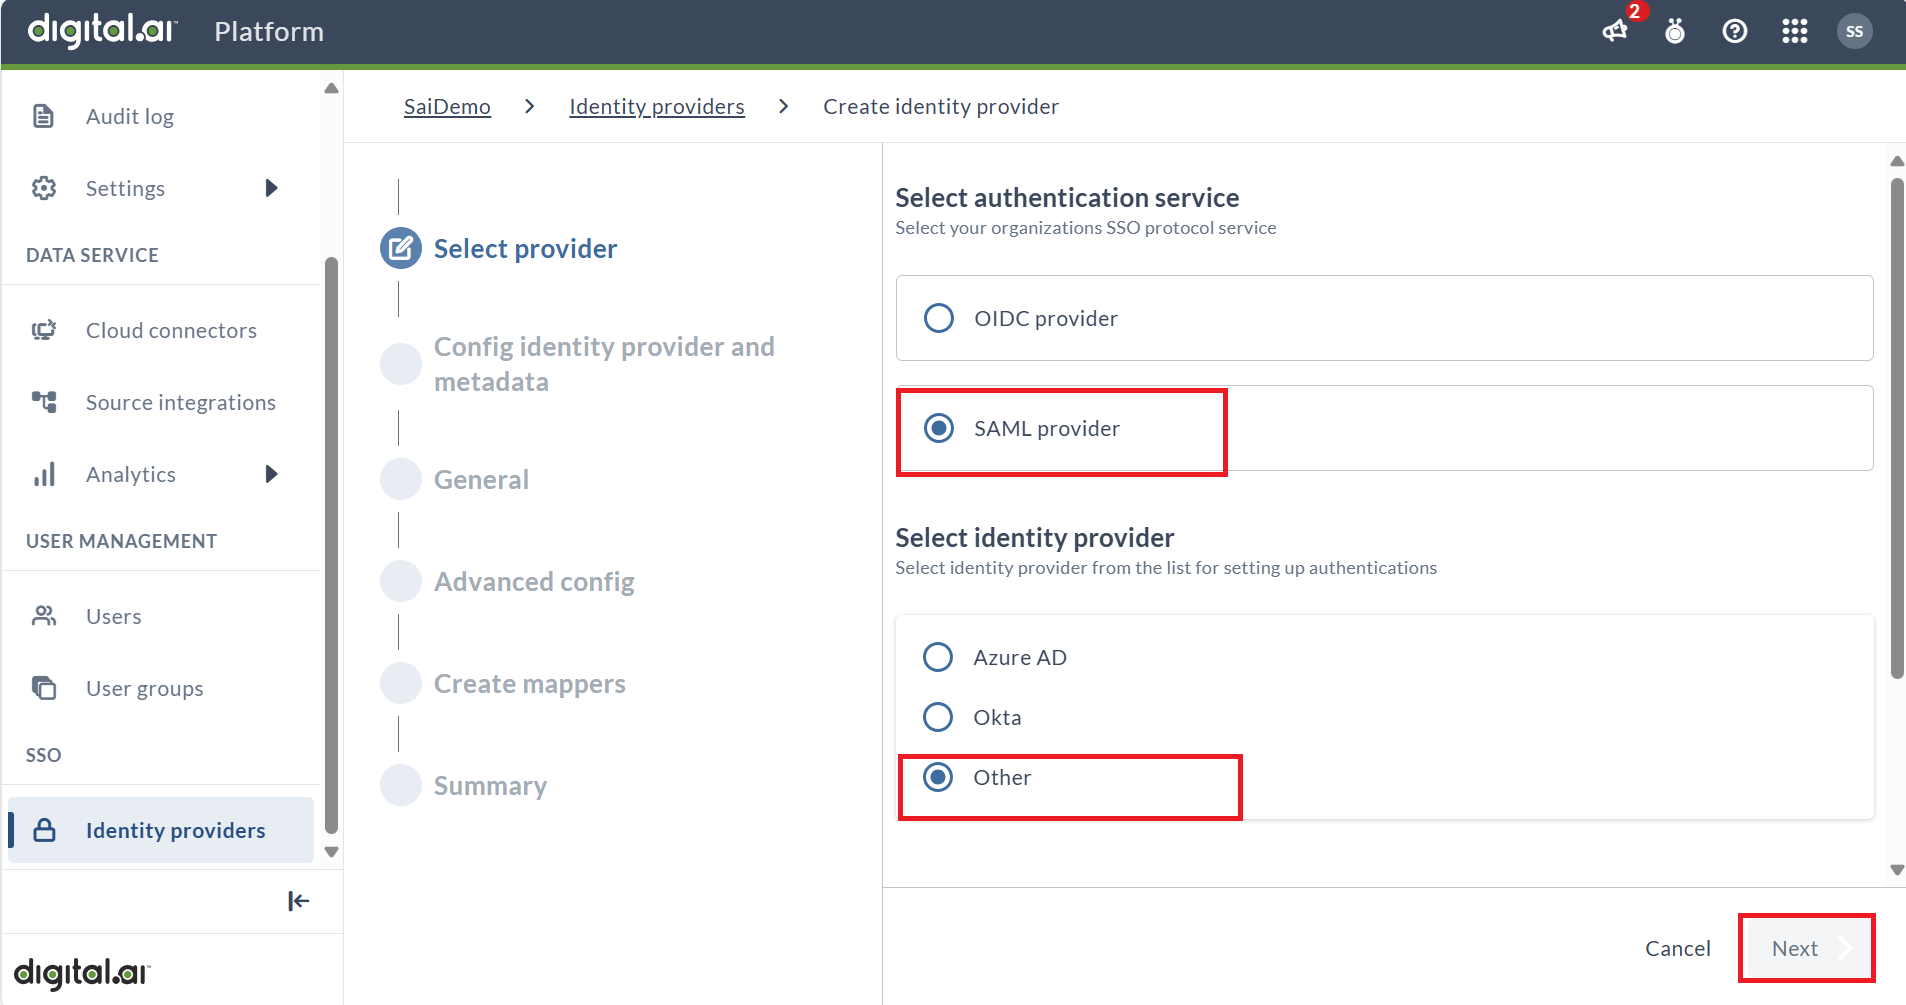
- Choose Add SAML Provider as the authentication service.
- In Select identity provider, choose Other.
- In IdP display name, add a unique, user-friendly name for the IdP. This name will appear on the Digital.ai Platform login page.
- Click Next.
Config identity provider and metadata
- Copy the Redirect URI and Service Provider Entity ID to setup your identity provider. Ensure to share this information with your IT/Security/SSO team.
If a descriptor endpoint was unavailable at the start, you should be able to provide one now.
Do not save the Identity Provider at this time. We will revisit this page later to complete the process of creating the Identity Provider.
Add New Application in Entra ID
- Login to your Entra ID account to add a new application for this connection.
- Log in to your Microsoft Entra ID account, and go to Manage Entra ID Active Directory.
- Go to Manage > App registrations.
- Click + New registration.
- In Name, add a unique, user-friendly name for this connection.
- In the Redirect URI section:
- In Select a platform, choose Web.
- In the text box, paste the value of Redirect URI that you saved previously.
- Click Register.
- On the new tenant you just created, go to Manage > Token configuration.
- Click + Add optional claim.
- Choose SAML and select all 3 options (acct, email, upn).
- Go to Manage > API permissions.
- Click + Add a permission then choose Microsoft Graph.
- Click Delegated permissions.
- Under OpenId permissions, select email and profile.
- Go to Manage > Expose an API.
- Beside Application ID URI, click Set.
- In Application ID URI, paste the value of Service Provider Entity ID you saved previously.
- Go to Overview and click Endpoints tab.
- Copy the value of the Federation Metadata URL from the list of endpoints.
- Go to Overview and click Endpoints tab.
- Copy the value of the Federation Metadata URL from the list of endpoints.
Finish Creating the Connection in Config identity provider and metadata
- Next you will return to the Platform SAML connection you left previously.
-
Your IT/Security/SSO team will use the Redirect URI and Service Provider Entity ID to configure your Corporate IdP and provide the SSO setup details in one of the following three formats::
-
If you select I have the metadata URL for my identity provider, then paste the .well-known endpoint into the Enter Metadata URL field and click Import. You will receive a success message once the data is imported. This import should update several fields in the configuration on the General page.
-
If you select I have a file which contains the metadata, then choose the file and upload.
-
If you select I want to manually configure the identity provider, then enter the fields manually. Click Next.
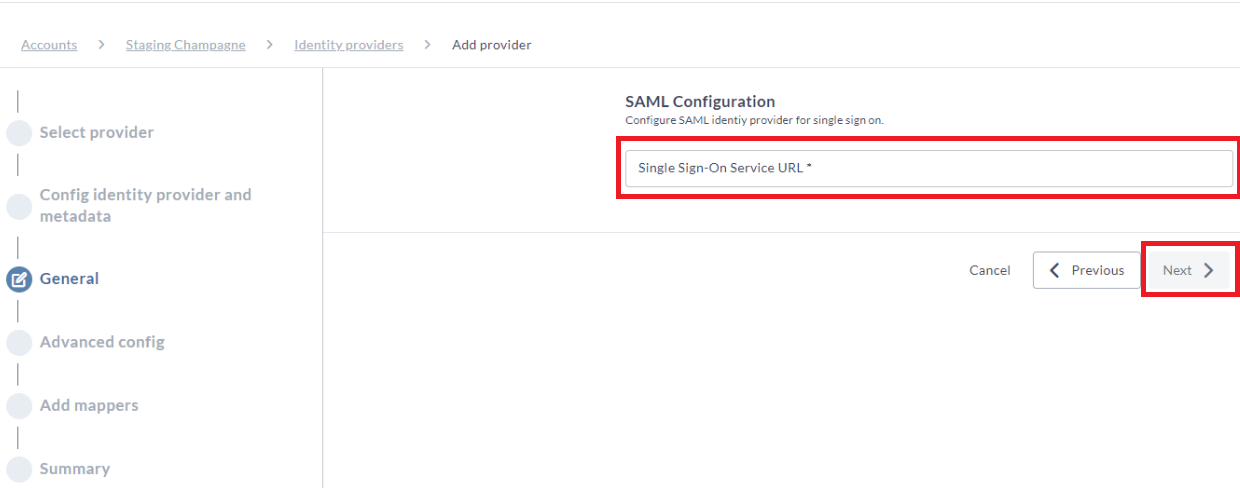
General
- Depending on the selection you made in the previous step, the majority of fields may be automatically filled in.
- In SAML configuration, enter the Single Sign-On Service URL.
- Click Next.
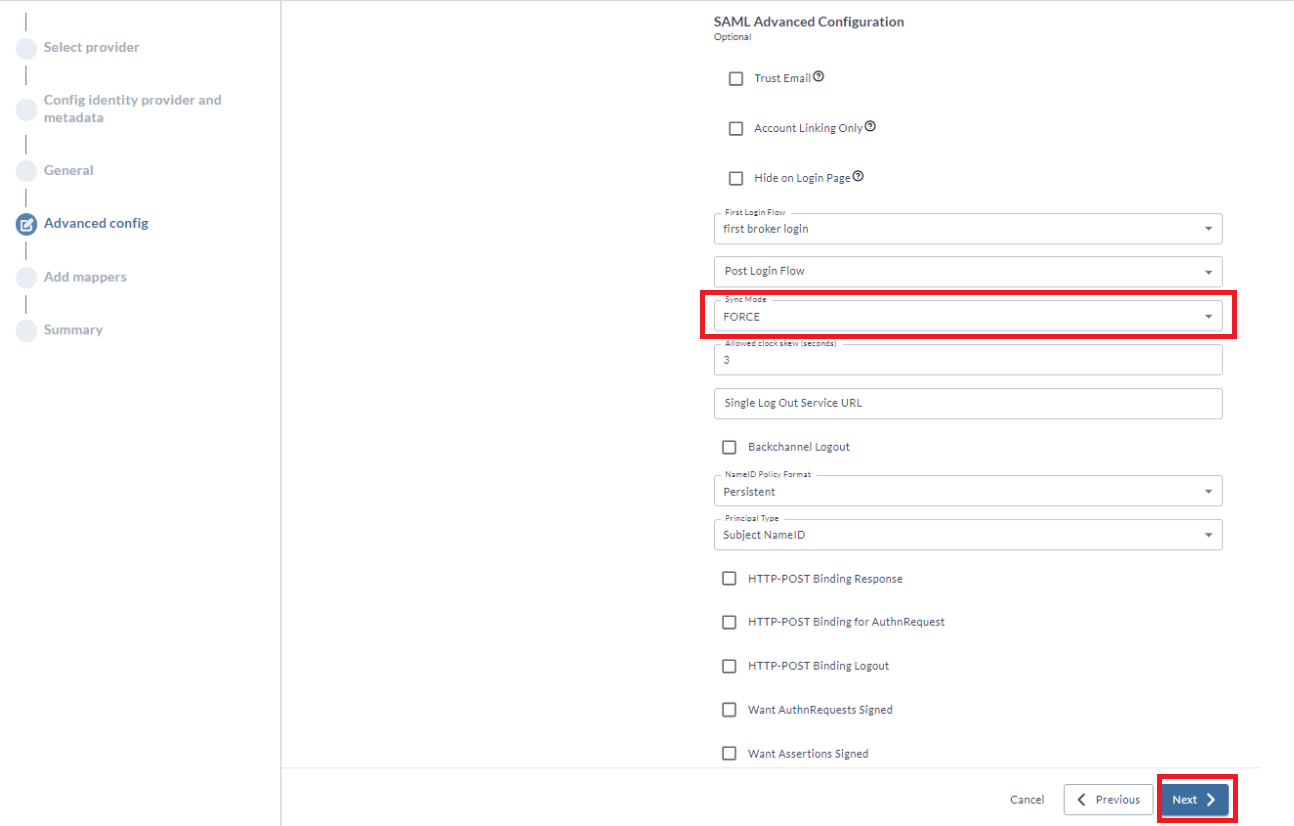
Advanced Config
Advanced Configuration page is optional.
- Depending on the selection you made in the previous step, the majority of fields may be automatically filled in. Click Next.
Ensure that Sync Mode is set to FORCE. Sync Mode is set to FORCE by default, which allows Digital.ai to update a stored user's data whenever it is changed in the IdP. If you set it to IMPORT, user data is only imported the first time they log in through the IdP.
Mappers
Mappers page is optional.
- Adding mappers to this configuration ensures that user and user group attributes from your IdP are correctly mapped with the Digital.ai Platform.
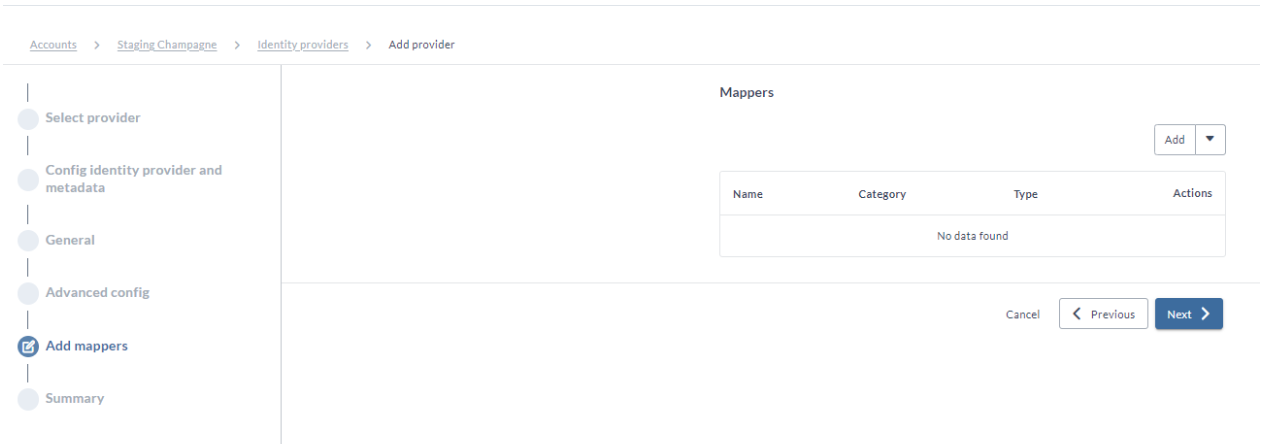
To enable Digital.ai Platform to inherit user groups defined in your IdP, perform the following steps:
Add Group Mapper
- Click Add and select Group mapper. All the fields are populated by default.
- Enter the Claim value.
To add additional mappers, perform the following steps:
Add Mapper
- Click Add and select Mapper.
- In Name, enter the name of the mapper.
- In Sync Mode, select INHERIT.
- In Mapper Type, choose Hardcoded Attribute (for example).
- In User Attribute, enter the attribute name.
- In User Attribute Value, enter the attribute value.
Summary
- On the Summary page you can review the configuration details.
- Click Create identity provider.
A new button will now appear on the Digital.ai Platform login page with the name you added under Display Name.
Add Attribute Mappers
- Add the attribute mappers, which are required to map attributes in the SAML token coming from Entra ID to user attributes in the Platform. To do this, you'll need to edit the identity provider you just created.
- On the Identity providers page, click Actions menu and click Edit.
- Edit identity provider.
- Click Mappers.
- Click Add Mapper, fill in the details, then click Create Mapper to save the mapper. Repeat for each additional mapper in the list.
- Name: username
- Mapper Type: Attribute Importer
- Attribute Name:
- Friendly Name:
- User Attribute Name: username
- Name: email
- Mapper Type: Attribute Importer
- Attribute Name:
- Friendly Name:
- User Attribute Name: email
- Name: firstName
- Mapper Type: Attribute Importer
- Attribute Name:
- Friendly Name:
- User Attribute Name: firstName
- Name: lastName
- Mapper Type: Attribute Importer
- Attribute Name:
- Friendly Name:
- User Attribute Name: lastName