Adding Deploy to Your Backstage IDP
Before You Begin
Ensure that you have installed the Backstage application. If not, you can follow the Getting Started guide on Backstage to create one. Once you have the Backstage application installed, you can proceed with installing the plugins.
Backstage Supported Versions
- Backstage version:
<=1.23.0 - Backstage NPM package version:
<=0.5.11
Installing and Configuring the Frontend Plugin
The frontend plugin needs to be added to your application. To do so:
- Run the following command from the Backstage root directory:
yarn --cwd packages/app add @digital-ai/plugin-dai-deploy
2. Add the DaiDeployEntityDeploymentsContent extension to your entity pages:
// For example in the CI/CD section
// packages/app/src/components/catalog/EntityPage.tsx
import {
  DaiDeployEntityDeploymentsContent
} from '@digital-ai/plugin-dai-deploy';

const cicdContent = (
  <EntitySwitch>
    // ...
    <EntitySwitch.Case>
        <DaiDeployEntityDeploymentsContent />
    </EntitySwitch.Case>
    // ...
  </EntitySwitch>
// For example to create a new section "Deploy" in entity page
// packages/app/src/components/catalog/EntityPage.tsx
import {
  DaiDeployEntityDeploymentsContent
} from '@digital-ai/plugin-dai-deploy';

const serviceEntityPage = (
  <EntityLayout>
// ...
<EntityLayout.Route path="/deploy" title="Deploy">
      	<DaiDeployEntityDeploymentsContent />
               </EntityLayout.Route>
// ...
  </EntityLayout>

const websiteEntityPage = (
  <EntityLayout>
// ...
<EntityLayout.Route path="/deploy" title="Deploy">
      <DaiDeployEntityDeploymentsContent />
    </EntityLayout.Route>
// ...
  </EntityLayout>
- Add an annotation to your catalog-info.yaml files. For example,
apiVersion: backstage.io/v1alpha1
kind: Component
metadata:
  # ...
  annotations:
     dai-deploy/ci-id: '<ci-name>'
spec:
  type: service
  # ...
ci-name is your application name in Deploy.
Installing and Configuring the Backend Plugin
If you're using new Backstage backend system use Deploy backend plugin version > 0.1.2. For more information, see Backstage New Backend System.
- Run the following command from the Backstage root directory:
yarn --cwd packages/backend add @digital-ai/plugin-dai-deploy-backend.
- Create plugin file for deploy backend in the
packages/backend/src/plugins/directory.
// packages/backend/src/plugins/dai-deploy.ts

import { createRouter } from '@digital-ai/plugin-dai-deploy-backend';
import { Router } from 'express';
import type { PluginEnvironment } from '../types';

export default function createPlugin(
  env: PluginEnvironment,
): Promise<Router> {
  return createRouter({
    logger: env.logger,
    config: env.config,
    permissions: env.permissions
  });
}
3. Modify your backend router to expose the APIs for deploy backend.
// packages/backend/src/index.ts

import daiDeploy from './plugins/dai-deploy';
// ...

async function main() {
  // ...
  // Add this line under the other lines that follow the useHotMemoize pattern
  const daiDeployEnv = useHotMemoize(module, () => createEnv('dai-deploy'));
  // ...
  // Insert this line under the other lines that add their routers to apiRouter in the same way
  apiRouter.use('/dai-deploy', await daiDeploy(daiDeployEnv));
- Configure the deploy instance by adding the following to your app-config.yaml files
daiDeploy:
  host: <<deploy-instance-url>> #http://deploy-hostname:4516
  username: ${username}
  password: ${password}
username and password must be set as environment variables.
Installing and Configuring the Backend Plugin - New Backstage Backend System
- Run the following command from the Backstage root directory:
yarn --cwd packages/backend add @digital-ai/plugin-dai-deploy-backend.
- In your packages/backend/src/index.ts make the following changes:
  import { createBackend } from '@backstage/backend-defaults';

  const backend = createBackend();

  // ... other feature additions

+ backend.add(import('@digital-ai/plugin-dai-deploy-backend'));

  backend.start();
- Configure the deploy instance by adding the following to your app-config.yaml files.
daiDeploy:
  host: <<deploy-instance-url>> #http://deploy-hostname:4516
  username: ${username}
  password: ${password}
Creating Users in Deploy
Before you can use the Deploy plugin for Backstage, certain prerequisites need to be met within the Digital.ai Deploy. These involve creating a new user and assigning the necessary roles to that user. For example,
- Create a new user in Digital.ai Deploy for Backstage. For example, ‘backstage’.

You can also use an existing user.
- Create a new role. For example, ‘backstage-users’.

If you are using an existing role, then map the user.
-
In the Global permission tab, select Login and Report view permission.

-
All CI’s (Applications. Environment, Infrastructure) must have read permission for the role.


Using the Deploy Plugin in Backstage
-
Open your Backstage application and select a component from the Catalog page.
-
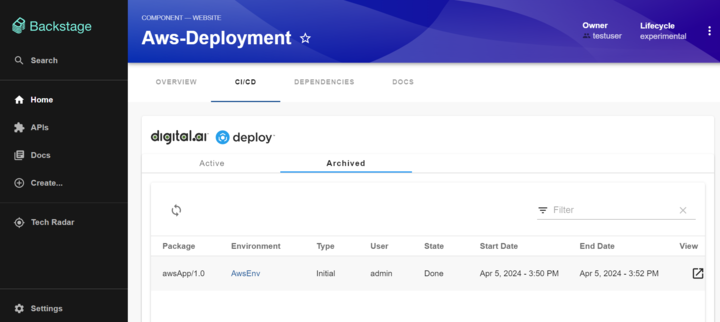
Go to CI/CD tab if you have configured the Deploy plugin in CI/CD.
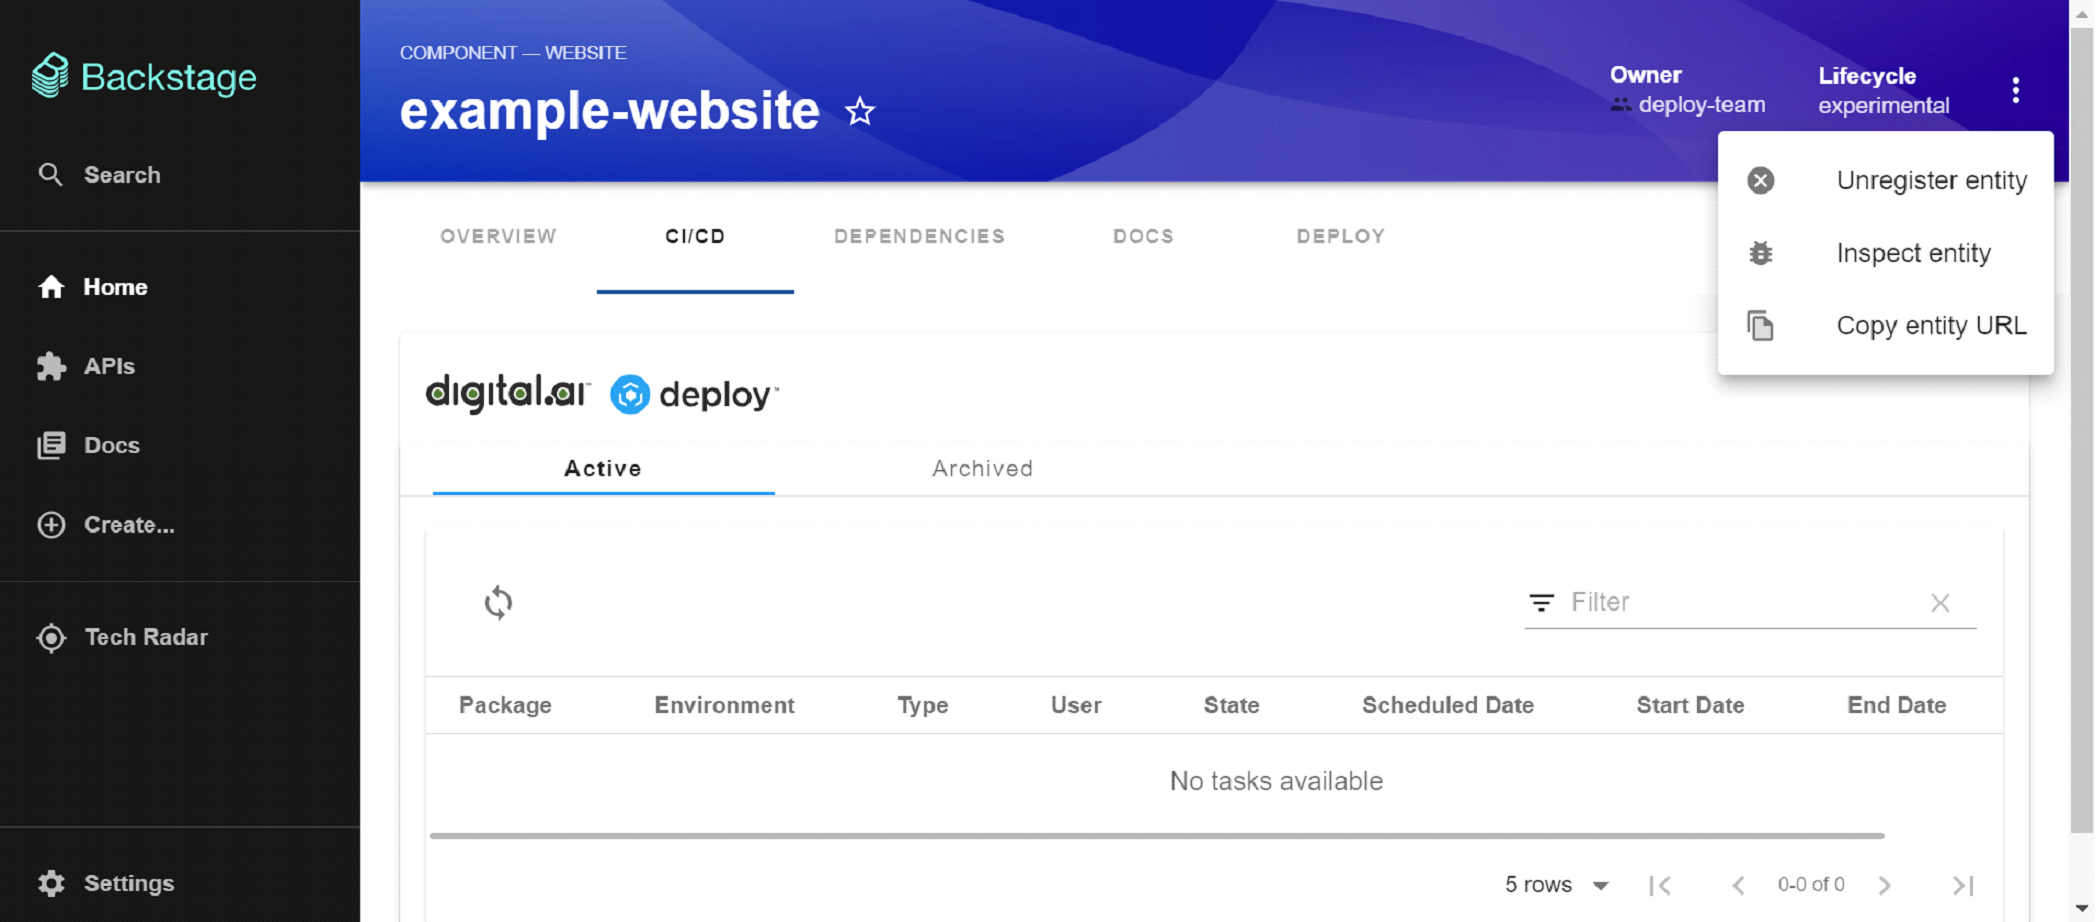
The CI/CD tab displays the Active and Archived tabs. The Active and Archive tab contains the deployment details such as Package, Environment, Type, User, State, Scheduled Date, Start Date, End date and View task.
- To view the deployment task, click
- If you have configured the Deploy plugin to appear as a new tab.
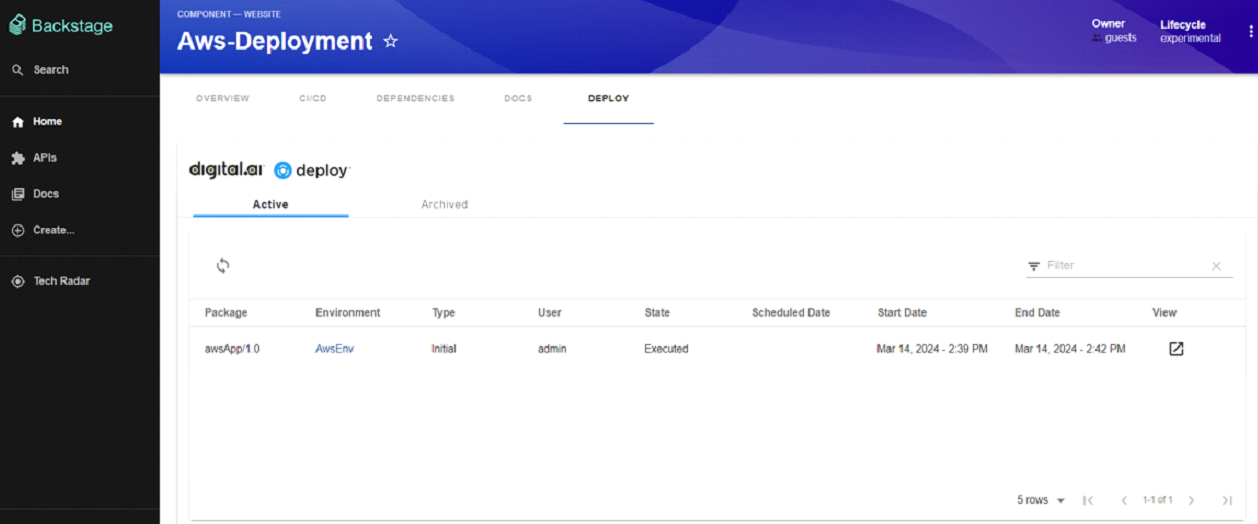
- Go to the new tab.
The tab displays the Active and Archived tabs. The Active and Archive tab contains the deployment details such as Package, Environment, Type, User, State, Scheduled Date, Start Date, End date and View task.
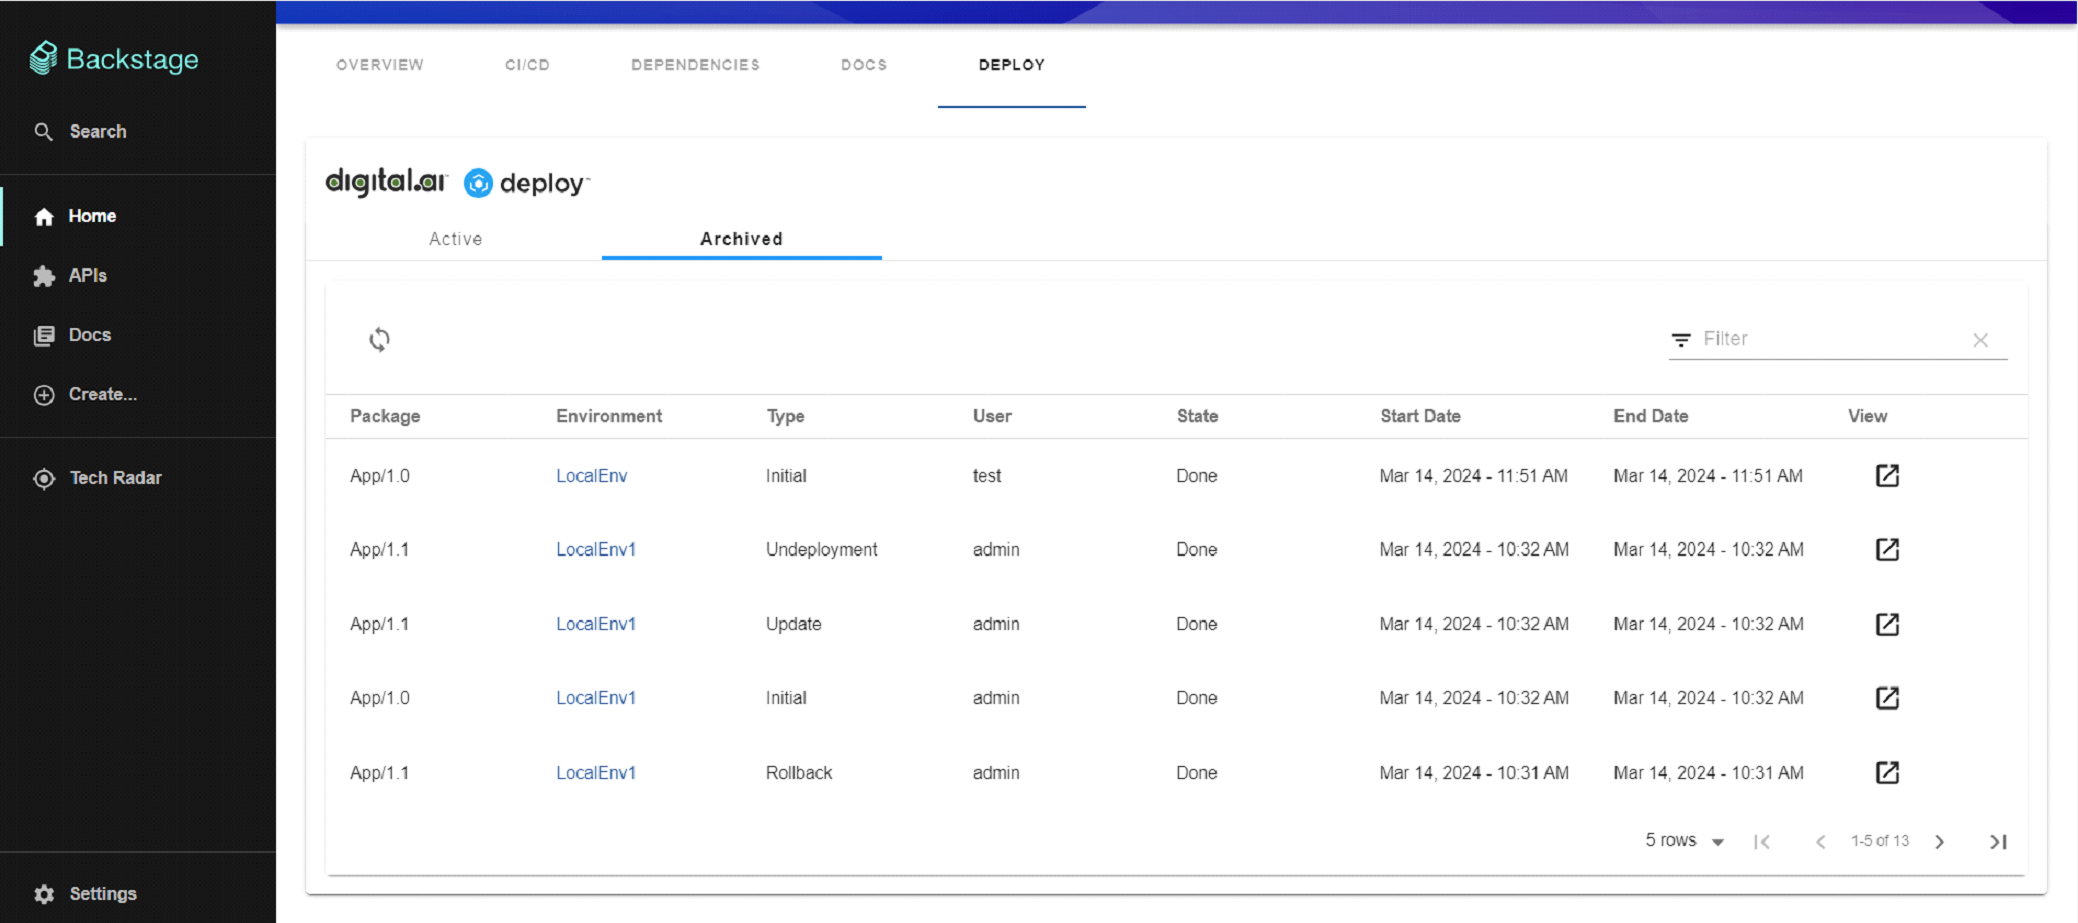
- To view the deployment task, click
- To refresh the data, click
. It displays the current deployment status.
The latest deployment appears on top.
Sample Deployment to View the Deployment Status
The following example shows the application deployment status in Backstage:
- Log in to Deploy and start a new deployment.
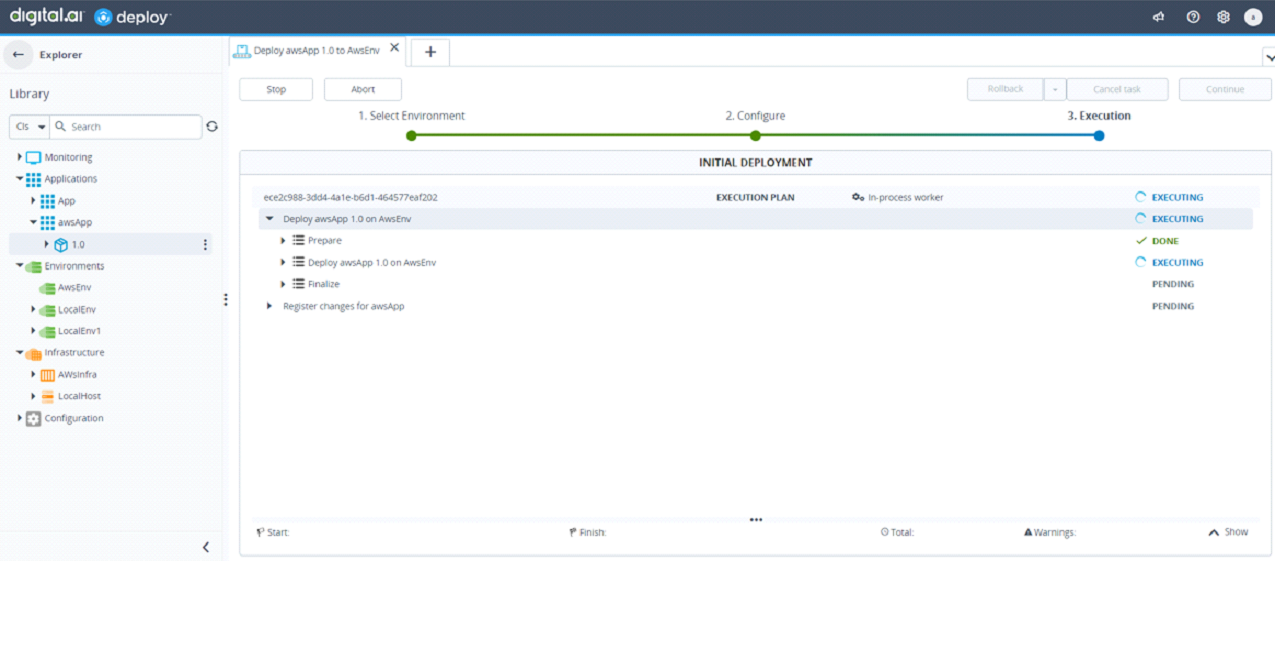
- In Backstage, navigate to the Active Deployments tab to monitor the deployment.
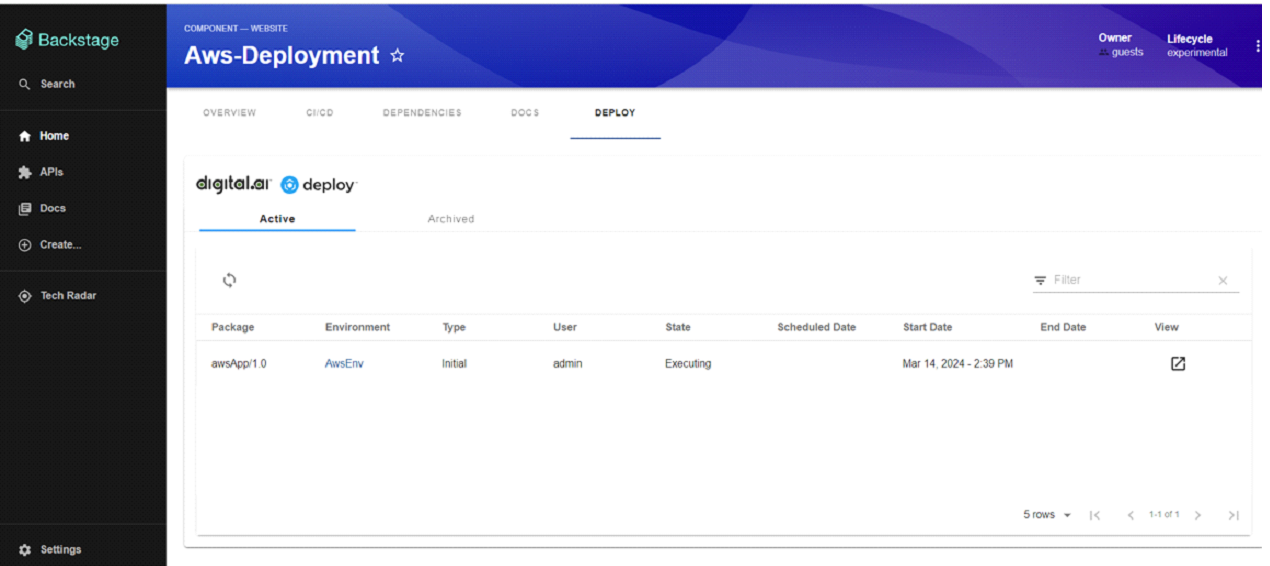
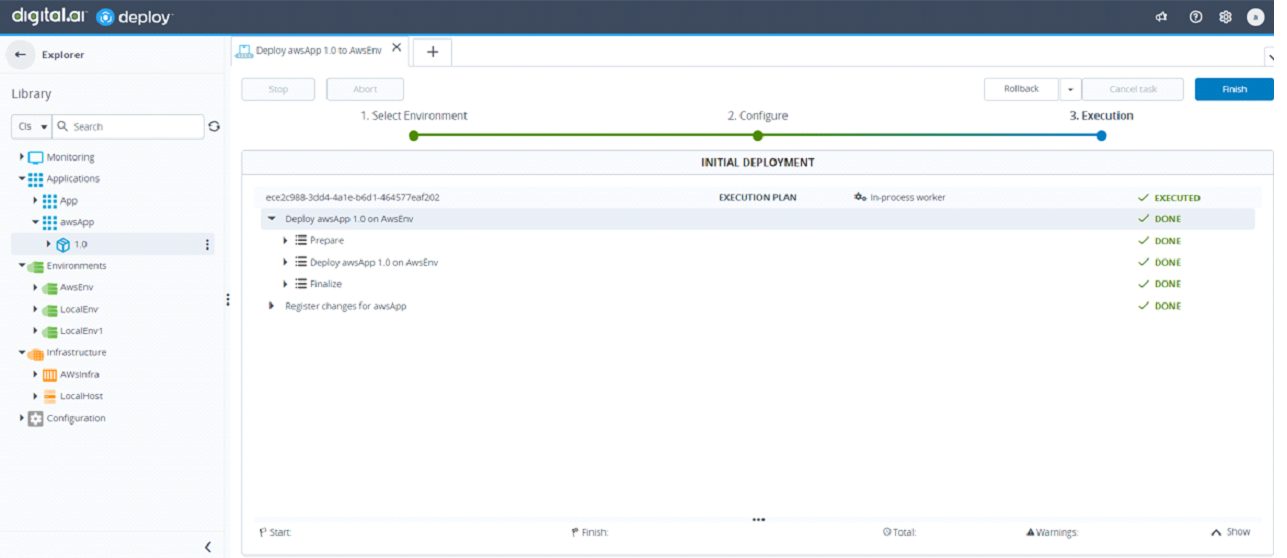
- After the execution is completed, navigate to Backstage and click refresh. The deployment state is updated to Executed.

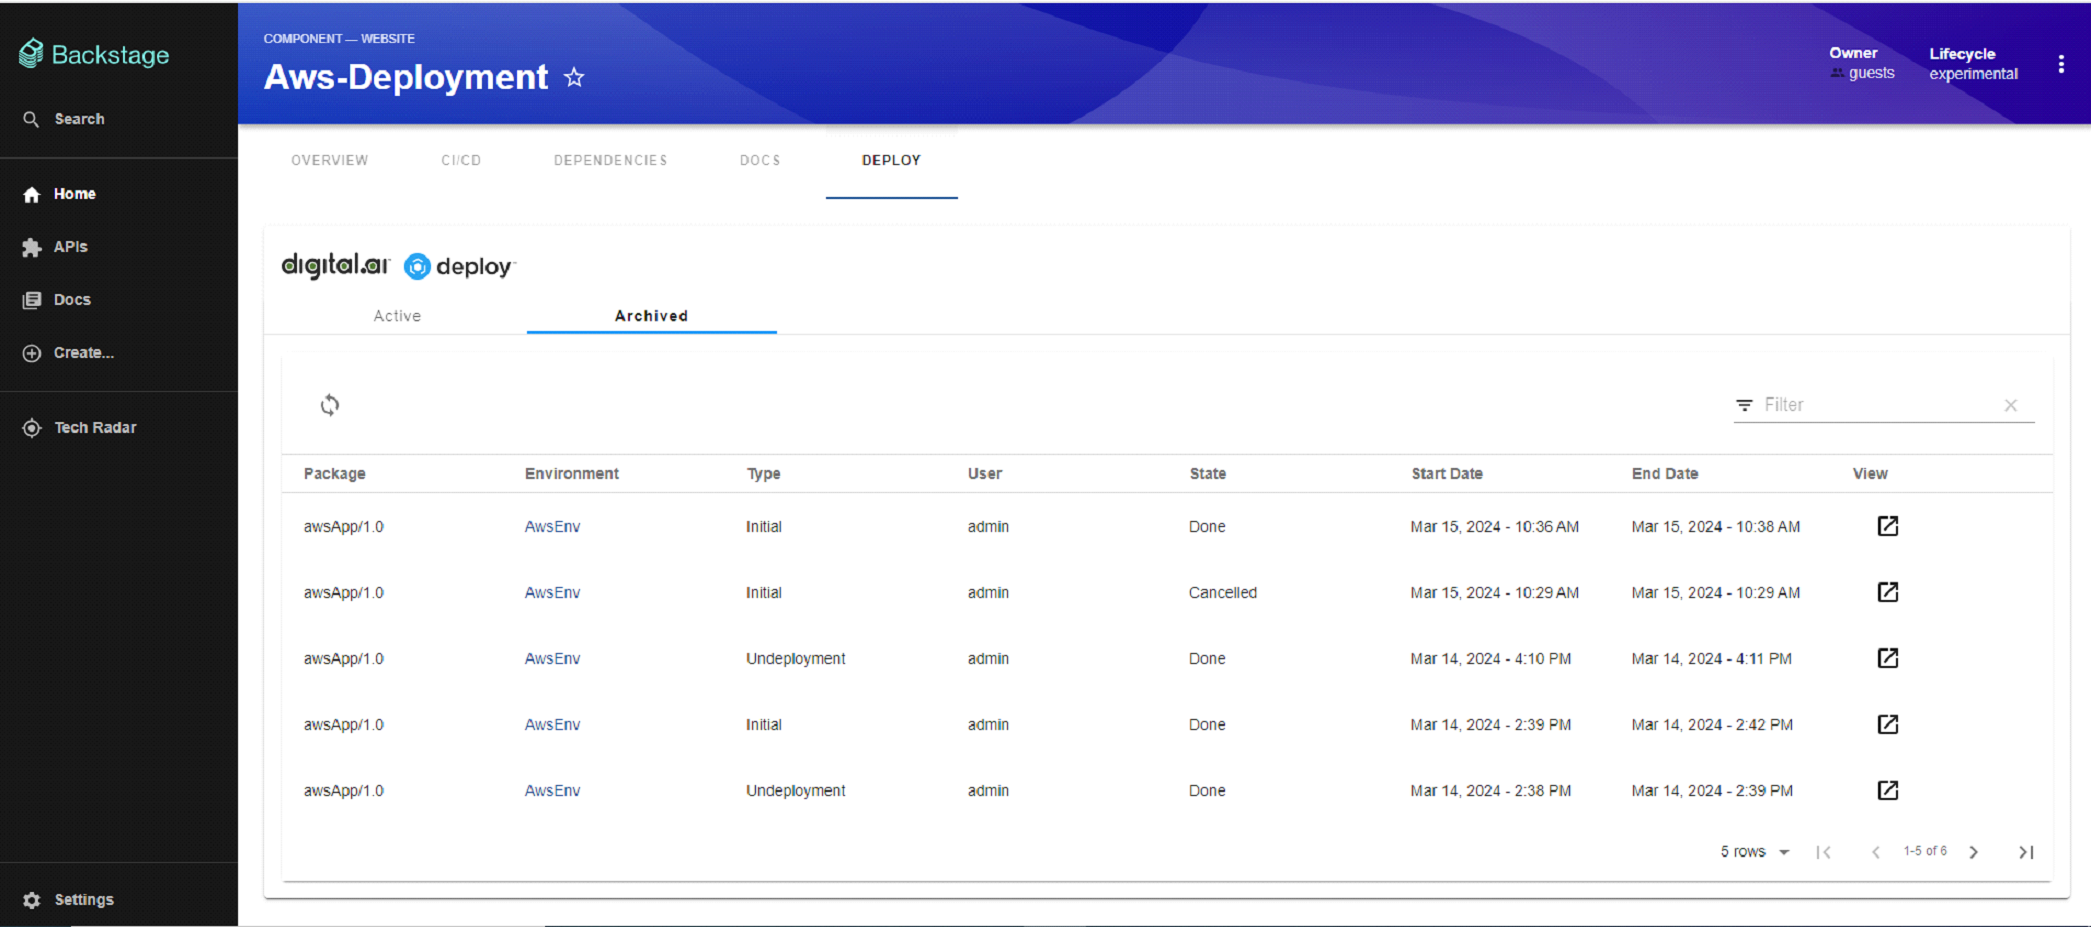
- In Digital.ai Deploy, click Finish and archive deployment. The deployment task will be displayed in Reports section.

- In Backstage the archived deployment is displayed in Archived tab.
Warnings
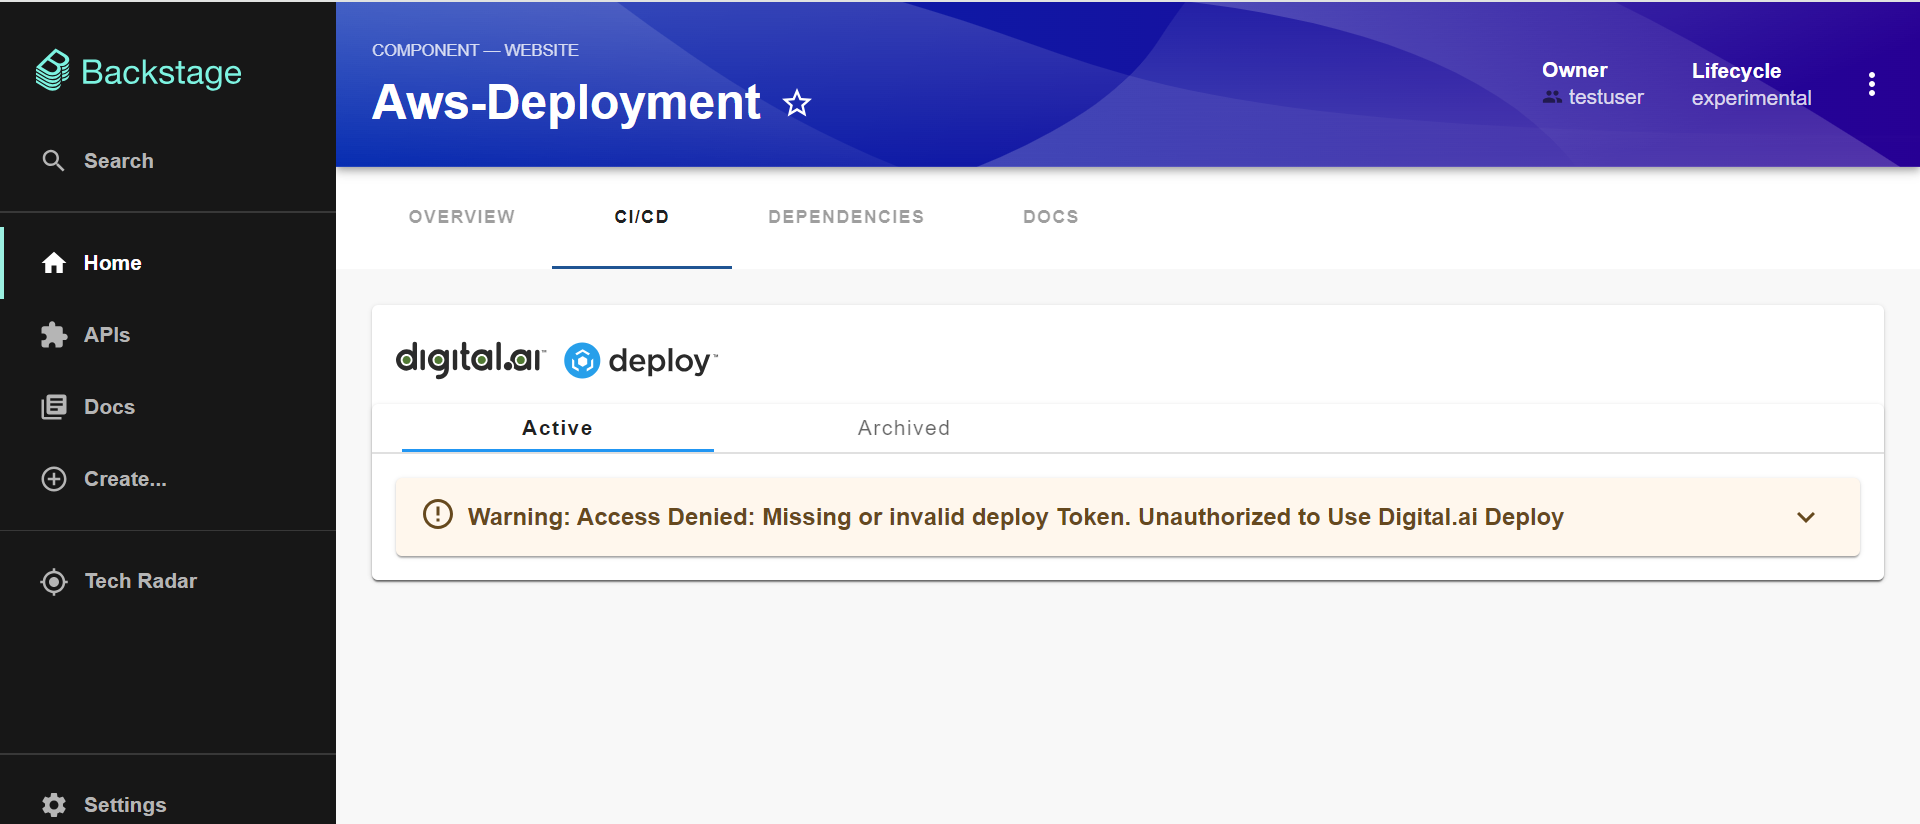
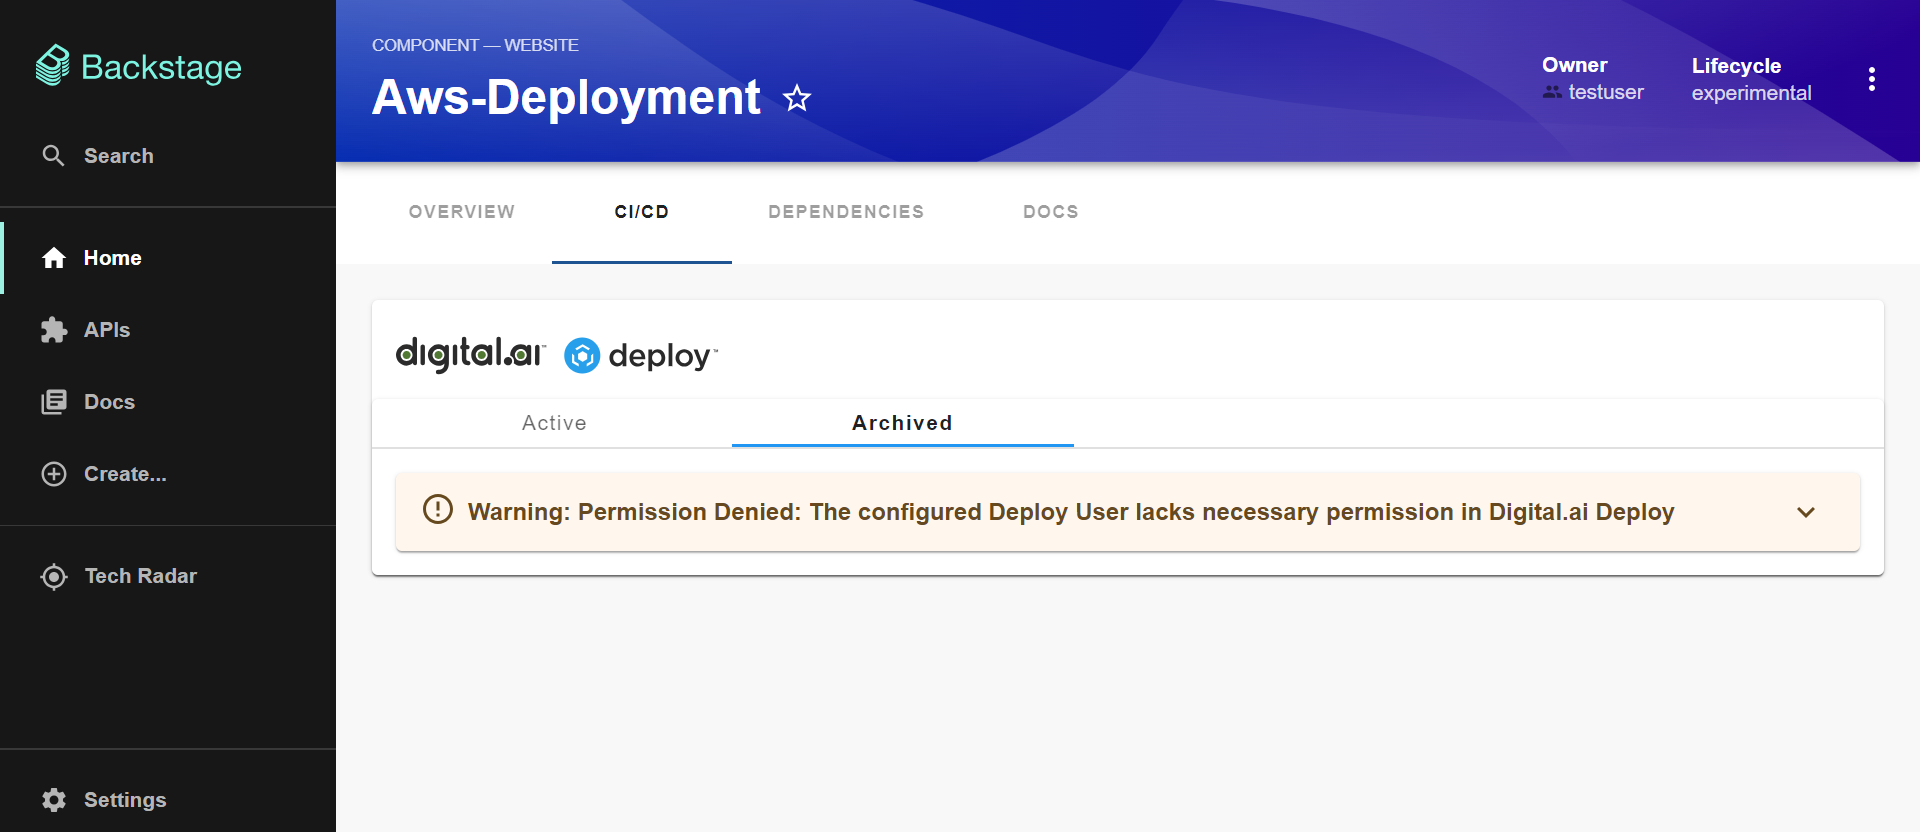
Permission Warnings
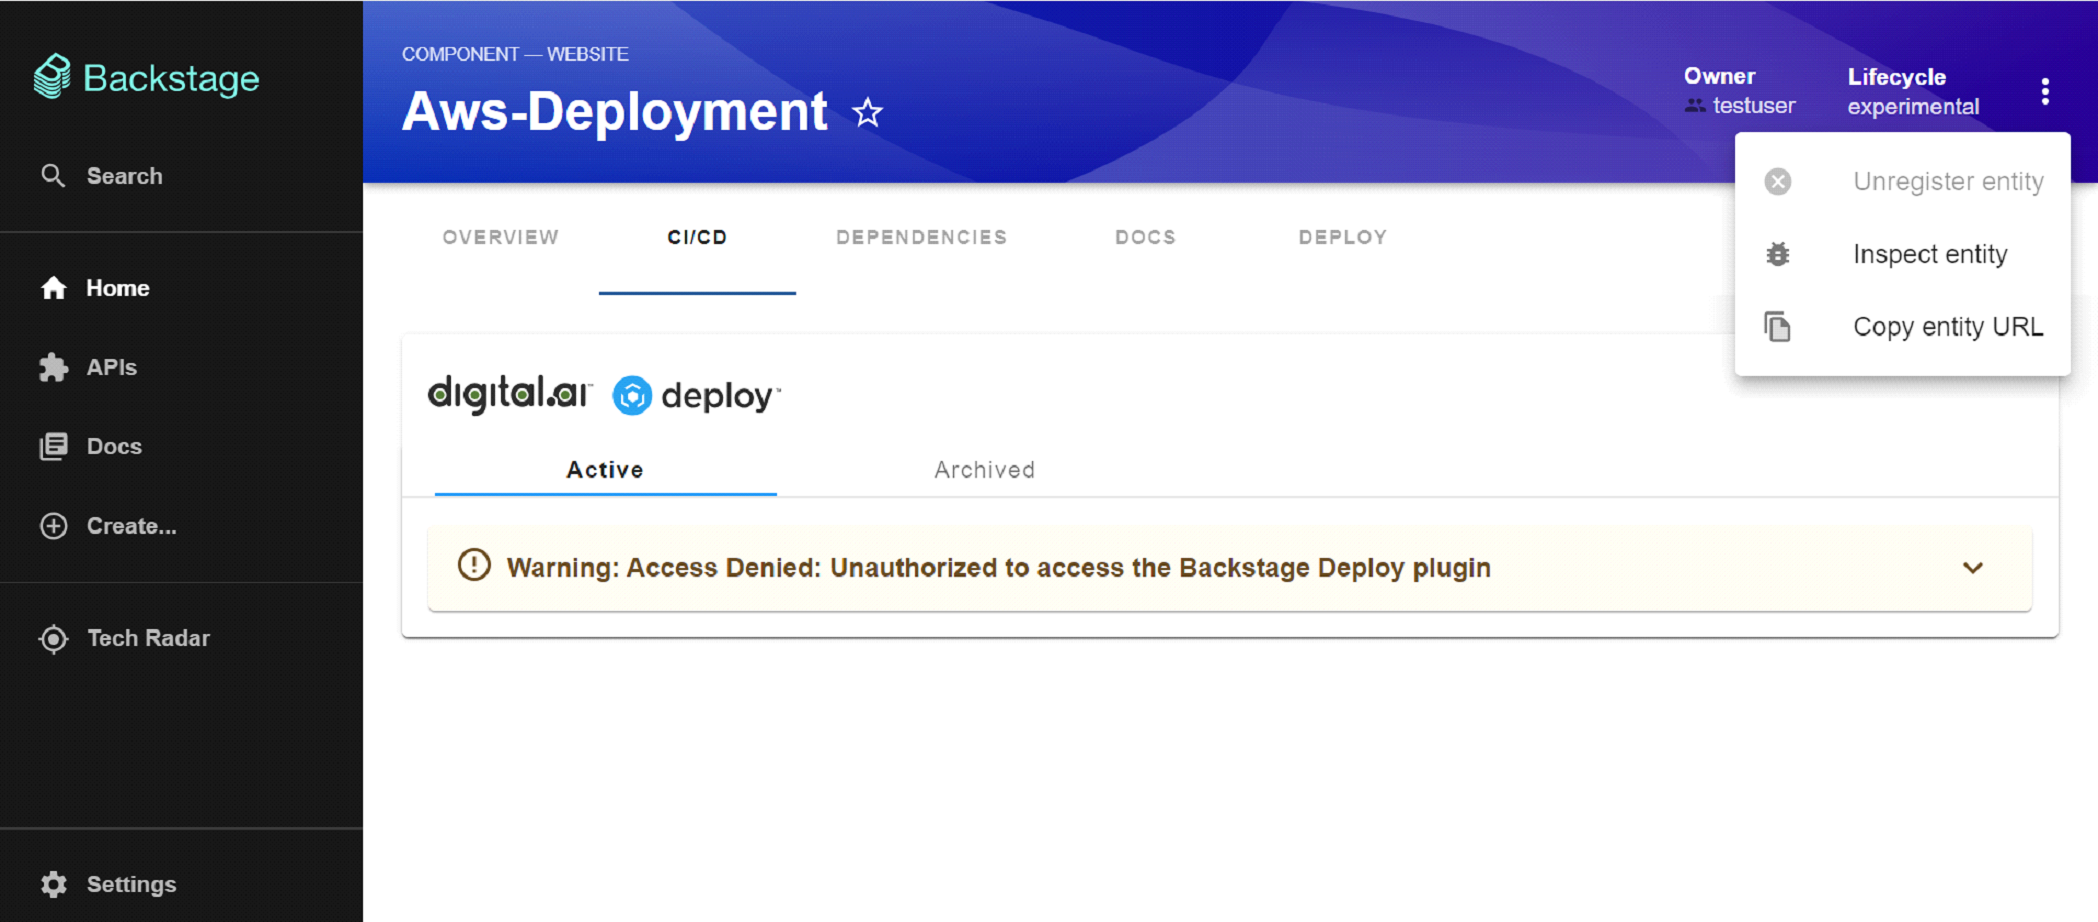
- The following errors occur if you do not have the required permissions. Verify the permissions assigned to the Backstage user in Deploy to prevent these errors.
Connectivity Warnings
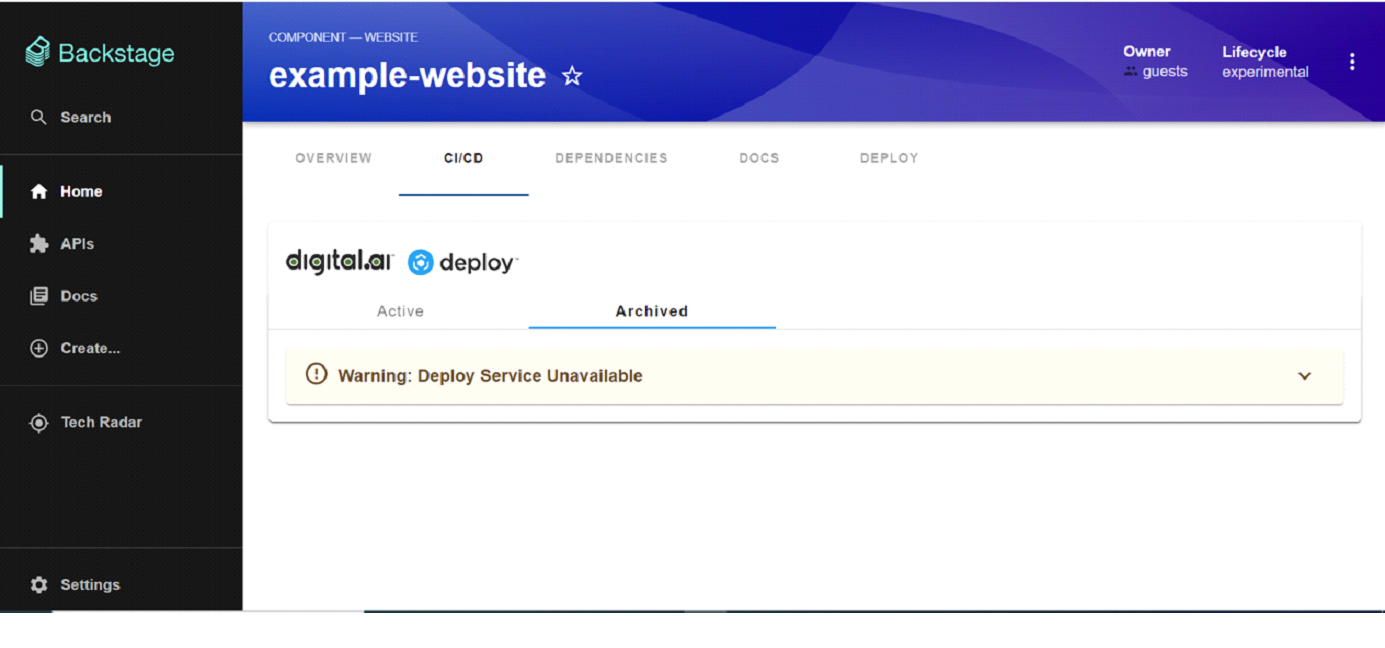
- The following error occurs if you do not have network connectivity. Verify your network connectivity to prevent this error.
Enabling Permissions
The permissions framework helps to decide who can access the Deploy plugin in Backstage. In order to achieve this, we configure permissions in backend plugin and allow authorised users to access the data in Backstage. For more information, see Permissions in Backstage.
To integrate permission with Digital.ai Deploy plugin, perform the following steps:
- Run the following command:
yarn --cwd packages/backend add @digital-ai/plugin-dai-deploy-common
- In Deploy plugin, we have defined deployViewPermission with RESOURCE_TYPE_CATALOG_ENTITY
For example, we have used deployViewPermission permissions to restrict access to view deploy records based on the component ownership.
        if (isPermission(request.permission, daiDeployViewPermission)) {
            return createCatalogConditionalDecision(
                 request.permission,
                 catalogConditions.isEntityOwner({
                     claims: user?.identity.ownershipEntityRefs ?? []
                 }),);
         }
Examples
⦁ The following screenshot shows the user's ownership permission to access the example-website component.
⦁ The following screenshot shows the user without the ownership permission to access the AWS-deployment component.
