Create a provisioning package
This topic describes the process of creating and configuring a provisioning package in Deploy.
In Deploy, a provisioning package is a collection of:
- Provisionables: contain settings that are required to provision the environment.
- Provisioners: execute actions in the environment after it is set up.
- Templates: create configuration items (CIs) during the provisioning process.
Example of contents of a provisioning package:
- A provisionable that creates an Amazon Web Services EC2 instance (
aws.ec2.InstanceSpec) - A Puppet provisioner that installs Apache HTTP Server on the instance (
puppet.provisioner.Manifest) - Templates that create an SSH host CI (
template.overthere.SshHost), a Tomcat server CI (template.tomcat.Server), and a Tomcat virtual host CI (template.tomcat.VirtualHost)
The process of provisioning a cloud-based environment through Deploy is very similar to the process of deploying an application. You start by creating an application (udm.Application) that defines the environment that you want to provision. You then create provisioning packages (udm.ProvisioningPackage) that represent specific versions of the environment definition.
Step 1 Create an application
To create an application:
- In the top bar, click Explorer
- In the side bar, hover over Applications, click
, and select New > Application.
- In the Name field, enter a unique name for the application.
- Click Save.
Step 2 Create a provisioning package
To create a provisioning package:
- Hover over the application, click
, and select New > Provisioning Package.
- In the Name field, enter the provisioning package version.
- Click Save.
Step 3 Add a provisionable to a package
To add a provisionable to a provisioning package:
-
Hover over the provisioning package, click
, and select the type of provisionable that you want to add. Example: To add an Amazon Web Services EC2 AMI, select aws > ec2.InstanceSpec.
-
Fill in the provisionable properties. Example of properties for an
aws.ec2.instanceSpec: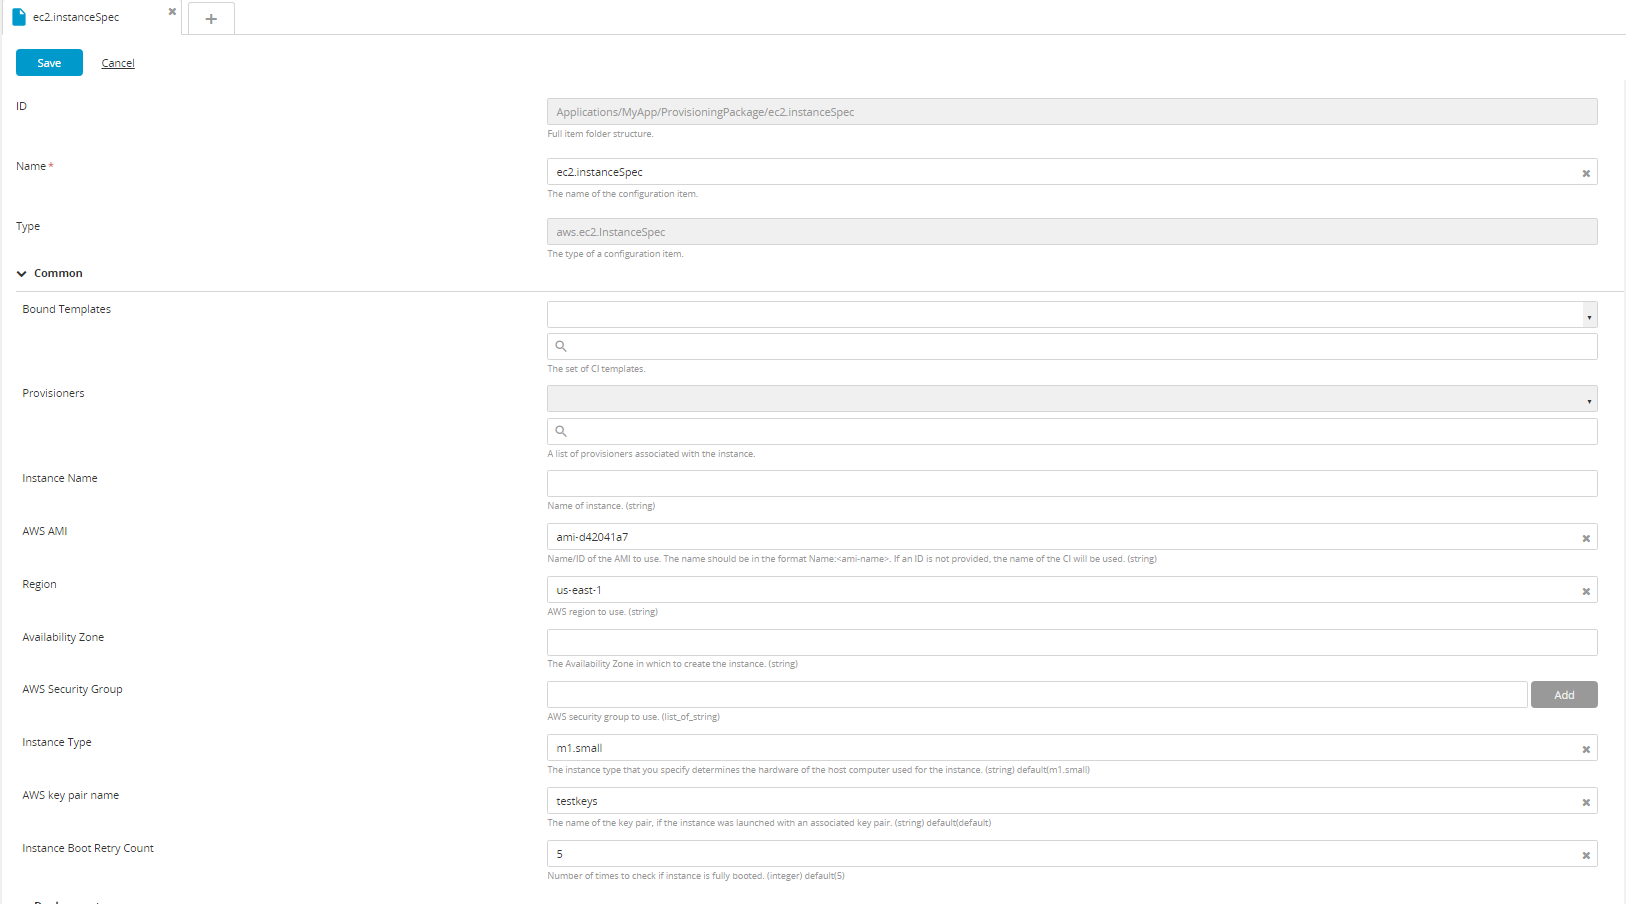
-
Click Save.
Cardinality in provisionables
The cardinality and ordinal properties are set to hidden=true by default. If you want to use the cardinality functionality, you must modify the properties in the synthetic.xml file.
Example of <type-modification> in the synthetic.xml:
<type-modification type="dummy-provider.Provisionable">
    <property name="cardinality" kind="string" category="Provisioning" description="Number of instances to launch." hidden="false" default="1"/>
</type-modification>

<type type="dummy-provider.Provisioned" extends="udm.BaseProvisioned" deployable-type="dummy-provider.Provisionable" container-type="dummy-provider.Provider">
  <generate-deployable type="dummy-provider.Provisionable" extends="udm.BaseProvisionable" copy-default-values="true"/>
  <property name="ordinal" kind="integer" required="false" category="output" hidden="false"/>
</type>
If you enable the cardinality property, you can use this functionality to create multiple provisioneds based on a single provisionable.
Example: an aws.ec2.InstanceSpec with a cardinality of 5 will result in five Amazon EC2 instances, all based on the same instance specification. When each provisioned is created, its ordinal will be added to its name, as described in Provision an environment.
When setting up the provisioning, you can use a placeholder such as NUMBER_OF_TOMCAT_INSTANCES for the cardinality property to specify the number of instances in the provisioning properties.
Step 4 Add a template to a package
To add a template to a provisioning package:
-
Hover over the provisioning package, click
, select New > Template, and select the type of template that you want to add.
The type of a template is the same as the type of CI it represents, with a
template.prefix. Example: the template type that will create anoverthere.SshHostCI is calledtemplate.overthere.SshHost. -
Fill in the configuration for the template.
Template properties are inherited from the original CI type, but simple property kinds are mapped to the
STRINGkind. You can specify placeholders in template properties. Deploy resolves the placeholders when it instantiates a CI based on the template. -
Click Save.
Note You are not required to create a template for container CIs. All the existing provisioneds that are containers will be added to the target environment after provisioning is done.
Step 5 Add a template as a bound template
To resolve a template and create a CI based on it, you must add the template as a bound template on a provisioning package (udm.ProvisioningPackage). You can use contextual placeholders in the properties of templates.
Storing generated CIs
CIs that are generated from bound templates are saved in the directory that you specify in the Directory Path property of the target environment.
Example: Cloud/EC2/Testing
The directory that you specify must already exist under Infrastructure and/or Environments (for udm.Dictionary CIs).
Naming generated CIs
The names of CIs that are generated based on templates follow this pattern:
/Infrastructure/$DirectoryPath$/$ProvisioningId$-$rootTemplateName$/$templateName$
The elements in the CI name:
- The root (in this example:
/Infrastructure) is based on the CI type. It can be any repository root name. $DirectoryPath$is the value specified in the Directory Path property of the target environment.$ProvisioningId$is the unique provisioning ID that Deploy generates.$rootTemplateName$is the name of the root template, if the template has a root template or is a root template.$templateName$is the name of the template when it is nested under a root template.
To change this rule, specify the optional Instance Name property on the template. The output ID will be:
/Infrastructure/$DirectoryPath$/$rootInstanceName$/$templateInstanceName$
Note: As, of Deploy 10.0, when you add directories in bound templates as a part of provisioning, the path of the directory is specified in each template.core.Directory via the Instance Name field. This works only if the directory exists. If some directories are missing, you must explicitly configure the template.core.Directory by adding them as bounded to CI, to avoid an error.
Example of a directory path in bound templates of template.core.Directory CI:
Creating a hierarchy of templates
You can create a hierarchy of templates that have a parent-child relationship. To do this, hover over the parent CI, click , and select New > Template.
Example of a hierarchy of
template.overthere.SshHost, template.tomcat.Server, and template.tomcat.VirtualHost CIs:
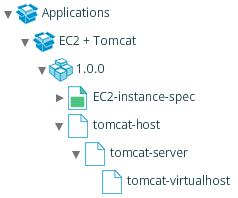
In this example, you must specify only the root (parent) of the hierarchy as a bound template. Deploy will automatically create CIs based on the child templates.
Step 6 Add a provisioner to a provisionable
You can optionally add a provisioner such as Puppet to a provisionable:
- Hover over the provisionable, click
, select New, and then select the type of provisioner that you want to add. Example: to add a Puppet manifest, select provisioner.Manifest.
- Fill in the configuration for the provisioner.
- Click Save.
A provisioner must run on a host. Create a host template (for example, template.overthere.SshHost) and then assign it to the provisioner.
Step 7: Add CI’s to the new server by creating new environment while provisioning
You can deploy a provisioning package that will create a new infrastructure to the newly created environment.
From Deploy 10.1 while deploying provisioning package, CI can be deployable to a specific folder by creating a new folder for new environment and infrastructure. Before Deploy 10.1, the deployment was always adding new environment to the root node.
Below given is a use case deploying the provisioning package that will create a new infrastructure to the newly created environment.
- Create a localhost infrastructure (eg: Localinfra). See create an infrastructure to know more information.
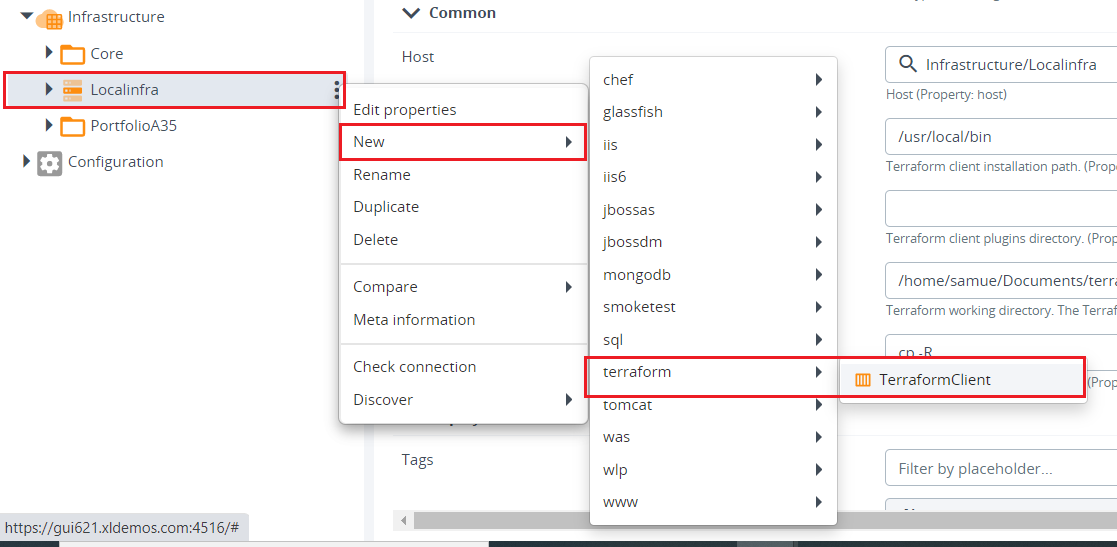
- Create a Terraform client by hovering over the Localinfra, click
then select **New ** > terraform > TerraformClient under the Localinfra and provide the specified path and working directory.
- Create an environment (eg: Terraform) and add the Terraform client container. See create an environment to know more information.
- Create an application and add a provisioning package, refer Step 1 to Step 3.
- Create a terraform module by hovering over the provisioning package, click
then select **New ** > terraform > Module under the provisioning package and specify the related values in the module.
- Create a template (tomcat.ssh) under the provisioning package.
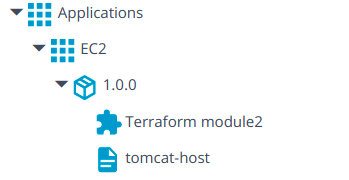
- Add the created ssh template in the Templates and Bound Templates under the provisioning package.
- Deploy the provisioning package to the environment (eg: Terraform).
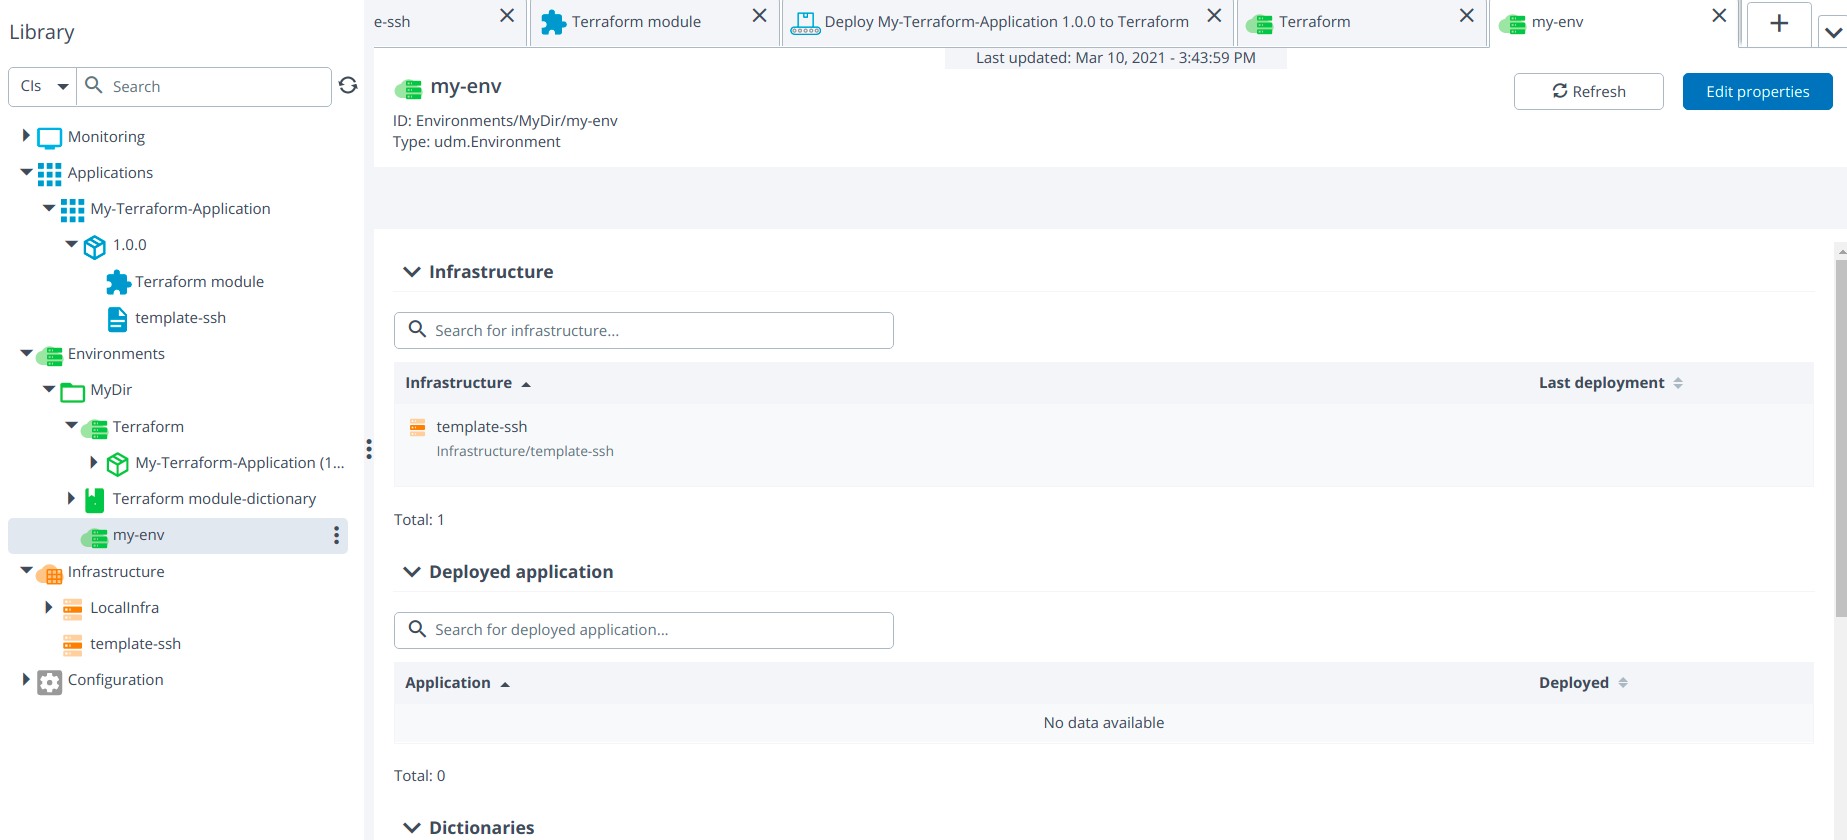
- After the execution, a new environment (my-env) is created as specified in terraform module and also newly created infrastructure (template.ssh) added to the newly created environment.
