Add satellite JMX counters to Nagios
This topic describes how to configure Nagios to pick up JMX counters from Deploy Satellite.
For more information on how to setup and use JMX counters with Deploy Satellite, see Using JMX counters for Deploy Satellite.
Setting up Deploy Satellite JMX counters with Nagios requires a Nagios Server with Web UI and the setup of a Nagios Remote Plugin Executor (NRPE) agent on the machine running the Satellite JMX agent.
Setup the NRPE agent
- Setup the NRPE agent, follow the steps in the Nagios documentation corresponding to the OS of the Deploy Satellite server machine, see the Nagios documentation.
- Setup NRPE with SSL, follow the steps mentioned here.
- To verify that the installation is working on the Deploy Satellite machine, execute the following command from the machine running Nagios Server:
If the installation was successful, you should see this response:
/usr/local/nagios/libexec/check_nrpe -H <IP_ADDRESS_OF_SATELLITE_SERVER>NRPE v3.2.1 - After NRPE is successfully installed, install the
check_jmxplugin that monitors any javaobject/attributeaccessible through JMX, including the Satellite counters. - Install the
check_jmxplugin, open a terminal and execute the following commands:cd /usr/local/nagios/libexec/
wget -O check_jmx "https://raw.githubusercontent.com/WillPlatnick/jmxquery/master/plugin/check_jmx"
wget -O jmxquery.jar "https://github.com/WillPlatnick/jmxquery/raw/master/plugin/jmxquery.jar"
chmod +x *jmx*
chown nagios:nagios *jmx* - If the JMX agent on the Deploy Satellite server has SSL enabled, execute the following steps:
- Copy the SSL
truststoreto/usr/local/nagios/libexec/ - Change the permissions on
truststoreto usernagios:chmod +x <trustore_file_name>
chown nagios:nagios <trustore_file_name>
- Copy the SSL
- Change the content of
/usr/local/nagios/libexec/check_jmxto:#!/bin/sh
#
# Nagios plugin to monitor Java JMX (http://java.sun.com/jmx)attributes.
#
RDIR=`dirname $0`
JMX_SSL_OPS='-Djavax.net.ssl.trustStore='$RDIR'/<trustore_file_name> -Djavax.net.ssl.trustStorePassword=<trustore_password>'
java $JMX_SSL_OPS -jar $RDIR/jmxquery.jar "$@"
Replace <trustore_file_name> and <trustore_password> with the actual values.
- Test the
check_jmxplugin from the Nagios Server by executing this command:The sample output:/usr/local/nagios/libexec/check_jmx -U service:jmx:rmi:///jndi/rmi://<satellite_host>:<jmx_port>/jmxrmi -O com.xebialabs.satellite.metrics:name=task.done -A CountJMX OK - Count=0 | Count=0
Configure the NRPE agent
-
To execute the
check_jmxplugin, you must define a command for this plugin in thenrpe.cfgfile on the Satellite server. Edit the/usr/local/nagios/etc/nrpe.cfgfile by executing the following command:vi /usr/local/nagios/etc/nrpe.cfg -
Add the following line to the end of the file:
command[check_jmx]=/usr/local/nagios/libexec/check_jmx $ARG1$ -
Restart the NRPE service on satellite server. To restart the NRPE service, refer to the documentation for the NRPE agent installation.
-
To test, establish a terminal session to your Nagios server and execute the following command, replace
<satellite_host>with the IP address of your Deploy Satellite server:/usr/local/nagios/libexec/check_nrpe -H <satellite_host> -c check_jmx -a '-U service:jmx:rmi:///jndi/rmi://<satellite_host>:<jmx_port>/jmxrmi -O com.xebialabs.satellite.metrics:name=task.done -A Count'Sample output:
JMX OK - Count=0 | Count=0
Create the monitoring configuration in the Nagios Web UI
-
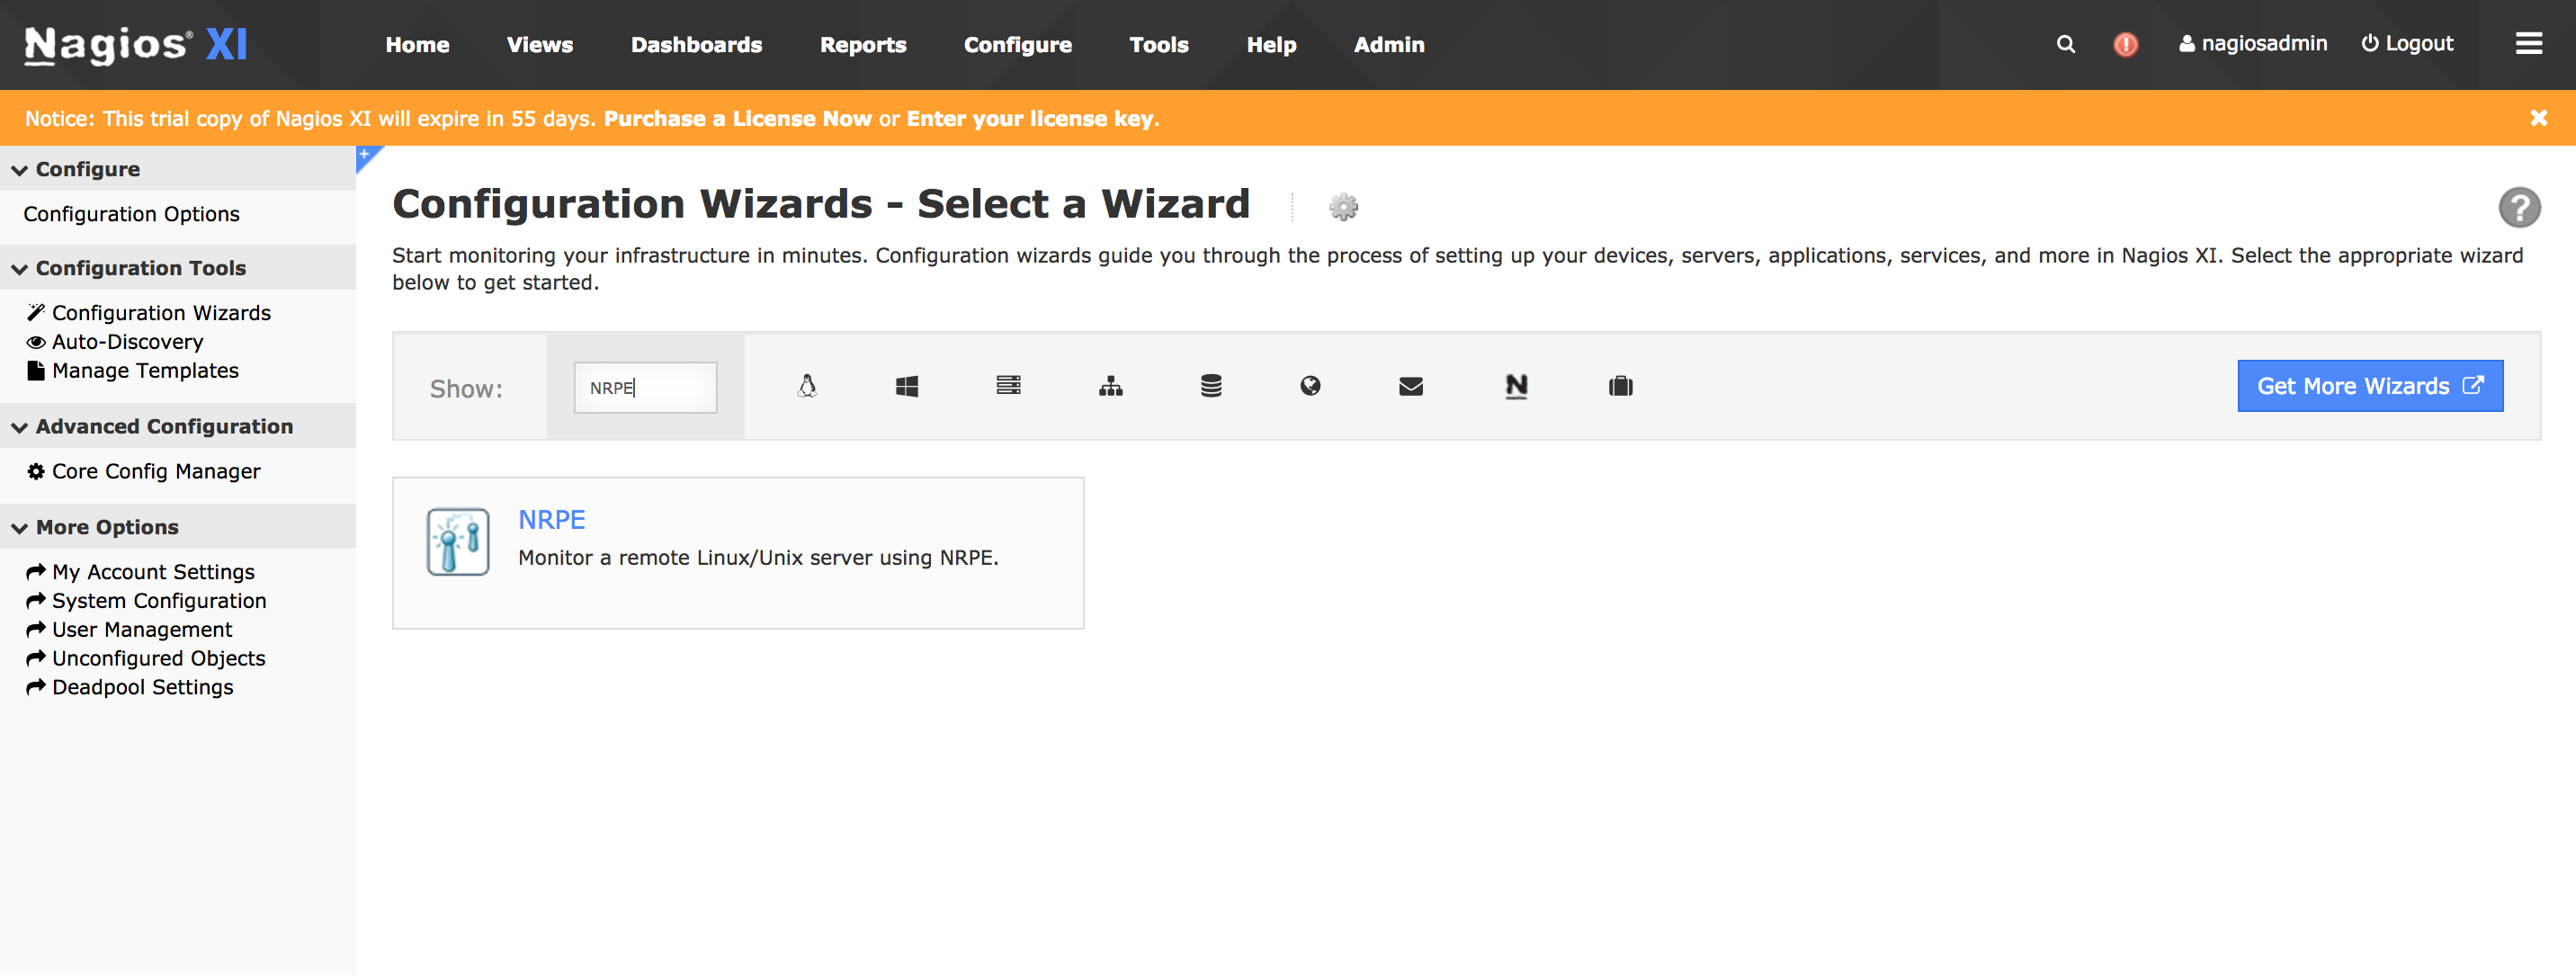
Open the Nagios Web UI, in the top menu bar, go to Configure > Run a configuring wizard, and select the NRPE wizard.

-
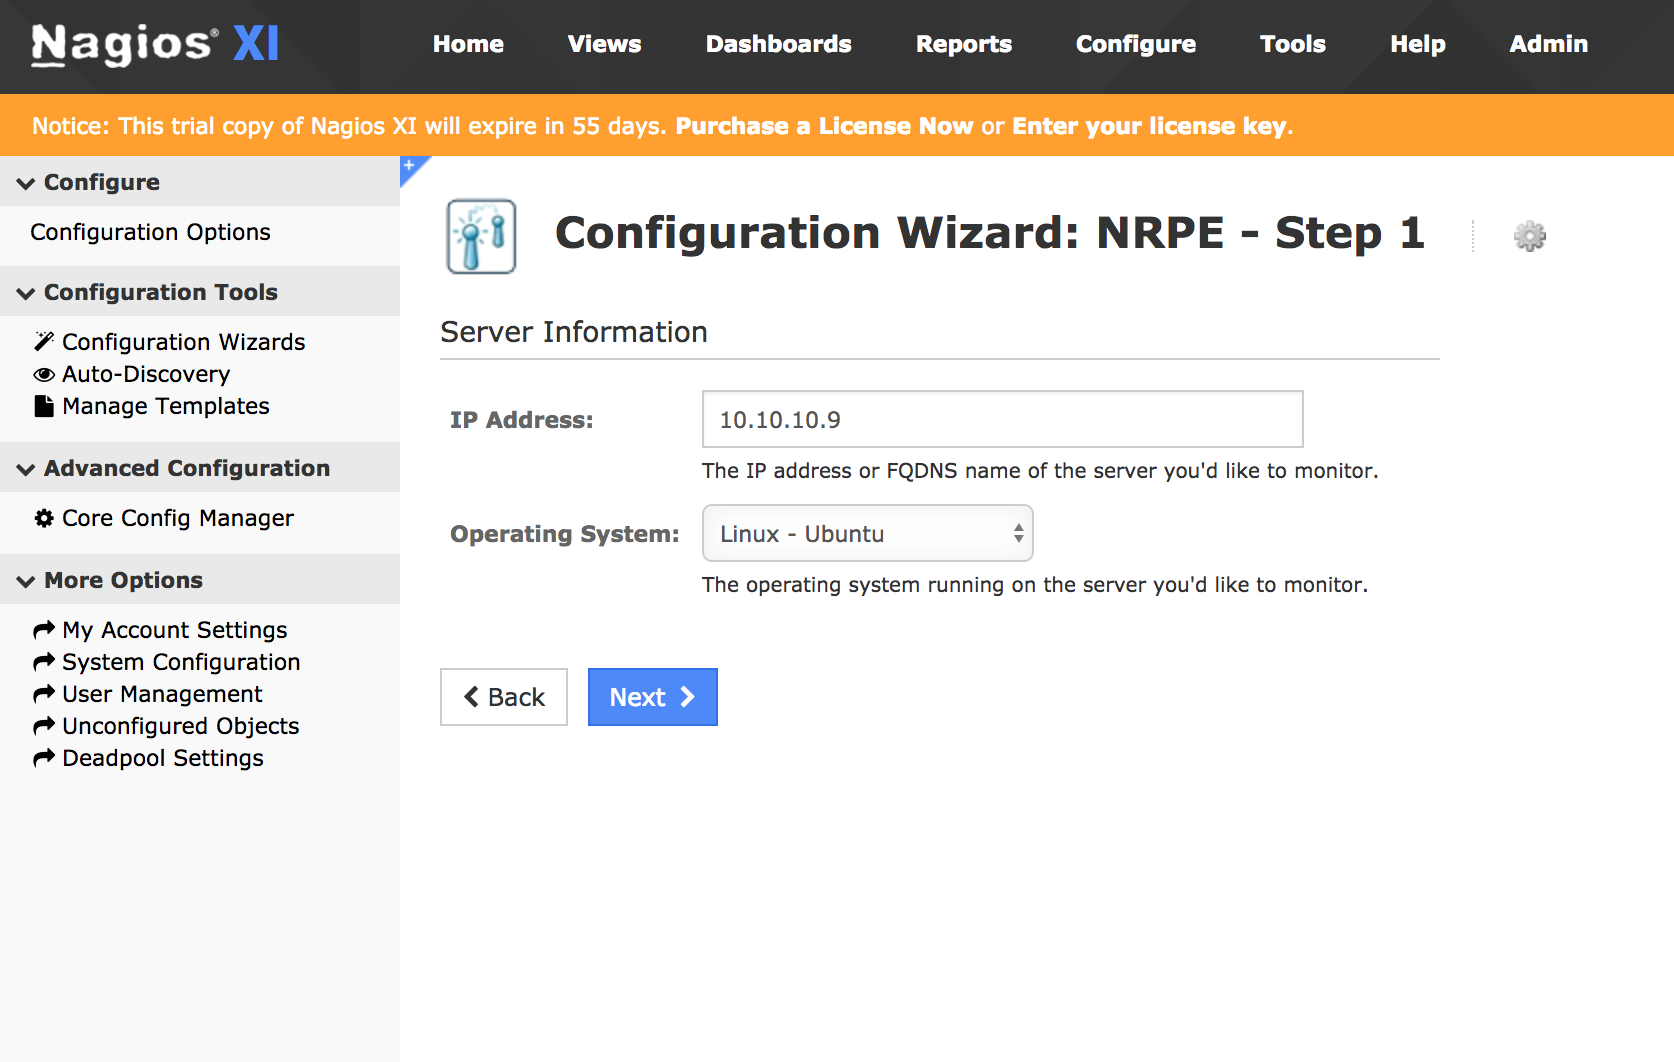
Specify the address and the OS type of the Satellite server.

-
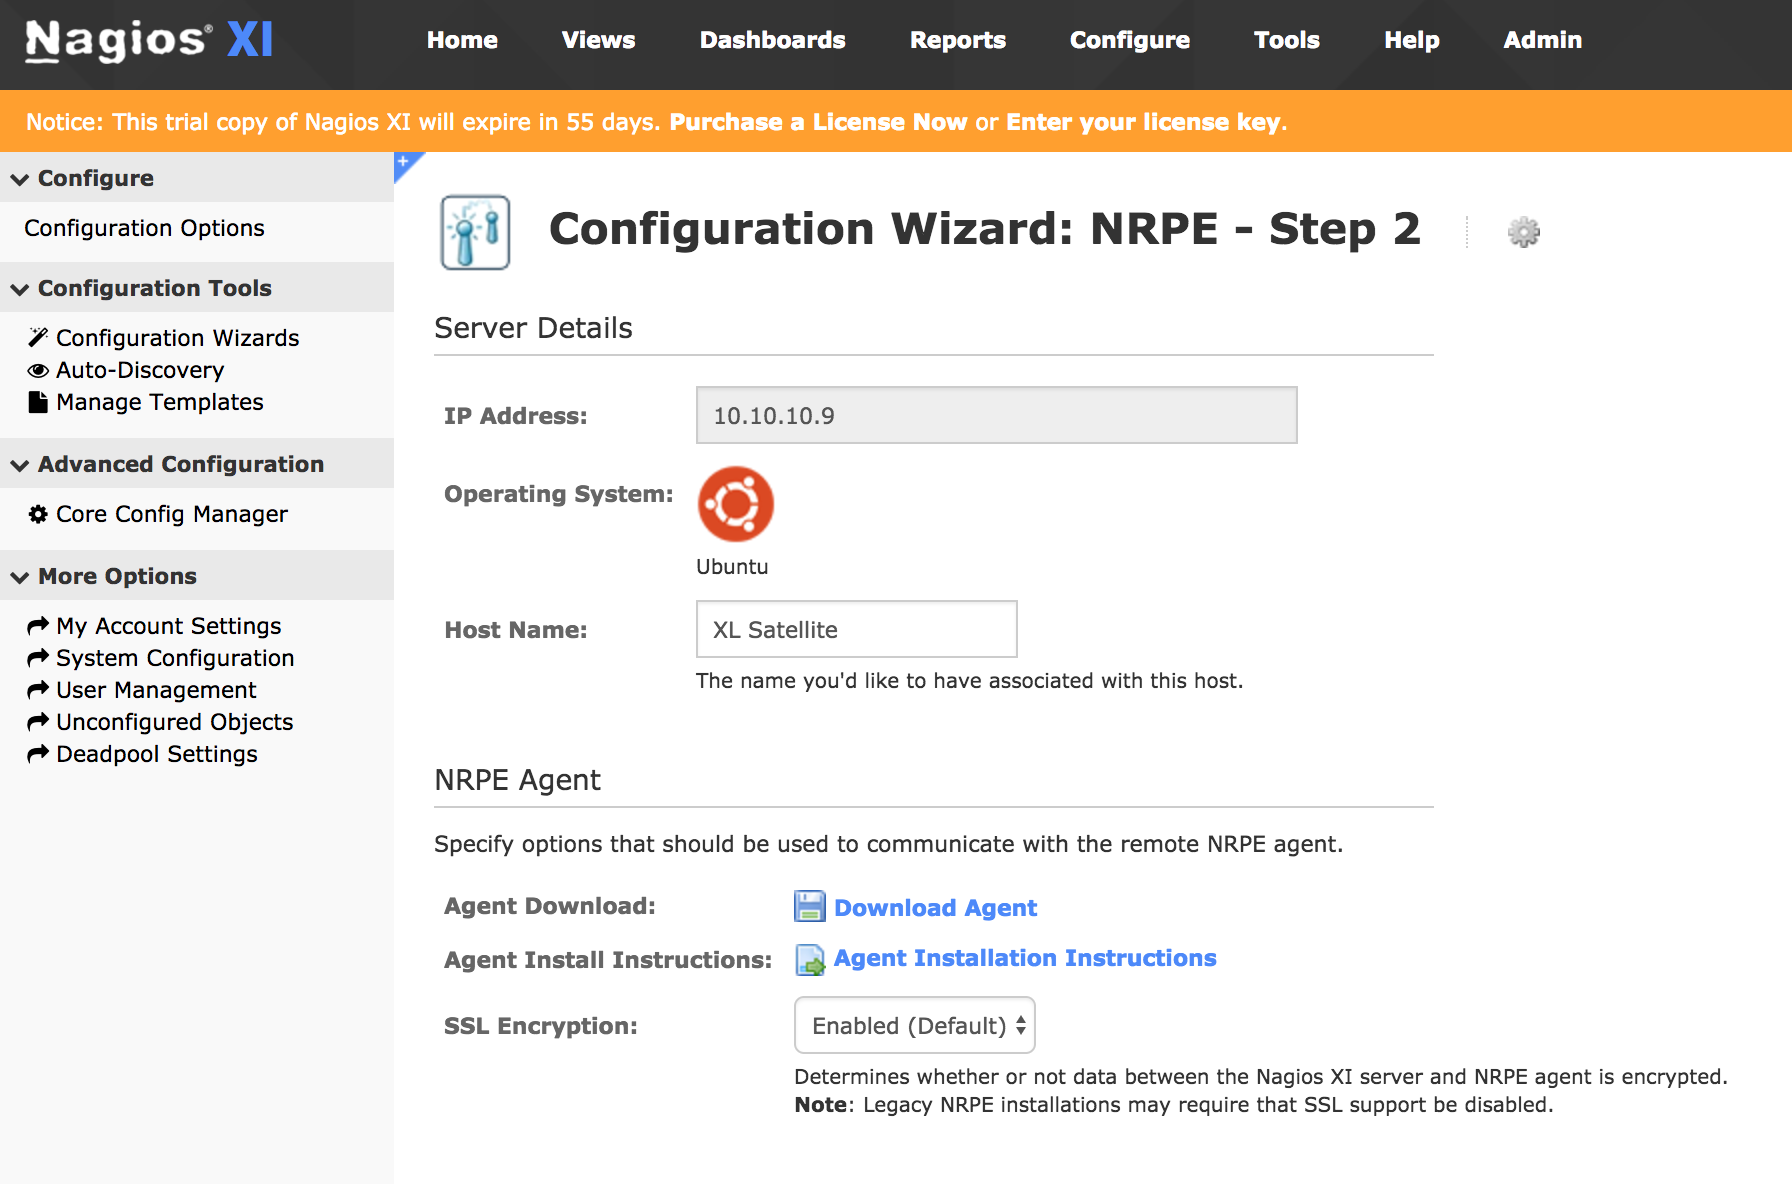
Specify the host name.

Skip the NRPE agent installation step because it was already done.
-
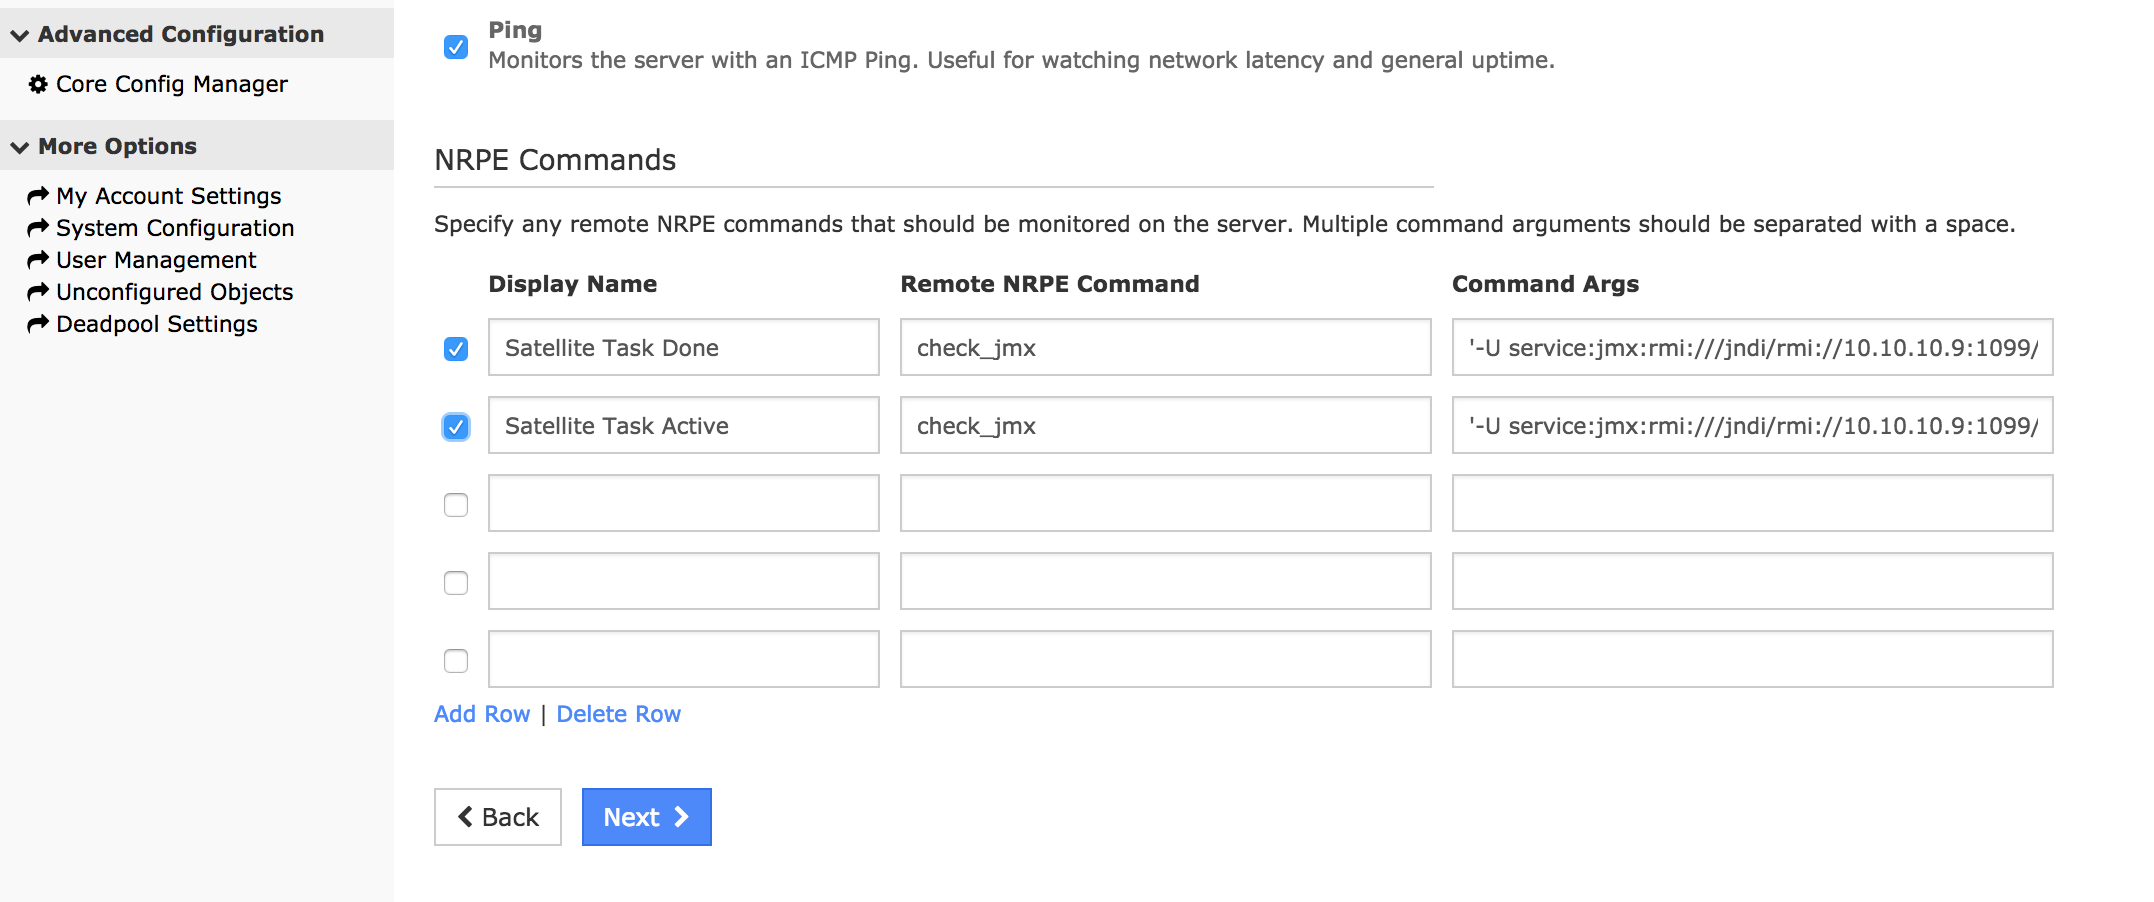
In the command args fields, specify the following command arguments:
- For Satellite Task Done
'-U service:jmx:rmi:///jndi/rmi://10.10.10.9:1099/jmxrmi -O com.xebialabs.satellite.metrics:name=task.done -A Count' - For Satellite Task Active
'-U service:jmx:rmi:///jndi/rmi://10.10.10.9:1099/jmxrmi -O com.xebialabs.satellite.metrics:name=task.active -A Count'

- For Satellite Task Done
-
Click Next and complete the wizard by choosing the required options in Steps 3 to 5.
-
Click Finish in the final step of the wizard. This creates the new hosts and service and begins monitoring.
-
After the wizard applies the configuration, click the View status details for the Deploy Satellite link to see that new host and service that was created.
