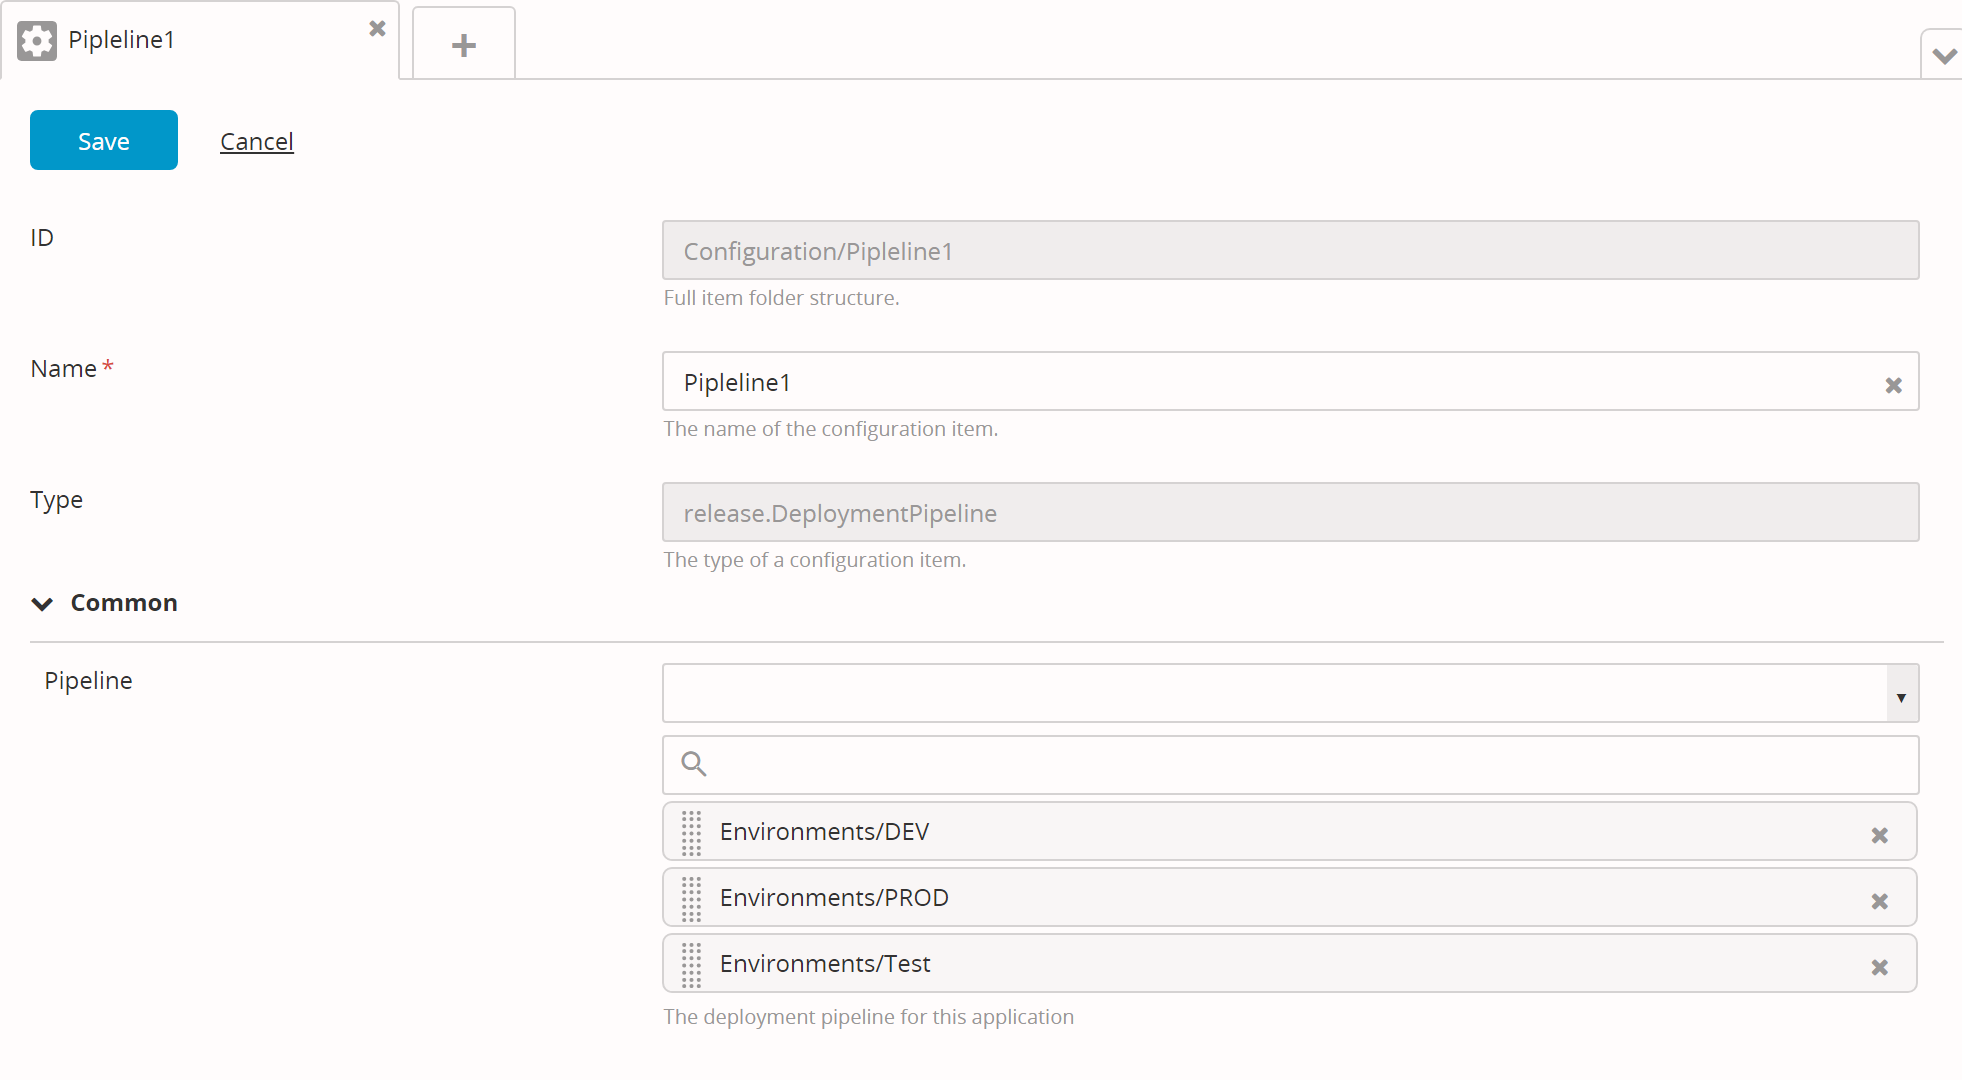
Create a deployment pipeline
A deployment pipeline defines the sequence of environments to which an application is deployed during its lifecycle.
To create a deployment pipeline for an application:
- From the top navigation bar, click Explorer.
- In the left pane, click Configuration.
- Click
, and select New > Release > DeploymentPipeline.
- In the Name field, enter a unique name for the pipeline.
- In the Pipeline field, enter the environments to add them to deployment pipeline.
Note: The order of the environments in the list is the order that they will appear in the pipeline. You can reorder the list by dragging and dropping items. - Click Save.
- Expand Applications.
- Click an application, click
, and then click Edit properties.
- In the Common tab, select the deployment pipeline from the Pipeline list.
- Click Save.

To view a deployment pipeline:
- Hover over the application, click
, and then select Deployment pipeline.
- Also, you can double-click the application to see the read-only deployment pipeline in the summary screen.