Configure the Digital.ai Agility— Micro Focus ALM QC Integration
Agility Connect 21.1 and later support integration with Micro Focus ALM QC. Agility Connect 21.1 supports Requirement and Defect modules of Micro Focus ALM QC.
However, in addition to setting up your mapping, you must enable history (if you want to sync change history too) for the Micro Focus ALM QC fields that you map in Agility Connect and configure the mapping's Webhook URL in Micro Focus ALM QC.
Enable History for the Micro Focus ALM QC Fields
- Log on to the Micro Focus ALM QC server as an Administration.
- Select Settings > Customize.
- Select Project Entities from the left tree view.
- Browse and select Requirement > System Fields from the Project Entities tree view.
- Select the Modified entity.
- Select the History check box.
- Repeat steps 4 through 6 for all the fields (with change history) that are mapped in Agility Connect. This step is not required for read-only fields, such as the Defect ID, that have no change history.
- Select Defects and repeat steps 4 through 6 for Defects.
Configure FTP settings for Agility Connect
This step is required to allow Agility Connect to automatically configure webhook scripts in Micro Focus.
- Go to the Site Admin page.
- Click Site Configuration.
- Add the FTP_PORT parameter if it's not already there and set the value to 21.
Configure the Agility Connect Mapping's Webhook URL in Micro Focus ALM QC
- Once you have your mapping created and activated for Micro Focus ALM QC integration, go to Settings > Webhooks, copy the webhook URL for the mapping, and keep it handy.
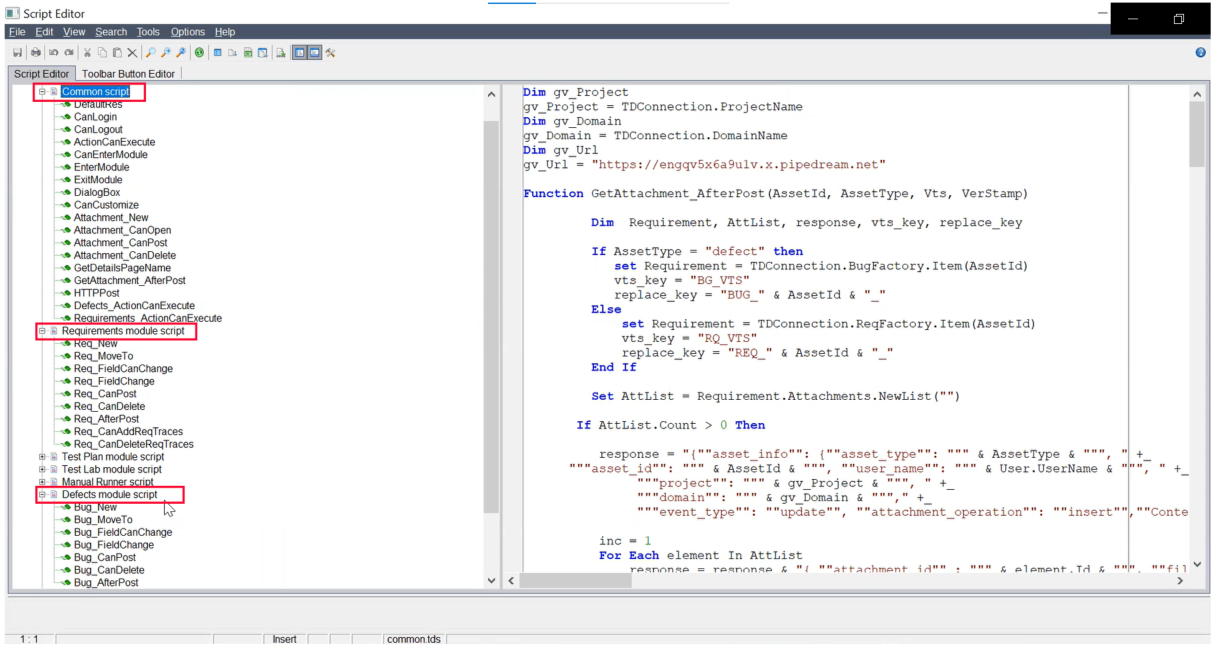
- Download the Agility Connect custom scripts -
common_script.vbs,Req_AfterPost.vbs, andBug_AfterPost.vbs—for the Micro Focus ALM QC's Common, Requirements, and Defects modules respectively. - Open the
common_script.vbsfile, edit the gv_URL value with your Agility Connect server's webhook URL, and save the file. - Log on to the Micro Focus ALM QC server as an Admin.
- Select Settings > Customize.
- Select Workflow from the left pane.
- Select Script Editor.
- Browse the tree view on the left and select Workflow Scripts > Project Scripts > Common script.
- Replace the Common script module's code with the one you downloaded.
- Repeat steps 7 and 8 for the Requirements module script and Defects module script using the custom scripts you downloaded.
