View the Live Status of Deployed Applications
Note: Live Status of Deployed Applications is a feature in Tech Preview—released in Digital.ai Release 22.3—enabled by default. You must disable this feature (using the feature flag) if you do not want to use it. With Digital.ai Release 22.3, you can view the live status of the applications deployed in Digital.ai Deploy and Argo CD. A new dashboard is provided, which displays the live status of the applications.
Prerequisites
You have a running instance(s) of:
- Digital.ai Deploy or/and
- Argo CD server
- Digital.ai Release with enabled Show live status feature flag
Default setting of Applications Dashboard
With Digital.ai Release 22.3, the Applications Dashboard view is visible by default. If you want to disable this feature, see the Enable Applications Dashboard section at the end of this page.
The entire setup is done on the folder level. However, you can select Digital.ai Deploy or Argo CD servers from the global connections configuration.
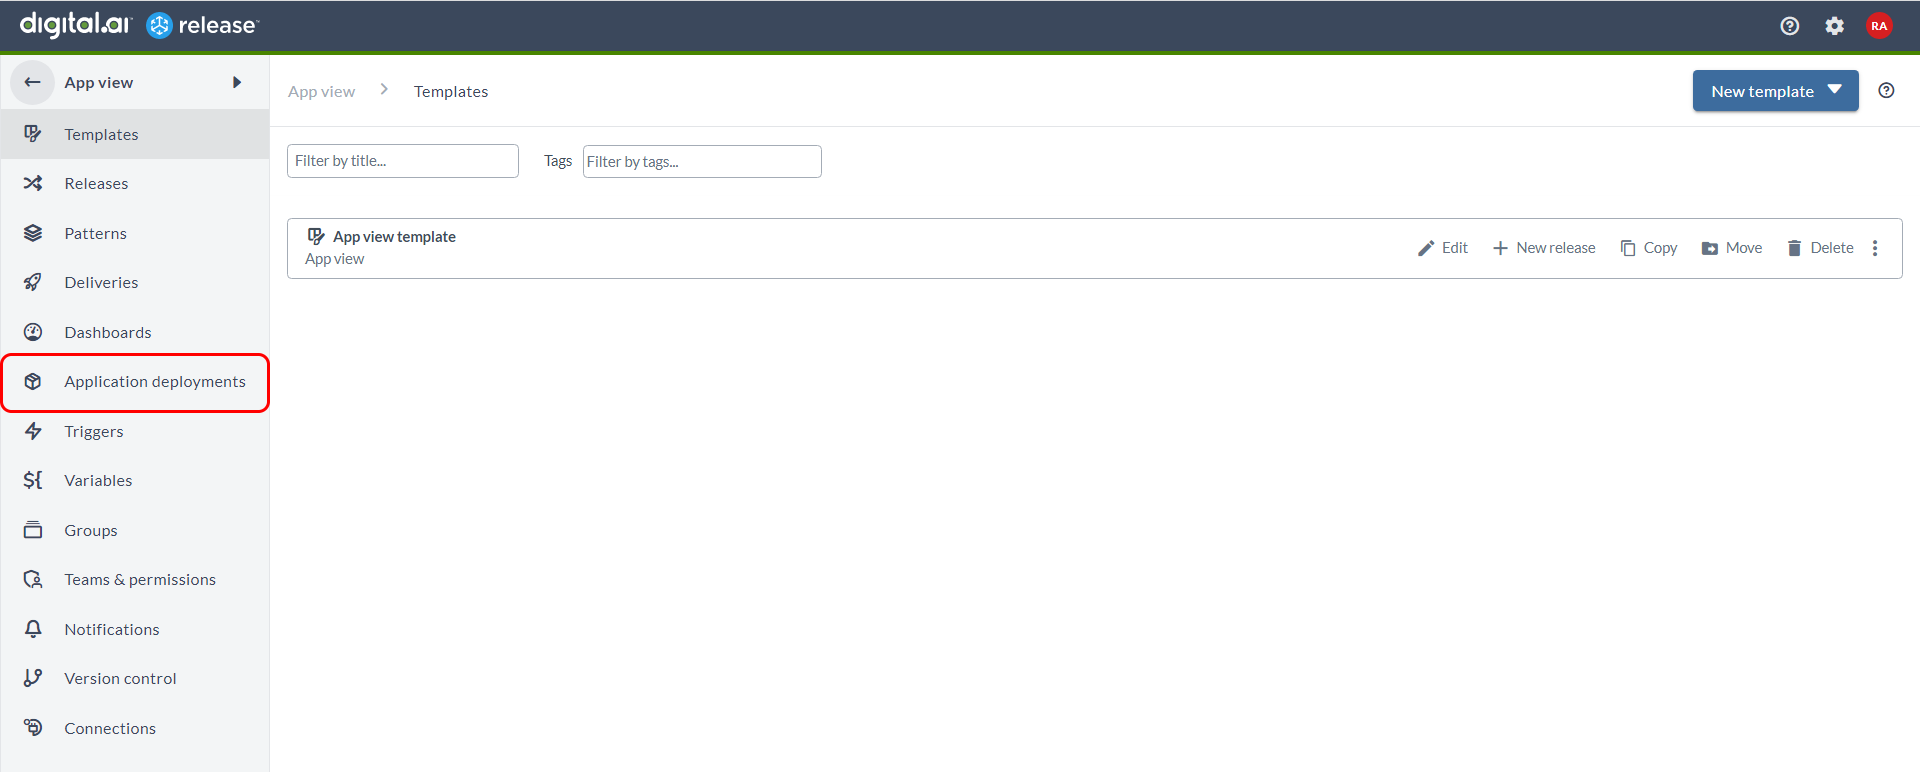
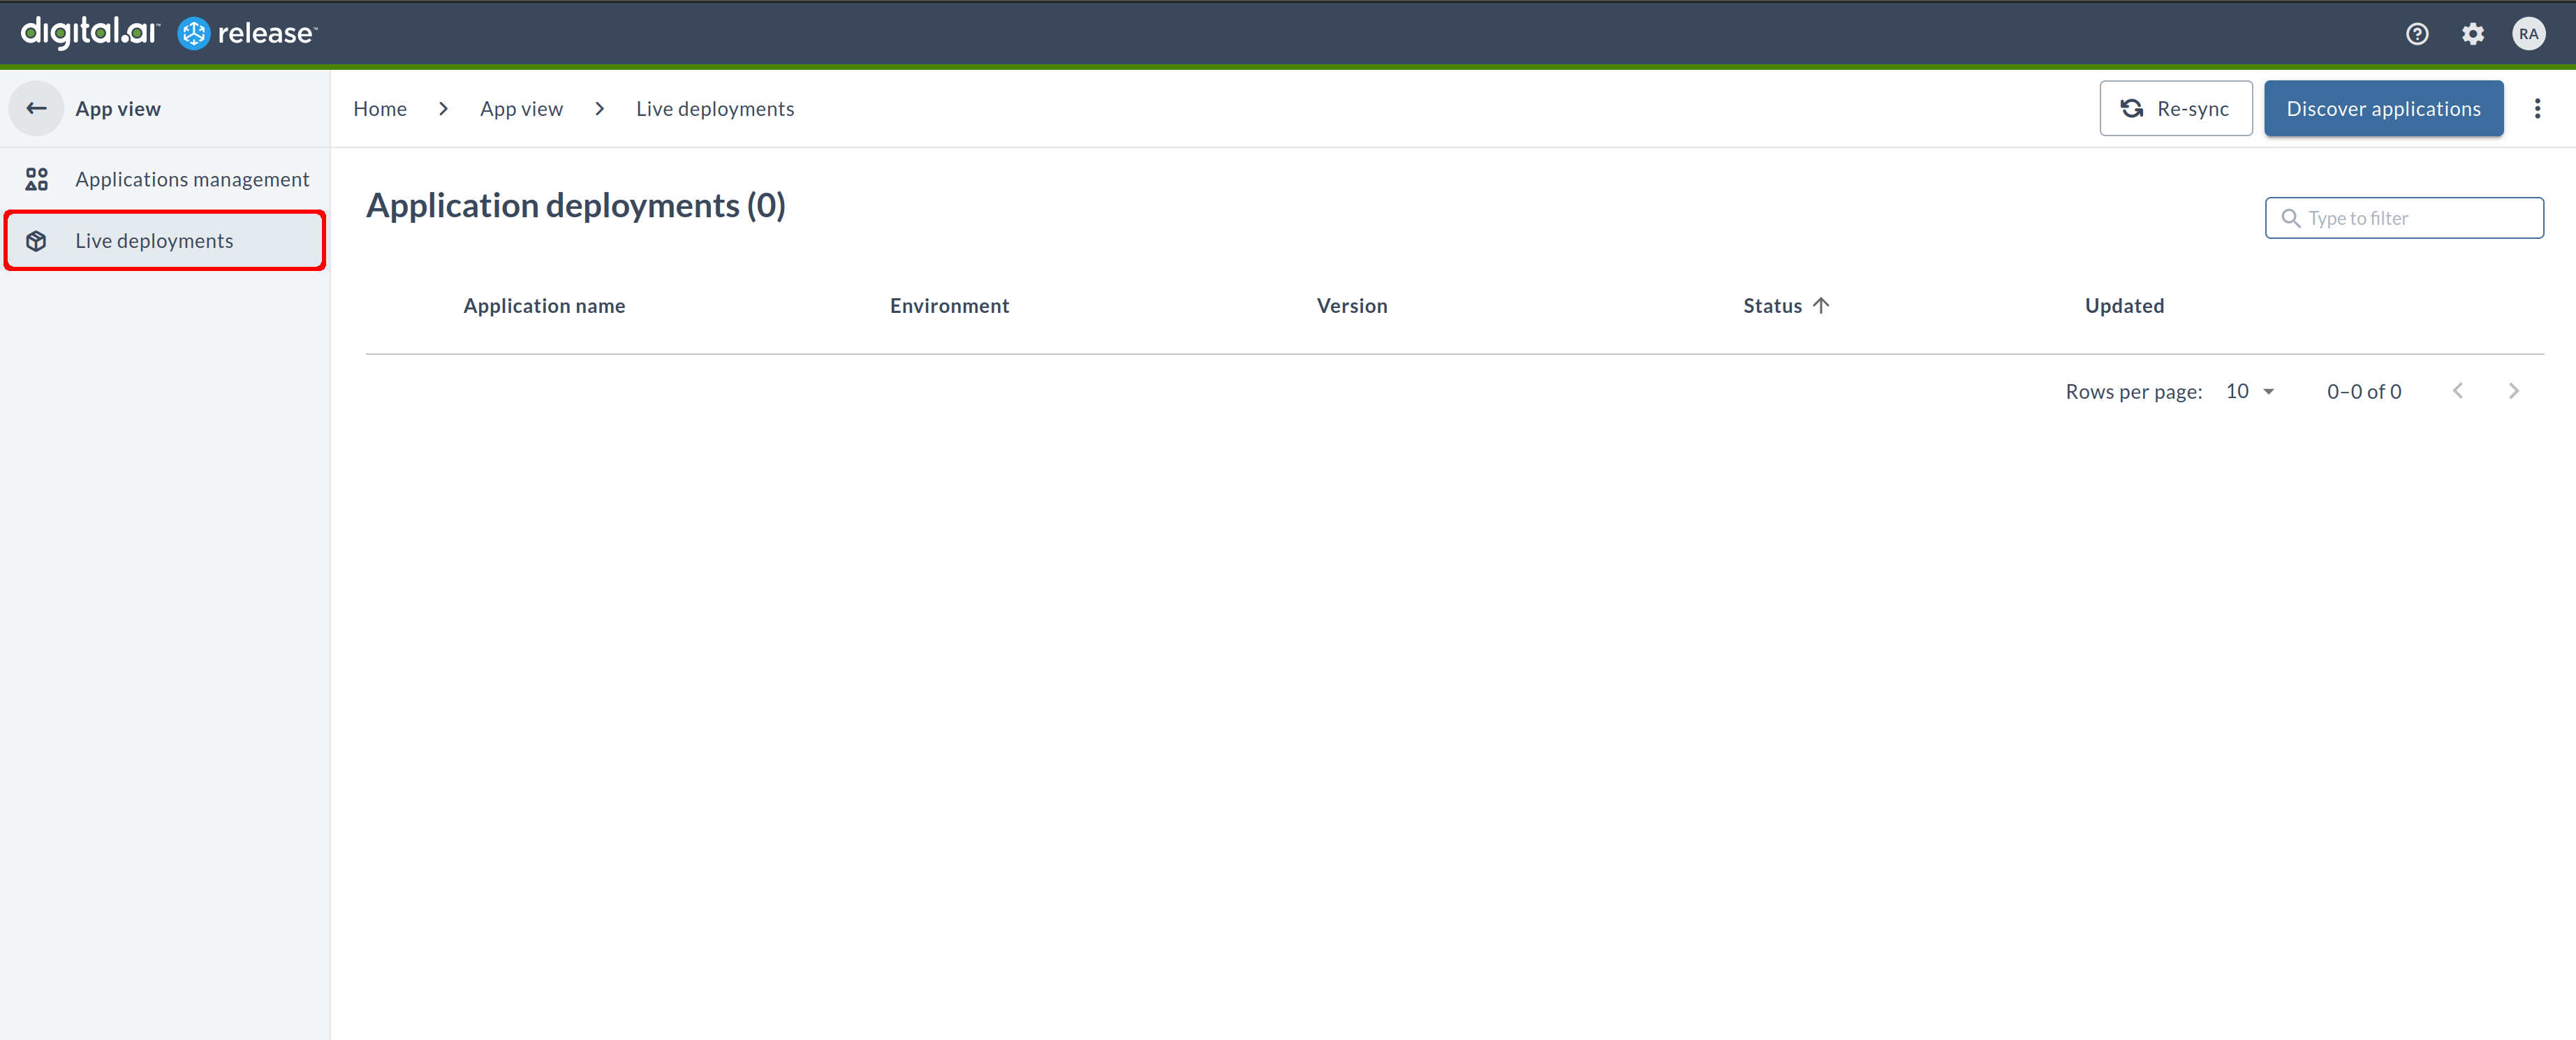
Select your relevant folder and click App pipelines > Live deployments dashboard on the left-navigation pane. Note that, this is a folder-level setting, and no applications are displayed until Digital.ai Release is connected to some Digital.ai Deploy or Argo CD server servers.
Quick Wizard to Discover Applications
To go through a quick setup and connect to the Digital.ai Deploy or Argo Cd servers, use the Discover applications button on the top right side of the screen.
Connect to Newly Created Servers
Follow the below steps to create a connection with your Digital.ai Deploy or Argo CD server:
- In the Application deployments screen, click Discover applications on the top-right corner.
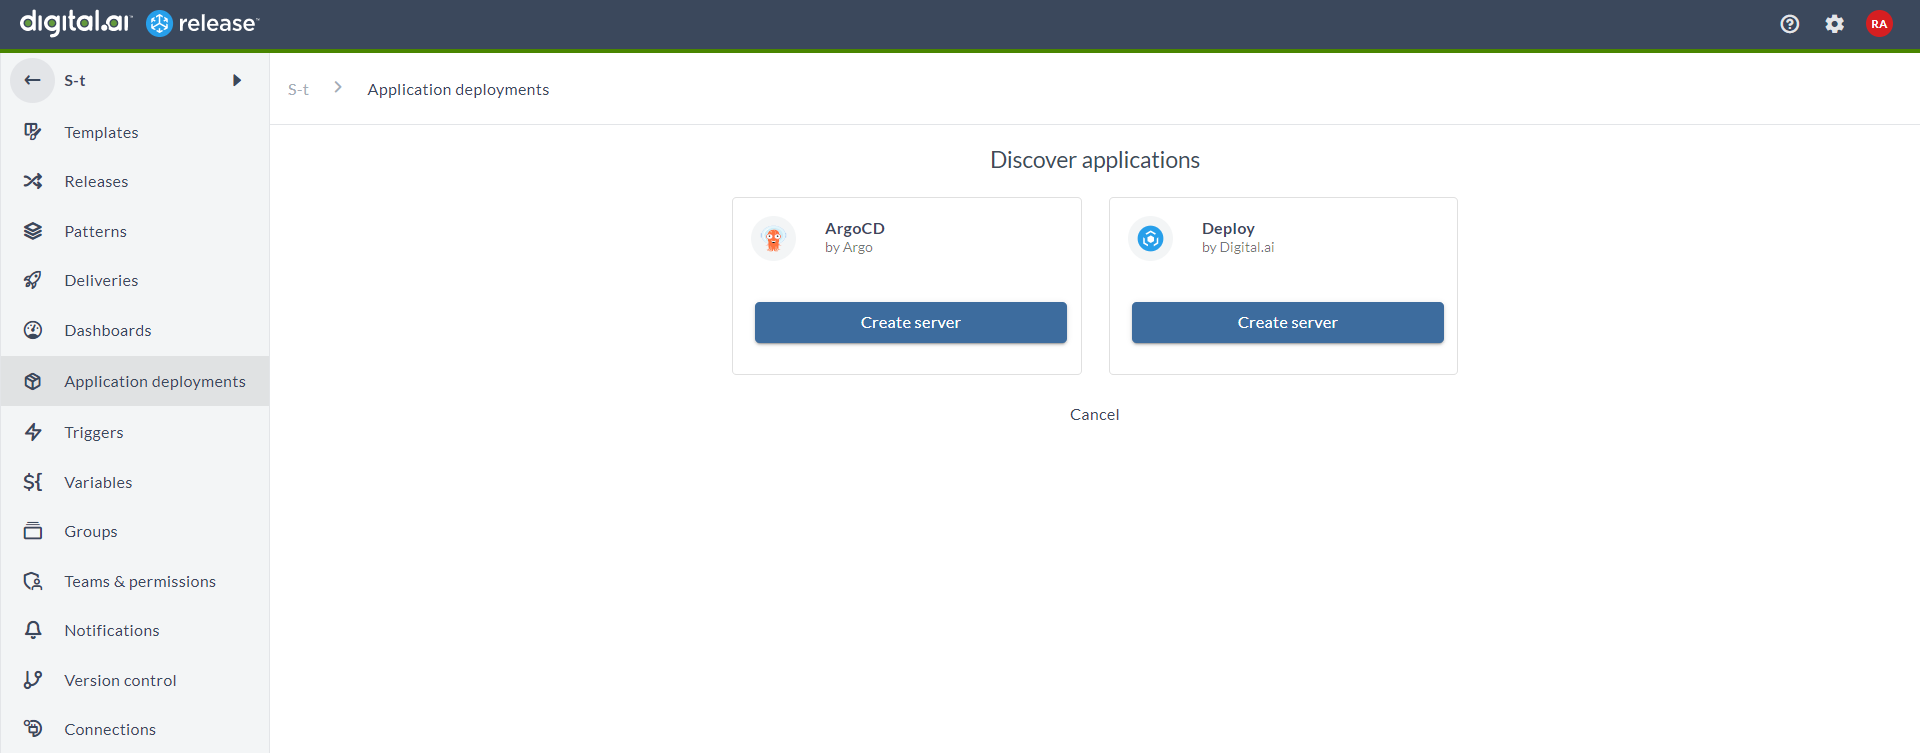
Note: This set up is very helpful when you're connecting to your Argo CD or Deploy server for the first time.
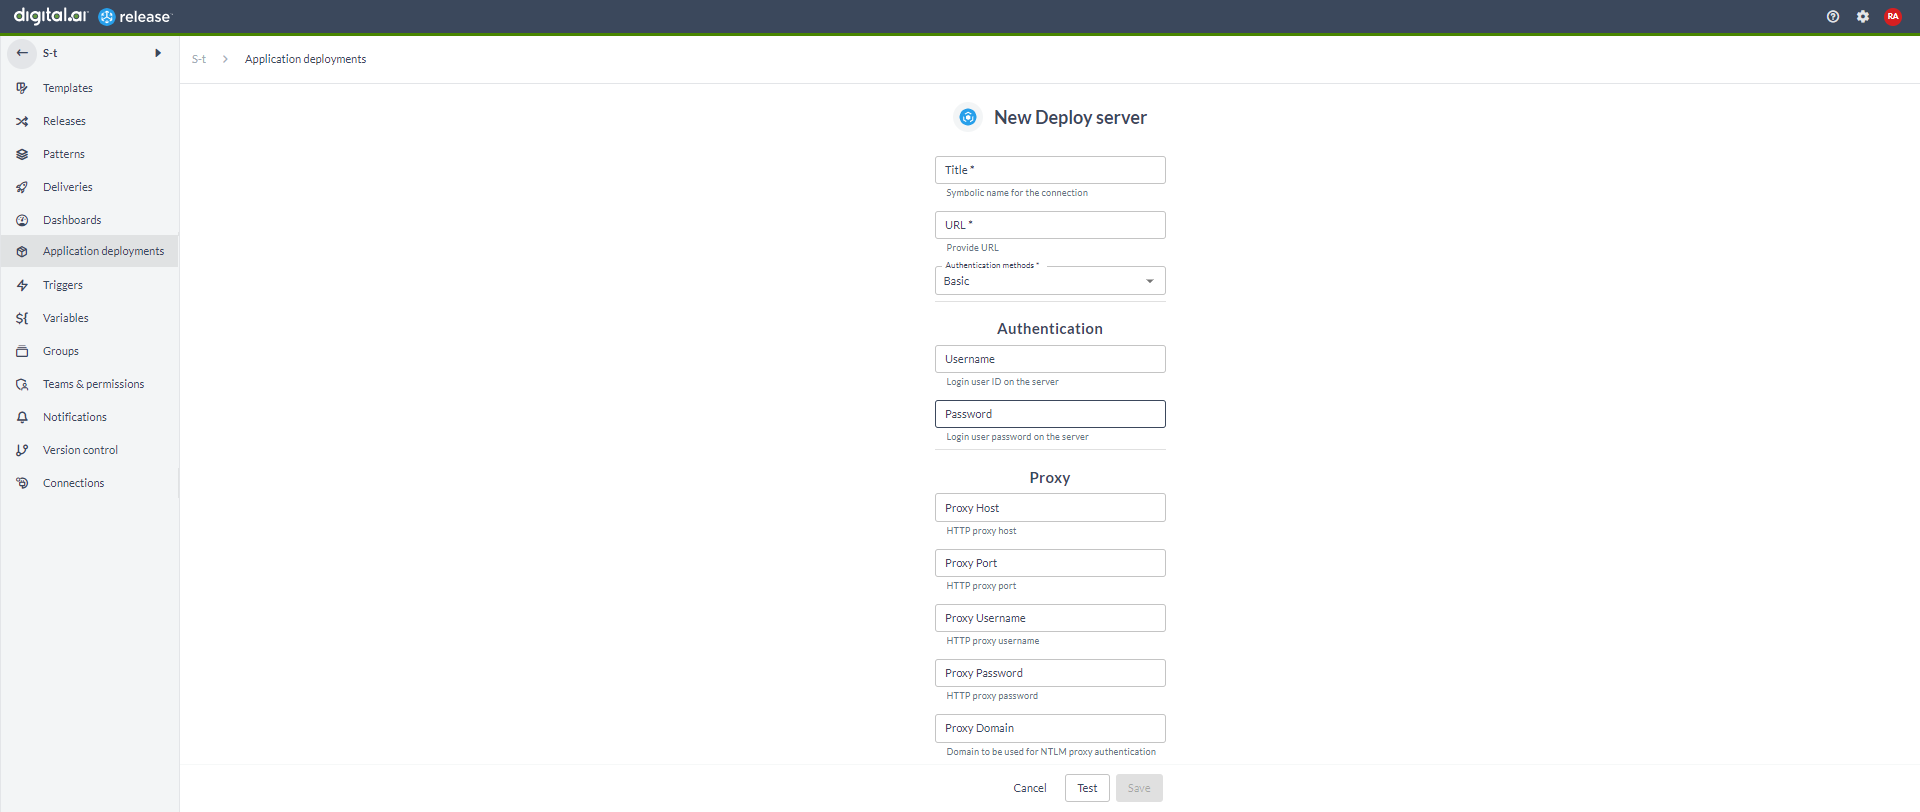
- To create a new Argo CD server, click Create connection in the Argo CD section.
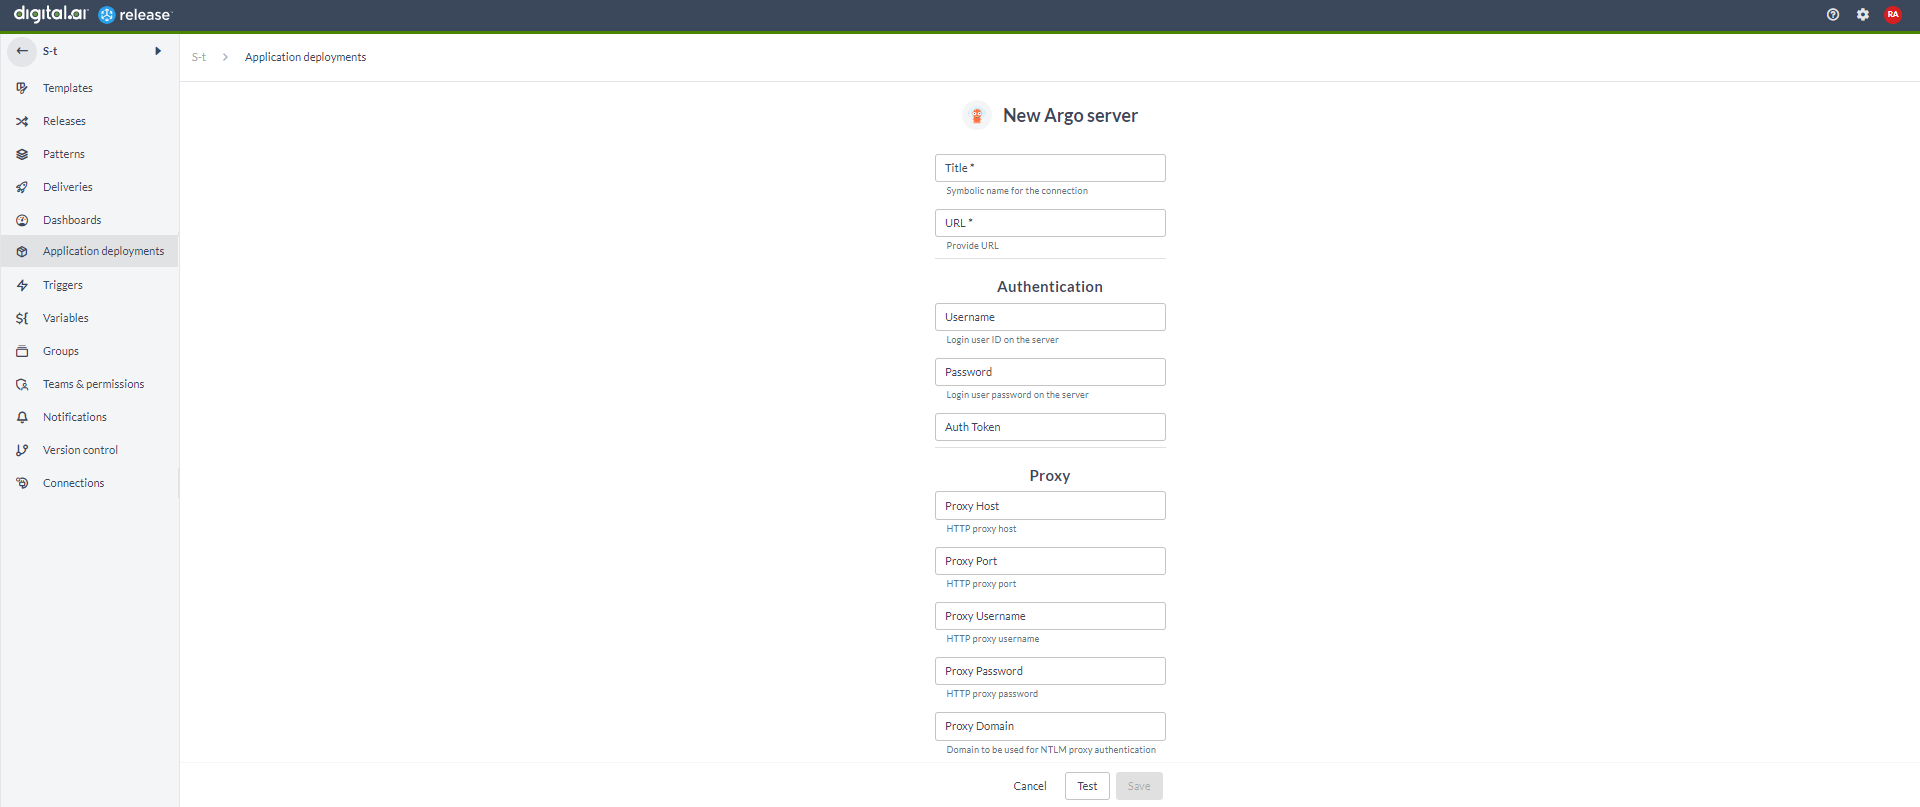
- Enter the Title and URL.
- In the Authentication and Proxy sections, enter the required details.
- Click Test to test the connection to your server.
- Click Save to save the changes.
- Follow the steps 3 to 5 to add a new Deploy server.
In Deploy, you can select the authentication method from the Authentication methods drop-down list. For more information, see Connect to Deploy server.
Connect to Already Existing Servers
Click Discover applications.
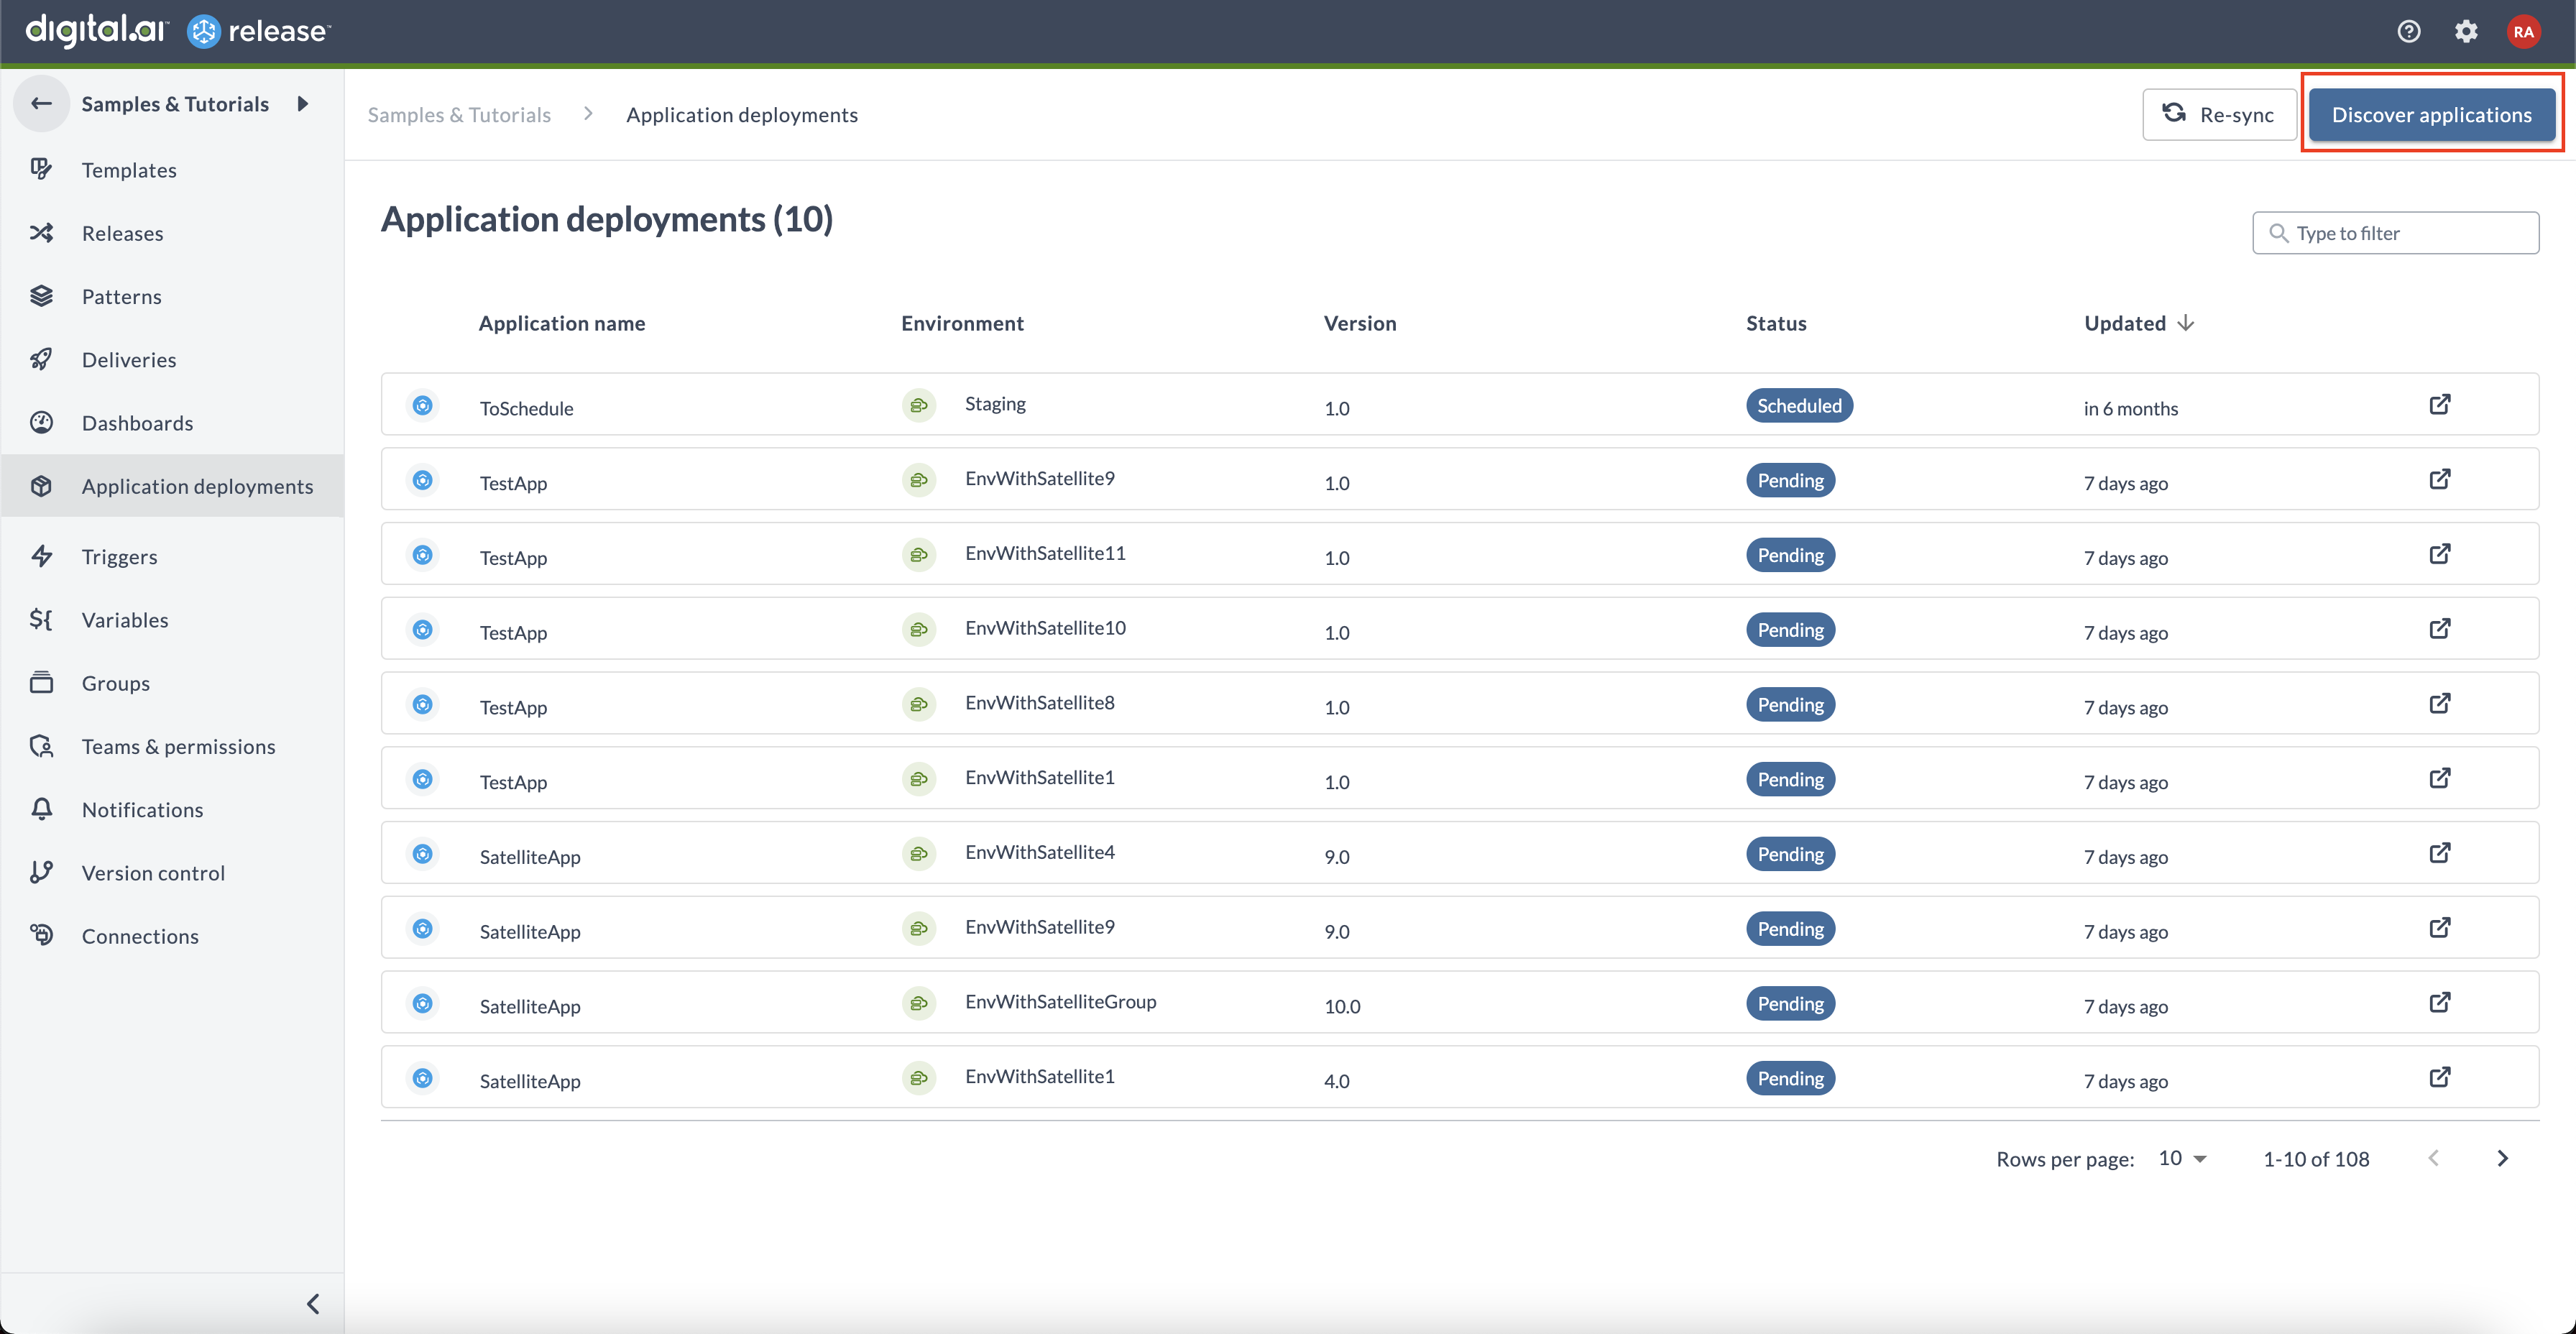
You can choose the server from the menu or create a new one by clicking Create source from the Choose server drop-down list. Once the server is selected, click Discover applications to connect to the servers.
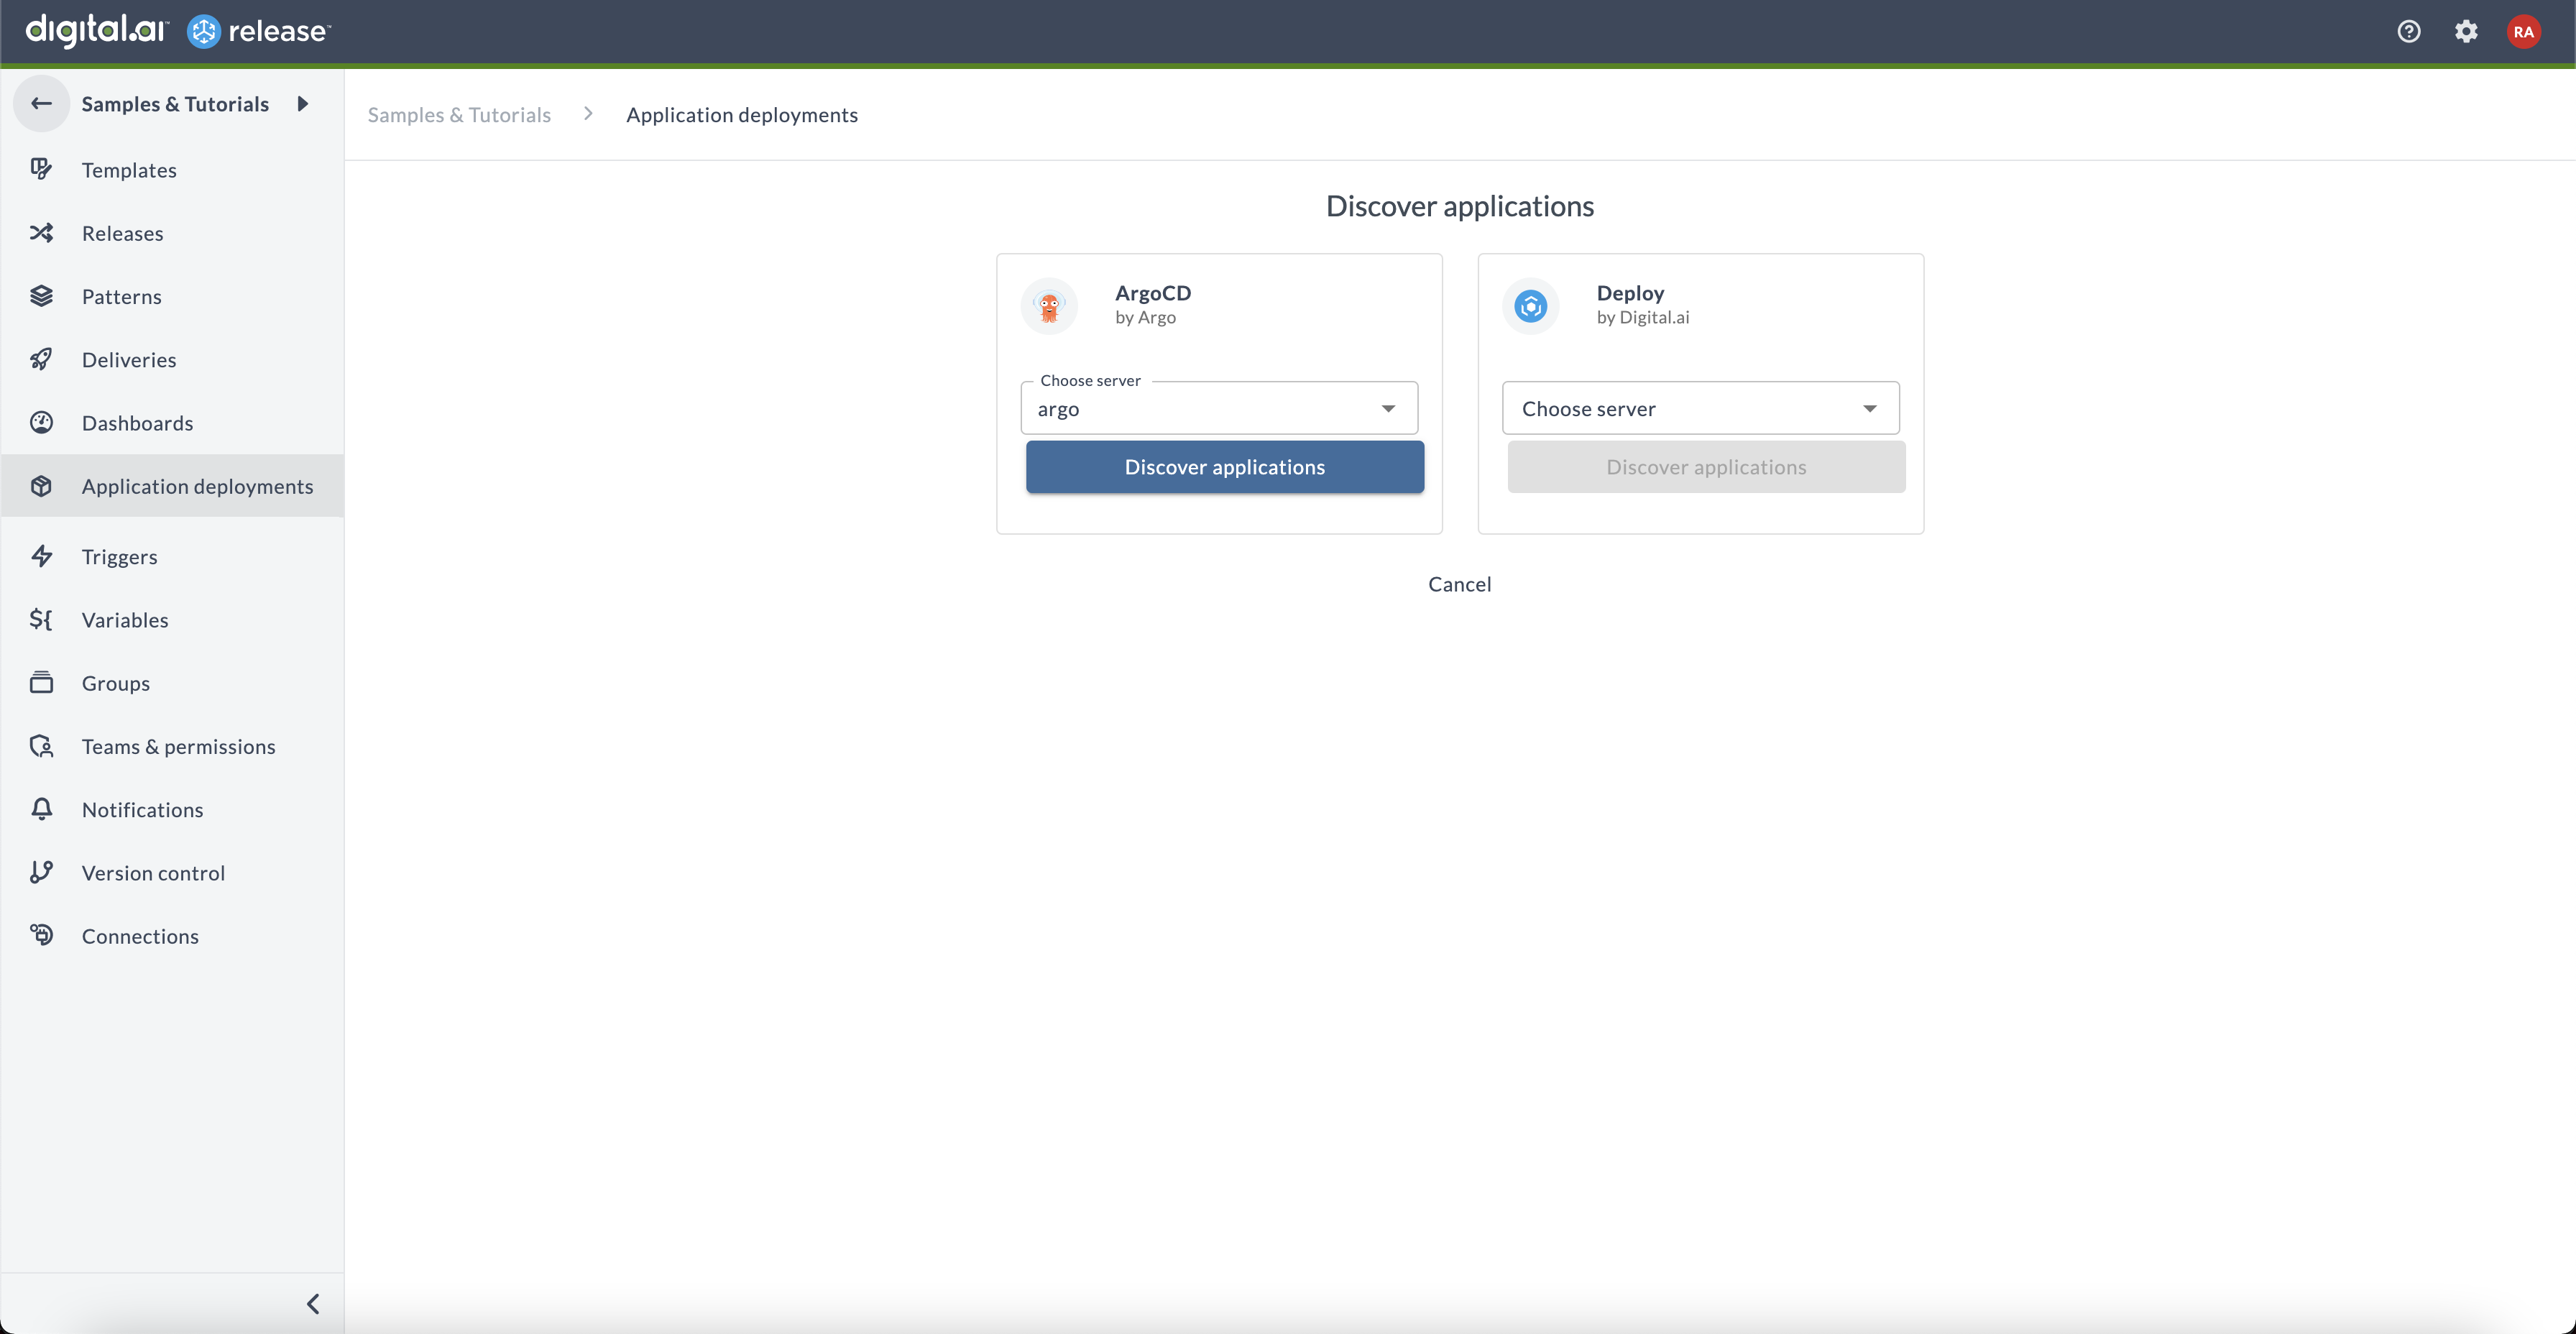
If there is no configured webhook source for the server, it will be automatically created and configured (the same flow as clicking on Propagate on the advanced setup).
Follow the instructions appearing in modal to check on the created CI on Digital.ai Deploy server or for creating a ConfigMap on K8s in the namespace where your Argo CD server is running.
Note: For Argo CD it is important to follow these instructions because the setup is not done automatically at this point.
Note: Select the Also create managed applications from discovered applications checkbox to automatically create Application management entries for discovered ArgoCD or Deploy applications as the last step of the wizard.
Once you choose the server, you can create a filter by choosing the filter records. It is specific to the type of server selected:
- for the Argo CD Webhook, you can filter applications by the Argo CD project.
- for the Deploy Webhook, you can filter applications by the folders.
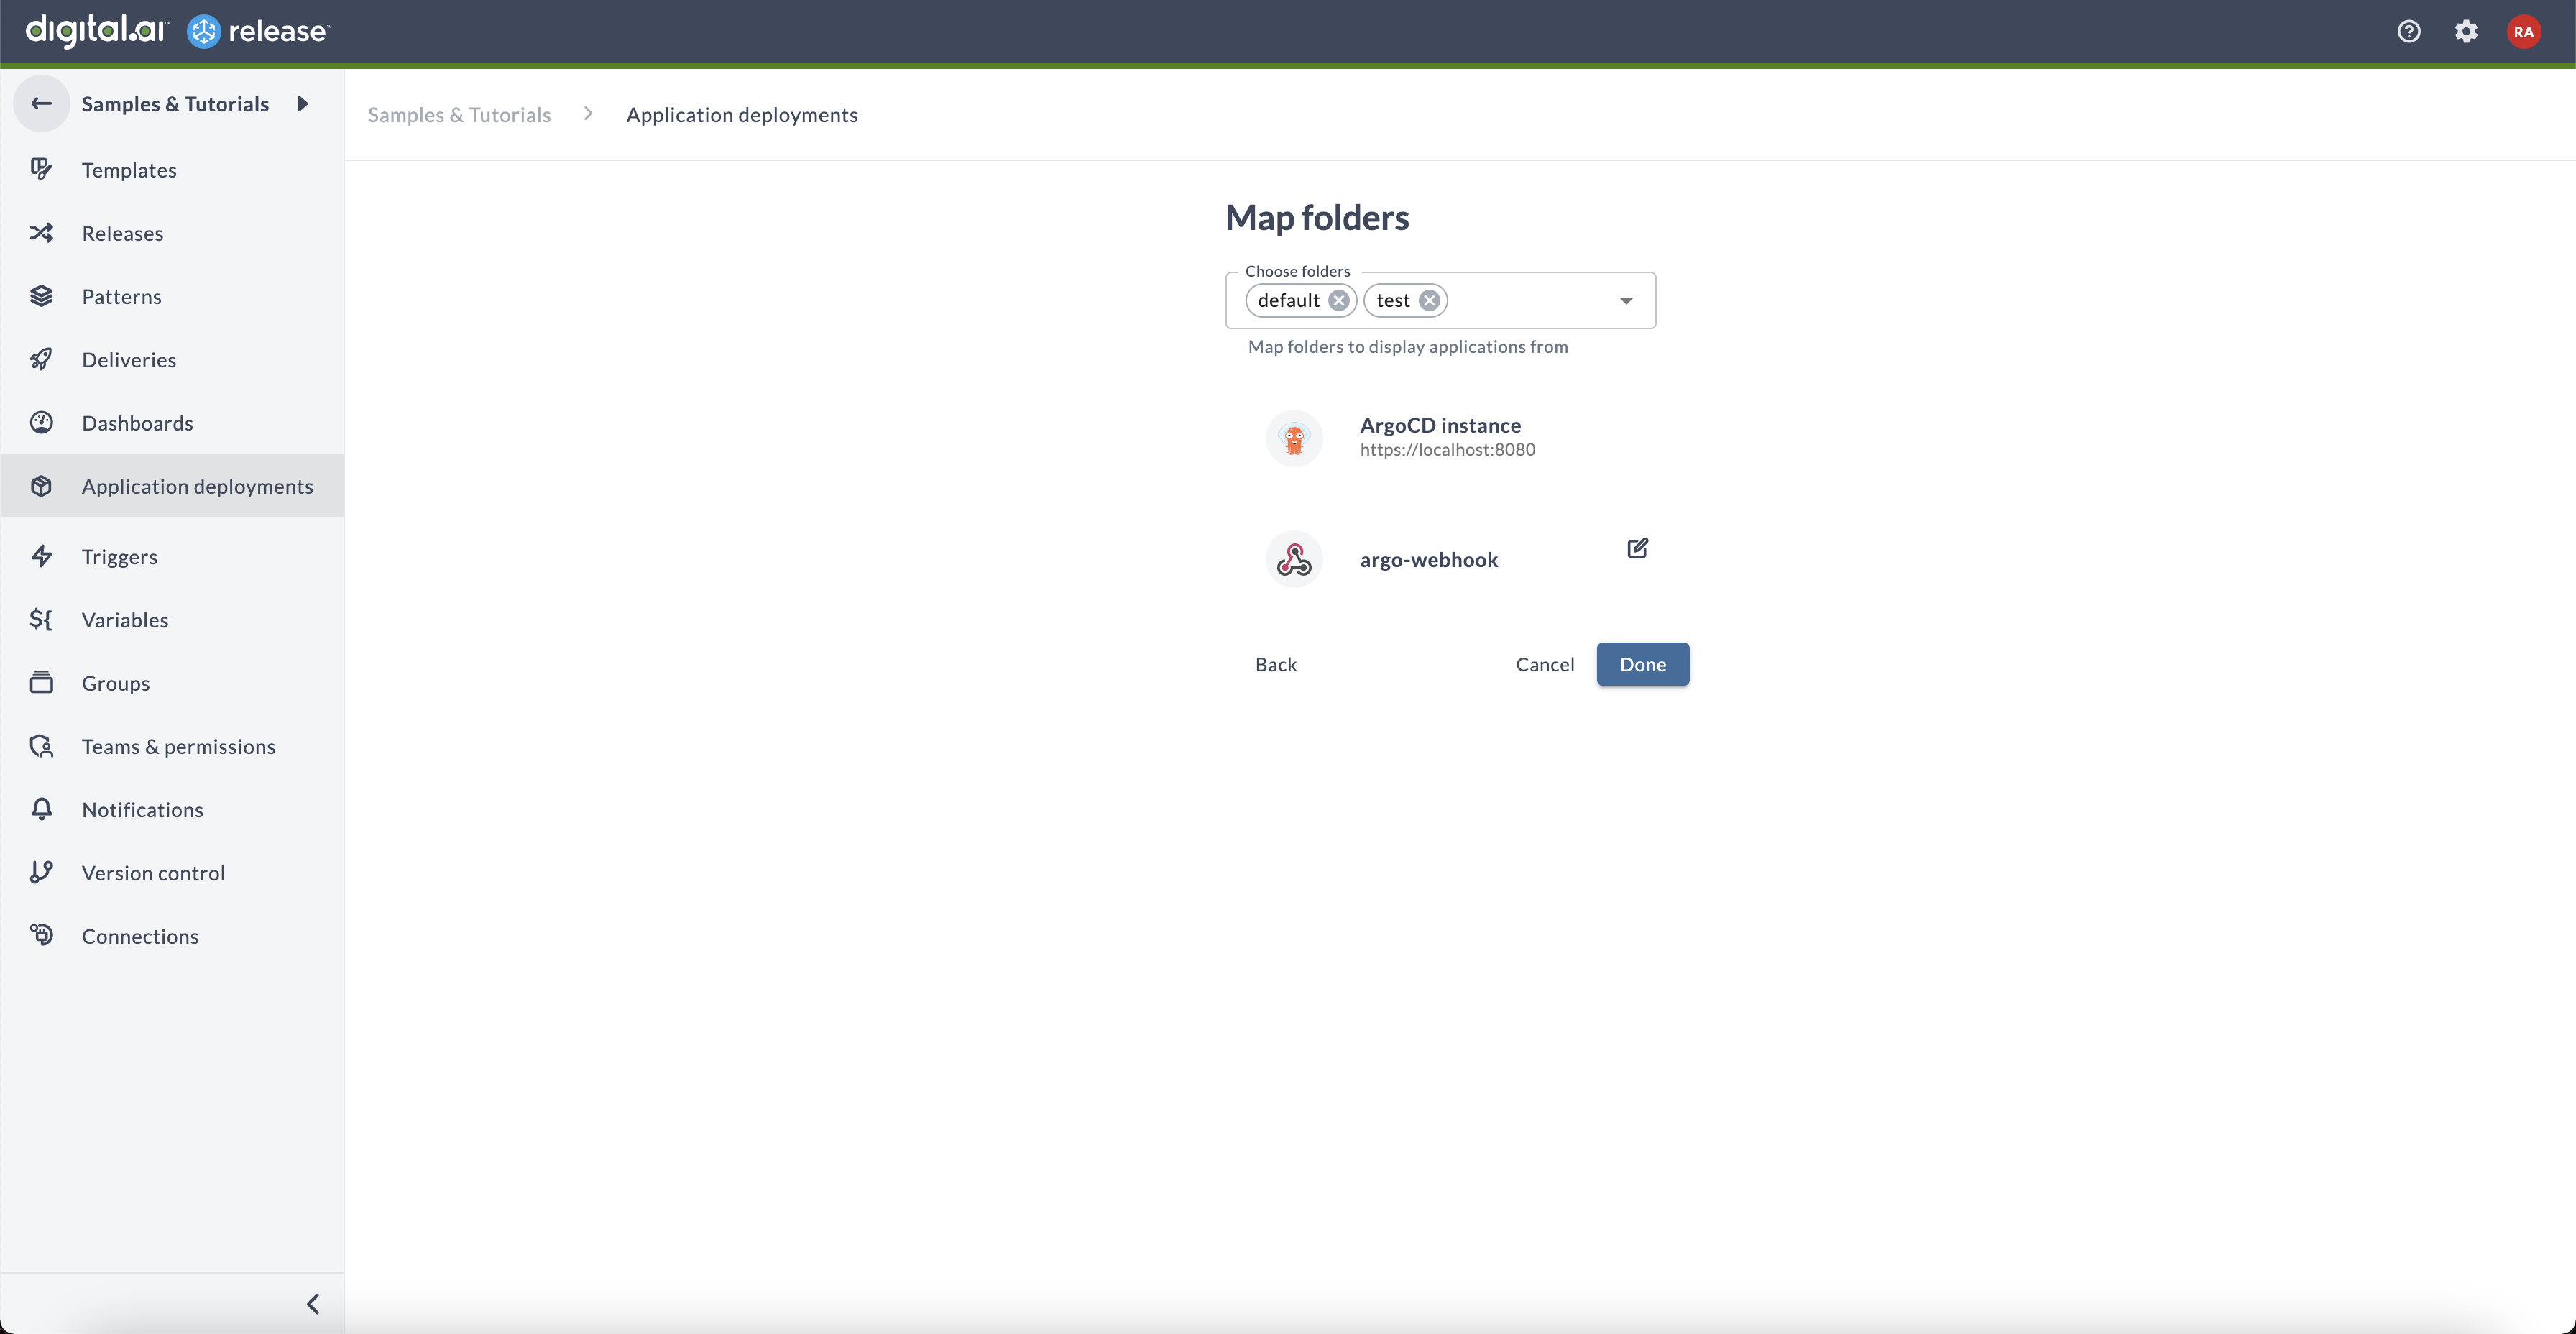
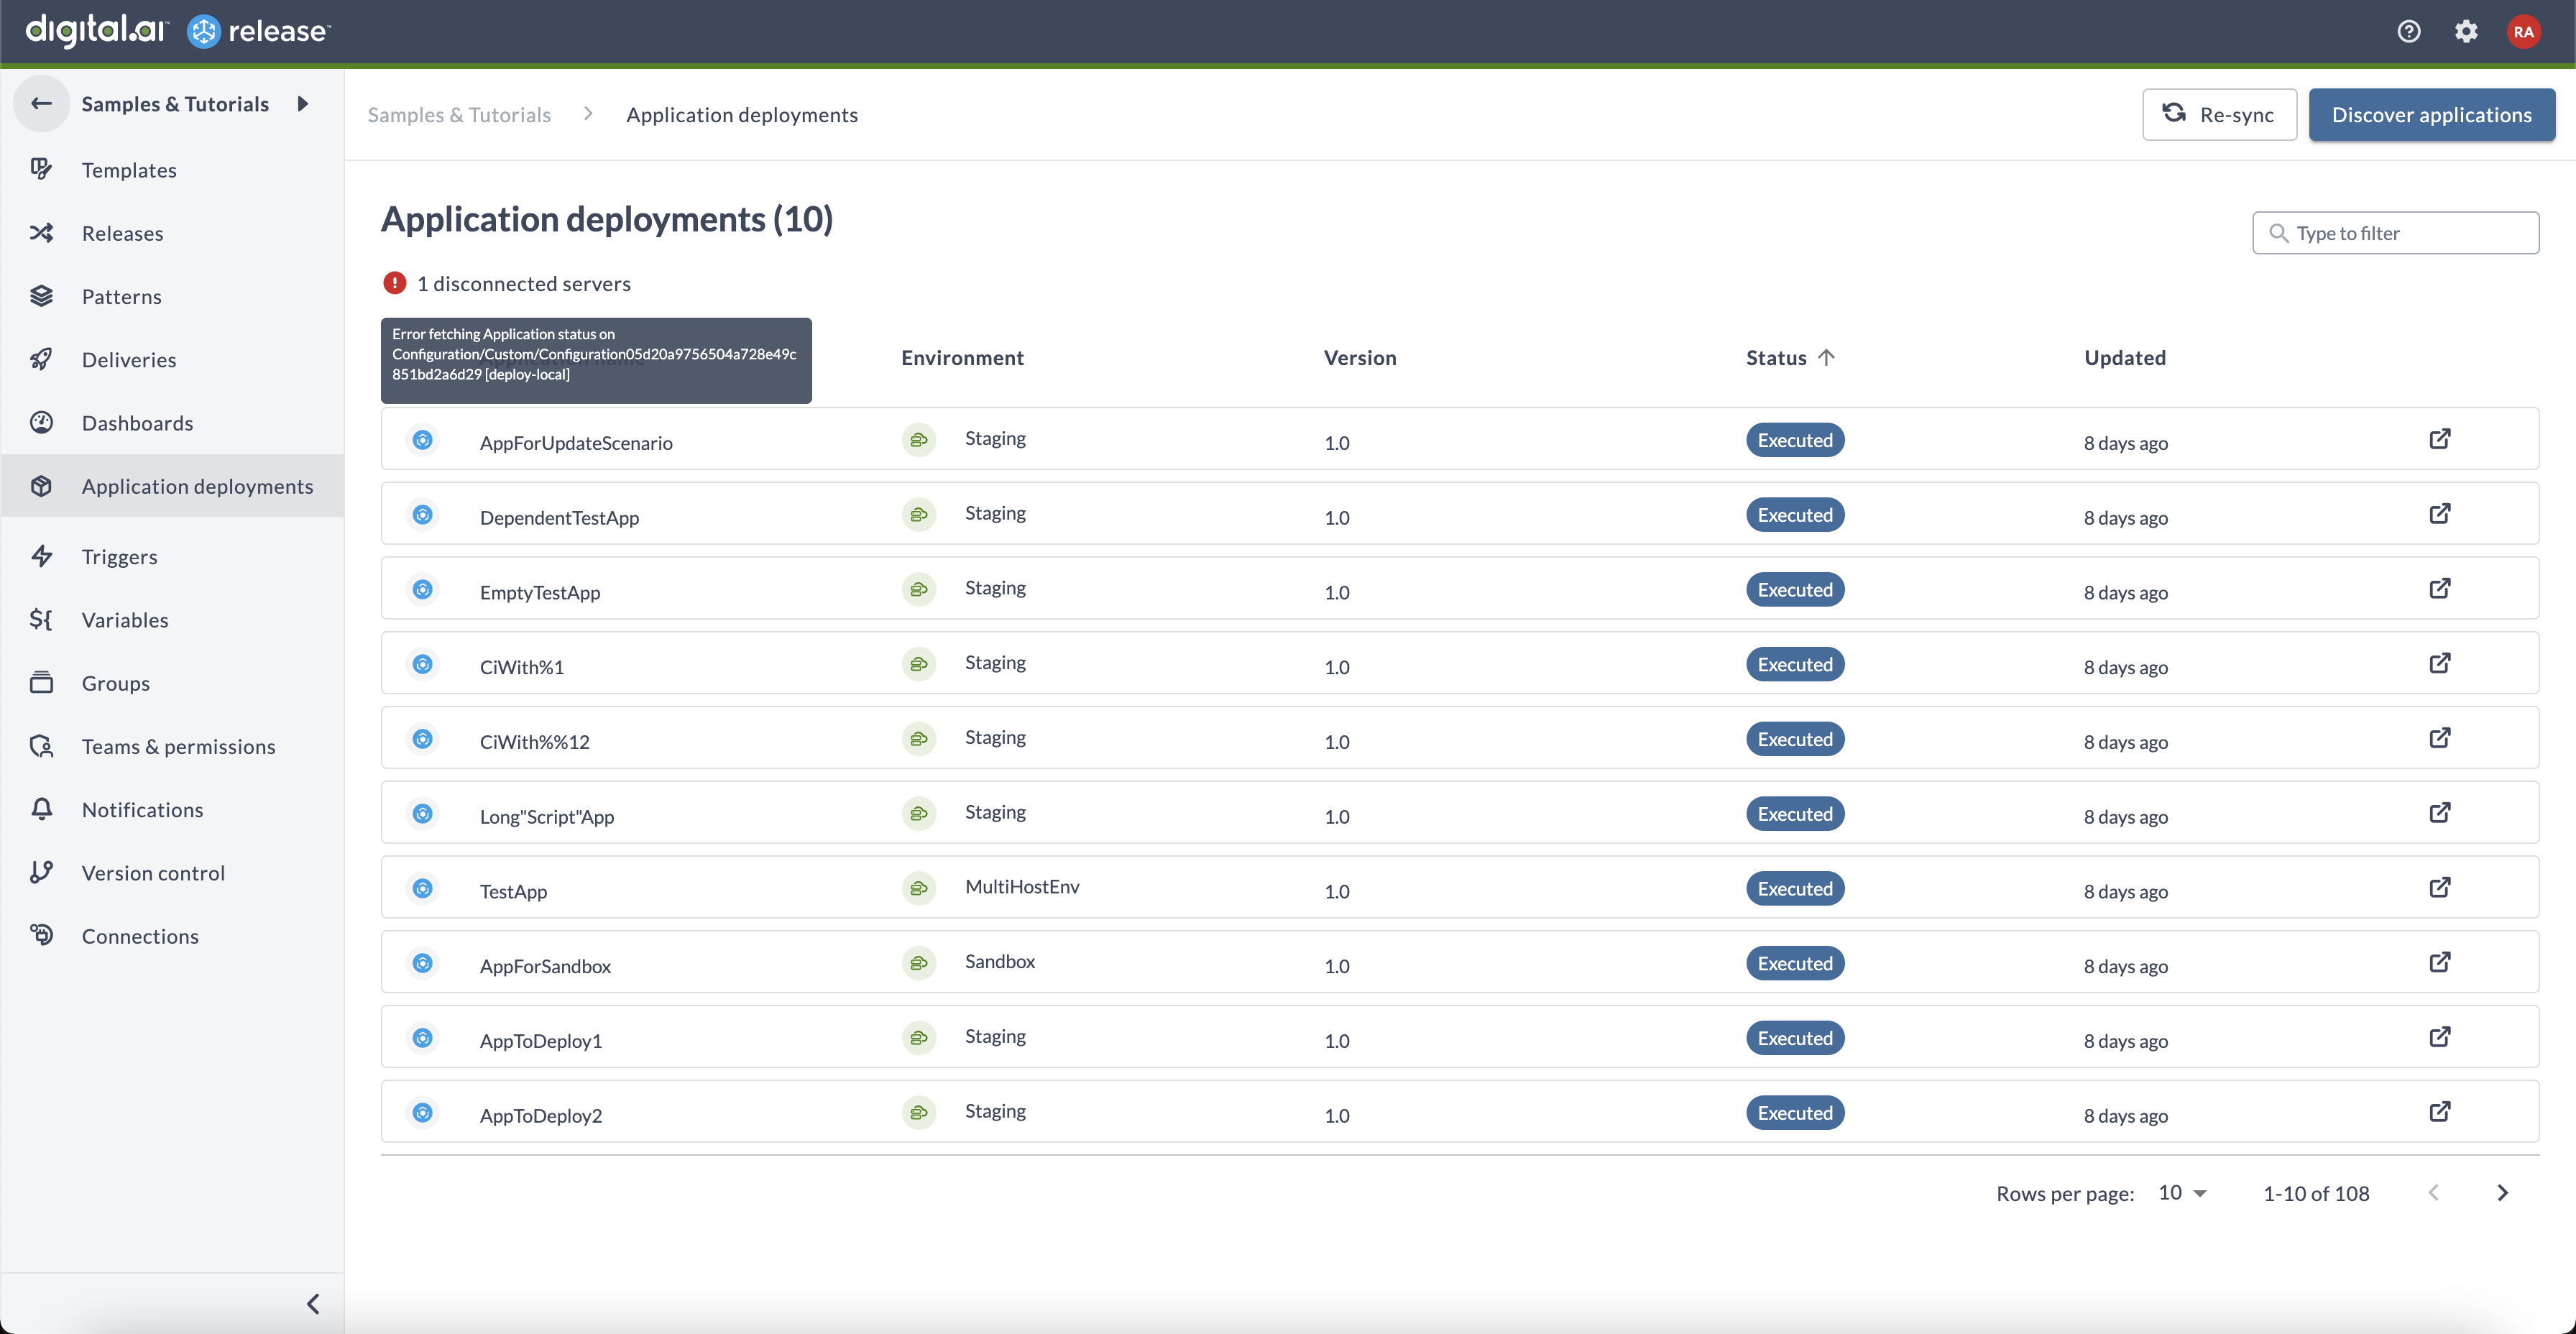
Click Done to view the deployed applications in the form of a table for configured servers. If there is an error in the setup or connection to the server is lost, a failure message is displayed in the Application deployments label that shows an error when you hover over the label.
Argo CD Discovery: Additional Steps
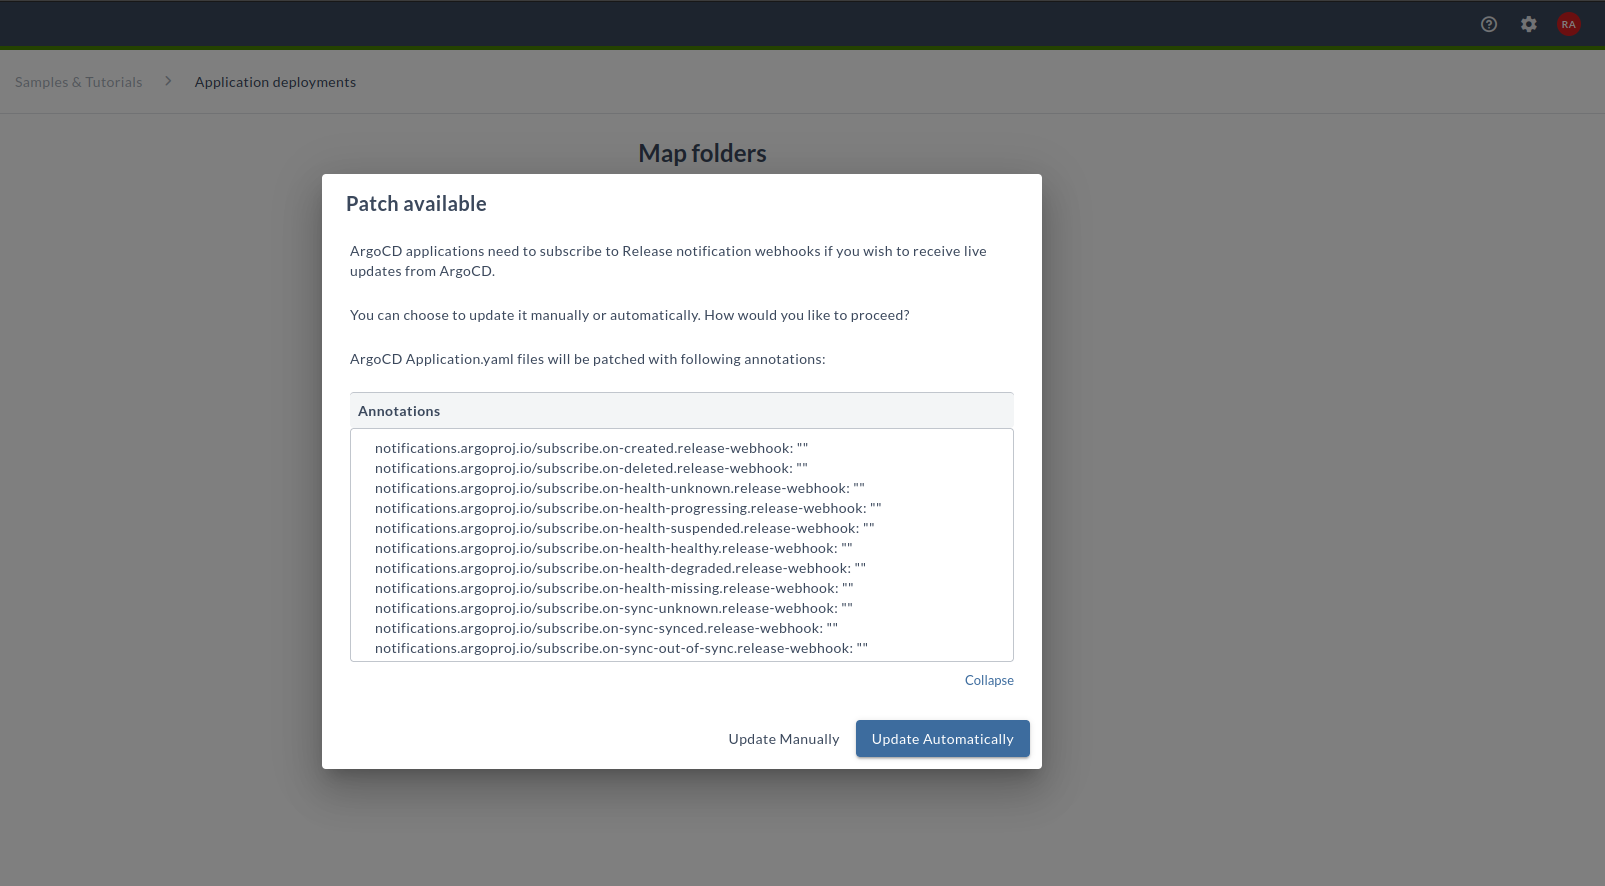
Once you click Done on Argo CD application filtering, you will view the Patch available dialog. If you wish to receive live updates from Argo CD applications, then the applications must subscribe to Release notification annotations. In the Patch available dialog, you can choose for an automatic or manual update.
Creating New Argo CD Applications
Once you create a new application in your Argo CD instance and you want to receive live updates for the created application, you have to manually apply notification annotations to a created application. Otherwise, you have to go through the wizard filtering steps again to trigger automatic updates.
notifications.argoproj.io/subscribe.on-created.release-webhook: ""
notifications.argoproj.io/subscribe.on-deleted.release-webhook: ""
notifications.argoproj.io/subscribe.on-health-unknown.release-webhook: ""
notifications.argoproj.io/subscribe.on-health-progressing.release-webhook: ""
notifications.argoproj.io/subscribe.on-health-suspended.release-webhook: ""
notifications.argoproj.io/subscribe.on-health-healthy.release-webhook: ""
notifications.argoproj.io/subscribe.on-health-degraded.release-webhook: ""
notifications.argoproj.io/subscribe.on-health-missing.release-webhook: ""
notifications.argoproj.io/subscribe.on-sync-unknown.release-webhook: ""
notifications.argoproj.io/subscribe.on-sync-synced.release-webhook: ""
notifications.argoproj.io/subscribe.on-sync-out-of-sync.release-webhook: ""
View the Live Status of Deployed Applications
After all the above configurations are completed in Digital.ai Release, you can view the live status of the applications deployed in Digital.ai Deploy and Argo CD.
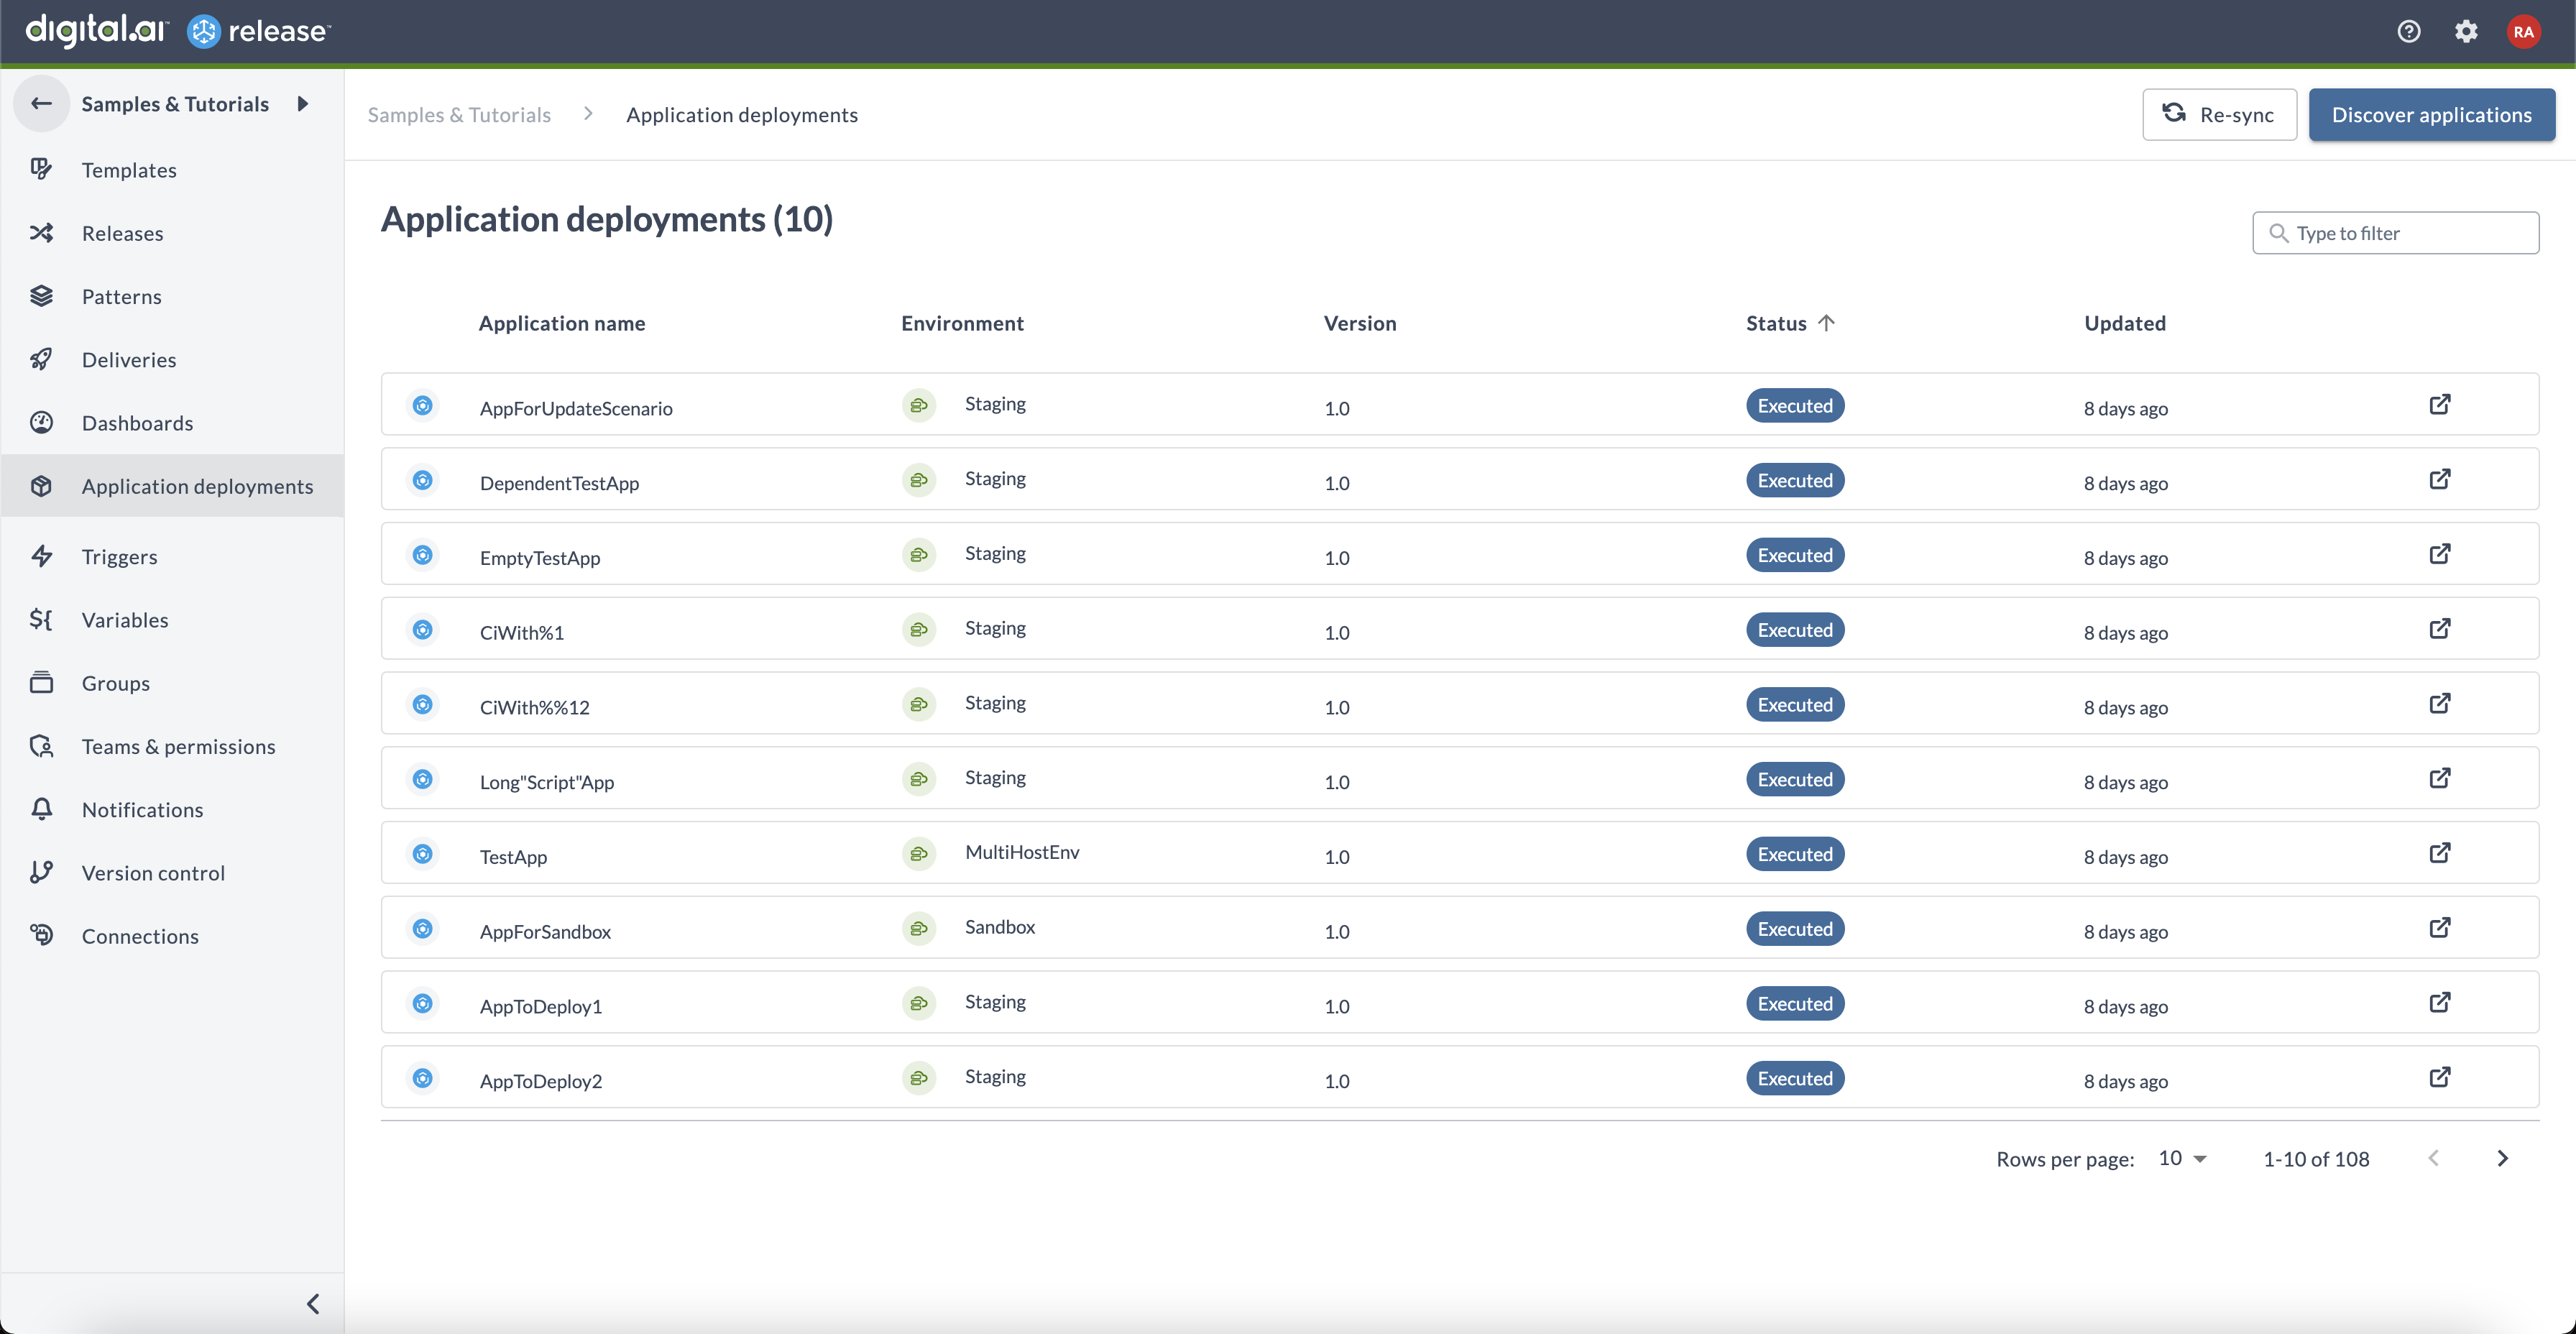
You can filter applications and sort them by the columns of the table.
If some servers are not configured correctly, the number of disconnected servers will be displayed on the screen. Hovering over the number will display the error messages.
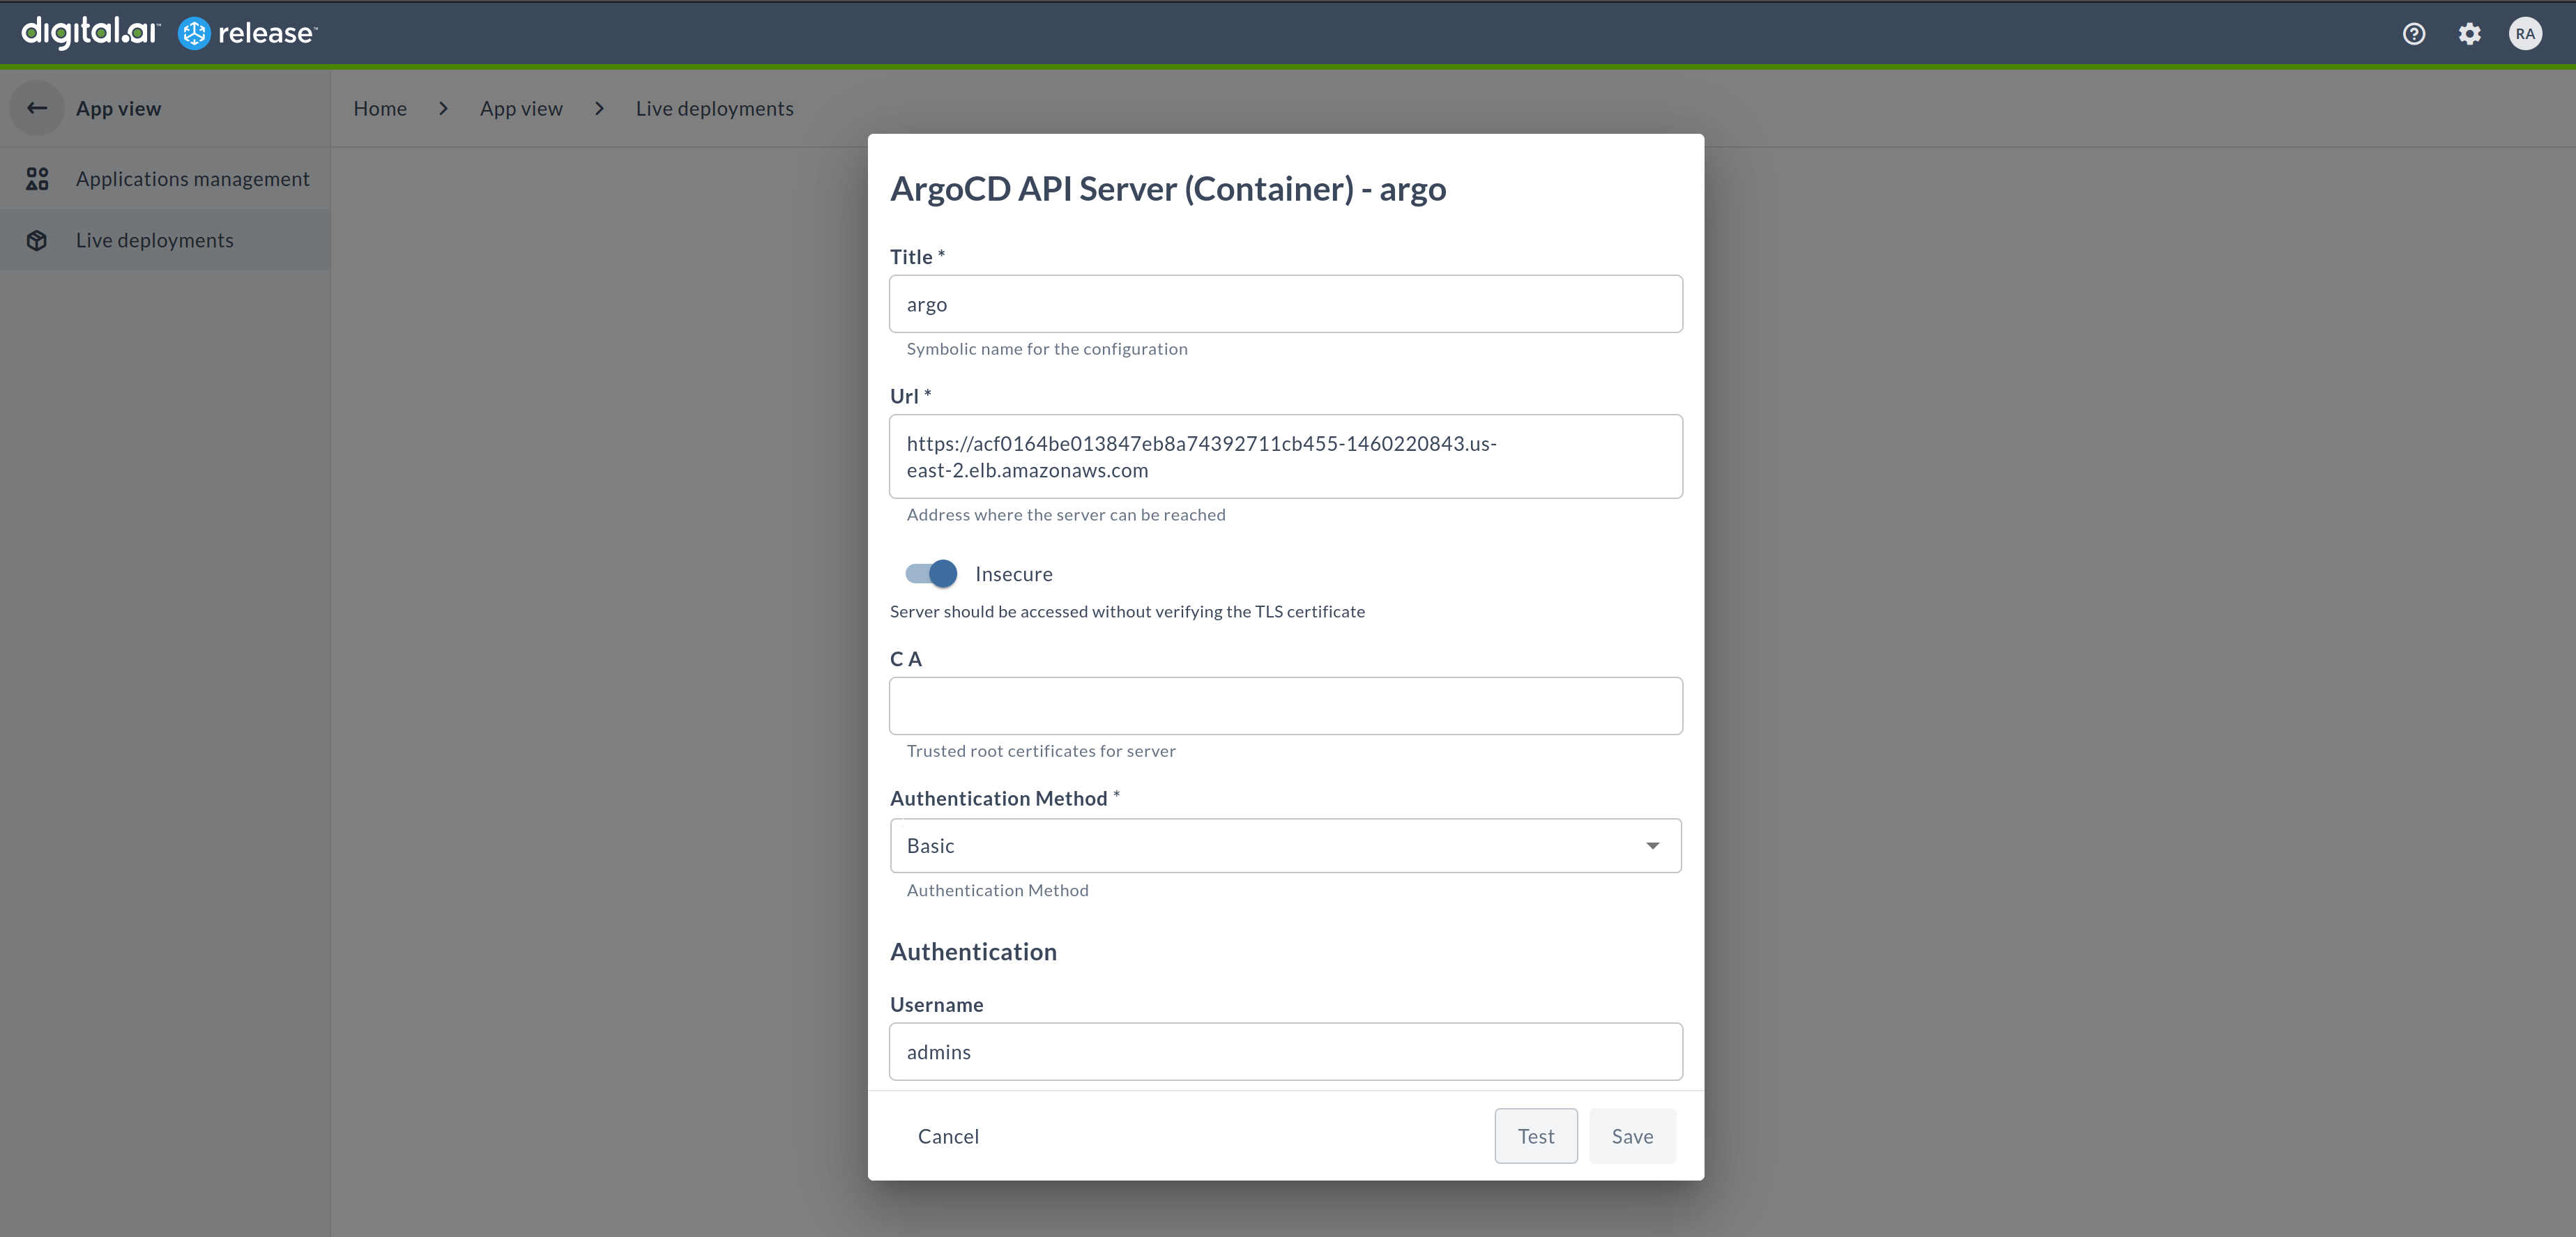
Clicking on the error opens the edit dialog for disconnected server where it can be updated.
Step-by-step: Advanced Setup
If you want to do the step-by-step setup without automatic creation of Webhook and Webhook source for the server, you can follow the below steps:
Set up Connections�
Follow the steps to connect Digital.ai Release to Digital.ai Deploy and Argo CD.
- Select the relevant folder.
- Click Connections > Digital.Ai Deploy Server.
The New Digital.ai Deploy Server settings screen opens.
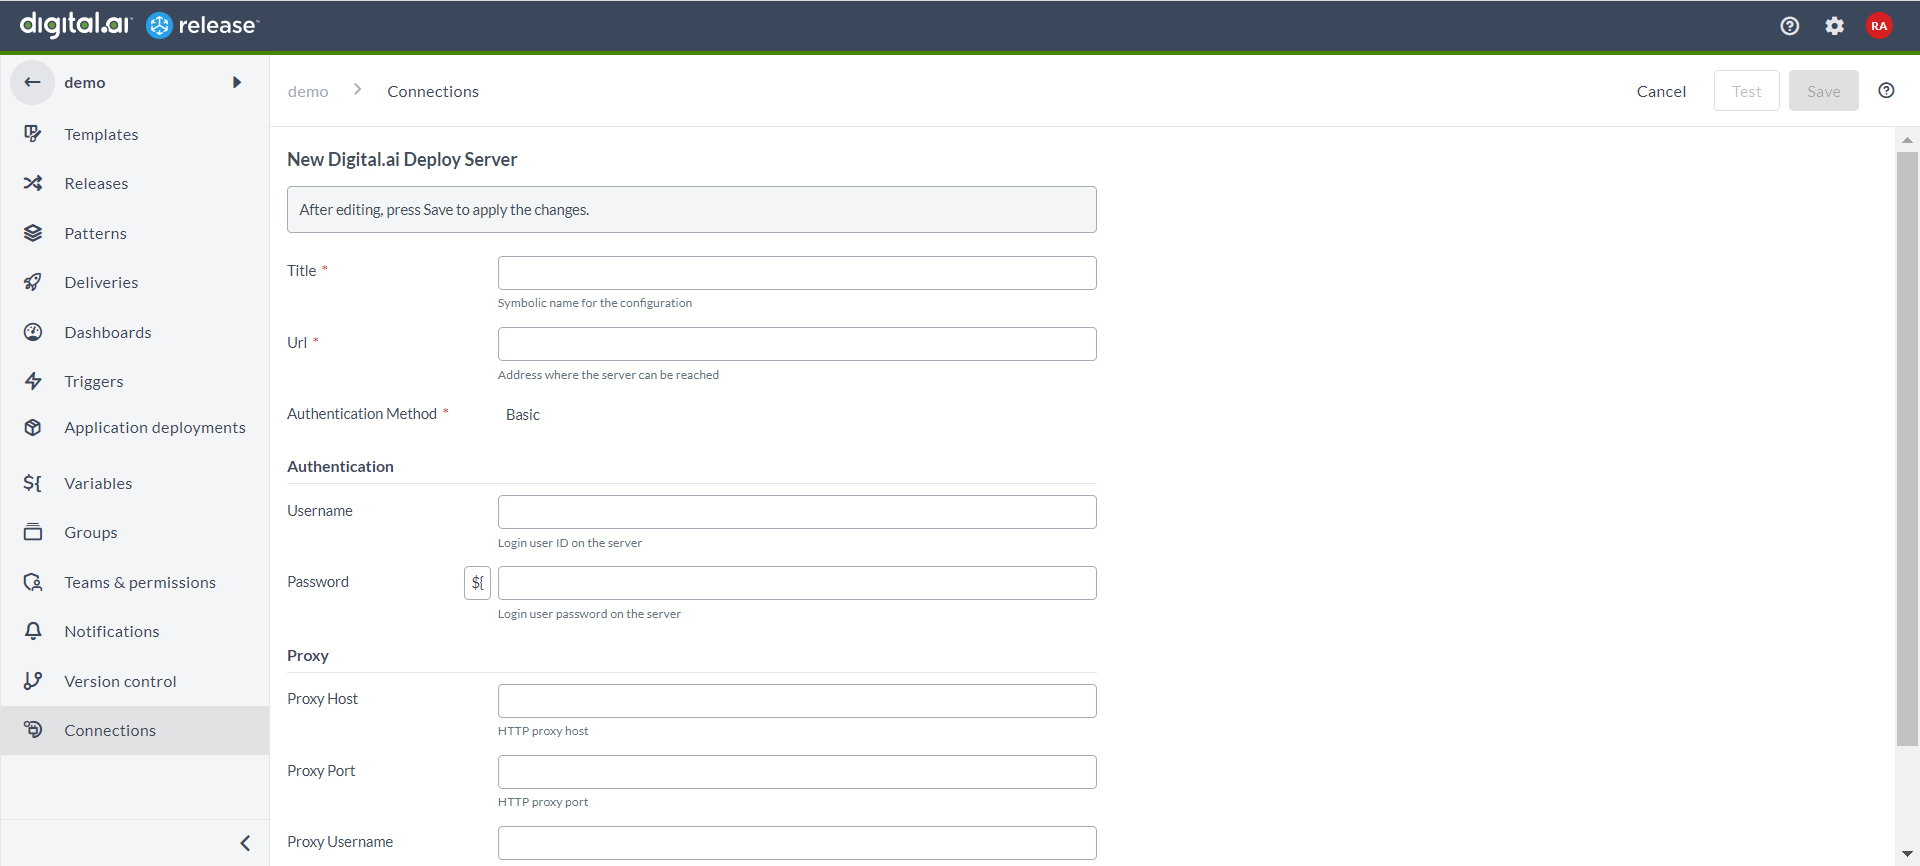
- Enter the required details to create a connection between Digital.ai Release and Digital.ai Deploy and save the changes.
- Repeat steps 1 to 3.
However, in step #2, click Connections > ArgoCD: Server.
The New ArgoCD Server settings screen opens.
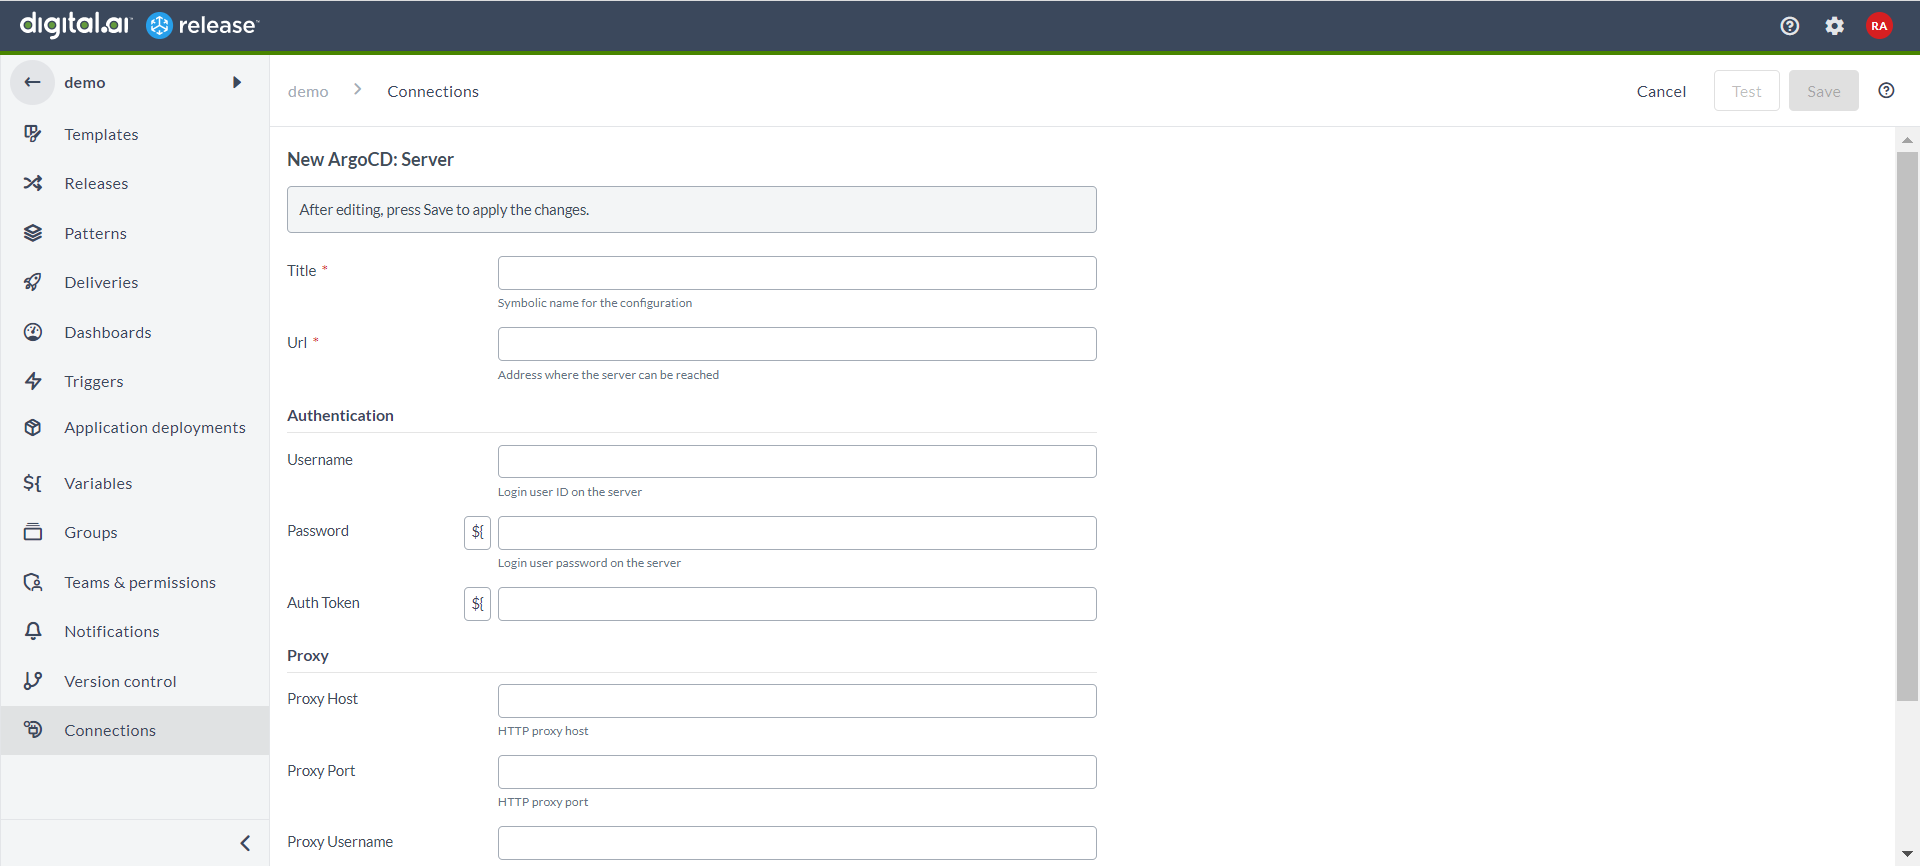
- Enter the required details to create a connection between Digital.ai Release and Argo CD and save the changes.
Now, once you save these settings, Digital.ai Release is connected to Digital.ai Deploy and Argo CD.
Configure Endpoints
Follow the steps to add HTTP endpoints for webhooks. It triggers the deployment status from Digital.ai Deploy and Argo CD to Digital.ai Release.
- Select the relevant folder.
- Click Connections > HTTP Endpoint for Webhooks. The New HTTP Endpoint for Webhooks settings screen opens.
- Click POST Endpoint.
The settings are visible now.
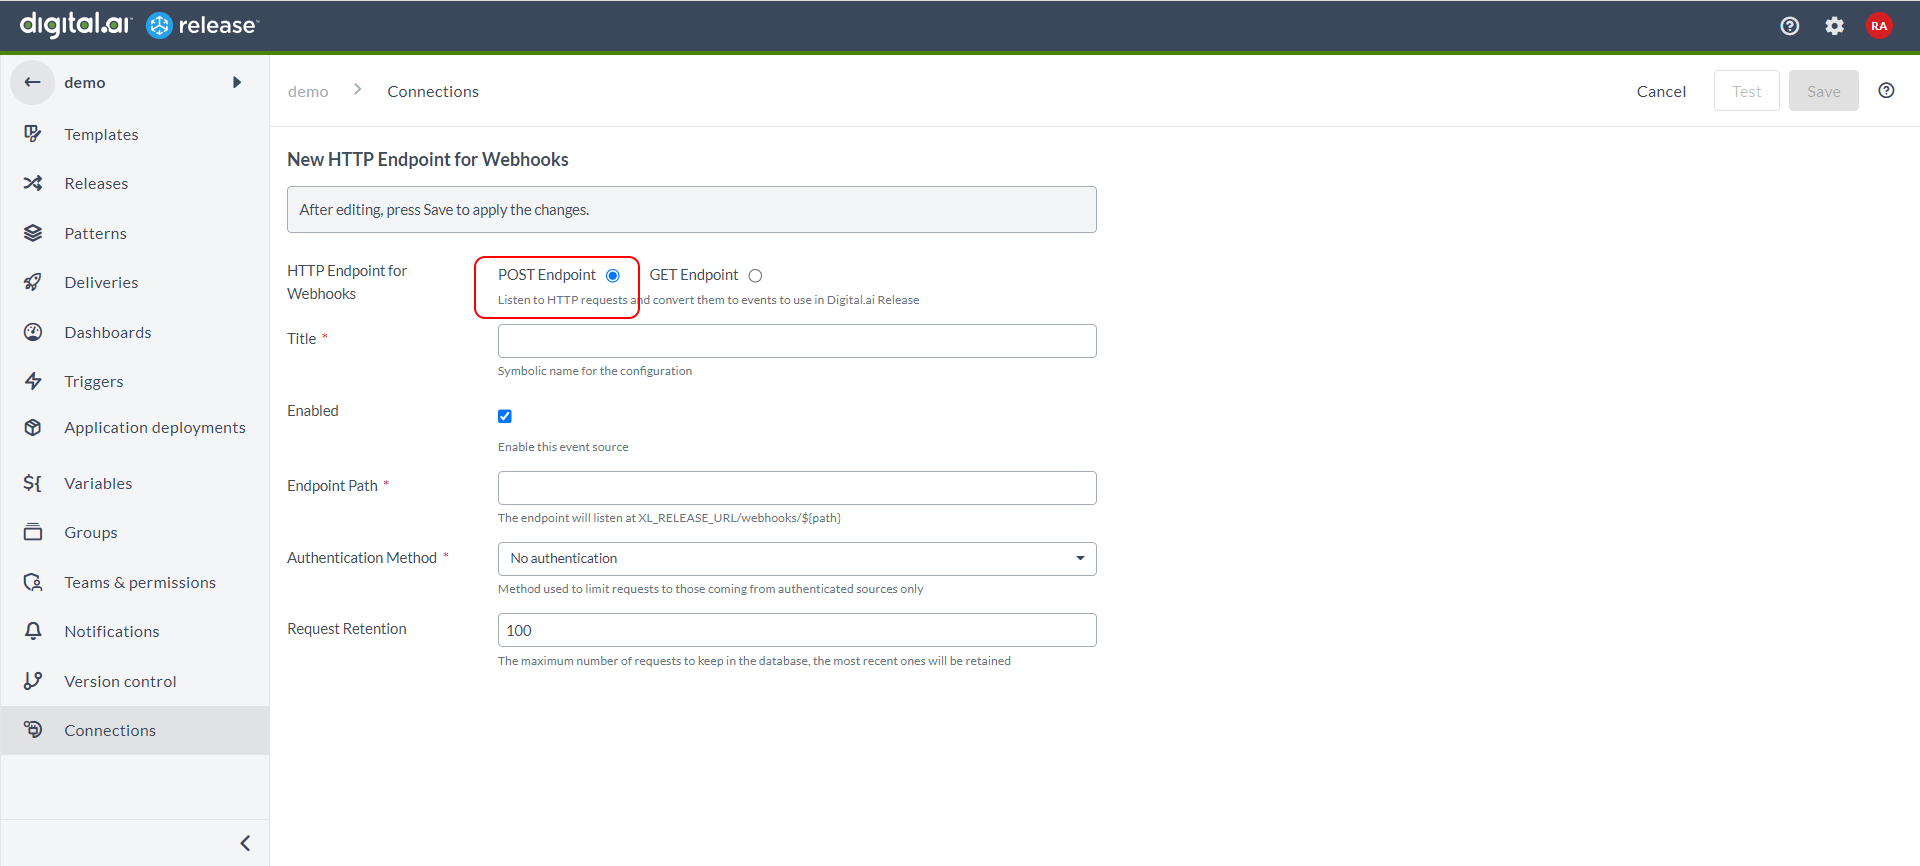
- Enter a title and a name for the endpoint path.
- Select the Enabled checkbox to enable this event source, and select an authentication method from the drop-down list.
- Click Save.
Configure Webhooks
Follow the steps to configure the webhook source for Digital.ai Deploy and Argo CD.
- Select the relevant folder.
- Click Connections > Digital.Ai Deploy Webhook Source.
The New Digital.ai Deploy Webhook Source settings screen opens.
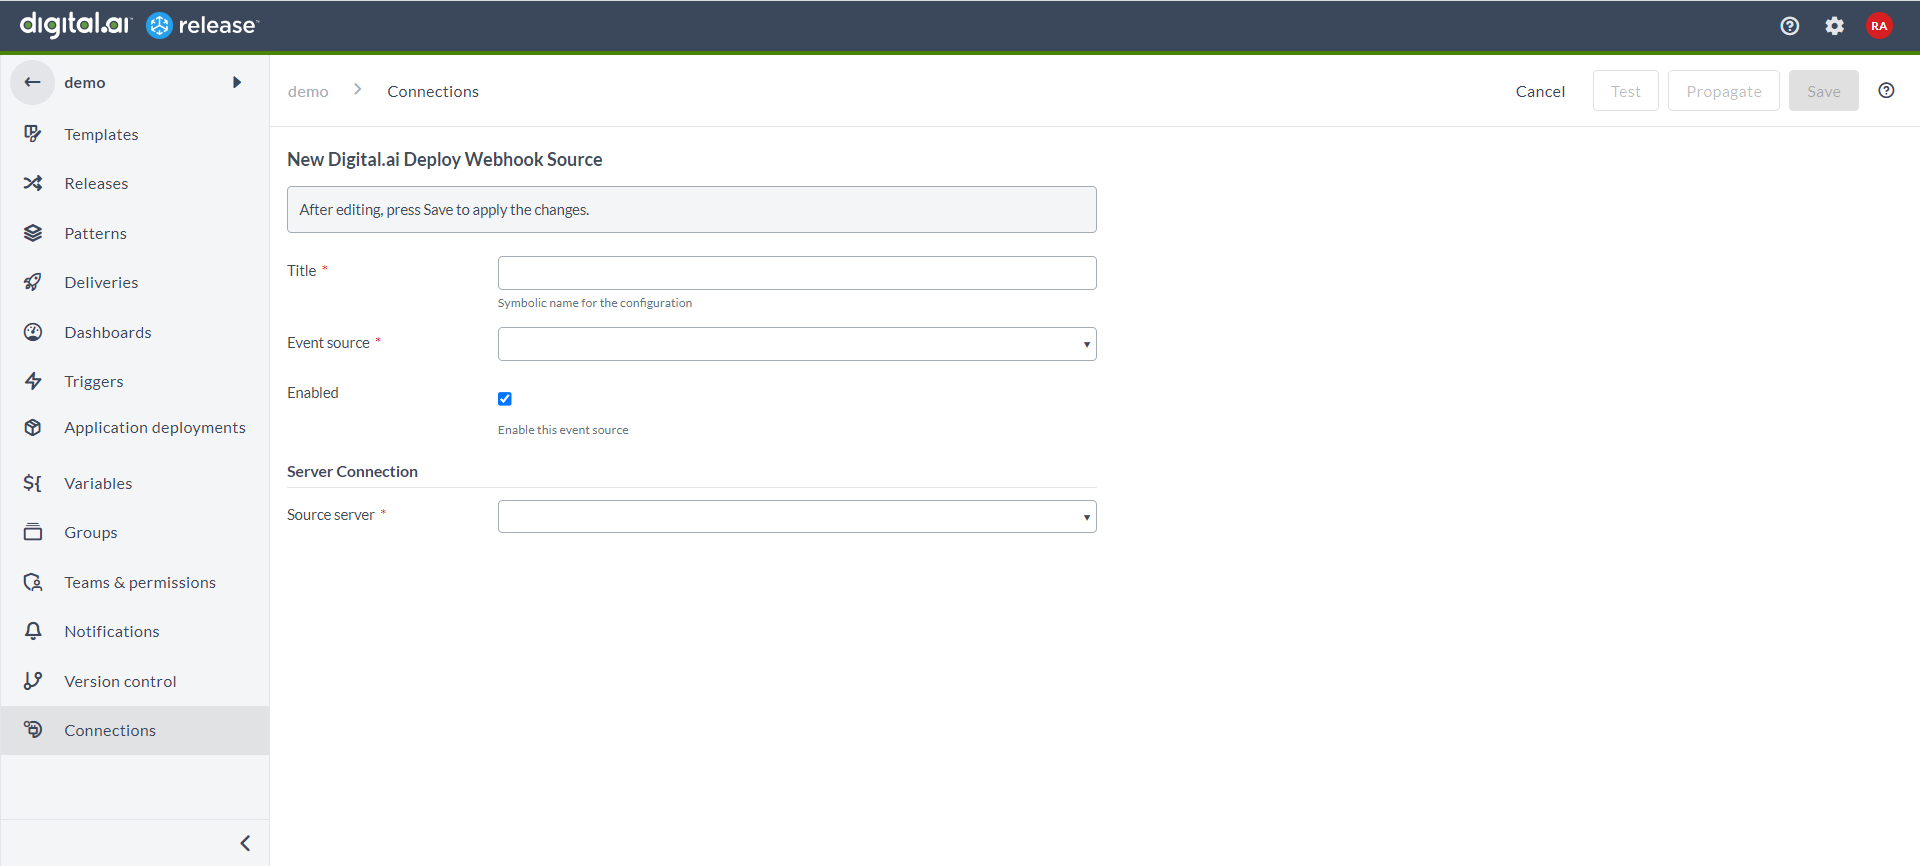
- Enter the required details to configure the API server URL for Digital.ai Deploy and save the changes.
- Repeat steps 1 to 3.
However, in step #2, click Connections > ArgoCD Webhook Source.
The New ArgoCD Webhook Source settings screen opens.
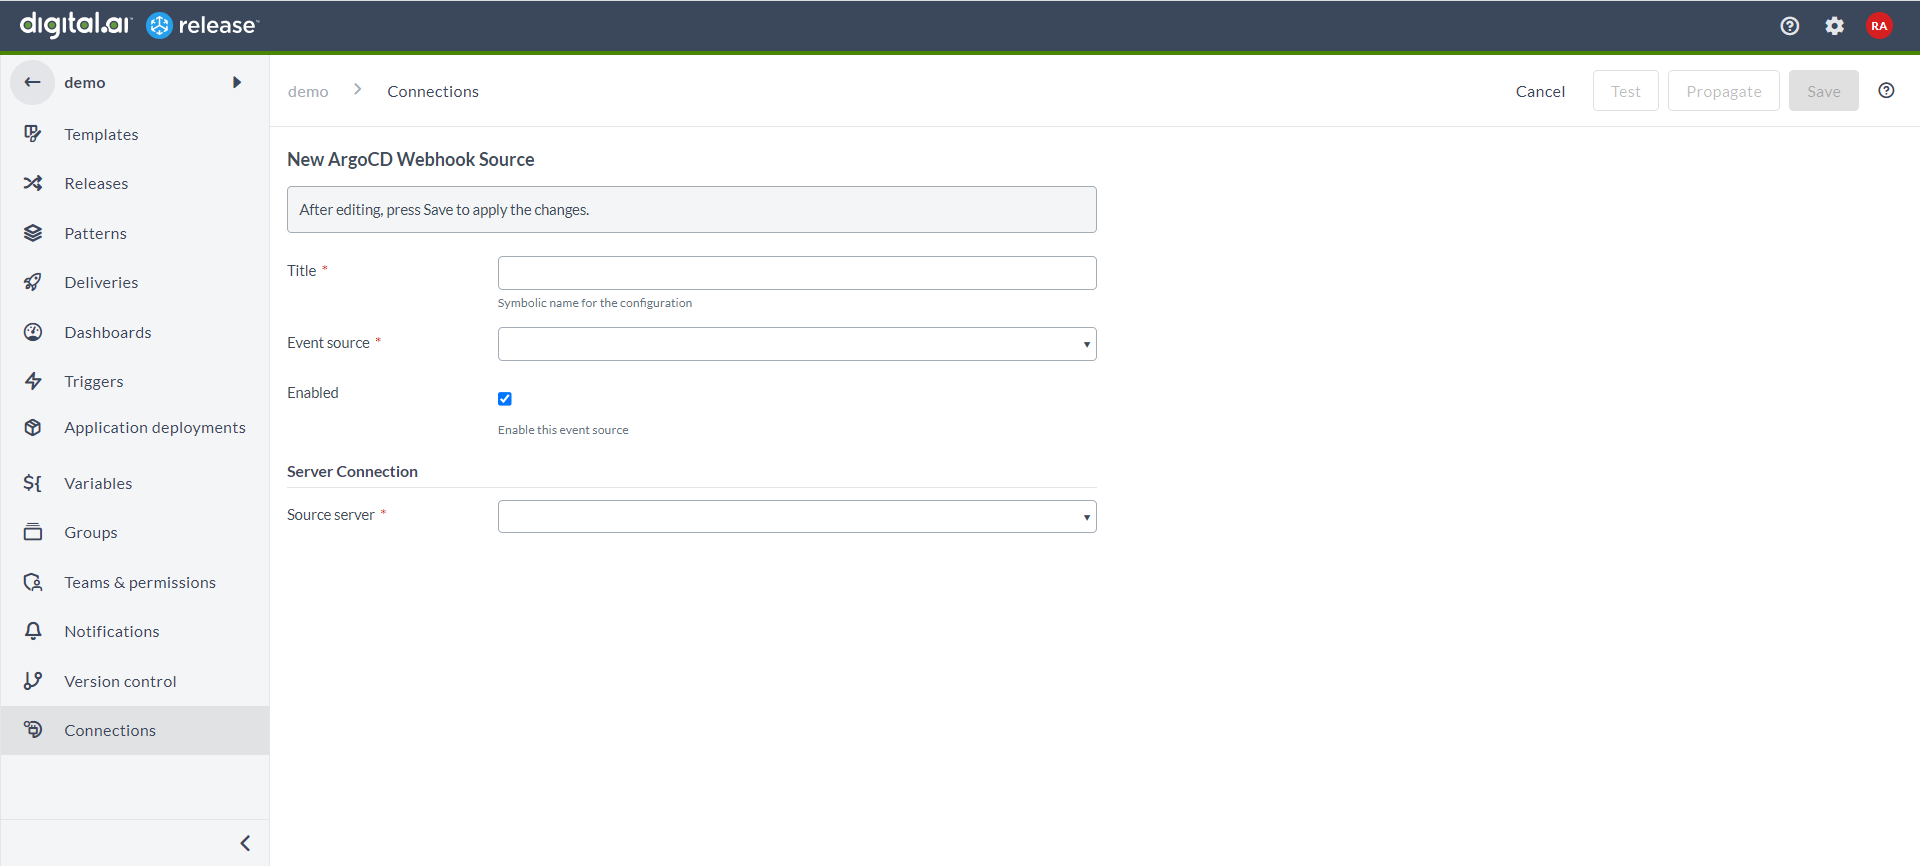
- Enter the required details to configure the API server URL for Argo CD and save the changes.
Now, once you save these settings, the webhook source is configured for Digital.ai Deploy and Argo CD.
Digital.Ai Deploy Webhook Source
When you configure the Deploy webhook, you can auto-configure the webhook on the Deploy side by clicking on Propagate. After clicking, if the configuration was successful, you will get the following message:
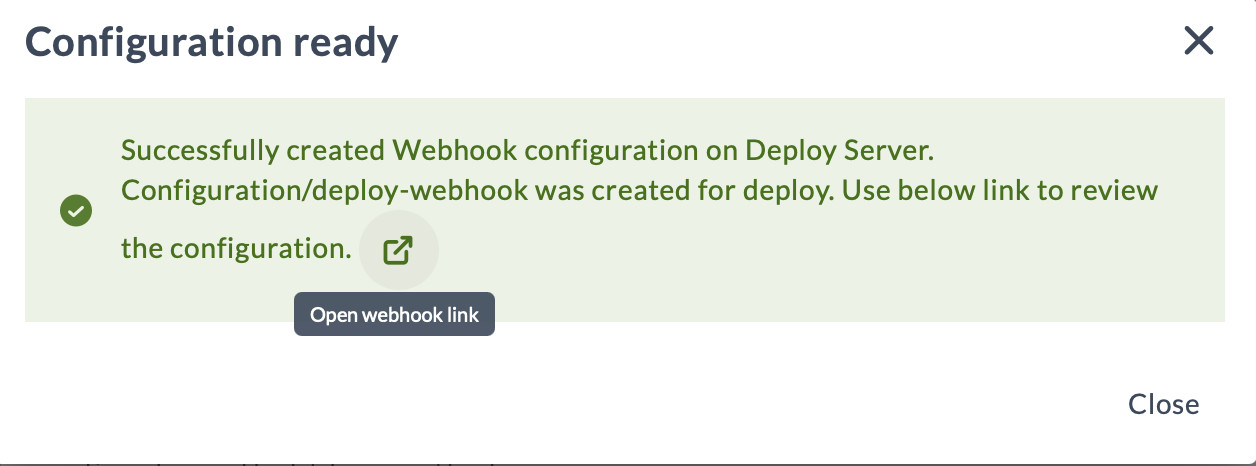
It provides an external link to the webhook created on the Deploy side which can be opened in a new tab.
Argo CD Webhook Source
When you configure the Argo CD webhook, you can generate a config map that needs to be applied to your cluster by clicking on Propagate.
After clicking, a webhook manifest for Argo CD will be generated. Copy it and apply it to the cluster.
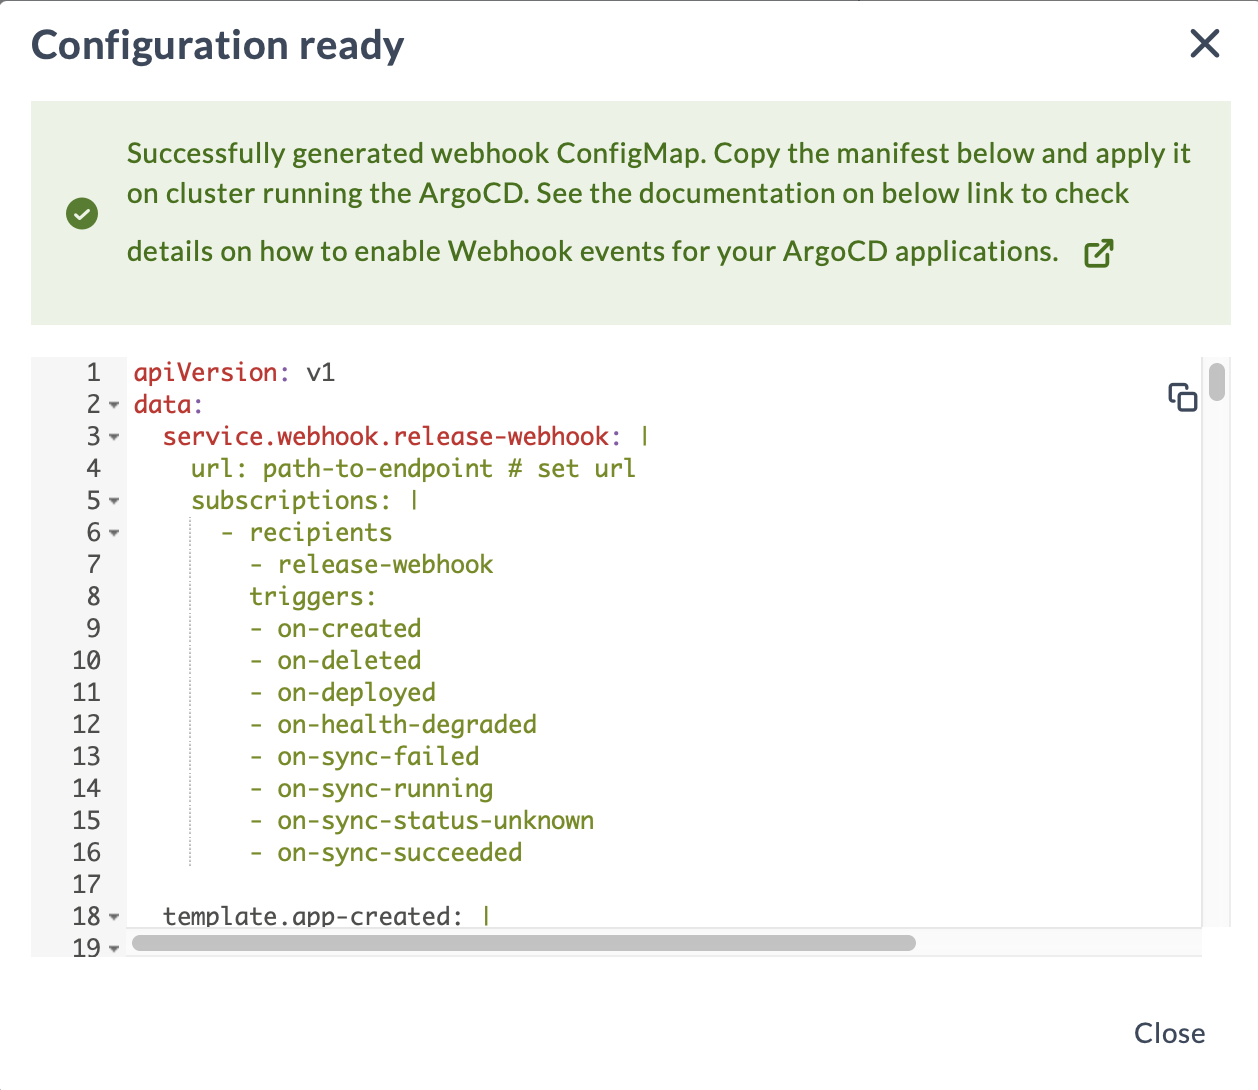
The Argo CD Notification subscriptions are managed using notifications.argoproj.io/subscription annotation. To subscribe to the Argo CD application events, add the following annotations under the metadata:
notifications.argoproj.io/subscribe.<trigger>.<service>: <recipient>
Administering Applications Sources
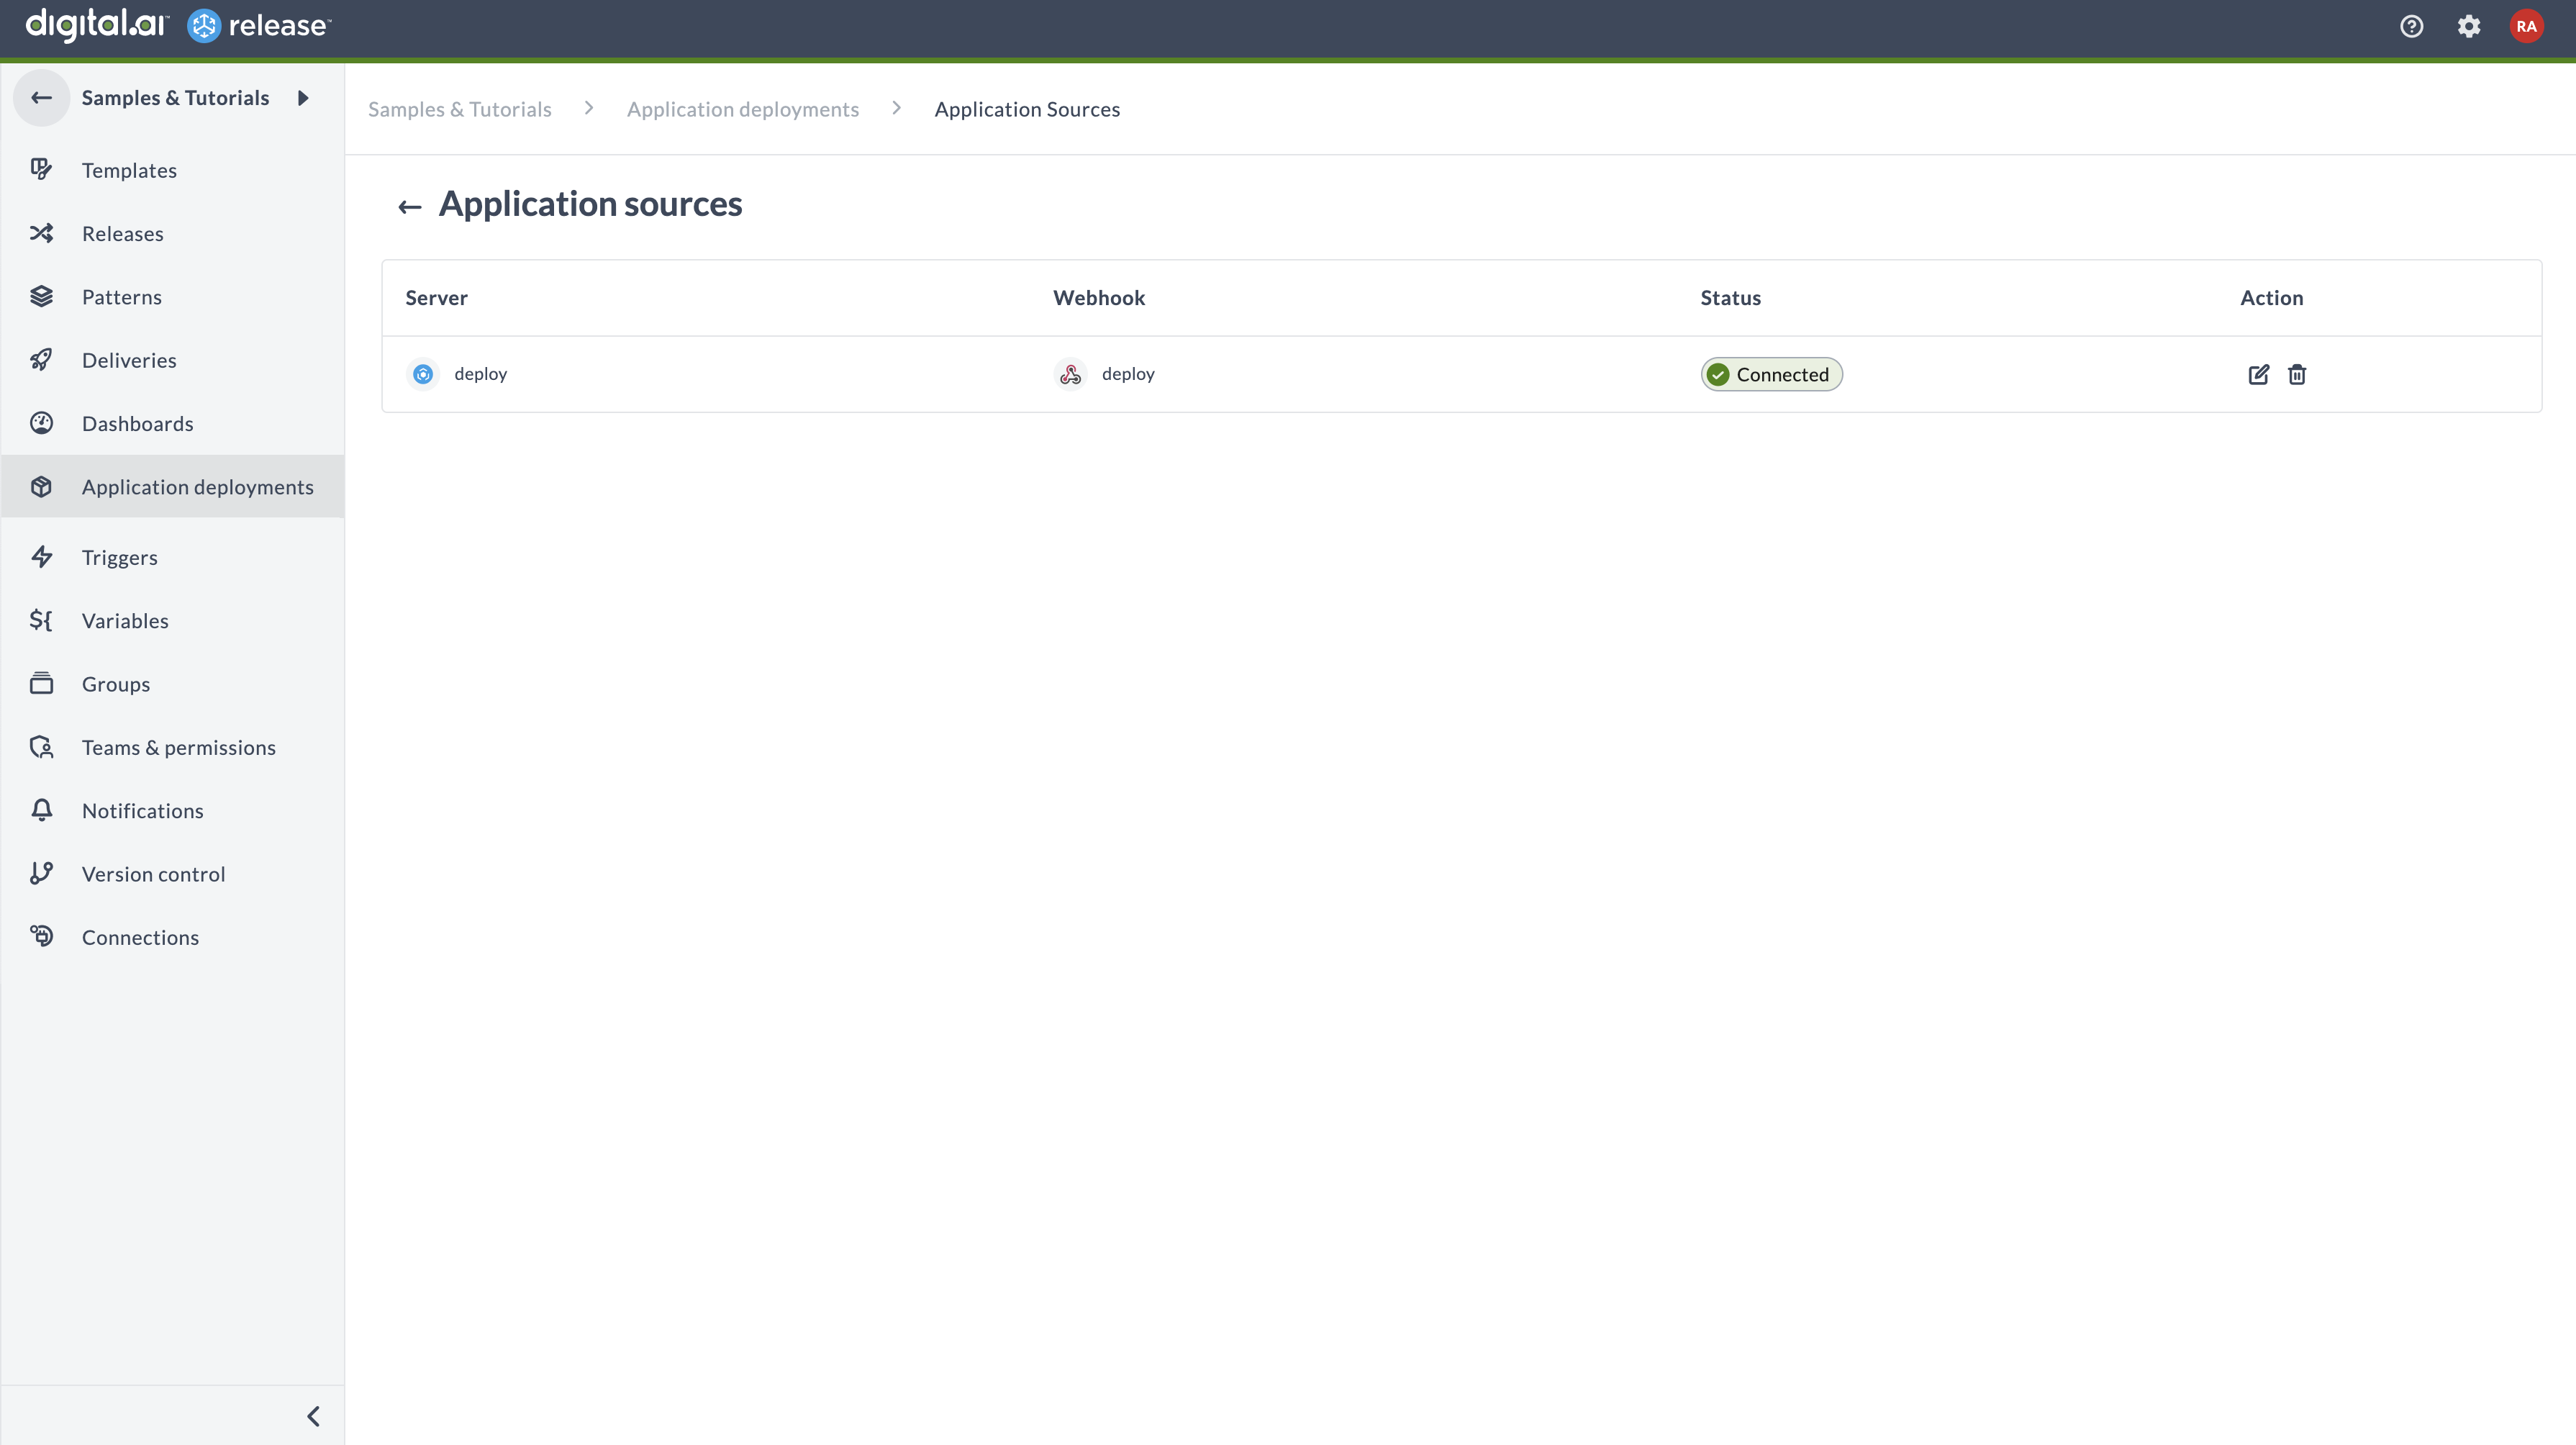
- To edit or delete created application sources and HTTP endpoints, click the
> Application sources. The Application sources page appears.
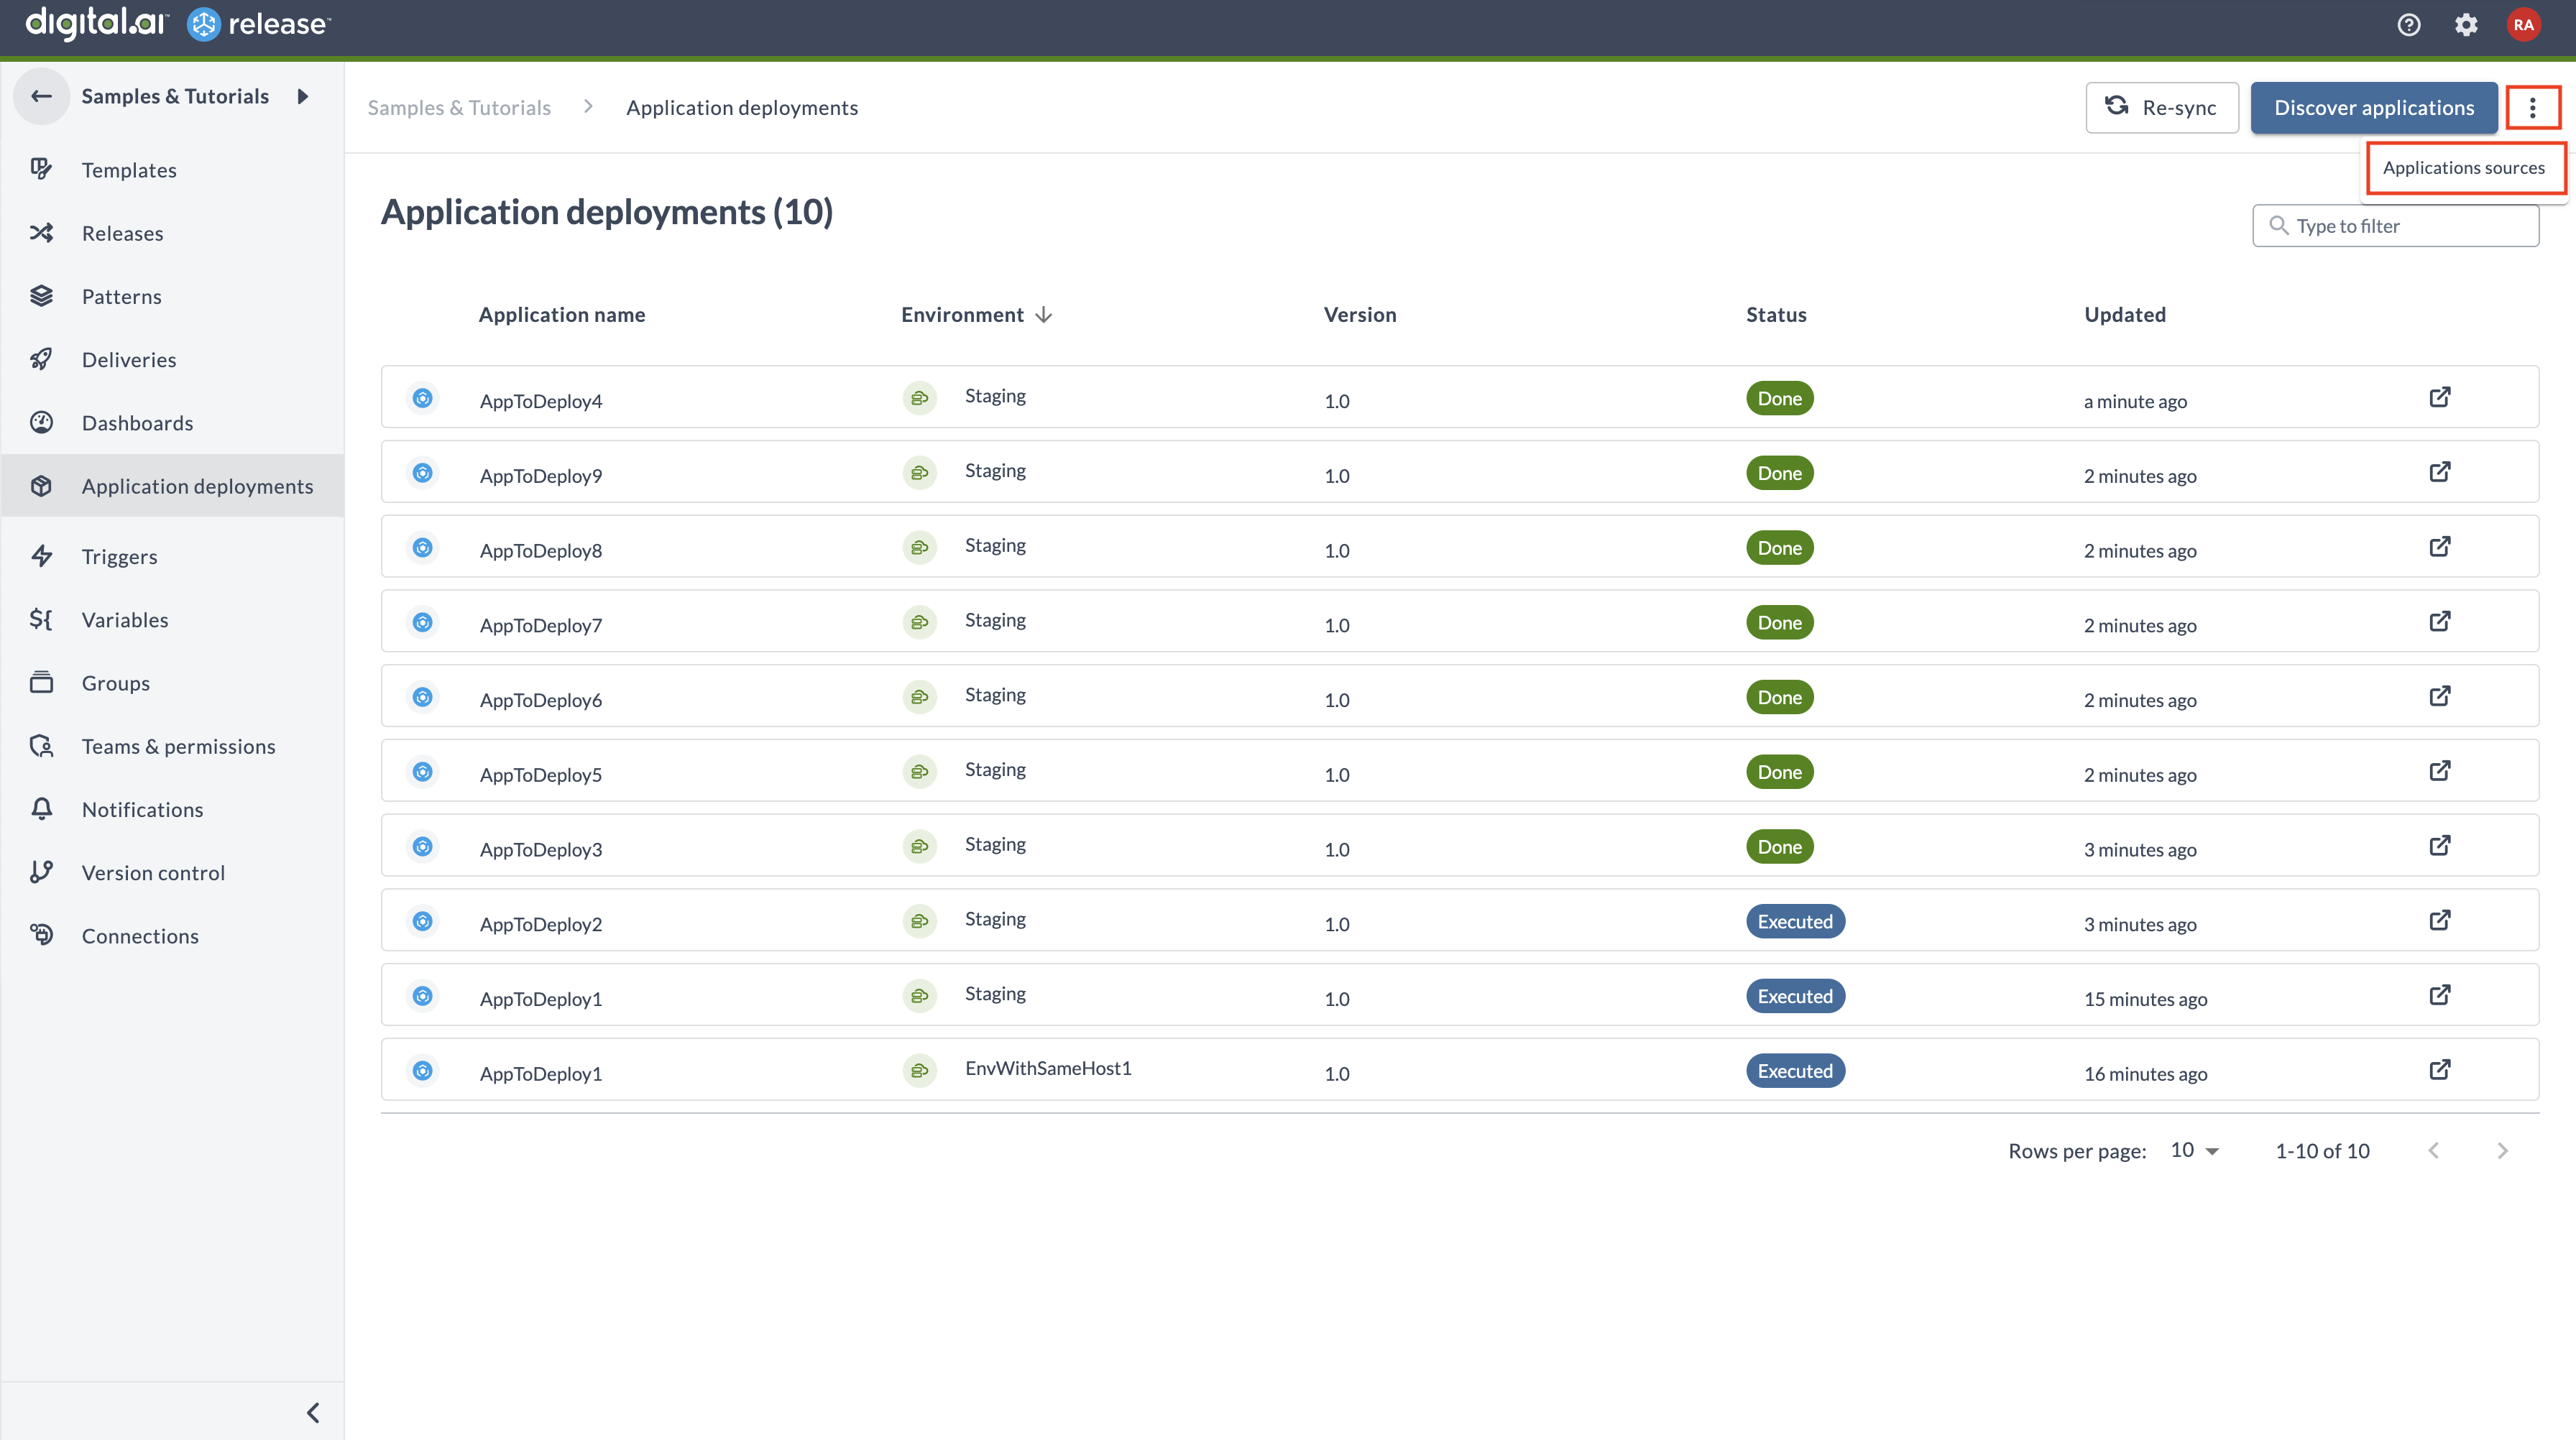
- Here, you can see server name, its webhook, current status (connected/disconnected), and the action buttons to edit or delete the corresponding application source and HTTP endpoint.
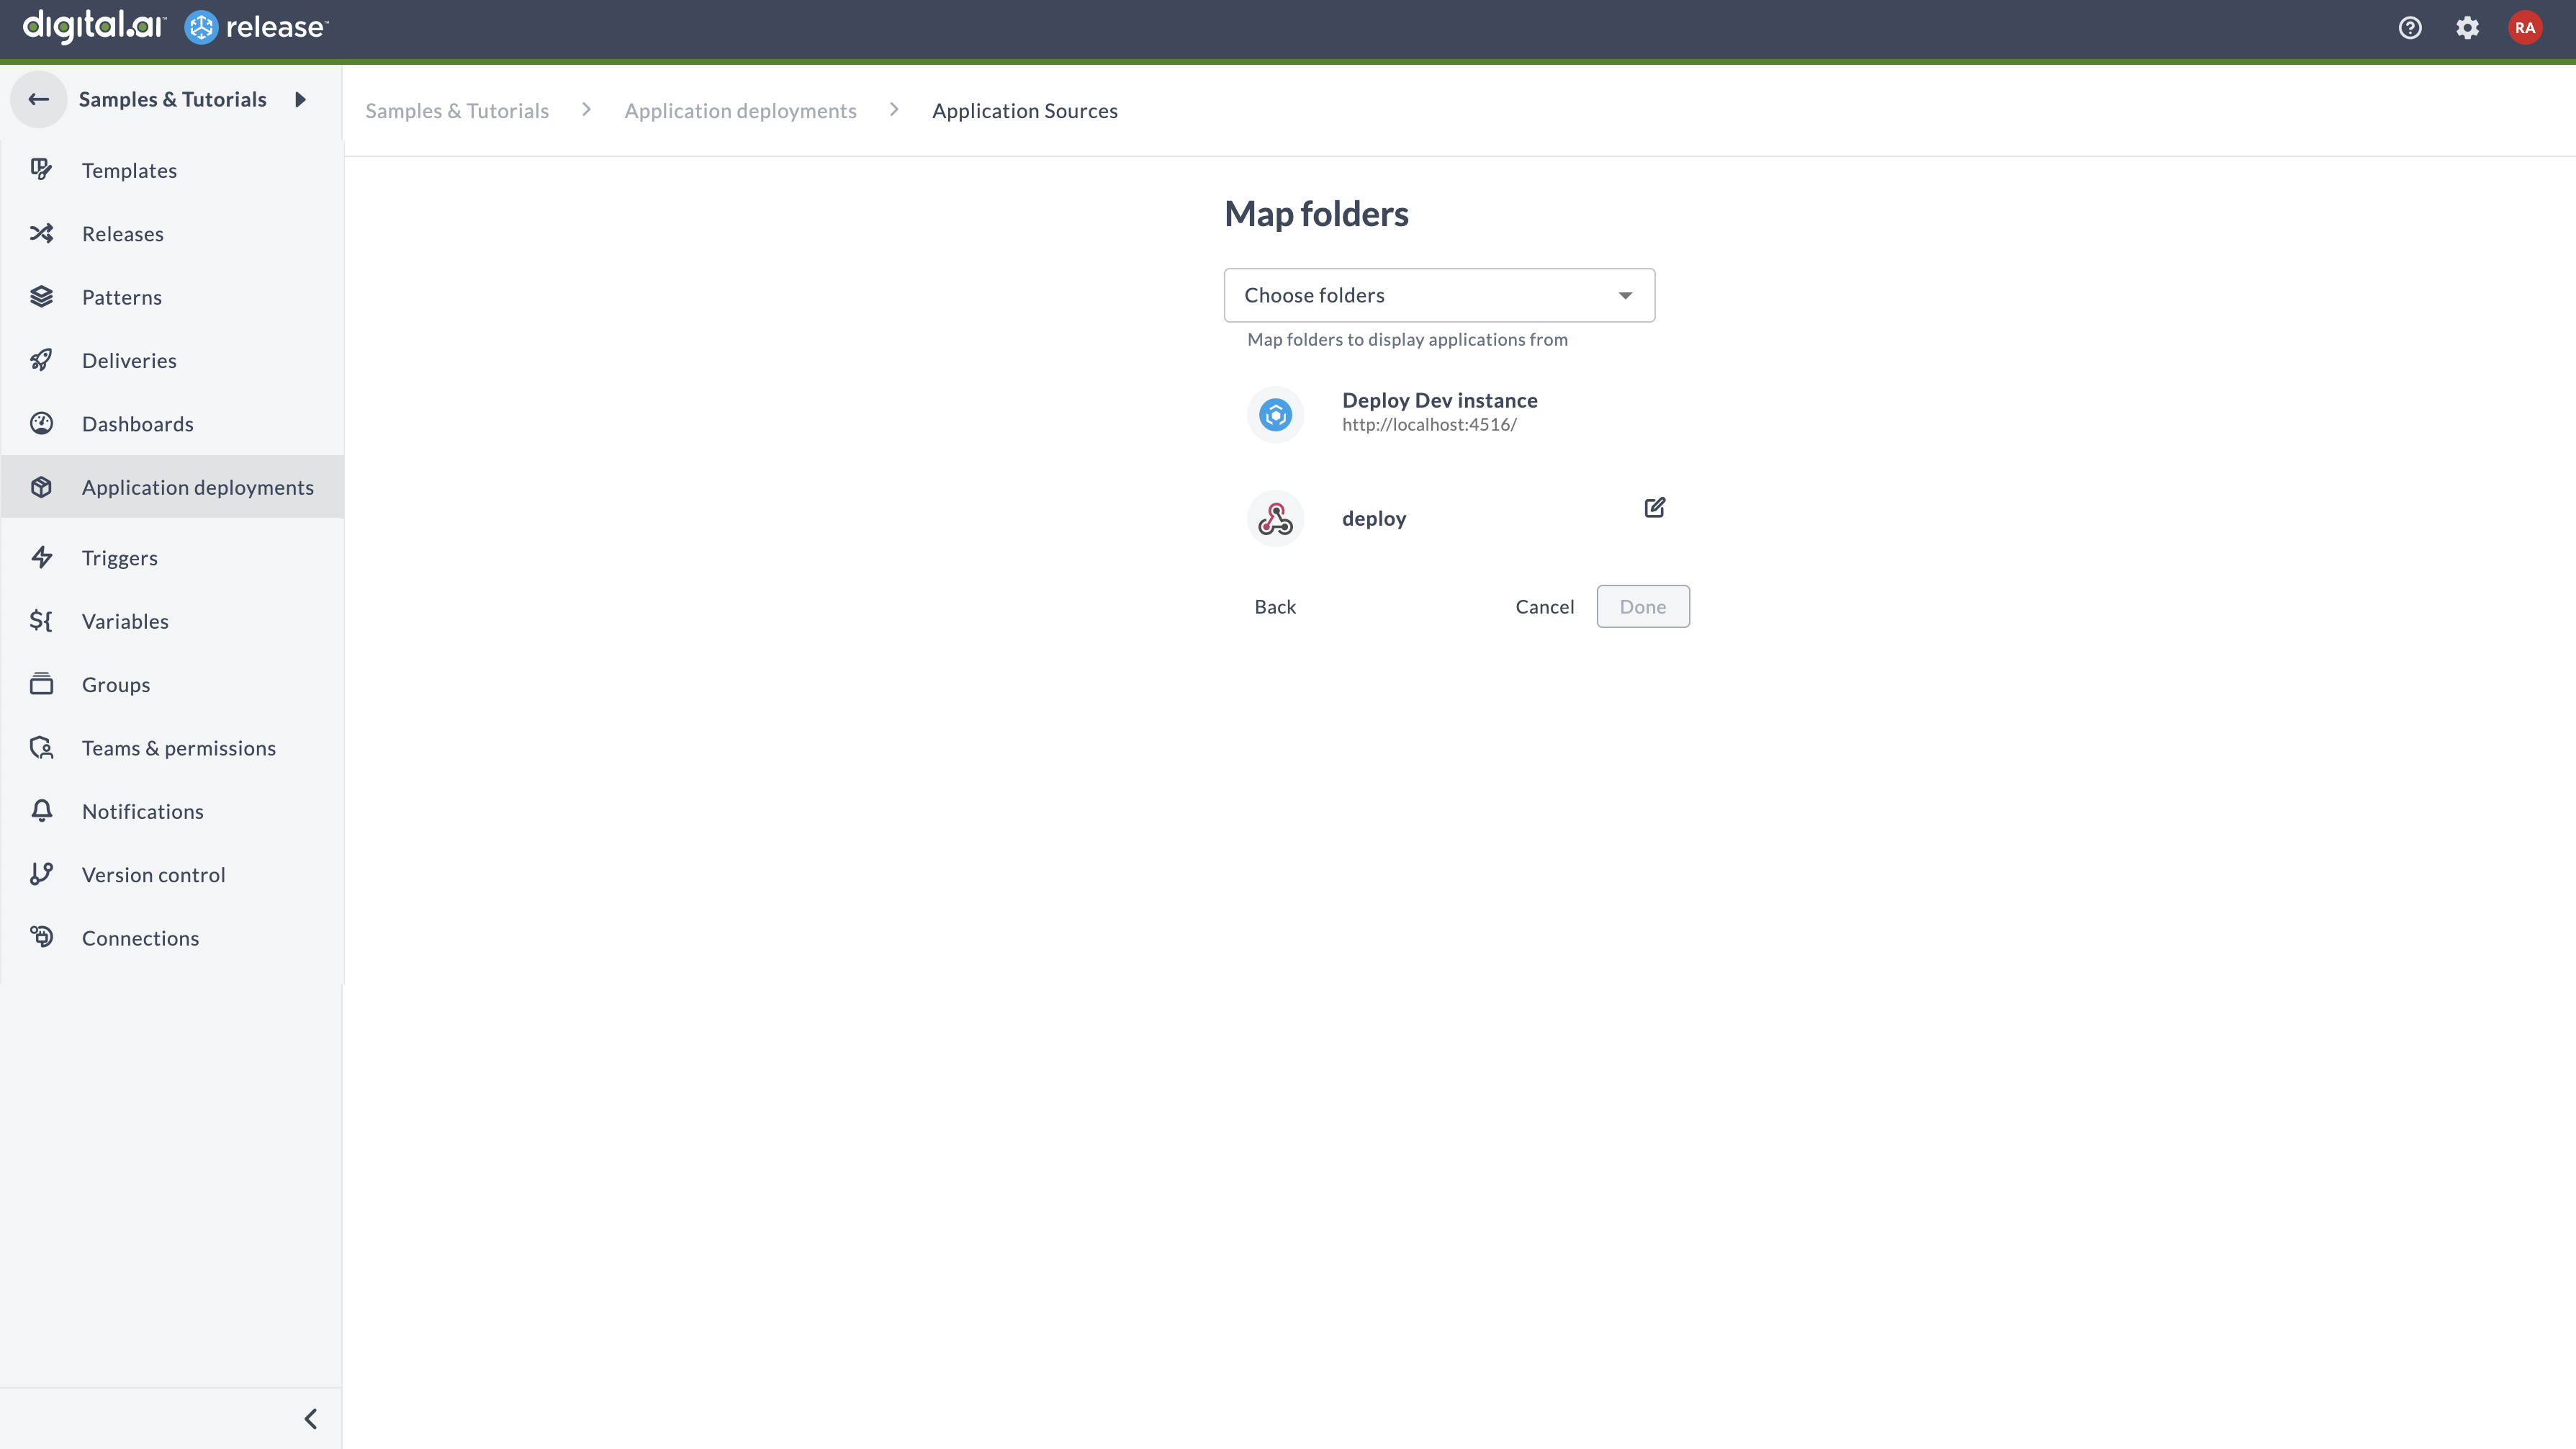
Edit Application Source
Click the edit button to open the edit screen. It opens a screen similar to the Quick wizard.
Here, you can:
-
Filter applications by the Argo CD project for the Argo CD Webhook
-
Filter applications by the folders for the Deploy Webhook
-
Edit webhook endpoint
Delete Application Source
- Click the delete button to view the Delete application source dialog box.
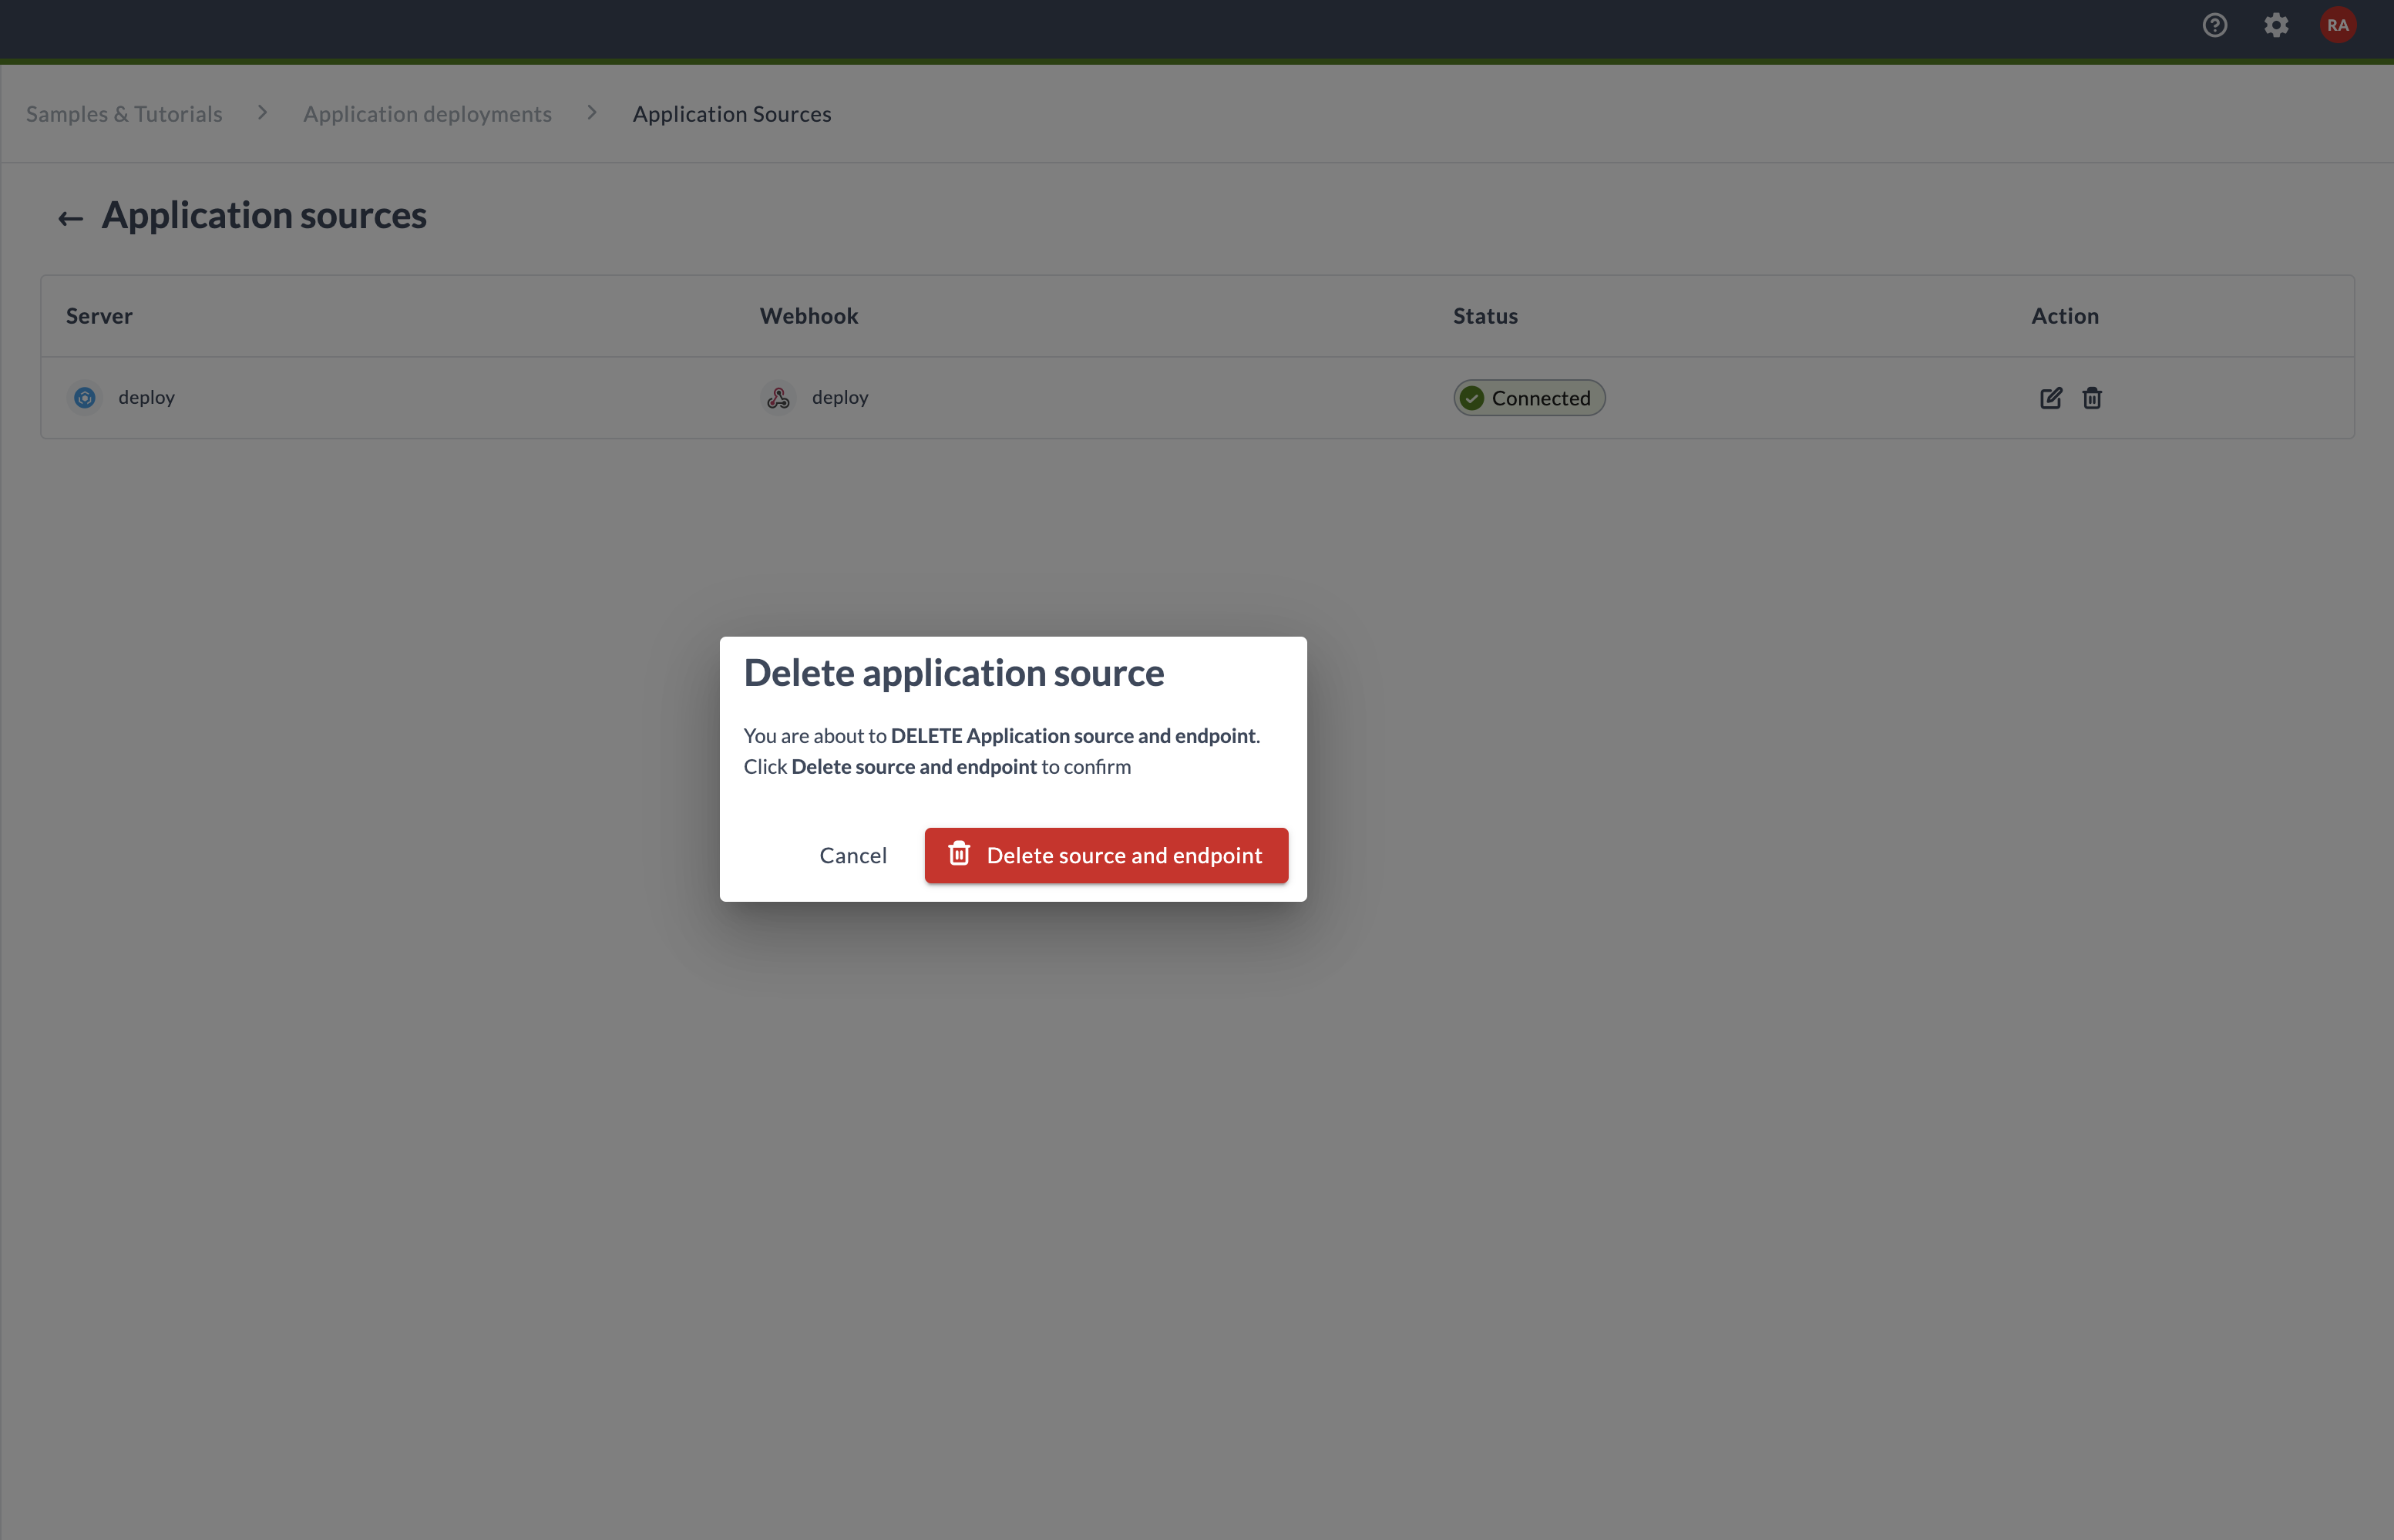
- Click Delete source and endpoint to delete the corresponding application source and HTTP endpoint.
- Click Cancel to cancel the deletion.
Disable the Applications Dashboard
- Log in to Digital.ai Release.
- Click Settings > System settings. The System settings screen appears.
- In the left-navigation bar, click Feature flags.
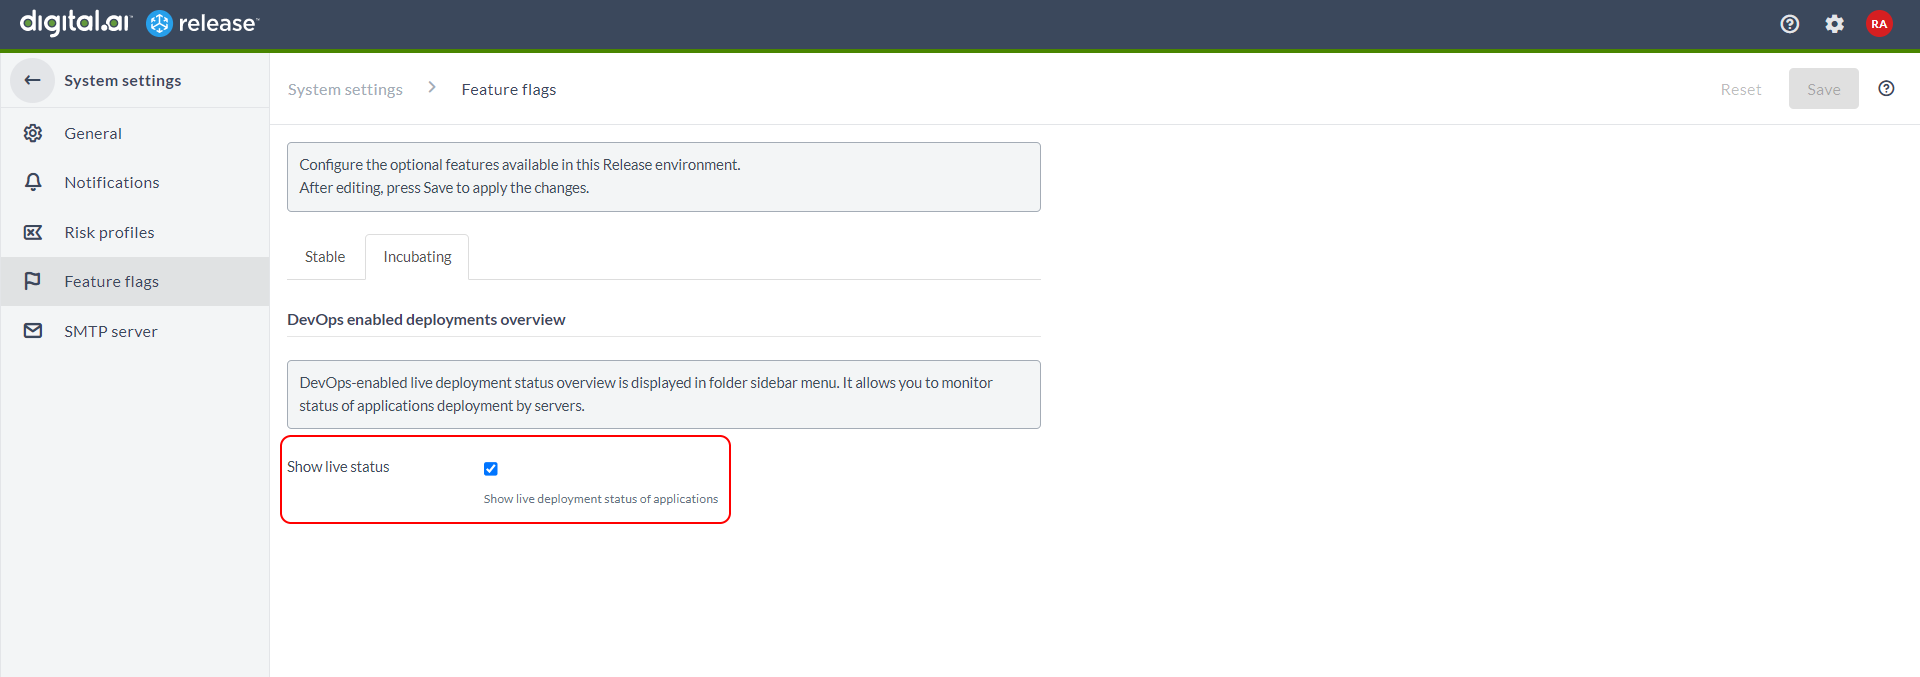
- Select the Stable tab.
- In the DevOps enabled deployments overview section, clear the Show live status checkbox. This disables the Application deployments dashboard.
- Click Save.