Jenkins Plugin
You can configure the Release plugin for Jenkins at the global and job levels.
This topic describes using a CI tool plugin to interact with Release. However, as a preferred alternative starting with version 9.0, you can utilize a wrapper script to bootstrap XL CLI commands on your Unix or Windows-based Continuous Integration (CI) servers without having to install the XL CLI executable itself. The script is stored with your project YAML files and you can execute XL CLI commands from within your CI tool scripts. For details, see the following topics:
Global Jenkins configuration
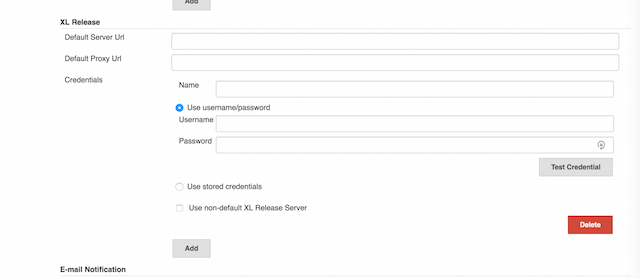
Manage the global Jenkins configuration by navigating to Manage Jenkins > Configure System. You can specify the Release server URL and one or more sets of credentials. Different credentials can be used for different jobs.

CSRF Protection
From the Jenkins Documentation: "A cross site request forgery (or CSRF/XSRF) is an exploit that enables an unauthorized third party to perform requests against a web application by impersonating another, authenticated, user. In the context of a Jenkins environment, a CSRF attack could allow an malicious actor to delete projects, alter builds, or modify Jenkins' system configuration. To guard against this class of vulnerabilities, CSRF protection has been enabled by default with all Jenkins versions since 2.0."
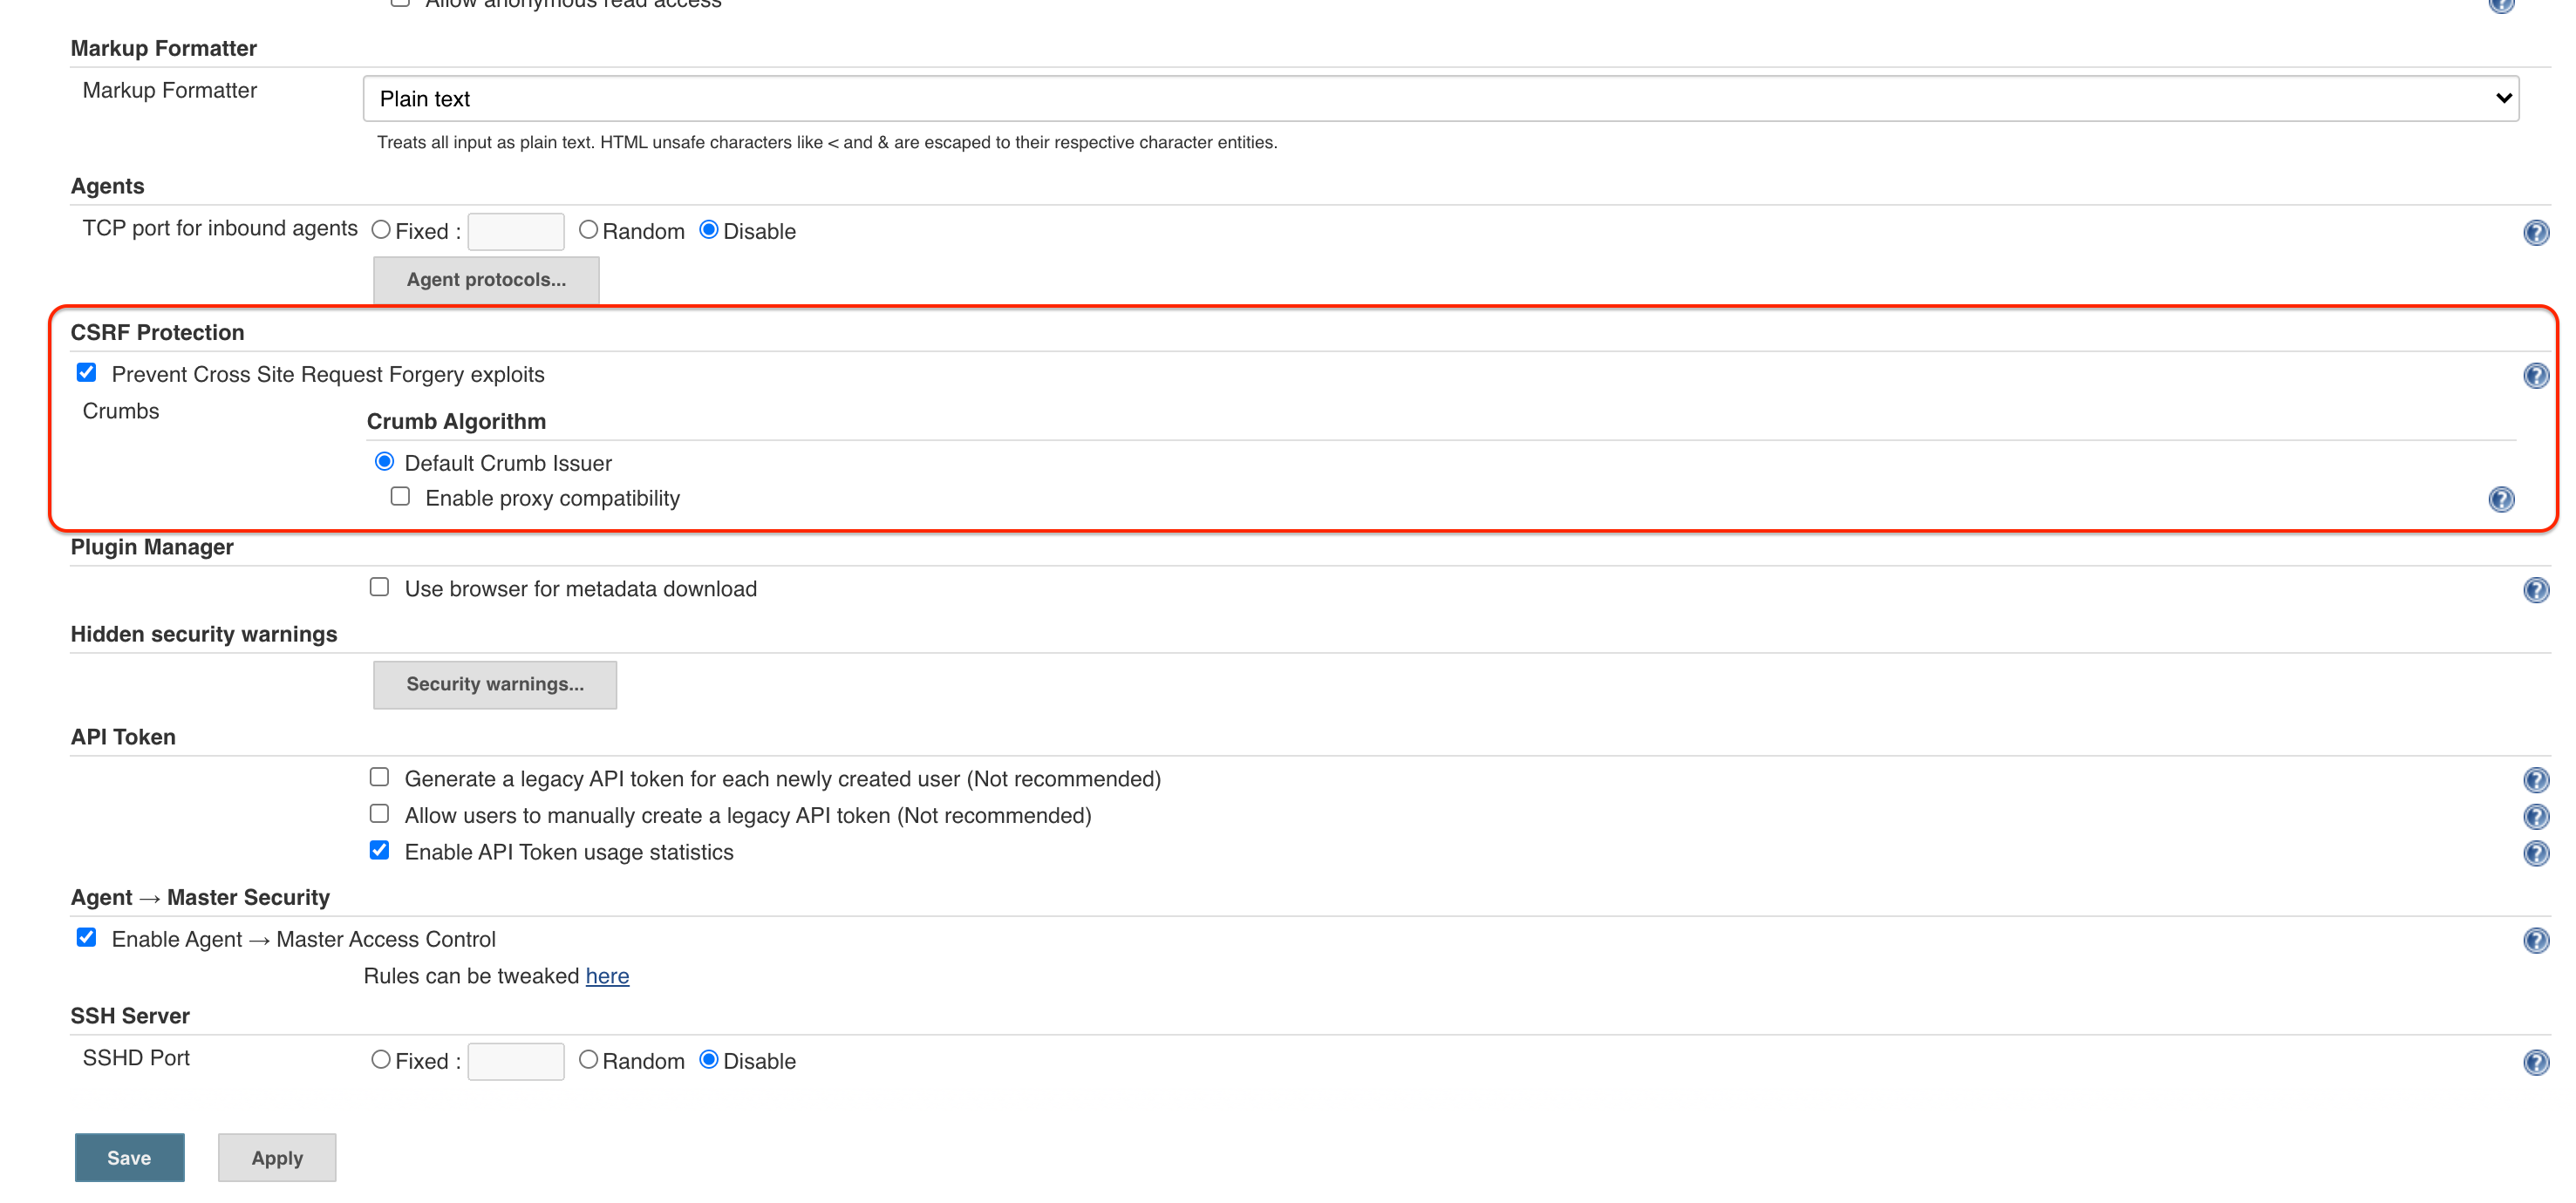
Manage CSRF protections by navigating to Manage Jenkins > Configure System. Enable the "Prevent Cross Site Request Forgery exploits" and "Default Crumb Issuer".

This will enforce API token authentication in the XLR Jenkins Connections settings.

Note: Before Jenkins version 2.176.2 it was possible disable CSRF directly by Configure Global Security. Now to avoid secure issues since 2.176.2 that option it was removed. You can find more information on this topic here under Cross Site Request Forgery.
Job configuration
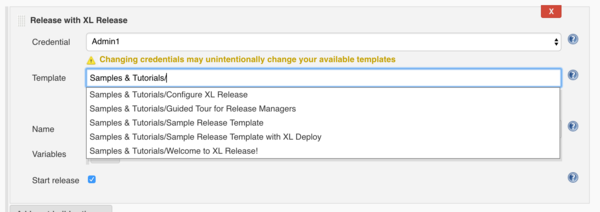
In the job configuration page, select Post-build Actions > Add post-build action > Release with Release. Enter the template name in the box and select a value from the drop-down list.
You can type / in front of a folder name to see the subfolders and template names in the specified folder.

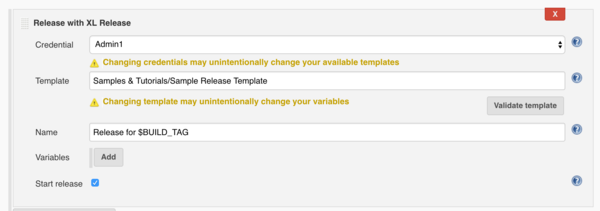
After you select the template, click Validate template.

To get information about each setting, click ? located next to the setting.
Using the Jenkinsfile
You can use the Jenkins Pipeline feature with the Release plugin for Jenkins. This feature allows you to create a "pipeline as code" in a Jenkinsfile, using the Pipeline DSL. You can then store the Jenkinsfile in a source control repository.
For more information about the Jenkins task in Release, see Create a Jenkins task.
Create a Jenkinsfile
To start using Jenkinsfile, create a pipeline job and add the Jenkinsfile content to the Pipeline section of the job configuration.
Additional resources:
- For a detailed procedure on how to use the Jenkins Pipeline feature with the Release plugin for Jenkins, see the XebiaLabs Release Plugin.
- For information about the Jenkinsfile syntax, see the Jenkins Pipeline documentation.
- For information about the items you can use in the Jenkinsfile, click Check Pipeline Syntax on the job.
- For information about how to add steps to Jenkinsfile, see the Jenkins Plugin Steps documentation.
Jenkinsfile example
The following Jenkinsfile can be used to build a pipeline and deploy a simple web application to a Tomcat environment configured in Release.
node {
stage('Package') {
  xldCreatePackage artifactsPath: 'build/libs', manifestPath: 'deployit-manifest.xml', darPath: '$JOB_NAME-$BUILD_NUMBER.0.dar'
}
stage('Publish') {
  xldPublishPackage serverCredentials: '<user_name>', darPath: '$JOB_NAME-$BUILD_NUMBER.0.dar'
}
stage('Deploy') {
  xldDeploy serverCredentials: '<user_name>', environmentId: 'Environments/Dev', packageId: 'Applications/<app_name>/$BUILD_NUMBER.0'
}
stage('Start XLR Release') {
      xlrCreateRelease serverCredentials: '<user_name>', template: 'Release <app_name>', releaseTitle: 'Release for $BUILD_TAG', variables: [[propertyName: 'version', propertyValue: '$BUILD_NUMBER.0']], startRelease: true
product:
- release
}
    }