OpsGenie Plugin
The Release OpsGenie plugin enables you to use Release with OpsGenie to generate alerts with all the supporting information to the responsible teams and people from within the release pipeline.
Features of the OpsGenie integration
- In a typical release process, teams are informed of task failures and for application server issues.
- With the Release OpsGenie plugin, alerts with all the supporting information are delivered to the teams involved in the release process. This means that users can assess the issues and take appropriate actions rapidly.
- The Release OpsGenie plugin can be used to specify the create, snooze, and close alerts tasks in the release pipeline. You can also create a task in Release to execute any custom action on the alerts.
- The plugin provides the functionality to disable or enable integrations in OpsGenie for the deployment downtime. For example, if you do not want the Nagios application monitoring tool to generate alerts in OpsGenie at the time of application deployment, create a task to disable Nagios integration before the deployment. You can enable the integration after the deployment is completed.
List of actions
- Create, snooze, and close alerts in OpsGenie.
- Execute custom actions on alerts in OpsGenie.
- Disable or enable integrations in OpsGenie.
To download a sample OpsGenie Release plugin, click here.
Requirements
- A valid OpsGenie subscription and a user with admin rights.
- Release.
- The Release OpsGenie plugin
Setup
-
Download the latest version of the Release OpsGenie plugin.
-
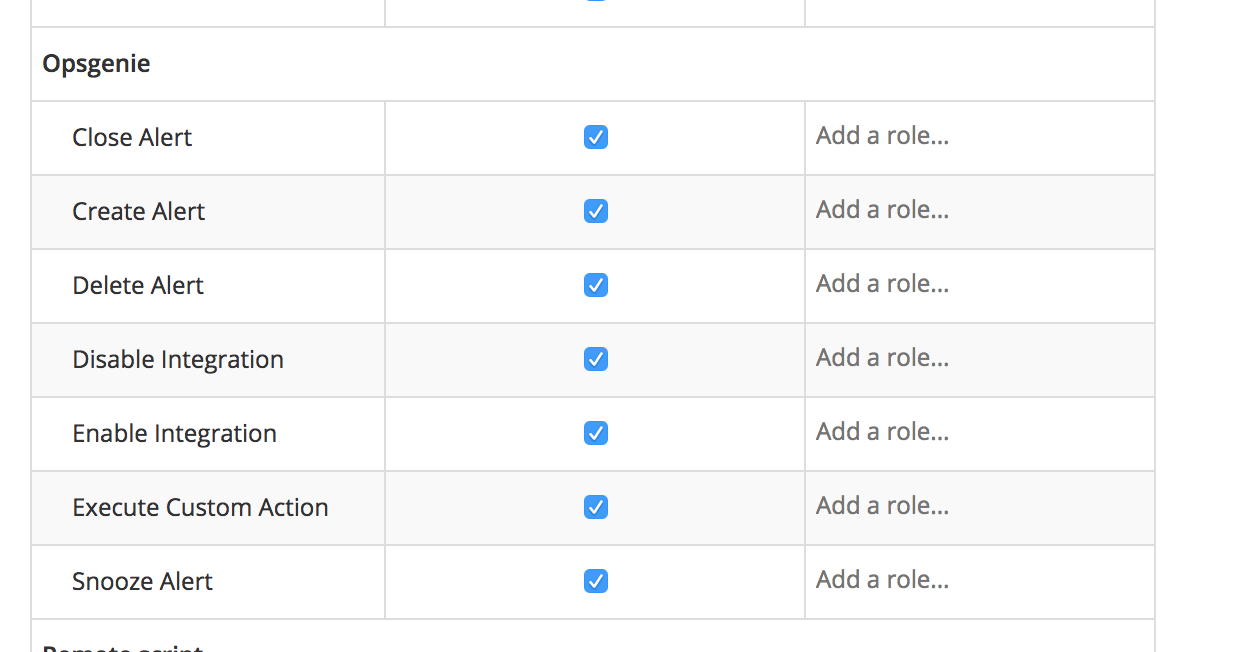
Start the Release server. You will see the following new task types.
Specify OpsGenie API key
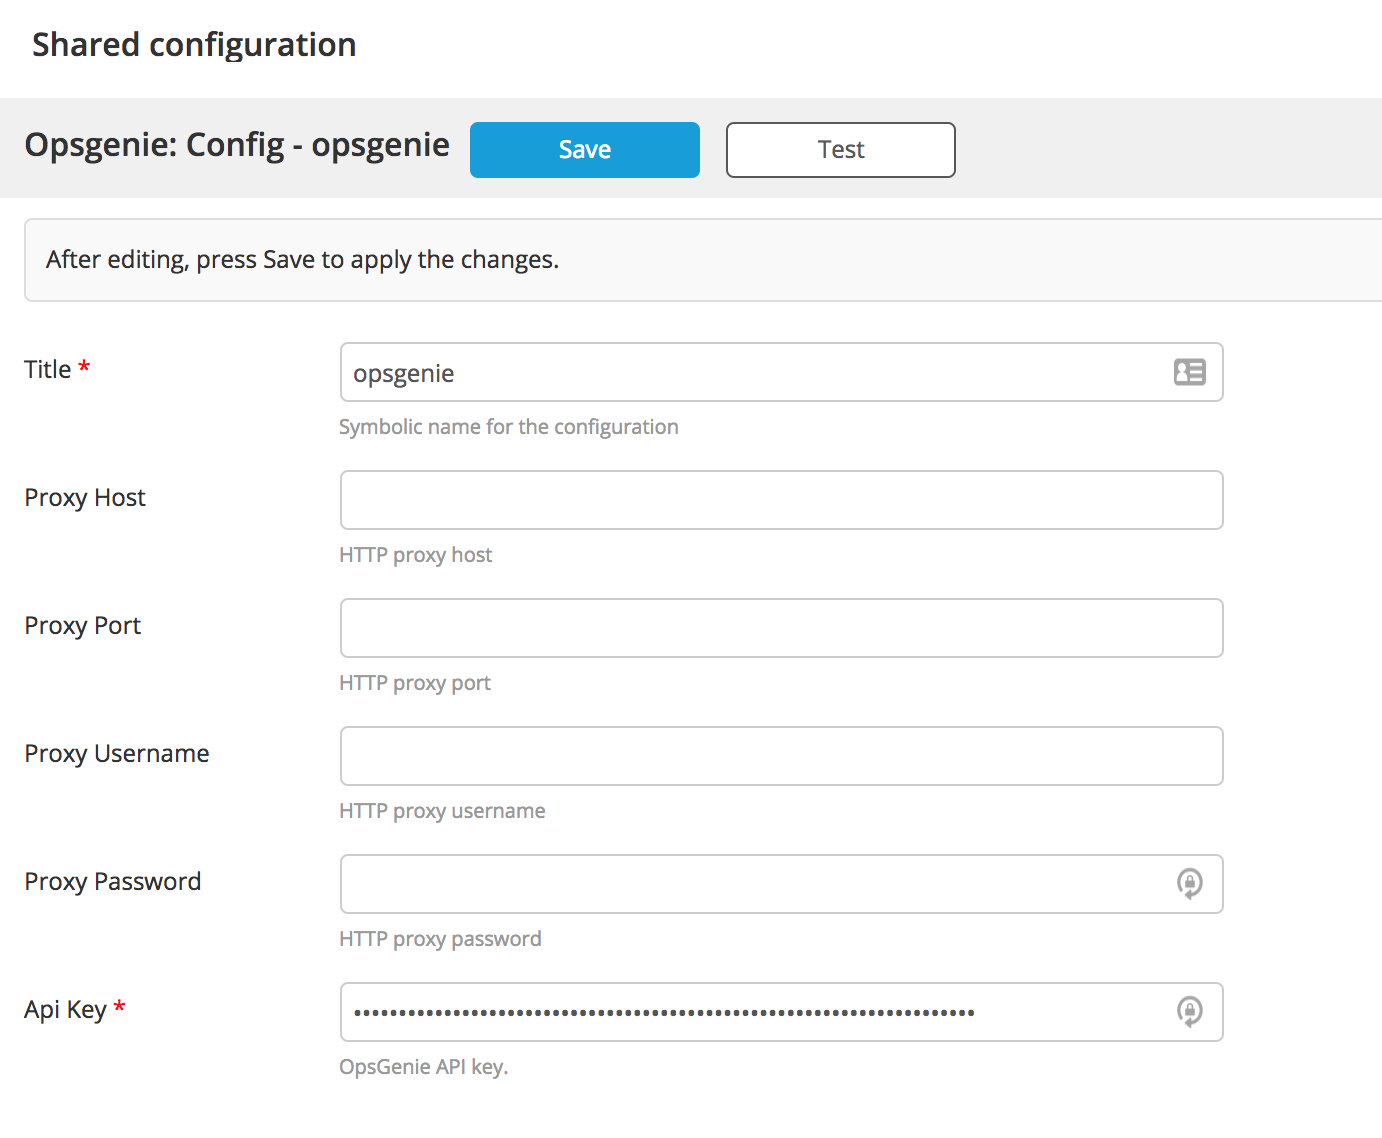
- Specify the OpsGenie API key to make API calls to OpsGenie.
- Specify proxy settings if applicable.
- Create multiple configurations if the API keys are limited to specific teams.
Steps to generate API key in OpsGenie
- Log in to OpsGenie as an admin user.
- Go to integrations and search for XebiaLabs Release integration in the list.
- Create Release integration and copy the generated API key.
In Release, from the navigation pane, go to Configuration> Connections.
- Add a new OpsGenie config and provide a title.
- In the API Key property, copy the API key from the OpsGenie integration.
Create an alert
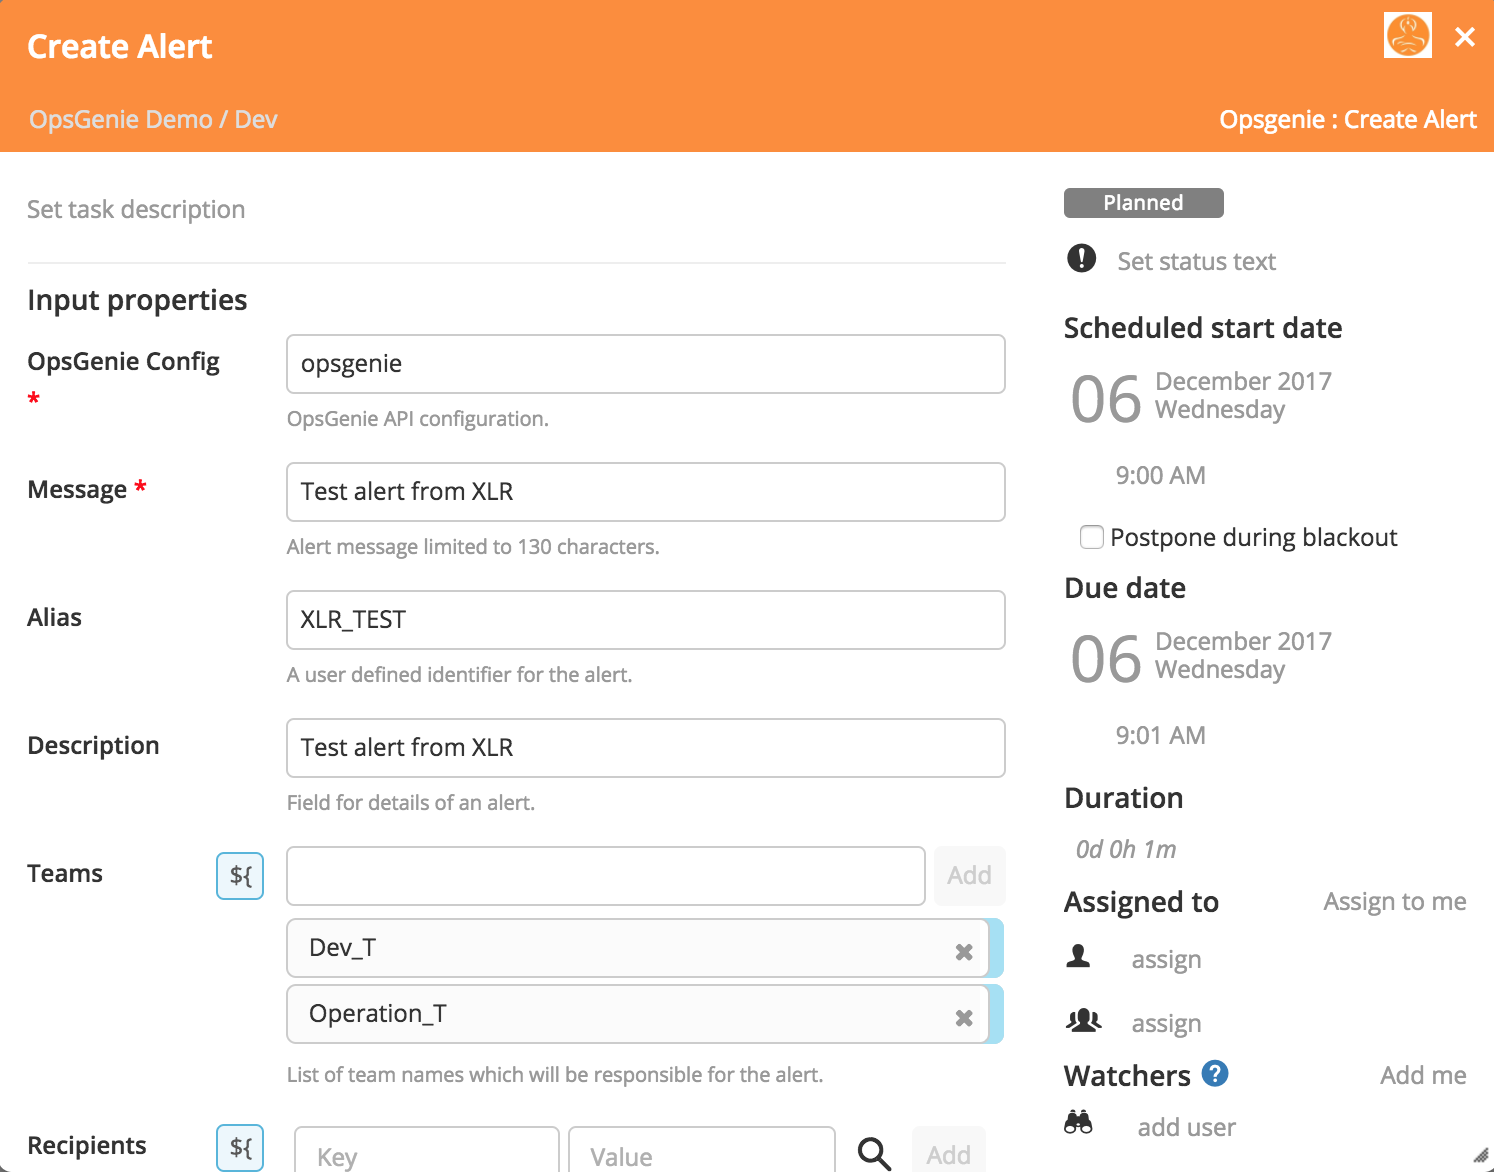
The OpsGenie: Create Alert task creates an alert in OpsGenie by specifying the alert message, recipient teams, priority, and other information.
Usage: When the deployment task fails in the release pipeline, create an alert in OpsGenie for the release team.
Task Properties
- OpsGenie Config: Select the OpsGenie config created in Connections.
- Message: The message of the alert.
- Alias: The user defined identifier of the alert.
- Description: The description field of the alert that is used to provide a detailed information about the alert.
- Teams: The teams where the alert will be routed to send notifications. If the API Key belongs to a team integration, this field will be overwritten with the owner team. Either the ID or the name of each team should be provided.
- Recipients: User, group, schedule, or escalation names define which users will receive the notifications of the alert. If the recipients field is used when an alert is getting created, the recipients field supersedes the team's assignment. The key is the ID or the name, the value is type of recipient (example: 'user' or 'team').
- Actions: Custom actions that will be available for the alert.
- Tags: The tags of the alert.
- Entity: The entity field of the alert that is used to specify which domain the alert is related to.
- Priority: Priority level of the alert. Possible values are P1, P2, P3, P4, and P5. The default value is P3.
- User: Displays the name of the request owner.
- Note: Additional note that will be added while creating the alert.
Snooze an alert
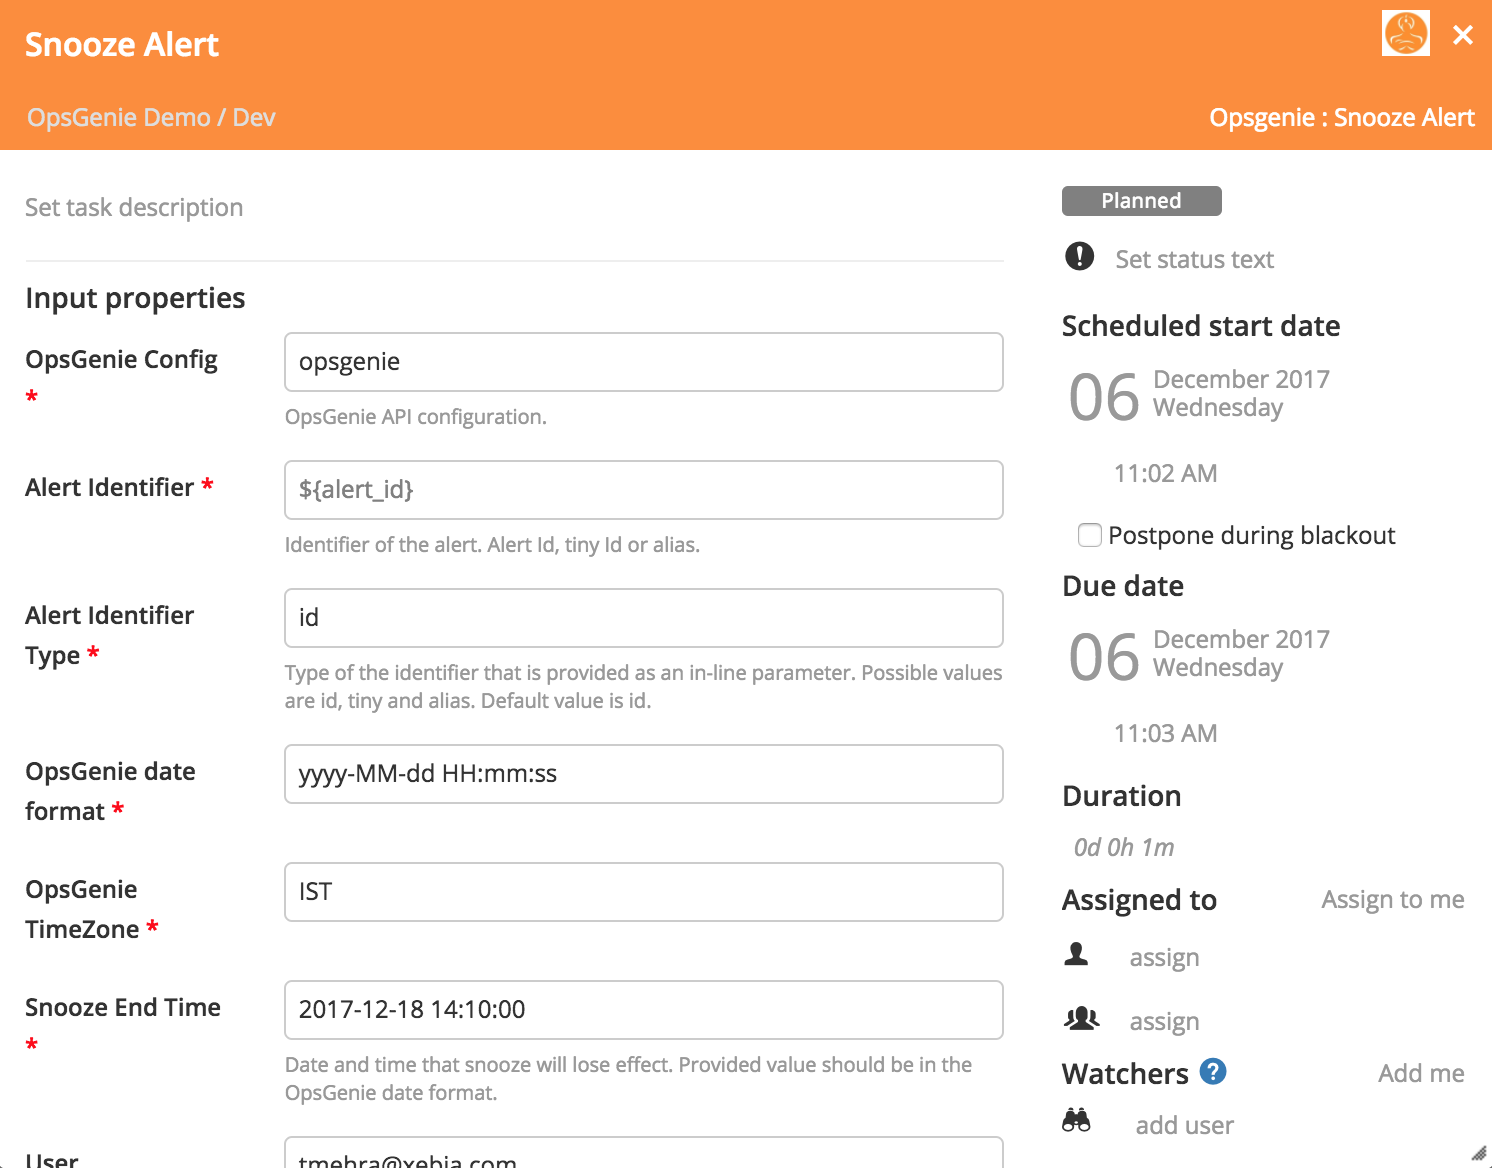
The OpsGenie: Snooze Alert task is used to snooze an alert in OpsGenie by specifying the time zone and snooze end time in the task.
Usage: When an alert is triggered but a release is not yet finished, you can snooze the alert a period of time.
Task Properties
- OpsGenie Config: Select the OpsGenie config created in Connections.
- Alert Identifier: The identifier of the alert. The input can be the alert ID, tiny ID, or the alias.
- Alert Identifier Type: The type of the identifier that is provided as an in-line parameter. Possible values are ID, tiny, and alias. The default value is ID.
- OpsGenie date format: The date format for the snooze end date. The default is
yyyy-MM-dd HH:mm:ss. - OpsGenie TimeZone: The OpsGenie Time Zone for snooze end date. The default is GMT.
- Snooze End Time: The date and time when snooze will lose effect. The provided value should be in the OpsGenie date format.
- Snooze Time in minutes: Alert will be snoozed for a specified number of minutes. This property supersedes the End time property, if both are specified.
Execute Custom Action on alert
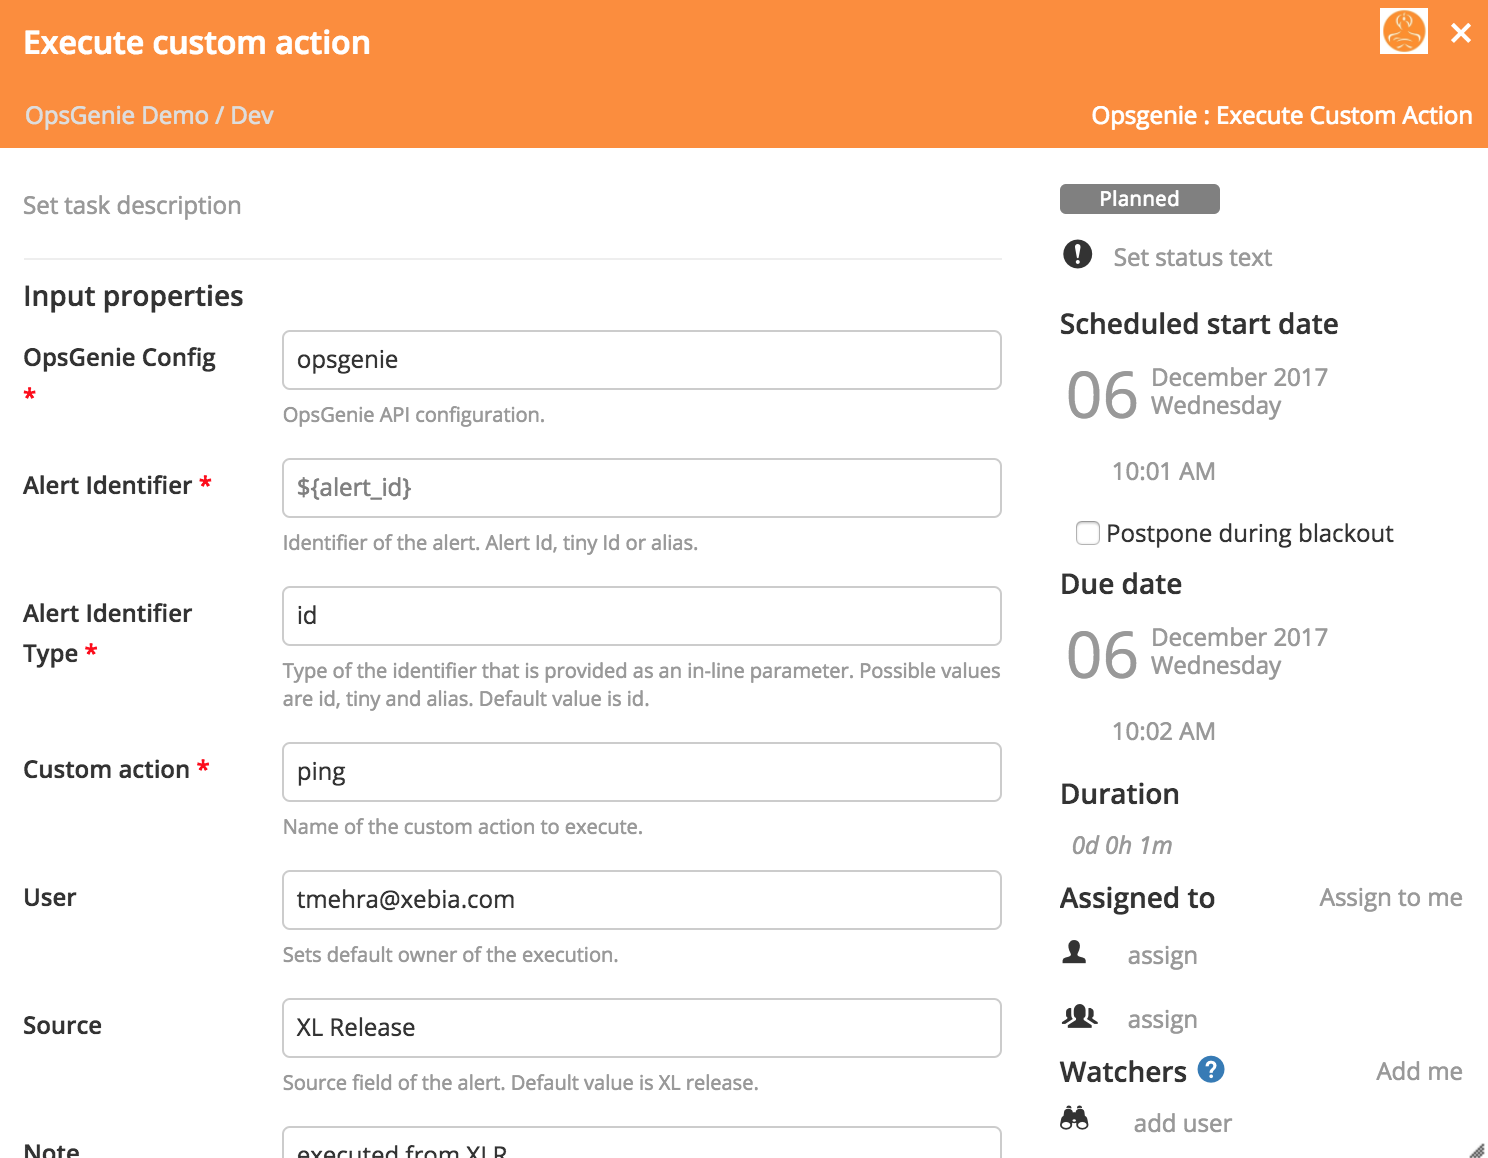
The OpsGenie: Custom Action Alert task executes a custom action on alert by specifying the alert ID or alias and the action name in the task.
Usage: When you want to execute a custom script from an alert action to retry a deployment in Deploy.
Task Properties
- OpsGenie Config: Select the OpsGenie config created in Connections.
- Alert Identifier: Identifier of the alert. Takes alert Id, tiny Id or alias as input.
- Alert Identifier Type: Type of the identifier that is provided as an in-line parameter. Possible values are id, tiny and alias. Default value is id.
- Custom action: Name of the custom action to execute.
Close an alert
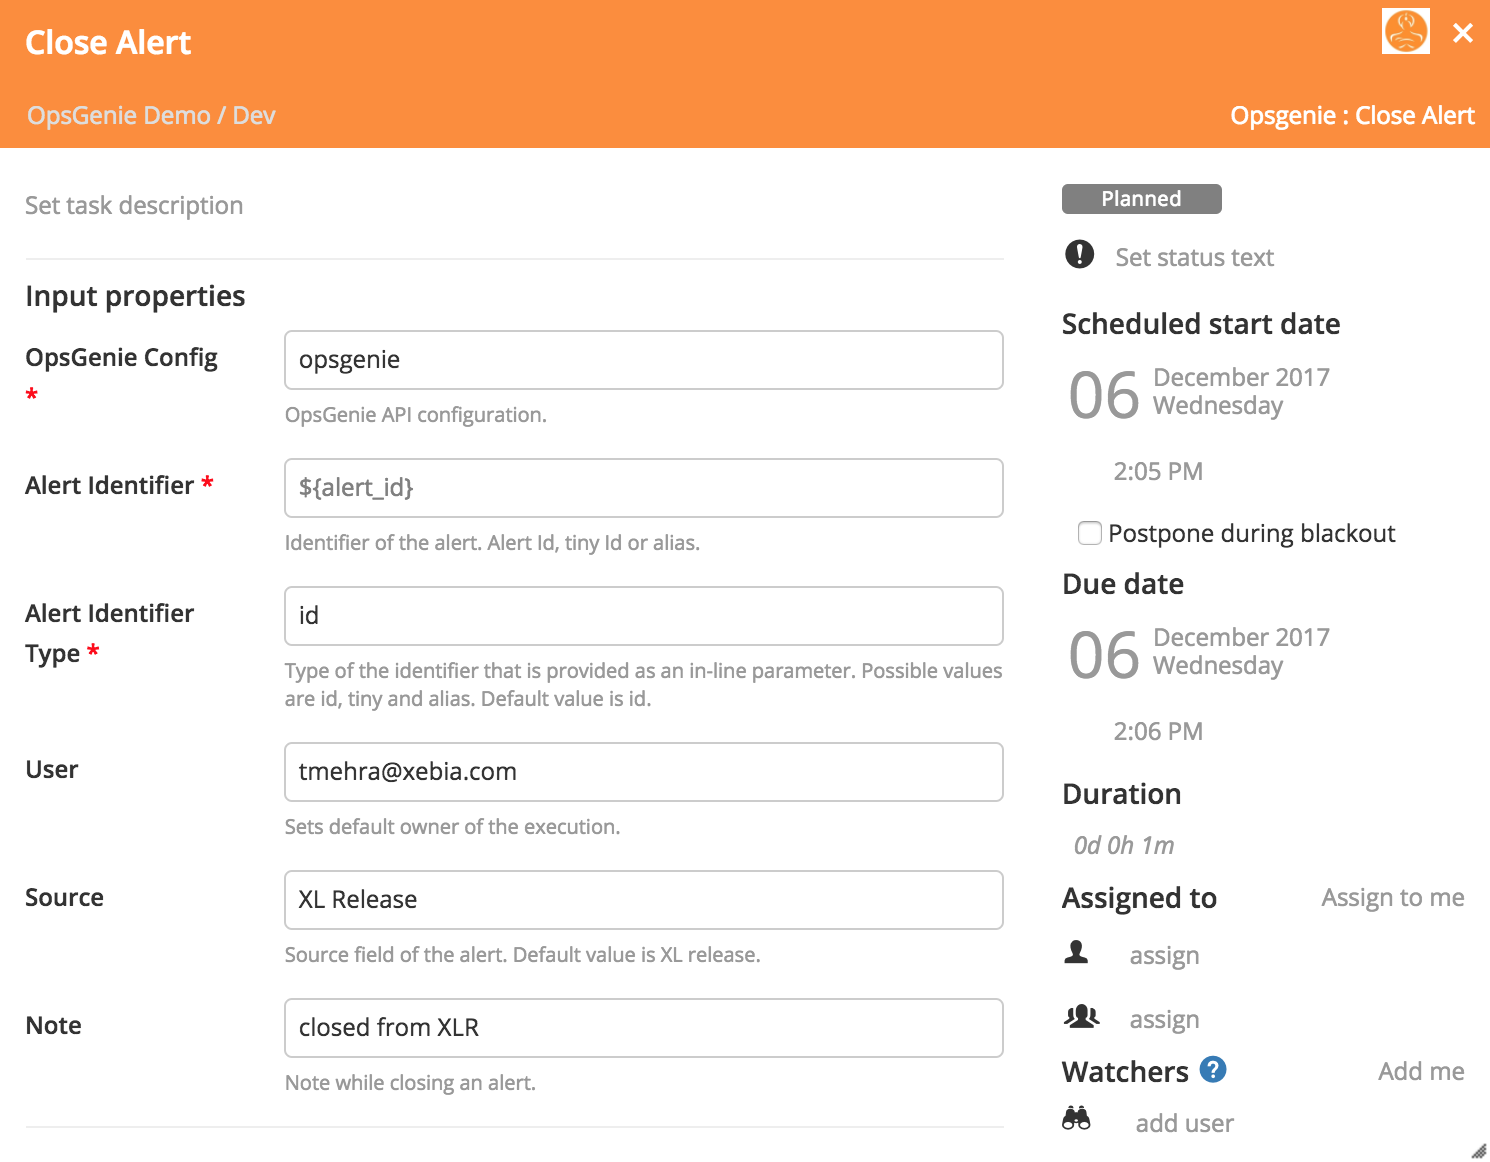
The OpsGenie: Close Alert task closes an alert in OpsGenie by specifying the alert ID or alias of an alert in the task.
Usage: When the deployment is successfully completed and you want to close the generated alert.
Task Properties
- OpsGenie Config: Select the OpsGenie config created in Connections.
- Alert Identifier: The identifier of the alert. The input can be the alert ID, tiny ID, or the alias.
- Alert Identifier Type: The type of the identifier that is provided as an in-line parameter. Possible values are ID, tiny, and alias. The default value is ID.
Delete an alert
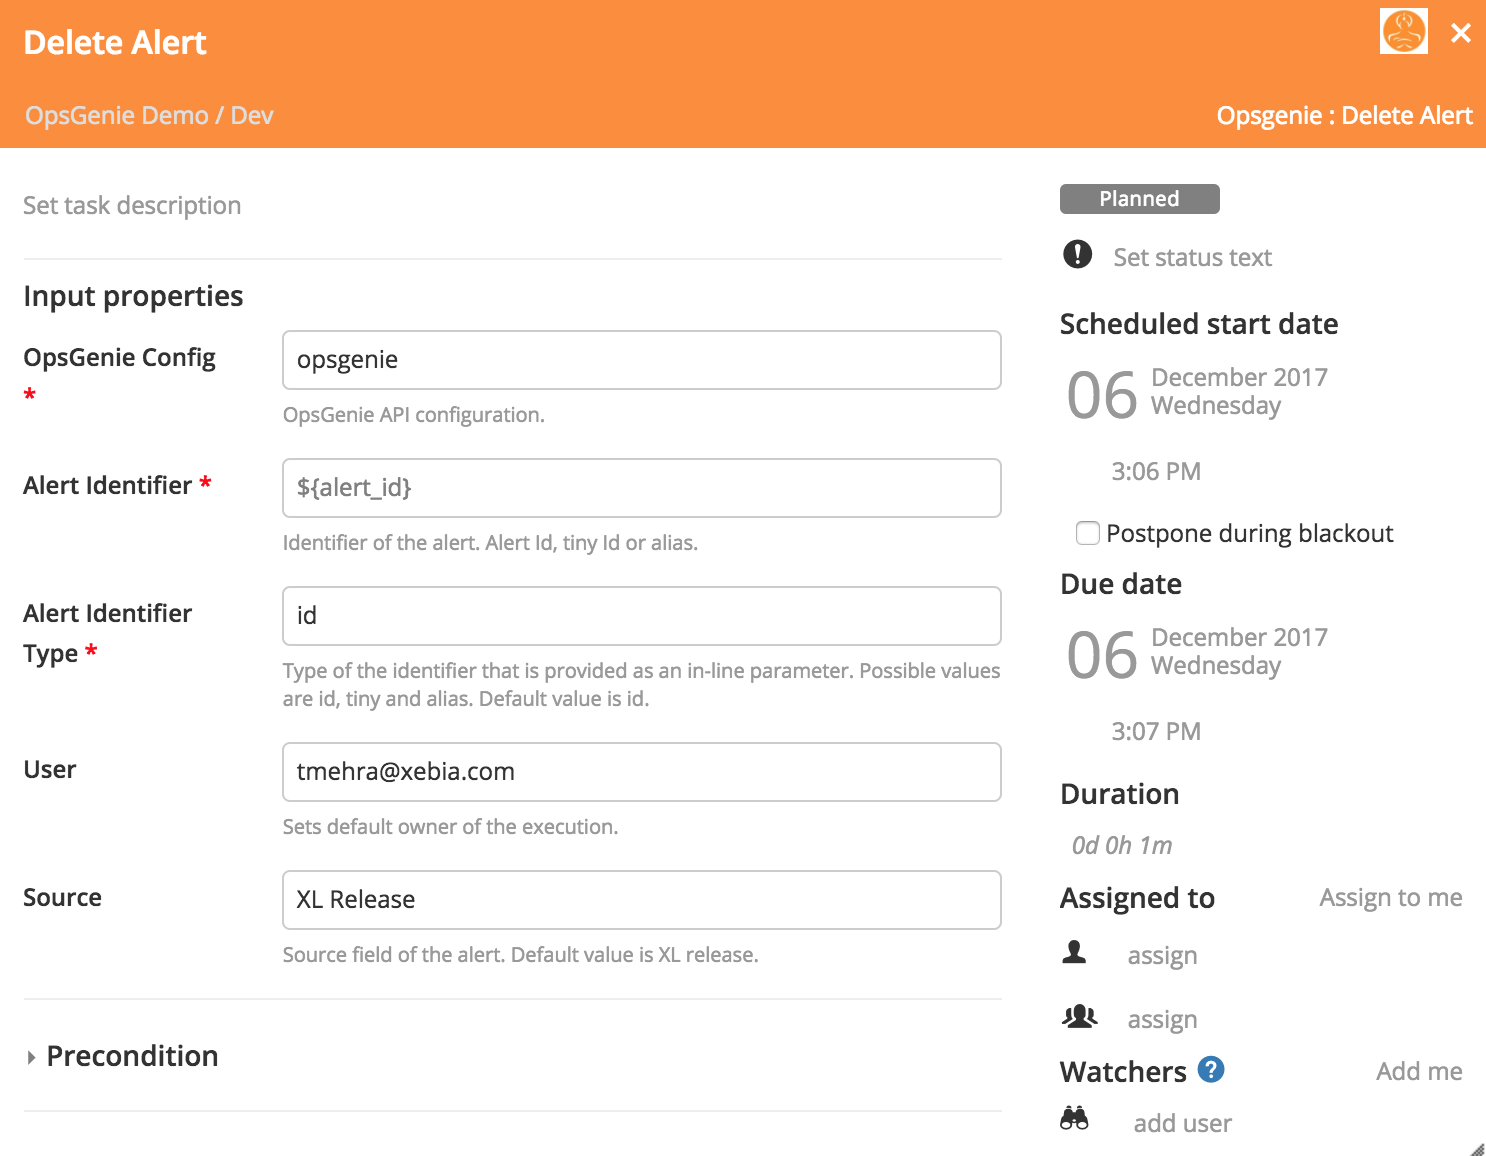
The OpsGenie: Delete Alert task is used to delete an alert in OpsGenie by specifying the alert ID or alias of an alert in the task.
Usage: When the generated alerts are no longer required to exist in OpsGenie, use the delete task to remove the alerts.
Task Properties
- OpsGenie Config: Select the OpsGenie config created in Connections.
- Alert Identifier: The identifier of the alert. The input can be the alert ID, tiny ID, or the alias.
- Alert Identifier Type: The type of the identifier that is provided as an in-line parameter. Possible values are ID, tiny, and alias. The default value is ID.
Enable Integration in OpsGenie
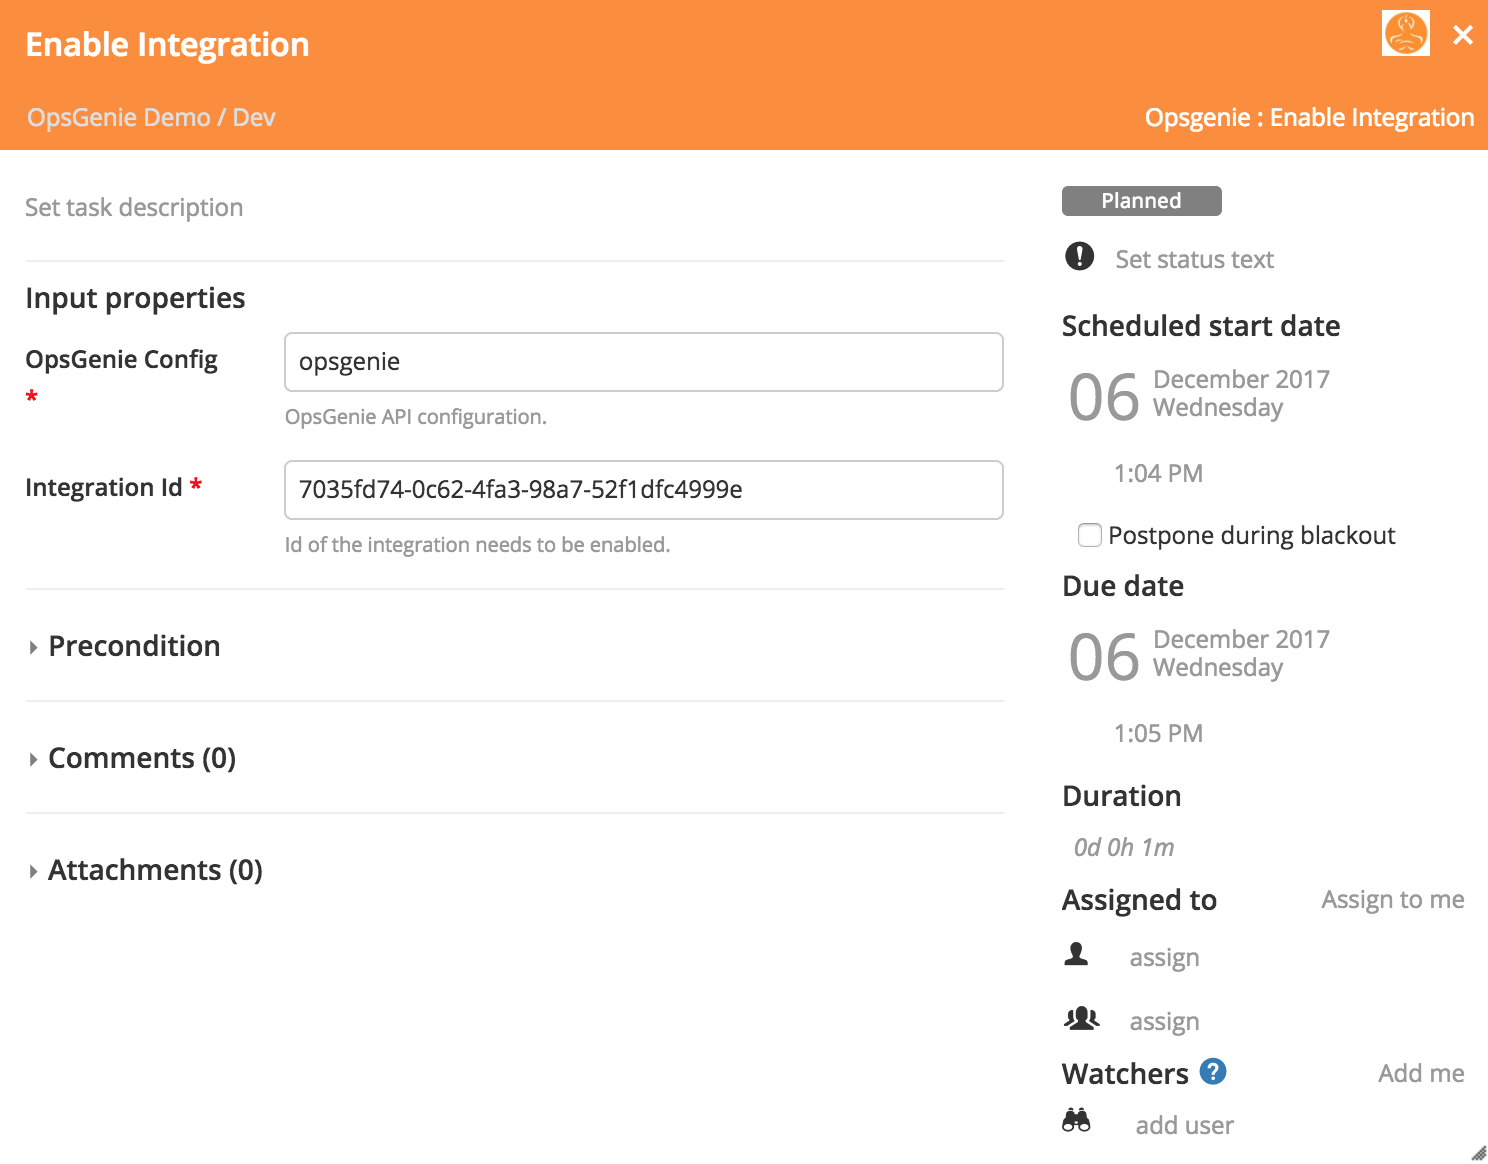
The OpsGenie: Enable Integration task enables an integration in OpsGenie by specifying the integration ID in the task.
Usage: After the successful deployment, you can re-enable the integrations in OpsGenie.
Task Properties
- OpsGenie Config: Select the OpsGenie config created in Connections.
- Integration ID: The ID of the integration needs to be enabled.
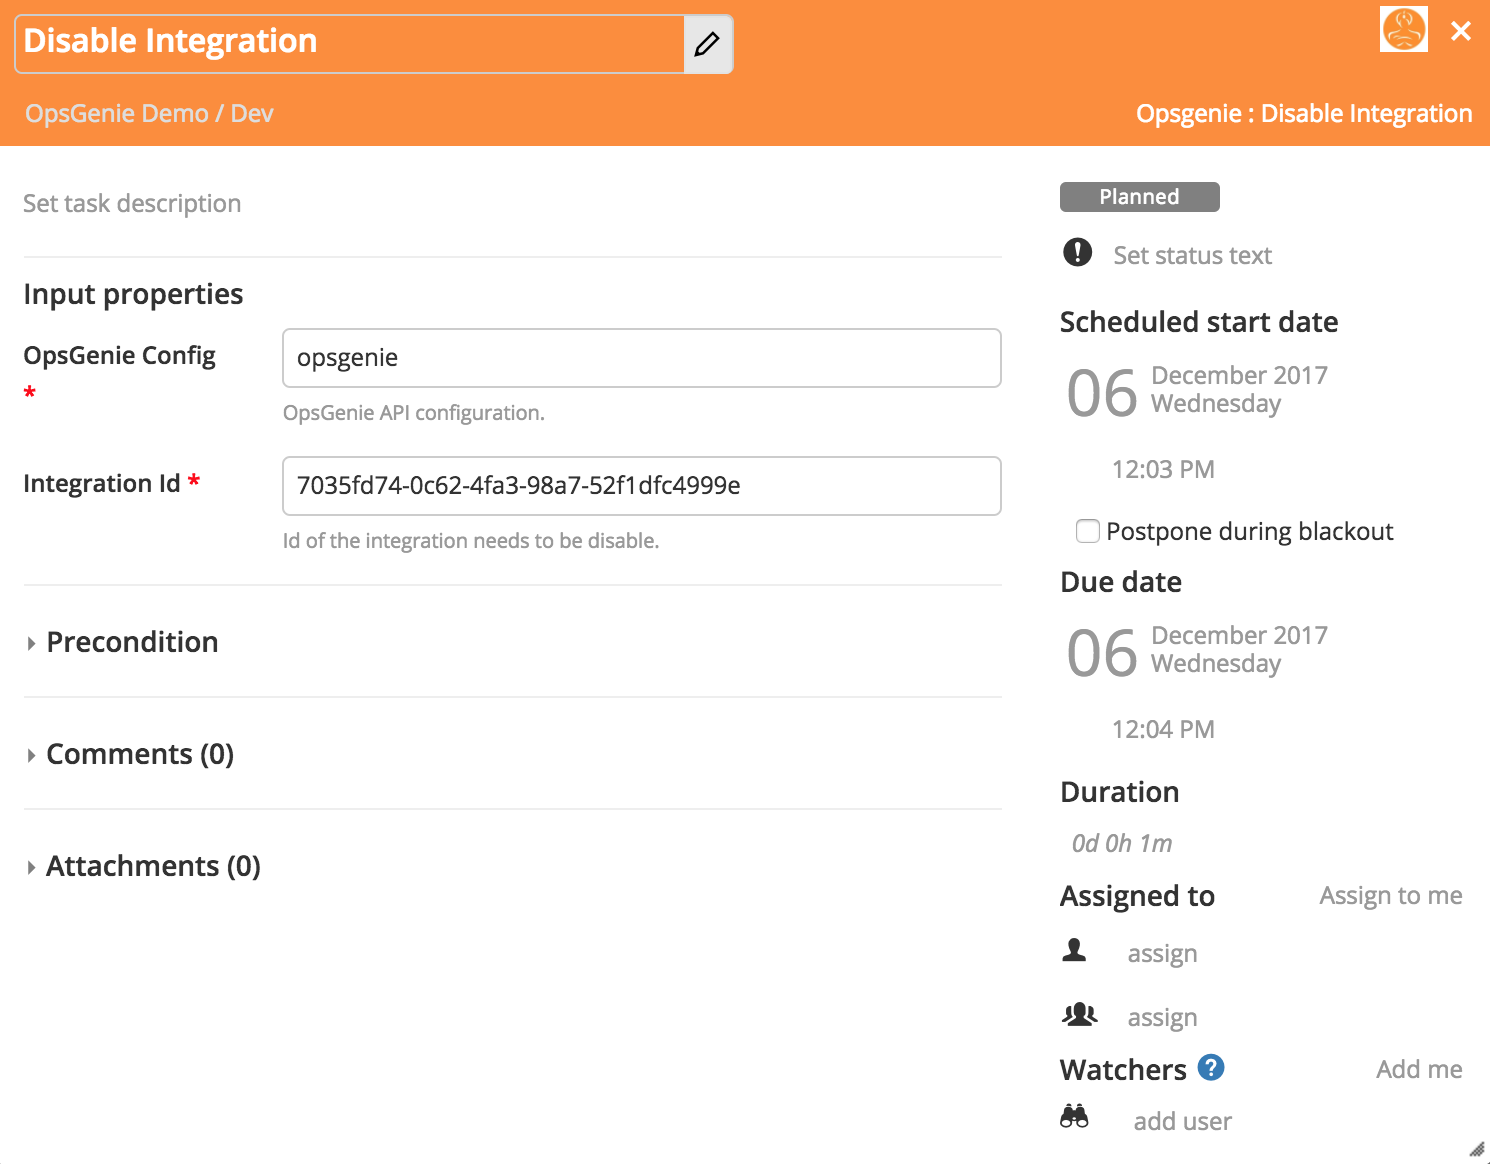
Disable Integration in OpsGenie
The OpsGenie: Disable Integration task is used to disable an integration in OpsGenie by specifying the integration ID the task.
Usage: Before starting the release, you can disable integrations which may generate alerts when the servers are down such as the Nagios monitoring tools.
Task Properties
- OpsGenie Config: Select the OpsGenie config created in Connections.
- Integration ID: The ID of the integration that needs to be enabled.
