Add a deployment plan step using the Command plugin
This topic describes how to handle a simple case by executing a remote shell command on a server.
For a deployment, Deploy calculates the step list based on your model. If you want to add an extra step, there are several ways to do so.
In this example we will show how to add a step to log the disk usage using the df command. We will do this using the Command plugin.
When to use the Command plugin
Choosing the command plugin to add a step has the following implications:
- The command is part of a deployment, so the command must be mapped to the particular hosts you want to run it on.
- The command must be independent of the environment, since the same package (and command) may be deployed to multiple environments.
- This approach automatically scales to environments with one or more hosts (i.e. using the auto-map button, you get the disk usage of every host in the environment)
Setup
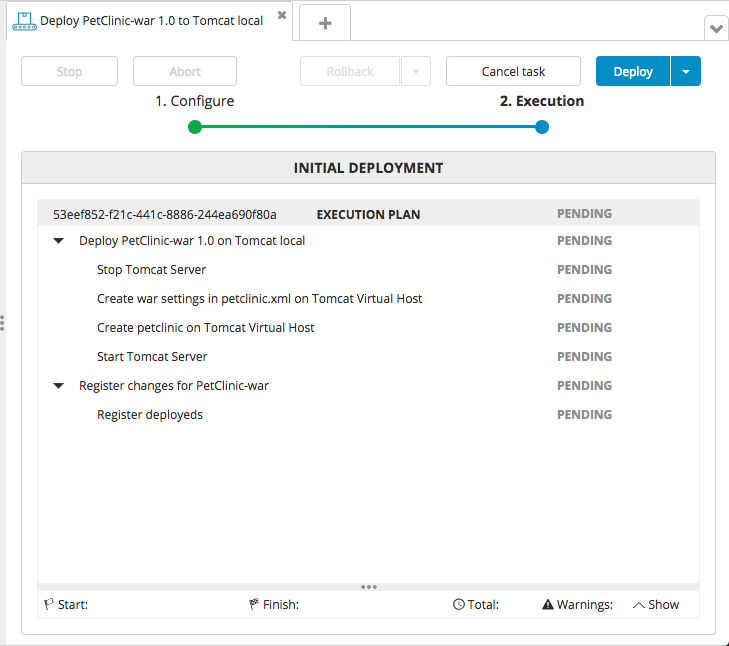
This example assumes a simple setup for the PetClinic WAR that will be deployed to a Tomcat server. When doing a deployment, we have the following steps.

To monitor the target server's disk, we want to add a step that displays the output of the df command at the end of the step list.
We will add this step in three stages:
- Use to UI to add a command to the application
- Test and refine the command
- Add the command to the Manifest file, so it will be packaged for subsequent versions of the application.
We will be adding the command using the Command Plugin. Make sure the command-plugin-X.jar is copied to the plugins folder of the Deploy Server home directory.
Adding the command in the UI
-
Go to the Explorer view, find the PetClinic-war under Applications, and right-click a version to add a new command. Select New > cmd > cmd.Command.
-
Name the command 'Log Disk Usage' and set the command line to
df -H. -
Save the command.
Testing and refining the command
Start a deployment of the version to which you just added the command. In our case, this would be deploying PetClinic war 1.0 to Tomcat.
The command will be mapped to an Overthere Host, so ensure the environment you deploy to contains the overthere.SshHost (or equivalent) that Tomcat is running on.
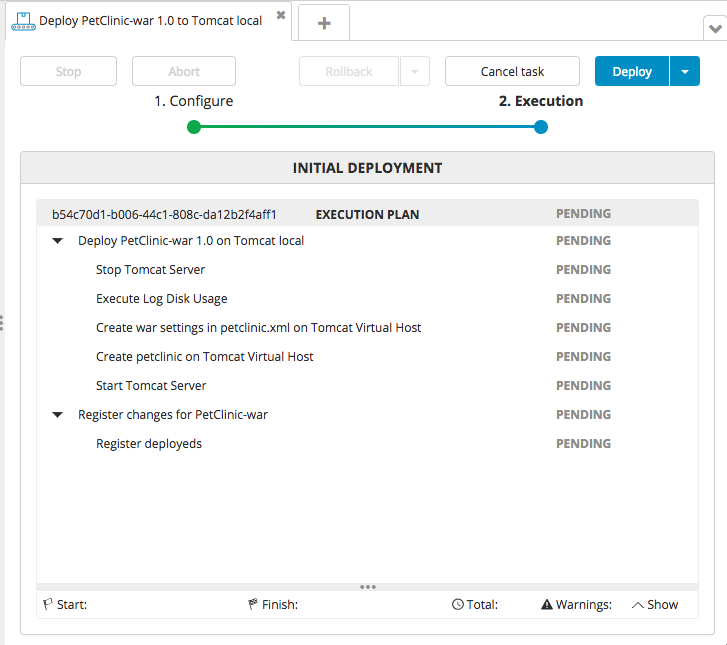
When doing a deployment, we will see that the step has been added:

Do not start the deployment just yet, as we want to move the step to the end so we will see the disk usage after deployment.
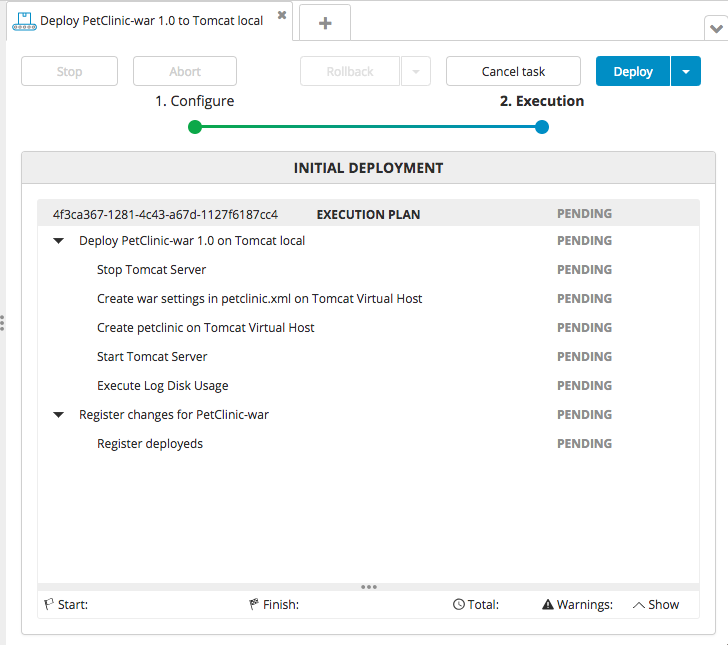
The steps in the step list are ordered by weight. Plugins contribute steps with order values between 0 and 100. So if we want to move the step to the end of the list, we have to change the order value to 100.
Find the Log Disk Usage command in the Library tree. Change Order to '100' and save. Now redo the deployment and we will see that the step has moved:

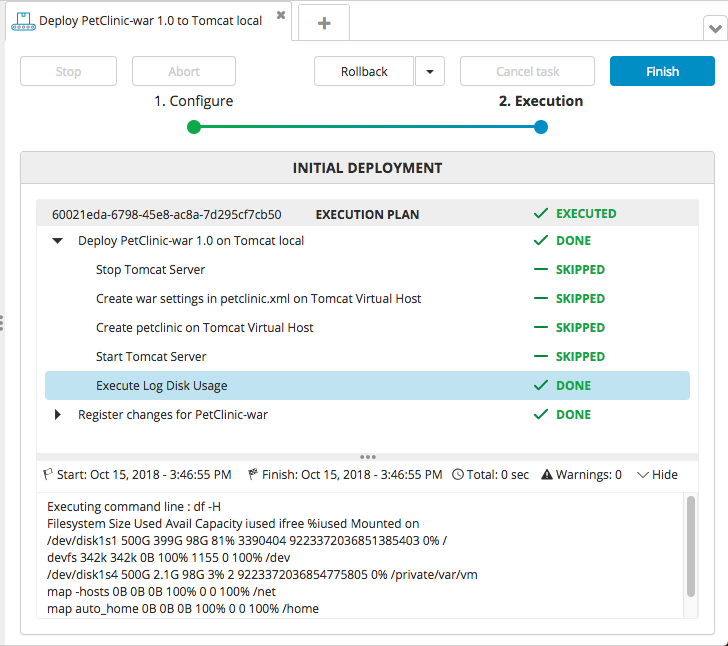
When executing the deployment, we will see the output of the df command in the logs:

Adding the command to the manifest
We did our changes in the UI, because it's easier to see what's going on and the development cycle (edit-test-refine) is faster. But now we want to make the changes more permanent, so other versions of the same application can use it as well. We do this by editing the deployit-manifest.xml file that is used to create the application package DAR file.
This is how the above example looks like in manifest format:
<cmd.Command name="Log Disk Usage">
    <order>100</order>
    <commandLine>df -H</commandLine>
</cmd.Command>