Deploy an app on Apache Tomcat
This tutorial describes how to deploy an application on Apache Tomcat.
It assumes you have the Tomcat plugin installed.
Required Tomcat setup
Tomcat must be configured to run in the background. On Unix, Tomcat should be installed as a daemon or the Tomcat startup script should start Tomcat in the background. On Windows, you must install Tomcat as a service.
For more information on running Tomcat in the background, see documentation for your version of Tomcat.
Step 1 - Create an environment
An environment is a grouping of infrastructure and middleware items such as hosts, servers, clusters, and so on. An environment is used as the target of a deployment, enabling you to map deployables to members of the environment.
To create an environment:
-
In the top navigation bar, click Explorer.
-
From the Library navigation pane, hover over Infrastructure, and then click
. Based on where Tomcat is running, select one of the following options:
- If Tomcat is running on the same computer as Deploy, choose new>overthere>LocalHost.
- If Tomcat is running on a Unix-based operating system, choose new>overthere>SshHost.
- If Tomcat is Running on Microsoft Windows, choose new>overthere>CifsHost.
-
In the name field, enter a unique name for the connection.
-
Choose an operating system and click Save to create connection.

-
On the connection you created, click
, then select new > tomcat > Server
If you do not see the Tomcat option in the menu, verify that the Tomcat plugin is installed.
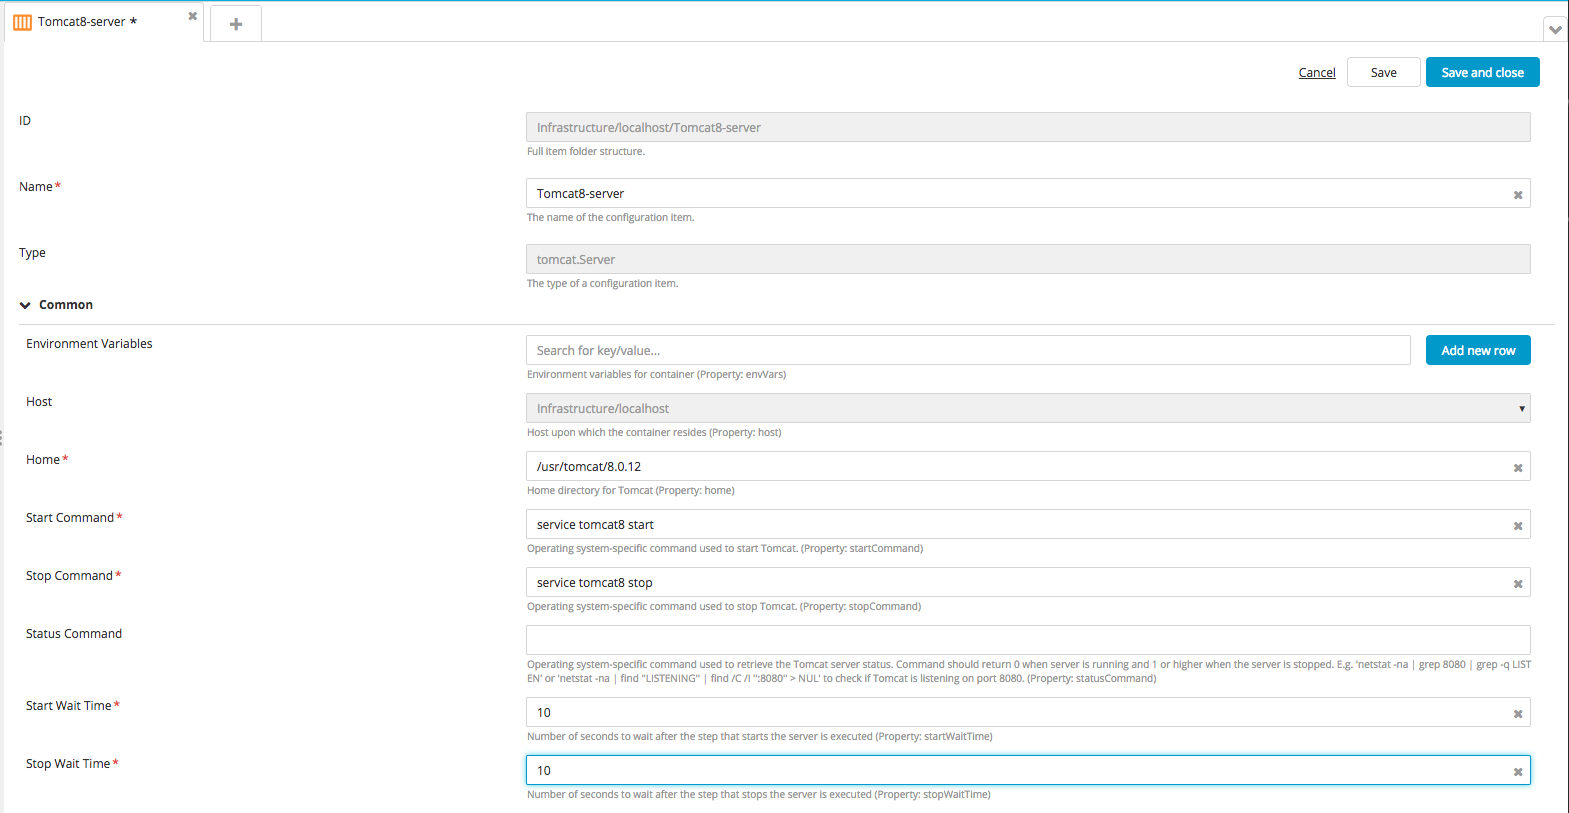
- In the Name field, enter a unique name for the server.
- In the Home field, enter Tomcat home directory. For example,
/opt/apache-tomcat-8.0.9/on Unix, orC:\Program Files\Tomcat\on Microsoft Windows. - In the Start Command field, enter the home directory, followed by the OS-specific command to start Tomcat. For example:
-
./bin/startup.shon Unix. -
/bin/startup.baton Microsoft Windows.
-
Deploy expects the Tomcat start command to return and leave Tomcat running. If the start command does not return, Deploy will not complete a deployment to Tomcat.
-
In the Stop Command field, enter the home directory, followed by the 0S-specific command to stop Tomcat. For example:
./bin/shutdown.shon Unix./bin/shutdown.baton Microsoft Windows.
-
In the Start Wait Time field, enter the number of seconds that Deploy should wait after executing the start command and before continuing with the deployment plan.
-
In the Stop Wait Time field, enter the number of seconds that Deploy should wait after executing the stop command and before continuing with the deployment plan.
If your startup and shutdown scripts only return after the server has fully started or stopped, you can set the wait time to 0.
-
Click Save to create the server.

-
To start the Tomcat server, do the following:
- Hover over the server you created, click
, and then click Start Server > Execute. The Start Server execution plan page displays the status of Start Server command. .
- Hover over the server you created, click
-
To stop the Tomcat server, do the following:
-
Hover over the server you created, click
, and then click Stop Server > Execute. The Start Server execution plan page displays the status of Stop Server command.
-
To add a Tomcat virtual host, hover over the server you created, click
, then select new > tomcat > VirtualHost.
-
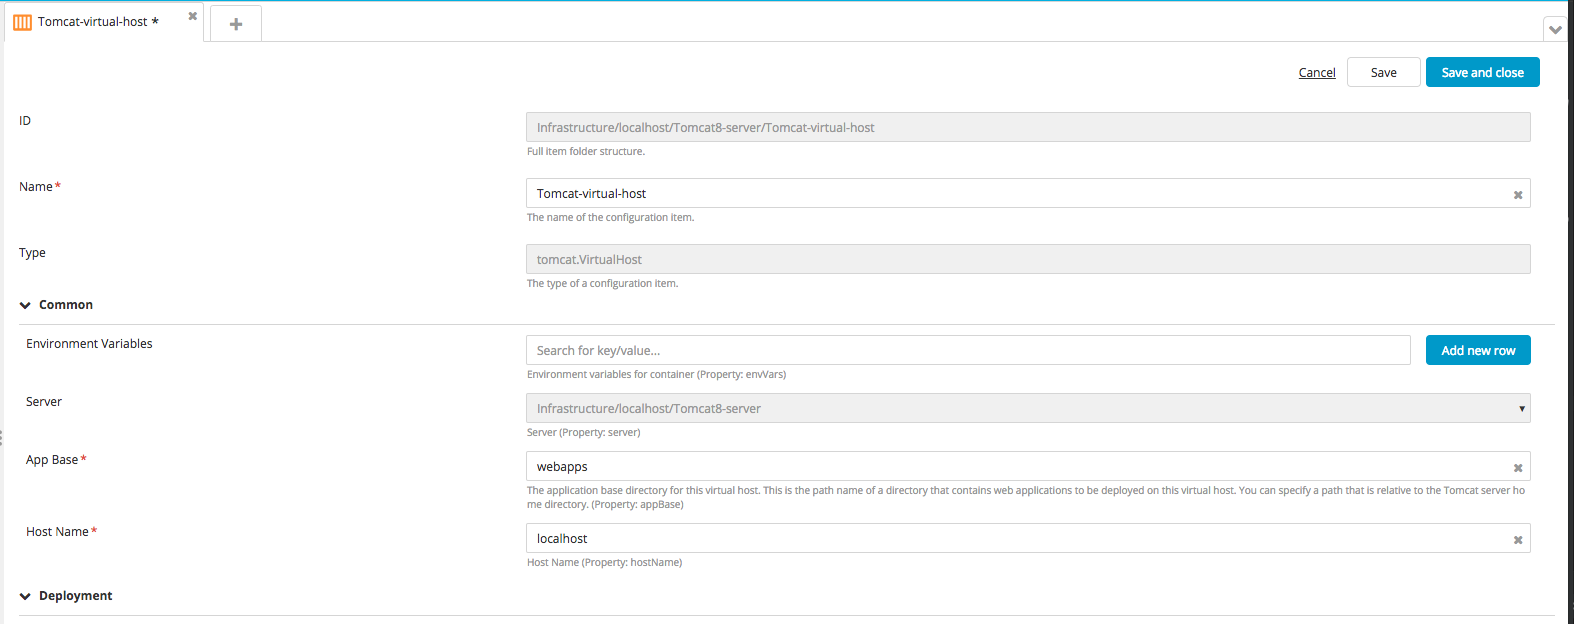
In the Name field, enter a name for the virtual host.
-
Optionally, change the App Base and Host Name. The defaults are
webappsandlocalhost. -
Click Save to create the virtual host.

-
Hover over Environments, click
, and select new > Environment.
-
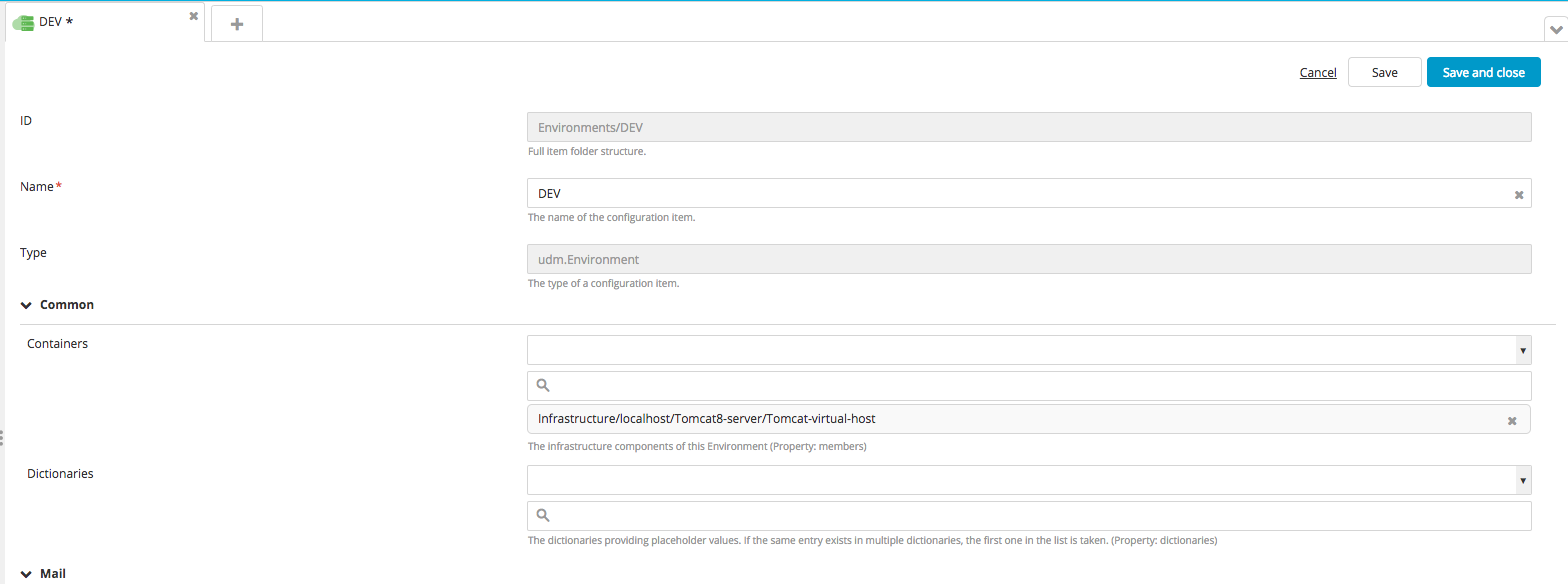
In the Name field, enter a unique name for the environment.
-
From the Containers list, select the tomcat virtual host that you created.
-
Click Save to create the environment.

Step 2 - Import the sample application
Deploy includes two versions of a sample application called PetClinic-ear, that is already packaged in the Deploy deployment package format (DAR).
To import the PetClinic-ear/1.0 sample application, follow the steps described in Import a package instructions.
Step 3 - Deploy the sample application
To deploy the sample application, follow the steps described in Deploy an application.
If the deployment succeeds, the state of the deployment plan is EXECUTED.

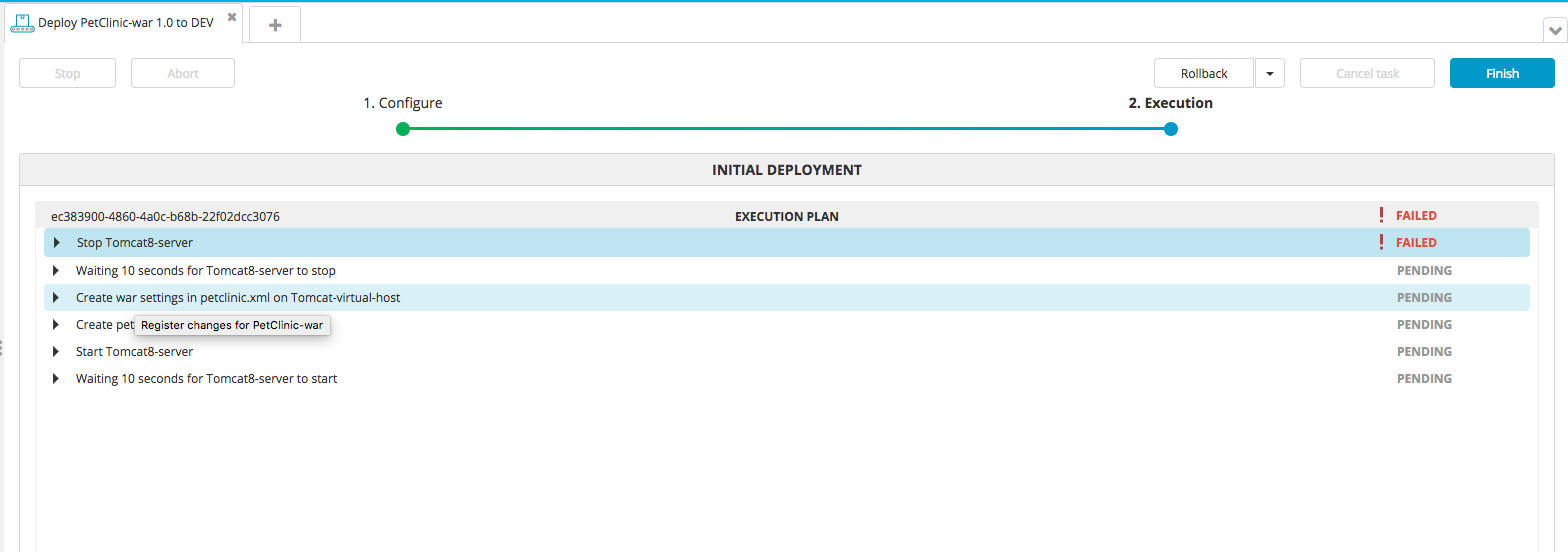
If the deployment fails, click the failed step to see information about the failure. In some cases, you can correct the error and try again. For example, in the deployment shown below, Deploy could not stop the Tomcat server because the shutdown script is set to /opt/apache-tomcat-8.0.1/bin/startup. You should abort the deployment and correct the Stop Command in the Tomcat server configuration in the Repository, then try the deployment again.

Verify the deployment
To verify the deployment, go to http://IP:8080/petclinic, where IP is the IP address of the Tomcat server.
Get help
To ask questions and connect with other users, visit our forums.