This topic describes how CF CLI integration is used in the Digital.ai Deploy server.
The Cloud Foundry (CF) CLI (Command Line Interface) integration is also Digital.ai Deploy integration for the CloudFoundry server which makes use of CF CLI.
Install the CF CLI Plugin
To install the CF CLI plugin, refer Plugin Manager Documentation:
Features
The Cloud Foundry CLI Integration supports:
- Creating spaces
- Deploying Cloud Foundry applications
- Creating routes for a Cloud Foundry application
- Binding services with a Cloud Foundry application
- Creating Cloud Foundry services
- Deploying Cloud Foundry application using a manifest file
Create an Infrastructure
- In the side navigation bar, click Explorer.
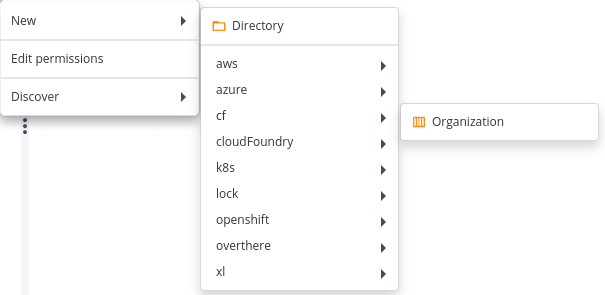
- Hover over Infrastructure, click
, then select New > cf > Organization. A new tab displays.
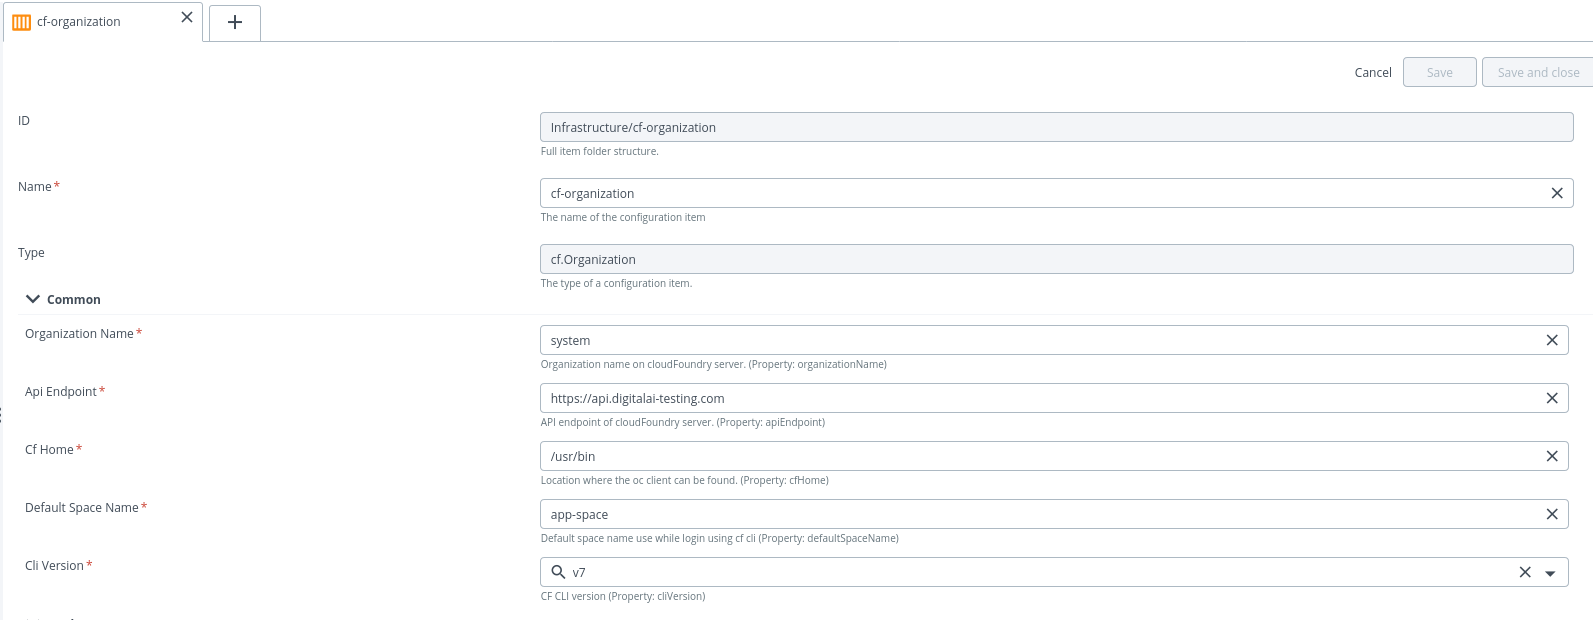
- Specify the following properties in the
cf.organization:
- Organization Name: Organization name on the Cloud Foundry server
- API Endpoint: API endpoint of Cloud Foundry server
- Cf Home: Location where the oc client can be found
- Default Space Name: Add any default space which we use while 1st login using cf cli
- Cli Version: Select CLI version installed on system
- Username: User name to use for authentication
- Password: Password to use for authentication.
- Click Save.
- Hover over newly created cf.organization, click
, then Check Connection.
- Click Execute and check the connection.
Add Space in Infrastructure
To add Space in cf.organization infrastructure, do the following steps:
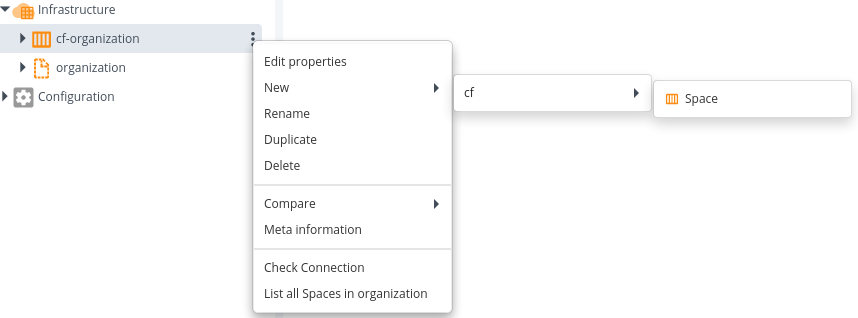
- Hover over the newly created
cf.organization, click, then select New > cf > Space. A new tab displays.
- Specify the space name in the Name field.
- Click Save
Note: You can also add Space to organization by creating space app and deploy it to
cf.organization.
Create an Environment
To create an environment, do the following steps:
-
In the side navigation bar, click Explorer.
-
Hover over Environments, click
, then select New > Environment. A new tab displays.
-
In the Name field, enter a name for the environment.
-
In the Common section, click Containers field and select newly created
cf.organizationorSpacecontainers. Note: You have to create two environments, one for Organization and the other for Space. -
Click Save.


cf.organization will be the container for SpaceSpec which deploys Space will be the container for the other (pushApp, Manifest, Routes, Service) deployment.
Create and Deploy an Application
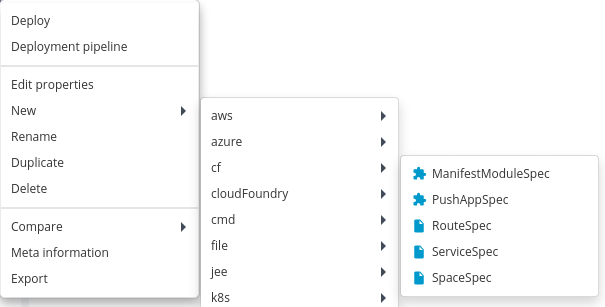
The following are the deploy tasks that can be performed:
cf.SpaceSpec: Deploys a Space to an Organisation environment (env that has cf.organization container).cf.PushAppSpec: Deploys or push an App to a Space environment (env that has cf.Space container deployed by cf.SpaceSpec deployable).cf.ManifestModuleSpec: Deploy Multiple applications using a single manifest file to Space environment (env that has cf.Space container deployed by cf.SpaceSpec deployable).cf.RouteSpec: Deploys a Route to a Space environment.cf.ServiceSpec: Deploy a Service to a Space environment.
If you have multiple spaces in a single Org, it is advised to create a separate Environment which has a container reference to a single Space.
Deploy a Space
To deploy a space, do the following steps:
- Create a deployment package and specify the deployable as
SpaceSpec. - Specify the required properties for Space.
You must have to provide already available space name in Default Space Name property as your initial default space while login into CF CLI.
 3. Click Save.
4. Deploy the
 SpaceSpec to cf.organization container environment.

Deploy or Push an App
To deploy or push an App, do the following steps:
- Create a deployment package and specify the deployable (any artifact file like
war,jarorzip) asPushAppSpec. - Specify the required properties for Push.
- The properties of Pushing an App in Deploy are similar as mentioned in
https://cli.cloudfoundry.org/en-US/v6/push.htmlandhttps://cli.cloudfoundry.org/en-US/v7/push.html.
Only some properties in PushAppSpec are specific to v7 of CF CLI.
- To deploy the artifact file to CF, create a
PushAppSpecwith the App name, buildback and memory- 1G. Then deploy it to a CF. - For rolling deployment, select the strategy as rolling, while creating the deployment package.

- After creating the
cf.PushAppSpecdeployable, you can deploy its package to the environments containing Space infrastructure container.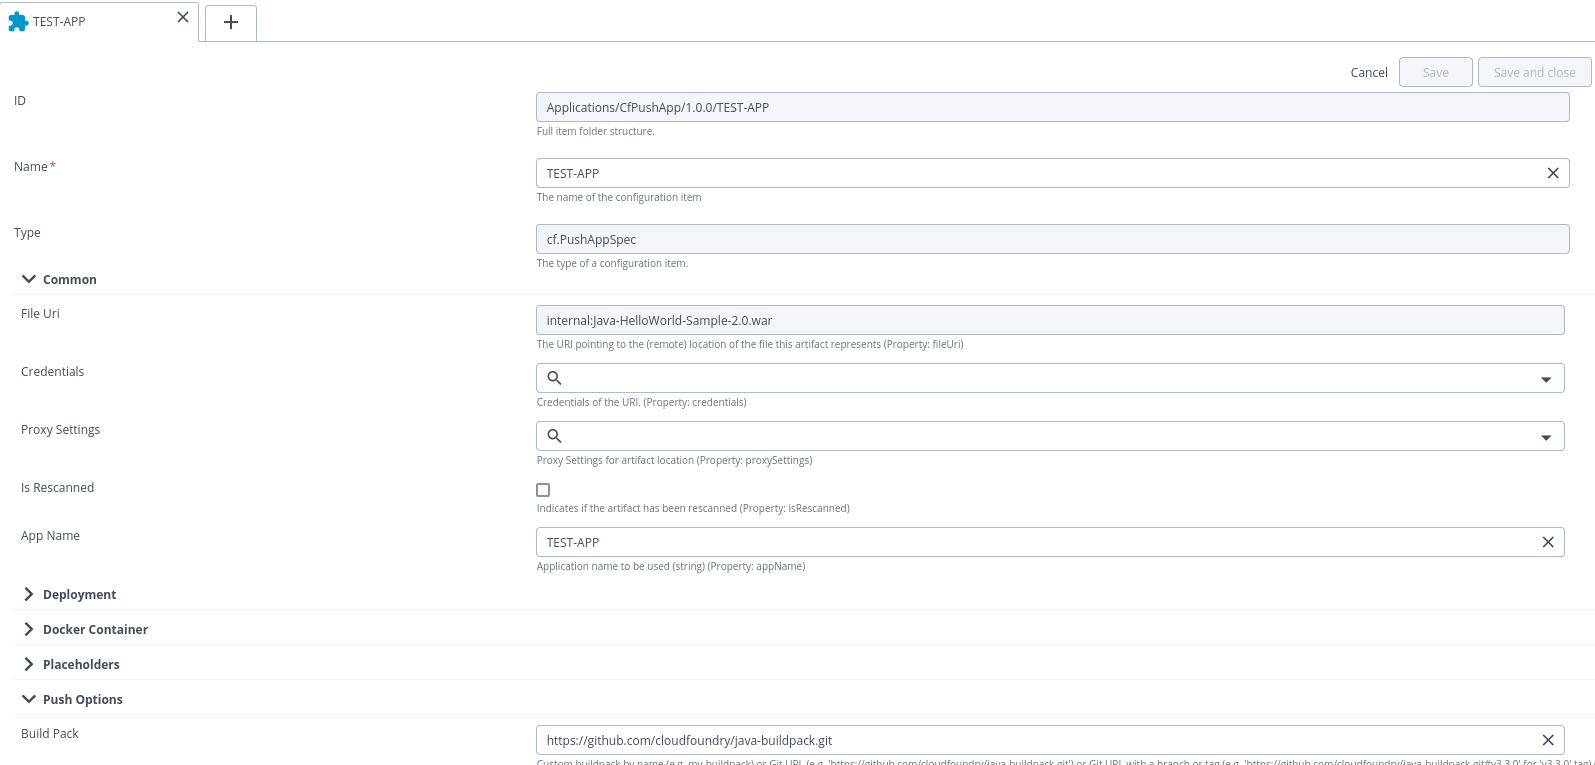 Note: You can update this deployment and undeploy.
Note: You cannot change the appName of pushed app as it uniquely identifies the name of an App during the update process.
Deploy or Push and app using ManifestFile
To deploy or push an App using ManifestFile, do the following steps:
- Create a deployment package and specify the deployable as ManifestModuleSpec.
- In the File property, specify a zip file that contains the manifest file and artifacts required to create the application.
- If you want to deploy the app with a sidecar process then you have to put information related to sidecar in the
manifest.ymlfile. - You can also update this deployment and undeploy.
- After the creation of
cf.ManifestModuleSpecdeployable, you can deploy its package to environments containing aSpaceinfrastructure container.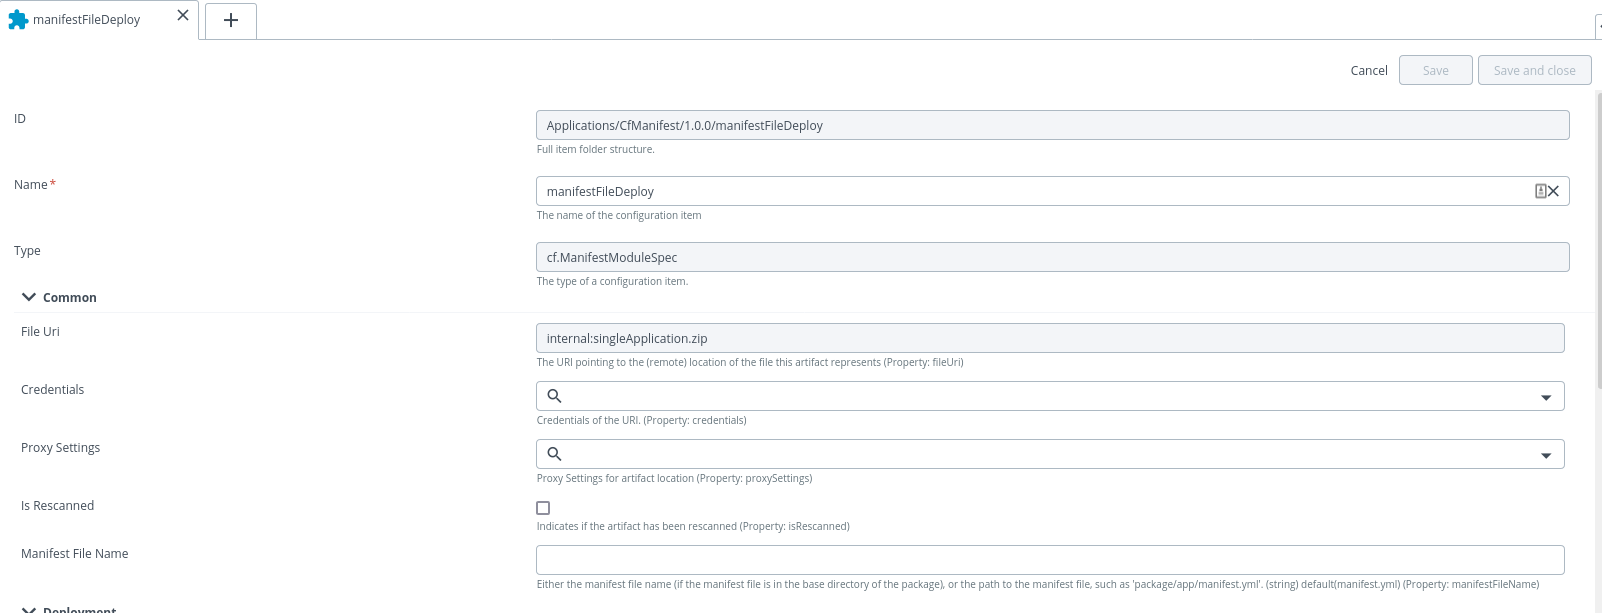 Note: As per cloudfoundry cli document we cannot use any command line options with
 cf pushexcept for-fand--no-start. Hence if the user wants to make any configuration for application in multi-app deployment then configuration has to be add in the manifest file instead of in xld
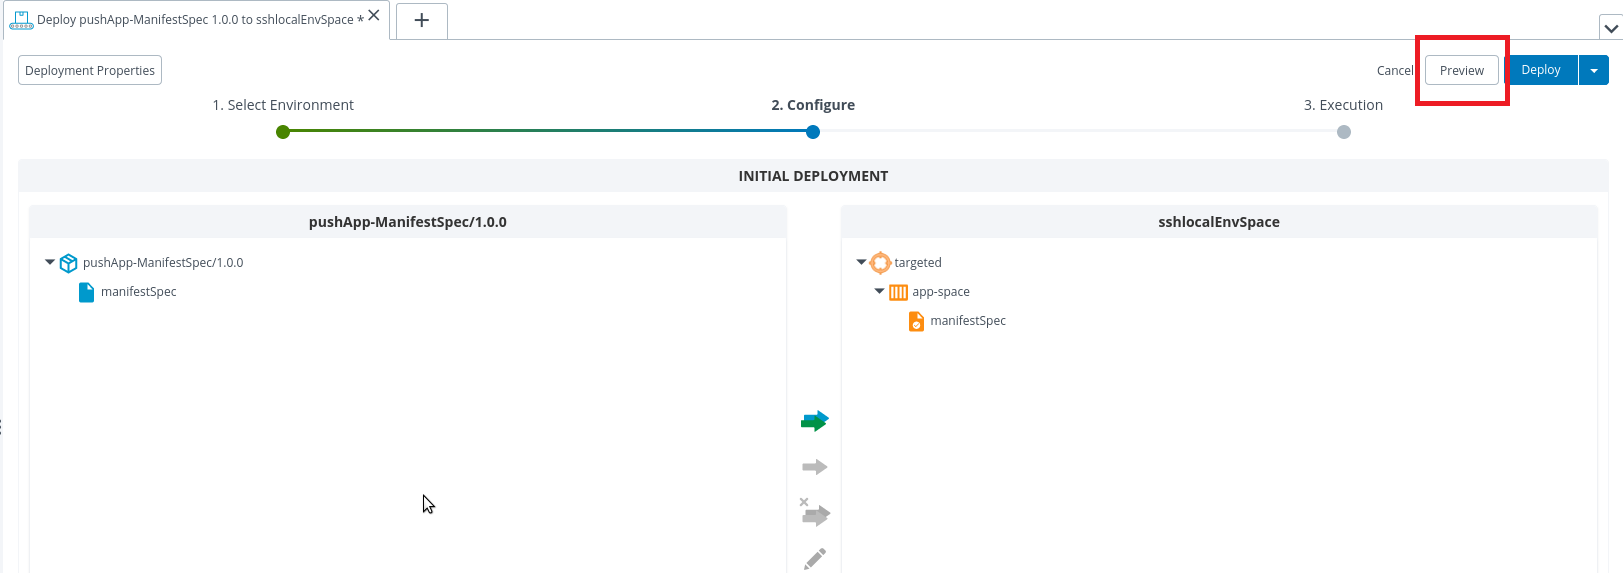
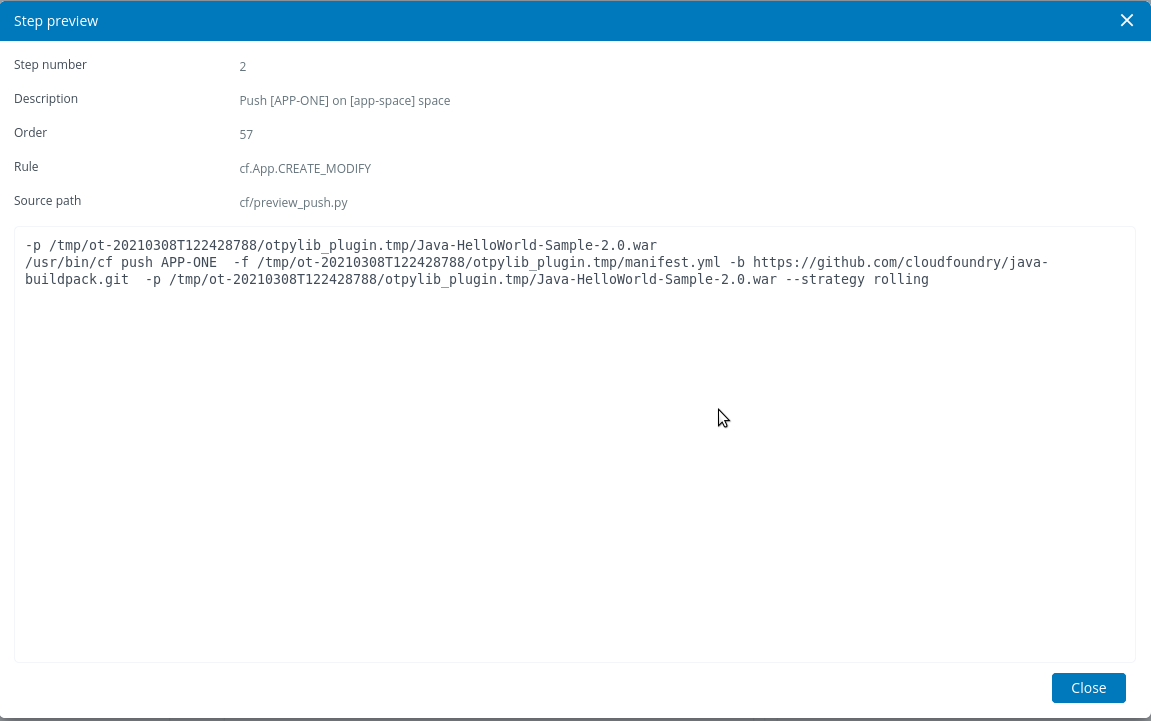
How to verify the CF CLI command on XLD before executing the task?
To verify the CF CLI command before executing, do the following steps:
- After you select the deployable for deployment of app click on Preview.
- Double click on any step, that shows the command run on CF CLI.
Deploy a Route
To deploy a Route, do the following steps:
- Create a deployment package with deployable
cf.RouteSpec. - Specify properties of the RouteSpec.
- Specify a Valid Route Domain. There are special properties that correspond to routeType http or tcp.
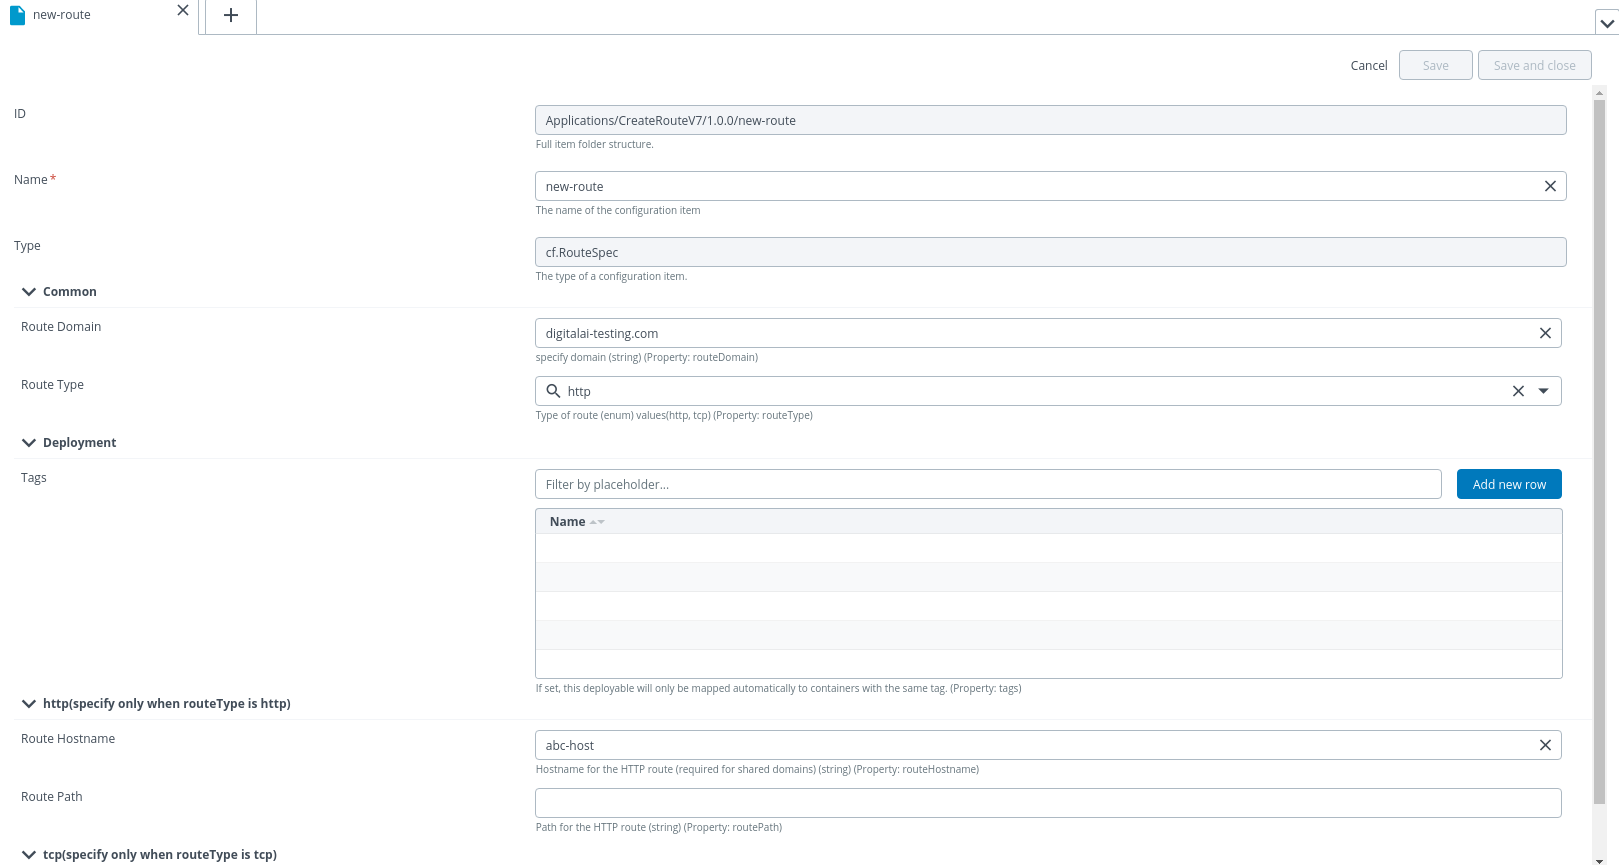
- After the creation of deployable, you can deploy its package to the Space Environment.
- Deploy, Update, and Un-deployment of a Route is supported.
Deploy a Service
To deploy a service, do the following steps:
- Add service to your targeted Organization. Refer Managing Services.
- Create a deployment package with deployable
cf.ServiceSpec. - Specify the properties of ServiceSpec.
- Specify service to use, plan, and service instance. You can also use options like specify broker, configuration (JSON string), and Service Tags.
- There are upgrade-specific options under the category update options also which need to be given only in case of updating a service.
- You cannot change service instance or service while updating the service as these are the properties that identify a service uniquely.
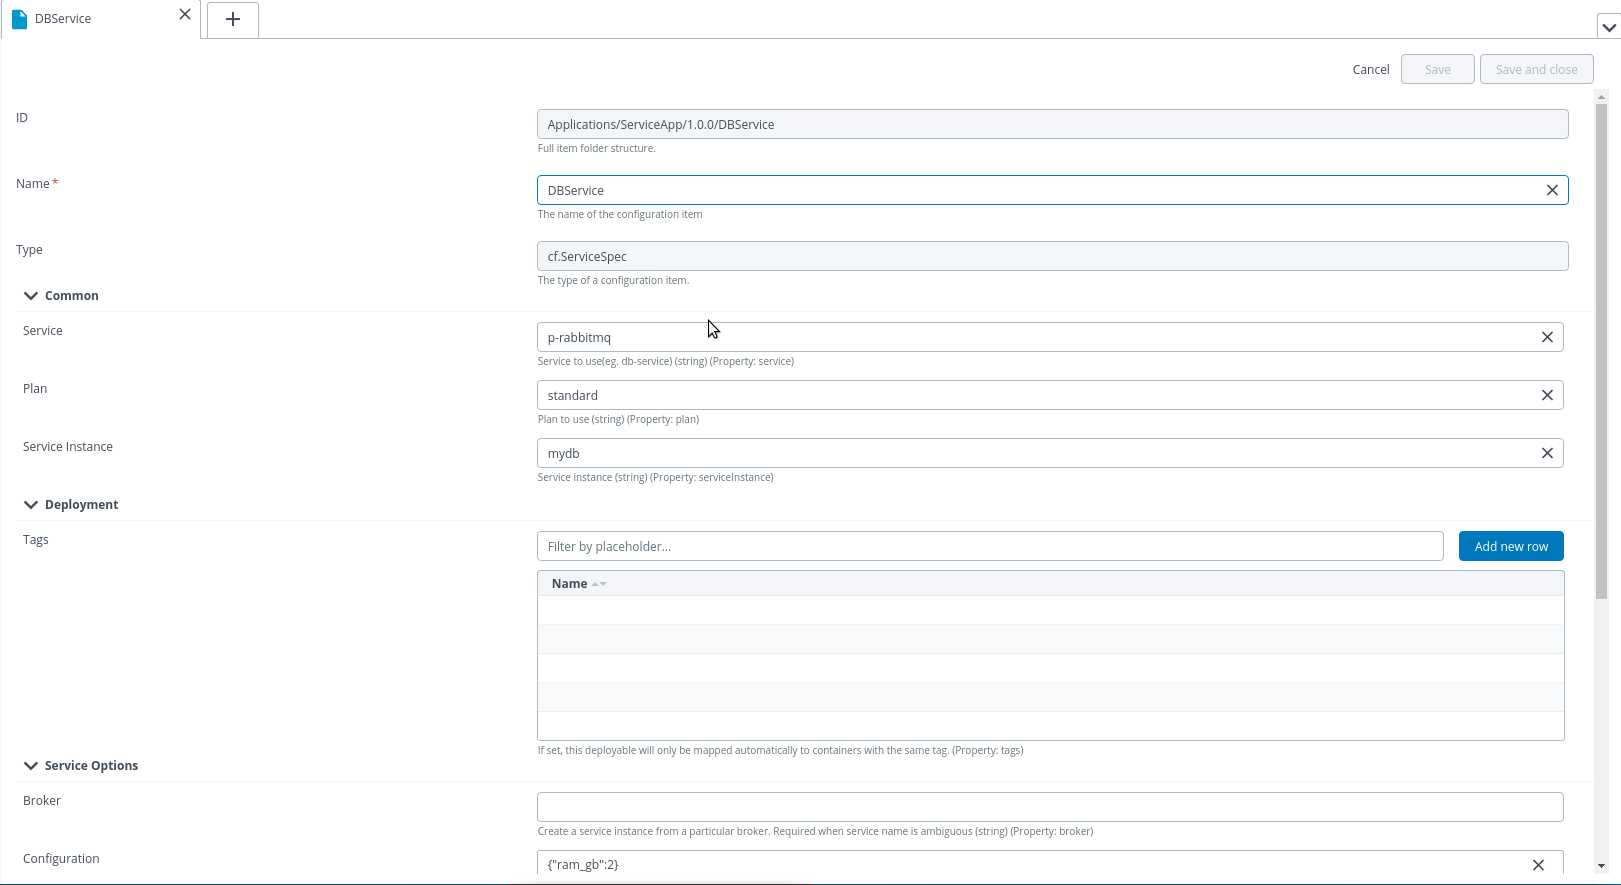
- After the creation of deployable, you can deploy its package to the Space Environment.
- Deploy, Update and Un-deployment of a Service is supported.
Controls Tasks
There are a number of control tasks that you can perform using cloudfoundry-cli-integration.
On cf.Organization deployed
The cf.Organization control task will list all Spaces in the current CF servers.
On cf.App deployed:
The following are the control tasks that can be performed on cf.PushApp deployed:
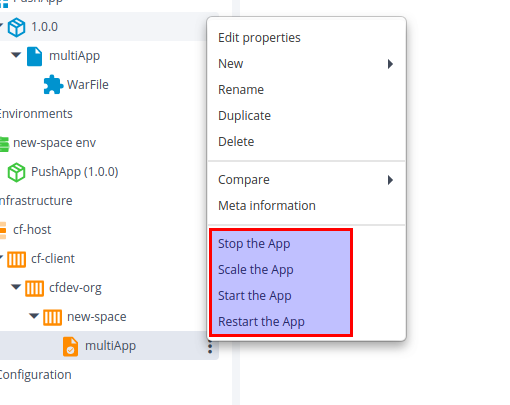
-
Restart the App:
Note” Restarts the running App in Cloud Foundry Space. There are params you can supply if the deployment is like strategy and no wait. The strategy should be specified if a deployment is rolling update.
-
Stop the App
Stops the running App in Cloud Foundry Space
-
Start the App
Starts the stopped App in Cloud Foundry Space.
-
Scale the App:
Scales the currently running App on the ground of instances, disk limit, and memory limit.
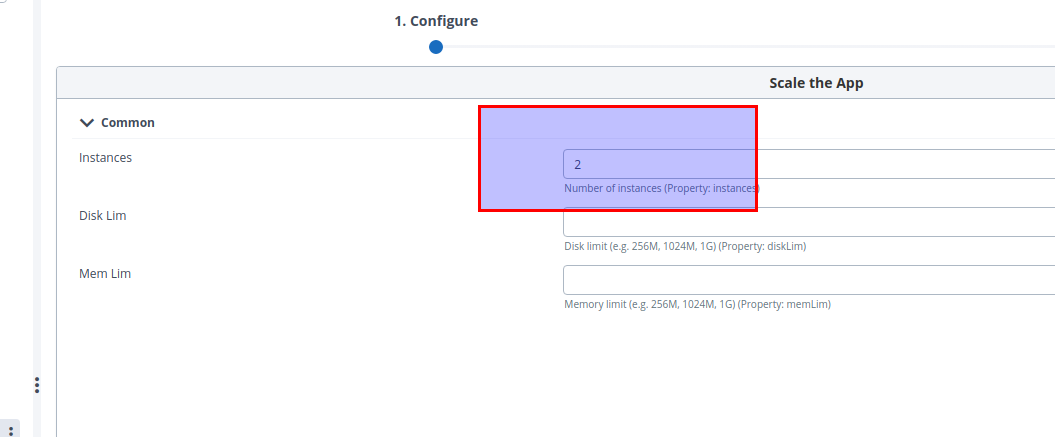
On cf.Route deployed
The following control task that can be performed on cf.Route deployed:
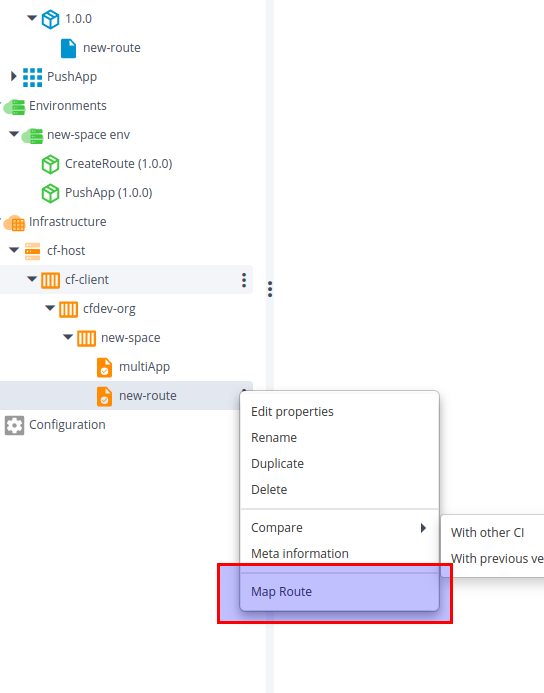
-
Map Route:
Maps the current route (deployed) to an instance of an App. Supply the App name in the control task parameter and this control task will map the deployed route to an App.
On cf.Service deployed
The following are the control tasks that can be performed on cf.Service deployed:
-
bindService:
Bind this service instance (deployed) to an app. Supply parameters- App Name, bindingName, and conf (configuration in JSON string) to this control task.
-
unbindService:
Unbind this service instance (deployed) from an app. Supply parameters- App Name to this control task.
-
bindRouteService:
Bind this service instance (deployed) to an HTTP route. Supply parameters- domain, hostname, path, and conf (configuration in JSON string) to this control task.
-
unbindRouteService:
unbind this service instance (deployed) to an HTTP route. Supply parameters- domain, hostname, and path to this control task.