Managing Delivery Patterns
This topic describes how to create and manage delivery patterns. A delivery pattern allows you to design a flow of stages that the tracked items in a delivery must go through. You can reuse these patterns in multiple deliveries.
Manage delivery patterns
To view a list of delivery patterns in a folder, from the navigation pane, under the Overview group, click Folders, select a folder, and click the Patterns tab. You can filter the delivery patterns by name.
Notes:
- To create an identical copy of an existing delivery pattern, click Duplicate on the desired pattern.
- To remove a delivery pattern, click Delete.
Create a delivery pattern
To create a new delivery pattern:
- From the navigation pane, click Folders.
- Select a folder and click the Patterns tab.
- Click New delivery pattern.
- Specify a name for the delivery pattern.
- Set the duration of the delivery pattern by clicking the Duration field, and entering the number of months, days, and hours.
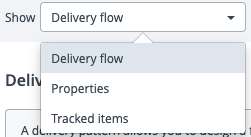
Note You can change the duration and other properties anytime by selecting Show > Properties at the top left of the delivery pattern screen.

- Enter a short description.
- Click Create.
Add tracked items to a delivery pattern
- At the top of the screen, select Show > Tracked items
- Click Add tracked item.
- Enter the name of the tracked item.
- Optionally, select the Create another checkbox if you wish to create multiple tracked items for the delivery pattern.
- Click Create.
- If you selected Create another, the item will be created and the dialog box will remain open allowing you to add as many items as you need.
Edit the delivery pattern
To edit a delivery pattern:
- From the navigation pane, click Folders.
- Select a folder and click the Patterns tab.
- Click Edit. The delivery flow view opens.
- To add a new stage, click Add stage. Stages show the status of tracked items registered for the delivery created out of the delivery pattern.
- Click on New stage inside the stage to change the name.
- To add a transition between two stages, click Add transition. Transitions allow you to set conditions to move tracked items through stages.
- To delete a transition or a stage, click the delete icon.
Delivery patterns are saved automatically when they are edited.
For more information on how to add a Stage Owner, see Stage Owner.