Install Remote Runner Using XL Kube
Remote runners are introduced with Digital.ai Release 23.1 to efficiently and effectively manage the execution of container-based tasks within a Kubernetes cluster. These isolate the task execution process and provides greater stability and scalability for executing tasks.
Important: The container-based task functionality is not compatible with DB2.
Prerequisites
- Read and understand the Plan Your Installation or Upgrade page
- Read and understand the XL CLI's xl kube command
- A computer that runs Windows, macOS, or Linux to install and run the kubectl and other CLIs
- A Kubernetes cluster where you install Digital.ai Remote Runner
- kubectl
- XL CLI 23.1.0 or later
- Helm
- yq 4.18.2 or later
Important: If you want to enable the TLS protocol in your cluster, you must have the TLS secret created in the namespace before you start the installation or upgrade. This means that you must create the namespace first, create the TLS secret in that namespace, and use the same namespace and TLS secret during the installation or upgrade of Digital.ai Remote Runner
The xl kube install and xl kube upgrade wizards let you go with the default (latest) docker image tags available when you install or upgrade Digital.ai Remote Runner. Here's the Docker Hub link to verify all the available image tags for Digital.ai Remote Runner.
You can install Remote runners on the following Kubernetes platforms.
- Plain Multi-node Kubernetes Cluster On-premise
- Amazon EKS
- Azure AKS
- Google GKE
- OpenShift
Step 1—Prepare for Installation
You must set up your system for installation, which include installing the kubectl, the required CLIs, and so on.
Install kubectl, XL CLI, Helm, eksctl, and yq
See:
Additional Set up for Installation
To run container-based tasks in a production environment, you need:
- Digital.ai Release instance running with a template that has container-based tasks. If you want to create your own container-based tasks, you can use the Python SDK. To learn more about how to use the Python SDK, see Python SDK Tutorial.
- PAT must be created in Release to register the Remote runner. To learn more about it, see Create a PAT.
Step 2—Set up Your Kubernetes Cluster
Note: The instructions to set up the cluster are indicative of the process. You may have to keep abreast of the latest developments with regards to the cloud platform you work with and set up the cluster to suit your requirements.
The process of setting up a Kubernetes cluster and the tools required for the same varies from one platform to the other. However, there are certain things that you must think through before setting up a Kubernetes cluster in general.
For more information on the common aspects, see setting up your Kubernetes cluster.
Step 3—Install Digital.ai Remote Runner
Keep these handy before you run the xl kube install command:
- GitHub URL for the Helm chart of the Remote runner
- URL of the Release instance that is running
- PAT created
- Run the
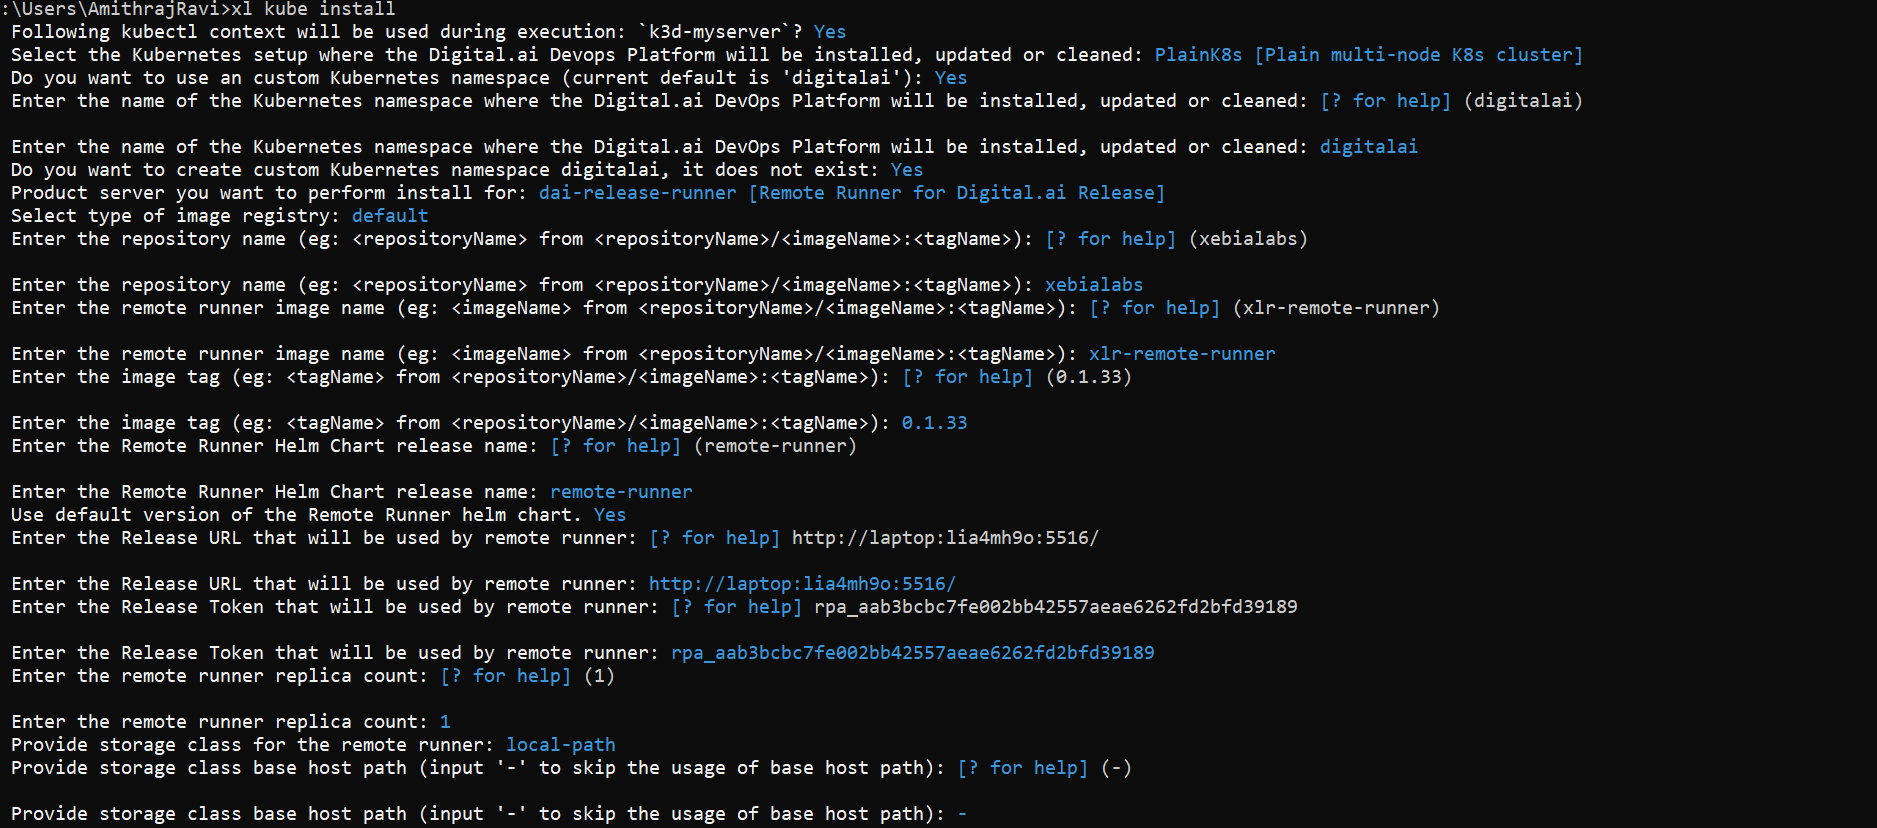
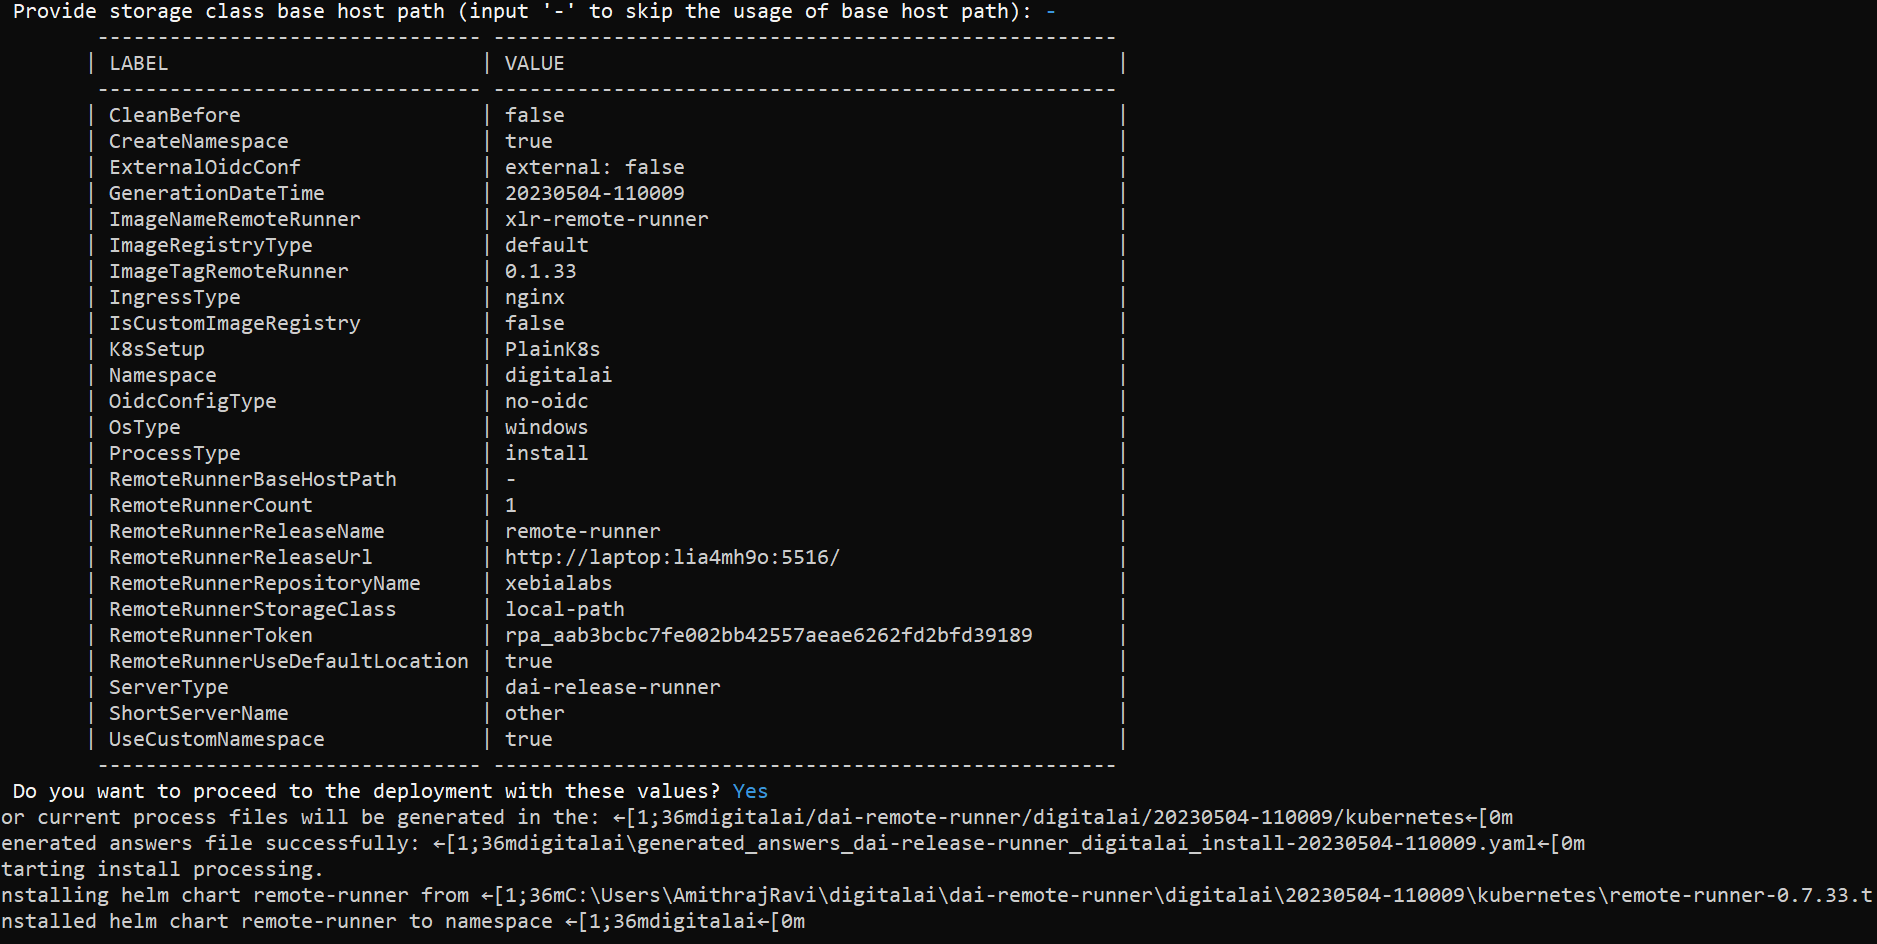
xl kube installcommand. For more information about flags to skip prompts, enable additional logging, and so on, see xl kube install Command Reference. - Answer the questions in the Installation Wizard as follows:


- Ensure that the installation process has successfully finished.
- Check the Remote runner logs to confirm that it started correctly and is able to connect to Release.
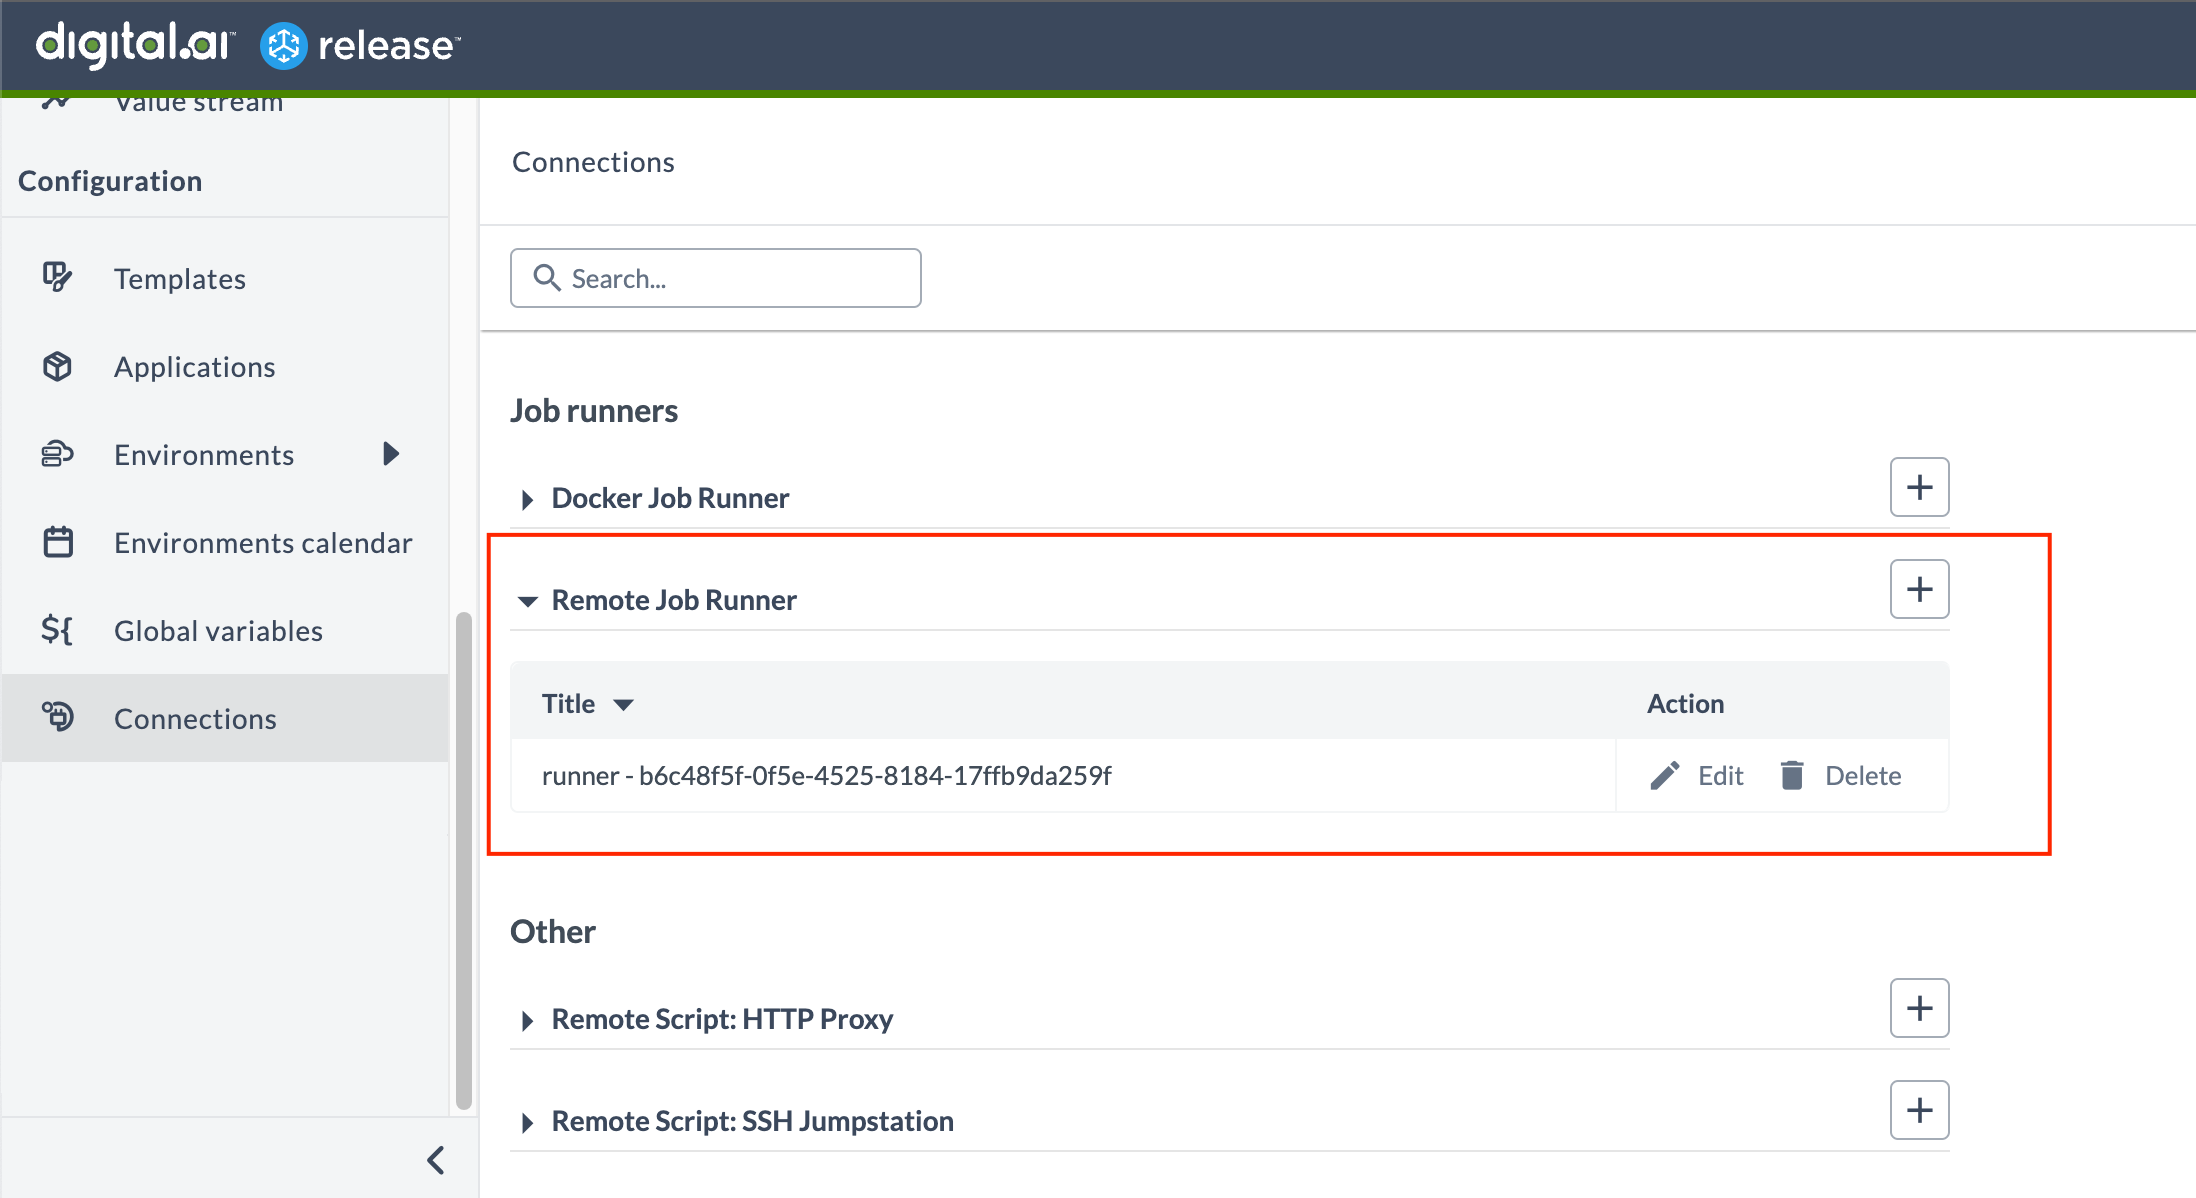
- Once you have confirmed that the runner is connected, log in to Release UI as an admin.
- Go to the Connections page and verify that the Remote runner connections are properly listed. This will confirm that the runner has been successfully.
