Configuring the integration
Configuration for the integration is a 3 step process:
- Configuring Bugzilla
- Configuring Digital.ai Agility
- Configuring ServiceHost
- More information
- Source Code
Configuring Bugzilla
This section describes how to modify your Bugzilla instance for use with Digital.ai Agility. Before you begin you need to know your Bugzilla version number and you need to decide if you want to Assign or Tag the bugs you want visible in Digital.ai Agility.
It's beyond the scope of this document to describe how to create filters in Bugzilla, but here are some filter ideas:
It is recommended that you create the filter using the same credentials used by the integration.
- Select or create a Bugzilla user: The integration requires a valid Bugzilla User ID and a Password in order to connect. This user must have sufficient rights to accept work and modify bugs.
- The next step depends on the approach for pushing bugs to Digital.ai Agility.
- Assigned: If you choose to push bugs by assigning them to the user identified in step 2, proceed to the next step.
- Tagged: If you want to push bugs to Digital.ai Agility using a Custom Field, you need to do the following:
- Create the Custom field. It is recommended that you use a drop-down field and limit the values.

- Populate the field with the desired values.
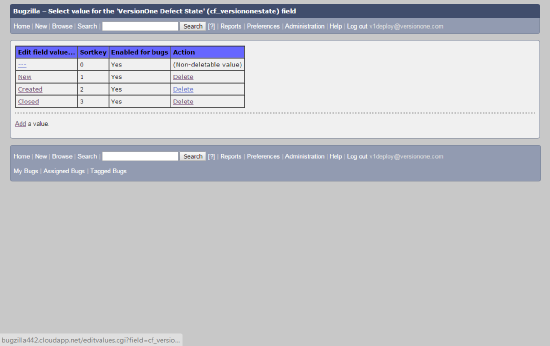
- Create the Custom field. It is recommended that you use a drop-down field and limit the values.
- Create a 'Saved Search' to select the bugs you want pushed to Digital.ai Agility.
- Assigned: Using this approach, the easiest filter is based on who is assigned to ("Assignee is (user)") and Status (i.e. "CONFIRMED")
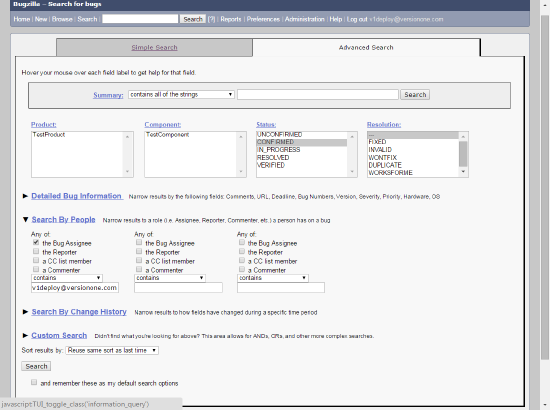
- Tagged: Using this approach, the easiest Filter is based on the value of the Custom Field.

- Assigned: Using this approach, the easiest filter is based on who is assigned to ("Assignee is (user)") and Status (i.e. "CONFIRMED")
- Determine how to prevent bugs from being pushed more than once.
This decision is based on your search and how you want bugs pushed to Digital.aiAgility.- Assigned: Using this approach, the simplest option is to change the Status. To do this, you need to accept the bug.
- Tagged:. Using this approach, the simplest option is to change the value of the Custom Field. To do this, you need to know the value you want set in the Custom Field.
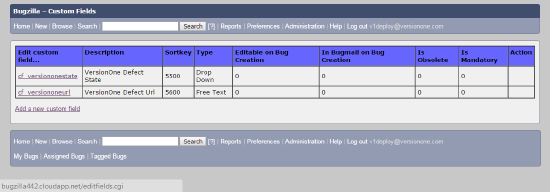
- Do you want the URL of the Digital.aiAgility defect to appear in Bugzilla? If so, you'll need to create a custom field in Bugzilla.
Configuring Digital.ai Agility
-
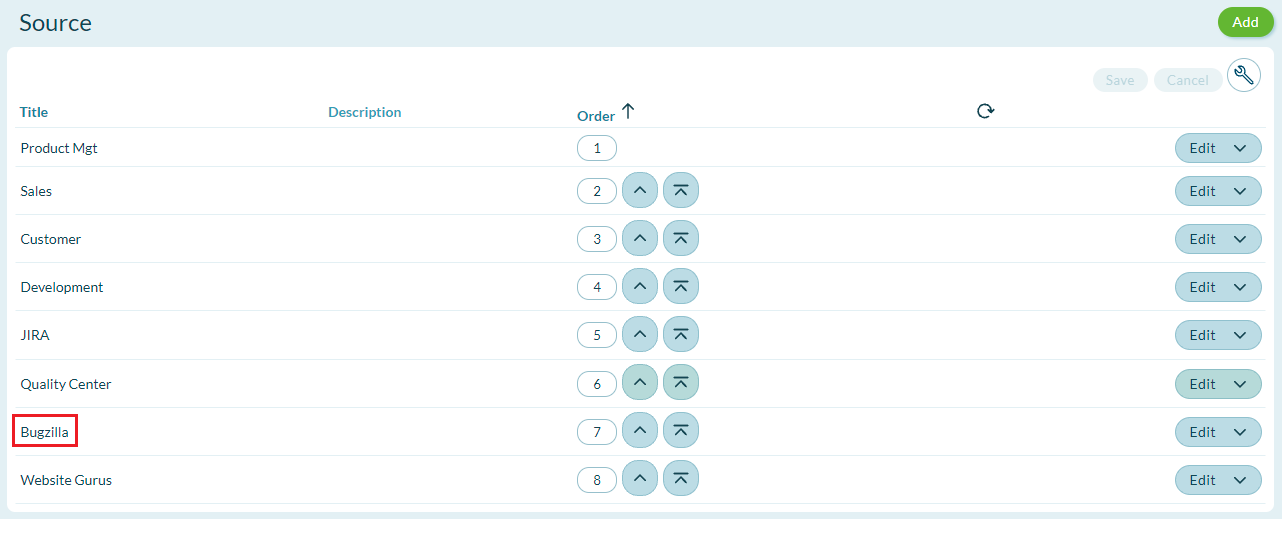
Add "Bugzilla" to the Digital.ai Agility Global Source list.
-
Determine where to store the Bugzilla ID.
The integration needs a text field in Digital.ai Agility to store the Bugzilla identifier; by default this is the Reference field. If you are already using this field, you'll need to create a custom text field and note the name.
Configure the integration
To configure the Bugzilla integration, run the ServiceHost configuration tool: ServiceHostConfigTool.exe
The following section describes how to configure your Bugzilla integration using the configuration tool.
-
On the General tab, specify your Digital.ai Agility connection details.
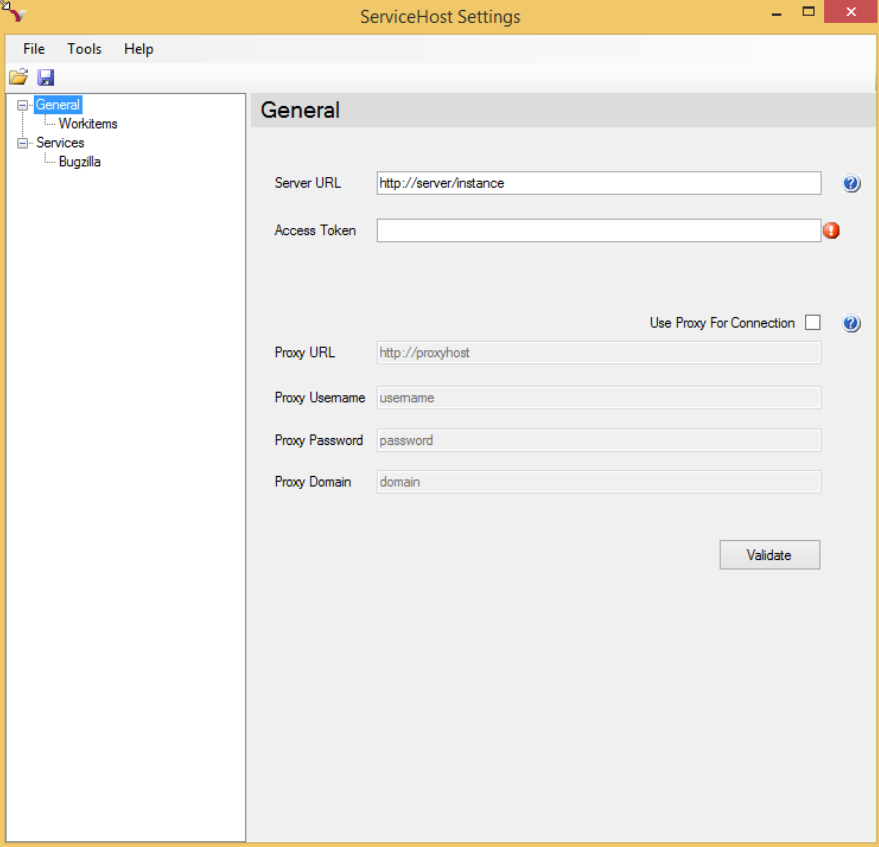
The following table describes the fields on this tab:
Field Description Server URL This is the URL to your Digital.ai Agility server. Access Token Digital.ai Agility-generated Access Token -
Once the Digital.ai Agility parameters are specified, press the Validate button to continue. You should see a "Digital.ai Agility settings are valid" message to the left of the Validate button.
-
On the Workitems tab, specify the Digital.ai Agility field that will hold the Bugzilla ID.
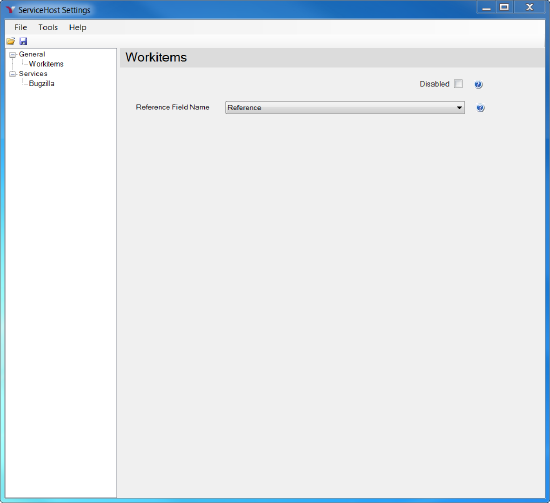
The following table describes the fields on this tab: -
On the Bugzilla tab, specify your Bugzilla connection details and the bug transfer behavior.
This tab changes slightly depending on whether you are assigning or tagging bugs. -
Configure the Bugzilla connection (Connection Parameters):
-
Click the Validate button to ensure your Bugzilla connection parameters are correct.
-
Configure how bugs are linked between Bugzilla and Digital.ai Agility ( Digital.ai Agility Defect Attributes):
-
Configure how bugs are identified by Digital.ai Agility in Bugzilla.
-
Configure how Bugzilla bugs are updated after defect creation and closure in Digital.ai Agility.
-
Select the appropriate mode of operation (Assign or Tag).
- Assign: The following fields are available when you are assigning Bugs to Digital.ai Agility:
- Tag: The following fields are available when you are tagging bugs you want in Digital.ai Agility:
-
Map your project values: Project Mapping allows you to specify where defects are created in Digital.ai Agility.
The algorithm for selecting a project is as follows:- First, the integration looks for the Bugzilla Product Name in the map.
- If it exists, the defect is created in the corresponding Digital.ai Agility Project. If the Bugzilla Product Name is not found, the integration attempts to find a Digital.ai Agility Project with the same name. If found, the integration creates the defect in the Digital.ai Agility project with a matching name.
- If it cannot find a Digital.ai Agility project with a name that matches the Bugzilla product, the integration will create the defect in the root level node of the Digital.ai Agility Project tree or in the first project in the list if there are multiple top level nodes.
-
- Click on the Project and Priority Mapping tab.
- In the Project Mapping grid, select a Digital.ai Agility project value from the drop-down.
- Supply the corresponding Bugzilla product name.
-
- Select the desired row.
- Click the Delete current row button.
-
Map your Priority values: Priority mapping allows you to configure how the Digital.ai Agility defect priority value is set based on the Bugzilla priority value. The algorithm for mapping is simple, if the Bugzilla priority value is in the mapping, the Digital.ai Agility defect value is set to the mapped value. If the Bugzilla priority value is not found, the Digital.ai Agility defect value is not set.
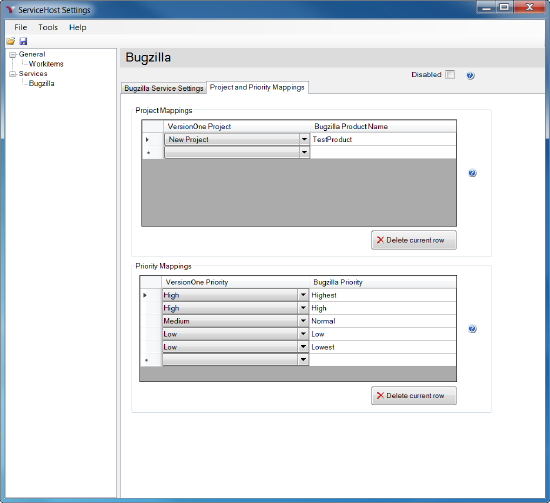
To add a priority mapping, follow these steps:
- Click the Project and Priority Mapping tab.
- In the Priority Mappings grid, select a Digital.ai Agility Priority value from the drop-down.
- Supply the corresponding Bugzilla Priority value name.
To remove a mapping:
- Select the desired row.
- Click the Delete current row button.
-
Save your changes and exit the program.
Source Code
Source code for this integration can be found in GitHub.