Release With Delivery Insights
The Digital.ai Release with Delivery Insights brings together Agile and DevOps to help you improve visibility and collaboration across software development and deliveries by seamlessly connecting the data and artifacts at each stage of the release to the related agile stories and features—allowing the whole organization to use a single tool to easily track progress end-to-end.
- Digital.ai Release is our Release orchestrator and is more focused on the work flow—less on the contents of the flow, but more of the process.
- Delivery Insights continuously tracks the content: work items, commits, packages, versions and where they are in the development value stream.
- The idea is to bring (integrate) them together, so that Release can provide rich insights into what is flowing through your development value stream.
- This combo of Release and Delivery Insights is being offered as the Release with Delivery Insights solution.
- While Release is the customer facing product, Delivery Insights runs as a headless server in the background.
Package Progression and Package Progression Board
A Package Progression is a defined set of one or more Phases through which package revisions move in order to be delivered to the end users. Each package revision contains one or more work items (stories or defects) with associated changes (commits).
A Package Progression Board presents you with the package progression perspective to view the package revisions (a bundle of associated work items and scm commits) you have and lets you promote the package revisions from one phase to the other before you deliver them to the end users.
In other words, Release with Delivery Insights provides you with much needed visibility into the value that flows through your software delivery value stream.
This how-to walks you through the process of setting up the Release with Delivery Insights service. By the end of this exercise, you will have a working instance of Digital.ai Release with Delivery Insights.
Prerequisites
The Release with Delivery Insights service integrates with and aggregates data from the following tools to generate rich insights into what's flowing through your software delivery value stream.
- Issue tracking tools—Jira and Agility
- SCM tools—GitHub, GitLab, Bitbucket Cloud, and Bitbucket Data Center
For illustrative purposes, this topic deals only with Jira and GitHub as the ticketing and SCM tools respectively.
You need the following to set up the Release with Delivery Insights service:
- Digital.ai Release 22.0 or later
- Delivery Insights plug-in
- GitHub plug-in
- Your credentials to connect to the Delivery Insights, Jira and GitHub servers
Before You Begin
Gather the following data and keep them handy.
Jira Credentials
- Jira server's URL—for example,
https://yourcompany.atlassian.net/ - Jira user name
- Jira API token (required only if the Atlassian account you authenticate with has a two-step verification enabled)
GitHub Credentials
- GitHub repository's Base URL—for example,
https://github.your-organization.com/api/v3 - GitHub personal access token
Delivery Insights Credentials
-
Delivery Insights server URL—for example,
http://yourcompany.deliveryinsights.com -
Delivery Insights server API token
-
Contact Digital.ai Support to get the Delivery Insights server credentials. Once you raise a request, the Digital.ai Support team would set up a Delivery Insights server and provide the server's URL and API token to you, which you would need later in the process.
Digital.ai Cloud Connector for BitBucket Data Center
- Contact Digital.ai Support if your data source is Bitbucket Data Center.
- The Delivery Insights service runs on the cloud. Hence, you must get the Digital.ai Cloud Connector from Digital.ai Support and use it to integrate your Bitbucket Data Center and Delivery Insights servers.
Install Digital.Ai Release 10.1 or Later
Install Digital.ai Release. For more information, see Basic Install.
Install the License Key
Note: You can skip this part if you had your Digital.ai Release license file (xl-release-license.lic) created before starting the installation. For more information, see Basic Install. If not, install the license when you are logging on to Digital.ai Release for the first time.
-
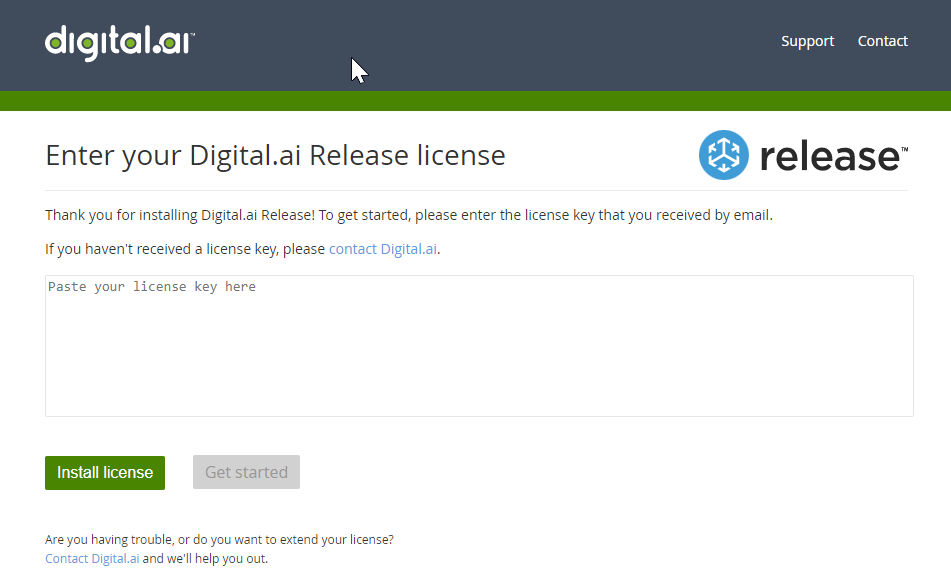
Log on to Digital.ai Release as an Admin. You would be prompted to enter your license key.
-
Copy the Digital.ai Release's license key, paste the license key in the text box, and click Install license.
Install the Delivery Insights Plug-in
-
Click Manage Plugins from the Settings menu at the top navigation bar, search for the Delivery Insights plug-in, and click Install now.
-
Restart Digital.ai Release. Open a command prompt or terminal, go to
XL_RELEASE_SERVER_HOME/bindirectory, and run the following command.Operating system Command Microsoft Windows platform run.cmdUnix platform run.sh
Install the Digital.ai Cloud Connector (Only Required for Bitbucket Data Center)
- Contact Digital.ai Support if your data source is Bitbucket Data Center (behind the firewall).
- You must get to know how to install the Digital.ai Cloud Connector and install it in your behind-the-firewall data center. This is required if your data source is Bitbucket Data Center (behind the firewall).
- In addition, the Digital.ai Support team must set up the Delivery Insights service to work with the Bitbucket Data Center (enable additional backend services), which the Digital.ai Support team would take care of when you request for the Digital.ai Cloud Connector.
Here's the minimum hardware and software requirements to install the Digital.ai CLoud Connector.
- Linux—RHEL 7.3 or later, Centos 7.4, Ubuntu 16.04
- 16GB RAM
- 10GB free disk space
- Docker and docker-compose
- Curl
For more information, contact Digital.ai Support.
Install the Github Plug-in
Make sure the GitHub plug-in is installed. If not install it from the Plugin Manager.
-
Click Manage Plugins from the Settings menu at the top navigation bar. Search for the Github plug-in, and click Install now.
-
Restart Digital.ai Release. Open a command prompt or terminal, go to
XL_RELEASE_SERVER_HOME/bindirectory, and run the following command.Operating system Command Microsoft Windows platform run.cmdUnix platform run.sh
Set Up Connections to Your Jira, Github, and Delivery Insights Servers
Click Connections from the sidebar menu and add your Jira, Github, and Delivery Insights servers and test the connections.
Add a Jira Server
-
Click the + icon to add a Jira server.

-
Type a title for the Jira server (
jira-serverin this example), type the Jira server's URL, user name, API token, and click Test.The
Jira Server is availablemessage shows up if the connection is successful.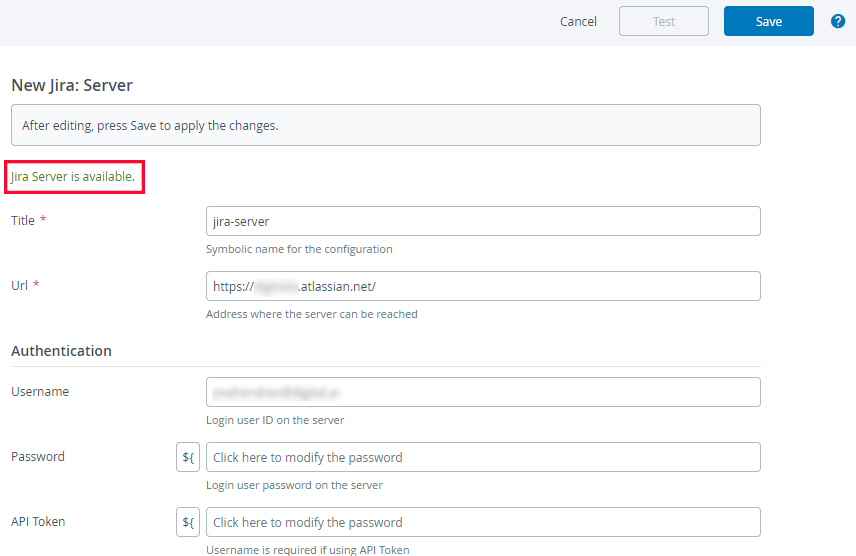
-
Click Save.
Add a Github Server
-
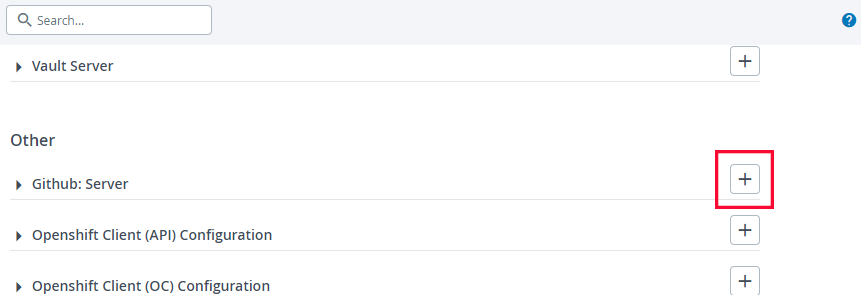
Click the + icon to add a GitHub server.
-
Type a title for the GitHub server (
GitHub-delivery-insights-demo-docsin this example), type the GitHub repository's base URL, copy and paster your GitHub personal access API token (in the Login field), and click Test.The
Github Server is availablemessage shows up if the connection is successful.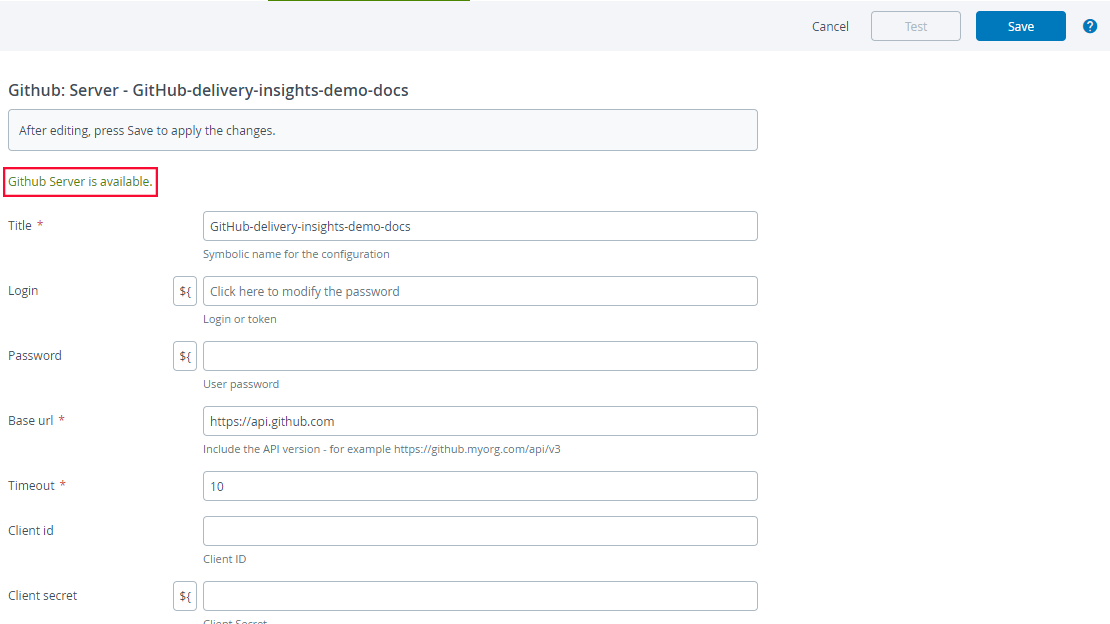
-
Click Save.
Add a Delivery Insights Server
-
Click the + icon to add a Delivery Insights server.

-
Type a title for the Delivery Insights server (
delivery-insights-serverin this example), type the Delivery Insights server's URL and API token, and click Test.The
Delivery Insights service is availablemessage shows up if the connection is successful.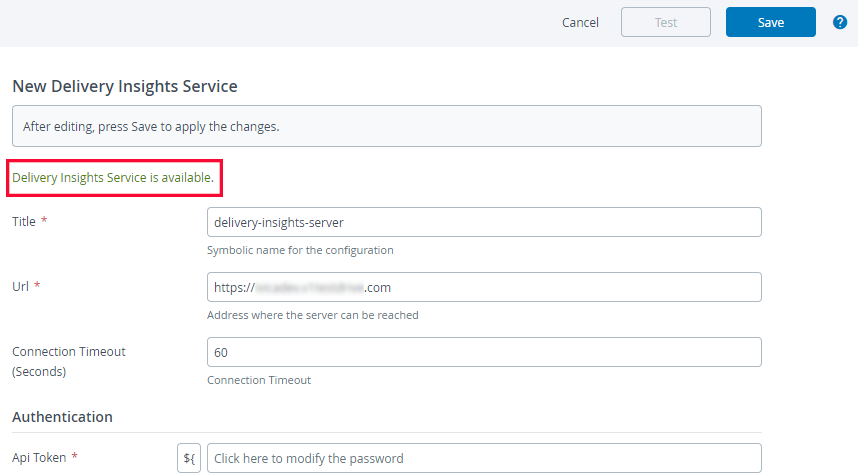
-
Click Save.
You are now all set to configure your Delivery Insights Progression Board and track your packages.
Configure the Digital.Ai Release Dashboard
-
Click Reports > Dashboards from the sidebar navigation menu.
-
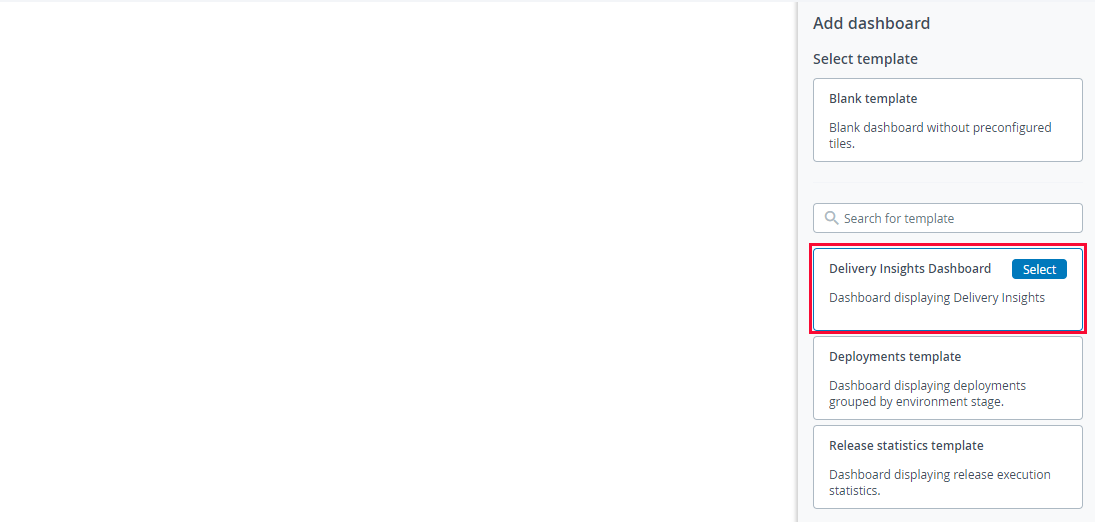
Click + Add custom dashboard from the sidebar navigation menu.
-
Hover over the Delivery Insights Dashboard card and click Select.
-
Type a name and description for the dashboard (
Pet Clinic Dashboardin this example) and click Create.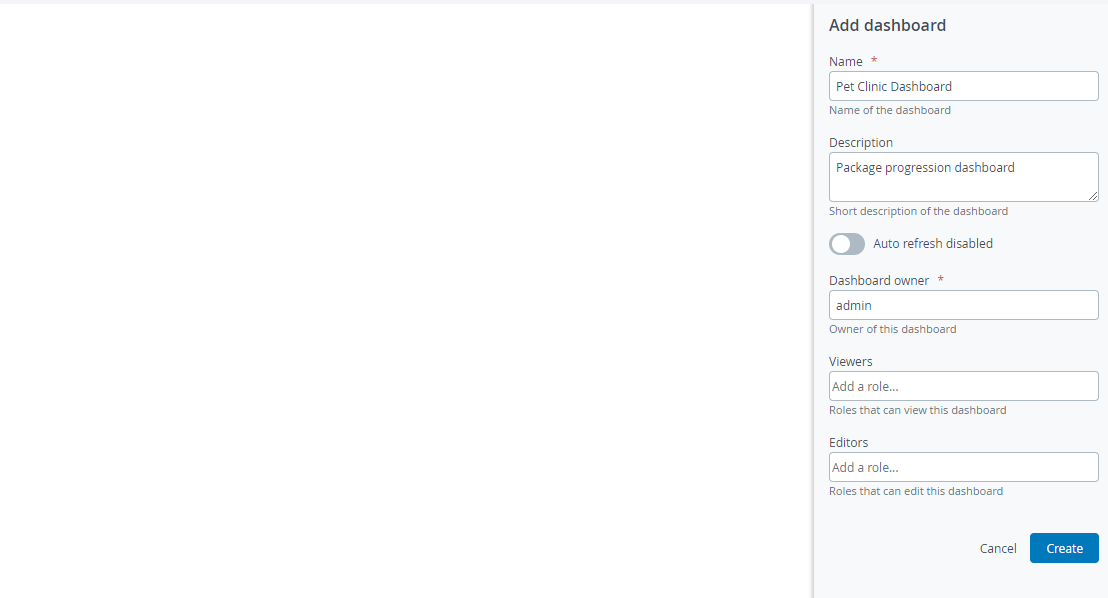
The new dashboard (
Pet Clinic Dashboardin this example) is created.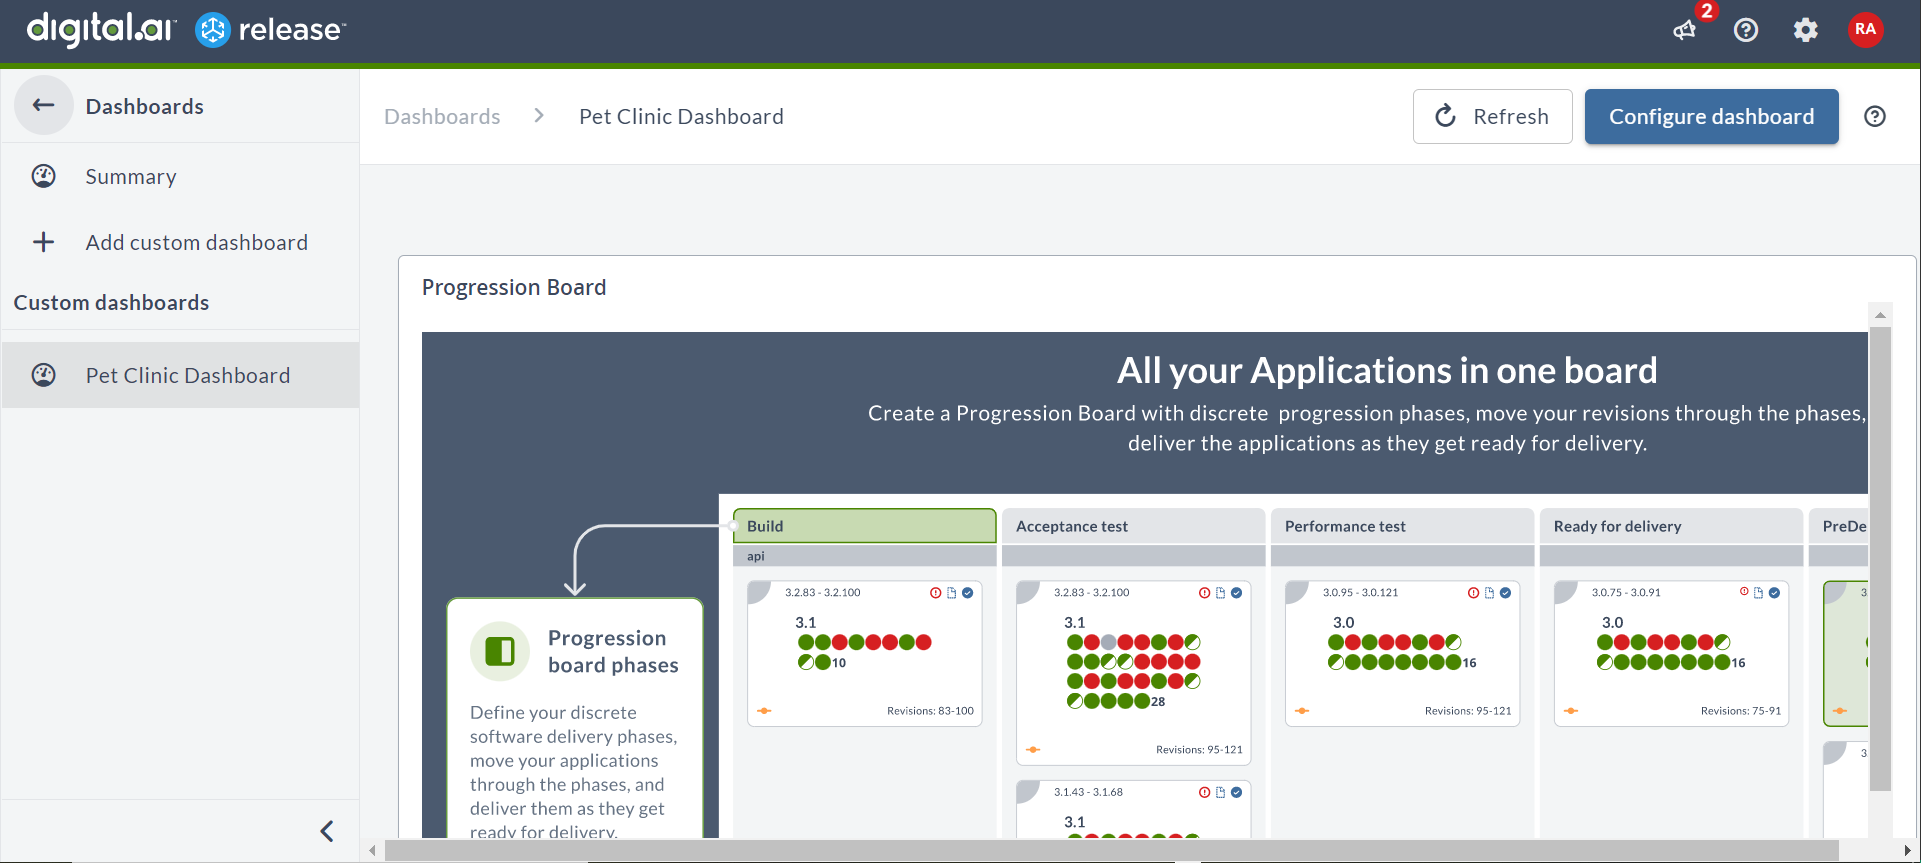
-
Click Configure Dashboard.
-
Hover over the progression board splash screen and click the configure icon.
The Edit tile pane shows up.
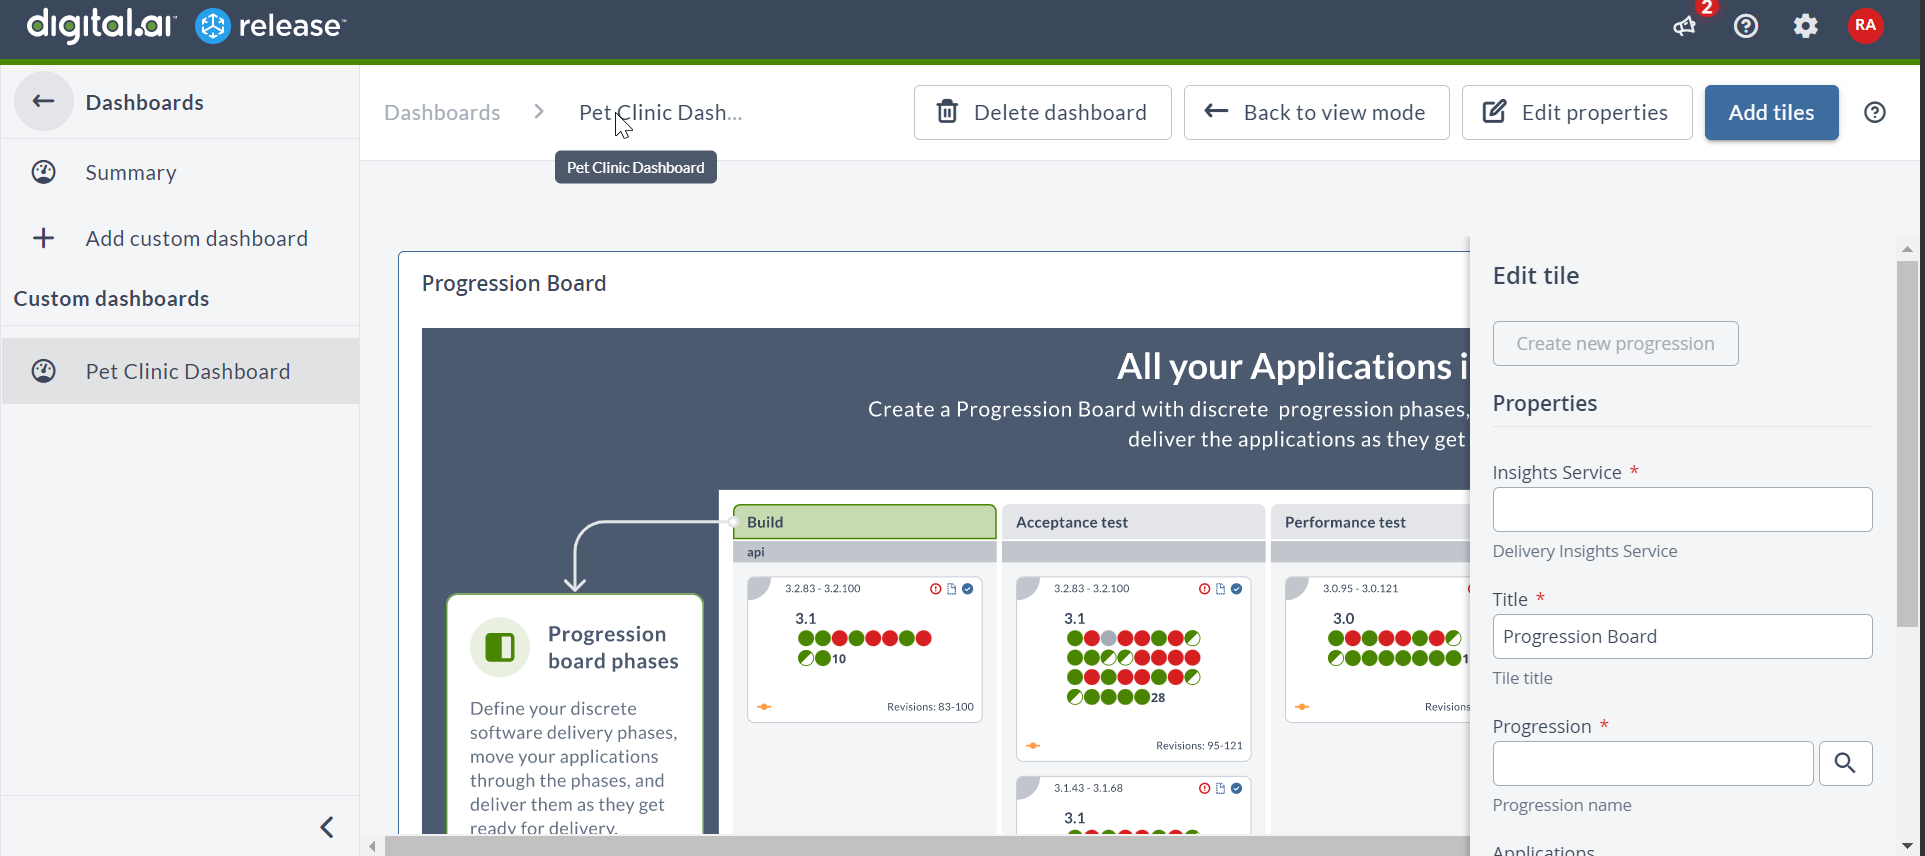
-
Select the Delivery Insights server from the Insights Service drop-down list.
-
Click Create new progression and type a name for your progression (
Pet Clinic Web Serverin this example) and click Create. -
Type a meaningful title (
Pet Clinic Package Progressionin this example) for the progression in the Title field.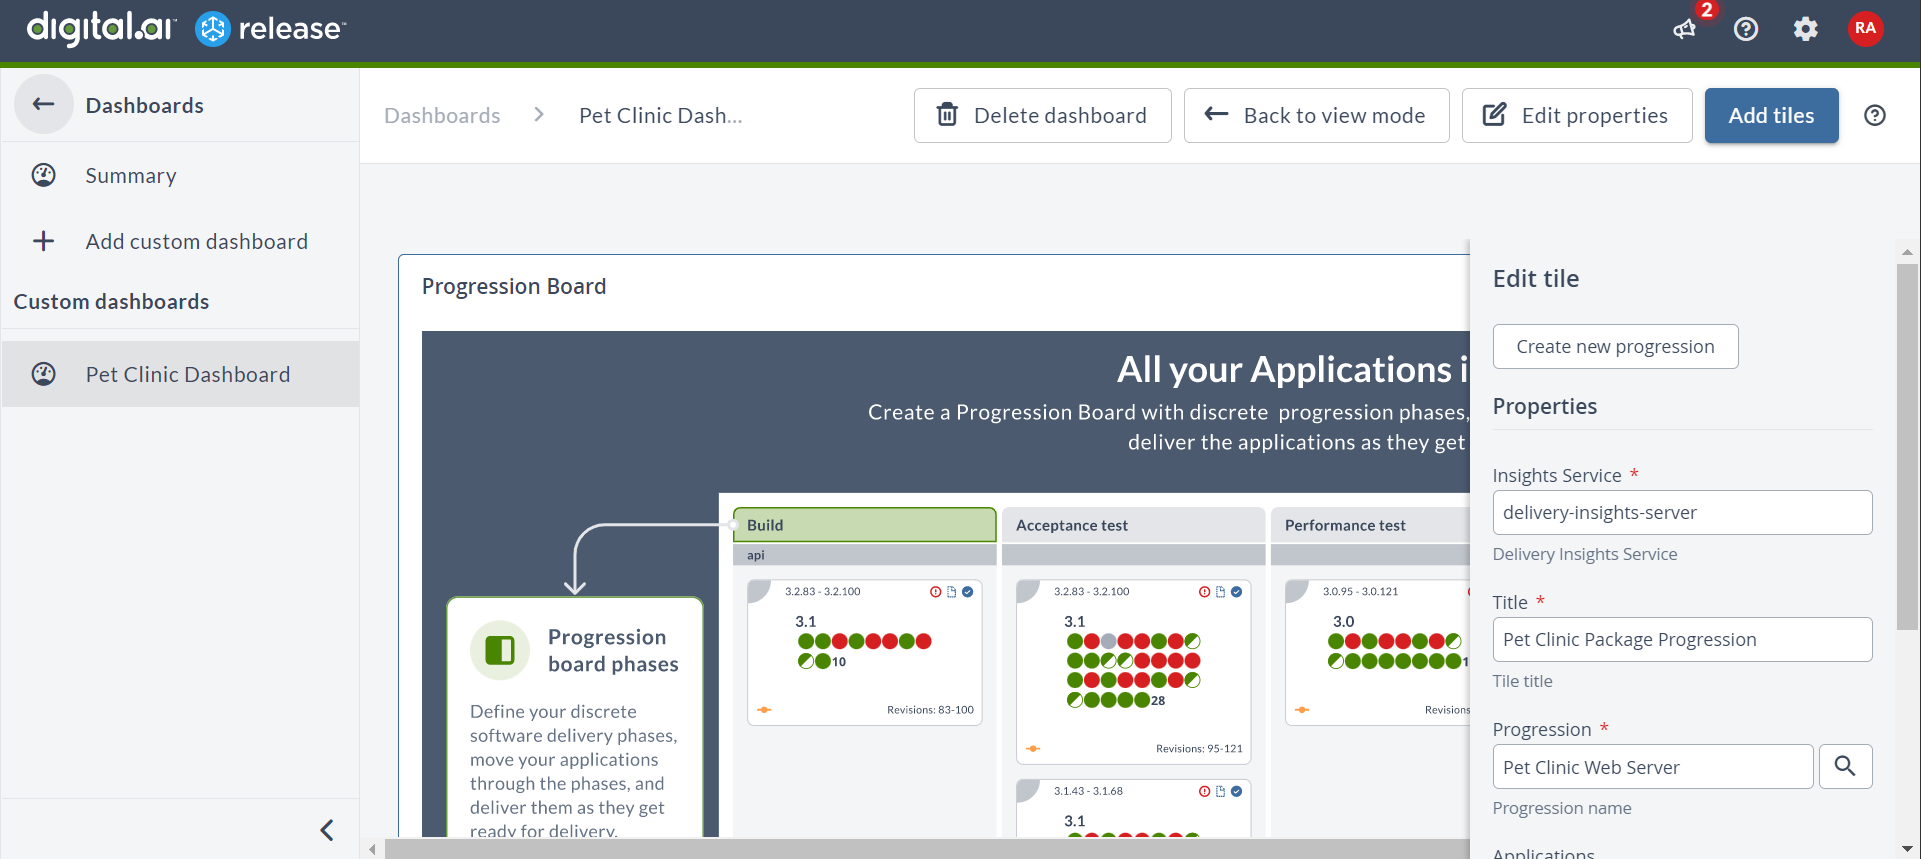
-
Click Save.
The new Progression Board is created.
-
Click Back to view mode.
Add Your Value Stream Phases
-
Click Add Phase.
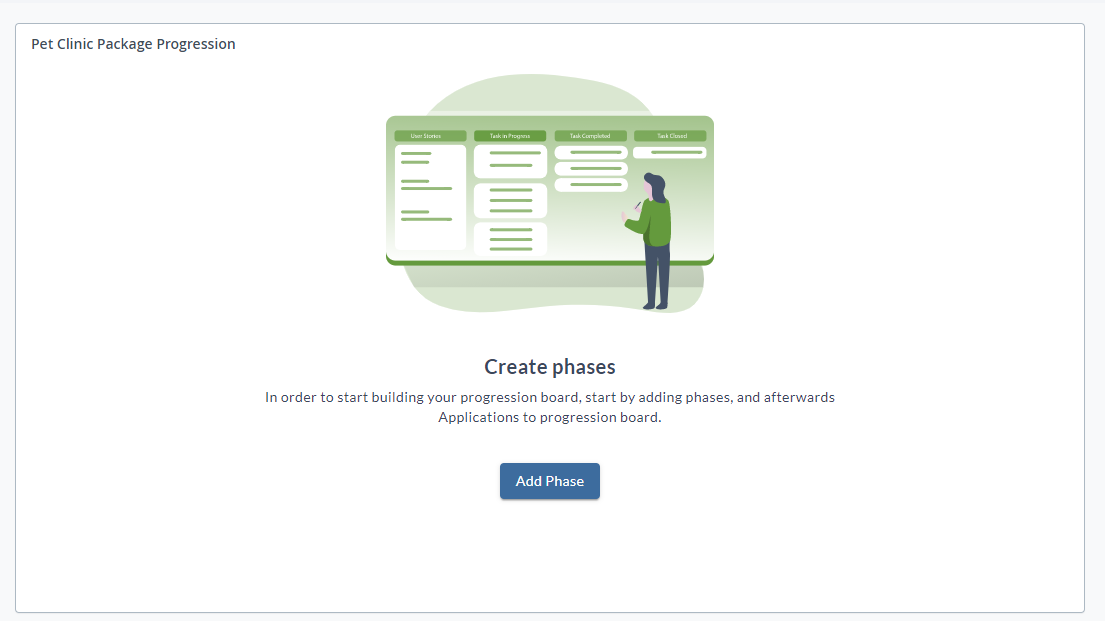
-
Click the + icon on the sides of the phase swim lane to add as many phases as you want.
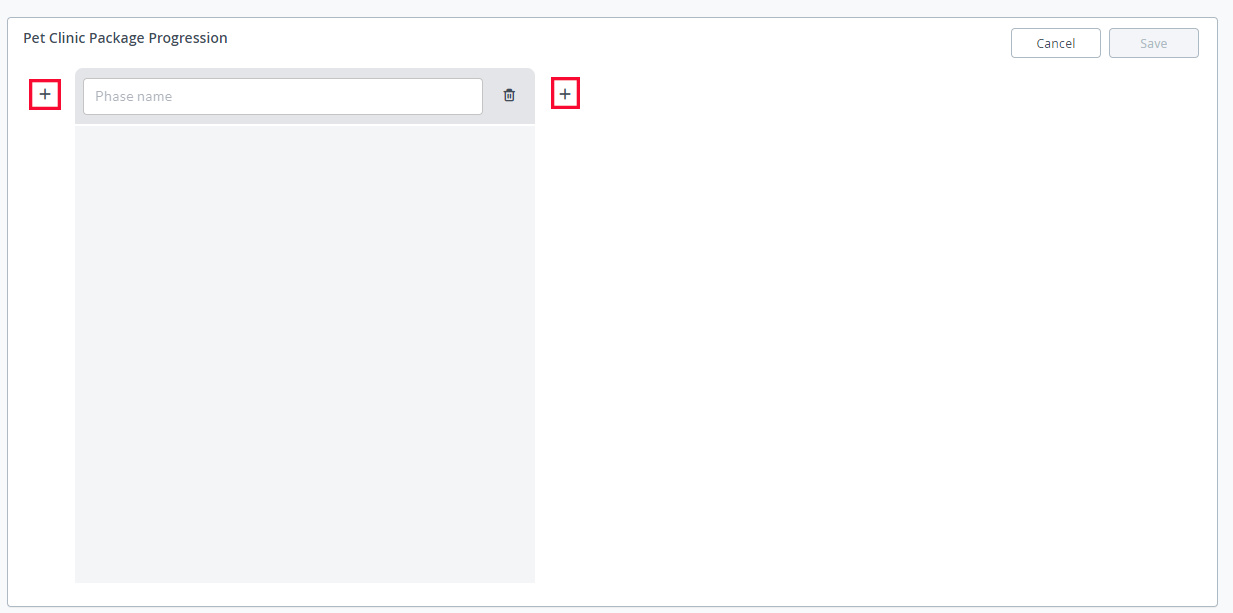
-
Type a name for all the phases you add.
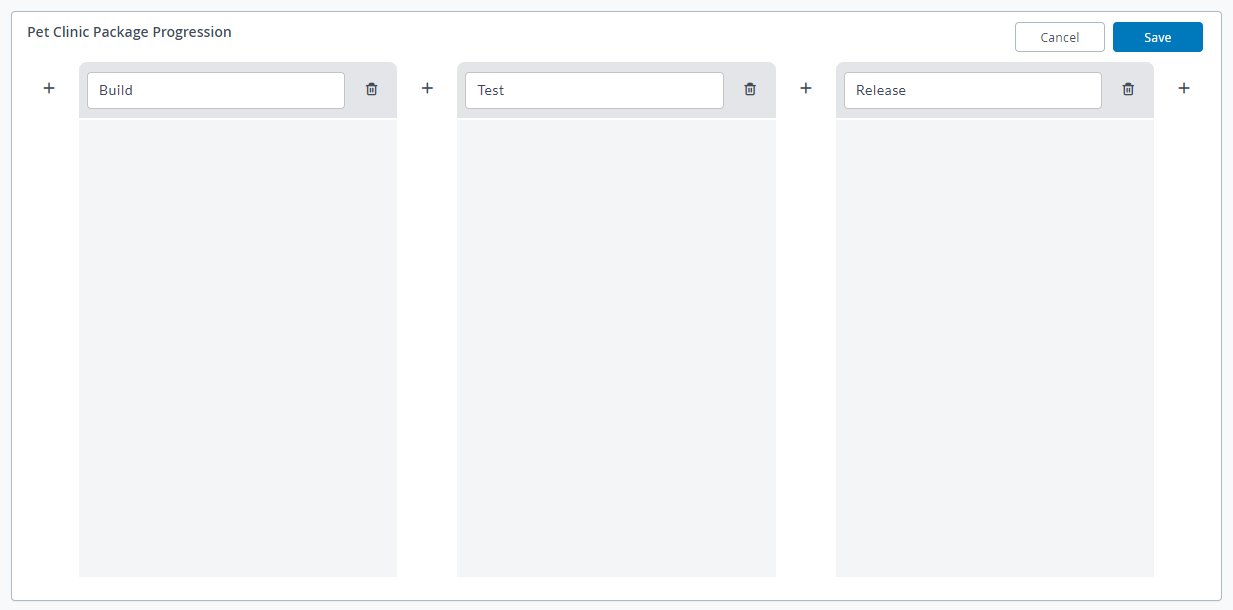
-
Click Save. The phases are added to the Progression Board.
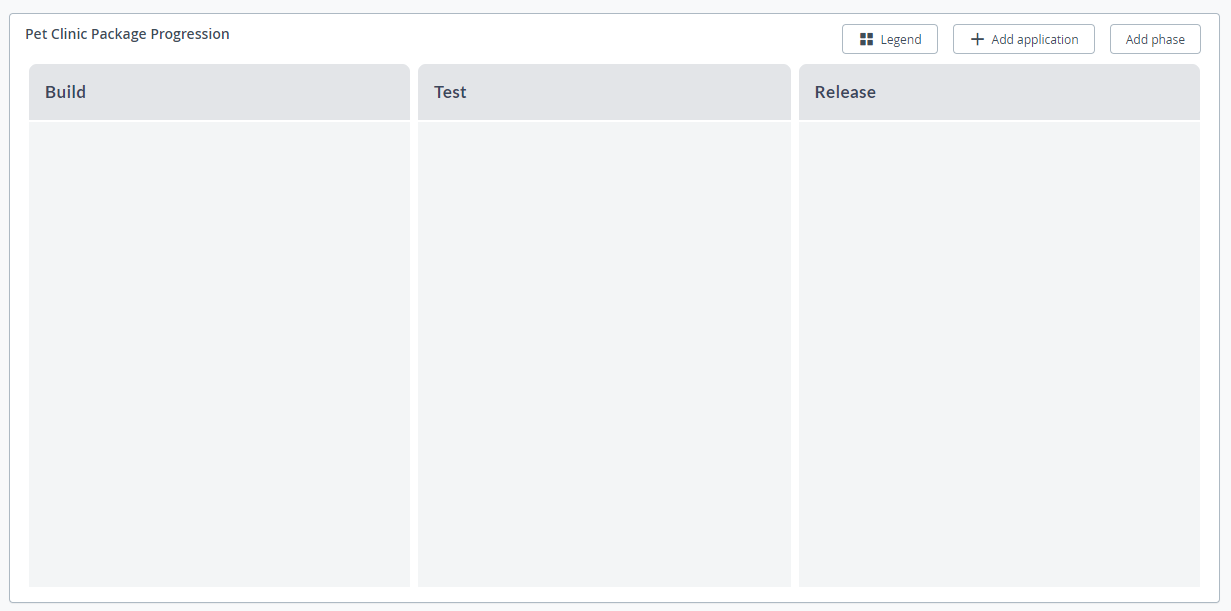
Important: After setting up your phases—though you can click Add Phase and add more phases—you cannot edit or delete the existing ones.
Add an Application
-
Click Add Application. The Add application pane shows up.
-
Type a name for the application (
Web Serverin this example). -
Select a source control (
GitHubin this example) from the Source Control drop-down list. -
Select your GitHub server from the Server Name drop-down list (
GitHub-delivery-insights-demo-docsin this example). -
Copy the Payload URL and keep it handy. Click the Copy to Clipboard icon to copy the Payload URL.
-
Select a ticketing system (
Jirain this example) from the Ticketing System drop-down list. -
Select the Jira server (
jira-serverin this example) from the Server Name drop-down list.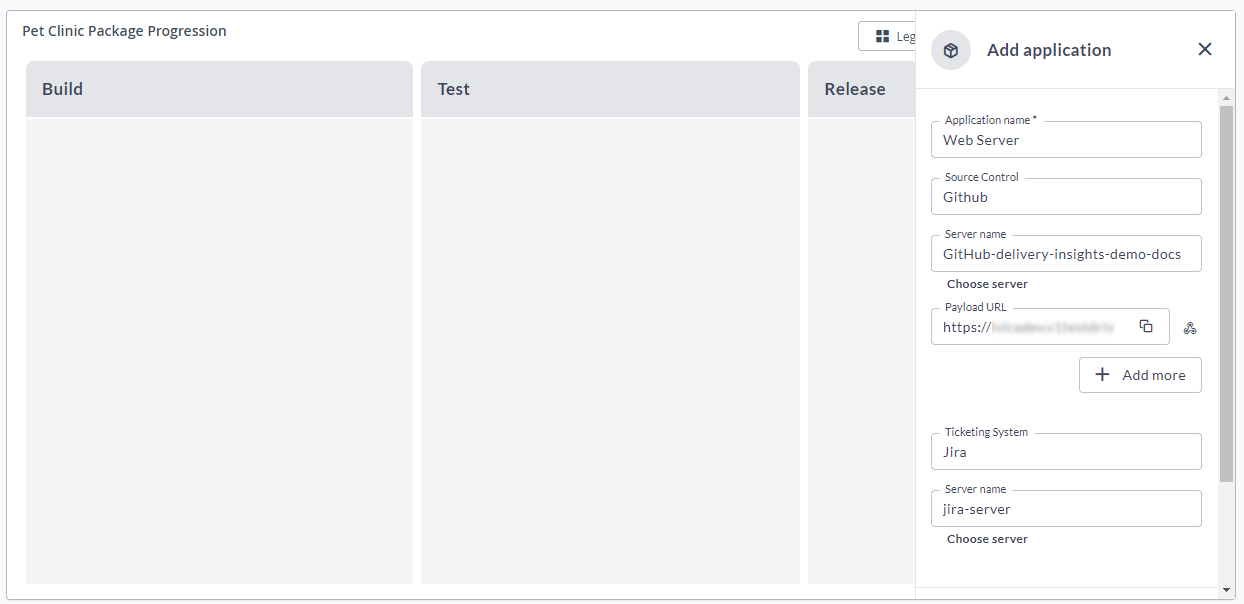
-
Scroll down and click Save.
The new application (
Web Server) is created in the Progression Board.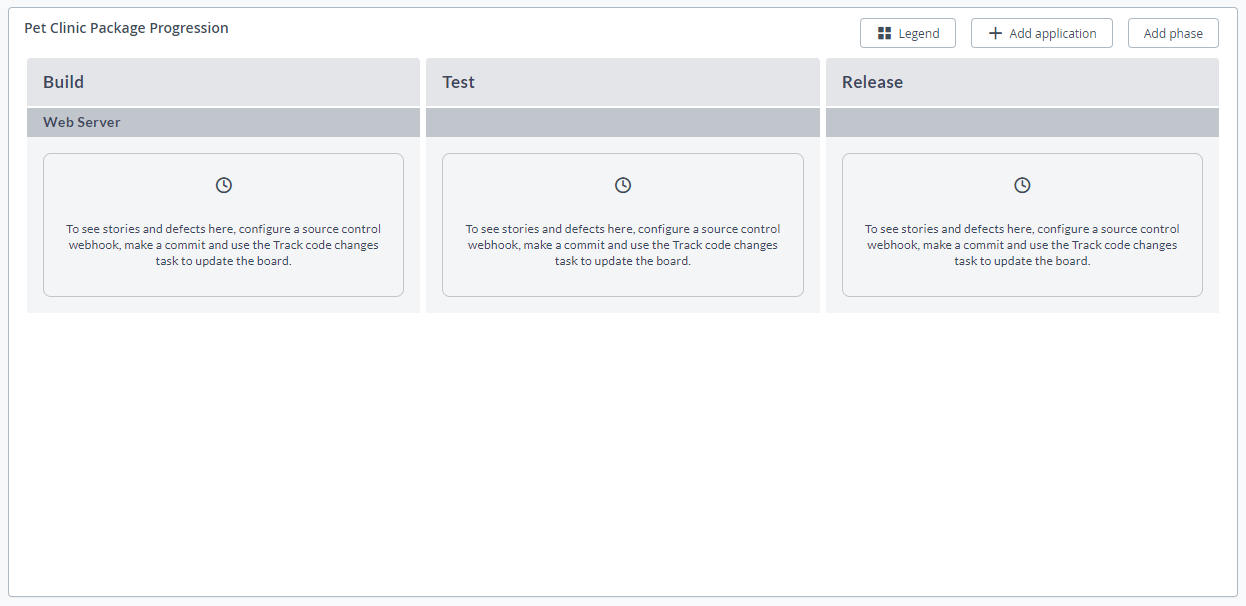
How to Recover The Payload Url of an Application?
You can open the Application Details pane and copy the Payload URL of an application at a later point in time, if required.
- Go to the Progression Board and click the application's name. The Application Details pane appears.
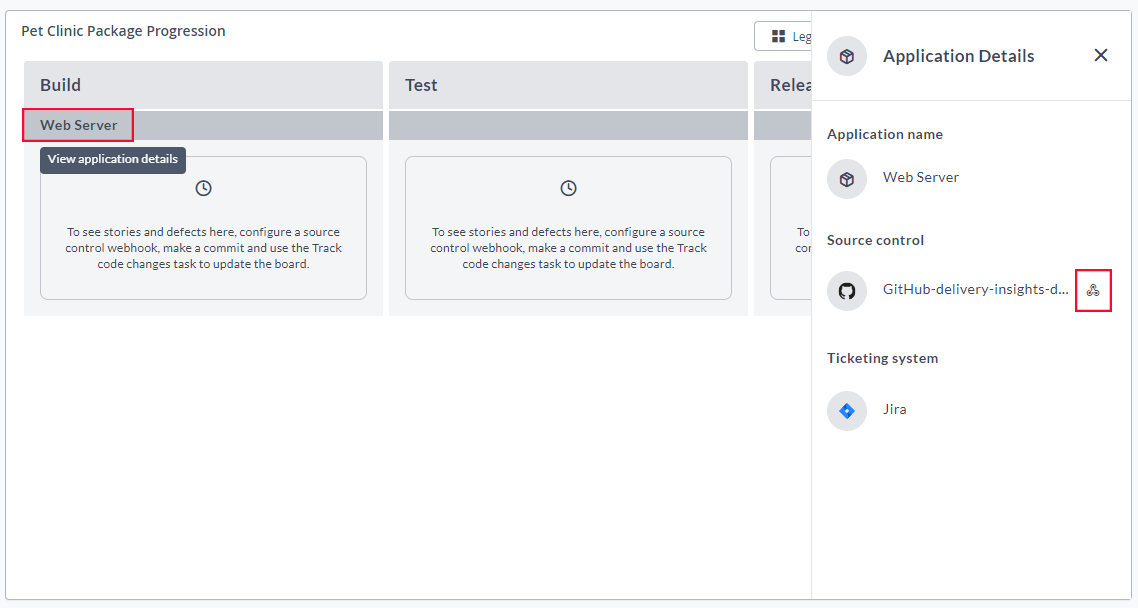
- Click the webhook icon
in the Source Control section. The Configure WebHook dialog box appears.
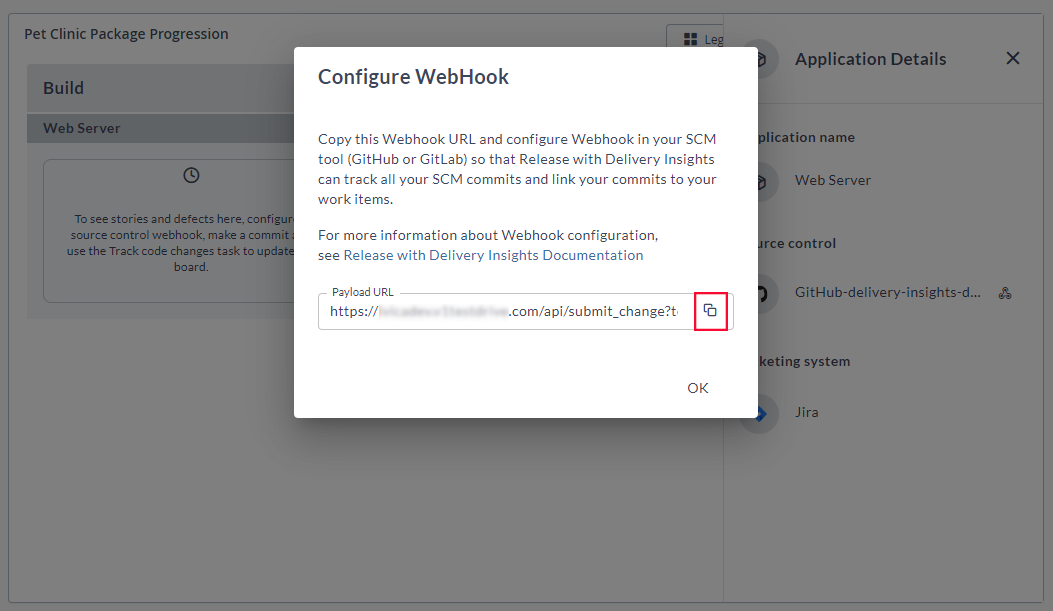
- Click the Copy to clipboard icon to copy the Payload URL and click OK to close the dialog box.
Configure the Application's Webhook in Github
-
Log on to GitHub.
-
Select your repository.
-
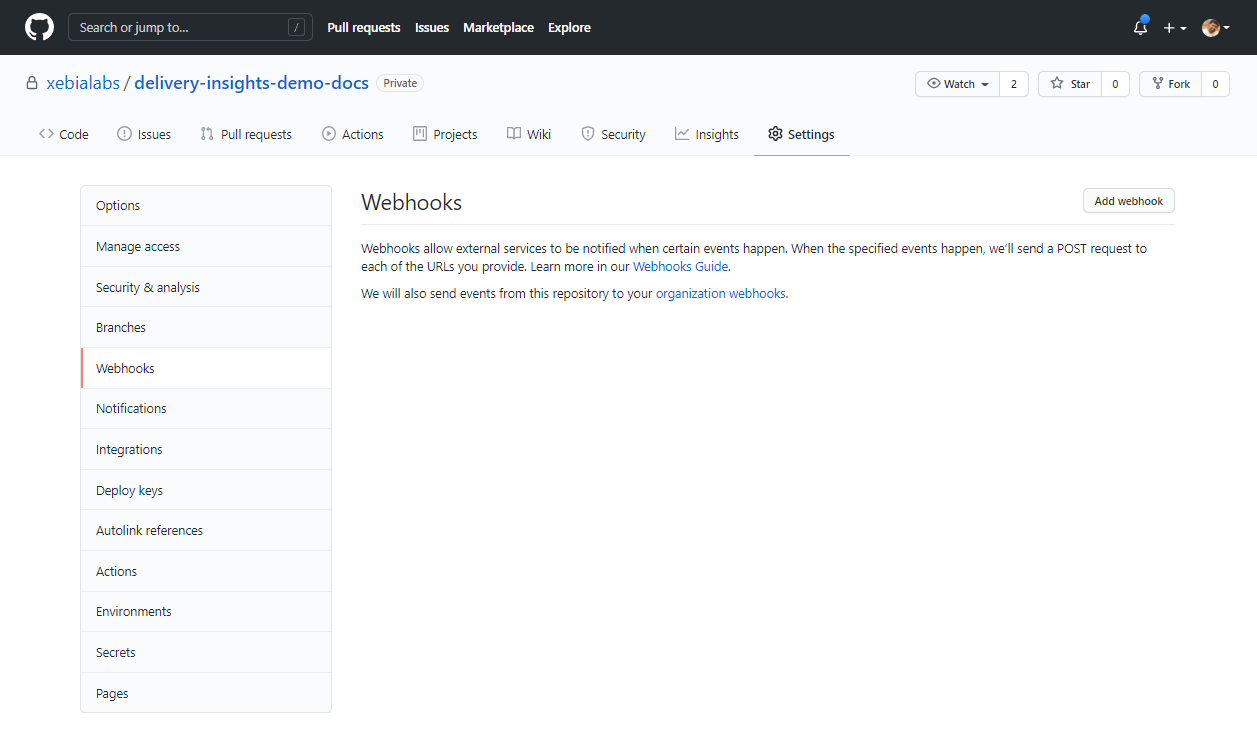
Select the Settings tab.
-
Select Webhooks from the left pane.
-
Click Add webhook.
-
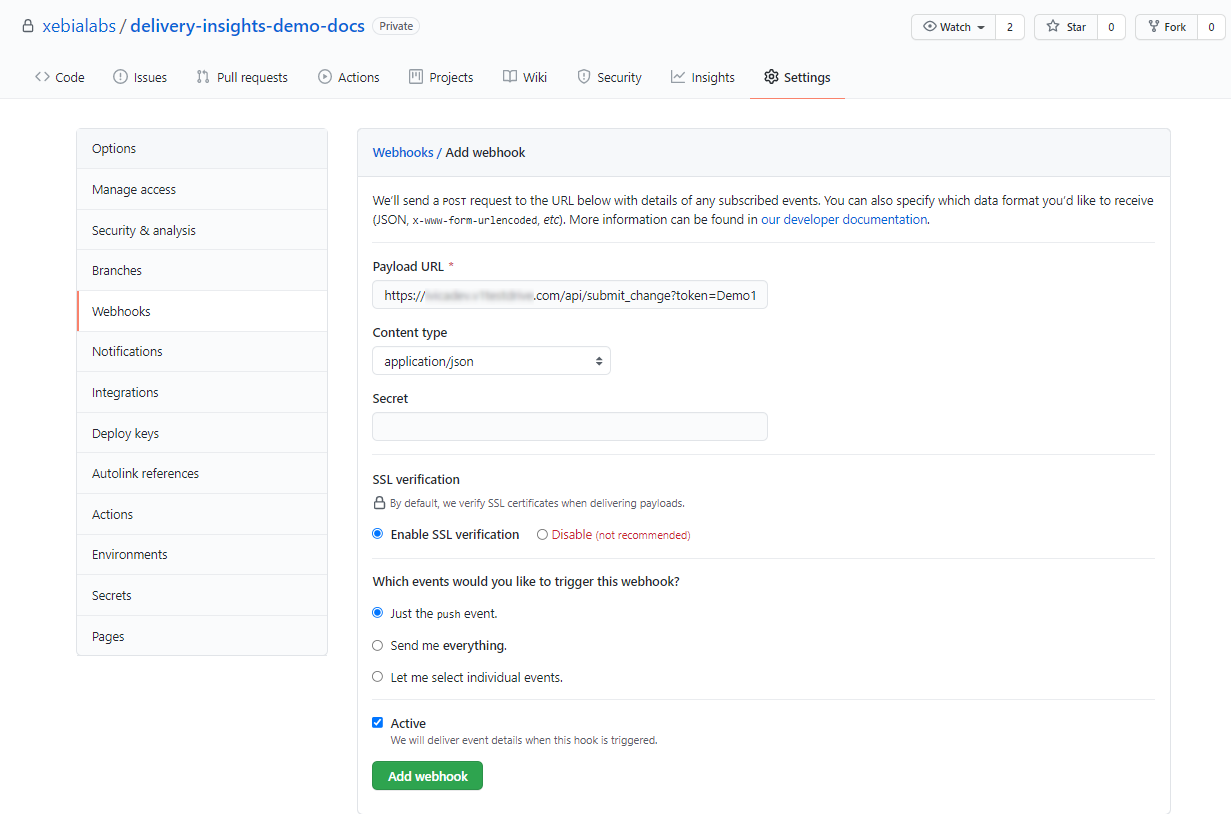
Copy and paste the application's Payload URL into the Payload URL text box.
-
Select application/json from the Content Type drop-down list.
-
Leave the defaults for the other fields and click Add webhook.
You are now all set with the configuration.
Let us now push some commits to the GitHub repository, create a package in the Progression Board, promote a package revision from one phase to the other, and finally remove (deliver) the package revision from the Progression Board.
For this tutorial, I have created three Jira work items as illustrated in the following image to commit my changes in the GitHub repository. Note the Jira work item IDs (ENG-5580, ENG-5581, ENG-5582), which I would include in the commit messages for creating association between the commits and work items.

Here's an example commit message to illustrate how to include the Jira work item ID in the commit message.
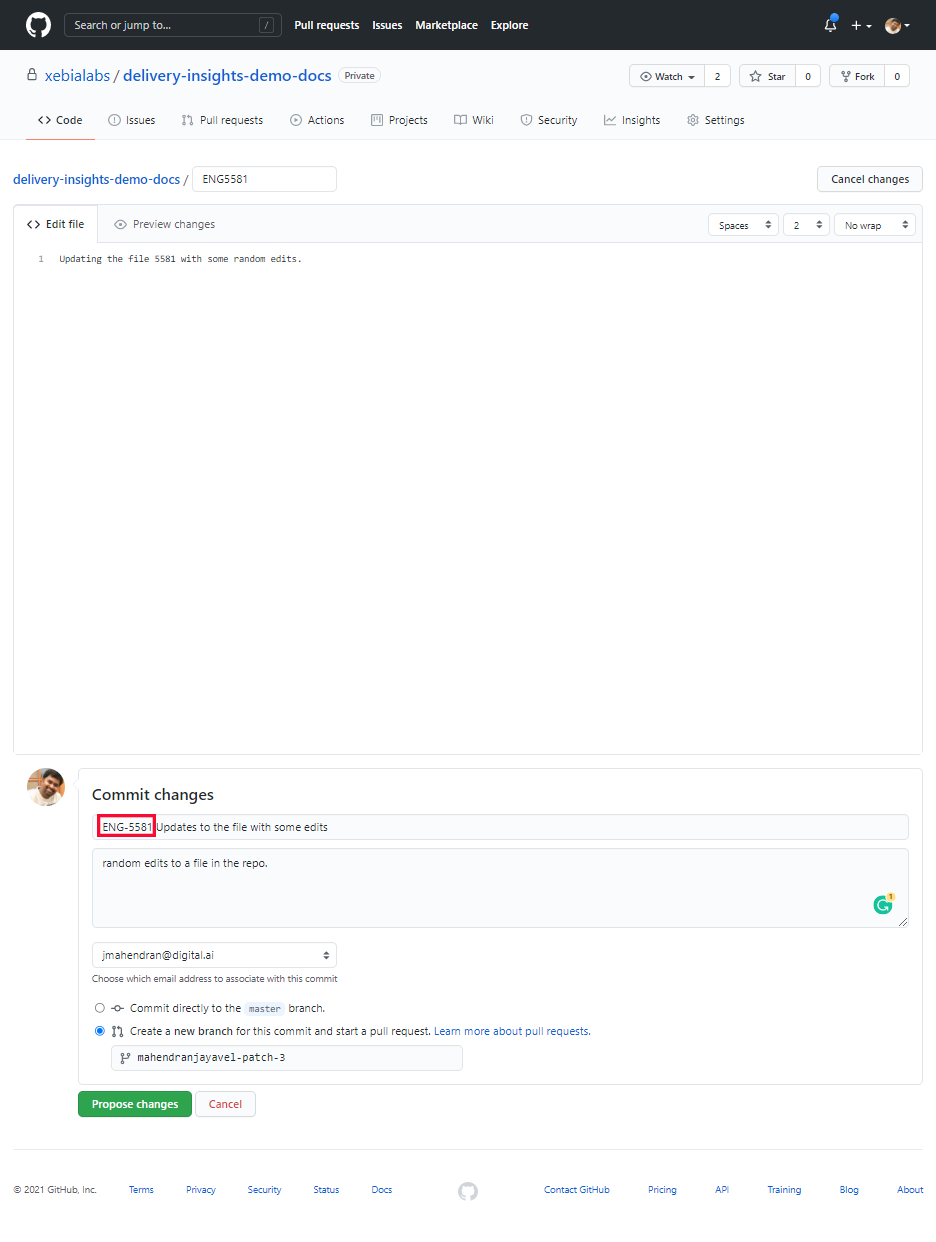
Go on and push your commits to your repository. When you have enough commits, you can create a package to track the work items/commits.
Note: In real world scenarios, you may have a CI tool (like Jenkins) create a build and when it's done you can have Digital.ai Release start a new release to create a package revision that you can track in your Progression Board. However, for illustrative purposes, we are going to create and run the following Create Package Revision task manually.
Create a Package Revision
-
Log on to Release.
-
Select Folders from the sidebar navigation menu.
-
Click + Add Folder and create a new Delivery Insights folder.

-
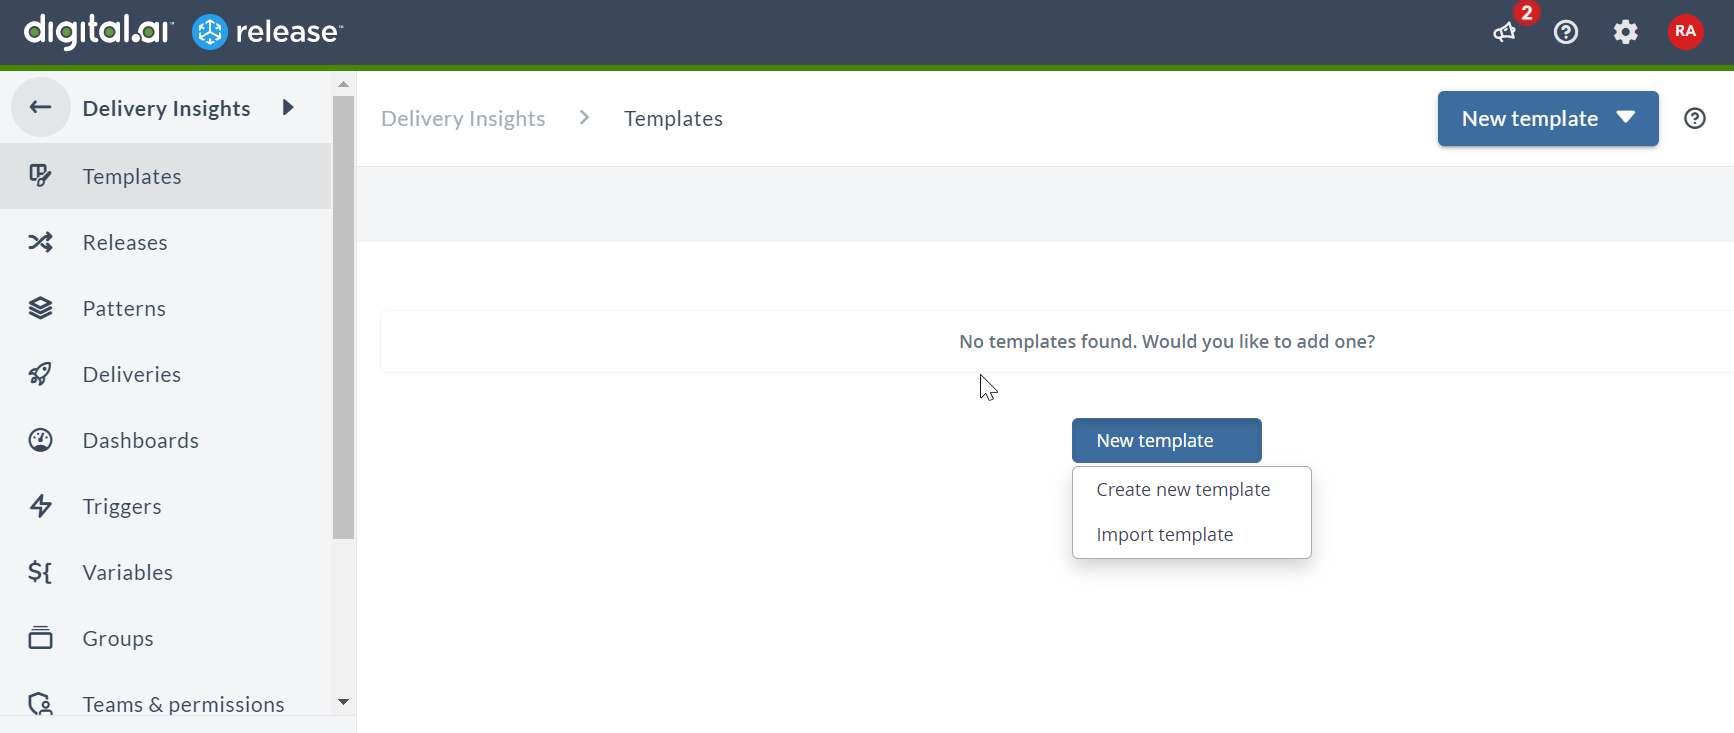
Select the Delivery Insights folder, select Templates from the sidebar, and click New template > Create new template.
-
Type a name for the template and click Create (
Create Packagein this example).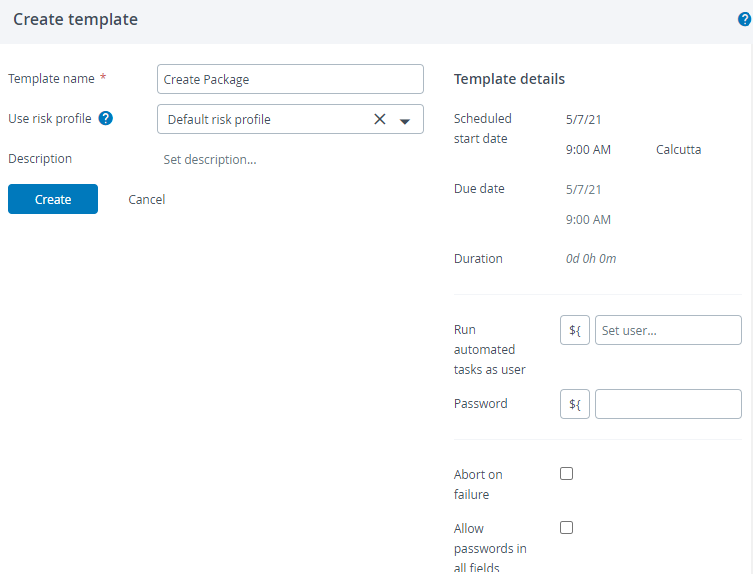
-
Click Add Task.
-
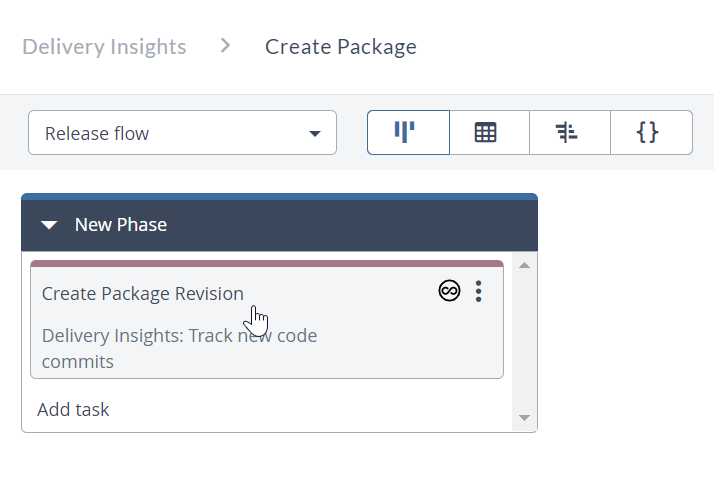
Type a title for the Task (Create Package Revision in this example).
-
Select the Track new code commits task from the drop-down menu.
-
Click Add. The Create Package Revision task is created.
-
Click the Create Package Revision task to configure it.
-
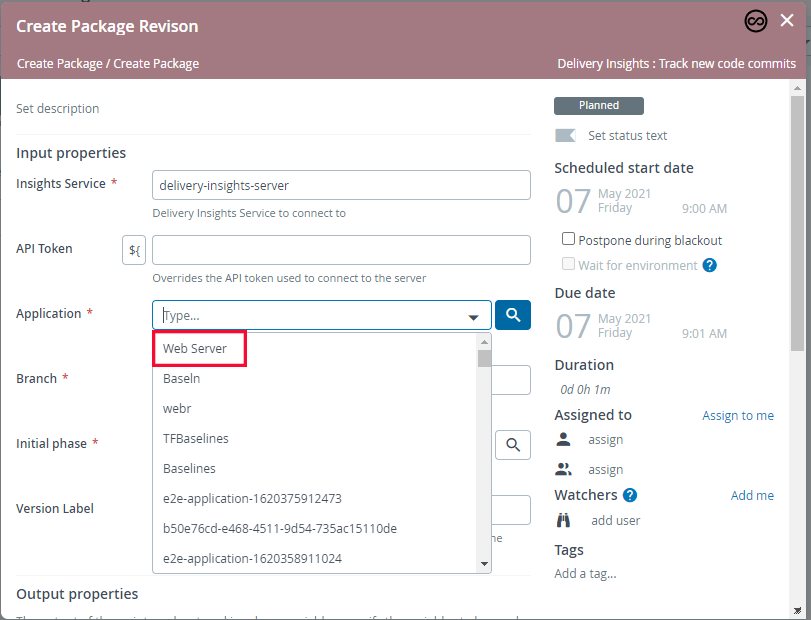
Click the Application field's search icon and select the application you created (Web Server in this example).
-
Type the repository's branch name to fetch the commits from.
-
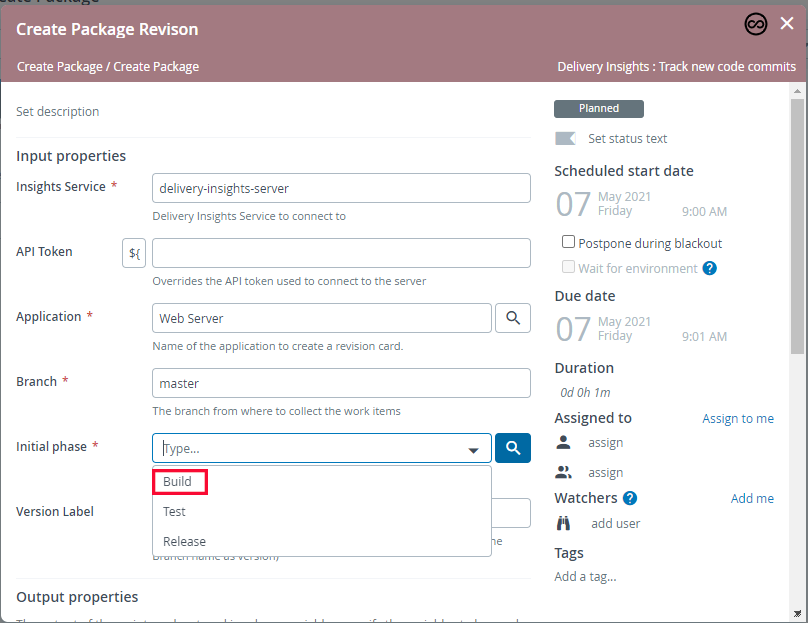
Click the Initial Phase field's search icon and select the initial phase you want the package revision to be created in.
-
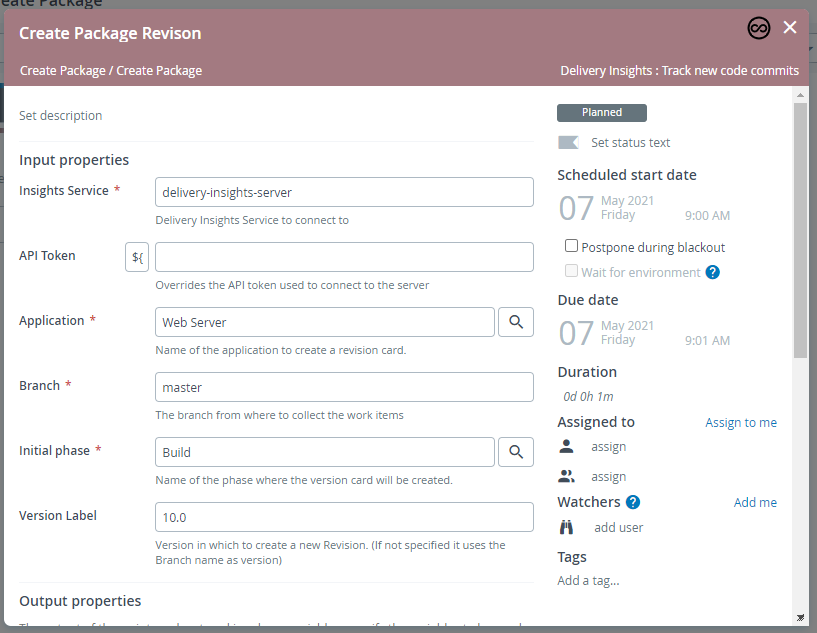
Type a version label, 10.0 for example.
-
Close the Create Package Revision task's configuration dialog box.
-
Click New Release.
-
Type a name for the release (
Create 10.0 Packagein this example) and click Create.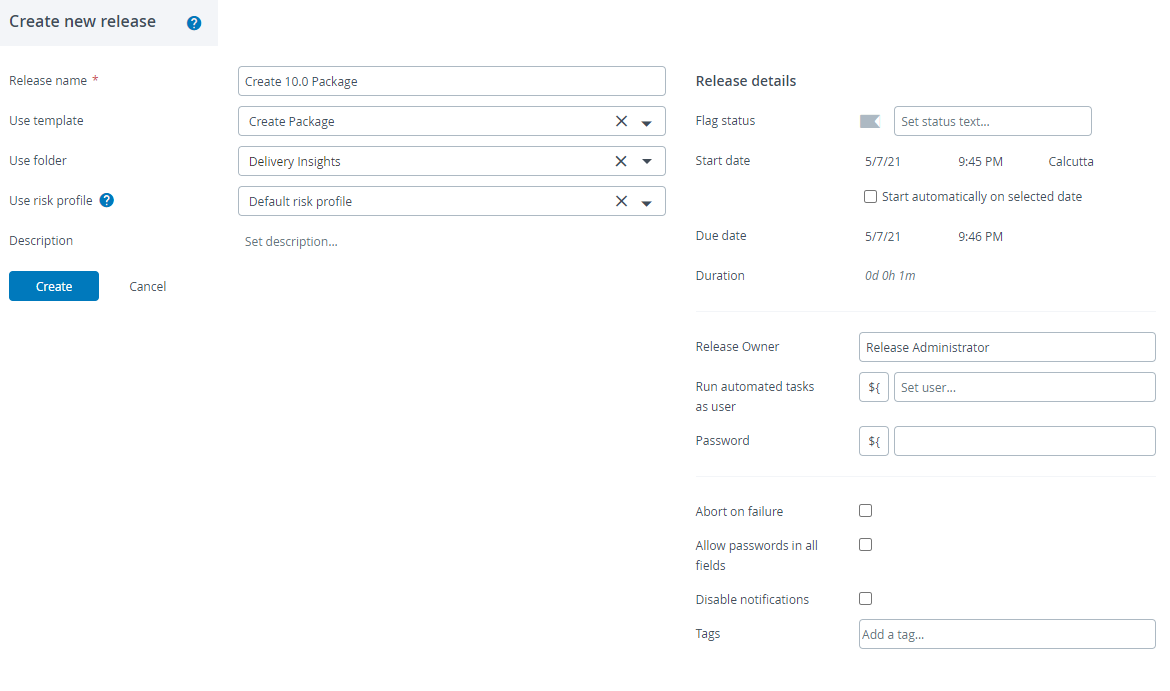
-
Click Start Release.

-
A confirmation message appears. Click Start.

-
Click the completed task to view the log.
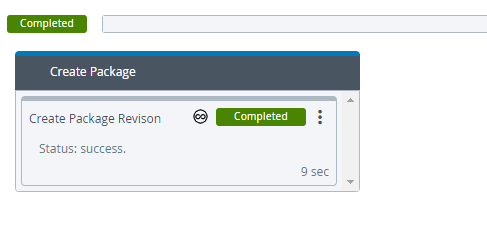
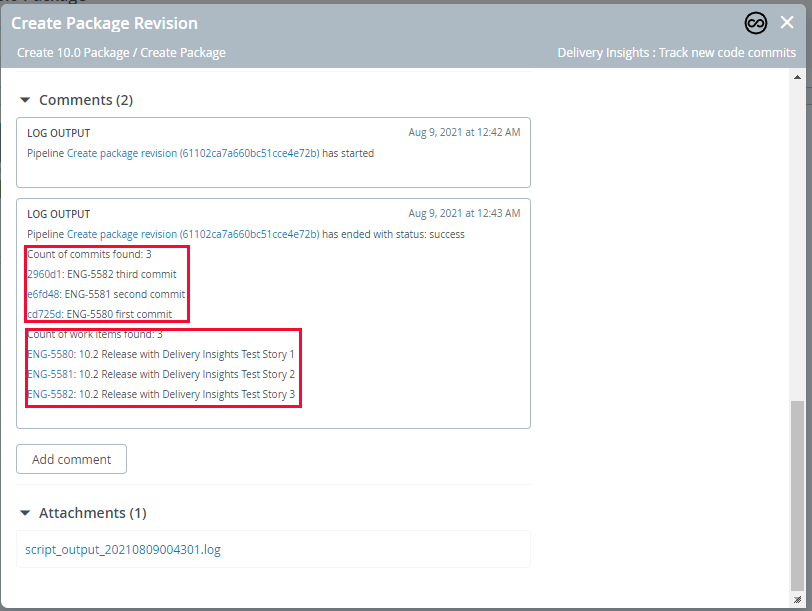
-
You can now go to the Progression Board and refresh the board to view the new package revision card.
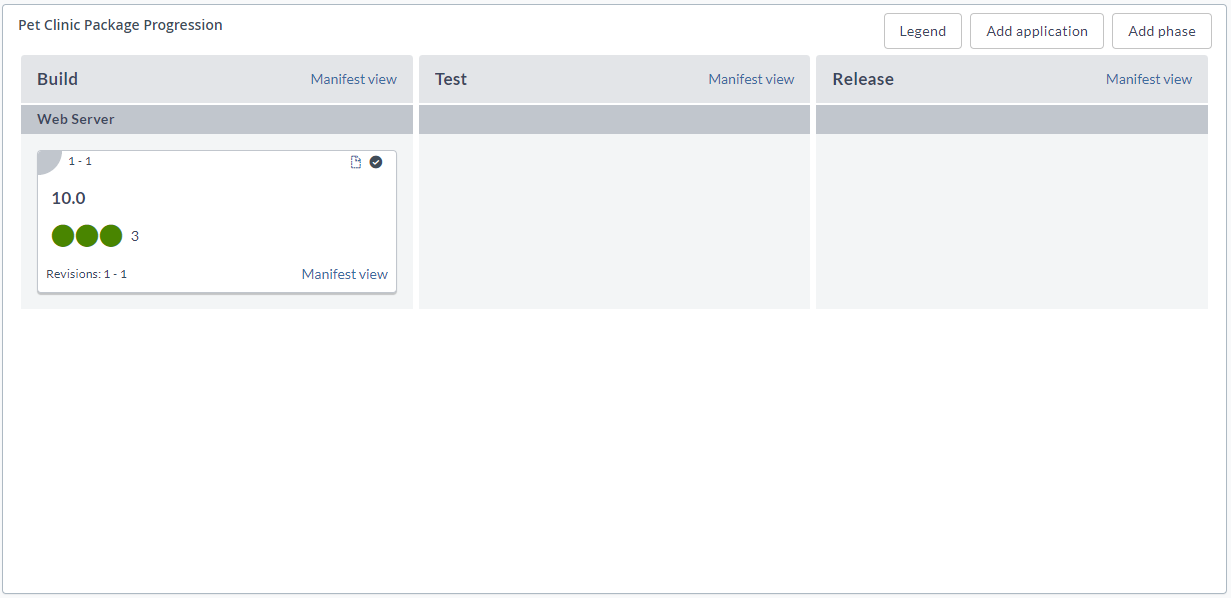
-
Hover over a dot to view the associated work item.
-
Click a dot to view the work item's details pane. You can click the Open in Jira icon to view the work item in Jira.
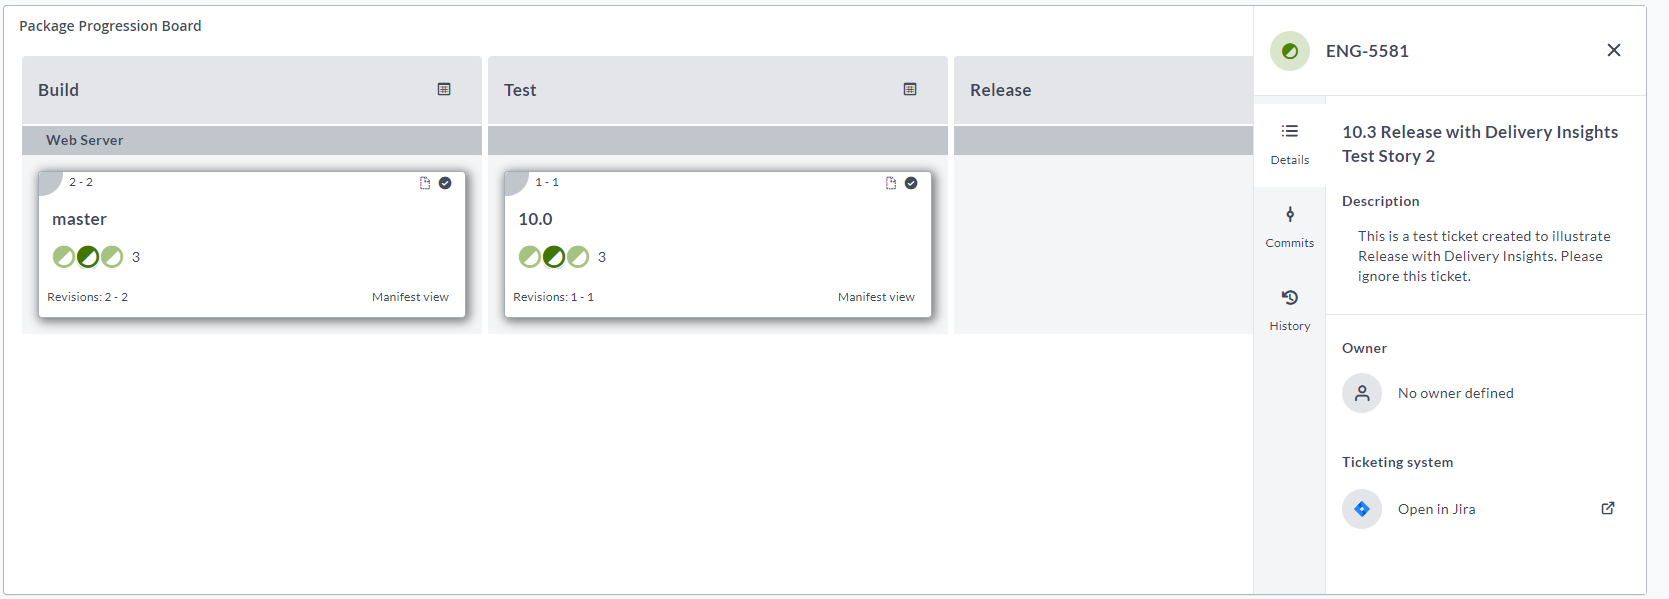
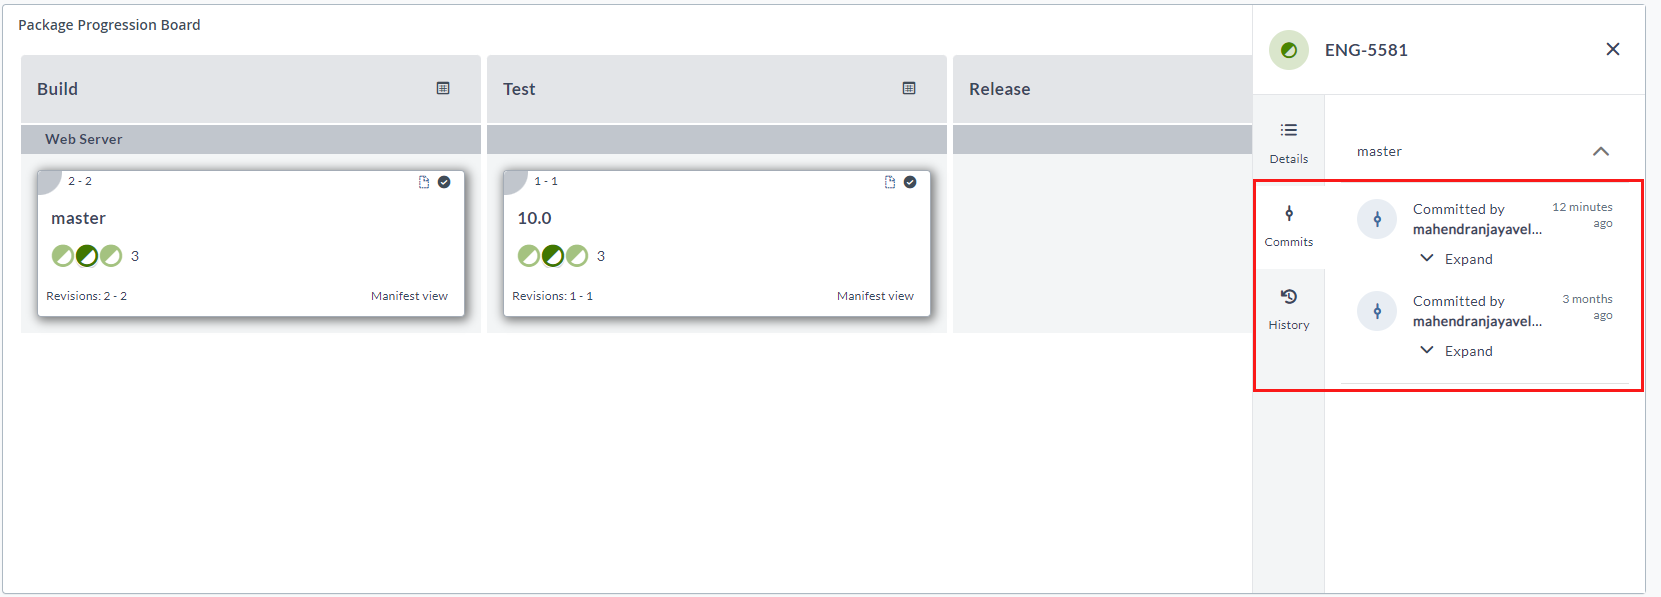
Select the Commits tab of the work item details pane to view the commits associated with the work item.
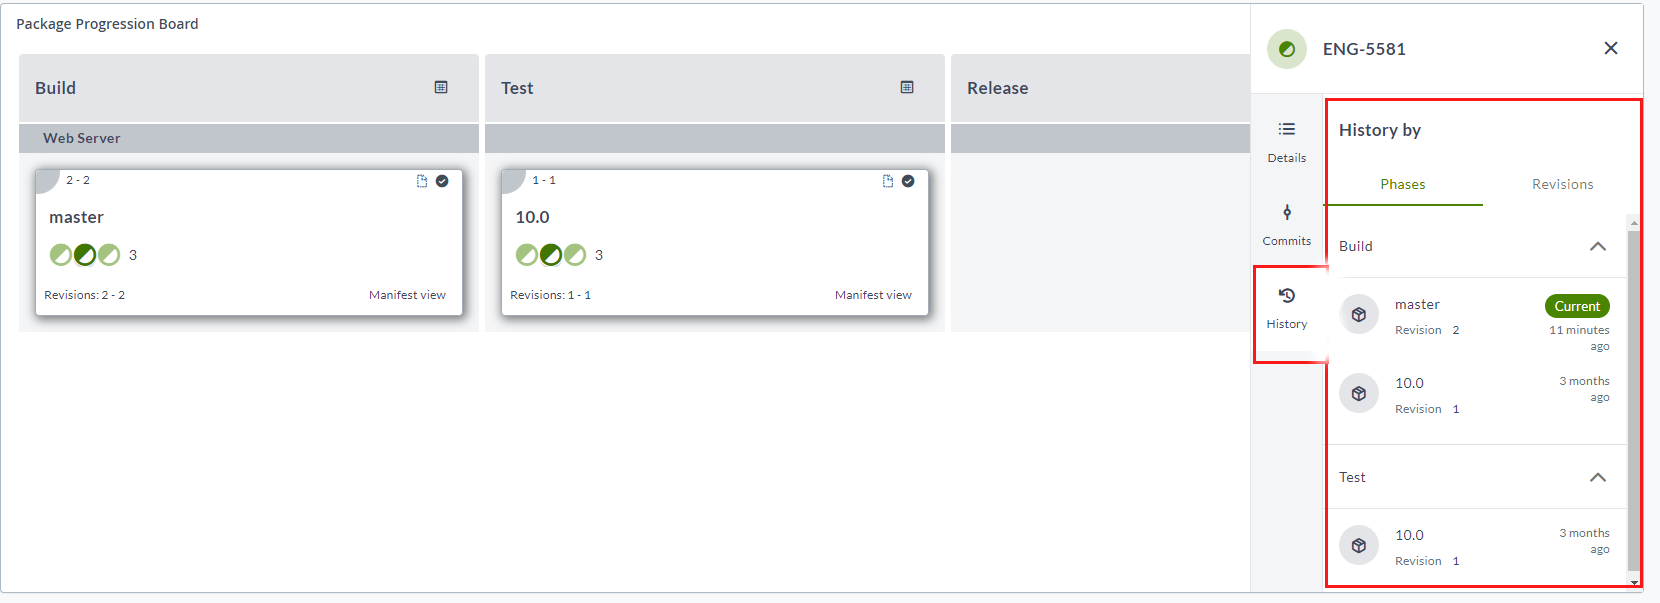
Select the History tab of the work item details pane to view the history by phases and revisions (select the Phases and Revisions tabs respectively).
Promote a Package Revision
-
Select the Delivery Insights folder and click Add template > Create new template.
-
Type a name for the template and click Create (
Promote Packagein this example). -
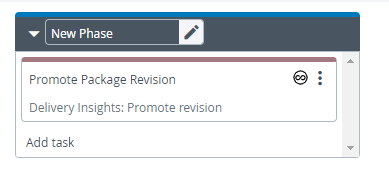
Click Add Task.
-
Type a title for the Task (
Promote Package Revisionin this example). -
Select the Promote revision task from the drop-down menu.
-
Click Add.
-
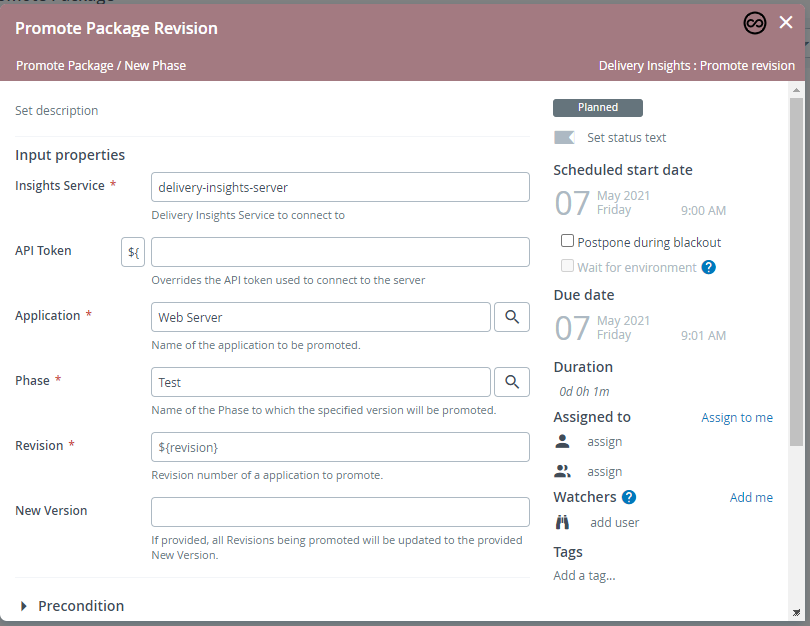
Click the Promote Package Revision task to configure it.
-
Click the Application field's search icon and select the application you created (Web Server in this example).
-
Click the Phase field's search icon and select the phase which you want the package revision to be promoted to.
-
Leave the other fields with the default values and close the Promote Package Revision task's configuration dialog box.
-
Click New Release.
-
Type a name for the release (
Promote 10.0 Version 1in this example), type a revision number you want to promote (1in this example) in the revision text box, and click Create.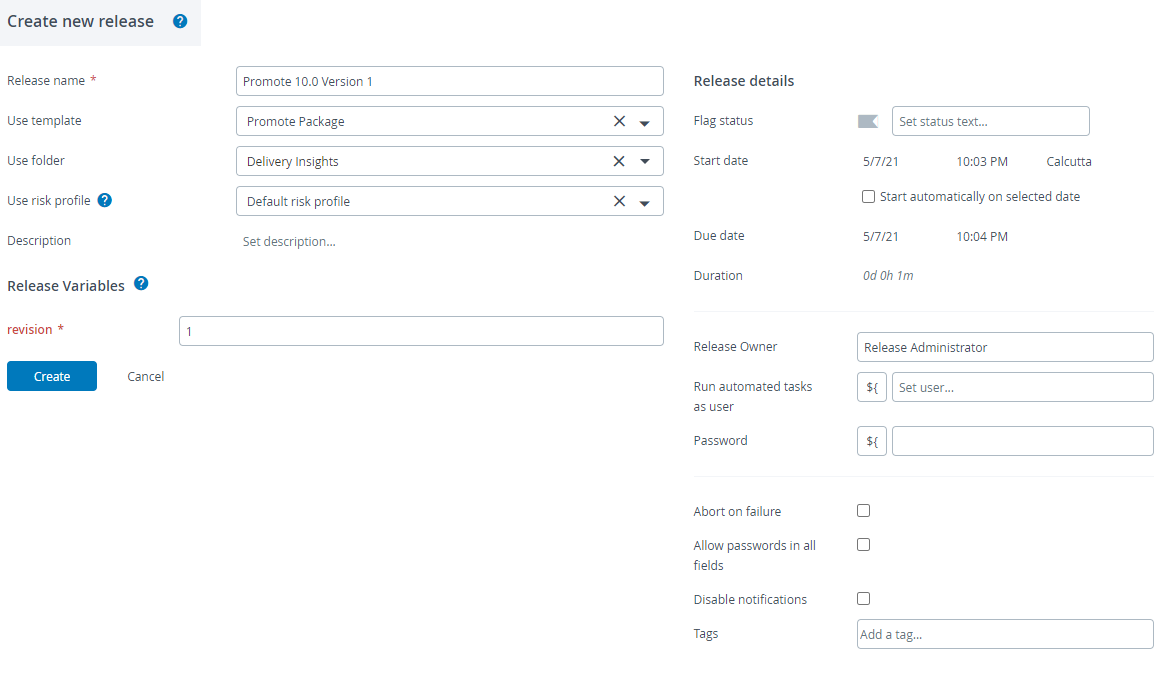
-
Click Start Release.
-
A confirmation message appears. Click Start.

-
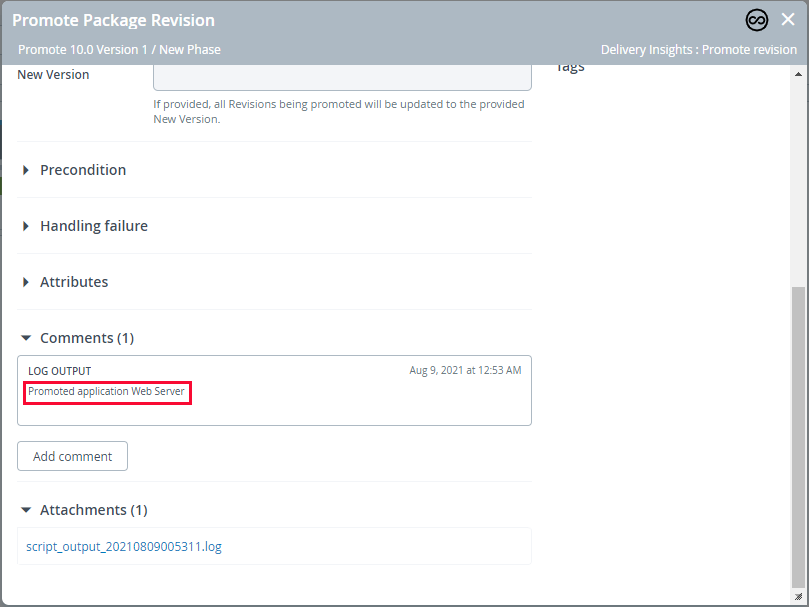
Click the completed task to view the log.
-
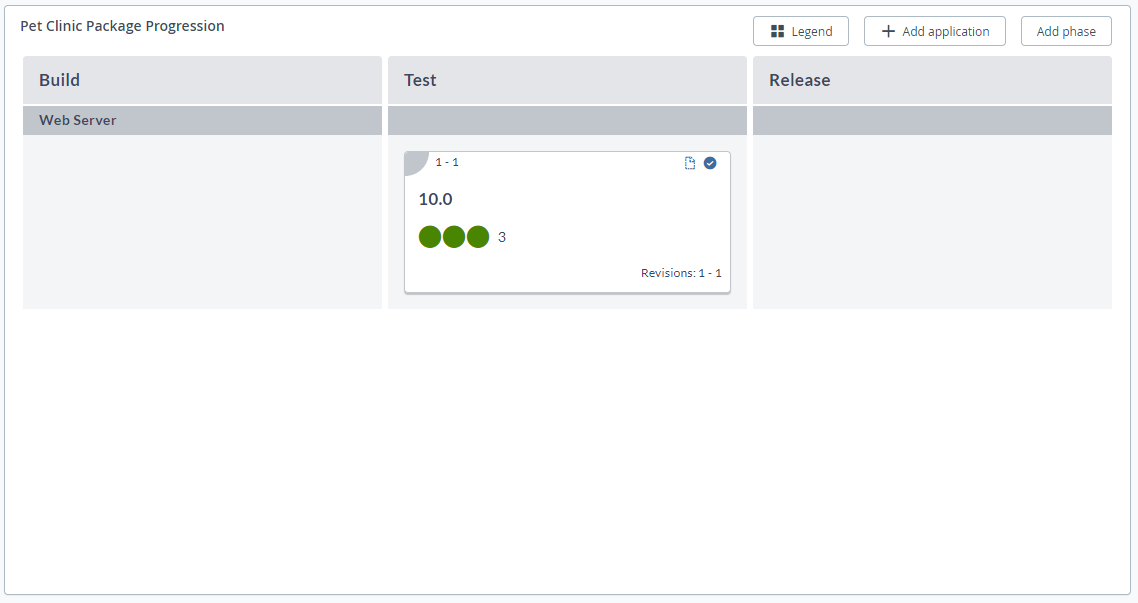
You can now go to the Progression Board and refresh the board to view the new package promoted to the Test phase.
Remove a Package Revision
-
Select the Delivery Insights folder and click New template > Create new template.
-
Type a name for the template and click Create (
Remove Packagein this example).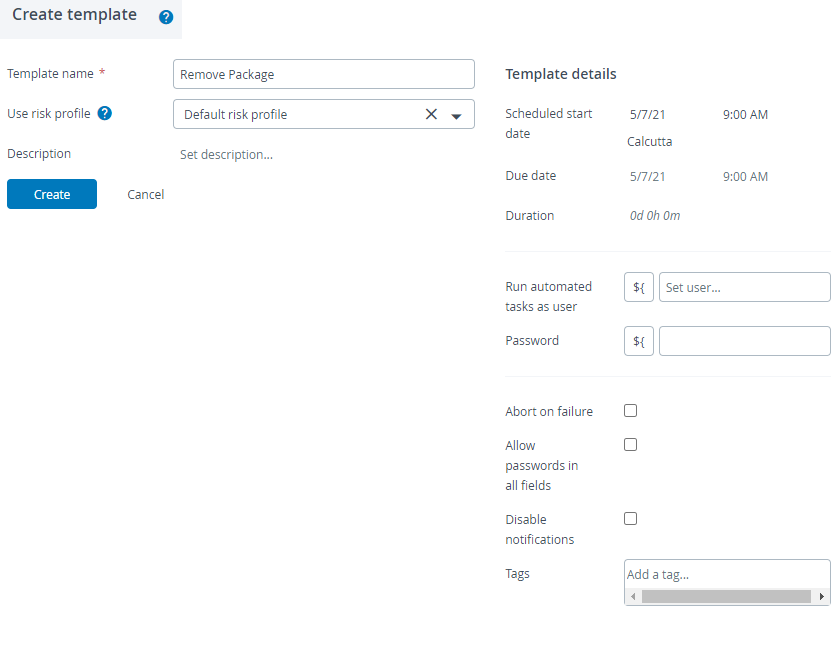
-
Click Add Task.
-
Type a title for the Task. (
Remove Package Revisionin this example) -
Select the Remove revision task from the drop-down menu.
-
Click Add.

-
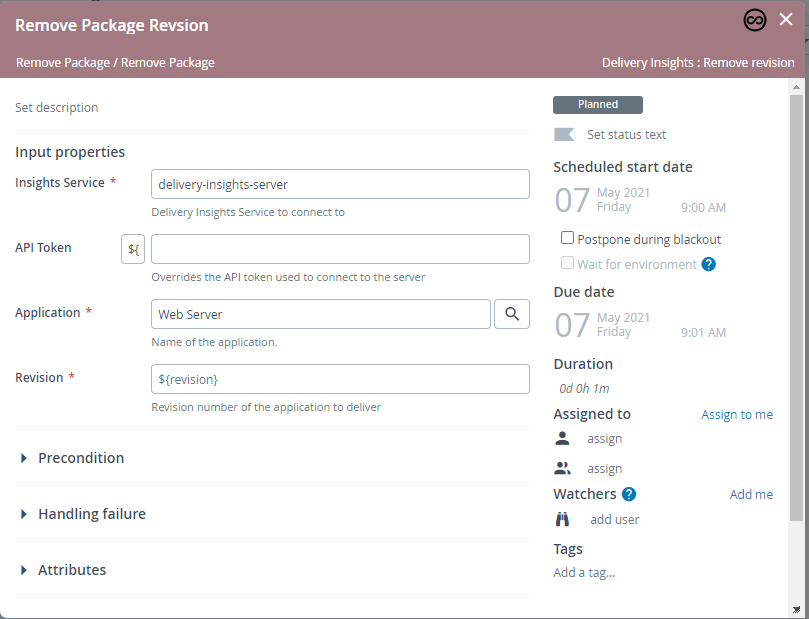
Click the Remove Package Revision task to configure it.
-
Click the Application field's search icon and select the application you created (Web Server in this example).
-
Leave the other fields with the default values and close the Remove Package revision task's configuration dialog box.
-
Click New Release.
-
Type a name for the release (
Remove 10.0 Revision 1in this example), type the revision you want to deliver (1in this example) in the revision text box, and click Create.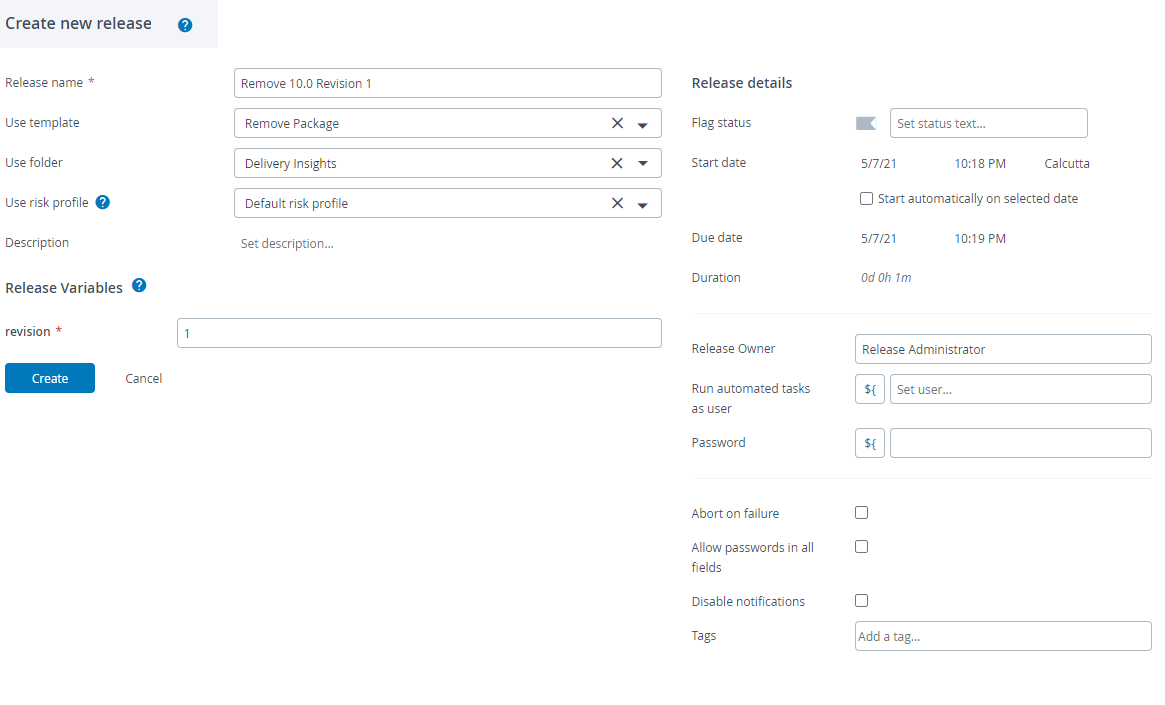
-
Click Start Release.
-
A confirmation message appears. Click Start.

-
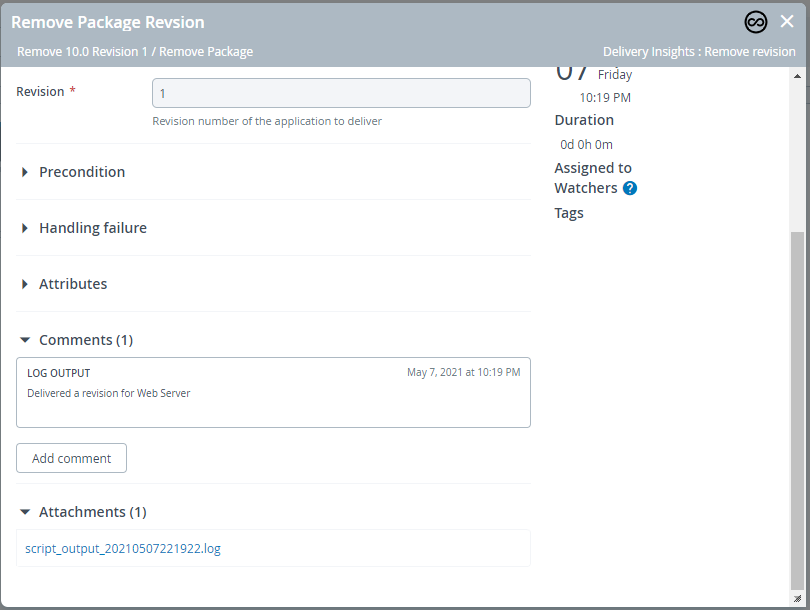
Click the completed task to view the log.
-
You can now go to the Progression Board and refresh the board to confirm that the package revision has been removed (delivered) from the Progression Board.
How to read the Progression Board?
-
A Package Progression Board consists of software delivery phases (swim lanes) and package revision cards.
-
Each phase in the Package Progression Board represents a discrete step in your software delivery process through which value (work items) is moved as your software gets closer to delivery.
-
A package revision card consists of Summary Tabs at the top right and bottom left with visual aid icons and presents you with data such as the package's major version number, revision range, total number of work items, and the number of rogue commits (commits that are not associated with a work item).
-
Work items in a package revision card are shown as color-coded dots to visually distinguish Stories (Green), Defects (Red), and work items with trailing commits (diametrical split).
-
With more and more packages to track, package revisions are grouped by application names in the Progression Board.
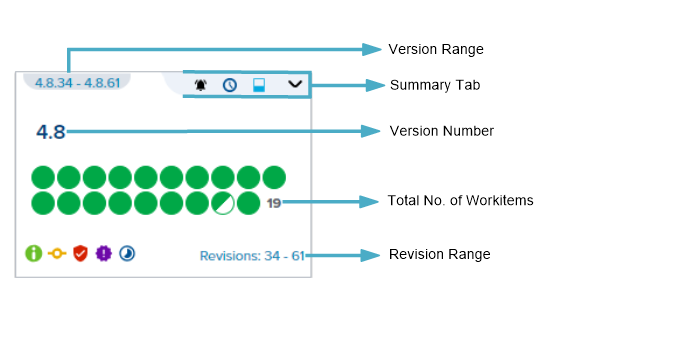
- Version Range: Range of minor version numbers included in this package revision.
- Package Version Number: Package major version number.
- Revision Range: Range of package revisions included in package revision.
- Total Number of Workitems: Total number of stories and defects included in this package revision.
- Number of Rogue Commits: Total number of commits that are not associated to a work item and thus are "rogue".
-
Hovering over a dot shows the work item ID.
-
Clicking a work item dot shows the Work Item Details pane.
-
The following types of units are shown on the board:
-
A green dot represents a "Story" work item.
-
A Red dot represents a defect.
-
The half-green-shaded dot represents an "undeliverable" work item, which contains trailing commits. This means there are additional commits for this work item in a package located in an earlier phase that is not contained in the package revision you are currently viewing. Effectively all the work that has been committed against this item is not in the current package and thus is not deliverable.
-
Manifest View
The Delivery Insights dashboard presents the Manifest View for individual application versions and for individual phases. The Manifest View lets you know more about the work items that are part of:
- an application version in a phase
- all the application versions in a phase
The Manifest View includes the following work item information:
- work item ID
- work item title
- work item type
- application, which the work item belongs to
- date and time of last activity
- status of the work item
- and the number of changes (commits) in the work item
You can:
-
view the Manifest View for a phase—click the Manifest view icon next to the phase name in the Delivery Insights dashboard.
-
view the Manifest View for an application version—click the Manifest view link on the application version's card in the Delivery Insights dashboard.
-
both expand and collapse the Manifest View for better usability.
-
download the manifest for a phase or a version (as a
.csvfile) -
use the Phase, Application, and Version drop-down lists to view the manifest for the phase, application, and version of interest to you.
Manifest View—icons and widgets

Manifest View—Expanded

Summary Tabs
The upper right-hand and lower left-hand sides of each package revision offers a Summary tab with the following data:
A forecast (in days) of when this package revision will be delivered. This number is calculated based on the past delivery performances for this particular package.
Amount of commits in this package revision that are not associated with a work item (story or defect).
Percentage of activities that have been completed for this package revision (both automated and manual).
Indicates that there is a manual activity pending for this package revision.
Github Repository to Test Digital.Ai Release with Delivery Insights
We have created a Docker image of the Digital.ai Release with Delivery Insights for demonstrating the Release with Delivery Insights solution.
The Digital.ai Release with Delivery Insights Docker image comes with:
- a set of predefined Digital.ai Release templates for configuring the Delivery Insights server, project and progression.
- Delivery Insights plug-in pre-installed to integrate Digital.ai Release with Delivery Insights.
Here is the link to the GitHub repository that hosts the Digital.ai Release with Delivery Insights Docker image.