Deploy to Azure with using the ARM template blueprint
The Azure Resource Manager (ARM) allows users to deploy applications to Azure using declarative JSON templates. In the DevOps as Code CLI, you can use the Basic ARM Template to run blueprints on the platforms hosted on Azure, by creating ARM templates. This can greatly simplify the process of provisioning resources from Deploy and Release in an Azure environment.
This tutorial will enable you to use the Azure ARM template to deploy a resource group VM in Azure. The blueprint will generate an ARM JSON template and a set of YAML files defining the deployment model and then allow you to run a release in Release, which triggers the resource group creation in Deploy.
Before you get started
The following resources will help to get started with Azure blueprints:
Familiarize yourself with Azure template structure and syntax.
Make sure your Azure account is correctly configured, with at least the following elements:
- Azure CLI
- Subscription ID
- Service principal, with a Tenant ID, Client ID, and Client secret value
For more information on obtaining these values, see the microservice-ecommerce blueprint.
Note: Ensure that you have the AZ CLI and you are signed in.
Minimum Required versions
This blueprint version requires at least the below versions of the specified tools to work properly.
Release: Version 9.0.0 Deploy: Version 9.0.0 XL CLI: Version 9.0.0
Information required
This blueprint will ask for the following information:
- Subscription ID
- Client ID
- Client secret
- Tenant ID
- Resource group to create
- An Azure region to create the resource group (e.g.
westus) - Name of the Azure app. This will also be used as the name of the Release and Deploy CIs.
- Name of the template file to create (e.g. ../arm/template.json)
- Username and password for the admin account
This can be entered into an answers file and passed using the -a flag in the blueprint command.
Run the blueprint
To use this blueprint, run xl blueprint in an empty directory and select azure/basic-arm-template from the list. Fill in the answers and run the blueprint.
The blueprint will generate:
- A batch of YAML templates which will create the necessary configuration items in Release and Deploy.
- An ARM template which can be deployed from your Release and Deploy instances. This will create the resource group you defined when it is run.
Configuring application in the azure active directory at the portal side for ARM template deployment
Configure authentication settings for the application
- After successful login into the azure portal (https://portal.azure.com), select Azure Active Directory, then in the left pane under Manage, select App Registrations.
- Under owned applications, in the left pane under Manage, select Authentication.
- On the Authentication page, scroll down to Advanced Settings > Default Client Type.
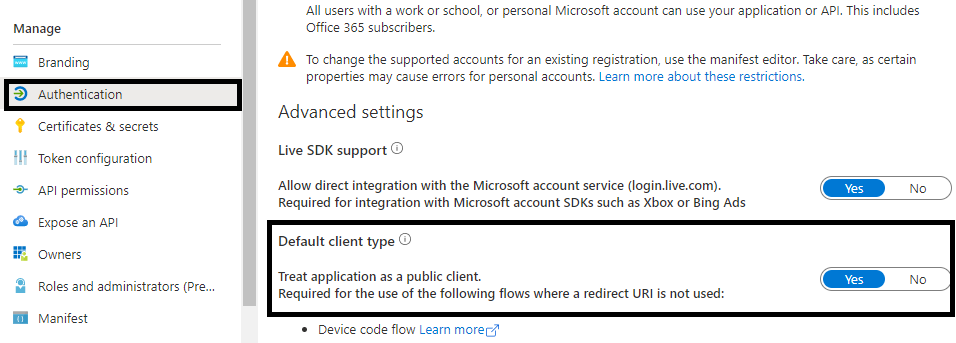
- Click Yes to treat the application as a public client.
- In the command bar, click Save.
Configure API permissions for the application
- On the API Permissions page, add a new API permission for Azure Service Management.
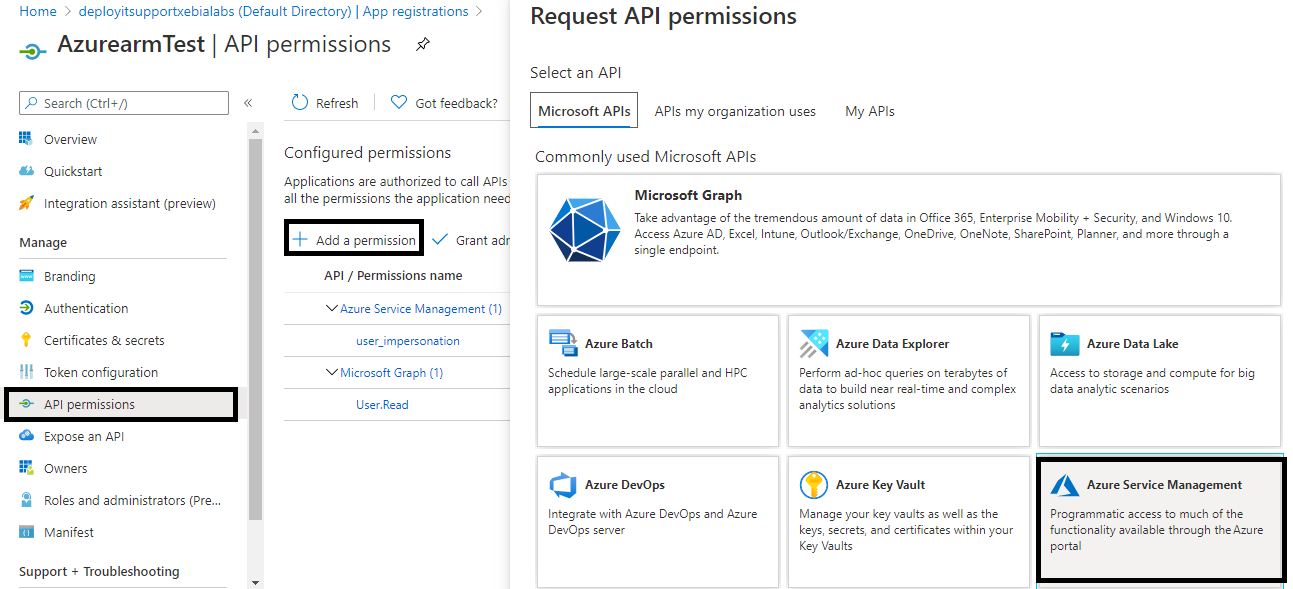
- On the Request API Permissions page, choose the following options:
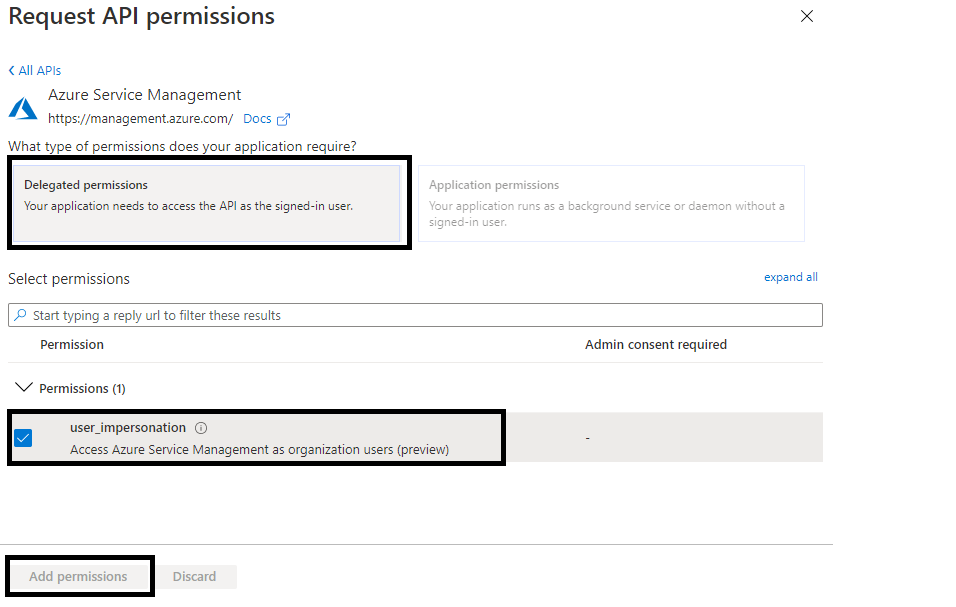
- At the bottom of the page, click Add permissions.
Grant Admin Consent from App Registrations
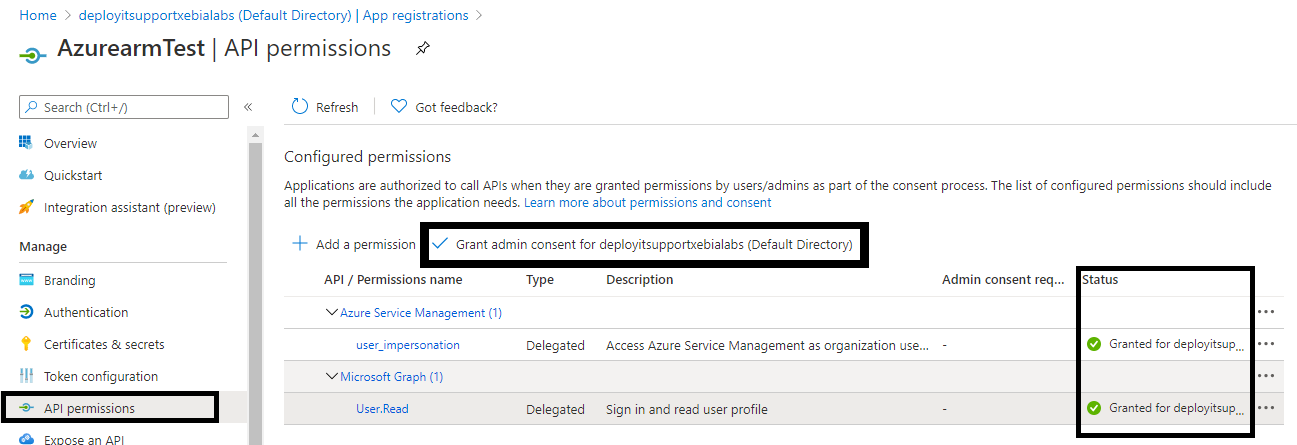
- On the API Permissions page for the application, click Grant admin consent for Default Directory.
- When you are prompted to grant consent for the requested permissions for all accounts in the Default Directory, click Yes.
Passing an object as a parameter in an ARM JSON template through XLD
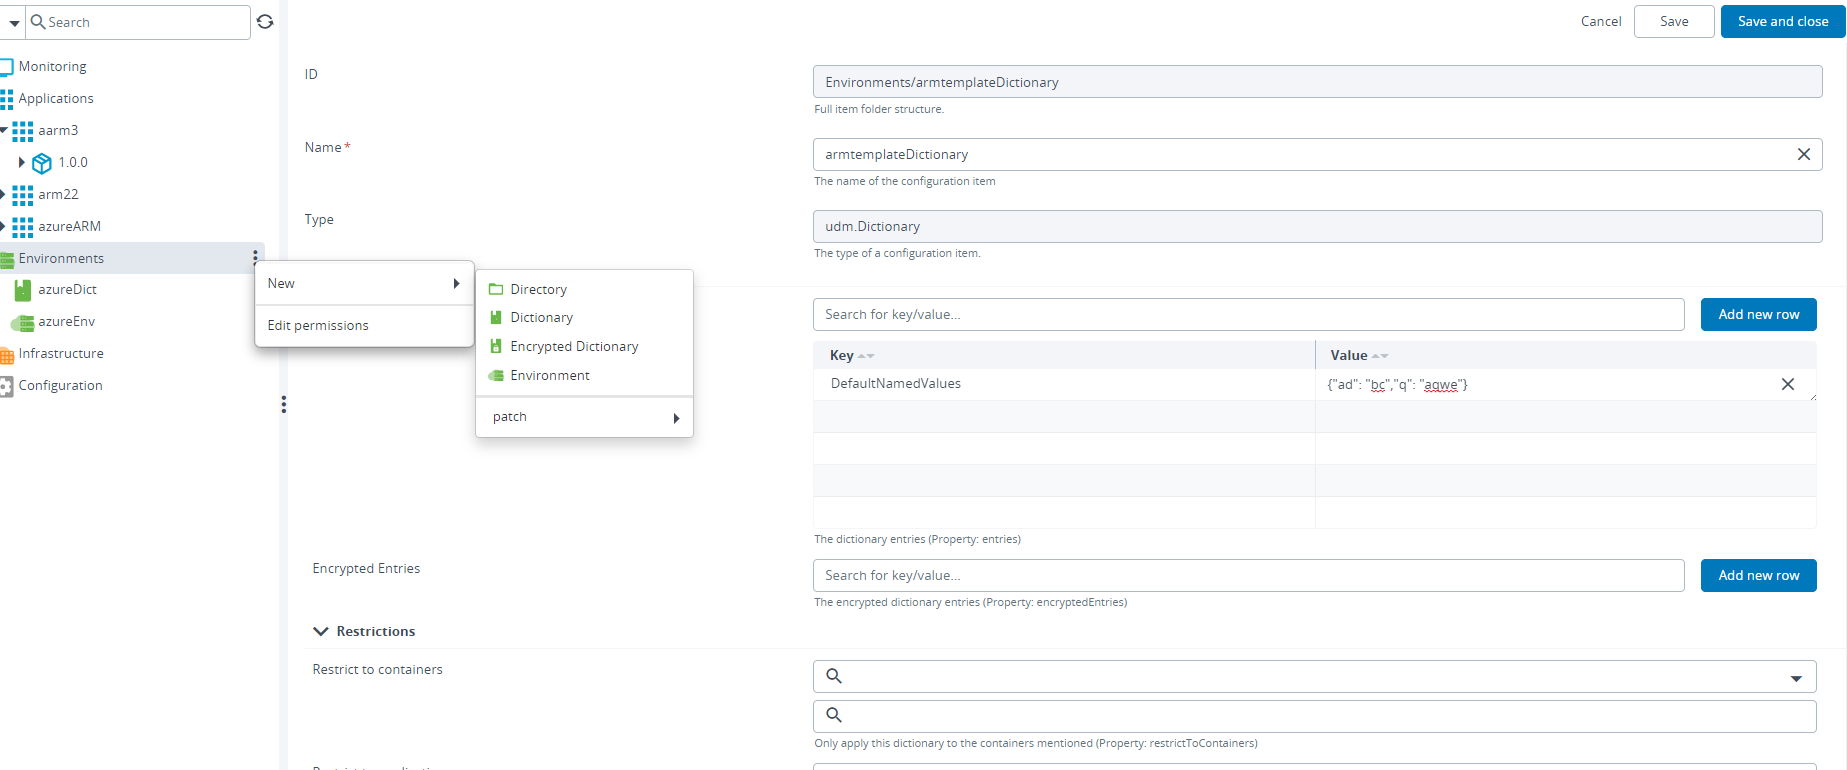
Create a dictionary
- In the top bar, click Explorer.
- Hover over Environments, click the Menu button, and select New > Dictionary.
- In the Name field, enter a name for the dictionary.
- In the Common section, in the Entries field, click Add new row.
- Under Key, enter the name of the key. For example "DefaultNamedValues".
- Under Value, enter the corresponding value of object which needs to be passed in the ARM JSON template.
Assign this dictionary to an environment
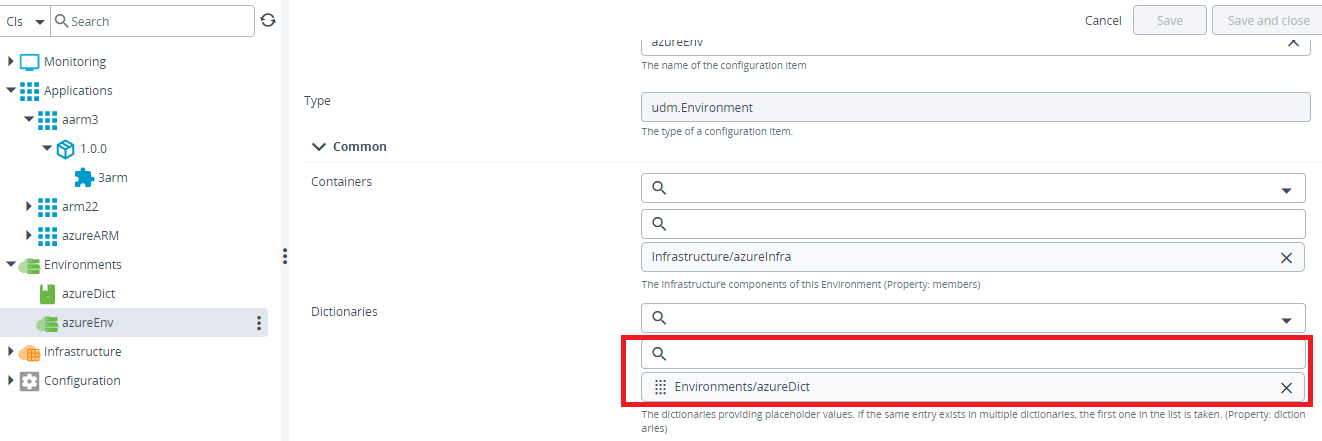
- In the top bar, click Explorer.
- Expand Environments and double-click the desired environment.
- In the Dictionaries field, select this dictionary from the dropdown list. Click Save to save the environment.
Add key in Placeholder in the azure template application
- In applications, create an azure.arm.template.
- In the azure.arm.template, along with other fields, in the Placeholders field, click add new row. Add the key of the dictionary in the row. For example "DefaultNamedValues" - is the same key which was added in the dictionary while creating it.

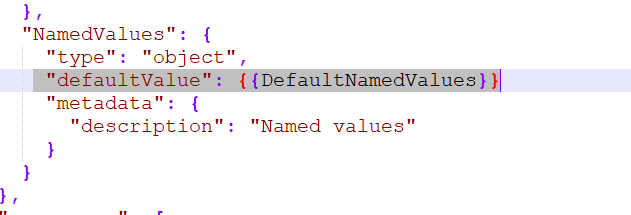
Pass placeholder in the ARM JSON template
- In the ARM JSON template, for the parameter of type object, add the value "defaultValue" as the placeholder's value. For eg - {{ DefaultNamedValues }} - the same key which was added in the placeholder in the azure template application.
Deploy the ARM template
Log into Release. You will see a new design template with the name of the Azure app. Create and run a new release from the template.
When the release is finished, log into your Azure account. You will see the Resource Group which you created from the template.
UnDeploy/Rollback the ARM template
When "Undeploy" or "Rollback" the azure arm template, we will have to delete the entire resource group as this is the suggested and seems to be the only possible way to undeploy all the resources deployed through arm template json file. Reference link -