Deploy to AWS Using Digital.ai Deploy and Terraform
This how-to demonstrates how you can leverage the Digital.ai Deploy application's DevOps as code capabilities and deploy applications to Amazon Web Services (AWS) using Terraform.
This tutorial involves working with a variety of tools and technologies such as Docker, Docker Compose, Digital.ai Deploy, AWS (EC2 and RDS), Terraform, Digital.ai Deploy's DevOps as code repositories (YAML files), and so on. You can perform this task by simply following the instructions. However, being familiar with these tools and technologies can help you considerably when you try this out in your test environment.
Here's a video walk-through.
What's the objective?
Deploy a web application to AWS EC2 and RDS using Digital.ai Deploy and Terraform scripts.
What do you need?
- A Linux server (with root and Internet access)
- Docker
- Docker Compose
- An AWS account
What do you have?
We have created a xebialabs-community/how-to GitHub repository that hosts the following.
- A demo PetPortal web application for use with this example deployment
- A
howto/terraform/PetPortalHosts/build.shscript to create Deploy configuration items - Terraform scripts to provision resources to AWS EC2 and RDS
- A
howto/demoApps/PetPortalApp/build.shscript to create a deployment package of the demo web application (PetPortal) - A
howto/terraform/PetPortalHosts/startDemo.shscript - A
howto/terraform/PetPortalHosts/docker-compose.ymlfile
How does it work?
Here's a high-level overview of how this works. A more elaborate step-by-step is available later in this topic.
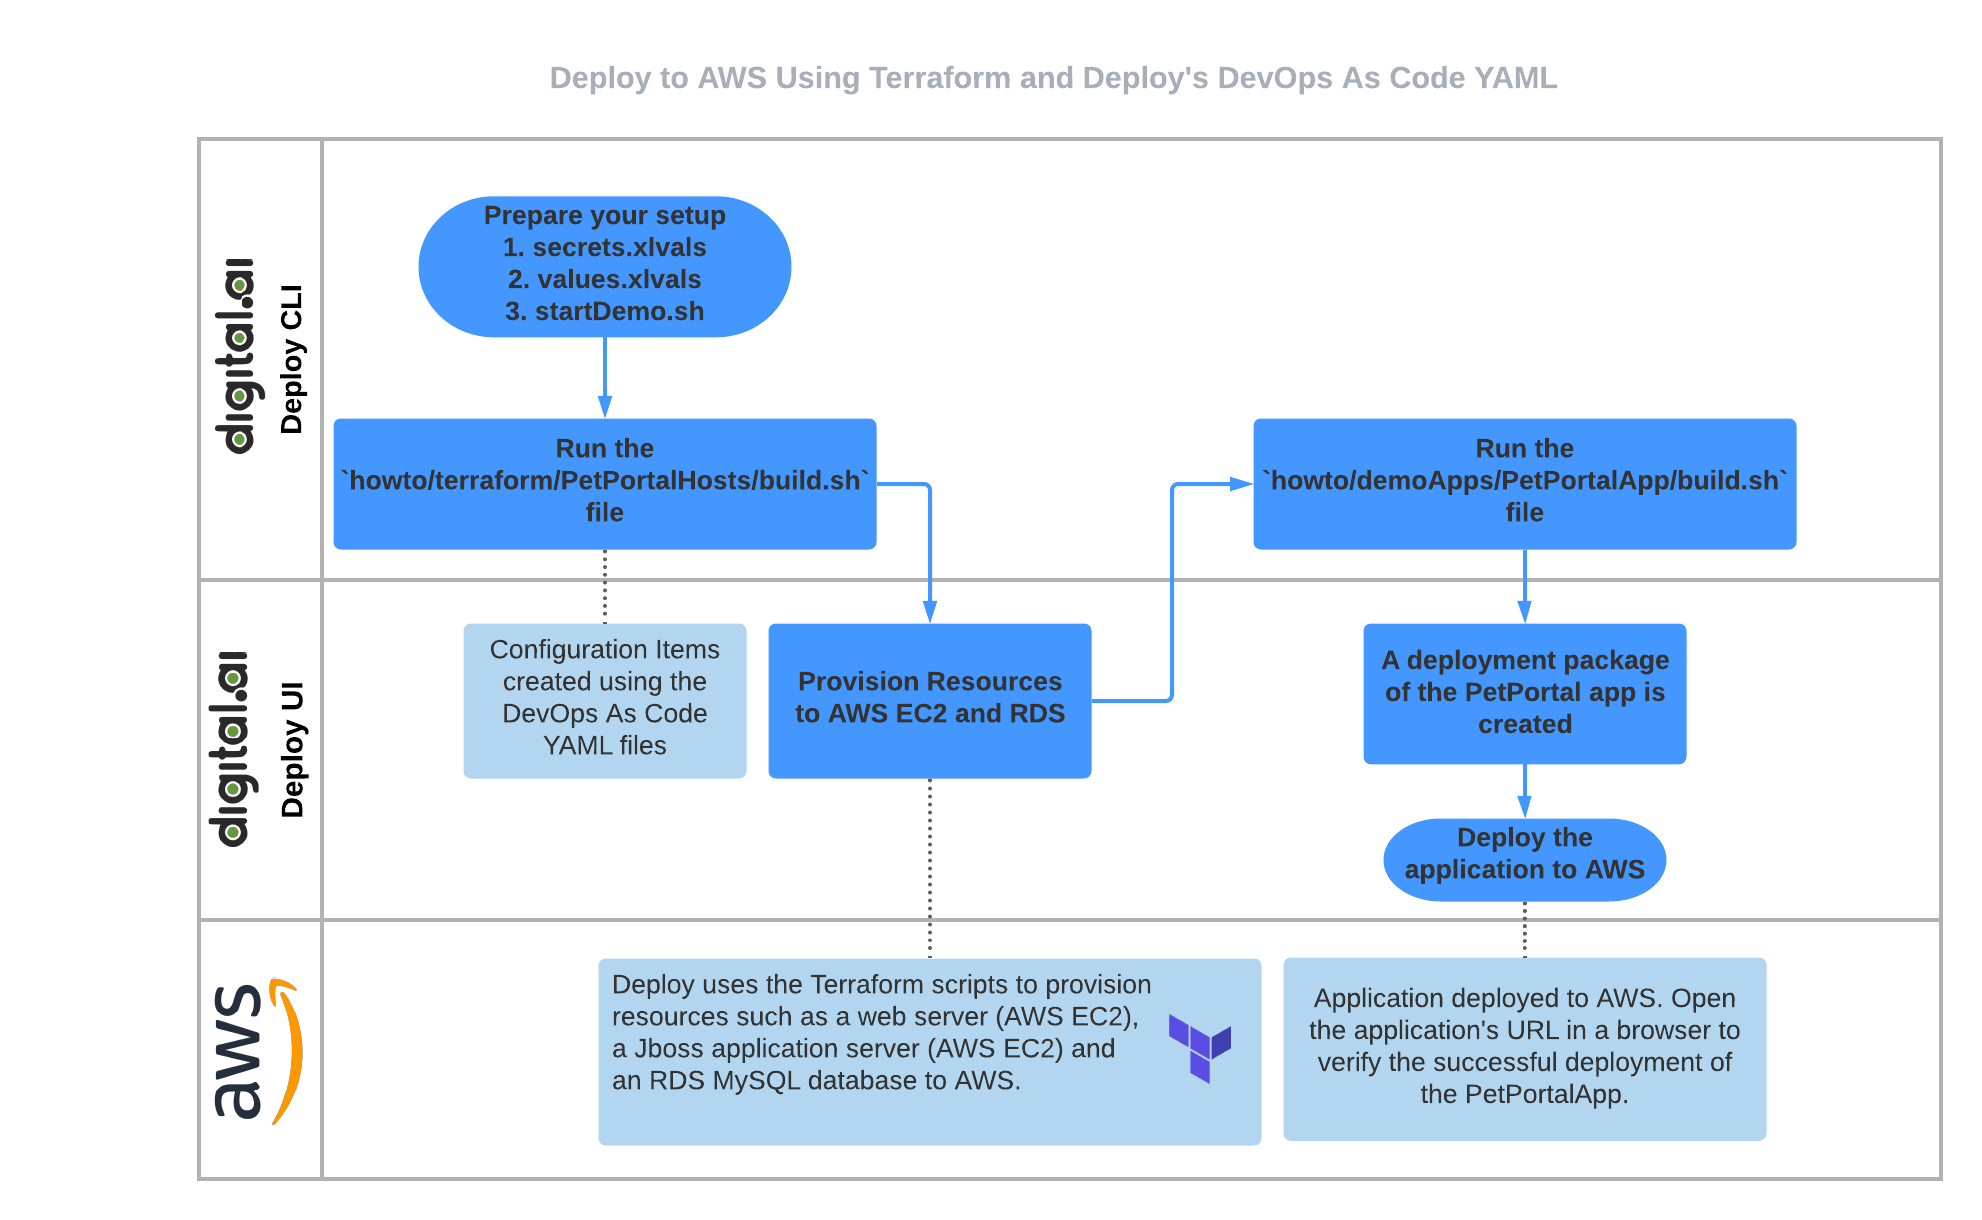
Step 1—Prepare your setup
- You set out by installing the Digital.ai Deploy v10.0 Docker image.
- Set up:
secrets.xlvalsfile—AWS secrets and RDS database password.values.xlvalsfile—values for AWS variables (such asssh_key,ami,aws_region, andami_size). For more information, see values.xlvals.
- Copy the AWS
ssh-key.pemfile to thehowto/terraform/PetPortalHosts/xebialabs/artifacts/ssh-key/directory. - Run the
howto/terraform/PetPortalHosts/startDemo.shscript. This script:-
Downloads the
terraform_0.14.7_linux_amd64.zipfile and installs (unzip) the same. -
Runs the
docker-compose.yml.The
docker-compose.ymlfile:-
Downloads and installs the officially supported Digital.ai Deploy version 10.0 Docker image (includes all relevant plugins).
-
-
The Digital.ai Deploy v10.0 Docker image comes with a 7 day free trial license, which you can use to evaluate this example deployment exercise.
- Mounts the Terraform v0.14.7 volume.
Step 2—Create the Configuration Items using the DevOps As Code YAML
Run the howto/terraform/PetPortalHosts/build.sh script. This script:
- Downloads and installs the XL CLI
- Creates the Application, Environment and Infrastructure configuration items—using the DevOps as code YAML files—in Digital.ai Deploy.
Step 3—Provision resources to AWS EC2 and RDS using Terraform
Log on to Digital.ai Deploy and provision the AWS resources—Deploy uses the Terraform scripts to provision resources such as a web server (AWS EC2), a Jboss application server (AWS EC2) and an RDS MySQL database to AWS.
Step 4—Create a deployment package
Run the howto/demoApps/PetPortalApp/build.sh script to create a deployment package of the PetPortal application.
Step 5—Deploy the PetPortal application to AWS EC2
- Start a deployment in Digital.ai Deploy and deploy the PetPortal application to the AWS EC2 instances.
- Get the web server address and open the URL in a browser to verify the PetPortalApp's deployment.
DevOps As Code YAML files and Terraform AWS modules
This section discusses the Terraform AWS Modules and Deploy's DevOps as code YAML files. Skip this section if you are familiar with Terraform AWS Modules and Deploy's DevOps as code feature.
DevOps As Code YAML files
The xebialabs-community/how-to GitHub repository consists of a howto/terraform/PetPortalHosts/xebialabs.yaml file that imports a set of as code YAML files as illustrated in the following code snippet.
howto/terraform/PetPortalHosts/xebialabs.yaml:
apiVersion: xl/v1
kind: Import
metadata:
  imports:
    - xebialabs/xld-infrastructure.yaml
    - xebialabs/xld-environment.yaml
    - xebialabs/petportalhosts.yaml
    - xebialabs/ssh-key.yaml
The howto/terraform/PetPortalHosts/build.sh script calls the howto/terraform/PetPortalHosts/xebialabs.yaml file, which in turn imports these YAML files in Step 2 (of the How Does It Work? section) as discussed earlier and are used to create the Application, Environment and Infrastructure configuration items in Digital.ai Deploy.
Terraform AWS Modules
The approach here is to follow one of the best practices of having individual Terraform AWS Modules to create resources on AWS and then calling those modules from the main.tf configuration file in Step 3 (of the How Does It Work? section) as discussed earlier.
The xebialabs-community/how-to GitHub repository consists of:
howto/terraform/PetPortalHosts/xebialabs/artifacts/aws.ec2_instance/main.tf—the main Terraform configuration filehowto/terraform/PetPortalHosts/xebialabs/artifacts/aws.ec2_instance/appserver/appserver.tf—the Terraform module to provision an EC2 application server resourcehowto/terraform/PetPortalHosts/xebialabs/artifacts/aws.ec2_instance/webserver/webserver.tf—the Terraform module to provision an EC2 web server resourcehowto/terraform/PetPortalHosts/xebialabs/artifacts/aws.ec2_instance/db/db.tf—the Terraform module to create an RDS MySQL database server resource
Here's a look at the main.tf Terraform configuration file.
# Terraform configuration
provider "aws" {
  region = "{{aws_region}}"
  access_key = "{{AWS_ACCESS_KEY}}"
  secret_key = "{{AWS_SECRET_KEY}}"
}

##########################################################################
#  Webserver
#
module "webserver" {
    source = "./webserver"
    my-ami = var.ami
    my-sg = var.my-sg
    ami-size = var.ami-size
    ssh-key  = var.ssh-key
}
##########################################################################
#  Appserver
#
module "appserver" {
    source   = "./appserver"
    my-ami   = var.ami
    my-sg    = var.my-sg
    ami-size = var.ami-size
    ssh-key  = var.ssh-key
}

##########################################################################
#  RDS Database
#
module "db" {
    source = "./db"
    my-sg = var.my-sg
}
© 2021 GitHub, Inc.
Deploy step-by-step
-
Prepare your Digital.ai Deploy Linux host.
- Install Docker if not done already.
- Install Docker Compose if not done already.
-
Clone the xebialabs-community/how-to GitHub repository. Suppose you clone the repository to the user's home directory (for example,
/home/john). -
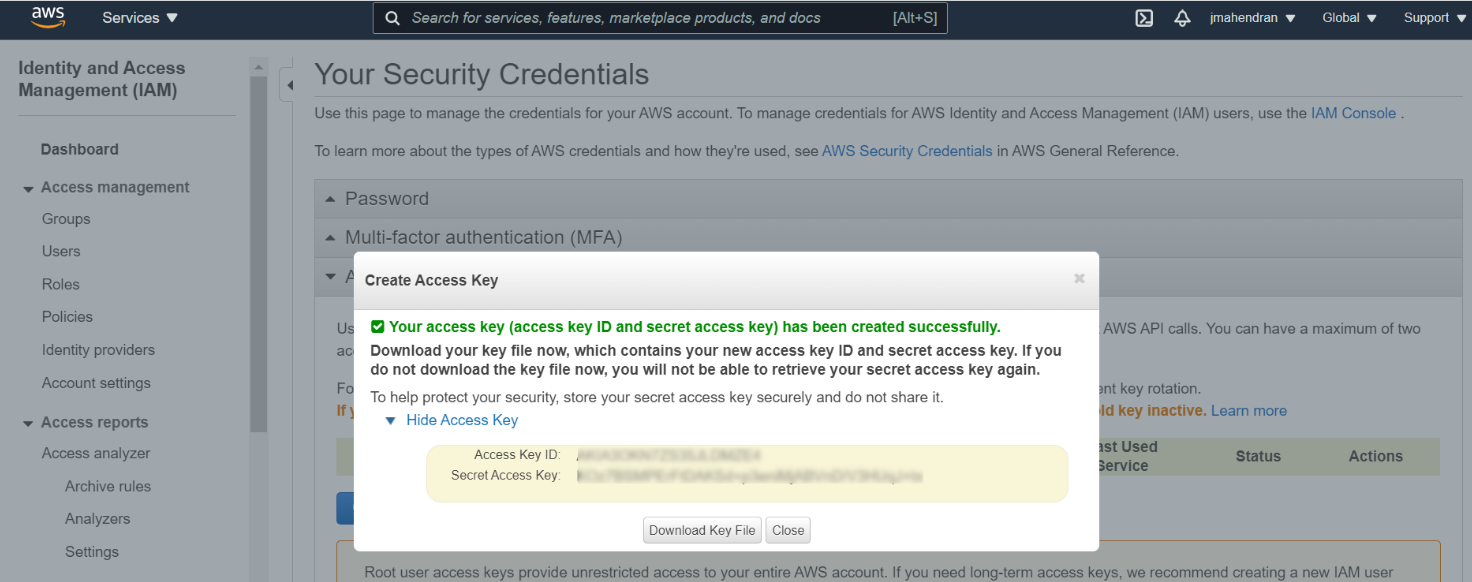
Log on to your AWS account and gather the
AWSAccessKeyIdandAWSSecretKey.Create an access key if you do not have one already. For more information, see Managing access keys.
It is recommended to download and save the AWS access key file immediately after creating the access key as you cannot retrieve your Secret Access Key later.
-
Add your AWS account secrets and the database password to the
howto/terraform/PetPortalHosts/xebialabs/secrets.xlvalsfile.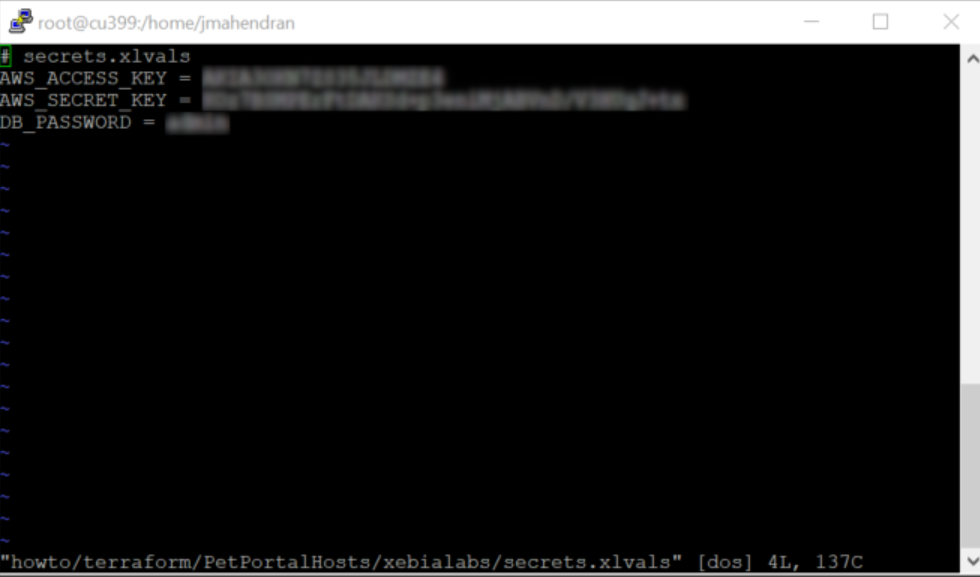
-
Add values for AWS variables to the
howto/terraform/PetPortalHosts/xebialabs/values.xlvalsfile.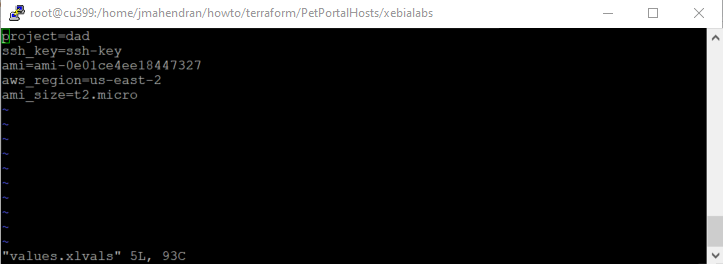
-
Copy your AWS
ssh-key.pempublic key file to thehowto/terraform/PetPortalHosts/xebialabs/artifacts/ssh-key/directory. -
Go to
howto/terraform/PetPortalHostsdirectory.cd /home/<usr>/howto/terraform/PetPortalHosts -
Run the
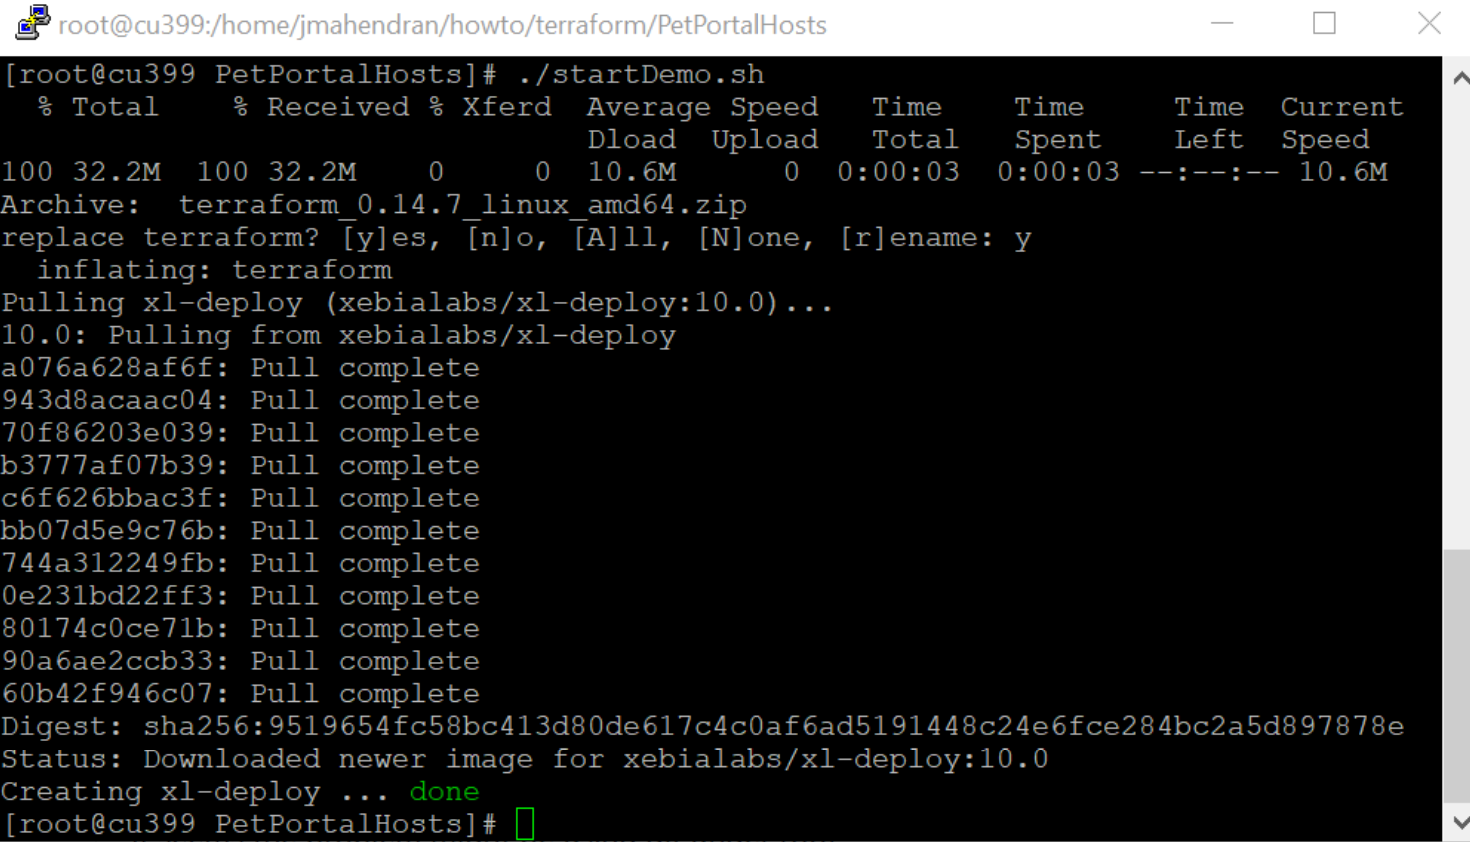
startDemo.shscript../startDemo.sh -
Press
yif prompted for an input—this installs Terraform v0.14.7.
Wait for Digital.ai Deploy application to start. Use the docker-compose logs -f xl-deploy command and look for the point your browser to... output to show up.
-
Create Deploy configuration items—run the
howto/terraform/PetPortalHosts/build.shscript../build.sh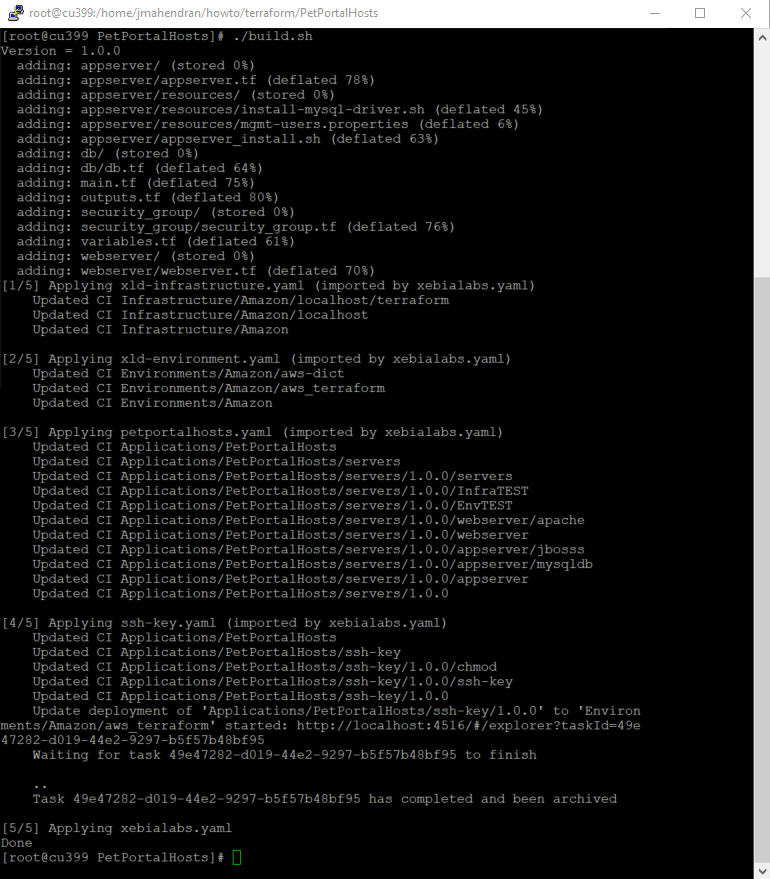
The Application, Environment and Infrastructure configuration items are now created.
You can now verify that the values you passed via the
values.xlvalsfile are available as input variables in Deploy.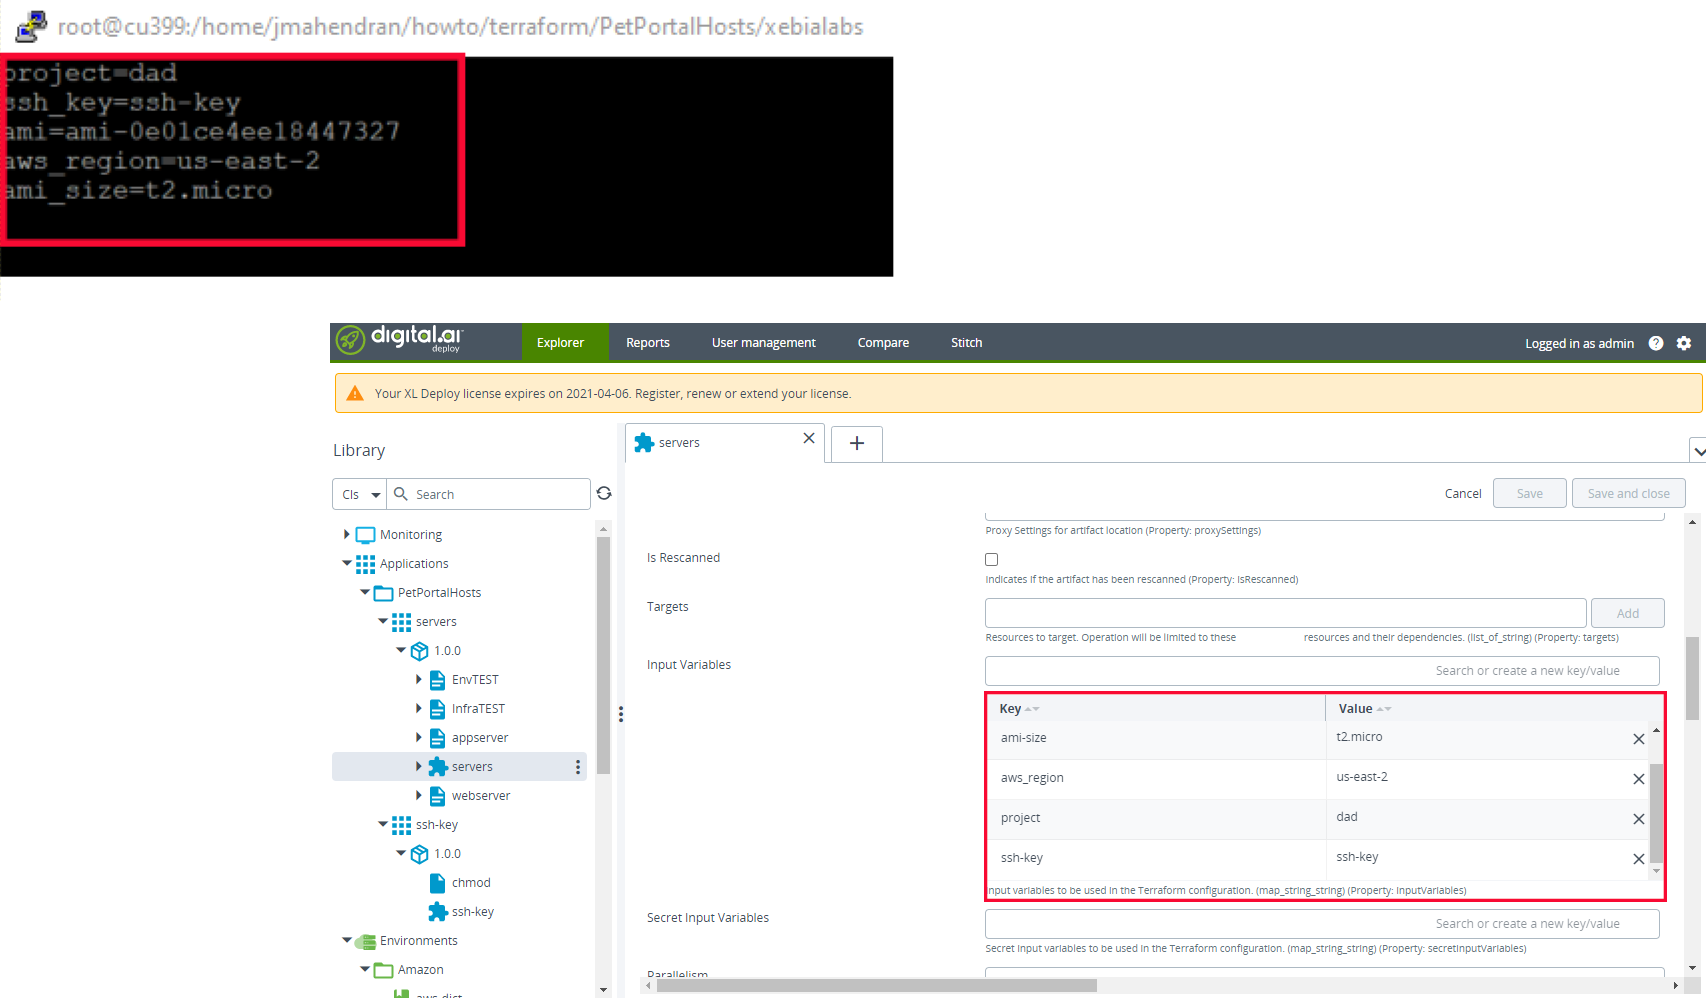
-
Log on to Deploy.
http://deploy-server-domain:4516- Username:
admin - Password:
admin
-
Deploy the
PetPortalHosts/servers/1.0.0application to theaws_terraformenvironment.-
Select
PetPortalHosts/servers/1.0.0, select theaws_terraformenvironment, and click Continue.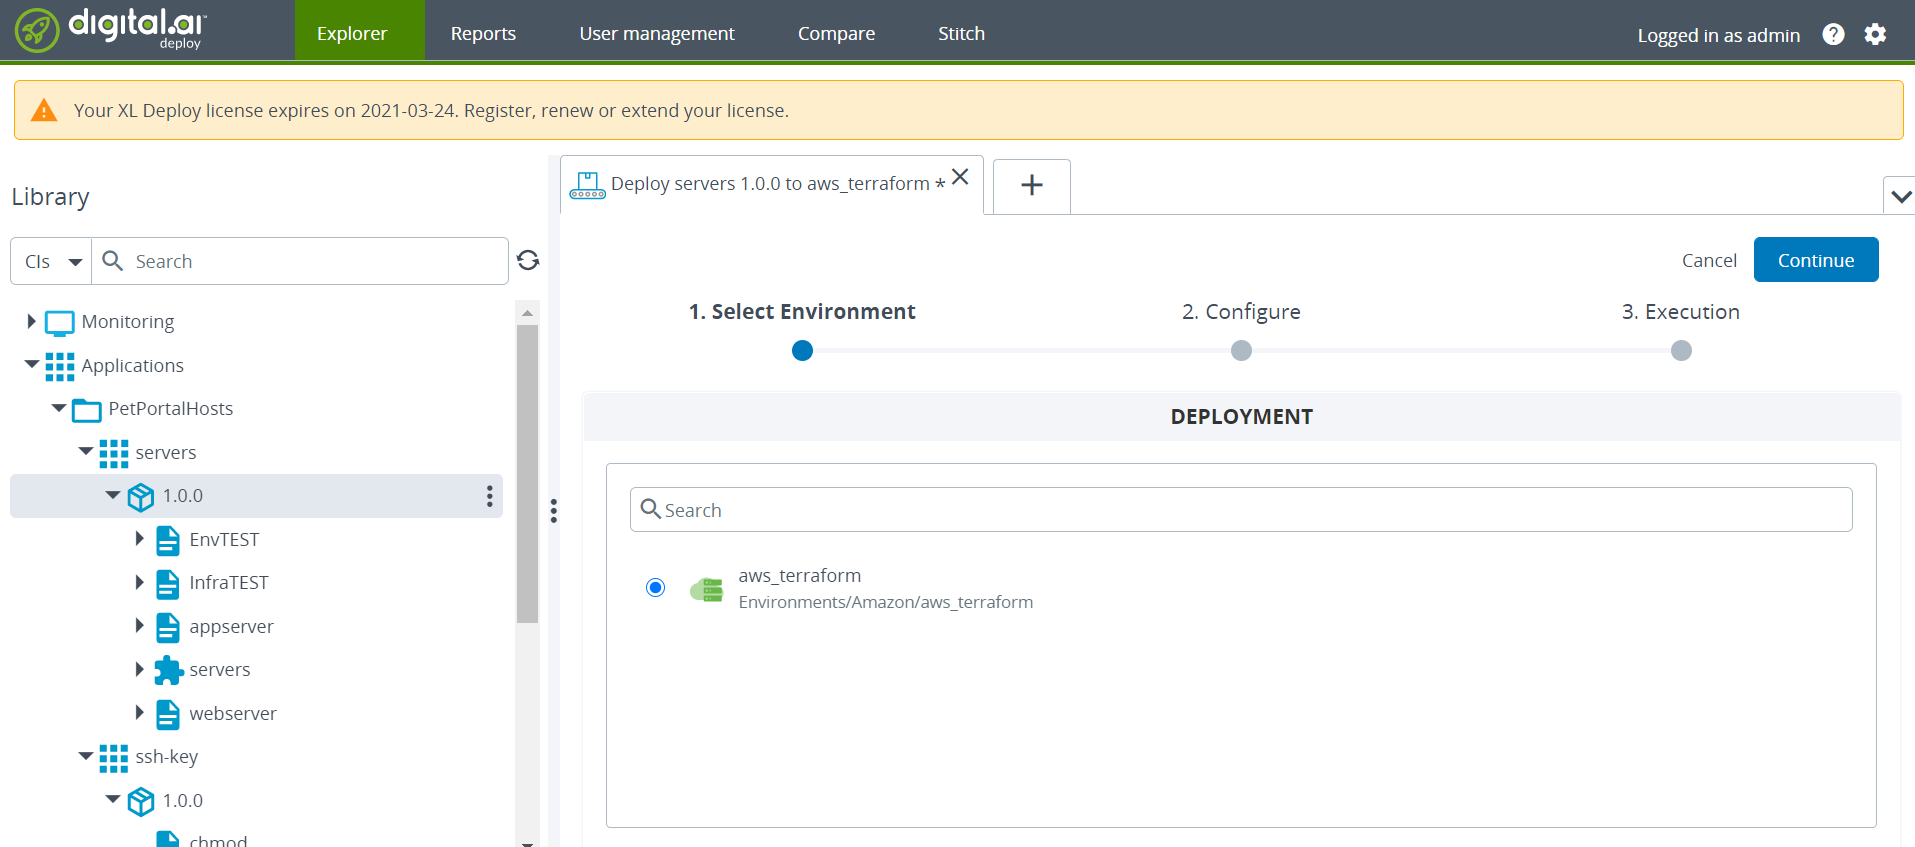
-
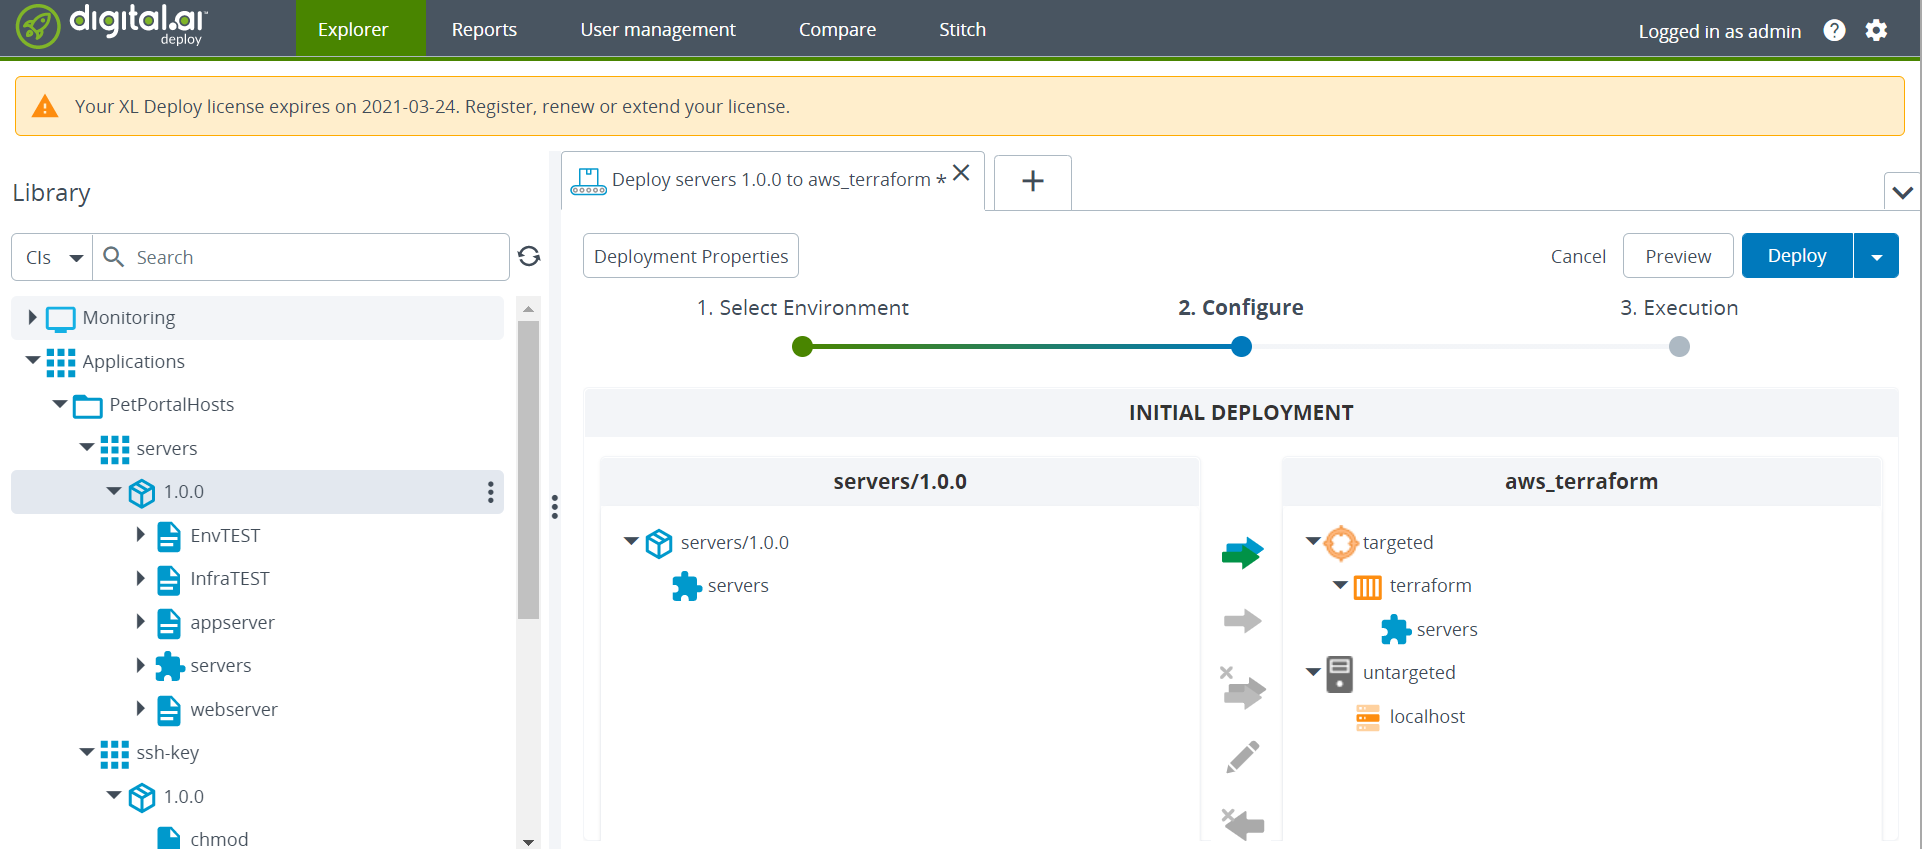
Preview the deployment, if required (click Preview), and click Deploy.
-
Wait for the deployment process to complete.
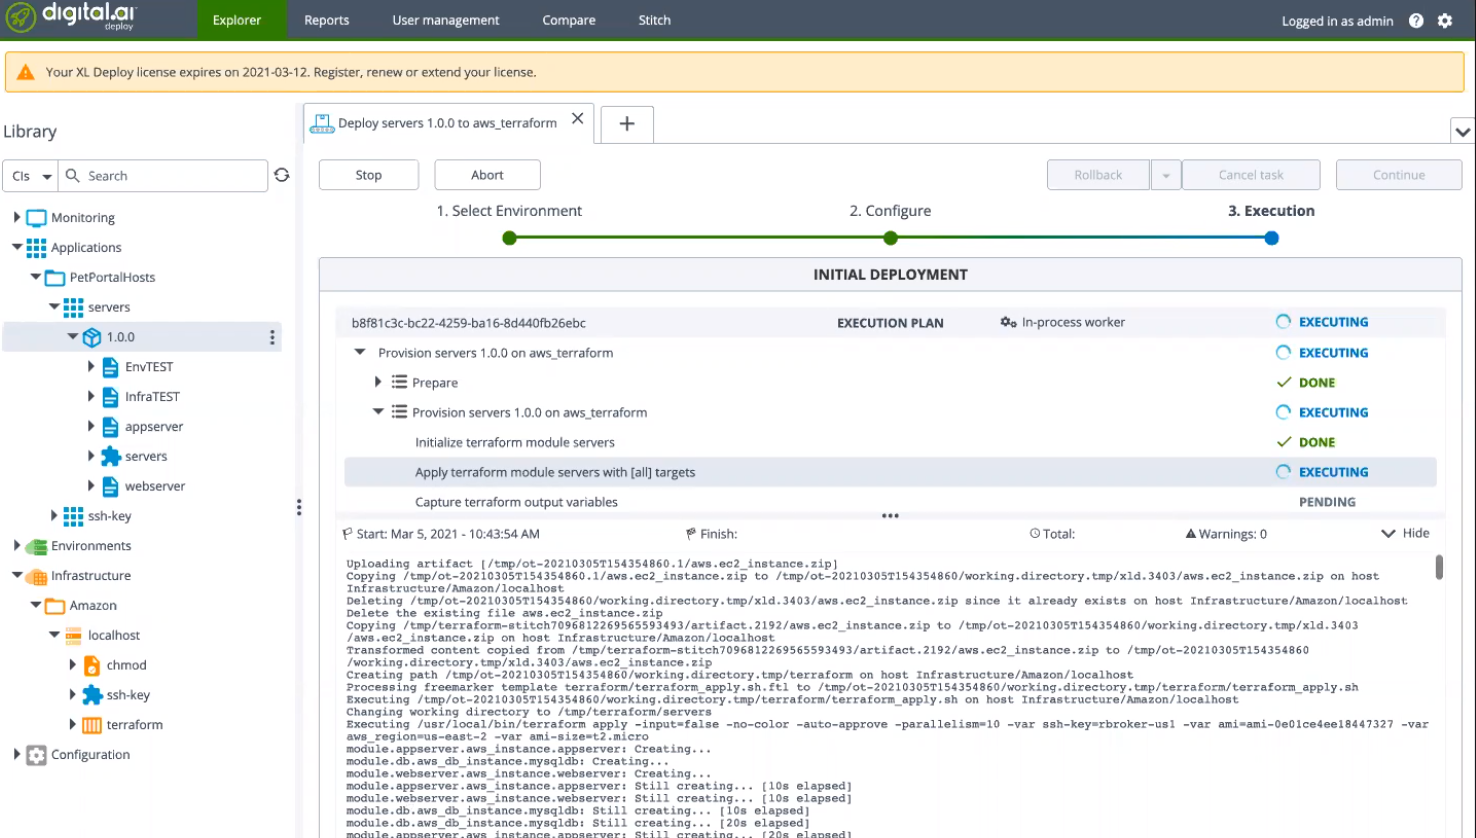
You now have the resources provisioned to AWS and a
TESTenvironment created to deploy your application.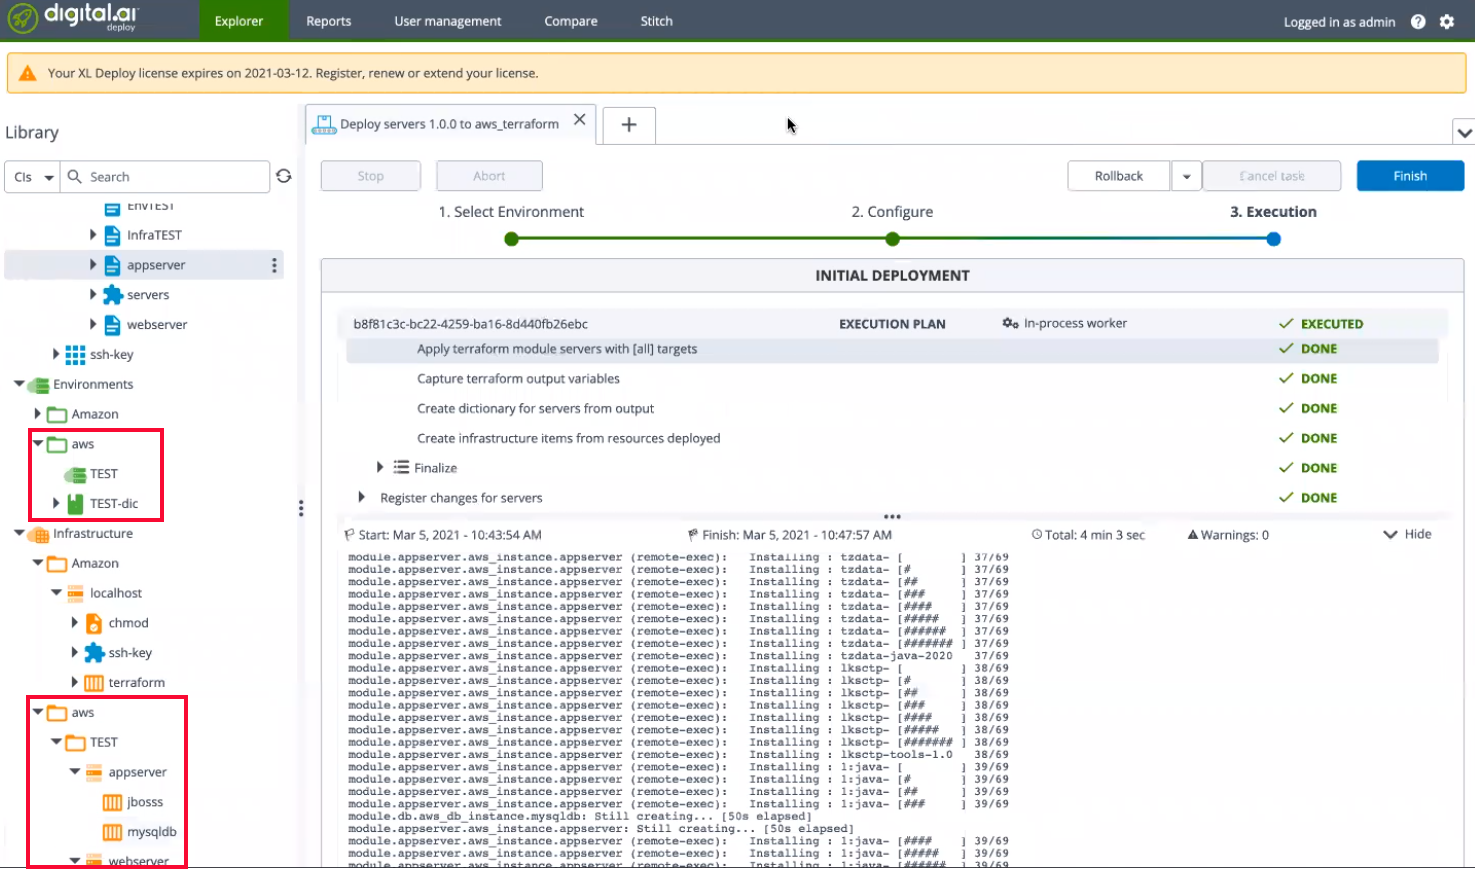
-
Click Finish.
-
-
You can now log on to AWS and verify the provisioned servers.


-
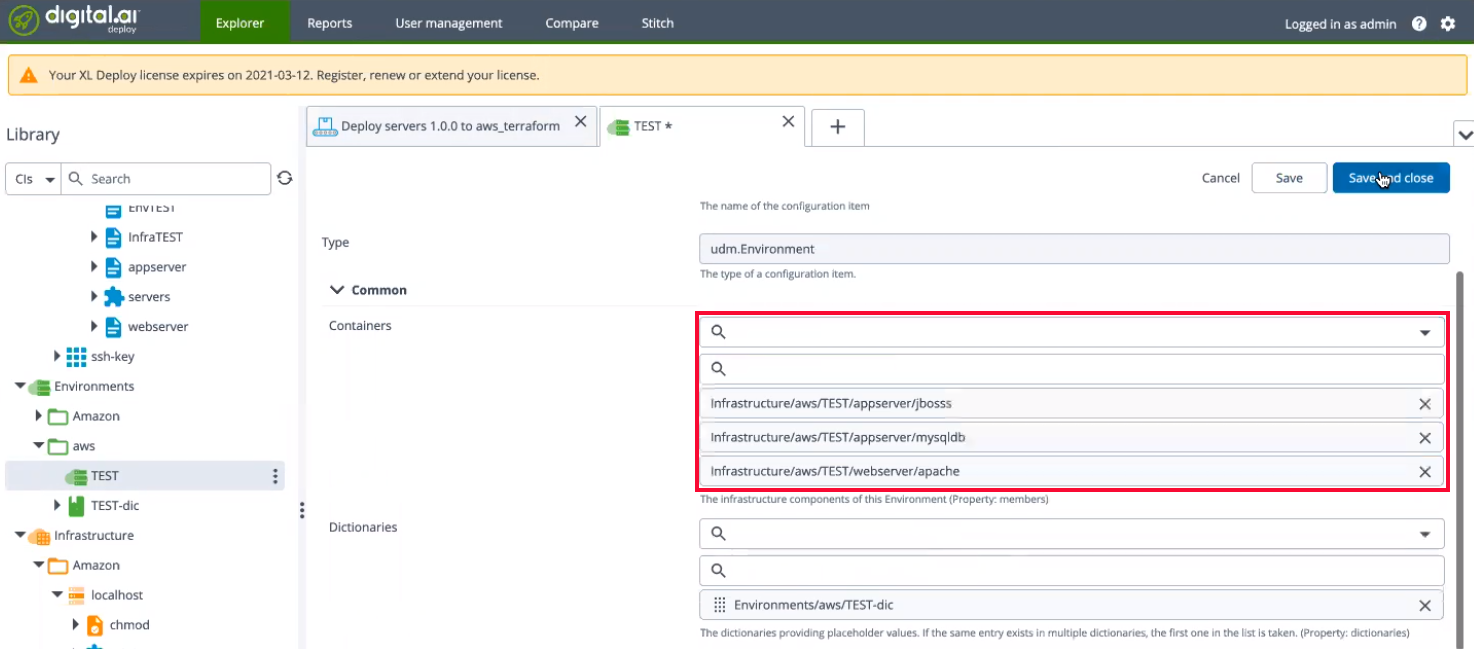
Select the
TESTenvironment and add the following containers from the drop-down list:-
Infrastructure/aws/TEST/webserver/apache
-
Infrastructure/aws/TEST/appserver/jboss
-
Infrastructure/aws/TEST/appserver/mysqldb
-
-
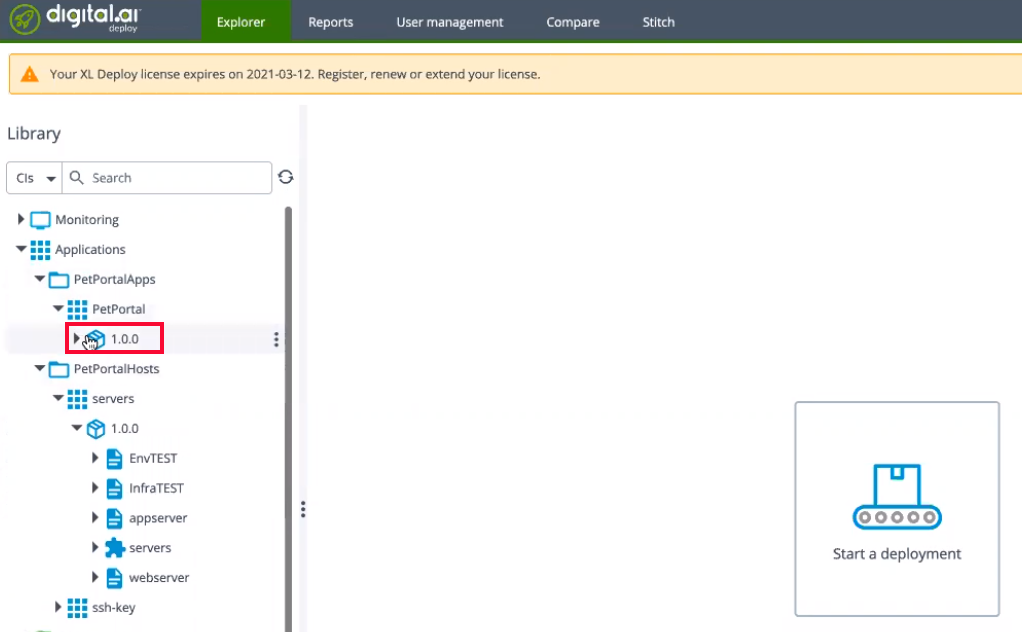
Create a deployment package—run the
howto/demoApps/PetPortalApp/build.shscript.cd /home/<usr>/howto/demoApps/PetPortalApp
./build.shYou now have a deployable version of the PetPortal application.
-
Click Start a deployment.
-
Select, drag, and drop the
Applications/PetPortalApps/PetPortal/1.0.0node from the Packages pane. -
Select, drag, and drop the
Environments/aws/TESTnode from the Environments pane.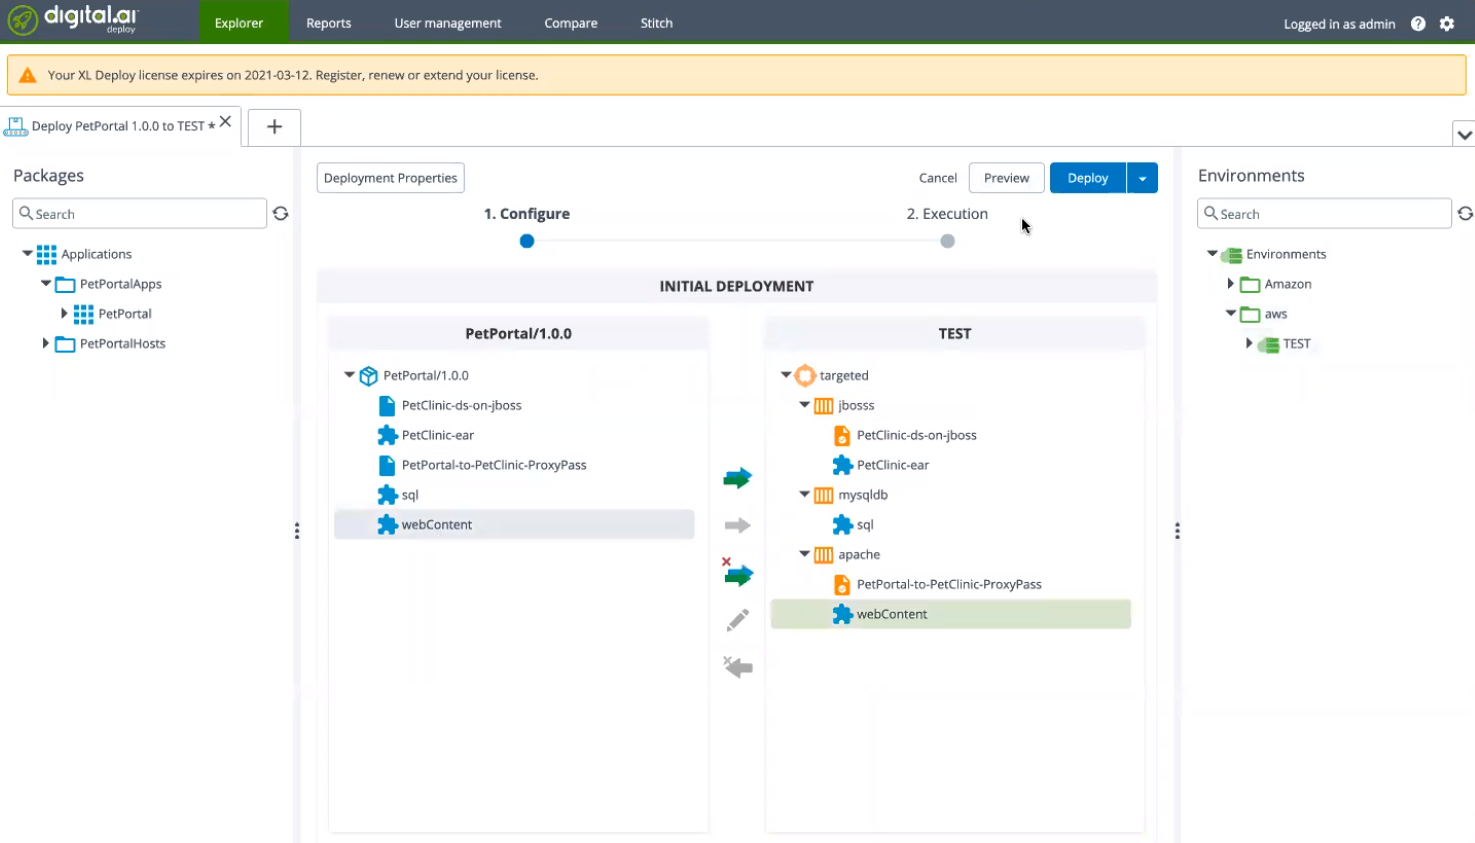
-
Click Deploy and wait for the deployment process to complete.
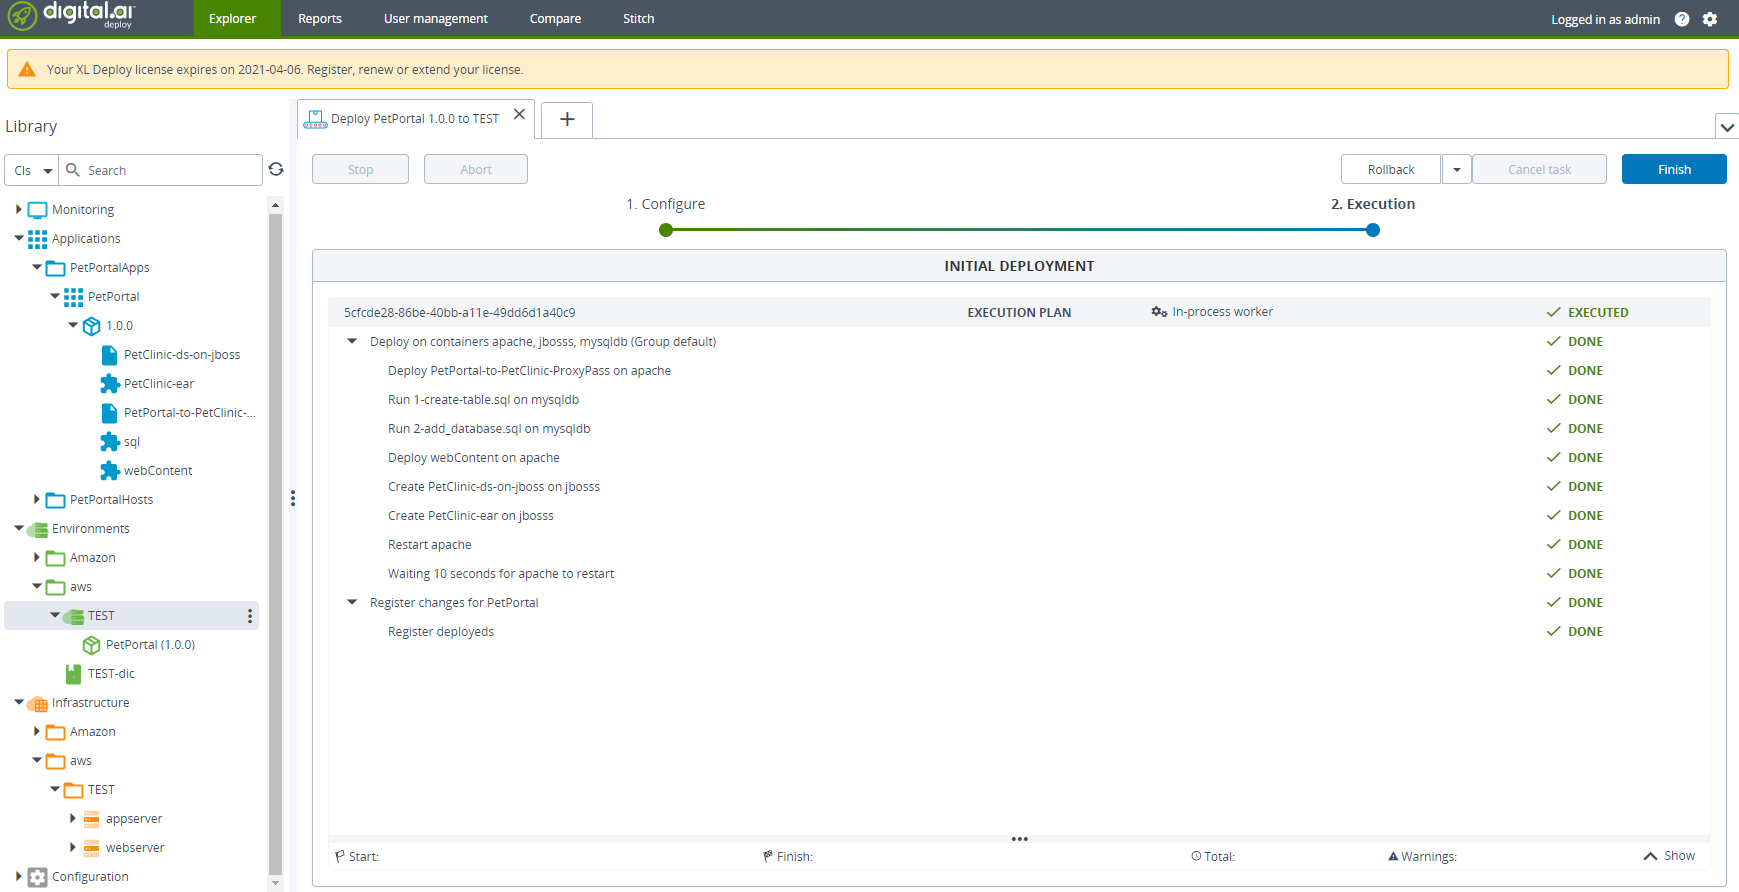
-
Click Finish.
-
Open the
Infrastructure/aws/TEST/webservernode from the left pane and copy the web server URL.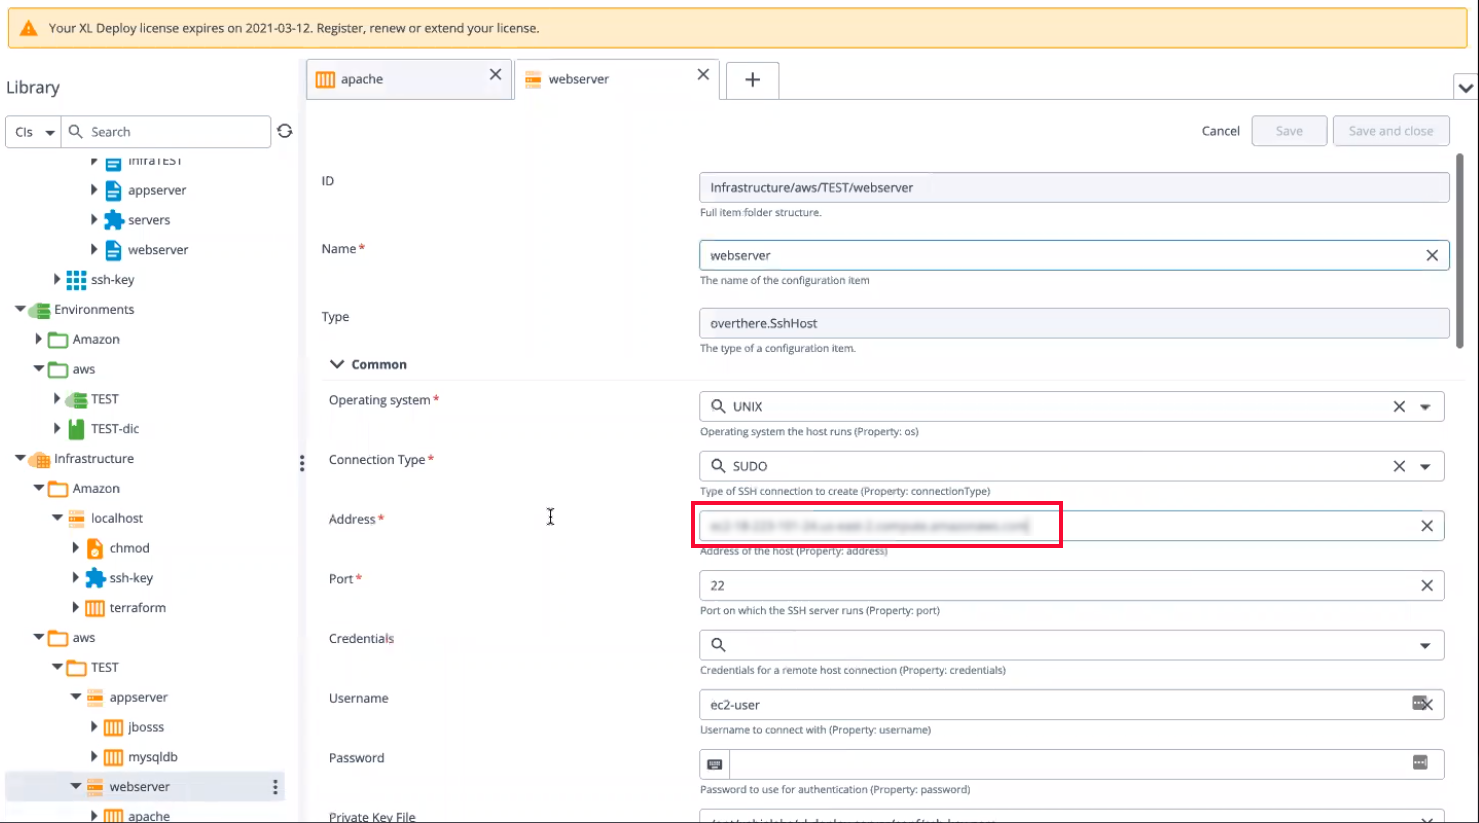
-
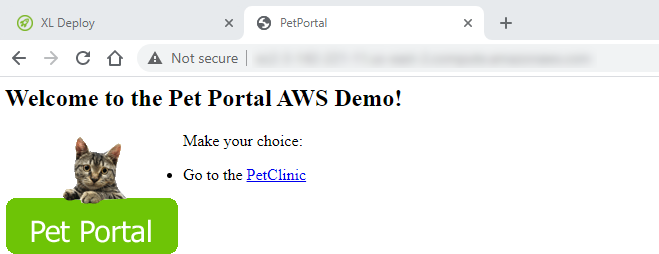
Open the URL in a browser to verify the successful deployment of the PetPortalApp.
Undeploy your PetPortal application and deprovision your AWS resources
Finally, you can also undeploy the PetPortal application and deprovision your AWS resources.
-
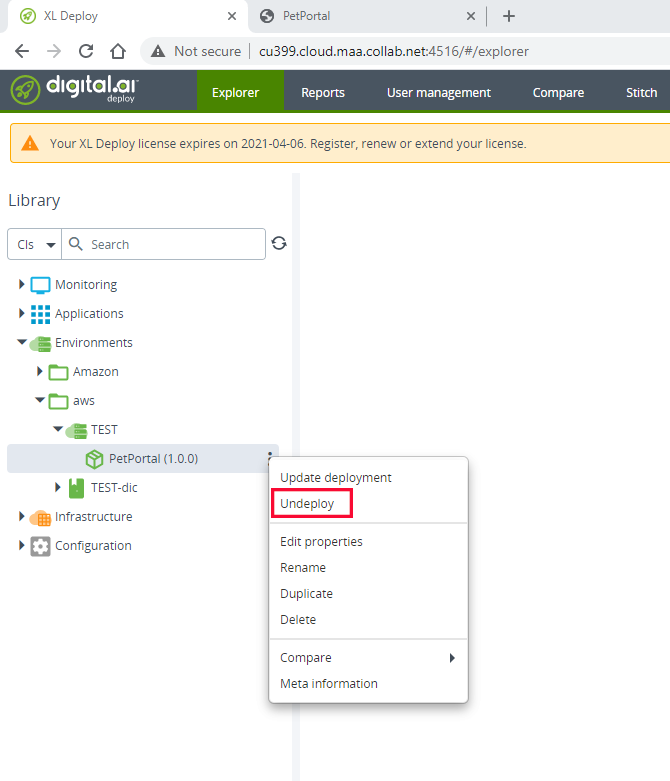
Select the Environments > aws > TEST > PetPortal node and select Undeploy from the shortcut menu.
-
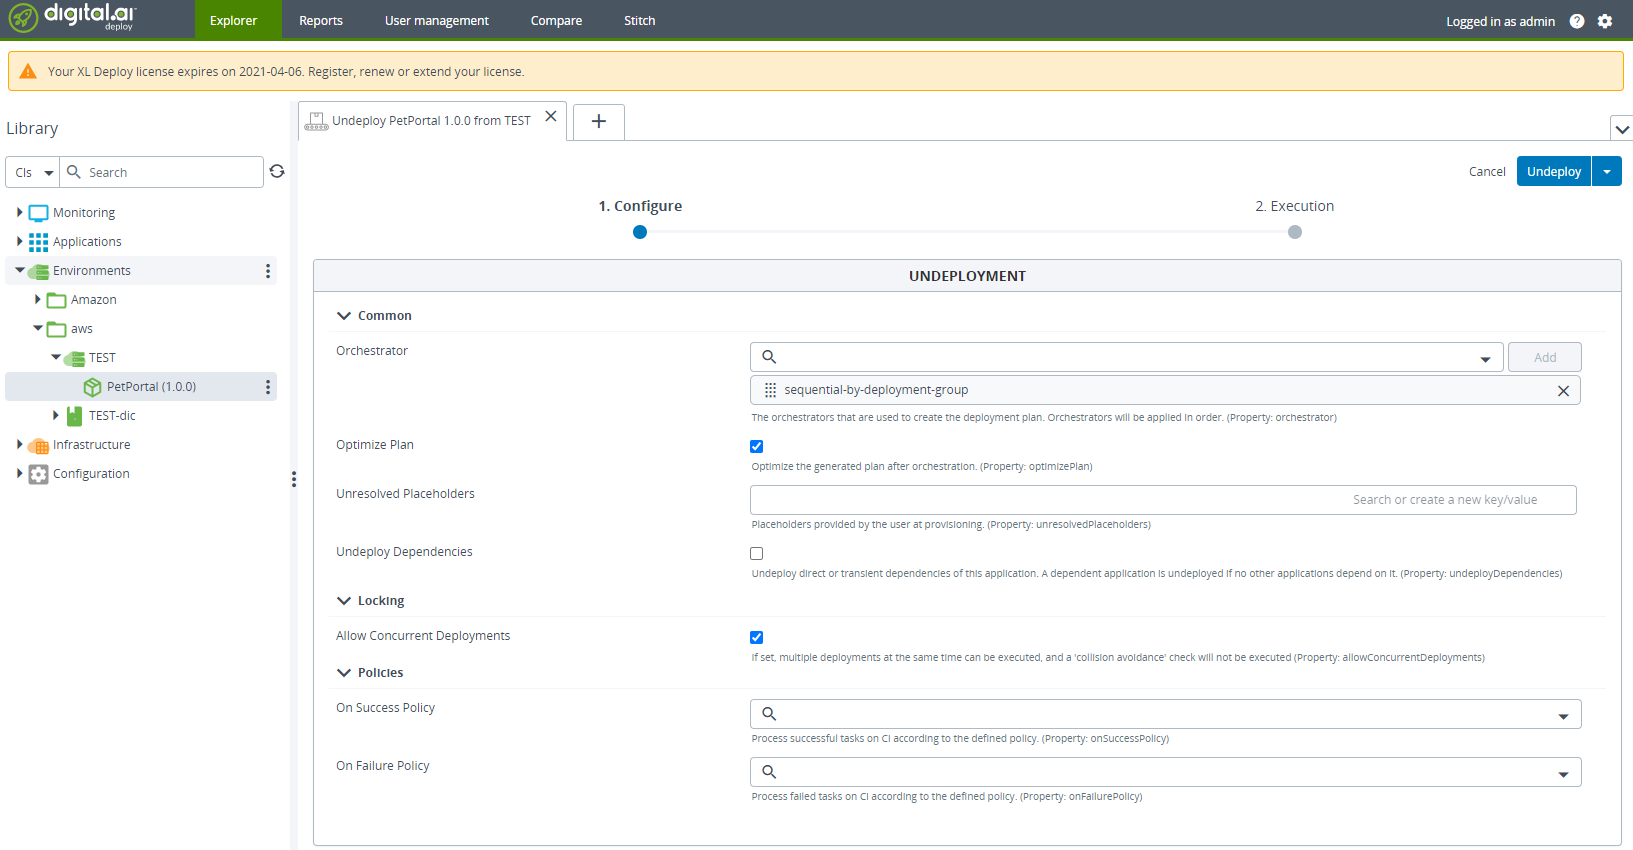
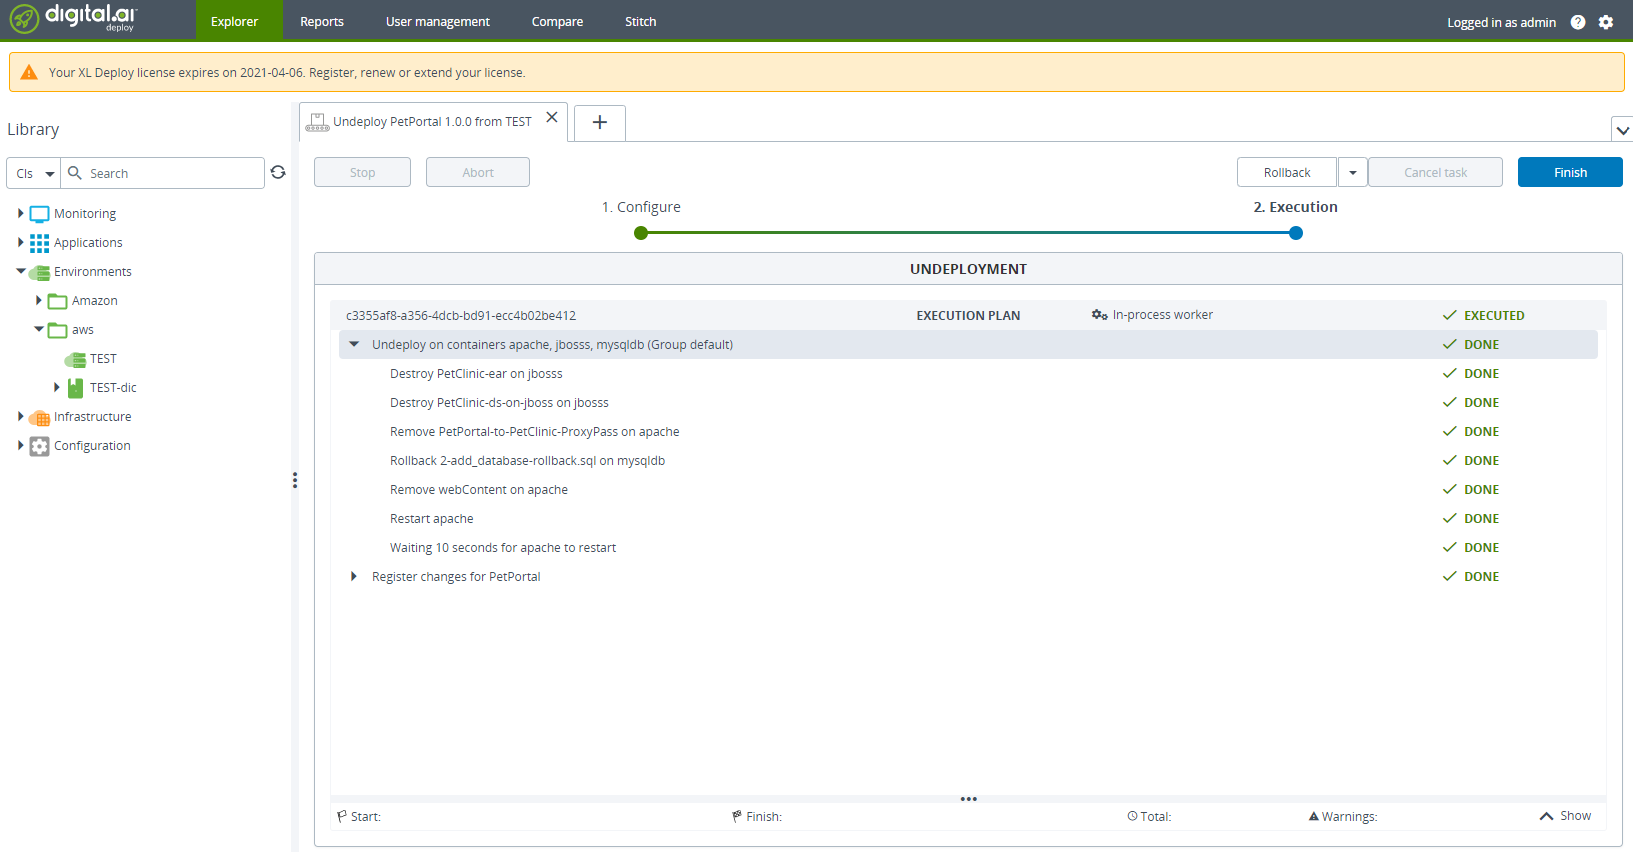
Click Undeploy.
-
Click Finish.
-
Open Environments > TEST, click Edit Properties, and delete the containers you added in Step 14 earlier.
-
Select the Environments > Amazon > aws_terraform > servers (1.0.0) node and select Undeploy from the shortcut menu.
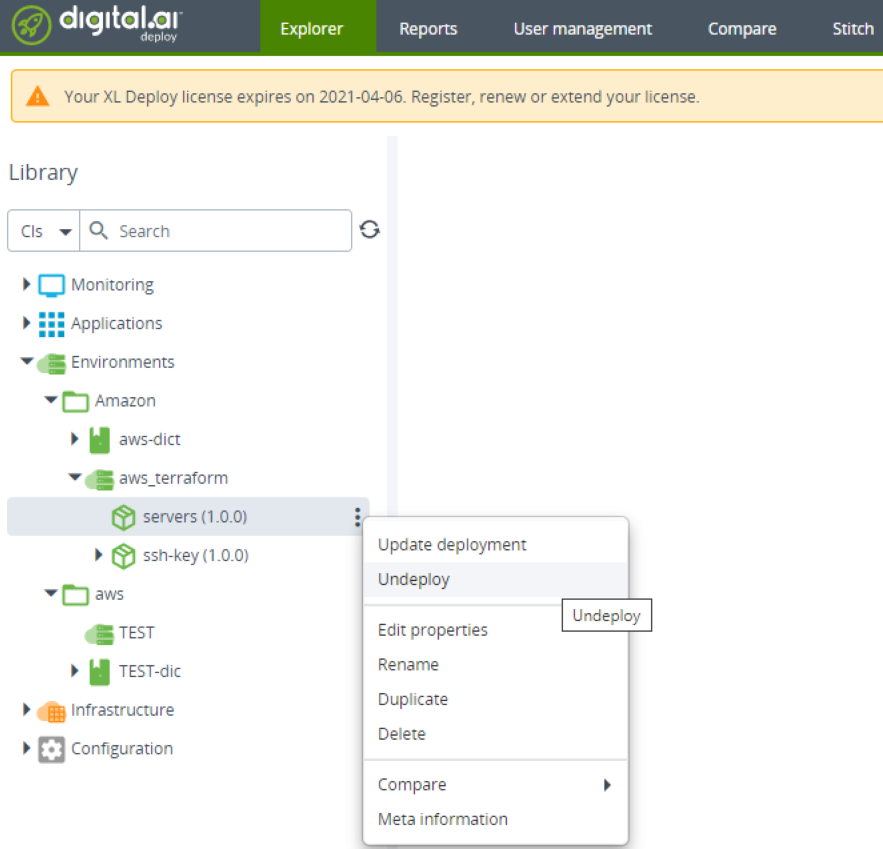
-
Click Undeploy.
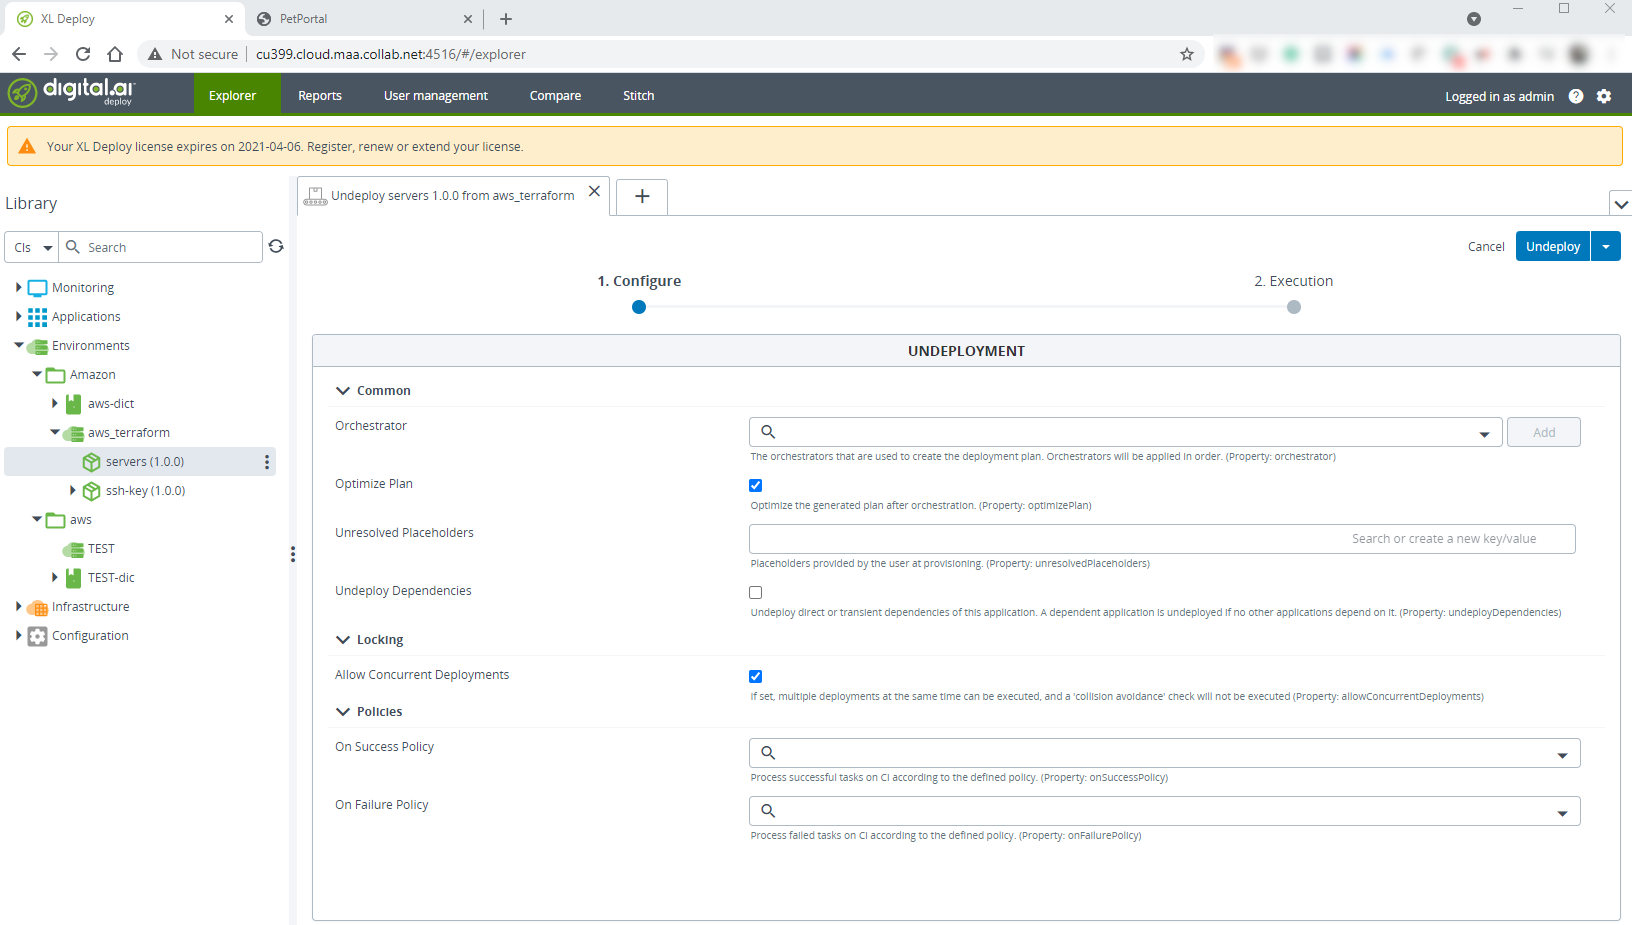
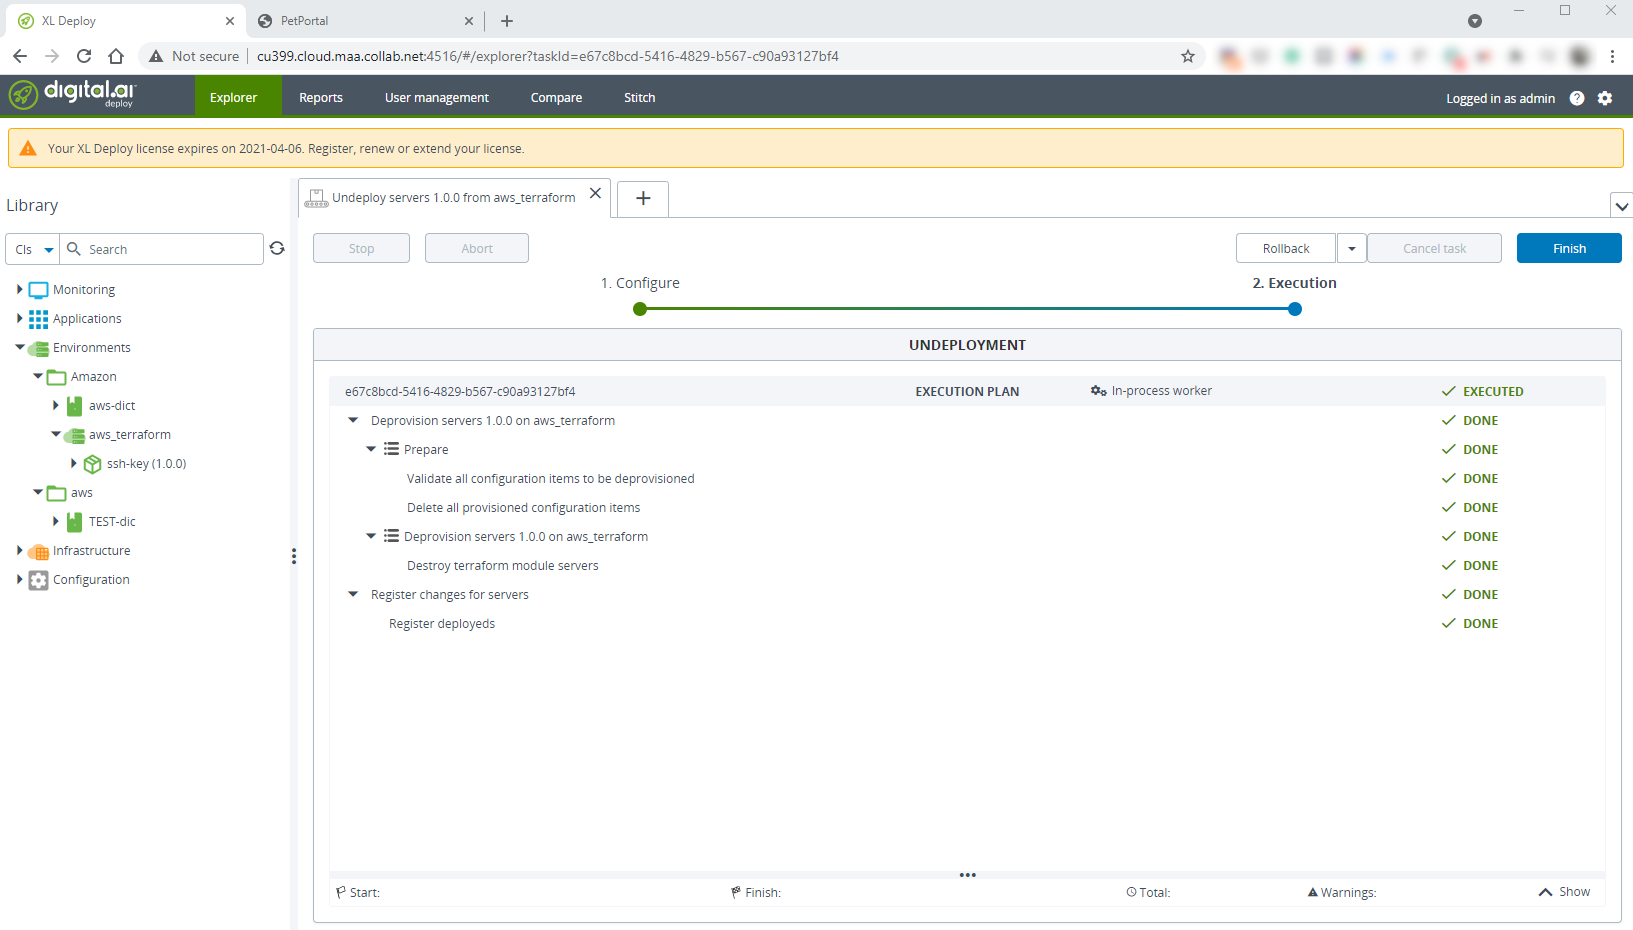
-
Click Finish.