Filter Tracker Artifacts
Configure Tracker Columns
When you're looking at the artifacts list in a tracker, a planning folder or a team, you can select the columns you want to see, either for this session or permanently.
You set your column preferences for each tracker, planning folder or team independently. If your project administrator has set default columns for the entire project, your individual column choices override those settings.
- Click Trackers from the Project Home menu.
- Select a tracker, planning folder or team and click COLUMNS > Configure.
- If you've already saved a column configuration, click it and skip the rest of these steps.
- To go back to the default column configuration, click System (default) and skip the rest of these steps.
- To set up a new configuration, click Configure.
- Choose your columns.
- Move the columns you want from Available Columns to Selected Columns. Artifact ID: Title, Priority and Status are required columns.
note
Selecting more columns can increase the time required to load the listing page.
- Remove any columns you don't need from Selected Columns.
- Use the move up and move down arrows to change the display order of the columns.
- Move the columns you want from Available Columns to Selected Columns. Artifact ID: Title, Priority and Status are required columns.
- Apply your choices to your view of the tracker.
- To use this arrangement this time only, click Apply. The next time you log in, you'll start with the default view again.
- To save your column layout for repeated use, click Apply and Save, then give your arrangement a name. The next time you log in, you'll see the column arrangement you just selected. (If you've sorted the records in your view that sort order is saved too.)
tip
If you are editing a column configuration that already exists, you can rename it by saving it under a new name.
- To make the same set of columns appear every time you come to this tracker, planning foler or team, click COLUMNS > Save and from Save Column Configuration page, select Make this my default view.
Tracker List Artifacts View
Use the Tracker List view to browse, filter, and sort artifacts within a specific tracker.
- Click Trackers from the Project Home menu.
- On the Tracker Summary page, click the title of the tracker in which you want to look at artifacts.
- Specify the filter criteria in one or more filter fields (at the top of each column) and clic FILTER.
- You can find a filter field at the top of each column in most of the tables in the TeamForge application.
- The filter field could be a text box or a drop-down list with multi-select check boxes.
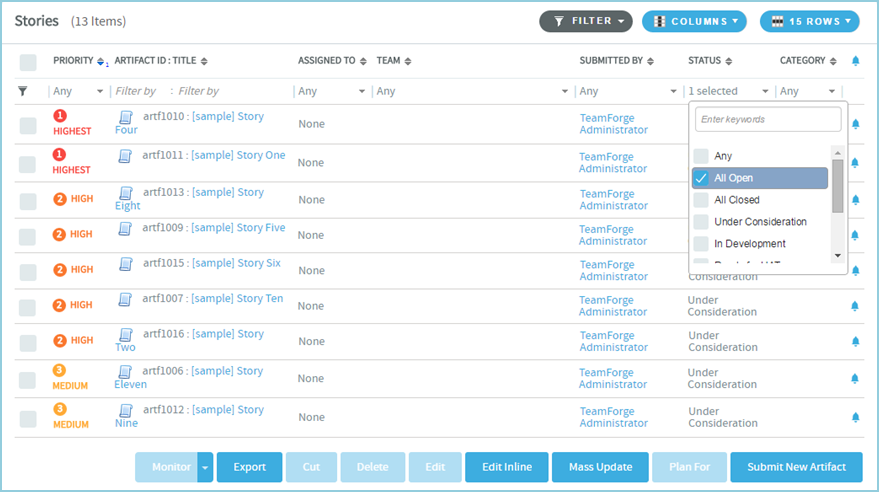
- You can type your filter criteria in the text boxes. The search text is case-insensitive.
- You can also select the filter values from on e or more drop-down lists. By default, you can only select up to 10 filter values in a drop-down list. However, you can set a value that suits your requirement for the
FILTER_DROPDOWN_MAX_SELECTIONtoken in thesite-options.conffile to increase or decrease the count. - Filter-as-you-type: You can find the Enter keywords text box in all filter drop-down lists. As you type your filter keyword, instant search results are shown in the drop-down list. For example, in the following illustration, typing "R" instanstly shows all statuses having the alphabet "R". The search text is case-insensitive.

- Some search filters may not appear if your site administrator has not enabled them.
- After filtering, if you want to save a filter for future use:
- Click FILTER and select Save from the drop-down list. The Save Filter As window appears.
- Type a name for the filter in the FILTER NAME text box.
- Click Save. The filter is saved. You can view and select the saved filters at a later point in time by clicking the Filter drop-down list.
note
You can save filters only in specific contexts. This feature may not be available in all the tables where you can filter table list items.
- To delete save filters:
- Click FILTER and select Delete from the drop-down list. The Select Filters To Be Deleted window appears.
- Select one or more filters to delete.
tip
Press and hold the Ctrl key to select more than one filter.
- Click Delete. A message such as
2 tracker filter(s) have been deleted successfully.is displayed if the process was successful.
- After filtering, if you want to clear the filters, click FILTER and select Clear from the drop-down list.
- Use the up-down arrow at the top of any column to sort your list by that column.
- Your primary sort column is identified by a superscript 1 next to the up-down arrow, and your secondary and third-level sort columns, if any, are likewise marked.
- Click the up-down arrow again to reverse the sort order.
- You cannot sort the list by the following fields (columns)—
Reported in Release,Fixed in Release,Tags, multi-select flex fields and user flex fields.
Planning Folder List Artifacts View
 In the Planning Folder list view, you can filter only by Priority, Artifact ID, Title, Assigned To and Team columns.
Though the artifacts are listed in a tree view (parent artifact with its child artifacts), the filter is applicable only for the parent artifacts and not their children.
The filter is available only in the Sort mode and not in the Rank mode.
The filter that you set is retained even after you navigate to other pages and return to this page.
By default, artifacts are sorted by Priority (ascending), then by the display order of trackers set in Project Admin > Tracker Settings. When you sort by another column, that column becomes the primary sort (ascending) and the tracker display order remains the secondary sort.
- Click Trackers from the Project Home menu.
- Click Planning Folders.
- On the Summary page, click the planning folder in which you want to look at artifacts.
- Specify the filter criteria in one or more filter fields (at the top of the filterable columns) and click FILTER.
- The filter field could be a text box or a drop-down list with multi-select check boxes.
- You can type your filter criteria in the text boxes. The search text is case-insensitive.
- You can also select the filter values from on e or more drop-down lists. By default, you can only select up to 10 filter values in a drop-down list. However, you can set a value that suits your requirement for the
FILTER_DROPDOWN_MAX_SELECTIONtoken in thesite-options.conffile to increase or decrease the count. - Filter-as-you-type: You can find the Enter keywords text box in all filter drop-down lists. As you type your filter keyword, instant search results are shown in the drop-down list. For example, in the following illustration, typing "R" instanstly shows all statuses having the alphabet "R". The search text is case-insensitive.
- After filtering, if you want to clear the filters, click FILTER and select Clear from the drop-down list.
- Use the up-down arrow at the top of any column to sort your list by that column.
-
Your primary sort column is identified by a superscript 1 next to the up-down arrow, and your secondary and third-level sort columns, if any, are likewise marked.
-
Click the up-down arrow again to reverse the sort order.
-
You cannot sort the list by the following fields (columns)—
Reported in Release,Fixed in Release,Tags, multi-select flex fields and user flex fields.Filter by artifact status
In addition to the column-wise filter, you can also filter and view artifacts based on their status alone using the status drop-down list.

-
- Select All, Open only or Closed from the drop-down list. Selecting an option refreshes both the list of underlying statuses shown for each listed tracker and the artifacts in the table/list view. For example, select Open only and the artifacts with associated status values such as 'Under Construction', 'Open' and 'In Progress' (all belonging to the Open meta-status) are displayed, including child artifacts.
note
By default, Open only is selected. The list of underlying statuses for each listed tracker and the table/list view both show only the artifacts belonging to the Open meta-status (Status Type).
noteThe statuses All, Open only and Closed are associated with user-defined status values while configuring a tracker field on the Edit Tracker Field page (Project Admin > Tracker Settings). For more information, see Configure Tracker Select Field Values.
Teams List Artifacts View
- In the Teams list view, you can filter only by Priority, Artifact ID, Assigned To and Planned For columns.
- The filter that you set is retained even after you navigate to other pages and return to this page.
note
The Sort and Rank modes are not available on the Teams list view.
By default, artifacts are sorted by Priority (ascending), then by the display order of trackers set in Project Admin > Tracker Settings. When you sort by another column, that column becomes the primary sort (ascending) and the tracker display order remains the secondary sort.
Filter by columns
-
Click Trackers from the Project Home menu.
-
Click Teams.
-
On the Summary page, click the planning folder in which you want to look at artifacts.
-
Specify the filter criteria in one or more filter fields (at the top of the filterable columns) and click FILTER.
- The filter field could be a text box or a drop-down list with multi-select check boxes.
- You can type your filter criteria in the text boxes. The search text is case-insensitive.
- You can also select the filter values from on e or more drop-down lists. By default, you can only select up to 10 filter values in a drop-down list. However, you can set a value that suits your requirement for the
FILTER_DROPDOWN_MAX_SELECTIONtoken in thesite-options.conffile to increase or decrease the count. - Filter-as-you-type: You can find the Enter keywords text box in all filter drop-down lists. As you type your filter keyword, instant search results are shown in the drop-down list. For example, in the following illustration, typing "R" instanstly shows all statuses having the alphabet "R". The search text is case-insensitive.
-
After filtering, if you want to clear the filters, click FILTER and select Clear from the drop-down list.
-
Use the up-down arrow at the top of any column to sort your list by that column.
- Your primary sort column is identified by a superscript 1 next to the up-down arrow, and your secondary and third-level sort columns, if any, are likewise marked.
- Click the up-down arrow again to reverse the sort order.
- You cannot sort the list by the following fields (columns)—
Reported in Release,Fixed in Release,Tags, multi-select flex fields and user flex fields.
Filter by artifact status
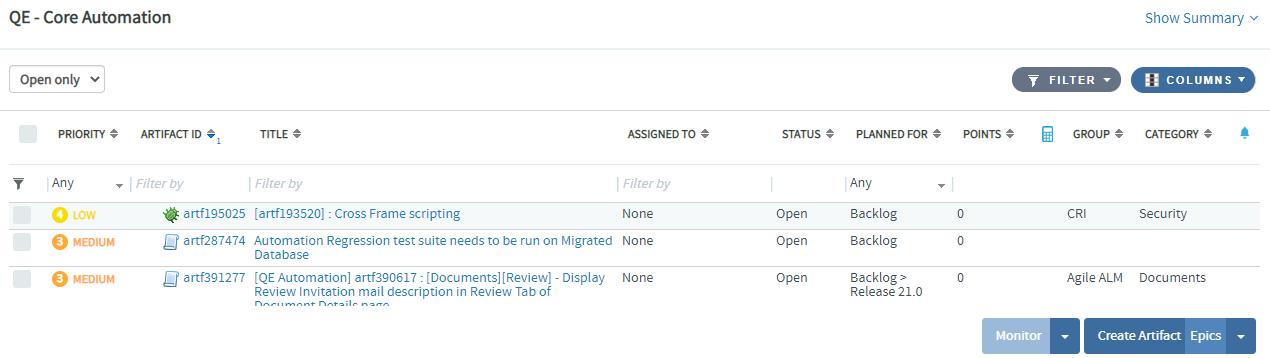
In addition to the column-wise filter, you can also filter and view artifacts based on their status alone using the status drop-down list.
-
Select All, Open only or Closed from the drop-down list. Selecting an option refreshes both the list of underlying statuses shown for each listed tracker and the artifacts in the table/list view. For example, select Open only and the artifacts with associated status values such as 'Under Construction', 'Open' and 'In Progress' (all belonging to the Open meta-status) are displayed, including child artifacts.
noteBy default, Open only is selected. The list of underlying statuses for each listed tracker and the table/list view both show only the artifacts belonging to the Open meta-status (Status Type).
noteThe statuses All, Open only and Closed are associated with user-defined status values while configuring a tracker field on the Edit Tracker Field page (Project Admin > Tracker Settings). For more information, see Configure Tracker Select Field Values.
Recent Artifacts View
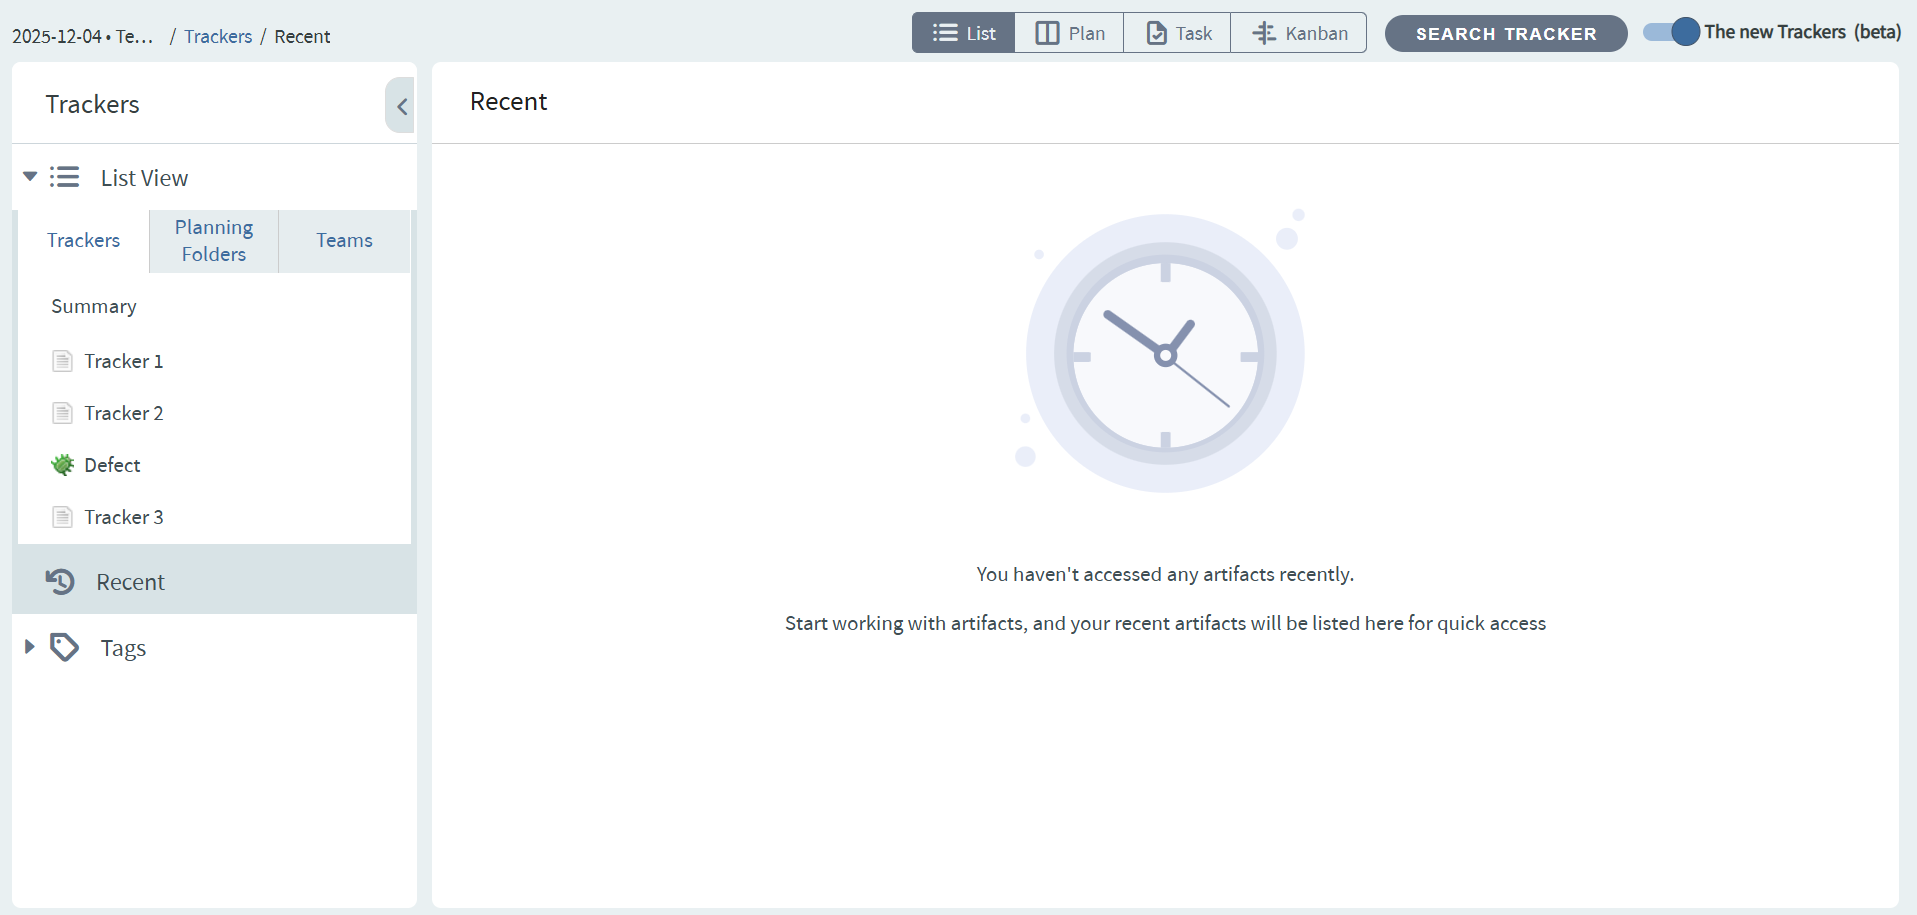
The Recent view provides quick access to the 50 most recently viewed or updated artifacts.
- Click Trackers from the Project Home menu.
- Click Recent in the left navigation panel.
- The recent artifacts are displayed in descending order.
Filtering in Recent View
You can narrow down the list of recent artifacts using the available filter options.
Column-level Filtering: Use the filter fields at the top of each column to narrow down the list.
- Available columns: Artifact ID : Title, Status, Priority, Planned For, Assigned To
- Filter fields work the same way as in the Tracker List Artifacts View
- Only values present in the current Recent view are available as filter options
Available Actions
The Recent view provides a subset of actions available in the standard Trackers List view.
- Individual Artifact Actions: Hover over an artifact to access available actions (same as New Trackers List view)
- Export: Export the artifact list (available when at least one artifact is present)
The Recent view is not available for public projects.
Tags View
The Tags view in Trackers provides a visual tag cloud for navigating and filtering artifacts by their associated tags, similar to the Tag Cloud feature in the Documents module.
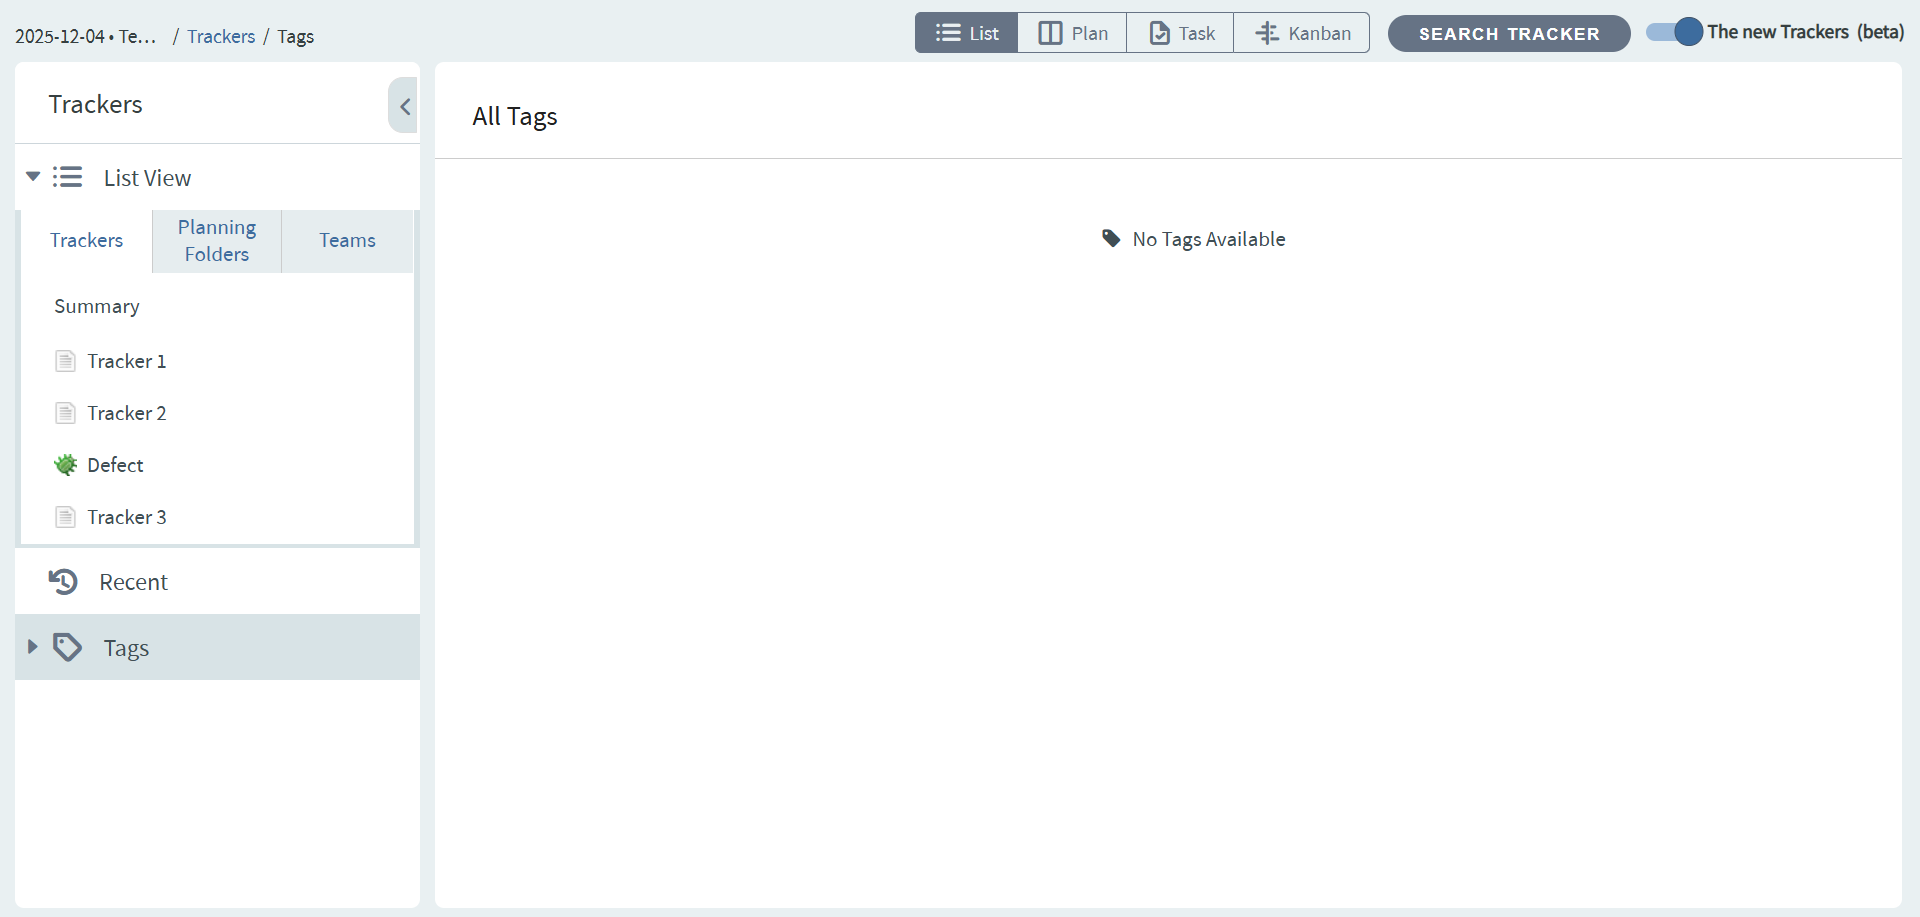
Tag Cloud
The Tag Cloud provides a visual representation of all tags used across tracker artifacts, with tag size and shade indicating popularity.
- The Tag Cloud shows the most recently used tags first.
- Click a tag to list all artifacts associated with that tag.
- Click All Tags to view all tags if more tags exist than can be displayed.
- Tags are visually distinguishable by size and shade:
- Larger font and darker shade: More artifacts are associated with the tag
- Smaller font and lighter shade: Fewer artifacts are associated with the tag
- Only tags associated with Tracker artifacts are shown.
Tags List View
When you click a tag in the Tag Cloud, the Tags list view displays all artifacts associated with that tag.
To filter artifacts in the Tags list view:
- Click Trackers from the Project Home menu.
- Click on a tag from the Tag Cloud in the left navigation pane.
- Artifacts are sorted by Last Modified in descending order.
Tag Cloud Behavior
The Tag Cloud dynamically updates based on how tags are used across artifacts. Here's how different actions affect the tag cloud:
Adding a tag to an artifact:
- Increments the tag's size-shade count by 1
- Moves the tag to the top of the cloud
- Tags with the same count are ordered alphabetically
Removing a tag from an artifact:
- Decrements the tag's size-shade count by 1
- Tag ordering remains the same
- Removing a tag from the last associated artifact removes the tag from the cloud
Deleting an artifact:
- Decrements the size-shade count of all associated tags by 1
- Tag ordering remains the same
- If the artifact was the last one associated with a tag, the tag is removed from the cloud
Tag cloud data is cached and refreshed every 8 hours for performance optimization.
Favorites View
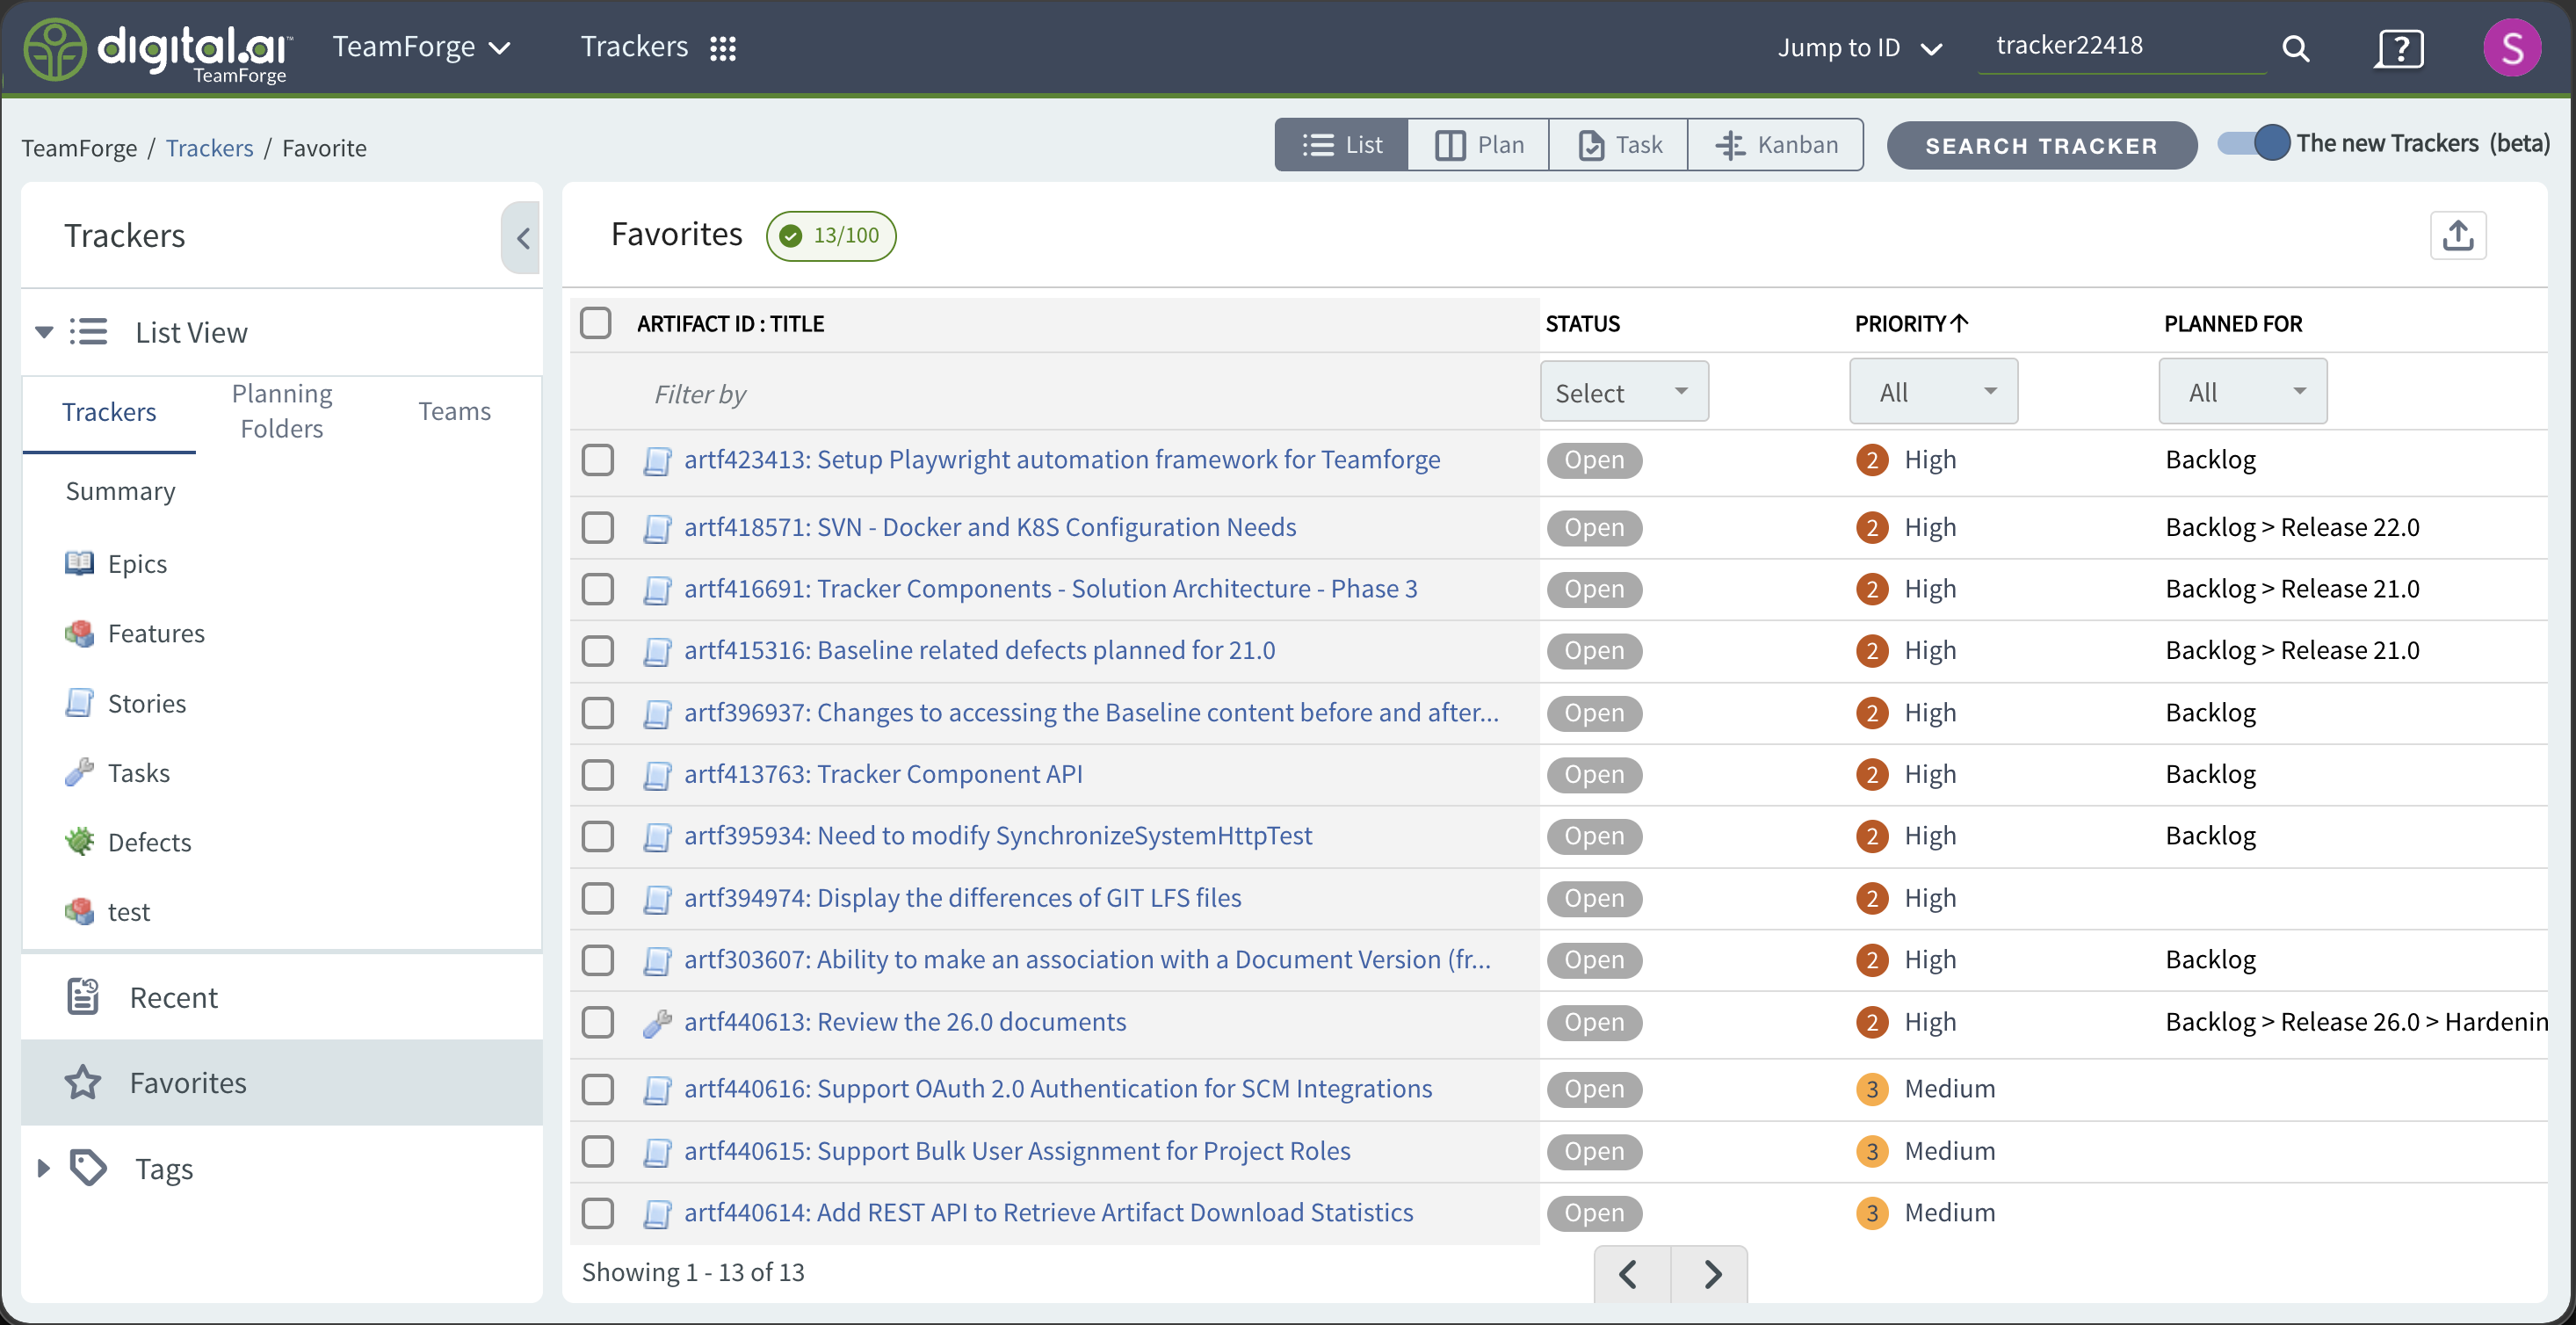
The Favorites view provides quick access to the artifacts you mark as favorites in a project. It works much like the Recent Artifacts View, with its own list, filtering, and export options.
Mark and Unmark Favorites
A Star icon lets you add or remove favorites from several places:
- The artifact detailed view (between Copy URL and Start/Stop Monitoring).
- The floating action menu (on hover) in the Trackers, Planning Folders, Teams, Recents, and Tags list views.
- The bulk-action menu when multiple artifacts are selected in the Trackers, Planning Folders, and Teams list views. When at least one selected artifact is not a favorite, the bulk favorite icon is not highlighted; clicking it marks all selected artifacts as favorites.
- The Plan Board cards (before the Edit Artifact icon, on hover).
- The Quick Edit slider (top right, before Open in New Window).
When an artifact is a favorite, the star is filled and a star also appears at the end of the artifact title in the list views. Add and remove confirmations appear in a banner, similar to the Monitor experience.
The inactive Favorites and Monitor icons are outline icons (an outline star and an outline bell). The active icons are a blue-filled star and a blue-filled bell.
View Favorites
- Click Trackers from the Project Home menu.
- Click Favorites in the left navigation panel.
- Artifacts are sorted in descending order by the last accessed or updated timestamp (most recent first).
The breadcrumb is / Trackers / Favorites. Click Trackers to return to the last visited folder (Trackers, Planning Folders, or Teams). The artifact count is shown at the bottom left (for example, Showing 1 - 18 of 18). Pagination does not apply.
The following columns are shown in this order: Artifact ID : Title, Status, Priority, Planned For, Assigned To, Team.
Filtering in Favorites View
Column-level filtering and Filter by Status (All, Open only, Closed) work the same way as in the New Trackers list view. The default status is All (both open and closed artifacts). Only the values present in the current Favorites view are available as filter options. Filter by Criteria and Save are not available. When you leave and return to the view, the status resets to All.
Available Actions
- Hover over an artifact to access the same actions as the New Trackers list view.
- When multiple artifacts are selected, only Export and Unfavorite are available.
- Export uses the same dialog as the Teams list view, with the same formats and the Favorites columns as selectable fields. Export is available when at least one artifact is present.
- Sort, Rank, Manage Views, Edit Inline, and +New are not available.
- Horizontal scrolling behaves the same as the New Trackers list view.
Limitations
- A maximum of 100 artifacts can be favorited per project. Beyond that, TeamForge shows "You've hit the maximum number of favorites. Remove an existing favorite to add a new one".
- Parent-child relationships are not reflected in the Favorites view.
- The Favorites tab is hidden for public projects and is not available in the Old Trackers list view.
- An artifact belonging to another project appears only in the Favorites list of its parent project.
- Artifacts in trackers you lose permission to no longer appear in the Favorites view.
- All RBAC permissions apply. An appropriate empty-state message is shown when there are no favorites.
The Favorites view is cached in the browser for the session, so returning to the Trackers module from another module lands you back on the Favorites view.
Saved Filters and Status Filter Enhancements
Filtering in the New Trackers list views is easier to discover and manage.
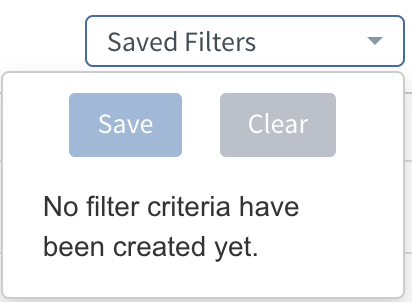
- A Saved Filters dropdown appears as a button (rather than an icon) at the top right, next to Rank. When empty, it shows "No filter criteria have been created yet." When it contains criteria, it shows Save and Clear actions along with a criteria message, and a tick mark for the selected filter. A gear (Settings) icon for a saved filter appears only when you hover over it. Saved Filters are available for the Trackers, Planning Folders, and Teams views, and are not available for Tags, Recents, and Favorites.
- Filter by Status now lives inside a Status dropdown that shows All, Open only, and Closed in a row below the search box. Open only is the default for Planning Folders and Teams; All is the default for Recents, Favorites, and Tags.
- When a column filter is applied, a highlighted Funnel (x) icon appears on the left to clear all filters. Hovering over the icon shows the tooltip "Clear All Filters." The icon is hidden when no filters are applied, and it is not shown by default until you manually select a filter option.