The New Trackers UI (Beta)
- The new Trackers UI lets you work with trackers effortlessly.
- It offers a clear list view for artifacts with a sticky title column, icon-based action buttons, smooth scrolling options, pagination for large lists, and so on. User avatars show who is assigned to each artifact.
- The new Trackers UI is available in TeamForge 24.0 and later as a beta feature, which you can turn on or off as you please.
Switching Between the Classic and New Tracker UIs
As the new Trackers UI is being offered as a beta feature, you can switch between the classic (old) and the new Tracker UIs as you please.
- Select Project Home > TRACKERS.
- Turn The new Trackers toggle at the top right corner,
 , on and off to switch between the new and classic (old) Tracker UIs respectively.
TeamForge 26.0
TeamForge 26.0 brings the following new features and enhancements to the New Trackers UI.
Favorites View
Mark the artifacts you care about most as Favorites and reach them from a dedicated Favorites view in the New Trackers module. Marking frequently used artifacts gives you one-click access, reducing repeated searches and navigation.
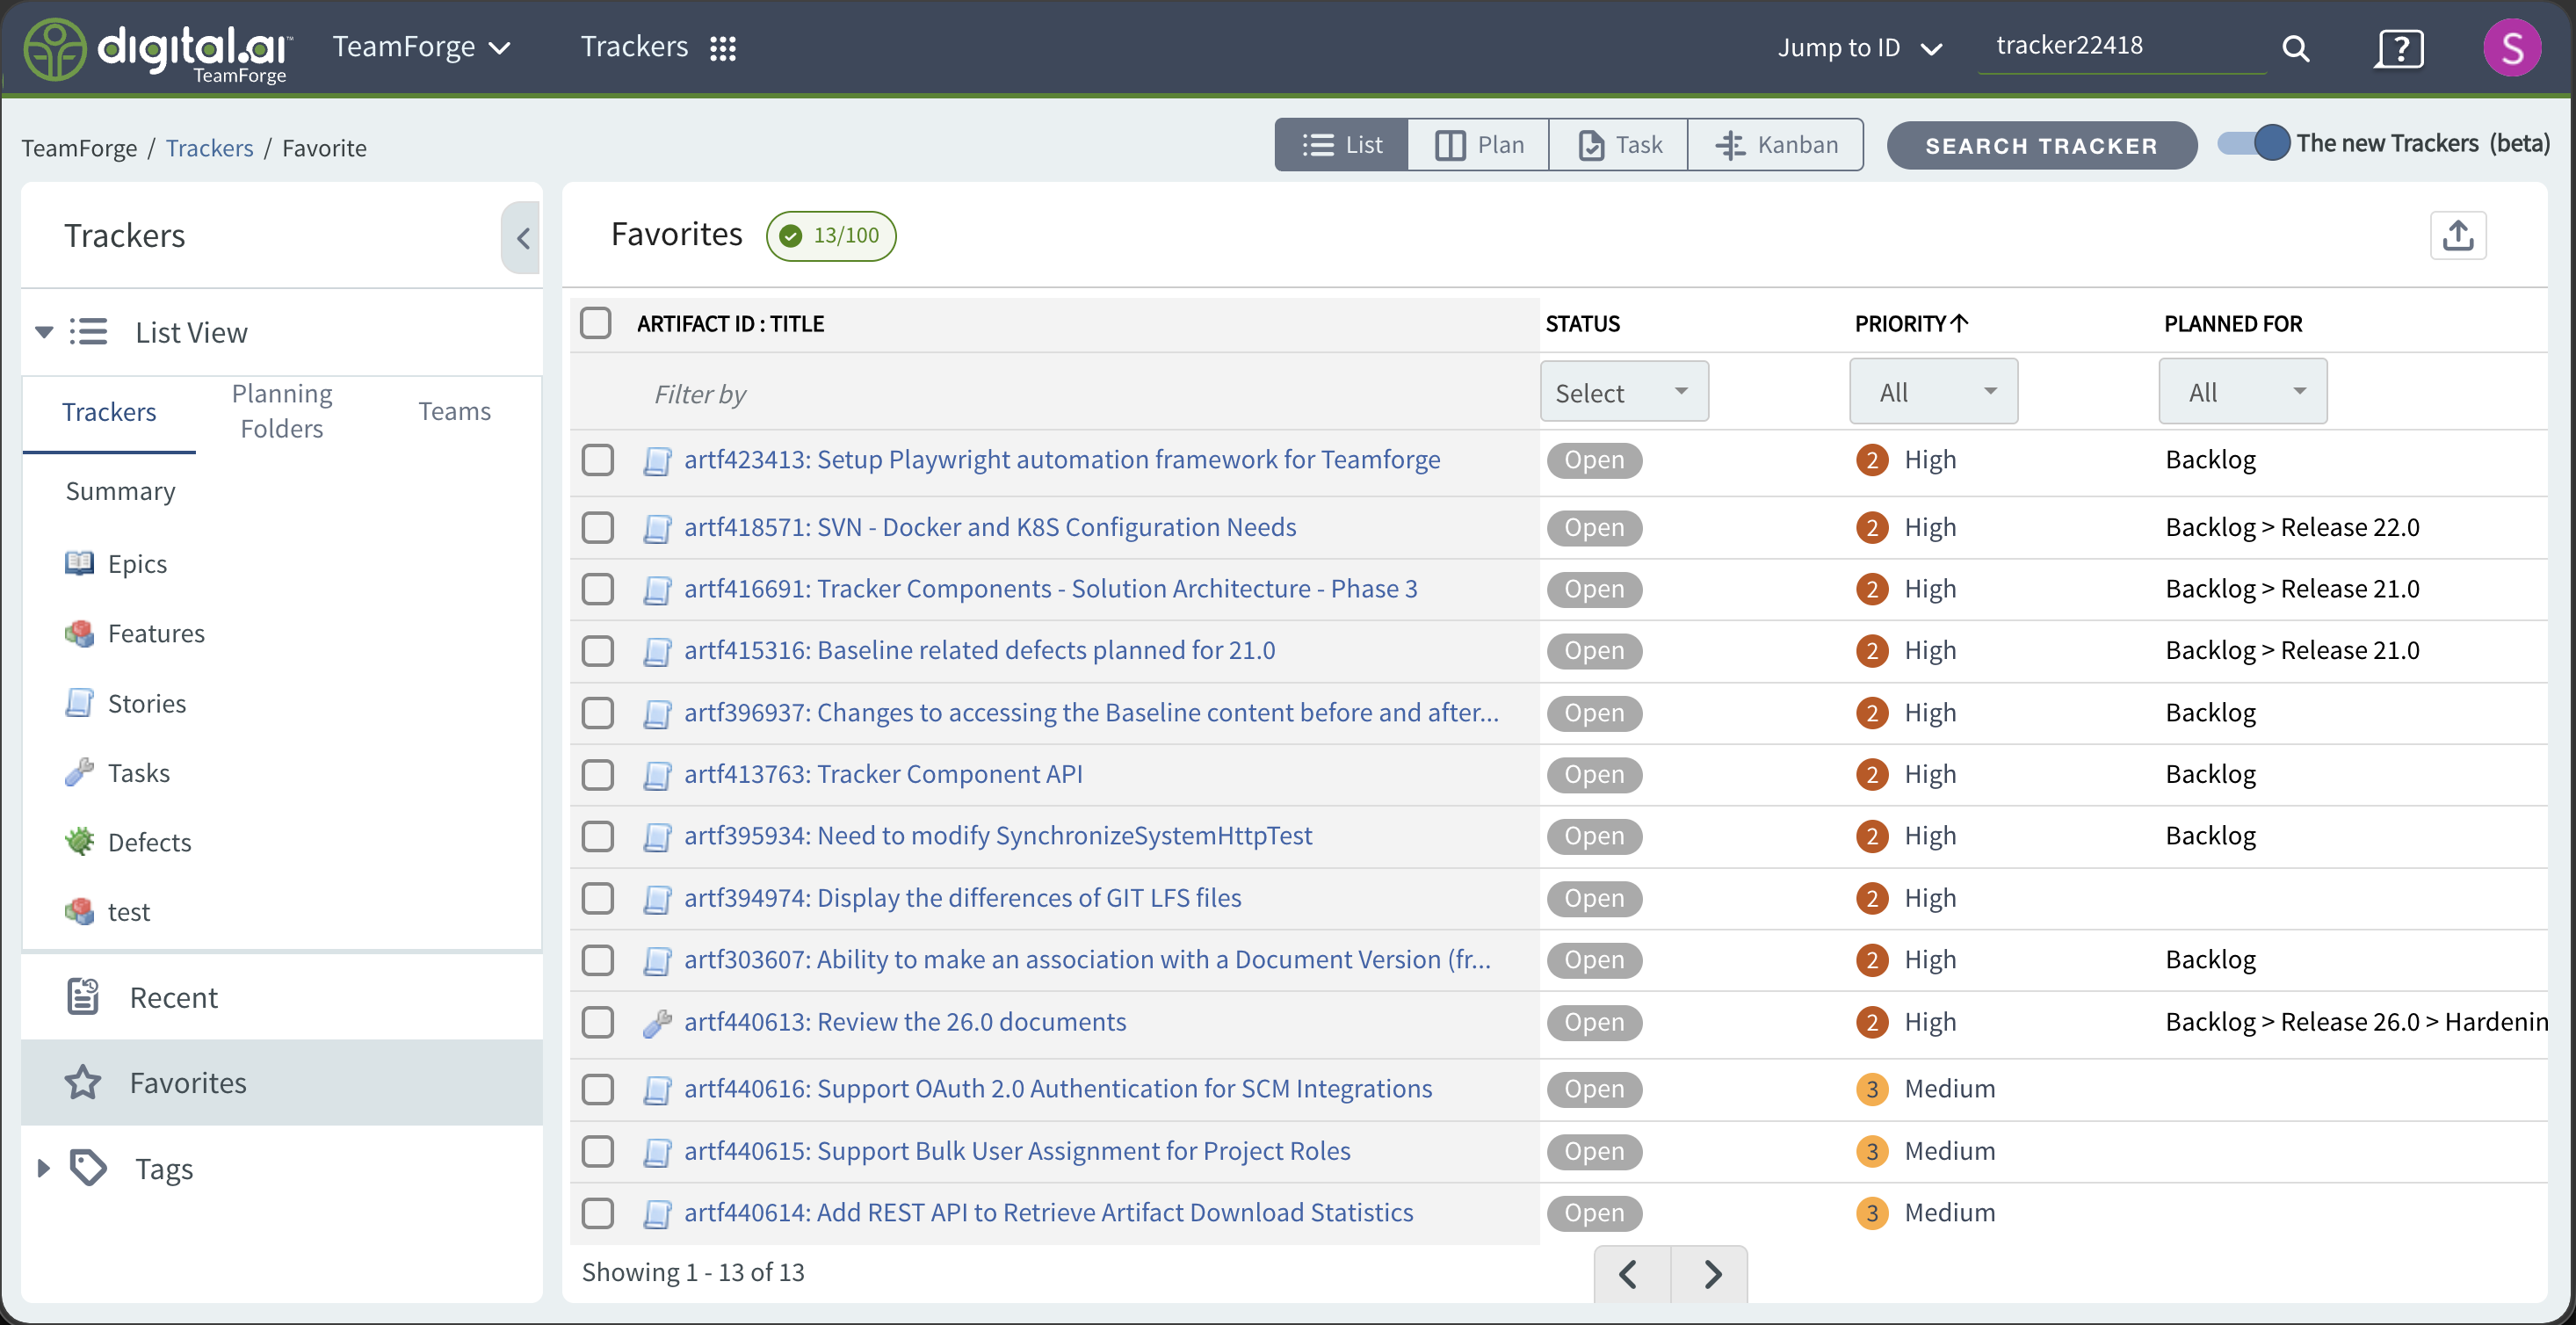
- A Star icon lets you add or remove favorites from the artifact detailed view, the list-view hover and bulk-action menus, the Plan Board cards, and the Quick Edit slider. Favorites are marked with a filled star and a star at the end of the artifact title.
- The dedicated Favorites view lists your favorites (most recent first) with column and status filtering and export, and lets you bulk Unfavorite.
- A maximum of 100 artifacts can be favorited per project. The Favorites tab is hidden for public projects and does not apply to the Old Trackers list view.
For more information, see Favorites View.
Saved Filters and Status Filter Enhancements
A Saved Filters dropdown next to Rank and a consolidated Status dropdown (All, Open only, Closed) make filtering easier to discover and manage.
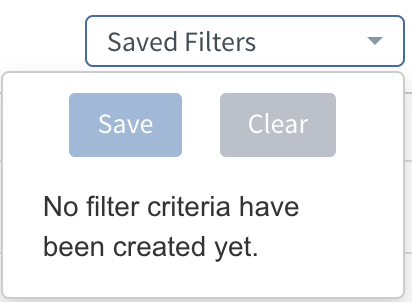
For more information, see Saved Filters and Status Filter Enhancements.
Default Sort Order in Planning Folder and Teams Views
The Planning Folder and Teams list views sort by Priority ascending, then by the tracker display order set in Project Admin > Tracker Settings. When you sort by another column, that column becomes the primary sort and the tracker display order remains the secondary sort.
Refreshed Favorites and Monitor Icons
The inactive Favorites and Monitor icons are now outline icons; the active icons remain blue-filled.
Real-time Toastr Notifications
TeamForge now shows lightweight, real-time Toastr notifications across all applications, including the New Trackers module, for key actions, giving you clear, contextual feedback on success, warning, and error outcomes without interrupting your workflow.
- Success messages dismiss automatically after 5 seconds. Error and Warning messages remain until you dismiss them.
- Notifications appear in the top-right corner, stack without overlapping, do not block the UI, and are accessible to screen readers.
@mentions and Markdown Editor in Sliders and Mass Update
The artifact slider Description field and the Mass Update Comment field are now Markdown editors and support @mentions. Users called out via @mentions are added to the monitoring list on save. Edit Inline supports editing the description but not comments or @mentions.
Planning Board Enhancements
The New Planning Board includes several improvements. For more information, see The New Planning Board—Work with Artifact Cards.
- Filtering - Filter the Planning Board by Tags, Priority, and Assigned To using multiple selections. Filters apply on Apply, appear as removable chips above the swimlanes, and persist when you reopen the slider. Invalid filter values are highlighted when the board data changes, and you can clear everything with Clear all.
- Card Detailed View Configuration - Personalize Plan Board cards through the Detailed View Configuration dialog by showing or hiding tags and custom fields, so cards surface the details relevant to your planning without clutter.
- Select the tracker type before creating an artifact - Choose the tracker first and the slider loads the matching fields.
- Reorganized Planning Folder and Team dropdowns - The dropdowns now show the search control first, followed by the None (and All artifacts for Team) options, then the hierarchical list.
- Clearer card-move errors - Toastr notifications explain why a card cannot be moved to an unconfigured swimlane.
- Cleaner layout - The breadcrumb has been removed from the Plan Board view.
Assist—AI-Assisted Title and Description Authoring
Use Assist to draft or improve artifact titles and descriptions, producing consistent, comprehensive details faster. Assist is available on the Create Artifact and Edit Artifact screens once a site administrator configures and enables it. For more information, see Assist—AI-Assisted Authoring in Trackers.
Other New Trackers Refinements
- "Planned For" column in default list views - The "Planned For" column now appears by default across all List view sections (Trackers, Planning Folders, Teams, Recent, Favorites, and Tags).
- Faster left and right pane updates - Selecting a tracker, planning folder, or team in the left pane refreshes only the artifact list and the relevant lists instead of reloading the entire pane.
- Priority color coding in inline edit and Mass Update - Priority values display their color coding when edited inline or through Mass Update, consistent with the earlier UI.
TeamForge 24.1
TeamForge 24.1 brings you the following new features and enhancements to the the new Trackers UI.
Board Views
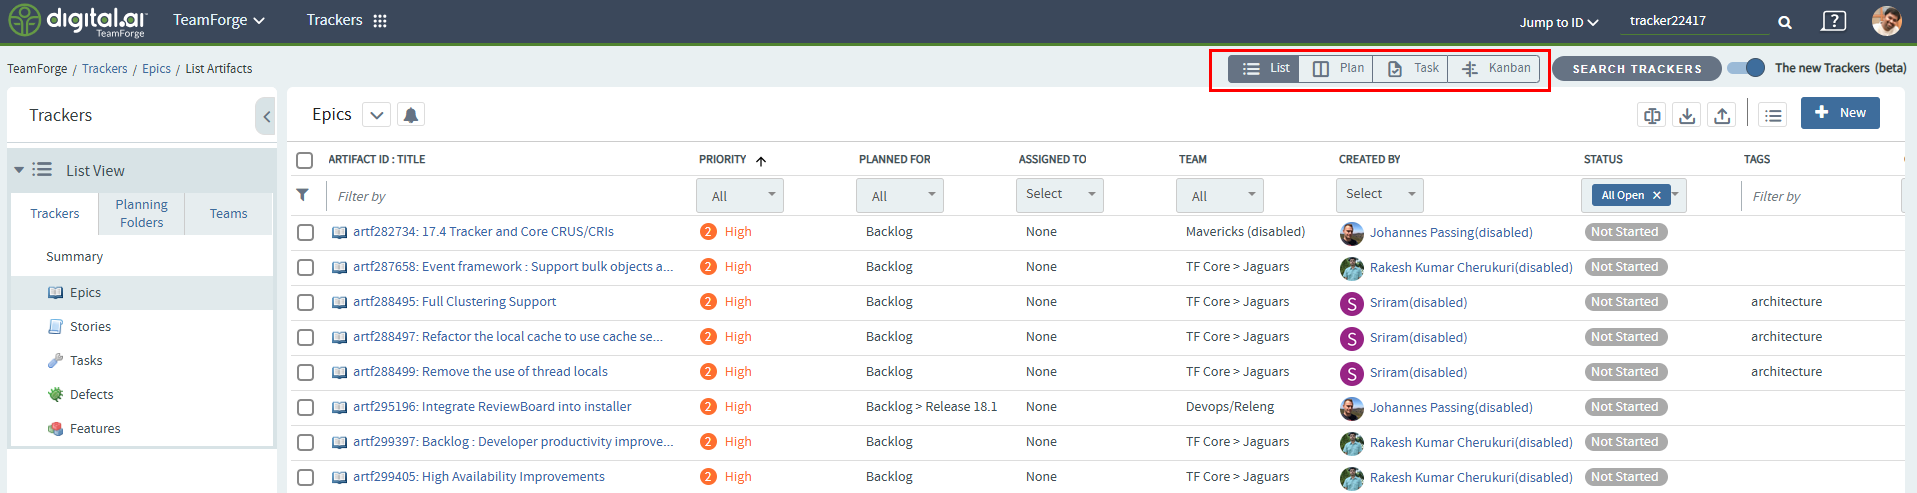
The List, Plan, Task, and Kanban boards have been moved from the sidebar to the top nav bar as a button group for easy access.
Planning Board
Releases and iterations have never been easier to plan with the new Plan Board. You can now accomplish your routine planning tasks quickly and effortlessly with the intuitive and user-friendly interface. For more information, see:
TeamForge 24.0
The new Trackers UI includes icon-based call-to-action (CTA) buttons for easier navigation. This change lets you perform actions with fewer clicks and improves how you work. Key differences and improvements include:
Sliding Sidebar
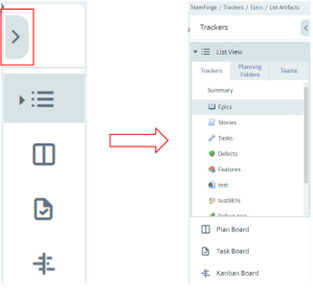
The sliding sidebar includes an expand and collapse button. When expanded, it shows options like List View, Plan Board, Task Board, and Kanban Board. By default, the sidebar is collapsed to save screen space.
Manage Planning Folders from the Sidebar
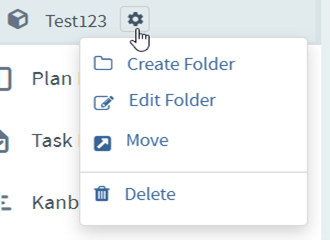
In the Planning Folders sidebar, the New and Edit buttons are deprecated and relocated as a gear icon for each folder and subfolder. Use this gear icon to create, edit, move, or delete a planning folder.
- Click TRACKERS from the Project Home menu.
- From the Trackers homepage, expand List View and click Planning Folders.
- Under Planning Folder, click the folder in which you want to create a new or make changes to an existing planning folder.
- Click the gear icon to create, edit, move, or delete a planning folder.
- Select the type of planning folder you want to create: Release, Iteration, or Folder.
- Configure the required field and click Save.
For more information see, Planning Folder Overview.
Manage Teams from the Sidebar
In the Teams navigation bar, the floating icons are deprecated and relocated as a gear icon for each folder and subfolder. Use this gear icon to create sub team, edit team, view team members, or delete a team.
- Click TRACKERS from the Project Home menu.
- From the Trackers homepage, expand List View and click Teams.
- Under Teams, click the folder where you want to create a sub-team, make changes to an existing team, or view team members.
- To create a new team, hover over Project Teams and click the gear icon > Create Team.
- Configure the required field and click Save.
For more information, see Manage Your Project Teams.

Enhanced Icons for Planning Folder Status
The Planning Folders icons are enhanced to show the current status of the following folder types in the sidebar.
- Active Planning Folder
 : Planning folder currently in use and accessible for organizing and managing project artifacts.
 - Inactive Planning Folder
 : Planning folder that is excluded from view by project members to avoid overload.
 - Freeze Planning Folder
 : Planning folder with a status set to Freeze, preventing any artifacts from being moved in or out.
Click the Active/All tab to switch between active folders and all folders (Active, Inactive, and Freeze).
: Planning folder with a status set to Freeze, preventing any artifacts from being moved in or out.
Click the Active/All tab to switch between active folders and all folders (Active, Inactive, and Freeze).
Left/Right Scroll Buttons in the Trackers Project Homepage
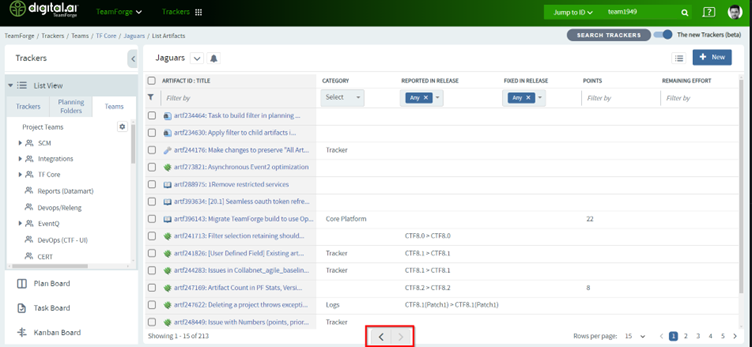
The new Trackers UI List View includes left/right scroll buttons at the bottom center of the project homepage. These buttons let you scroll horizontally if the columns are too wide for the screen. As you scroll, the first column remains fixed, so you always have a consistent reference point.
Trackers List View Enhancements
The Trackers > List View is enhanced with the following for Trackers, Planning Folders, and Teams:
Floating Icons
The List View now shows floating icons  on the right side of each artifact. These icons help you work more efficiently. Hover over an artifact to see the floating icon options.
- Start/Stop Monitor: Click the bell icon to start or stop monitoring activities for individual tracker artifacts.
- Move Artifact: Click the Move icon to relocate the artifact to a different tracker or a tracker in a different project.
- Plan For: Lets you move an artifact to a different planning folder or a planning folder from other projects.
- Copy Artifact URL: Click the Copy URL icon to copy its URL to the clipboard.
- Context Menu Icon: Click the ellipsis icon to access the contextual menu, which includes the following options:
- Clone: Duplicate a specific artifact to a different tracker.
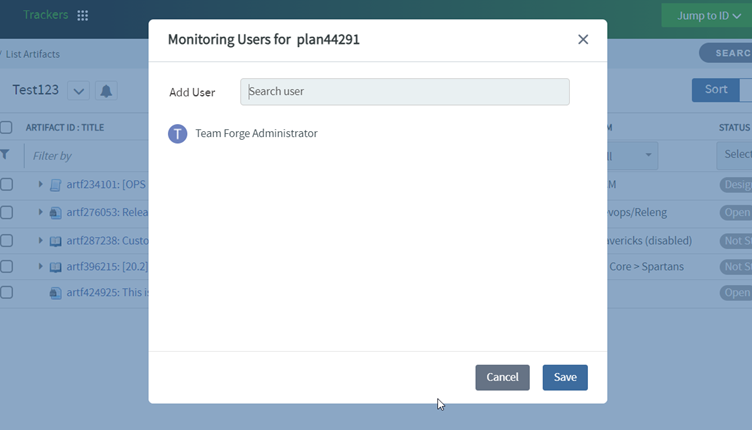
- Monitoring Users: Add one or more users to monitor a tracker artifact.
- Choose Child: Select a child artifact for a specific tracker artifact.
- Choose Parent: Select a parent artifact for a specific tracker artifact.
- Add Associations: Include one or more associations with a tracker artifact.
- Add Attachments: Attach files to a specific tracker artifact.
- Delete: Remove a specific artifact.
The Mass Update, Move, Start/Stop Monitor, and Delete icons show up at the top right of the List Artifacts page or as floating icons when you select one or more artifacts. Floating icons do not appear when more than one artifact is selected.
Mass Update of System Fields
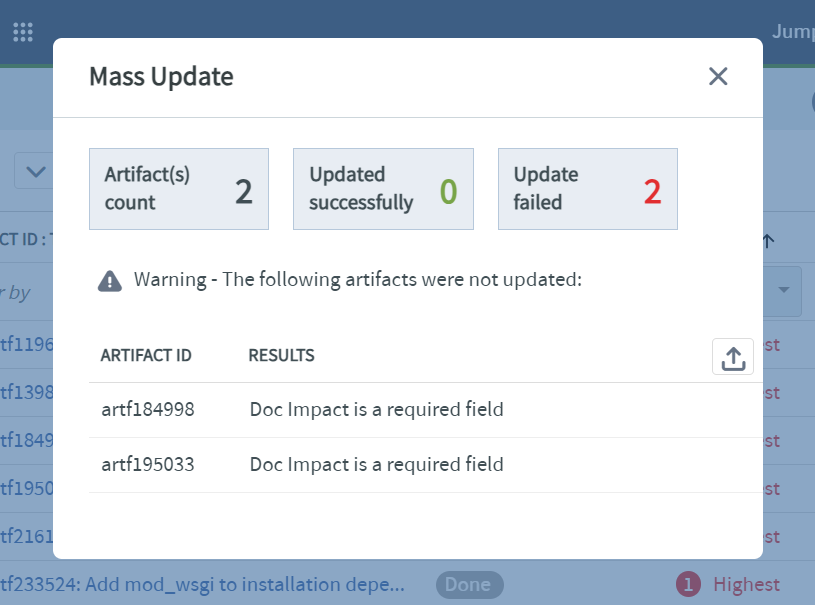
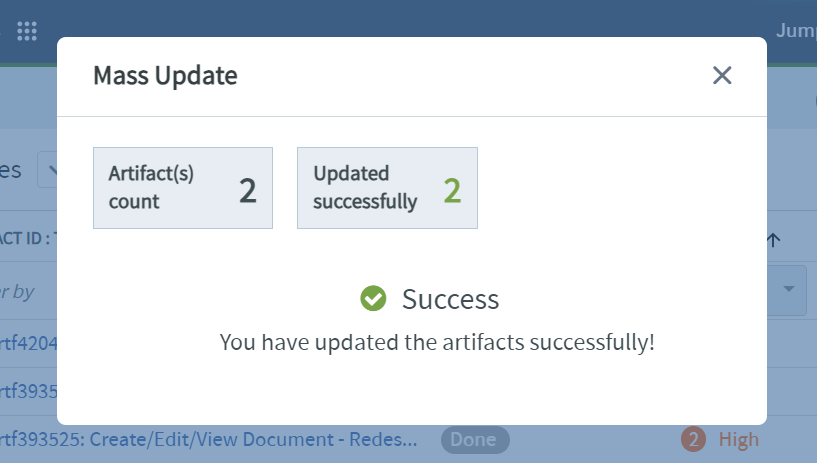
The Mass Update is redesigned as ( ) icon and appears at the top right corner when you select one or more artifacts in the list. Use this feature to configure system fields for multiple artifacts at once. Whether the mass update succeeds or fails, a Mass Update pop-up window displays the number of failed and successful artifacts.
The failed mass update pop-up window shows the failed artifact ID and the result indicating the cause of failure. An export button appears for failed scenarios.
Unlike the Mass Update result page, all other functionality result pages are the same for both successful and failed events.
For more information, see Edit Multiple Artifacts (Mass Update).
View Long Artifact Names
The new Trackers UI uses tooltips and ellipses to handle long names in the List View. When you hover over a truncated name, ellipses indicate that the name extends beyond the visible limit. A tooltip then appears, displaying the full name. This functionality is implemented across various elements in the list page, not just for artifact titles.

Manage Multi-Select Values in List Artifacts Columns
In the new trackers UI, if more than two values are selected in the filter criteria of the list artifacts table, +More appears in the filter field.

View/Add Monitoring Users from Trackers List View Homepage
The new Trackers UI homepage includes a bell  and an Options
  icon at the top left of the List Artifacts table. Use these icons to start, stop, or add monitoring users to a tracker from the Trackers, Planning Folders, or Teams project homepage.
- Click Trackers from the Project Home menu.
- Click the bell icon to start or stop monitoring a tracker.
- Click the dropdown menu of the respective tracker to view, add, or remove monitoring users.
Inline Editing of Multiple Artifacts
To update multiple tracker or planning folder artifacts at once, click the Edit Inline icon at the top right corner. This lets you edit all artifacts simultaneously.
- Click TRACKERS from the Project Home menu.
- Select the Trackers or Planning Folders that contain the artifacts you want to edit inline and click the Edit Inline icon.
- Click Save after making the changes.
For more information, see Edit Multiple Artifacts Inline.

Import Tracker Artifacts
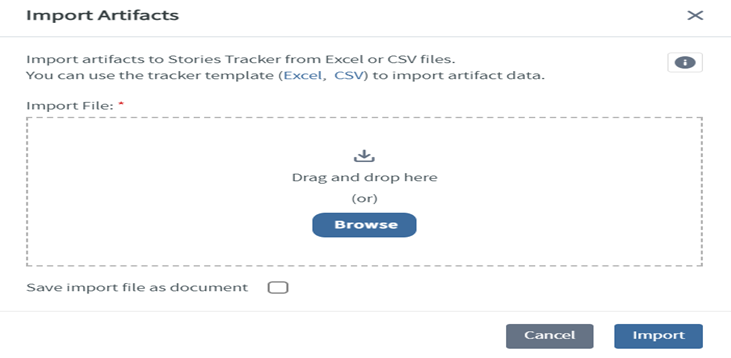
In the new Trackers UI, click the Import icon ( ) at the top right of the list artifact table to import artifacts into TeamForge. This lets you easily integrate Excel or CSV files containing artifacts.
- Click TRACKERS from the Project Home menu.
- Select a tracker from the TRACKERS tab.
- Click Import icon to import Excel/CSV file that contains the artifacts to be imported.
For more information, see Import Tracker Artifacts.
Export Tracker Artifacts
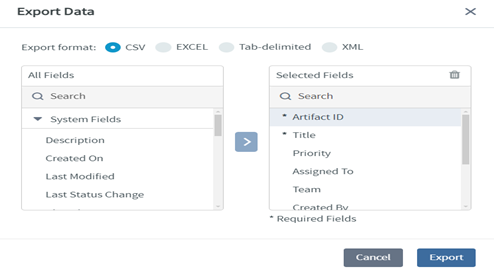
In the new trackers, click the new Export icon ( ) at the top right corner of the list artifact table to export artifact content from trackers or planning folders to external applications. Supported formats include CSV, XML, Excel, or tab-delimited files to facilitate data exchange with external systems.
- Click TRACKERS from the Project Home menu.
- Click a tracker or planning folder.
- Click the Export icon to export a tracker or planning folder.
In the Export Data, the first column remains fixed. You can drag and drop other fields horizontally to reorder them.
For more information, see Export Tracker Artifacts.
Configure System and Custom Fields in Trackers List View
You can set column preferences for each tracker, planning folder, or team. If a project administrator sets default columns for the entire project, your choices override these defaults.
-
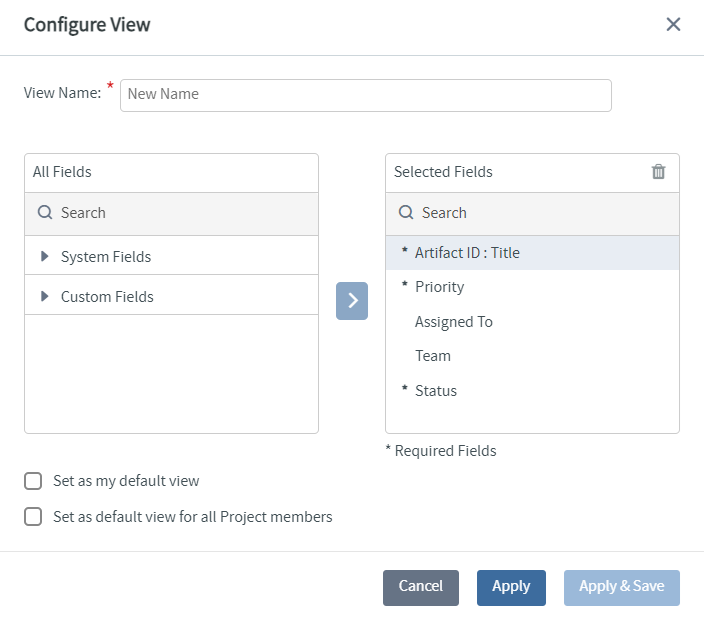
Manage Views in Trackers The new Trackers UI Manage Views in Trackers lets you configure column preferences, save the View Name of your choice, search, and configure system and custom fields.
- Click TRACKERS from the Project Home menu.
- Click Trackers and hover over the Manage Views hamburger icon at the top right corner to to access the Configure View and configure the desired System and Custom fields.
- Check the Set as my default view checkbox to set your default view.
- Check the Set as default view for all Project members checkbox to set the default view for all project members.
- Click Apply or Apply & Save.
note-
The System Default (default) option is selected by default.
-
You can add any number of Custom Fields in the manage views.
-
If you have already saved a column configuration, simply click it and proceed to skip the remaining steps.
In the Configure View, the first column remains fixed. You can drag and drop other fields horizontally to reorder them.
-
Manage Views in Planning Folders
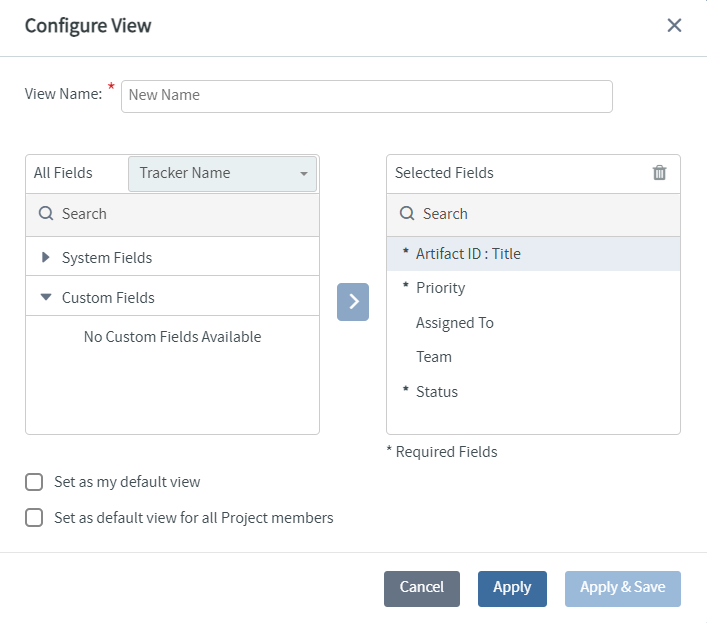
The new Trackers UI Manage Views in Planning Folders lets you configure column preferences, save your chosen View Name, search for items, and configure system and custom fields. You can also select a tracker from the Tracker Name dropdown list to see its custom fields.
- Click TRACKERS from the Project Home menu.
- Click Planning Folders and hover over the Manage Views hamburger icon at the top right corner to configure the desired System and Custom fields.
- Click the Tracker Name dropdown list to choose the tracker that lists the corresponding custom fields.
- Check the Set as my default view checkbox to set your default view.
- Check the Set as default view for all Project members checkbox to set the default view for all project members.
- Click Apply or Apply & Save.
Note:
-
The System Default (default) option is selected by default.
-
You can add up to three Custom Fields in the manage views.
-
If you have already saved a column configuration, simply click it and proceed to skip the remaining steps.
-
In the Configure View, the first column remains fixed. You can drag and drop other fields horizontally to reorder them.
- Click TRACKERS from the Project Home menu.
-
Manage Views in Teams
The new Trackers UI Manage Views in Teams lets you configure column preferences, save the View Name of your choice, search, and configure fields.
- Click TRACKERS from the Project Home menu.
- Click Teams and hover over the Manage Views hamburger icon at the top right corner to configure the desired fields.
- Check the Set as my default view checkbox to set your default view.
- Check the Set as default view for all Project members checkbox to set the default view for all project members.
- Click Apply or Apply & Save.
Note:
- The System Default (default) option is selected by default.
- If you have already saved a column configuration, simply click it and proceed to skip the remaining steps.
- In the Configure View, the first column remains fixed. You can drag and drop other fields horizontally to reorder them.
For more information, see Filter Tracker Artifacts.

- Click TRACKERS from the Project Home menu.
Creating Tracker Artifacts
In the new tracker UI, the Create Artifact button is replaced with a + New icon at the top right corner. You can also create a tracker artifact by sending an email to the tracker without needing to log in to TeamForge.
- Navigate to any tracker, planning folder, or teams view within TeamForge.
- Click the + New icon located at the top right corner of the screen.
- Select the specific tracker where you want to create your artifact from the dropdown menu. By default, the new artifact will be created within the current tracker, planning folder, or teams.
- Configure the required field and click Save or Save and Close.
For more information, see Create Tracker Artifacts
Add Save Filter View
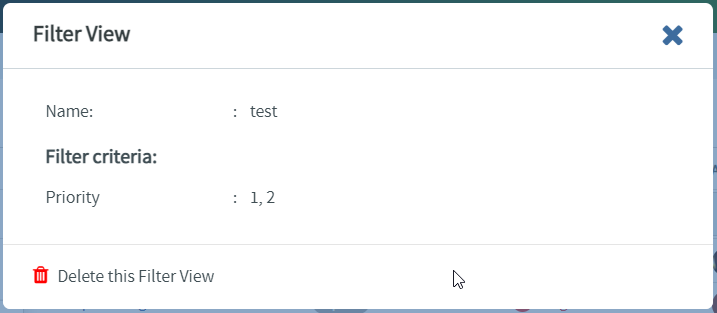
The new Trackers UI lets you save the configured filter view in the Filter by Criteria. This feature helps you quickly access and view results based on your saved filter criteria.
- Navigate to any tracker, planning folder, or teams view within TeamForge.
- Configure the columns as desired.
- Click the filter icon located at the top left side of the artifact list table.
- Click Save and enter a filter name in the Filter View dialog box.
- Click Save to save the filter view.

Once saved, Filter View cannot be edited but can only be deleted if needed.
Sorting and Ranking artifacts in the Planning Folders
The Planning Folders list view now features a new toggle switch button ( ) for switching between SORT and RANK modes. You can find this button in the top right corner of the list artifact table.
- SORT Mode: In this mode, you can sort the table by one column at a time. The table will automatically adjust the order of other columns based on the selected column. By default, the table sorts by PRIORITY in SORT mode.
- RANK Mode: Switching to RANK mode adds a new RANK column. This column lets you prioritize and list artifacts based on your chosen rank. It helps your team select tasks more effectively and reduces rework.
For more information, see Reorder Planning Folders.
Pagination in the Planning Folders and Teams
Pagination now makes it easier to navigate the Planning Folders and Teams list tables. It improves performance and usability by loading a limited number of artifacts per page. This way, the system runs smoothly even with large datasets.
You can use the Rows per page dropdown to choose how many artifacts show up on each page. This helps you manage lists better and find specific artifacts quickly.
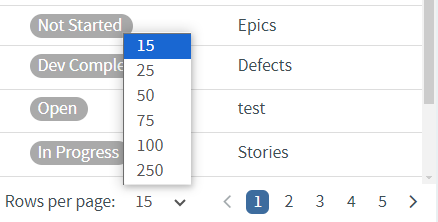
Pagination is not available in RANK Mode.
Displaying Avatars of Assigned Users
The List Artifact table shows the user avatar in the ASSIGNED TO column. If the avatar is missing, the column displays the user's initials.
Handling Empty Trackers
For Admin Users
-
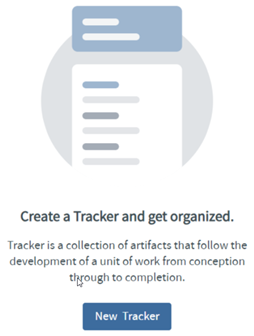
If a project has no trackers, the empty summary page shows a New Tracker button to create a new tracker.
-
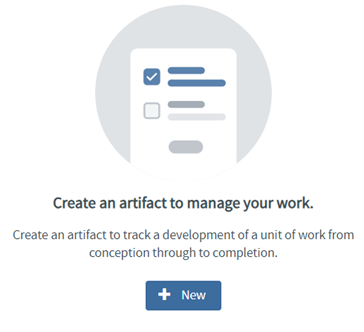
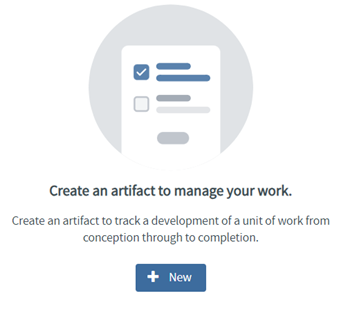
If trackers have no artifacts, the empty page shows a + New button to create a new artifact.
For Non-Admin Users
-
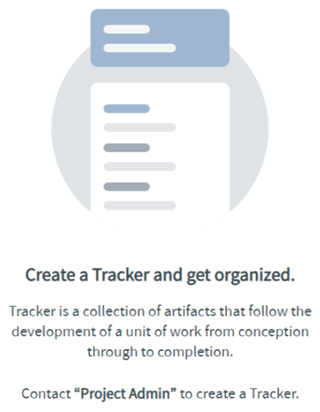
If a project has no trackers, the empty summary page shows a message to contact the project admin to create a tracker.
-
If trackers have no artifacts, the empty page shows a + New button to create a new artifact.