The New Planning Board—Work with Artifact Cards (Beta)
Add Artifacts Quickly
You can add artifacts (quick add) in select planning folders with minimum required artifact information.
You cannot add artifacts from the Planning Board if a workflow is configured for the meta status change from New to Open.
-
Select a planning folder in one of the swim lanes. The Add new artifact icon at the top of the swim lane is enabled.
 note
noteTo be able to add artifacts in Planning Board, you need to have the required permissions.
-
Click the Add new artifact button.
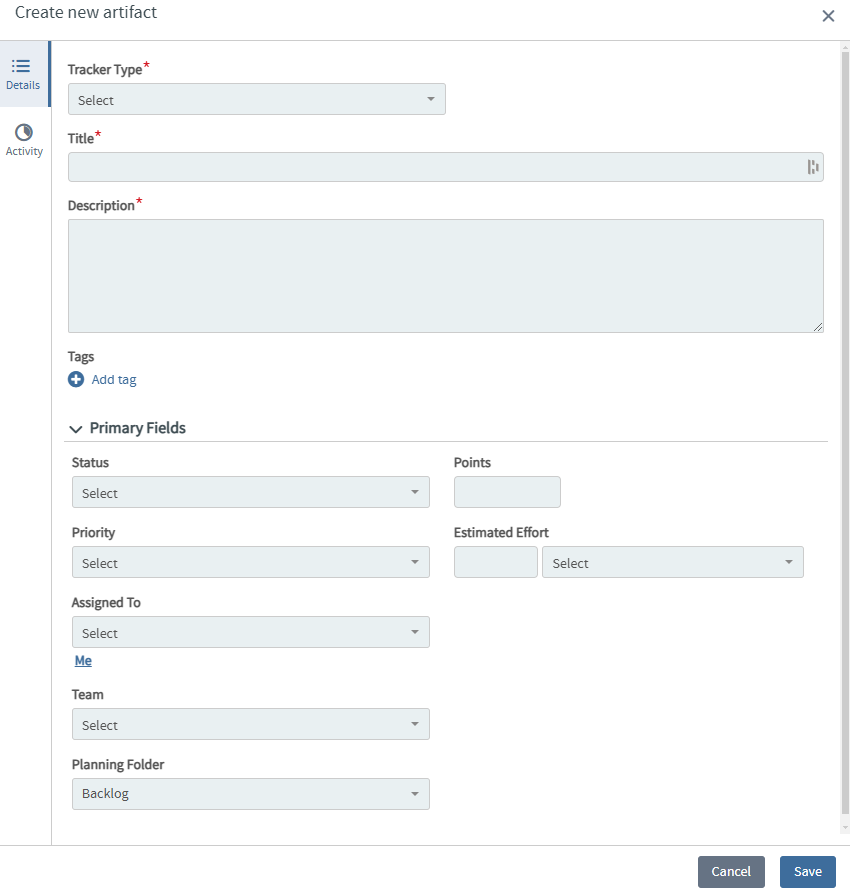
noteYou select the tracker type first, and the Create new artifact slider then loads the fields that apply to the selected tracker. This removes confusion caused by fields (such as Status and Assigned To) that depend on the tracker type. The dropdown shows the first six trackers by default; when more than six trackers exist, use the vertical scrollbar to select additional trackers. When no trackers are configured, the + (Add new artifact) icon is disabled.
-
Select the tracker type. The Create new artifact slider window appears with the fields for that tracker.
-
Type a title, description, select tags, and type the values for the other primary and required fields.
noteThe Description field in the artifact slider is a Markdown editor and supports @mentions. In the Mass Update modal, the Comment field is also a Markdown editor with @mentions support.
Artifacts support @mentions: Artifact description and comments now support @mentions and users called out via @mentions are added to the monitoring list. Include usernames with "@" as prefix (for example,
@mphippard) to add users to the monitoring list.noteUsers called out via
@mentionsmust haveArtifact Viewpermission to be added to the monitoring list. -
Select the Activity tab and add attachments, if you have any.
-
Click Save. The artifact is added as the bottommost artifact in the swim lane (planning folder). You may choose to rank the artifact (if you have rank permission) or update the artifact with more meta data later. To update the artifact, click the artifact ID link.
Rank a Card
If you have the requisite permission, you can drag and drop a card above or below the other cards within a swim lane to position it in the order you want the artifact addressed.
The positioning of cards is retained when you switch between the list and board views (planning, task and kanban). For related information on ranking artifacts in the list view, see Reorder the Contents of a Planning Folder.
Reassign (Move) a Card
In the course of planning your release, you may want to assign an artifact from the product backlog to a specific sprint or team, or move an artifact from one sprint to another. To do this, just drag and drop the artifact card from one swim lane to the other.
When you drop the card, its rank is relative to its position in the new swim lane. However, if a child artifact is moved to a swim lane (planning folder) where its parent is already present, the child artifact is filed under its parent and its rank is relative to the parent's position.
To be able to move cards between swim lanes, you need to have the permission to update planning folders and rank artifact cards.
When a card cannot be moved to the target swimlane, the Planning Board shows a block icon and a Toastr notification explaining why:
- Target swimlane has no Planning Folder or Team selected: "Card cannot be moved. Select a Planning Folder or Team for this swimlane and try again."
- Target swimlane has a frozen Planning Folder: "Card cannot be moved because the selected Planning Folder is in Freeze status. Please choose a different Planning Folder for this swimlane and try again."
- Target swimlane has the same Planning Folder and Team as the source: "Card cannot be moved to a swimlane that has the same Planning Folder and Team."
Configure the Card Detailed View
Use the Detailed View Configuration dialog to control what appears on Plan Board cards.
- Toggle Tags on or off. Tags are shown by default.
- Toggle Custom field on or off. Custom fields are hidden by default. The option to choose the tracker and custom fields appears only when the custom-field toggle is enabled.
- If both tags and custom fields are enabled, they display on the same line. If only one is enabled, it spans the full line width.
By default, the Detailed View check box is enabled and unchecked, and the Tags toggle is on. When both tags and the custom field are unchecked, the Detailed View check box is disabled and unchecked, with the tooltip "Detailed view is not configured. Click the configuration icon to enable the detailed view."
Filter the Planning Board
Filter the cards on the Planning Board by Tags, Priority, and Assigned To.
-
Click Filter by to open the filter slider.
noteThe Filter by button is disabled when no planning folders are selected or when no artifacts are listed in the swimlanes. In the slider, the Apply button stays disabled until you select at least one filter value.
-
Select one or more values in each filter. Each filter lists only the values associated with at least one card currently shown on the board. Tags and assignees are listed alphabetically.
noteWithin a filter, values use OR logic; across filters, AND logic applies. When all values in a filter are selected, the dropdown shows "No tags to select", "No priorities to select", or "No assignees to select".
-
Click Apply. The board updates to show matching cards, and the selected values appear as chips (each with a remove x) above the swimlanes.
To edit a filter, reopen the slider (your selections are retained). To reset, click Clear all in the board or the slider.
If a swimlane changes so that a filter value no longer applies, the affected chips turn red. You can clear the red values manually or by clicking Apply. Child artifacts not shown on the board are not considered for filtering.
Edit an Artifact
-
Click the artifact ID link in a card.
The View Artifact page appears.
-
Make the necessary changes and click Save to update the artifact and return to the Planning Board.
-
To quickly edit an artifact, click the Edit artifact icon in a card.
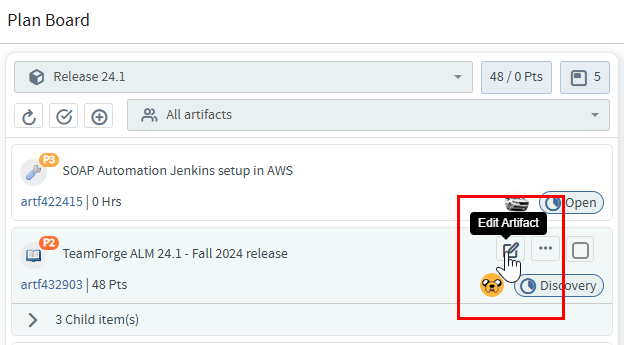
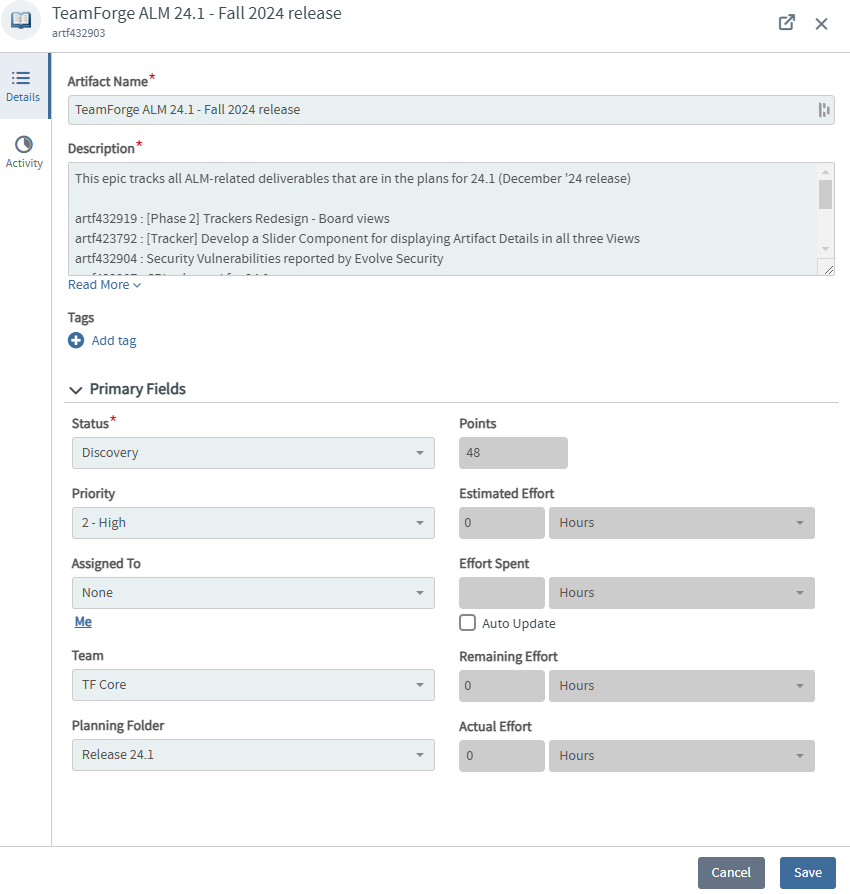
The Edit Artifact slider window appears.
noteTo be able to edit artifacts, you need to have the required permissions.
-
You can edit the following in the Edit Artifact slider window:
-
Artifact title
-
Artifact description
-
Tags
-
Primary and Required attributes
You have two tabs, Details and Activity, that list fields you can edit. Primary attributes include Priority, Status, Assigned To, Team, Estimated Effort, Remaining Effort, Actual Effort and Points. The fields listed depend on your application configuration that you set in Tracker Settings. For example:
-
Configurable fields which are enabled. For more information, see Enable or Disable Tracker Fields.
-
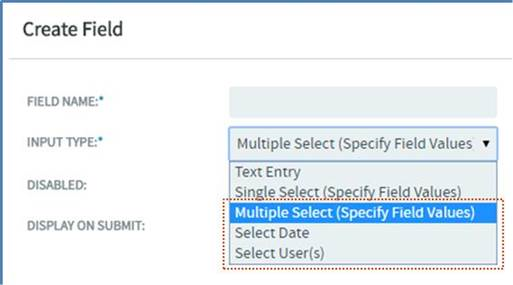
User-defined fields (flex fields) with the field type Text Entry and Single Select and set as Required (Tracker Settings > Tracker Administration > Create Field) or workflow configured. For more information, see Create Custom Tracker Fields and Create a Tracker Workflow.
noteYou cannot change the status of an artifact in the Planning Board view, if
Assigned Tois set as a mandatory field for status changes per your tracker workflow settings (Tracker Settings). However, you can edit the status of an artifact in the List view with the sameAssigned Toworkflow constraint.By default, the following field types which you select while creating a user-defined field (Tracker Settings), are non-editable from the planning board's Edit Artifact window: Multiple select, Date picker and User picker.
-
-
Comments
Click the Activity tab to add comments and attachments. In addition to adding comments, you can view the last five comments for an artifact.
Artifacts support @mentions: Artifact description and comments now support @mentions and users called out via @mentions are added to the monitoring list. Include usernames with "@" as prefix (for example, @mphippard) to add users to the monitoring list.
noteUsers called out via
@mentionsmust haveArtifact Viewpermission to be added to the monitoring list.
-
-
After editing an artifact, click Save.
Mass Edit in the New Planning Board
The new Planning Board lets you select multiple cards and perform tasks in one go. You can mass edit the following fields for multiple artifacts using this floating menu:
- Priority
- Assigned To
- Teams
- Planning Folders
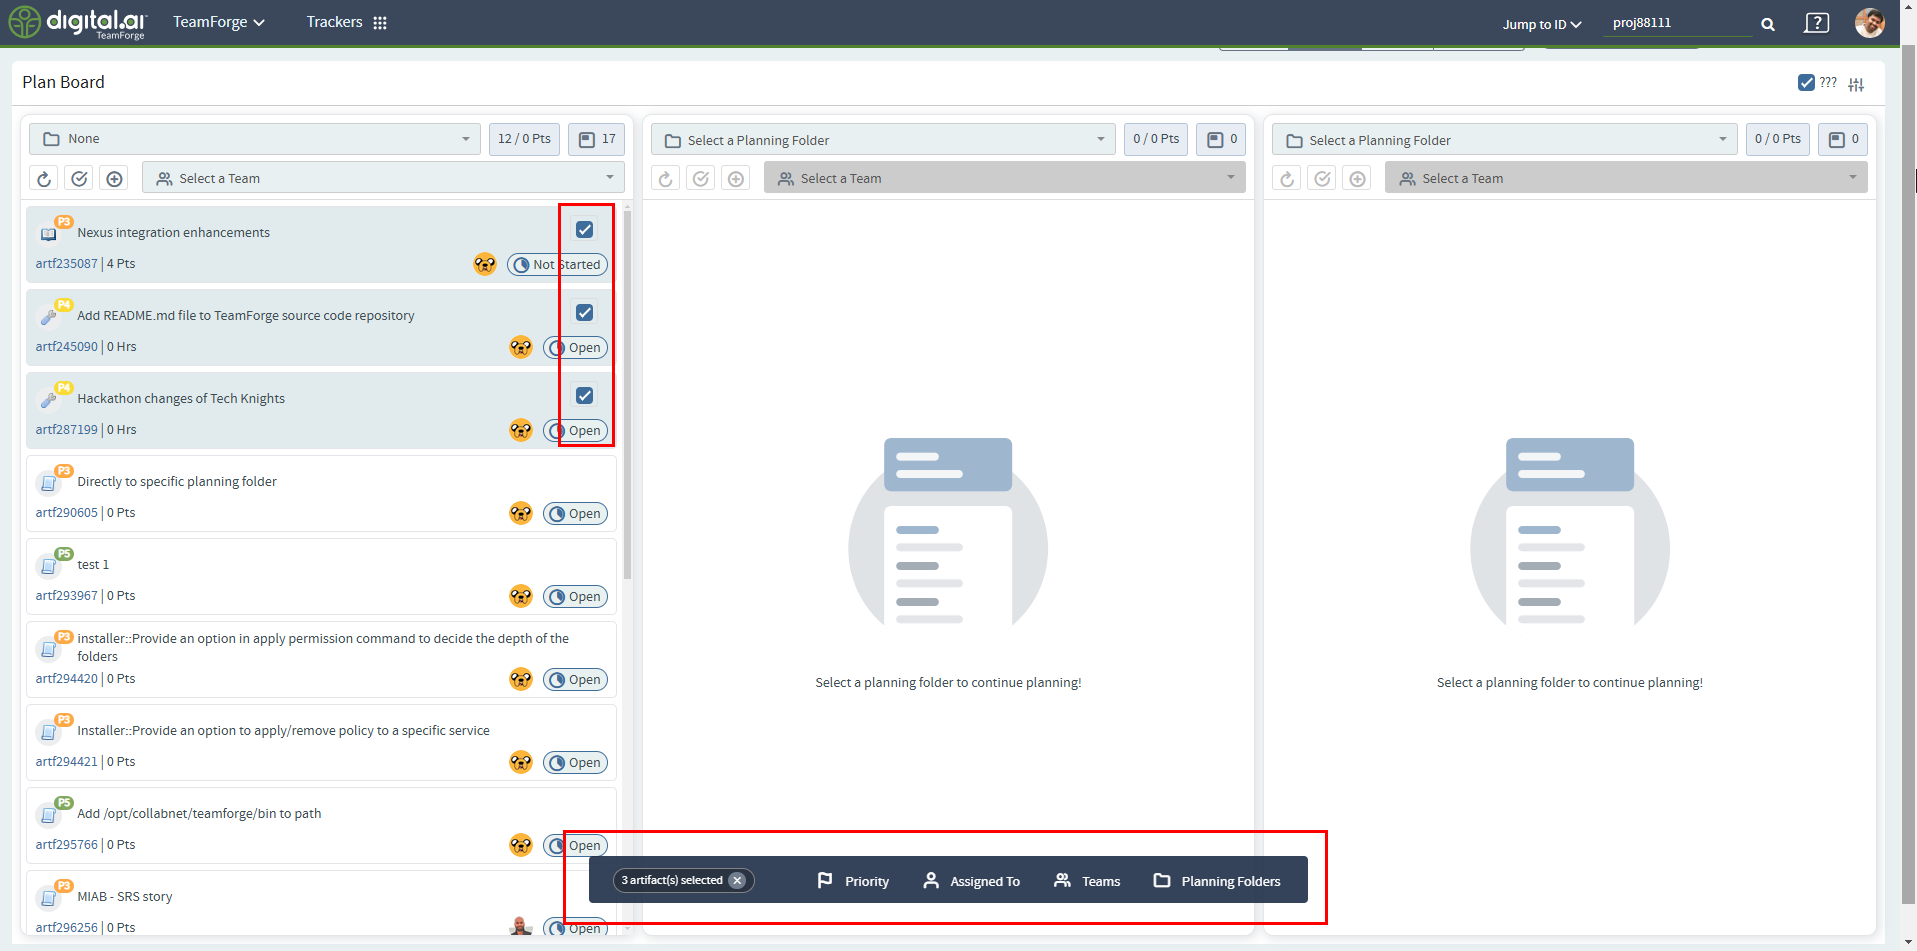
Select one or more cards from the planning board and click the field you want to update from the floating menu to update the field for all the selected artifacts.