Release Properties
This topic covers Release properties, which are configurable attributes that influence the behavior and execution of a release.
To specify metadata for a release or template, select Properties under Configuration menu to go to the properties page.
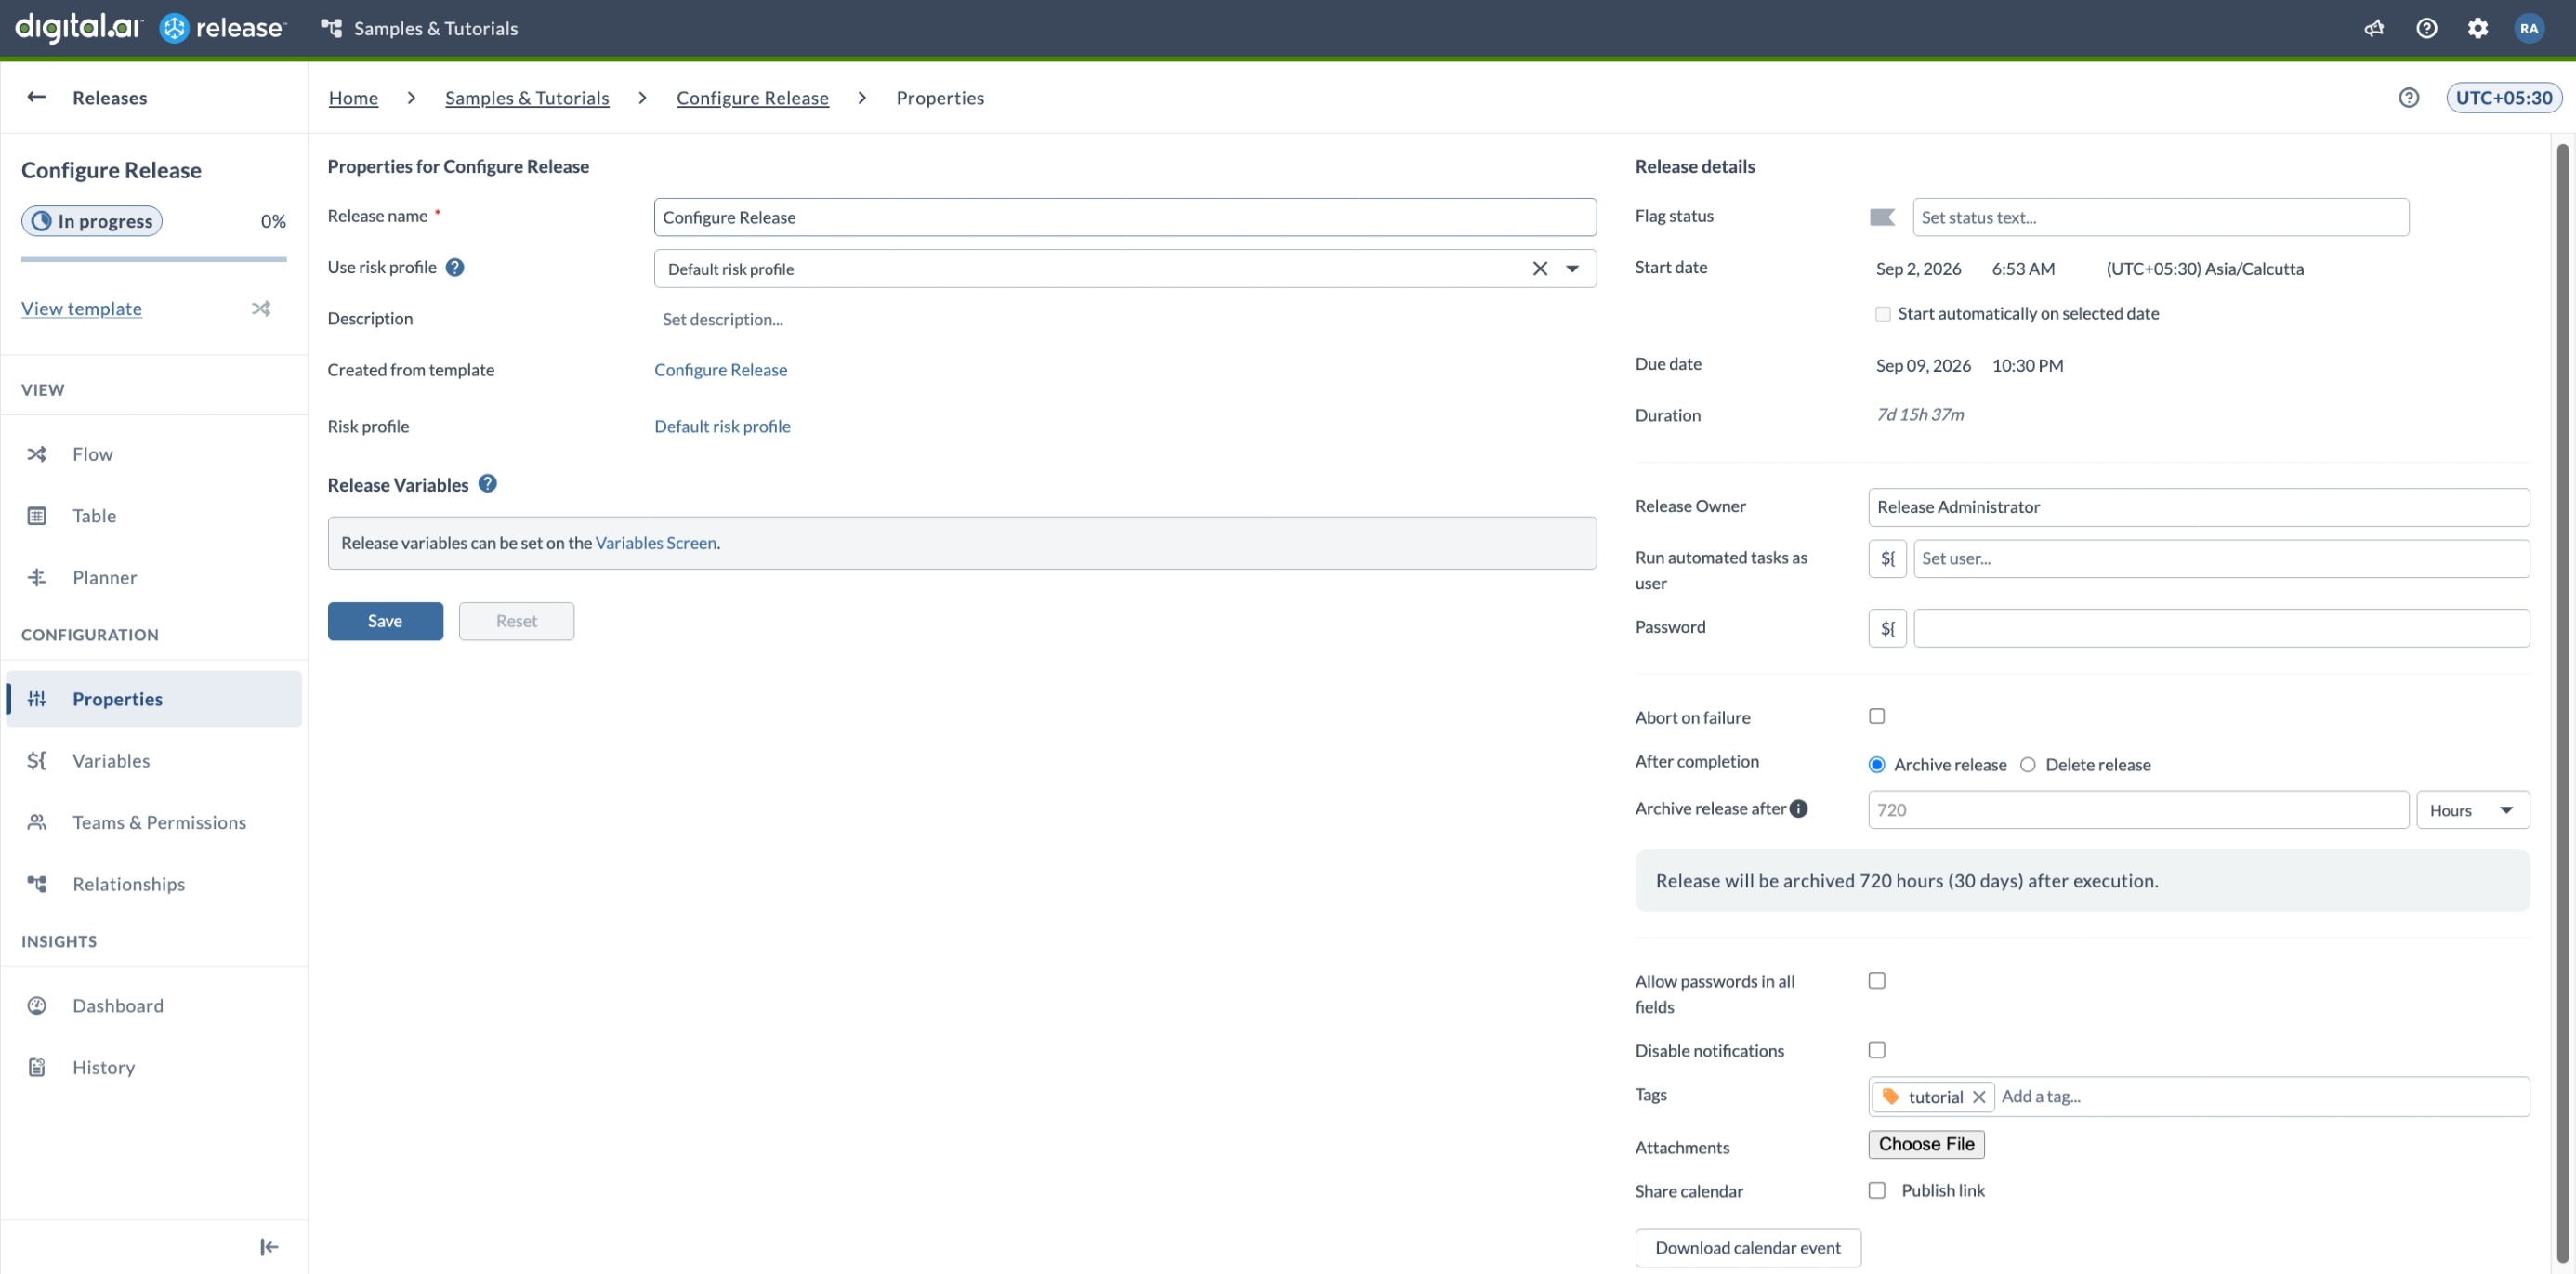
To configure the release properties:
-
Enter the release name – In Release name, enter or update the name of the release. You can rename a release even after it starts.
-
Select a risk profile – In Use risk profile, choose a profile from the list. If you don’t select one, the Default risk profile is used. For more information, see Configure profile risk settings.
-
Add a description – In Description, enter information about the release. You can use Markdown. Links to the template and, if applicable, the release that triggered it appear below this field.
-
Set release flags – Next to Flag status, choose the yellow (attention) or red (at risk) indicator and enter a status message. Flagged releases appear highlighted in overviews.
-
Set planned dates – In Start date and Due date, enter the planned start and end dates. These dates are used for calendar views. To start the release automatically at the planned start date, select Start automatically on selected date.
-
Assign the release owner – In Release Owner, select the user responsible for the release. This user receives additional notifications when tasks fail or are flagged. The release owner is added to the Release Admin team when the release is created.
-
Set the automation account – In Run automated tasks as user and Password, enter the credentials of the account used to run automated tasks in this release. In Password, you can type a password or reference a password variable.
-
Configure execution options
- Abort on failure – Select this option to stop the release when any task fails.
- Allow passwords in all fields – Select this option to allow password variables in non-encrypted fields. This option is available only when the global Passwords in Tasks setting is enabled. For more information, see Passwords in Tasks.
-
Choose what happens after completion – Next to After completion, select Archive release to archive the release when it is completed or aborted, or Delete release to delete it instead. Archive release is selected by default. This setting appears only when Enable per-release archive or delete is enabled in Releases and Triggers settings. Only Release administrators can change the archiving settings in this step and the next.
-
Set the archiving or deletion age – In Archive release after, or Delete release after if you selected Delete release, enter how long a finished release waits before it is archived or deleted, then select Hours or Days. Changing the unit converts the value you entered, and the line below the field confirms the result, such as "Release will be archived 720 hours (30 days) after execution." Leave the field empty to use the global age. For more information, see Setting a Custom Archiving or Deletion Age.
-
Add tags – In Tags, add one or more tags to help filter and locate the release.
-
Manage attachments – To add an attachment, select Choose File. To remove one, select the X next to it.
-
Add the release to a calendar – To publish an always-updated link for calendar apps (such as Outlook or iCal), select Publish link. To download an ICS file, select Download calendar event.
-
Set variable values – Under Release Variables, select Variables Screen to enter values for variables defined in the release.
-
Save your changes – Select Save to apply your changes. To discard unsaved changes, select Reset.